
Wine-making was where I started my home-brewing career and it has been a thrilling ride with a few notable derailments on the way. The wines I have included in this chapter are mostly the stalwarts of home wine-making – elderberry, elderflower, blackberry, dandelion and so on; stick with these if you want to tread a safe path. A few are a little more unusual and some can only be described as ‘interesting’. As with all home brewing the best thing is to make a range of different brews then stick to the ones you like.
There is a serious bias here in favour of ingredients that you can forage – because I like them, because they make the best wines, because they are traditional and because they are free. Foraged ingredients are very much in the spirit of homemade wines; it makes them seem all the more homemade, but in a very good way.
Some flavour ingredients such as soft fruits provide a proportion of the sugar and water necessary for making wine, but many of them (floral flavourings in particular) provide neither. Wines made from these ingredients lack the fruitiness that we would usually expect. This is a combination of acidic flavours and tannins and in order to create them we often include grapes in the form of juice or raisins, or we simply add shop-bought fruit acids and tannin.
Despite a sweet tooth (the singular being increasingly appropriate), generally speaking, I prefer dry wines and most of the recipes that follow will produce a dry wine if left to follow their natural inclinations. However, if you like sweeter wines, it is easy to sweeten a dry wine before it is bottled. Alternatively, you can sweeten a wine immediately prior to serving, though, for some reason I cannot fathom, this is something we feel uncomfortable about.
The distinction between wine and beer is actually a vague one. In his survey of ancient brews, Stephen Buhner says that historically there really isn’t any difference between them; in many cultures the same word or words are used indiscriminately to refer to either or both. Today things have settled down and we think of beer as coming from grains and wines coming from grapes. Country wines are made from anything that is not a grape and to which sugar is added. Sadly they are considered to be poor relations of their noble cousins, and certainly it is a very good country wine that can surpass a first-class grape wine. However comparisons are futile; they are different things. Certainly, you should never be ashamed of your home-brewed creations, not without good reason at least.

The method
Wine-making is fairly straightforward, with a few variations. Generally, water and sugar are added to one or more flavour ingredients, then the fluid is separated from the solid matter (or not), and the resulting liquid is fermented. There is no single method, there are several, but this is an outline of how wine can be made at home. The recipe for Rhubarb wine is a model for most of those that follow.
Preparing the main ingredients Fruit (and vegetables) need to be washed thoroughly and finely sliced, chopped or squashed and placed in a fermenting bucket. There is no point in washing flowers or herbs.
Adding sugar Sugar is stirred in and left to absorb the juices and flavours.
Adding water Hot water is poured over the fruit/vegetable/flower and sugar mix and left to cool to room temperature (about 18°C). A crushed Campden tablet can be added at this point (see here). Please note that sometimes the sugar and water are added at the same time and that sometimes the water used is cold.
Additional ingredients Other ingredients such as pectic enzyme, yeast nutrient, tannin, fruit acids, grape concentrate, lemon juice, etc. are stirred in. The totality of mixture prior to and during fermentation is called the must (from mustum, the Latin for ‘new wine’).
Adjusting specific gravity The specific gravity of the must (which indicates the sugar concentration) is measured and adjusted upwards with sugar or, rarely, downwards with cold water.
Aeration The must is aerated with a whisk or something similar.
Pitching Yeast is added (‘pitched’) and a prayer offered.
Primary fermentation The must is stirred once a day until fermentation has slowed – about 5 or 6 days. During the primary fermentation a large number of yeast cells are produced in the presence of oxygen (aerobic conditions).
Transferring to a second fermenter The must is left for a day without stirring then siphoned or strained into a demi-john or other container (pic 1), leaving the lees (dead yeast at the bottom of the bucket) and other solid matter behind. An air lock is fitted to the demi-john (pic 2).

Siphoning the must from the fermenting bucket into a demi-john
Fitting an air lock to the demi-john

Racking the wine into a clean demi-john after the second fermentation

Siphoning the wine into bottles
Secondary fermentation The demi-john is kept at room temperature until the fermentation has ceased or almost ceased. This second stage of fermentation, when the yeast lives without oxygen (anaerobically) and produces alcohol, is a much more sedate affair than the first. It can take anything from 3 weeks to 2 months depending on a number of factors, particularly temperature. When air bubbles are no longer emitting from the air lock (or slow to one every few minutes), this stage is complete.
Racking and fining The contents of the demi-john are siphoned into a fresh demi-john (pic 3), leaving the lees behind, and again an air lock is fitted. Wine finings are often added to clear the wine. To ensure anaerobic fermentation the demi-john must be full. Any shortfall is made up with a sugar solution (made with 3 parts boiled water to 1 part sugar and cooled), or some sterilised glass marbles.
Clearing The must is left until all signs of fermentation have ceased and what now may be called wine is clear. This will take at least a couple of months.
Sweetening and bottling If you want a dry wine, or you have used sufficient sugar to ensure a sweet one, then your wine is ready to bottle (pic 4). For advice on bottling. If you want a sweet wine and the wine is dry (intentionally or not), follow the sterilisation and sweetening process described here.
Making a dry wine
Provided there is not too much for it to cope with, yeast will consume all the fermentable sugar in a must. For this reason it is easy to produce a wine that is dry; you just use a limited amount of sugar and dry it will be. Of course it is the amount of sugar that ends up in the must that matters, not necessarily the amount you add. Some ingredients, such as blackberries, add sugar to a must and others, like rhubarb, actually take some away. Therefore before you start a fermentation you should test the must for sugar level with a hydrometer and, if necessary, adjust it upwards by stirring in sugar syrup or caster sugar or, more rarely, downward by adding water.
The specific gravity before fermentation starts is called the original gravity (OG), see here. To make a dry wine, the original gravity should be in the range 1085–1105. The low part of the range will be very dry indeed and the high part slightly sweet – though such things as the activity of the yeast and temperature can affect sweetness too. For most of the wines in this book I take a middle path and suggest an original gravity of 1095. This will give you a dry wine, but it is open to you to go for anything in that range if you want. Knowing the original gravity of what will be a dry wine also gives a fairly accurate indication of its alcohol content.

Making a sweet wine
Most of the recipes in this chapter will make a dry wine unless you either add more sugar right from the start or at the end after it has been stabilised. To add sugar from the start, one can simply use ‘too much’ sugar in the must before fermentation; the yeast then consumes all it can manage and some sugar is left over at the end as a sweetener.
This is a time-honoured method of making a sweet or medium sweet wine, and it is the way that many wines are made at home. It is a little hit and miss as it is never possible to determine exactly how sweet your wine will be – sickly sweet wines are seldom to anyone’s taste and I consider them to be the bane of home wine-making. While only a few of the recipes that follow suggest this method, there is always the option of adding more sugar to the original must of a dry wine should you wish.
The following table gives the original gravity (OG) you will need for sweet and medium sweet wine – and also for dry. It also provides the likely final gravity (FG), which is the specific gravity of the finished wine; the higher the final gravity the sweeter the wine.
| STYLE | ORIGINAL GRAVITY (OG) | FINAL GRAVITY (FG) |
| Sweet | 1120–30 | 1005–15 |
| Medium | 1105–20 | 995–1005 |
| Dry | 1085–1105 | 990–1000 |
It is useful to know that every 100g sugar added to 5 litres of must will increase the specific gravity by 7.5 points. So, for example, 200g added to a must at 1090 will result in a must at 1105.
Sweetening a dry wine
The most precise approach for making sweet wine, and the default method used in most of the recipes here, is to make a dry wine and then sweeten it. The problem with this is that any yeast cells remaining in the brew may be delighted to be presented with more food and carry on devouring sugar where they left off, consuming all or most of it. It is therefore necessary to kill the yeast cells.
In commercial wines this is done by filtering out the yeast using industrial-grade filters under pressure. As far as I know, there are no domestic versions of these machines so we must employ chemical methods. Here is the process in brief.
A dry wine is made as usual, but instead of bottling it straight away, a tiny amount of potassium sorbate is added. Potassium sorbate is an organic salt of sorbic acid – a fruit acid found in rowan and other berries. It has the peculiar ability to prevent reproduction in yeast cells: birth control for yeast. There will be no more yeast babies and the yeasts will eventually die out. However, there will still be some yeast cells left so these are killed with sodium metabisulphite. The wine has now been ‘stabilised’.
If you are feeling alarmed at this point I quite understand but rest assured – both these chemicals are harmless in the minute quantities used. The ‘acceptable daily intake’ of potassium sorbate is about 2g for the average person. This would require the consumption of two gallons of wine in a single day, a drinking session that would likely make you flammable and certainly dead. The sulphur dioxide that derives from sodium metabisulphite is even more forgiving and mostly dissipates anyway.
Sugar is then added until the required degree of sweetness has been reached and the wine is bottled as normal.
Method for sweetening wine with sugar syrup Follow the directions for making a dry wine, but do not bottle it once it has been racked into the second demi-john. Instead, allow the wine to ferment out and clear completely.
Rack into a third demi-john and add ½ tsp potassium sorbate (1g) dissolved in a little boiled, warm water. Do not exceed this amount. Close the demi-john and leave for 24 hours. Now add one crushed Campden tablet, again dissolved in a little water. Close the demi-john and leave for a further 24 hours.
Make up a sugar syrup by dissolving 100g sugar in 150ml water over a medium heat and bringing to the boil. Remove about 150ml wine from the demi-john, keeping it in a covered sterilised container. Add some of the sugar syrup to the wine in the demi-john and, making sure it is evenly distributed (not easy!), test it for sweetness. Add more if necessary and test again. Fill any remaining space in the demi-john with the previously extracted wine. Bottle.
It is worth mentioning two other methods of sweetening wine:
Sweetening with sugar Adding sugar immediately prior to serving is the easiest way to sweeten a wine. People baulk at this but it is a method with a venerable and honourable history.
Sweetening with lactose Alternatively you can add lactose syrup to the wine just prior to bottling. This sugar is unfermentable so there will be no problems with it being lost to the yeast and no disasters from corks popping or bottles exploding from the carbon dioxide produced during re-fermentation. However, do remember that some people cannot tolerate lactose.
The ingredients
The primary ingredients will be those you wish to name on the label – blackberry, rosehip, and so on. There seems to be no limit to what can be turned into a wine, which, as I have indicated, can be a problem. Very few things will not make a passable wine provided the sweetness, tartness, alcohol level and so on are managed successfully, but to make a really good wine you need outstanding ingredients. They should have a strong and pleasant flavour or aroma. Fruits make the best wine in my opinion because they provide their own acids and sometimes tannin, but with the addition of fruit acids, the floral wines can have a lightness and fragrance typical of some first-class white wines.
Sugar
Cheap granulated sugar is fine for nearly all the recipes here, though if you want to spend the money then the organic, slightly brown stuff will be fine. More complex (and expensive) sugars such as molasses, coconut sugar, agave sugar and so on are far too strongly flavoured for wines and some of these exotic sugars can also contain unfermentable sugars which will impart an unavoidable extra and possibly unwanted sweetness. Honey, of course, is a time-honoured source of sugar and it is included in some of the recipes.
Grape juice
This is the part where we seem to be cheating as grape juice adds ‘vinosity’ to wine, that is, it makes your wine taste like wine. Grape juice, in the form of concentrates, adds body, tannin and fruitiness (acidity) to many wines and without it they can taste a little ‘thin’. Although you can add acids and tannins to your must, the benefits can be achieved by using grape concentrate. It is available in red and white, with a single 250ml tin being sufficient for one demi-john of wine. The tinned concentrates are made from wine grape varieties.
You can use cheap grape juice but this is made from dessert grapes and is fairly sweet and without much acidity; also you may need to rest the must for 24 hours if the juice contains sulphur dioxide preservative (labelled as E220); and if it contains potassium sorbate (E202) or similar you will get nowhere at all as this prevents yeasts from breeding.
The traditional alternative to grape concentrate or juice is raisins; these are coarsely chopped and added to the must. They are less used now, partly because they tend to make all your wines taste like bread pudding. Sometimes this is not a bad thing and I have used raisins in the ginger wine recipe and elsewhere.
Both raisins and grape concentrate contain about half their weight in sugar and this has been allowed for in the recipes.

Acids
Although most fruit wines are acidic enough to not require the addition of acidic ingredients, floral and vegetable wines need an acid boost. Low acidity in wine will not merely give you a bland wine, it can also result in slow yeast growth and the development of unwanted micro-organisms. The acidity level required is quite ‘high’, with a pH of between 3.2 and 3.6 (the lower the pH the higher the acidity). Knowing the required pH value is pretty useless if you do not possess a pH meter, though narrow-range acidity-testing strips are available very cheaply.
To boost acidity the fruit acids – malic, citric and tartaric – are often employed. These are readily available as crystals in little pots and you can buy all three in a mix under the name of ‘acid blend’. Alternatively you can add them by employing acidic fruits such as lemon, lime, crab apple and sea buckthorn.
Tannin
This bitter-tasting substance is found in abundance in grapes and apples, especially crab apples. Without tannins a wine tastes as though it has something seriously missing, so tannin, in one form or another, is often added. Grape concentrates provide tannin and it is possible to buy grape tannin as a powder. At one time teabags were used to introduce tannin into a wine – I stick to the powder.
Pectic enzyme
As a dedicated maker of jam I have always appreciated the gelling properties of pectin, which make jam set. For the wine maker it is nothing but a nuisance. Many fruits contain the protein pectin, which makes itself evident as an annoying, if harmless, ‘pectin haze’ sometimes seen in wines. Fortunately it is easy to avoid provided you take action at the beginning of the process and do not try to fix things later. (As a guide, if a fruit makes jam easily it contains a great deal of pectin.) Pectin is easily removed by pectic enzyme, which should be added to the must at least 8 hours before the yeast is pitched because it is deactivated in the presence of alcohol. It is available in crystalline form under various names, such as pectolase.
Amylase
This enzyme is of fundamental importance in the production of beer but only needed occasionally in wine-making. Starchy ingredients like parsnips and bananas can haze a wine with fine particles of starch. These can be avoided by adding a small quantity of amylase (1 level tsp per 4.5 litres) to the must before the yeast is pitched.
Campden tablets
Adding a crushed Campden tablet to the must as a matter of course is, strictly speaking, optional. The point of adding one is that it will kill any (or at least most) unwanted yeast and any spoilage bacteria. Generally, I do not use them as the yeast that is added at the next stage will be a vigorous, modern variety which usually out-performs any interlopers; and the boiling water, if used, is normally sufficient to sterilise the must anyway. If, however, I’m not convinced that all extraneous bugs will be dead before fermentation begins then I always employ them; if you want to be assured that nothing unpleasant gets into your brew then feel free to use one.
If you do, then leave the tablet to do its work for 24 hours before you move on to the next stage. By that time the sulphur dioxide will have dissipated or turned into a minute quantity of sulphuric acid.
Plums have always been a problem for me as they seem to come ready-loaded with any amount of biological baggage, so for plum wine and one or two other fruit wines I either use a Campden tablet or heat-treat the must by bringing it nearly to the boil.
Yeast nutrient
Many musts contain a sufficiency of other nutrients for the yeast, but many do not. For these a proprietary yeast nutrient should be stirred into the must before the yeast is pitched. For the most part you will get away with common yeast nutrients which provide just nitrogen, but some very low-nutrient brews, such as rice wine, require something containing more varied fare.
Yeast
As someone who is very easily distracted, I once found a fermenting bucket behind the sofa containing the must of a fruit wine that I had started 5 days previously and forgotten about. It was bubbling away vigorously even though I had added no yeast. There is always enough yeast floating around in the air or stuck to fruit skins to start a fermentation without the need to add any from a packet. Unfortunately it can take time to get going and you have no idea which of several score of wild yeast species and strains you will end up with. I was lucky on that occasion – indeed most of the time only Saccharomyces cerevisiae of one sort or another survives the brewing process – but it is not a good general policy – better to add something with a label on it.
Yeasts do not just produce alcohol. They also create the esters that give wine much of its flavour – imagine adding vodka to grape juice and you will see what I mean. The yeasts used in home-brewed wine derive from the grape yeasts which occur naturally on wine grape skins and it is good practice to choose the one that most closely matches the wine you want or expect. Alternatively, you can choose yeasts which have some characteristic you need for the wine you are making. You can use a general-purpose wine yeast but it is more interesting to choose something special for each brew.
Yeasts, like most other things in home brewing, come in a bewilderingly large number of varieties: hock, burgundy, Bordeaux, Champagne, Sauternes and so on. There are also yeasts with specific properties that can, for example, produce a high-alcohol wine, or tolerate low brewing temperatures so that the subtle aromas are not evaporated away, or reduce the malic acid concentration in wines such as gooseberry or crab apple.
To achieve the correct degree of sweetness the strain of yeast you choose is important. A single must might ferment to dryness with a yeast that tolerates high concentrations of alcohol, while another, less vigorous yeast might die out, leaving the wine sweet. Information on alcohol tolerance of the various strains of yeast are readily available.
Most yeasts are bought in little sachets and most are just sprinkled on the surface of the must and stirred in after 15 minutes. However, do read what it says on the packet – you may need to prepare the yeast in a sugar solution first.
You need to prepare the must for the yeast. Since you will probably have removed any dissolved oxygen from the water by heating it you must reintroduce it just before you add the yeast. This is called aeration and permits a large colony of yeast cells to develop quickly.
It can be done by splashing the must about a bit with a spoon, or pouring the must backwards and forwards between two fermenting buckets, but I use a sterilised electric hand-held stick blender – it is quick and you get a reassuring froth on top of your must.
Once fermentation is under way and, later, the must has been transferred to your demi-john, it is essential to exclude oxygen as far as humanly possible – this encourages secondary ‘anaerobic’ fermentation and prevents spoilage of the wine through oxidisation.
Finings
Most wines clear eventually but it is perfectly legitimate to help them along by adding finings. This is usually done during the second racking a few days before bottling. Bentonite is a good general-purpose fining, removing the fine particles that cloud a wine by clumping them together so that they fall out of suspension. There are several others available.
In the recipes I do not mention using finings as a matter of course, but if the wine has resolutely refused to clear after 3 months in the second demi-john then that is the time to add some. Bottle a few days later.
Potassium sorbate
This is the remarkable chemical that stops yeasts breeding, thus stabilising a wine. For more details, see here.
Equipment
Home wine-making requires very little equipment, though this has not stopped me buying most of the contents of the home-brew store. Below is the basic shopping list. The list of ‘optional’ items is even longer but I will cover these extras as needed.
Weighing scales I generally use digital scales, which accurately measure anything from a few grams to several kilos.
Food-quality fermenting buckets with lids For making a typical 4.5-litre (one demi-john) batch you will need two 10-litre buckets, though they come in larger and smaller sizes if you need them. Lids can be obtained with a little grommet-filled hole in which an air lock may be inserted so that the carbon dioxide can escape without popping off the lid.
A 2-litre plastic measuring jug For pouring water over the primary ingredients.
Large saucepan For heating water.
Long-handled plastic spoon For stirring the must.
Hydrometer For measuring the specific gravity of the must.
Wine-thief A pipette for taking samples of wine or must for testing.
Trial glass A measuring cylinder in which samples can be tested with a hydrometer.
Thermometer For checking the temperature of the must.
Several demi-johns or closed fermenters These come in a standard 4.5-litre size and are usually made of glass though plastic demi-johns are also available. If you are making larger batches of wine then 25-litre plastic fermenters – ‘wide-necked fermenting buckets’ – are available, complete with a fitting to receive an air lock.
Several air locks and associated corks with holes An air lock is fitted to a demi-john or fermenting bucket to prevent air entering a fermentation (pictured). Water, with a few crystals of sodium metabisulphite dissolved in it, is used to form a lock, preventing air, bacteria, yeast and bugs from entering your brew and spoiling it, while allowing carbon dioxide to escape with a ‘blooping’ sound. This provides a clue as to how the fermentation is going; if the bubbles stop, so has fermentation.
Funnel A large plastic funnel is handy for pouring the must into a demi-john.
Nylon straining bag or muslin cloth Used to strain solid matter from the must. These are real bug traps so should always be thoroughly washed and cleaned in boiling water before and after use.
Large sieve or colander A metal or nylon sieve is used sometimes to filter out the must into a demi-john.
Siphon tube This is used to transfer must and wine from one container to another. The best siphon tubes have a rigid tube with a little cup at one end, which prevents sucking up the lees from the bottom of a fermenter or demi-john. Some have little clips for fixing the tube to a fermenting bucket or a tap at the outlet end. There are even ‘self-priming’ siphons which can be pumped to start the flow rather than relying on the slightly unhygienic method of sucking the wine or must with your mouth – they are cheap enough so I advise getting one of these.
An enormous number of wine bottles Any shape you like but bottles that accept corks are the best. Most wine bottles, even screw-top, will accommodate a cork. See here.
Corks You can buy tapered corks but I much prefer the straight ones which require the services of a corker (see here).
Corker For fitting corks. It is worth spending a bit of money on one of these as some cheap corkers are hard work to use.
pH meter or pH-testing strips For testing the acidity level of the wine.
Bottles and bottling
While you can buy new bottles, the home brewer has the opportunity to recycle in the most virtuous way – reusing something in its original form. I live next door to a restaurant and opposite a pub so I am blessed with a limitless supply of bottles of all shapes and sizes – my elderberry wine can live in Burgundy bottles, my parsnip in Alsatian flutes if I so wish. Sparkling wines require more serious consideration, as discussed here. Reused bottles and indeed new shop-bought bottles must be scrupulously clean and sterilised. Full details of this character-building chore are given here. You will need to siphon your wine into the bottles.

A fitted air lock

Corking wine bottles
Corking
Screw tops have resulted in the loss of several ‘vintages’ and I now use only the traditional method for bottling still wines – corking. As it happens, screw-top bottles have an internal neck diameter that perfectly accepts a cork.
New corks are easy to buy and you will need a corker to insert them. This is easy and strangely satisfying, but you need to be very precise about the gap that exists between the top of the wine and the top of the bottle. Too much and the air left in the gap will damage your wine, too little and the cork will refuse to enter. The gap should be 2cm. I have devised a ‘plunger’ (actually a modified lipgloss container – not mine) which, when inserted into a bottle which is slightly over-filled, pushes out excess wine (stand the bottles in a tray!), leaving exactly the right gap. Corks should be new and sterilised with sodium metabisulphite – absolutely not a chlorine-based steriliser.
Things that go wrong with wine
The greatest sin for the home brewer and the commonest cause of problems is poor hygiene. It is essential to keep your brews covered and to sterilise everything they come into contact with. Sterilising equipment is covered in detail here.
The second most common cause of disaster is the wrong temperature or poor temperature control. Yeasts don’t like change. If you make most home brews at a steady room temperature of around 18–20°C then things should go well. A degree or even two higher or lower and things will be fine too. Matters go awry when temperatures fluctuate too wildly. Decide on a room where the ambient temperature is a steady 18–20°C and keep your fermenting buckets and demi-johns there.
Some home brewers insist on keeping their fermenting vessels in thermostatically controlled cupboards. Less demanding of domestic real estate is a heat mat or jacket but there is no real control with these. One method, which I also use for beer, is to stand the fermenting bucket or demi-john in a larger bucket of water and submerge an aquarium heater, set to the correct temperature, in the water.
Stuck fermentations
Everything seems to be going so well – your air lock is bubbling away reassuringly and then it unexpectedly stops or slows to a crawl. Of course it may have just finished fermenting a little earlier than usual as often happens if the temperature is quite high. Test your wine to see if it is close to the final gravity you were expecting (anything from 990 for a very dry wine through to 1015 for a sweet one). Also check that the cork is snugly fitted into the neck of the bottle so that the carbon dioxide is escaping through the air lock rather than from around the cork. Once you are assured that fermentation is indeed stuck you will need to try a succession of fixes, waiting a couple of days each time to see if it works. The first is to move the demi-john to a warmer environment, or use a heat mat or heat band. This might just give the yeast the boost it needs. The second is to give the demi-john a shake to release any live yeast from the bottom back into suspension.
Some fermentations stop because the yeast runs out of nutrients. A plain yeast nutrient is unlikely to fix things, as it does not contain the trace chemicals likely to be lacking. Use instead ½ tsp yeast energiser, such as Tronozymol.
The next fix is to rack the wine into a fermenting bucket and add a new batch of yeast. For this there are special ‘restarter yeasts’ which are able to cope with the shock of being dumped straight into an alcohol/sugar mix. They are normally just sprinkled over the surface, however, the best way is to mix a little warm water with 1 tsp sugar and the yeast in a jug, cover and leave until fermentation is well under way, then add 50ml of the stuck wine. Wait until this starts fermenting, then add another 100ml wine. Once this is fizzing merrily pour it back into the demi-john.
Failing these techniques I suggest reversing the polarity on the dilithium crystals and going to warp 7.5. Make it so.
Over-sweetness
Nearly all the home wines I have been offered over the years have, to my mind, been syrupy. It is all a matter of taste but if you make something for yourself and find it too sweet then too sweet it is. It may be due to a stuck fermentation, or at least a fermentation that stopped a little earlier than expected, or it may simply be down to too much sugar in the first place. If it is the latter, there is little you can do although restarting with a high-alcohol-tolerant yeast may work. Introduce it to the wine by making a small restarter batch as described above.
Blending with a dry wine is another solution. Sugar goes a long way, however, so you may need two or more bottles of dry to every bottle of sweet to form an acceptable wine. The drawback is that fermentation may very well restart (which may or may not be desirable), so return the blend to demi-johns for a few weeks before bottling.
Murky brews
With the possible exception of what is called a ‘pectin haze’ all wines will clear given time. ‘Time’ in this instance may mean a year or more. Finings are designed to remove the fine particles that cause cloudiness by making them clump together and fall to the bottom of the demi-john. If you add wine finings a week or two before bottling you should have no problems.
Some wines such as parsnip can contain a certain amount of starch. Amylase will convert starch to sugar and should be added to the must at the very beginning.
Pectin hazes are caused by pectin from many fruit and are fairly easily avoided by using pectic enzyme in the early stage, before the yeast is pitched (see here). After this, when alcohol is present, pectic enzyme does not work and you are stuck with a cloudy wine. In this situation (and any other!) cloudiness can be reduced by using a gravity-fed filter such as the Harris Vinbrite wine filter kit.
Ethyl acetate
This nasty affliction is easily detected by the strong smell of pear drops (or nail-polish remover) and can arise for several reasons. However, the chief culprit is the bacterium Acetobacter, which turns alcohol into acetic acid and then to ethyl acetate. It can be avoided by scrupulous hygiene and keeping your brew covered. If caught early then treat the must with a hefty dose of sulphur dioxide in the form of a crushed Campden tablet or two, followed by a 2-day rest, aeration and a restart of the fermentation. In fact, ethyl acetate is an important ester in wine, providing a fruity flavour beyond that of mere acidity. Too much, however, will take your breath away and is extremely unpleasant to drink.
Ropiness
This is an impressive fault that I have only suffered from once. The must in the fermenting bucket takes on the consistency of egg white and can pour in dollops. It is caused by Acetobacter who spend their time knitting long-chain molecules. One or two crushed Campden tablets per 4.5 litres and a good whisk will fix things – the flavour is not affected. Rest for 2 days before re-pitching the yeast.
Acetic acid
Sometimes acetic acid fails to turn into ethyl acetate and you end up with wine vinegar. If caught early enough and treated as for ethyl acetate (see above) it adds a pleasant roundness to the finished wine; if not, then it’s nice on chips!
Musty flavours
Dead yeast cells fall to the bottom of the demi-john and slowly rot in a process called autolysis. This is important in achieving some subtler flavour in wines, notably Champagnes, but you can have too much of a good thing and wines must be racked into fresh demi-johns to remove them from the corpses of their creators.
Corked wines
The wet dog aroma and flavour of a corked wine is not nice. It occurs when the seal on a bottle is less than perfect, allowing oxygen into the wine. A fully inserted, sterilised cork will usually prevent problems and storing wine on its side ensures that corks do not dry out and shrink sufficiently for air to enter the bottle.
Rhubarb wine
| SEASON | March–July |
| ORIGINAL GRAVITY | 1095 |
I am very fond of rhubarb as it is just about the only local plant you can make fruity puddings out of early in the year. And very fruity it is too.
Early rhubarb sticks contain a lot of pectin so do be patient and give them time to grow; even with the later stems it is worth using pectic enzyme to be safe. This simple recipe produces one of the best wines I know – fruity and crisp.
Makes about six 75cl bottles
1.5kg rhubarb stalks
1.3kg granulated sugar
250ml tin white grape juice concentrate
1 tsp yeast nutrient
1 tsp pectic enzyme
1 Campden tablet, crushed
5 g sachet Sauternes yeast
Wash the rhubarb thoroughly, then cut into 3–5mm slices (the thinner the better). A mandolin is the ideal gadget for doing this, if you are brave enough. Place in a fermenting bucket and stir in the sugar. Cover with a lid or clean tea-towel and leave for 3 days, stirring once a day.
Strain the syrup that has formed into a fresh fermenting bucket. Return the rhubarb to the original bucket, stir in 2 litres cold water and continue to stir until any remaining sugar crystals have dissolved. Leave to stand for at least an hour, then strain this into the second bucket too. Repeat with another 1.5 litres water. (Cold water is used because hot water tends to extract the pectin, making the wine cloudy.)
Add the grape juice concentrate and make it up to 5 litres with more water. Check the specific gravity and adjust if necessary. Add the yeast nutrient, pectic enzyme and crushed Campden tablet (this wine needs one). Cover and leave for 24 hours.
Aerate and pitch the yeast, then cover and leave to ferment for about 5 days, stirring every day for the first 4 days, then siphon into a demi-john and fit an air lock.
Once fermentation appears to have ceased (usually after about 1–2 months) rack off into a second demi-john.
Once the wine is clear it can be bottled if you want a fairly dry wine, or you can sweeten it as described here. Allow to mature for a year before drinking.
Elderberry wine
| SEASON | August–September |
| ORIGINAL GRAVITY | 1095 |
Many of the home wine makers I know stick to a single wine – elderberry. In a survey of home wine makers it was by far the most popular country wine and I can understand why – elderberries are the closest fruit to wine grapes in colour, juice content, tannin and acidity. The resulting wine can easily match a good grape wine.
Like wine made from grapes, elderberry wine needs to be kept for at least a year to allow the tannin to mellow before drinking. The oldest I have tried was a venerable thirty-seven years. It was light, sweet, fruity and perfect, with the tannin subdued to a mere minor note. An extra piquancy was provided by the fact that it was the last bottle of its line.
Elderberries are conspicuous inhabitants of the hedgerow, appearing from August through until late September. There is little with which they might be confused though dogwood has berries of vaguely similar appearance but in smaller bunches. A very common and embarrassing mistake is to return to pick elderberries from the same tree where you picked elderflowers in the summer. There won’t be any.
Makes about six 75cl bottles
1.5kg elderberries
1.2kg sugar
1 tsp yeast nutrient
5 g sachet red wine yeast
There really is nothing to this – crush the berries gently (so as not to crush the pips too much) in the bottom of a fermenting bucket with the end of a rolling pin, add the sugar then pour over 4.5 litres boiling water. The hot water will kill all the bugs so no Campden tablet is needed.
Allow to cool, check the specific gravity and adjust if necessary. Add the yeast nutrient, aerate, then pitch the yeast. Ferment for a week, stirring every day except the last, then siphon or strain into a demi-john and fit an air lock.
Rack off into a second demi-john when fermentation appears to have ceased. Bottle once the wine is clear if you want a dry wine or sterilise and sweeten as described here. Leave to mature for a year before drinking.
Note This is such a reliable wine to make you may wish to use the other method of obtaining a sweeter wine and use 1.4–1.5kg sugar at the beginning (see here).

Elderberry wine
Blackberry wine
| SEASON | Late July–October |
| ORIGINAL GRAVITY | 1095 |
I love elderberry wine but my favourite must be its sister, blackberry wine. It is not to everyone’s taste though – some find it a little too much like blackberry cordial.
The bramble on which blackberries grow is a species-complex with over three hundred micro-species in Britain alone. This means that the blackberries they produce vary as much from plant to plant as they do from year to year. Like all foragers, I have developed a mental map telling me where the best blackberries are to be found, and also when is the best time to pick them. To be honest you do not need fat juicy blackberries to make a good wine, just those with a lot of flavour. You will certainly need to go equipped to pick them – bramble thorns are particularly vicious.
The recipe is the same as that for elderberry and there is no reason why you cannot obtain a little extra tannin by replacing one-third of your blackberries with elderberries. Blackberry and elderberry wine is a classic of the countryside. Indeed, elderberry and blackberry wines are often blended after maturity.
Makes about six 75cl bottles
1.5kg blackberries
1.2kg sugar
1 tsp pectic enzyme
1 tsp yeast nutrient
5 g sachet red wine yeast
Crush the berries gently (without crushing the pips) in the bottom of a fermenting bucket with a potato masher, add the sugar then pour on 4.5 litres boiling water. The hot water will kill all the bugs so no Campden tablet is needed. Allow to cool until just warm, then add the pectic enzyme. Once cooled, check the specific gravity and adjust if necessary. Cover and leave for 12–24 hours.
Stir in the yeast nutrient, aerate, then pitch the yeast. Leave to ferment for a week, stirring every day except the last, then siphon or strain into a demi-john and fit an air lock.
Rack off into a second demi-john when fermentation appears to have ceased. Bottle once the wine is clear if you want a dry wine or sterilise and sweeten as described here. Allow to mature for a year before drinking.
Note For a sweeter wine you can use 1.4kg sugar at the beginning (see here).

Blackberry wine
Cherry plum wine
| SEASON | July–August |
| ORIGINAL GRAVITY | 1095 |
The cherry plum is an unregarded semi-wild fruit collected by but a few, yet a single tree will produce masses of gorgeous plums. The flavour varies considerably from tree to tree but for wine you’ll need to pick the sharp-flavoured fruit, not the sweet/bland.
I have found plum wines to be a little troublesome to make. They seem to come with more than their fair share of Acetobacter. There is nothing you can do about this once it has taken serious hold and the whole lot has to go down the sink. For this reason, I recommend using two crushed Campden tablets in your fermenting must and a 48-hour wait before adding the yeast. I sometimes kill off unwanted bugs by very briefly heat-treating the must to 80°C. This should be brief as otherwise the wine tastes of cooked plums and large amounts of pectin can be released.
The wine is similar in appearance and body to a rosé but with a slight cherry flavour. This recipe will work for sharp-flavoured cultivated plums.
Makes about six 75cl bottles
2.8kg cherry plums, halved and stoned
1.3kg sugar
1 tsp pectic enzyme
2 Campden tablets, crushed
1 tsp yeast nutrient
5 g sachet red wine yeast
Put the cherry plums in a fermenting bucket and mash with the end of a rolling pin. Stir in the sugar, pectic enzyme and crushed Campden tablets. Cover, then stir after 3 hours and again after 6 hours. Leave for 3 days, stirring occasionally.
Add the yeast nutrient and sufficient cold water to make up to 6 litres. Strain a little must through a muslin cloth to check the specific gravity and adjust if necessary. Pitch the yeast and ferment for a week, stirring every day except the last two.
Your must should have settled into layers: sludge at the bottom, liquid in the middle and froth/pulp on top. Place your siphon in the liquid layer and transfer this to a demi-john. If this fails, carefully strain through muslin or a nylon straining bag, stopping before the sludge. Top up any shortfall with sugar solution (1 part sugar to 3 parts water). Fit an air lock and leave until fermentation appears to have ceased.
Rack off into a second demi-john. Bottle once the wine is clear if you want a dry wine or sterilise and sweeten as described here. Leave to mature for a year.
Sloe wine
| SEASON | September–December |
| ORIGINAL GRAVITY | 1095 |
Sloes themselves are described and discussed here so it is sufficient to say here that they are very easy to find provided you live in the countryside. The startling flavour of sloes comes mostly from the tannin and they contain relatively little organic acid, hence the addition of lemons to the recipe. Like the similarly tannin-rich elderberry wine, this needs a bit longer to mature than other country wines.
Makes about six 75cl bottles
1.5kg sloes
1.3kg sugar
100g raisins, chopped
Pared zest and juice of 2 lemons
½ tsp pectic enzyme
½ tsp yeast nutrient
5 g sachet Bordeaux yeast
Wash the sloes, removing anything you don’t like the look of, and put them into a fermenting bucket. Boil 2.5 litres water and pour it over the fruit. Once it is cool, crush the now soft sloes with clean hands.
Heat 2 litres water in a saucepan and stir in the sugar until it is dissolved, then add the raisins. Pour this into the fermenting bucket, allow to cool, then add the lemon zest and juice and the pectic enzyme. Cover and leave for 4 days.
Strain out all the solid matter and transfer the liquor to a clean fermenting bucket. Check the specific gravity and adjust if necessary.
Aerate the must, stir in the yeast nutrient, then pitch the yeast and allow to ferment for 5 days, stirring every day except the last.
Siphon into a demi-john and fit an air lock. Leave until fermentation appears to have ceased, then siphon into a second demi-john and leave until the wine has cleared completely.
Bottle if you want a dry wine or sterilise and sweeten to taste, following the instructions here. Give this wine at least a year, preferably longer, to mature before drinking.
Rosehip wine
| SEASON | August–November |
| ORIGINAL GRAVITY | 1095 |
Rosehips, like haws, are a bit of a problem for the forager – they look pretty and there are plenty of them, but what use are they? Rosehips make two appearances in the Infusion chapter (here and here) but, like just about everything else, they can be used to make wine. For once we do not have to worry about those troublesome seeds which sport stomach-irritating hairs – they just fall out of the wine.
While hedgerow plants like the dog rose and field rose are probably the best source for your rosehips, you can use any hip you like. If you find picking hips tiresome then choose the excellent Japanese rose, Rosa rugosa, as it has hips ten times bigger than the wild roses and thus is a tenth of the work to pick. Rosehips are always either too ripe or not ripe enough, so just pick any that are red all over and not actually rotting.
The flavour of the wine is mildly fruity with a vanilla undertone.
Makes about six 75cl bottles
1kg rosehips
1 Campden tablet, crushed
1 tsp pectic enzyme
1.3kg sugar
Juice of 3 lemons
½ tsp yeast nutrient
5 g sachet white wine yeast
Wash the hips thoroughly, removing any that are green and anything that looks nasty, then transfer to a fermenting bucket. Boil 2.5 litres water and pour over the hips. Allow to cool, then crush the hips with clean hands. Add the crushed Campden tablet and the pectic enzyme, cover and leave for 24 hours.
Heat 2 litres water in a saucepan and stir in the sugar until it is dissolved. Add this hot syrup to the fermenting bucket. When cool, add the lemon juice and yeast nutrient. Check the specific gravity and adjust if necessary.
Aerate the must and pitch the yeast. Allow to ferment for 6 days, stirring every day except the last.
Strain or siphon into a demi-john and fit an air lock. Leave until fermentation seems to have ceased. Siphon into a second demi-john and leave until the wine is clear.
Bottle if you want a dry wine or sterilise and sweeten to taste, following the instructions here. Allow to mature for a year before drinking.
Strawberry wine
| SEASON | June–August |
| ORIGINAL GRAVITY | 1120 |
Strawberry wine has a long history in Britain, the earliest recipe I have found dating back to 1745. This coincides with the introduction from France of our modern cultivated strawberry – a hybrid of two species from the Americas. I am very fond of heroic recipes so I was delighted to find one from 1832 which tells you to ‘Take two hundred baskets of good ripe fruit for a barrel, and sixty-four pounds of brown sugar…’ and to add ‘fourteen gallons of good white rum’. Strawberry wine is not universally appreciated though. In 1830 the Lord Bishop of Calcutta, no less, declared:
‘Hail strawberry! thou fruit divine
In any other shape than wine’
Well, I can see what he means, strawberry wine tastes so very much of strawberries. However, I heartily recommend it sweet and fortified as a dessert wine.
Strawberries lend themselves to natural fermentation and I have had considerable success letting the strawberries ferment from the native yeasts adhering to the surface. Using just wild yeasts is a high-risk strategy as you occasionally end up with the wrong yeast which may spoil the wine with off-flavours. But it is exciting to see things develop naturally and well worth trying from time to time.
This is another recipe where excess sugar is included from the start so that some is left after fermentation. If you would prefer a dry wine, or to adjust the sweetness later, then use 1.3kg sugar (see here). This is a fortified wine so it will be very strong. I suggest brandy as your fortifier but you could use vodka for a neutral flavour.
Makes about six 75cl bottles
2kg firm strawberries
1.5kg sugar
1 tsp pectic enzyme
½ tsp grape tannin
1 tsp acid blend or a mixture of citric, malic and tartaric acid
1 tsp yeast nutrient
5 g sachet white wine yeast (optional)
750ml brandy
Trim the greenery from the strawberries and remove any bruised bits. If you are relying on wild yeasts do not wash them. Mash them in a fermenting bucket with a potato masher. Mix in the sugar, pectic enzyme and 1.5 litres water, cover with muslin and leave for about a week if you want the wild yeast or a single day if not.
Add another 1.5 litres water and stir thoroughly. Strain the juice through a nylon straining bag into a clean fermenting bucket, saving the pulp. Add a final 1 litre water to the pulp in the original container, stir and strain into the bucket again – remember to use scrupulously clean hands or sterilised rubber gloves.
Stir in the grape tannin, acid blend and yeast nutrient. If you are using commercial yeast pitch it now. Leave to ferment for 5 days, stirring every day except the last.
Siphon or strain into a demi-john and fit an air lock. Leave until fermentation appears to have ceased, then rack off into a second demi-john and leave until the wine is clear.
Distribute the brandy among your wine bottles and siphon in the wine from the demi-john. Leave the fortified wine to mature for at least 6 months, preferably a year, before drinking.
Crab apple wine
| SEASON | September–October |
| ORIGINAL GRAVITY | 1120 |
Crab apples are a bit of a trial for the forager; not because they are hard to find, but because it is not obvious what can be done with them. Crab apple jelly and…? Their problems are manifest – they are hard, have a very poor pip/skin to flesh ratio and they are very, very sharp. They do, however, make an excellent country wine.
Most of the apples thought of as crab apples are ‘wildings’ – offspring of discarded apple cores, and, as apples do not breed true, their characteristics are pretty random. True crab apples are always small, hard, sharp and scabby. They are a different species, though not as distinct as one would like as there has been a great deal of inter-species dalliance. For wine-making, fine considerations of parentage do not matter; any small sharp apple can be used to make crab apple wine.
A country wine is what it is – pleasant and fruity without a great deal of subtlety. I once passed a bottle round the table towards the end of a posh dinner hosted by a posh French wine company. I thought they would turn up their noses at it but they genuinely seemed to like it, commenting only that it was not particularly structured, meaning there was little complexity to the flavour – still nice though.
Makes about six 75cl bottles
2.5kg crab apples
1.5kg sugar
1 tsp pectic enzyme
1 Campden tablet, crushed
1 tsp yeast nutrient
5 g sachet white wine yeast
Wash the crab apples thoroughly. Crush them in a fermenting bucket with the end of a rolling pin or however else you fancy. (Crushing apples is dealt with at length in the cider section here.) Stir in the sugar and leave covered for 24 hours.
Add 4 litres cold water, the pectic enzyme and crushed Campden tablet and leave for another 24 hours.
Stir in the yeast nutrient, then pitch the yeast. Leave to ferment for 6 days, stirring every day but the last. Siphon or strain into a demi-john, making up any shortfall with sugar solution (1 part sugar to 3 parts water), and fit an air lock.
Rack off into a second demi-john when fermentation appears to have ceased. Bottle once the wine is clear. Allow to mature for a year before drinking.
Mango and palm sugar wine
| SEASON | All year |
| ORIGINAL GRAVITY | About 1100 |
Palm sugars from any number of palm trees have been used to make alcoholic drinks for thousands of years, even rating a mention by Pliny two millennia ago. Sago, date, coconut and, notably, sugar palm have all been employed to make a rough and ready wine, beer or spirit. The most notorious of these is arrack. As the nineteenth-century missionary Samuel Meer wrote: ‘Arrack is the most injurious beverage… a single penny-worth will intoxicate a native’. Unfortunately we cannot make arrack but if you are a native and want to find out if this is true you can buy bottles of the stuff.
Palm sugars are the dried sap of the palm, bled either from the trunk, as with birch and maple, or more usually from the unopened flower buds situated inconveniently at the top of typically very tall plants. With a massive sugar concentration of 15%, the sap was used directly to make the wine.
The jaggery goor used here is an unrefined palm sugar sold in orange/brown blocks. It has an intense taste – like molasses – with some unfamiliar flavours thrown in. The taste of the wine is as exotic as the ingredients – fruity and a little spicy. The bitterness typical of raw sugars is also present, so I suggest using white sugar for the most part to reduce bitterness from the start.
Makes about six 75cl bottles
400g jaggery goor or coconut palm sugar
1kg sugar
2 large ripe mangoes
2 over-ripe bananas
1 tsp pectic enzyme
1 Campden tablet, crushed
5 g sachet white wine yeast
Boil 4.5 litres water and dissolve the sugars to make a syrup. Peel the mangoes and slice the flesh off the stones, then crush in a fermenting bucket with the end of a rolling pin and pour on the boiling syrup. Leave to cool until just warm. Slice the bananas and add them to the fermenting bucket, then stir in the pectic enzyme and the crushed Campden tablet and leave for 24 hours.
Aerate and pitch the yeast, then leave to ferment for 6 days, stirring every day but the last. Siphon or strain into a demi-john and fit an air lock.
Rack off into a second demi-john when fermentation appears to have ceased and bottle once the wine is clear. Leave to mature for a year before drinking.
Melon fizz
| SEASON | All year |
| ORIGINAL GRAVITY | 1080 |
Many of us have had fun cutting the end off a marrow, mashing up the insides and putting in some brown sugar to make an alcoholic drink of doubtful worth. It is the adult equivalent of growing mustard and cress on blotting paper. Melon fizz is very similar but actually tastes nice. The fun is still there, however, as you bottle it far too soon to be safe and face the possibility of explosions.
I recently came across an unlabelled half-bottle of what turned out to be year-old melon fizz in the spare fridge I use for lager-making. I foolishly washed away the sticky stuff that had run down the side with warm water before easing off the swing-top cap. Melon fizz hit the ceiling, the window, the door, the light fitting and me. The lights fused and went out. After an hour of domestic and marital restoration I sought consolation in the small amount of melon fizz left in the bottle.
Makes about 750ml
1 ripe honeydew melon or similar
Pared zest and juice of 1 lemon
About 100g sugar
A pinch of white wine yeast
Cut the melon in half and scrape the pips, juice and fibres into a small fermenting bucket or something similar. Spoon out the flesh, mash it up and add to the bucket. Add the lemon zest and juice. Stir in some sugar until you have a specific gravity of about 1080.
Pitch the yeast, cover and leave somewhere fairly warm to ferment for a week, stirring occasionally.
Sieve and funnel into plastic fizzy drink bottles, carefully leaving the lees behind. Allow to ferment for a day somewhere warm, then keep in the fridge – but not for too long! Serve with ice.
Elderflower and gooseberry wine
| SEASON | June–early July |
| ORIGINAL GRAVITY | 1095 |
Every year I take to the hedgerows to gather several hundred elderflower blossoms (see here). Some things seem to be made for each other and elderflower and gooseberry is one such pairing. It is possible to make a straight elderflower wine but you will need to add an acidic component to provide fruitiness so it might as well be gooseberry, which is about the nearest thing we have to a grape. Fortunately their seasons more or less coincide.
Try to pick the flower heads in the morning on a sunny day, making sure that the florets are open and still yellow in the middle, and start your brew as soon as you get home so that the freshness is preserved. The florets should be stripped from the flower head with a fork, removing as many of the bitter green bits as you can.
Makes about six 75cl bottles
1kg green gooseberries, washed
Florets from 8 elderflower sprays
1 level tsp pectic enzyme
1 Campden tablet, crushed (optional)
1.3kg sugar
1 level tsp grape tannin
1 tsp yeast nutrient
5 g sachet white wine yeast
Pre-freeze the gooseberries (to break down the cell walls and make the mashing process easier), then defrost and place in a ceramic mixing bowl. Crush them gently with the end of a clean rolling pin. It is important not to crush the pips too much as this will release more pectin. Once it is all nicely pulped, transfer to a fermenting bucket and pour on about 4 litres cold water. Add the elderflower florets, pectic enzyme and a crushed Campden tablet, if using, and leave for 24 hours.
Add the sugar and stir until fully dissolved. Allow the must to settle before extracting some to check the specific gravity; adjust if necessary. Add the grape tannin and yeast nutrient, then pitch the yeast. Leave to ferment for a week, stirring every day except the last. Carefully strain the must into a demi-john and fit an air lock.
Rack off into a second demi-john when fermentation appears to have ceased. Bottle once the wine is clear if you want a dry wine or sterilise and sweeten as described here. Allow to mature for a year before drinking.
Sparkling elderflower wine
| SEASON | June–early July |
| ORIGINAL GRAVITY | 1070–1080 |
This is the big one! Few self-respecting country dwellers will let the summer pass without making at least one batch of this remarkable wine. It is by far the nearest thing to Champagne you can make at home and an essential accompaniment to summer parties. There is, however, a small problem.
It is only possible to drink elderflower sparkly from a glass, not from the floor, walls and ceiling of the dining room, kitchen or garden shed. Exploding bottles are the bane of the elderflower sparkly maker and it is something that seems to happen to everyone. I read of one wine maker who kept a dozen bottles just inside the shed. Nine exploded, leaving a Hurt Locker collection of three. Since no one was prepared to approach the bottles, or indeed the end of the garden, they hit upon the rather brilliant idea of taking them out with an air rifle.
Which bottles you use has a bearing on the safety of this brew. Wine bottles will obviously have you redecorating, so something stronger is needed. You can use swing-top bottles, plastic fizzy drink bottles or Champagne-style bottles. Swing-top bottles are very good but only if you use the thick-walled variety with sturdy metal parts. Torpedo-shaped plastic lemonade bottles are just about up to it, though I was once presented with one full of elderflower fizz which had deformed into the shape of a monkey-nut and looked as though it would go bang at any moment.
Champagne bottles are designed to withstand pressure and are the most attractive solution, though it is more difficult to check how things are going and to release a little of the pressure if they are going badly. Also if they do go they produce high-velocity shrapnel, so remember to put some sandbags around your wine rack. Champagne bottles need to be corked with easy-fit plastic Champagne corks and fixed with a little cage. You can even buy shaped cups of coloured foil to make everything look the part.
There are at least three ways of making elderflower sparkly – quick and reckless, careful but not too fussy, and fussy. The second is my preferred method as it is easy as long as you keep an eye on things. The third is the ‘proper’ method involving a second fermentation to create the bubbles and complicated matters familiar to Champagne buffs such as remuage and disgorging (processes which enable the lees to be removed from the bottle). We are going to stick with the first two. Both are relatively low-alcohol brews and both are dry. For advice on gathering elderflowers, see here; for the easiest way to strip the florets from the flower heads, see here.
Quick and reckless recipe
This method for making sparkling elderflower is the one that can result in all that collateral damage, but it is very straightforward. I have enjoyed two-year-old elderflower sparkly made this way, so even though it is rough and ready it can keep quite well. Whenever you drink it, serve it chilled and pour carefully – there will be some sediment at the bottom of the bottle from the continued fermentation.
Makes about six 75cl bottles
800g sugar
Florets from 8 elderflower sprays
Pared zest and juice of 4 lemons
½ tsp yeast nutrient
5g sachet Champagne yeast
Dissolve the sugar in 2 litres hot water in a fermenting bucket, then top up with 3 litres cold water. Allow to cool.
Aerate and add the elderflower florets, lemon zest and juice, and the yeast nutrient. Pitch the yeast or, if you like a bit of excitement, don’t. Elderflowers come ready stocked with wild yeasts and it can be interesting to see how things turn out. Leave to ferment for 6 days, stirring every day for the first 5 days.
If you did not add yeast and fermentation has not started after 3 or 4 days then it is time to give the thing a kick-start with a packet of Champagne yeast.
After 6 days of fermentation, strain the must through boiled muslin into a fresh fermenting bucket, leaving the lees behind. Cover the bucket and leave for a few hours for the dust to settle, then siphon into your bottles of choice.
Your sparkly is about ready to drink after a week, and in any case a week is a good time to check to see how things are going. You can release a little excess pressure by easing the lid off, though, as noted, this is a little tricky if you have used Champagne bottles. If you are still worried then put the lot in the fridge to slow things down a little and drink it as quickly as you can.
Tried, trusted and reasonably safe recipe
This is reliable in that it leaves a measured amount of sugar in the wine instead of a wildly guessed amount, ensuring that only a safe amount of carbon dioxide is produced. Still, it is worth checking to make sure things are going well. This is a bottle-conditioned wine so there will be sediment in the bottom.
Makes about six 75cl bottles
Florets from 8 elderflower sprays
Pared zest and juice of 2 lemons
900g sugar
250ml tin white grape juice concentrate
½ tsp yeast nutrient
5 g sachet Champagne yeast
Put the elderflower florets, lemon zest and juice, sugar and grape concentrate in a sterilised bucket. Pour over 2.5 litres boiling water and stir until the sugar is dissolved. Add 2.5 litres cold water and the yeast nutrient. Leave until cool.
Aerate the must, pitch the yeast, cover and leave to ferment for 5 days, stirring every day for the first 4 days.
Strain the must into a sterilised demi-john and fit an air lock. The bubbles in the air lock should appear at about one per second. This will slow down after about a week and this is the time to test your brew with your hydrometer. Remove the air lock and carefully drop in your sterilised hydrometer. The goal is 1010. If it is not down to this level, then replace the air lock and leave your brew a bit longer. If you forget all about it and the specific gravity falls too low then add some sugar syrup.
Once the magic number has been achieved, siphon off into whichever bottles you are using. Leave for several weeks to allow the fermentation to add fizz to the wine before drinking.
A shameful cheat
Makes 1.25 litres
1 litre chilled soda water
50ml elderflower cordial
6 shots of vodka
Lemon slices
Mix, serve, don’t tell anyone what you have done.

Sparkling elderflower wine
Gorse wine
| SEASON | Best in April, but available most of the year |
| ORIGINAL GRAVITY | 1095 |
While primrose wine and, especially, cowslip wine will have even the most rapacious of foragers worrying about conservation, the yellow of gorse fills roadside, heath and hill the country over and picking will not damage it. Gorse flowers are described here. It is enough to say here that they are around for most of the year and the best time to pick is during their main flush in April while the sun is on them.
Gorse blossom makes one of the best country wines and is not to be missed. This wine does, however, need time to mature as the flavour of ‘pea’ (gorse is in the pea family, after all) is detectable for several months after bottling. The distinctive coconut aroma of the flowers survives the brewing and maturing processes reasonably intact and the wine as a whole is full-bodied and as rich as Xerxes.
Makes about six 75cl bottles
4.5 litres gorse flowers (½ builder’s bucket, loosely packed)
1.2kg sugar (or use honey for all or part of this, using a quarter as much honey again as the sugar it replaces)
250ml tin white grape juice concentrate
Pared zest and juice of 2 lemons
½ tsp yeast nutrient
5 g sachet white wine yeast
Remove any twigs and superfluous wildlife from the gorse flowers and place the blossoms in your fermenting bucket with the sugar. Pour over 2.5 litres boiling water and stir until the sugar has dissolved. When cool, add 2 litres cold water. Add the grape concentrate, lemon zest and juice and the yeast nutrient.
Check the specific gravity and adjust if necessary. Aerate, then pitch the yeast. Cover and leave for a week, stirring every day but the last.
Use a large funnel lined with a muslin cloth to strain the must into a demi-john, making sure that you leave the lees at the bottom of the fermenting bucket. Fit an air lock and leave for about 2 months.
Rack off into a second demi-john when fermentation appears to have ceased. Bottle once the wine is clear if you want a dry wine, or sterilise and sweeten as described here. The minimum for this wine to mature to glory seems to be 9 months.
Dandelion wine
| SEASON | Late March–early May |
| ORIGINAL GRAVITY | 1110 |
Dandelion wine-making is such an important part of the home brewer’s calendar and so good a wine that it is one you really must try. The flower has a bitter taste but this merely imparts a pleasant astringency to the wine.
Pick the flowers in full sun, preferably in the morning (see here) and start your wine the moment you get home. Hold each dandelion flower by the calyx and snip off the petals with scissors into a clean fermenting bucket; if much of the green stuff ends up in your must that pleasant bitterness can become too intense but the odd few bits won’t pose a problem. The recipe itself is easy, producing a rich, strong, golden wine.
As medium sweet is best for dandelion wine, I am using a little more sugar than usual, to leave some behind after the yeast has died. If you would prefer a fairly dry wine or to sweeten the wine later, then use 1.2kg sugar. See here for more details.
Makes about six 75cl bottles
4.5 litres dandelion petals (½ builder’s bucket, loosely packed)
1.4kg sugar
250ml tin white grape juice concentrate
Pared zest and juice of 4 lemons
1 tsp yeast nutrient
5 g sachet white wine yeast
Place the dandelion petals in your fermenting bucket and stir in the sugar. Pour 2.5 litres boiling water over the mixture, stir until the sugar has dissolved, then add 2 litres cold water. Cover and leave for a couple of days, stirring occasionally.
Strain and squeeze the floral syrup through a nylon straining bag into another fermenting bucket. Do make sure your hands are completely clean or use sterilised rubber gloves. Add the grape juice concentrate, lemon zest and juice and the yeast nutrient. Check the specific gravity and adjust if necessary.
Aerate, then pitch the yeast. Cover and ferment for 5 days, stirring every day except the last, then siphon into a demi-john and fit an air lock.
Rack off into a second demi-john when fermentation appears to have ceased. Bottle once the wine is clear.
Let the wine mature for a year before drinking to allow any bitterness to moderate.
Cowslip wine
| SEASON | April–early May |
| ORIGINAL GRAVITY | 1095 |
This recipe is included because cowslip wine is an all-time classic country wine, which, unsurprisingly, is seldom seen these days. The cowslip largely disappeared from the British countryside with the extensive ploughing of pasture and meadow after the Second World War. It has made something of a comeback as a roadside plant introduced to brighten up new bypasses and dual carriageways, but not everyone is keen on picking roadside flowers for wine, and flower-lovers may be justifiably enraged by the picking of so pretty a flower. I am fortunate in that I have my own patch, far away from any road, which no one ever sees. Still, despite the abundance of cowslips at this site, I do not like to pick more than a few blossoms and content myself with a ‘pico-brew’ of cowslip wine every year.
Look for cowslips in sunny locations and pick no more than half of the individual flowers that appear on each plant. Or you might prefer to replace or supplement the blossoms with those of the closely related and much more abundant primrose.
The following recipe is made in a 1-litre soft-drink container and produces barely a litre of wine. The fermenting processes in these pico-brews are very fast and complete in half the time, so I often use them when testing a new recipe.
Cowslip is indeed a lovely fragrant wine, which many have told me is the best country wine they have ever tasted… I tend to agree.
Makes about 1 litre
600ml cowslip flowers
250g sugar
Juice of 1 lemon
A pinch of yeast nutrient
1 tsp hock yeast or white wine yeast
Place the cowslip flowers, sugar and lemon juice in a sterilised container. Heat 1 litre water to 70°C, pour over the mixture and stir. When cool, aerate and add the yeast nutrient, then pitch the yeast. Cover and ferment for 3 days.
Transfer the must to a 1-litre container with a neck diameter suitable for an air-lock cork (or push a wad of cotton wool into any sized neck, making sure it does not touch the must). There is little point in racking this tiny brew – just leave it to more or less clear in the bottle then transfer it to 2 or 3 suitable-sized bottles.
Allow the wine to mature for at least 3 months before drinking.
Mead
| SEASON | All year |
| ORIGINAL GRAVITY | Variable |
The quest for alcohol has always been the quest for sugar – if you can find the latter you can make the former. Historically sugar has been difficult to obtain, certainly in pure form. Consisting of 83% sugars, honey is the nearest thing you can get to the pure stuff in nature, so it has been important in wine-making for millennia.
At heart, mead is a minimalist beverage as it contains very few ingredients: water, honey, lemons and yeast. Various flavourings are added, ginger being a favourite, but beyond a single extra ingredient the drink should really be called metheglin or any one of a score of other names, depending on the additive concerned.
Unadulterated, it is simply a wine that tastes of honey, although not as strongly as one might think. Writing in 1787, one Charlotte Mason described it as tasting like a fine, old Malaga – a dessert wine from Spain. Choosing the honey you use is a compromise between taste and cost. Some cheap honeys are perfectly pleasant, lacking only the dominant characteristics of single source (monofloral) honeys such as heather and acacia. Frankly, it is not worth splashing out on manuka honey.
Makes about six 75cl bottles
1.4, 1.7 or 2kg honey for, respectively, dry, medium or sweet mead
Pared zest and juice of 2 lemons
1 Campden tablet, crushed
1 level tsp Tronozymol yeast nutrient
5 g sachet Lalvin D47 wine yeast
1 tsp wine finings
First stand your jars of honey in warm water to make it a little more runny or to liquefy if your honey is set. Pour 4.5 litres warm water into a sterilised container. Stir in the honey until it is completely dissolved and then add the lemon zest and juice. Add the crushed Campden tablet, stir, cover and leave for 24 hours.
Aerate, then add the yeast nutrient and pitch the yeast. Leave to ferment for 6 days, stirring every day but the last, then siphon into a demi-john and fit an air lock.
Leave until fermentation has almost ceased, then rack off into a second demi-john, adding the wine finings.
If the mead does not clear, then rack into a third demi-john. Once the wine is clear, siphon it into bottles. Allow to mature for a year before drinking.
Metheglin
| SEASON | May–July |
| ORIGINAL GRAVITY | Variable |
Metheglin (pronounced meth-egg-lin) is simply a flavoured mead. It predates even wine made from grapes, so it is a pity it has gone out of fashion. Traditionally it was made stronger than mead. A seventeenth-century writer says that it is ‘Strong in the superlative… doth stupifie more than any other liquor, and keeps a humming in the brain’. I can find no one who makes metheglin commercially, so if you want to hear that humming you will have to make it yourself.
The name metheglin comes from the Welsh meddyglyn, equivalent to meddyg, which means healing. There was considerable congruence between food, drink and medicine in times past and the herbal nature of many metheglins reflects this.
There are endless old recipes; the seventeenth-century The Closet of Sir Kenelme Digby lists several dozen with names such as ‘Sir Baynham Throckmorton’s Mead’ and ‘Mead from the Muscovian Ambassador’s Steward’. An array of flavouring ingredients were used – virtually anything with a strong taste that was not poisonous (at least not very poisonous) and preferably good for you: watercress, fennel, ferns, liverwort, marshmallow roots, scurvy grass, cloves, borage, marjoram, flowers and so on. There is, incidentally, a third species of honey wine called ‘braggot’. This is a halfway house between wine and beer as it uses hops and sometimes malt.
Broadly, metheglins fall into four categories – herby, spicy, floral and weird. You can use whatever takes your fancy – the ingredients listed below just happen to be ones I found either in my garden or foraging basket. The garden herbs and mugwort are perfectly safe but leave out the wormwood if you are of a nervous disposition.
Makes about six 75cl bottles
1.4, 1.7 or 2kg honey for dry, medium or sweet metheglin
¼ tsp grape tannin
Pared zest and juice of 2 lemons
1 Campden tablet, crushed (optional)
1 level tsp Tronozymol yeast nutrient
5g sachet Lalvin D47 wine yeast
Flavourings
About 2 tbsp chopped rosemary
2 level tsp thyme leaves
2 level tsp mugwort
½ tsp wormwood
4 bay leaves
First stand your jars of honey in warm water to make it a little more runny or to liquefy if your honey is set.
Place all the flavouring ingredients in a fermenting bucket and pour on 4.5 litres boiling water. While it is still hot, stir in the honey until dissolved. Allow to cool, then add the grape tannin, lemon zest and lemon juice. This brew should be sterile but if you want to be sure add a crushed Campden tablet. Leave for 24 hours.
Strain the liquid into a sterilised fermenting bucket. Aerate, then add the yeast nutrient and pitch the yeast. Cover and leave to ferment for 6 days, stirring every day except the last, then siphon into a demi-john and fit an air lock.
Rack off into a second demi-john when fermentation appears to have ceased and bottle once the wine is clear. Leave to mature for a year before drinking.
Variation
Spicy metheglin In place of the herbs, use 1 cinnamon stick, ½ tsp each ground ginger, mace and cloves, 1 vanilla pod and the zest and juice of 1 orange.

Metheglin
Birch sap wine
| SEASON | March |
| ORIGINAL GRAVITY | 1095 |
I must tell you straight away that there is absolutely no point in making birch sap wine. Many experienced wine makers will disagree but they are wrong. A friend of mine (clue – he wrote the introduction to this book) told me about his great success with this brew and, concerned at my unenthusiastic response, gave me a bottle to prove the point. Well, it was OK, but a little dull, as I had suspected.
With most wines the principal ingredient is there to provide the flavour or the sugar and sometimes both. Birch sap contains very little of either so it cannot do these things – it just supplies the water. To prove the point I made two small batches of wine; both were to the recipe below but one replaced the birch sap with water and a tiny extra bit of sugar to make up for the equally tiny amount in birch sap (0.7% on a good day). I gave the finished brews to some friends in a blind tasting. No one could really tell the difference and the only notable comment was that one was fuller-bodied than the other – it was the water wine. But maybe I am missing something, so here is everything you need to know about making birch sap wine.
Nothing in the forager’s calendar is more seasonal than birch sap. Blackberries and wild garlic are around for months; with birch sap you have a couple of weeks, three at the most. In Dorset it is approximately the middle two weeks of March, but it can be earlier or later, depending on the weather.
I love collecting birch sap, so, apart from the odd batch of wine to remind myself how right I am, I make birch sap syrup to pour on my pancakes. I gently boil away most of the water then add sugar to make a flavoured syrup.
So how do you go about collecting this arcane ingredient? First, of course, you will need to find some mature (at least 25cm-diameter trunk) birch trees and obtain permission to drill holes in them from the owner – not always easy. And you will need more kit! A hand drill and drill bit, a bucket to collect the sap (I sometimes use a 4-litre milk container with a hole strategically cut in the side near the top), some tapered wooden plugs (candle waxed at the narrow end to seal them), a mallet and a large container to carry the sap home in.
You will also need some spigots or spiles. These are virtually impossible to obtain in Britain so you will have to source them online from Canada or the US where they are used for maple tapping. You can rig up something with tubes and pipes but I have never been able to stop it all leaking. Check, using a scrap of wood, that your plugs and spiles tightly match the drill bit you will be taking with you.
Off to the woods. Drill a slightly upward-slanting 4cm-deep hole into your chosen tree at waist height. If nothing comes out when you are halfway in, the tree is dry. Stop drilling, hammer in a plug and try another tree. After three no-shows it will be worth waiting another week. If all is well (the sap will start to trickle out as you drill), hammer in a spile, hook on your bucket through the little hole you will have made in the rim and cover it.
Come back the next day to collect your sap – if you are lucky you will get about 2–4 litres from each tree. Very carefully plug the holes – if you don’t the sap will continue to flow and the poor tree may not recover from this added insult. I was having lunch in the garden of a friend of mine and admiring his rather magnificent birch tree. I mentioned birch sap wine and he told me that it was a favourite of his student days. From one tree, he told me, he extracted 15 gallons of sap in one year. It died.
Birch sap tastes almost exactly like water – but the freshest water you have ever tasted, with just a hint of sweetness. It does not keep very long – about 4 days in the fridge – so use it as soon as you can. Here is how you make the wine.
Makes about six 75cl bottles
4.5 litres birch sap
1.2kg white sugar
250ml tin white grape juice concentrate
Juice of 2 lemons
1 tsp yeast nutrient
5 g sachet white wine yeast
Gently heat the birch sap in a large pan with the lid on to 75°C and turn the heat right down to keep it at that temperature for 20 minutes. Take off the heat and stir in the sugar until it is dissolved. Transfer to a fermentation bucket and allow to cool. Add the grape concentrate, lemon juice and yeast nutrient. Check the specific gravity and adjust if necessary.
Aerate, then pitch the yeast. Cover the bucket and leave to ferment for 5 days, stirring every day for the first 4 days.
Siphon into a demi-john and fit an air lock.
Rack off into a second demi-john when fermentation appears to have ceased. Bottle once the wine is clear if you want a dry wine or sterilise and sweeten as described here.
Leave the wine to mature for a year before drinking. The flavour? Light, fruity, with the faint piquancy of wet paper bag.
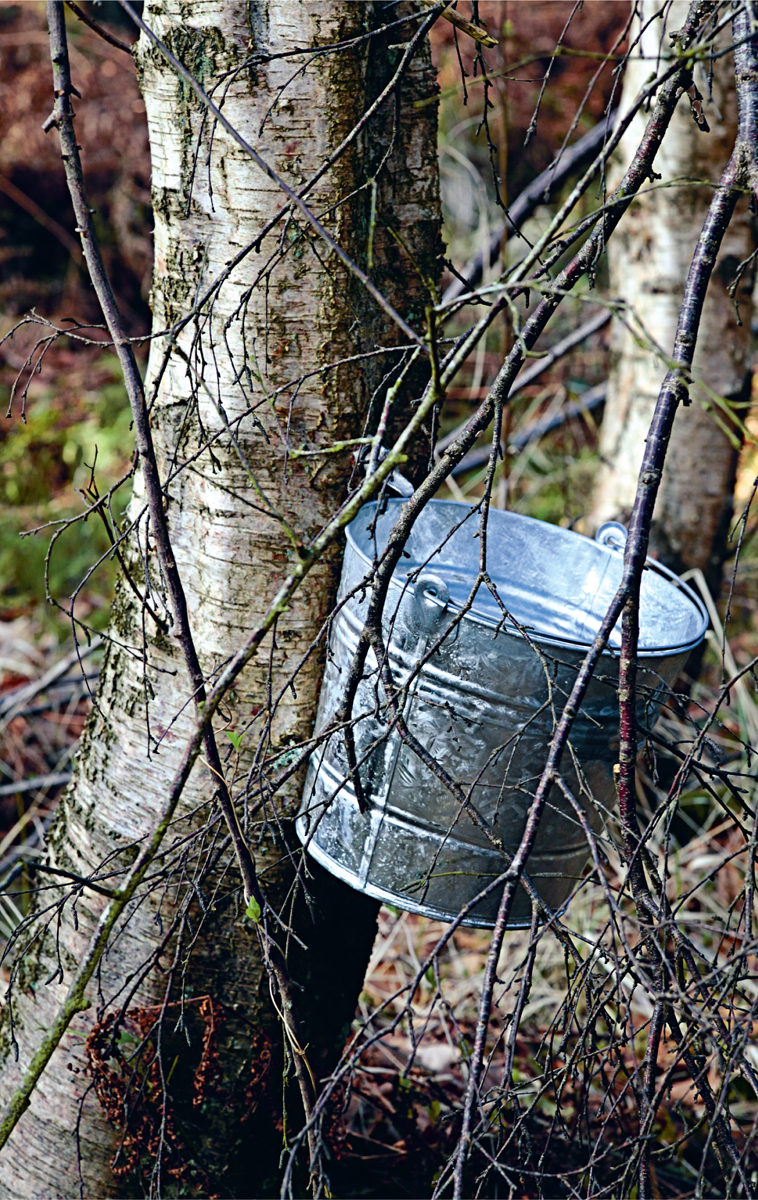
Ginger wine
| SEASON | All year |
| ORIGINAL GRAVITY | About 1120 |
Ginger wine always reminds me of Christmas. My father was a sort of male matron in a psychiatric hospital. He would often be engaged in ward rounds on Boxing Day and the family would always join him. Going from nurse’s station to nurse’s station we would be plied with Christmas drinks. My grandmother had a famous fondness for ginger wine and was given a glass, or two, at every stop. When we were about to move on to the last ward, I noticed that she was singing quietly to herself. She stood to her full and not inconsiderable height, then, not bending a single limb, crashed to the floor like a felled Douglas fir. We carried her comatose form to the car and took her home.
It is a wine with a long history and a heyday in the Victorian period when it was consumed for ‘health’ reasons; well suited to a lady who was born in the 1880s.
Ginger wine hardly needs describing; it is gingery, fruity and warming down to your toes.
Makes about six 75cl bottles
40g root ginger, peeled
1.5kg sugar
100g raisins, chopped
Pared zest and juice of 2 lemons
1 tsp yeast nutrient
5 g sachet white wine yeast
350ml brandy
Grate the root ginger into a saucepan, add the sugar and 4.5 litres water and boil for 30 minutes, skimming off any scum. Put the raisins into a fermenting bucket and pour over the hot liquid. Cool, then add the lemon zest and juice. Cover and leave to stand for 2 days.
Aerate, stir in the yeast nutrient, then pitch the yeast. Leave to ferment, stirring every day for 5 days.
Leave to settle for a day, then siphon or strain into a demi-john and fit an air lock.
Rack off into a second demi-john when fermentation appears to have ceased. Share the brandy out among your bottles and siphon in the wine. Allow to mature for a year before drinking.
Root vegetable wine
| SEASON | All year |
| ORIGINAL GRAVITY | 1095 |
It is impossible to make a palatable wine from anything in the cabbage family; you seldom hear of swede wine or turnip wine and for good reason – they taste of swede or turnip. For root vegetable wines we must turn our attention to members of the Apiaceae (carrot family) and the Chenopodiaceae (beet family), specifically carrots, parsnips and beetroot.
Carrot wine is highly thought of and parsnip wine is up there with elderberry as a bright star in the country wine firmament. The unpromisingly entitled Cyclopaedia of Commerce, Mercantile Law, Finance, Commercial Geography and Navigation of 1844 tells us that it ‘is said to possess a finer flavour than that obtained from any other British produce’.
Most of the early recipes are little different from the one below, though some insist on such things as ‘argol of wine’ and (real) isinglass – ingredients you will be hard pushed to find at your local home-brewing shop. And, of course, they invariably involve brewing industrial quantities of the stuff. One 1846 ‘receipt’ makes it in quantities of a kilderkin (which, as Sid James would have told you, is two firkins).
Beetroot wine, on the other hand, does not seem to be much liked by anyone for the simple reason that it tastes like dirt. It does, however, have one advantage – it is extremely useful in small quantities for adding a brilliant purple to any red wine that looks a little wan.
Makes about six 75cl bottles
2kg parsnips or carrots, or (if you must) beetroot
1.2kg sugar
1 tsp pectic enzyme
½ tsp amylase
Pared zest and juice of 2 lemons
250ml tin white grape juice concentrate
½ tsp grape tannin
1 tsp yeast nutrient
1 ripe banana (for parsnip wine and optional!)
5g sachet white wine yeast
Scrub your chosen root vegetable to remove all dirt, leaving the skin on, then cut into slices about 5mm thick. Place in a large pan and add 2.5 litres water. Bring to the boil and simmer gently until soft, but absolutely not until they are falling apart (the wine will never clear if your roots are mushy).
Strain the liquid into a clean fermenting bucket. Stir in the sugar until dissolved and add 2 litres cold water. Cover and allow to cool, then add the pectic enzyme and amylase (to break down any starch) and leave for 24 hours.
Aerate the must, then stir in the lemon zest and juice, grape concentrate, grape tannin and yeast nutrient, and slice in the banana, if using. Check the specific gravity and adjust if necessary.
Aerate the must, then pitch the yeast. Cover and leave to ferment for 5 days, stirring every day except the last.
Siphon into a demi-john and fit an air lock.
Rack off into a second demi-john when fermentation appears to have ceased and leave until the wine is clear. Bottle if you want a dry wine or sterilise and sweeten to taste as described here. Allow to mature for a year before drinking.

Root vegetable wine
Rice wine
| SEASON | All year |
| ORIGINAL GRAVITY | 1120 |
Rice wine is a stalwart of the home wine maker, but it is not true rice wine; that of course is sake. Rice contains little or no sugar but a great deal of starch. Starch is the basis of beer, being converted to sugars by the enzyme amylase found in malted barley. But how is the starch converted in rice? In fact it is amylase again, but rather than being produced by the rice grain it is manufactured by the fungus Aspergillus oryzae, known by the slightly more pronounceable name of kome-koji.
To make sake you prepare the rice, inoculate it with A. oryzae, then ferment it with yeast. To ensure authenticity it should be a special sake yeast, but it is still Saccharomyces cerevisiae, albeit a special strain. Both fungi are available commercially, though not particularly cheaply. Unfortunately expense would be the least of the problems for the hopeful home sake brewer. The process is slow, precise, very long and involves getting up at 3.30am to stir things. If you really want to make some I suggest taking a month off to do it.
However, I do not like to be defeated so here is a recipe which uses a few cheats (the main one in the form of amylase to convert some of the rice starch). These cheats bypass nearly all of the more complicated processes. It really, really isn’t sake but a Western homage to this 7th Dan wine. The wine is, or should be, sweet, and sherry-like with perhaps just a hint of rice pudding, which is a good thing.
Makes about six 75cl bottles
1 tsp amylase crystals
1kg flaked rice
1 Campden tablet, crushed
500g raisins, chopped
About 600g sugar
1 level tsp Tronozymol yeast nutrient
5 g sachet white wine yeast or, if you want to make a bit more effort, Wyeast Activator 4134 sake yeast
In a large container, mix 2.5 litres cold water with the amylase, then stir in the flaked rice and a crushed Campden tablet (otherwise it can start fermenting and not in a good way). Cover and leave for 5 days in a warm place, stirring occasionally. Surprisingly it does not go sticky, at least not very sticky.
At this stage check the specific gravity – it should be around 1035 (but do not worry if it is not this high, at least you tried).
Strain the liquid through a nylon straining bag or muslin into a pan, add another 2 litres water and bring to the boil.
Put the raisins and sugar into a fermenting bucket and pour on the boiling liquid, stirring until the sugar has dissolved. Allow to cool.
Add water until you have 5 litres, check the specific gravity and adjust if necessary; it should be about 1120.
Add the yeast nutrient, then pitch the yeast. Cover and keep at room temperature for 6 days, stirring every day except the last one.
Siphon or strain the liquid into a demi-john and fit an air lock.
Rack into a second demi-john when fermentation appears to have ceased and leave until the wine is clear. Bottle and leave to mature for a year before drinking.