canning
This classic preservation technique uses boiling water to process jars of food so they are shelf-stable up to a year. The boiling water destroys harmful microorganisms, inactivates the food’s enzymes, and vacuum-seals the jars so they are airtight.
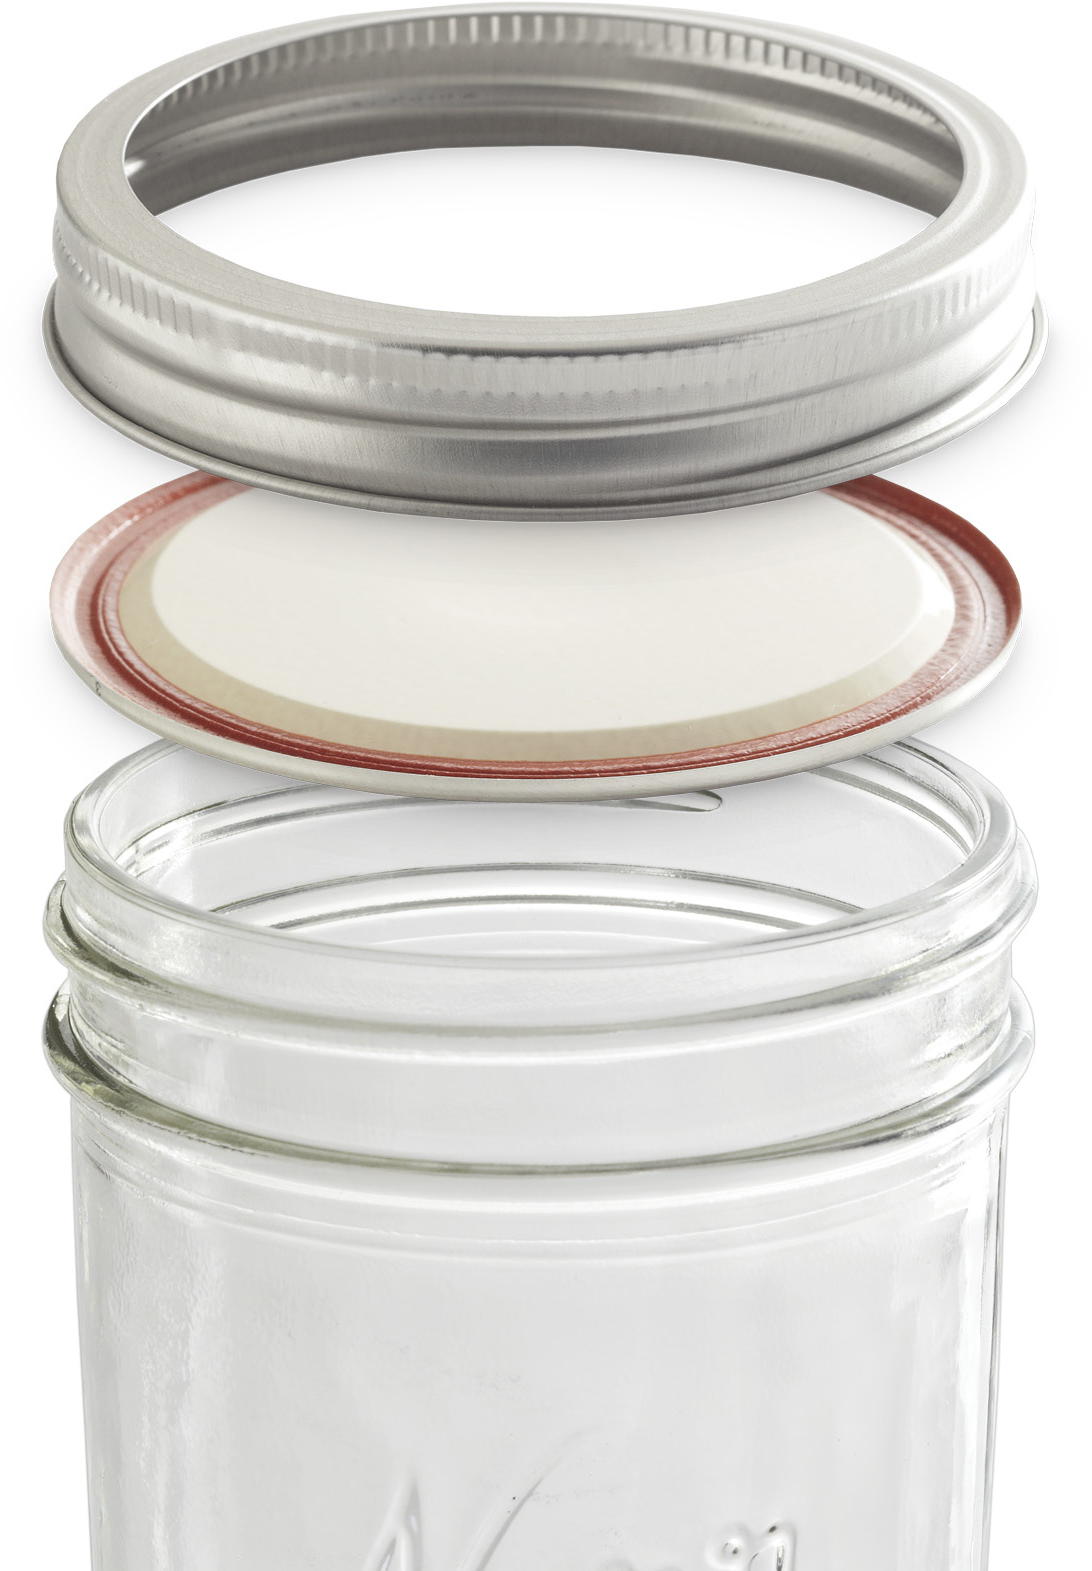
Jar Basics
The type of jars you use for canning is important. Look for canning-specific jars with the canning supplies in hardware stores and supermarkets.
screw bands may be reused; they secure lids to the jars during processing. They can be removed before storage or left on to provide cushioning between stacked jars. Wipe the threads of the jars and screw bands after processing to remove food particles before storing.
Lids (the flat round discs) are for one canning session only (purchase lids separately for each canning session). The red substance on the lid helps seal the lid onto the jar for an airtight seal. (For visual purposes, the lid is shown upside-down, left; the red substance seals onto the glass.) The compound only seals once, so discard the lid when the contents of the jar are gone.
Jars are molded from thick glass designed to withstand processing. They are available in many sizes; the jar tops are either regular-mouth or wide-mouth. As long as they are free of chips and cracks, canning jars can be reused year after year.
USING LIDS AND SCREW BANDS
1 ALWAYS USE NEW LIDS (the flat round piece, opposite). The sealing compound is effective only one time. Check the undersides to be sure the lids are free of scratches and the sealing compound is intact and covers the circumference of the lid.
2 BE SURE THE SCREW BANDS will fit the jars and are free of rust. Wash with soap and hot water before and after each use.
3 WASH LIDS IN SOAPY WATER and place them in a bowl, ladling some of the simmering water from your sterilizing pot over them; let stand until ready to use. Don’t boil the lids; this will affect the sticky compound and might prevent proper sealing (check the manufacturer’s directions for preparing lids).
4 EACH LID HAS A RAISED CIRCLE in the center. After canning, if a proper vacuum seal has been created, that raised circle is sucked down tight (while the jars are cooling, you will hear a loud pop from each jar as the vacuum is formed and the lid is sealed tight). Check the seals after the jars have cooled (tip, far right).
sterilizing
1
washing
Wash empty canning jars in hot, soapy water. Rinse thoroughly. Place jars right side up in the boiling-water canner on a rack. Cover jars with hot water 1 inch over tops of jars. Bring to boiling; boil 10 minutes to sterilize.
2
heating
Keep jars in the simmering water until needed. Wash any equipment that will also touch the food. Heat extra water in another large pot (to top off water in canner after jars are added).
3
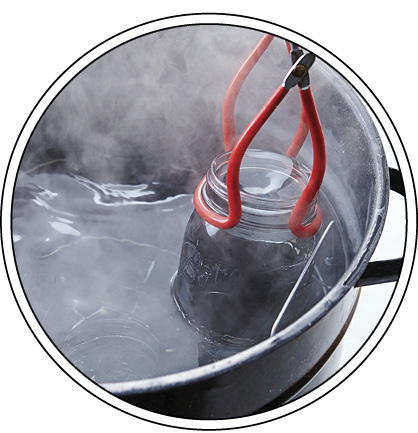
one jar at a time
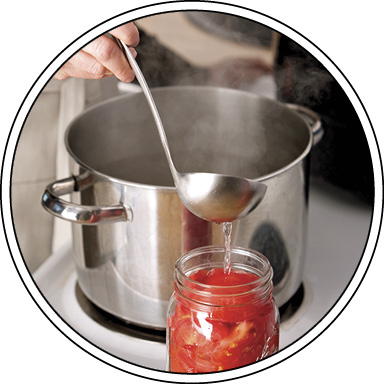
Take out just one jar at a time, fill it, put on the lid and screw band, and return it to the simmering water in the canner. We recommend doing one jar at a time rather than doing them all at one time (photos, Cooking Class).
boiling-water canning
process high-acid foods only Boiling-water canners are safe only for high-acid foods, such as most jams, jellies, pickles, relishes, and tomatoes (with added bottled lemon juice). These foods have a pH of 4.6 or lower (info, The Science of Canning: pH Levels), which allows them to naturally resist bacterial growth. Pressure canners (info, Pressure Canners) must be used for low-acid foods—such as veggies—that are prone to bacterial growth.
the right jars Use only modern jars made specifically for canning. Vintage jars are pretty, but they are not safe for canning. Do not reuse glass jars that contained purchased foods such as pasta sauce, even if they look like canning jars. Check jars carefully before each canning session, making sure they are free of chips or cracks. And always use the size jar specified in your recipe—the timings provided are crucial for that size to reach the internal temperature needed to kill microorganisms.
use lids properly Always use the lids made specifically for canning. The screw bands are reusable, but the flat lids are one-time-use only. Avoid screwing bands on too tightly—doing so might prevent a proper vacuum seal.
choose the right recipe Modern canning recipes based on USDA recommendations—like the ones in this book—are safer than those used years ago. Always use tested recipes from reliable, current sources and follow the recipes exactly. Do not substitute or add ingredients; this could compromise the food’s safety.
keep it clean and hot When canning, keep everything scrupulously clean. Make sure that fruits and vegetables are scrubbed free of dirt and chemical residue. Wash and sterilize jars and lids. Pack hot food into jars one at a time and return to the simmering water in the boiling-water canner to avoid the contents of the jars cooling between steps.
test seals Once jars are completely cooled (4 to 5 hours), test each seal by pressing the center of the lid. If it is firm and slightly concave, the jar is properly sealed. If the lid appears flat and you are able to make it bounce up and down, the jar is not properly sealed. (In that case, refrigerate and eat the food within 3 days.)
Altitude Adjustments
The timings listed in recipes in this book are for altitudes up to 1,000 feet above sea level. Water boils at a lower temperature at higher altitudes, so follow these adjustments for your location.
BLANCHING Add 1 minute if you live 5,000 feet or more above sea level.
BOILING-WATER CANNING Call your county extension office for detailed instructions.
JELLIES AND JAMS Add 1 minute processing time for each additional 1,000 feet above sea level.
STERILIZING JARS Boil jars an additional 1 minute for each additional 1,000 feet above sea level.
The Science of Canning: pH Levels
Essential to proper canning, pH is a scale from 1 to 14 that measures the chemical properties of foods. Foods with a pH of less than 7 are acidic. Foods with a pH of more than 7 are alkaline, or basic. To safely can foods with a boiling-water canner, they must be acidic. (Our Test Kitchen follows the USDA guidelines for a safe pH level of 4.6 or lower.) This is why you will find bottled lemon juice—an acid—added to so many recipes. Professionally developed recipes, such as the ones on these pages, have been tested with a pH meter to ensure their safety.
Pressure Canners
All of our canning recipes are appropriate for water-bath canning only (instead of pressure canning). What’s the difference? A pressure canner has a tight-locking lid that seals in all the steam as the canner gets hot; this creates intense pressure and raises the temperature past 212°F. It is safe to preserve meats and vegetables using this canner (without adding acidic ingredients). The water-bath canner is easier to work with and a good place to start if you’re new to canning or primarily can fruits, tomatoes, pickles, or pickled vegetables. If you want to dive into canning meat and/or unpickled vegetables, take the next step to the pressure canner.
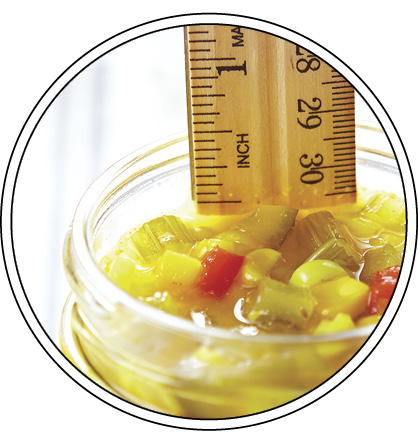
measuring headspace
The amount of headspace, or the space between the top of the jar and the top of the contents, is specified by a recipe to ensure jars seal properly.
1
measuring
Measure headspace with a ruler or canning tool from the top of the jar to the top of the contents.
2
processing
Process only jars that are filled to the recommended headspace. If you have any remaining mixture that doesn’t fill the jar, cover and refrigerate the leftovers (eat within 3 days). Partially full jars may not seal properly and are not considered safe.
CANNING TOOLBOX
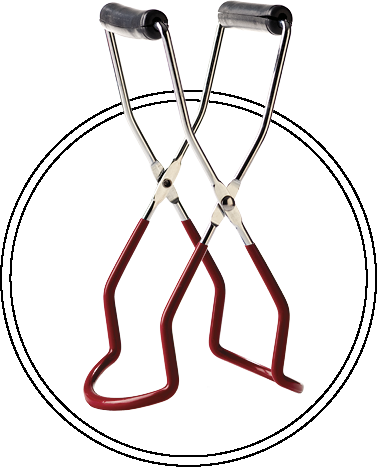
Jar Lifter This tool lifts jars firmly and securely in and out of hot water. Use two hands and squeeze firmly.

Magnetic Wand This magic wand enables you to grab and lift lids and bands from hot water so you don’t burn your fingers.
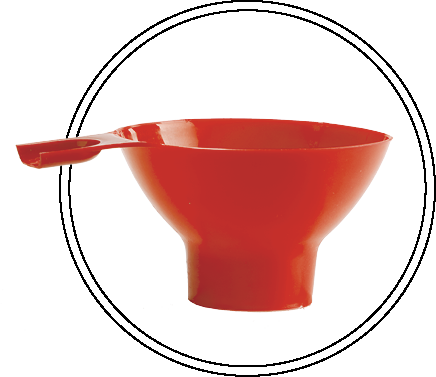
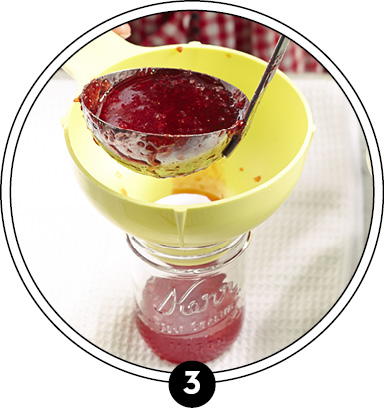
Jar Funnels Wider and shorter than other funnels, jar funnels come in both wide-mouth and regular-mouth versions. They’re invaluable for preventing spills when filling jars.

Ruler-Spatula Use the tapered end to release air bubbles along the jar sides. The calibrated, notched end measures the headspace.
COOKING CLASS

Sterilize Wash canning jars in hot, soapy water; rinse well. To sterilize jars, place jars in a boiling-water canner with a rack. Cover with hot tap water. Bring to boiling; sterilize jars 10 minutes at a steady boil. (For jars that are processed for more than 10 minutes with food in them, you do not need to sterilize first; but do keep jars hot in simmering water until ready to fill.)

Pack jars Prepare only as much food as needed to fill your canner at one time (most canning racks hold, at most, seven pint or quart jars). Remove the first jar from the hot water; pack food and liquid into the hot jar using a jar funnel. Remove air bubbles.
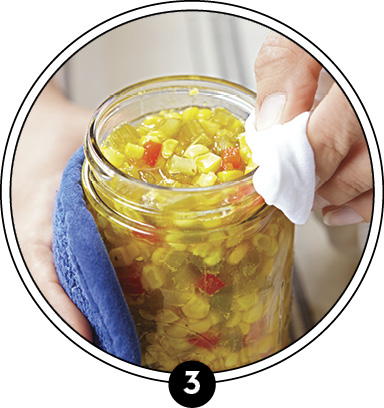
Wipe rim Check headspace with a ruler or the measuring notches on a canning spatula. Using a clean, damp cloth, wipe the rim and threads of the jar to remove any residue. Food particles or liquid left on the jar rim might interfere with the seal.

Put lid on it Remove lid from hot water with a magnetic wand or tongs. Place lid on jar and screw on band no more than fingertip-tight (just tight enough that you could turn the band another ¼ to ½ inch tighter with your fingertips). If applied too tightly, the lids might not seal.

In the Pot When all jars are filled and in the canner, if necessary, add additional boiling water to the canner to cover the jars by 1 inch. Cover canner; bring to a full rolling boil. Start processing time from the moment the water starts to boil. Keep at a steady, gentle boil. If the water stops boiling at anytime, turn the burner up and stop the timing until water returns to boiling.

Remove jars When the processing time is up, turn off heat. Using pot holders, lift up the canner rack and rest the handles on the side of the canner. Allow jars to cool in place for a few minutes.

Cool Use a jar lifter to remove jars from canner and set on a wire rack or a towel placed on the countertop (cold countertops can crack jars). Do not tighten bands. Let cool 4 to 5 hours.

Seal Test After that time, test the seal by pressing your finger on the center of the lid. It should not bounce up and down. If it does give (and makes a clicking sound), it is not properly sealed. (If a jar fails to seal, refrigerate immediately and eat the food within 3 days.) Remove screw bands. Wipe the jar rims to remove any food particles. Store canned foods in a cool, dry place up to 1 year.
about lemon juice
When a canning recipe calls for lemon juice, it’s best to use bottled lemon juice. The pH of bottled is always spot-on; the pH in fresh lemons may vary too much.
Stick to the Recipe
Do not alter the amounts of the main components of a recipe, such as the amount of produce, vinegar, sugar, salt, or water. Changing these amounts could alter the pH and make the recipe unsafe to can.
Pickled Three-Bean Salad
hands-on time 30 minutes
cook 45 minutes
process 15 minutes
- 8 oz. dried black-eyed peas (1¼ cups), rinsed
- 12 oz. fresh green beans, trimmed and cut into 2-inch pieces (3½ cups)
- 1¾ cups cider vinegar
- 1½ cups sugar
- 1½ cups water
- ¾ cup bottled lemon juice
- ½ cup olive oil
- 1 tsp. salt
- 1½ cups frozen shelled edamame
- 1 medium yellow sweet pepper, chopped (¾ cup)
- 1 medium red onion, thinly sliced (½ cup)
- 2 cloves garlic, minced
1. In a 4- to 5-qt. nonreactive pot (tip, Pick a Pot) bring 4 cups water and black-eyed peas to boiling; reduce heat. Simmer, covered, 45 to 60 minutes or until tender. Drain; rinse with cold water and drain again.
2. Bring 4 cups fresh water to boiling. Add green beans. Boil gently, uncovered, 3 minutes. Drain; rinse with cold water and drain again.
3. In the pot stir together vinegar, sugar, the 1½ cups water, the lemon juice, oil, and salt. Bring to boiling, stirring to dissolve sugar. Stir in black-eyed peas, green beans, and remaining ingredients. Return to boiling; remove from heat.
4. Ladle solids into hot, clean half-pint or pint canning jars (tips and photos, Cooking Class), leaving a ½-inch headspace. Add hot liquid to jars, maintaining the ½-inch headspace. Wipe jar rims; adjust lids and bands.
5. Process in a boiling-water canner 15 minutes (start timing when water returns to boiling). Remove jars from canner; cool on wire racks.
Makes 10 half-pints.
each ¼ cup 35 cal., 1 g fat (0 g sat. fat), 0 mg chol., 34 mg sodium, 5 g carb., 1 g fiber, 3 g sugars, 1 g pro.
PICKLED THREE-BEAN SALAD
DRIED BLACK-EYED PEAS can be replaced with two 15-oz. cans black-eyed peas, rinsed and drained. Omit Step 1.
Garlicky Pickled Mixed Veggies
Garlicky Pickled Mixed Veggies
hands-on time 45 minutes
process 10 minutes
- 2 ears of corn
- 3 cups cauliflower florets
- 3 medium red sweet peppers, cut into 1-inch pieces
- 12 oz. green beans, trimmed and cut into 1-inch pieces
- 3 medium carrots, cut into ½-inch slices
- 2 medium onions, cut into small wedges
- 3 cups water
- 3 cups white vinegar
- 1 cup sugar
- 1 Tbsp. kosher salt
- 18 cloves garlic, smashed and peeled
- 1½ tsp. crushed red pepper
1. Remove husks from ears of corn. Scrub to remove silks; rinse. Cut cobs into 1- to 1½-inch pieces. In an 8-qt. pot combine corn and next five ingredients (through onions). Add enough water to cover. Bring to boiling. Cook, uncovered, 3 minutes; drain. If desired, cut corn lengthwise into halves or quarters.
2. In a 4- to 5-qt. nonreactive pot (tip, Pick a Pot) combine the 3 cups water, vinegar, sugar, and salt. Bring to boiling, stirring to dissolve sugar.
3. Pack vegetables into six hot, sterilized pint canning jars (photos, Cooking Class), leaving a ½-inch headspace. Add three cloves garlic and ¼ tsp. crushed red pepper to each jar. Pour hot vinegar mixture over vegetables, maintaining the ½-inch headspace. Wipe jar rims; adjust lids and bands.
4. Process filled jars in a boiling-water canner 10 minutes (start timing when water returns to boiling). Remove jars from canner; cool on a wire rack.
Makes 6 pints.
each ¼ cup 45 cal., 0 g fat, 0 mg chol., 164 mg sodium, 9 g carb., 1 g fiber, 7 g sugars, 1 g pro.
Pickled Beets
hands-on time 20 minutes
cook 30 minutes
process 30 minutes
- 3 lb. small whole beets (about 2-inch diameter)
- 2 cups vinegar
- 1 cup water
- ½ cup sugar
- 3 inches stick cinnamon
- 1 tsp. whole allspice
- 6 whole cloves
1. Wash beets. Cut off beet tops, leaving 1 inch of stems; trim root ends. Do not peel. In a 4-qt. saucepan cook beets in enough boiling, lightly salted water to cover about 25 minutes or until tender; drain. Cool beets slightly; trim off roots and stems. Slip off and discard skins; quarter the beets.
2. In a 2-qt. nonreactive heavy saucepan (tip, Pick a Pot) combine vinegar, the 1 cup water, and sugar. Place cinnamon, allspice, and cloves in center of a double-thick, 6-inch square of 100%-cotton cheesecloth. Bring up corners; tie with clean kitchen string. Add to saucepan. Bring to boiling, stirring to dissolve sugar; reduce heat. Simmer, uncovered, 5 minutes. Remove and discard bag.
3. Pack beets into six hot, clean half-pint canning jars (photos, Cooking Class), leaving a ½-inch headspace. Pour hot vinegar mixture over beets, maintaining the ½-inch headspace. Wipe jar rims; adjust lids and bands.
4. Process filled jars in a boiling-water canner 30 minutes (start timing when water returns to boiling). Remove jars from canner; cool on a wire rack.
Makes 6 half-pints.
each ⅓ cup 25 cal., 0 g fat, 0 mg chol., 38 mg sodium, 8 g carb., 1 g fiber, 4 g sugars, 1 g pro.

PICKLED BEETS

BEETS are notorious for staining anything they touch—hands, clothes, and cutting boards. Wear plastic gloves and an apron when working with beets.
Use it up!
Top a spinach salad with Pickled Beets, cut-up apple, blue cheese, and toasted pecans. Add your favorite dressing and, if you like, a poached or soft-boiled egg (Eggs).
Pickled sweet and hot peppers
hands-on time 1 hour
bake 20 minutes at 450°F
stand 10 minutes
process 15 minutes
- 4½ lb. green, red, yellow, and/or orange sweet peppers
- 1½ lb. hot chile peppers, such as Anaheim, jalapeño, yellow banana, and/or Hungarian
- 6½ cups white or cider vinegar
- 1⅓ cups water
- ⅔ cup sugar
- 4 tsp. pickling salt
- 3 cloves garlic, peeled
1. Preheat oven to 450°F. Cut sweet peppers into quarters, removing stems, seeds, and membranes. Line two extra-large baking sheets with foil. Place sweet pepper quarters, cut sides down, on prepared baking sheets. Bake about 20 minutes or until skins are bubbly and dark. Wrap peppers in the foil to steam. Let stand 10 minutes or until cool enough to handle. Using a paring knife, gently peel off skins; discard skins.
2. Wearing gloves, remove stems and seeds from hot chile peppers (tip). Slice into rings.
3. In a large nonreactive saucepan (tip, Pick a Pot) combine remaining ingredients. Bring to boiling; reduce heat. Simmer, uncovered, 10 minutes. Remove and discard garlic cloves.
4. Pack sweet and hot peppers into hot, clean (tip, Cooking Class) pint or half-pint canning jars, leaving a ½-inch headspace. Pour hot vinegar mixture over peppers, maintaining the ½-inch headspace. Wipe jar rims; adjust lids and screw bands.
5. Process filled jars in a boiling-water canner 15 minutes (start timing when water returns to boiling). Remove jars from canner; cool on wire racks.
Makes 6 pints.
each 2 tbsp. 12 cal., 0 g fat, 0 mg chol., 41 mg sodium, 3 g carb., 1 g fiber, 2 g sugars, 0 g pro.

PICKLED SWEET AND HOT PEPPERS
Bread and Butter Pickles
hands-on time 40 minutes
chill 3 hours
process 10 minutes
- 4 qt. (16 cups) sliced medium cucumbers
- 8 medium white onions, sliced
- ⅓ cup pickling salt
- 3 cloves garlic, halved
- Crushed ice
- 4 cups sugar
- 3 cups cider vinegar
- 2 Tbsp. mustard seeds
- 1½ tsp. ground turmeric
- 1½ tsp. celery seeds
1. In a 6- to 8-qt. nonreactive heavy pot (tip, Pick a Pot) combine cucumbers, onions, pickling salt, and garlic. Add 2 inches crushed ice. Cover and chill 3 to 12 hours. Remove any remaining ice. Drain mixture well; remove and discard garlic.
2. In same pot combine remaining ingredients. Bring to boiling; add cucumber mixture. Return to boiling.
3. Pack hot cucumber mixture and liquid into seven hot, sterilized pint canning jars (photos, Cooking Class), leaving a ½-inch headspace. Wipe jar rims; adjust lids and screw bands. Process in a boiling-water canner 10 minutes (start timing when water returns to boiling). Remove jars from canner; cool on wire racks.
Makes 7 pints.
each ¼ cup 32 cal., 0 g fat, 0 mg chol., 278 mg sodium, 8 g carb., 0 g fiber, 7 g sugars, 0 g pro.

BREAD AND BUTTER PICKLES
GARDEN CUKES
If pickling cucumbers aren’t available, use regular-size cucumbers from the garden. Do not use waxed cucumbers that are sold in the supermarket.
Best-Ever Dill Pickles
hands-on time 30 minutes
process 10 minutes
stand 1 week
- 3 to 3¼ lb. 4-inch pickling cucumbers
- 4 cups water
- 4 cups white vinegar
- ½ cup sugar
- ⅓ cup pickling salt
- 6 Tbsp. dill seeds
1. Thoroughly scrub cucumbers with a soft vegetable brush in plenty of cold running water. Remove stems and blossoms; slice off blossom ends. Cut cucumbers lengthwise into quarters.
2. In a 4- to 5-qt. nonreactive heavy pot (tip, Pick a Pot) combine the water, vinegar, sugar, and pickling salt. Bring to boiling, stirring to dissolve sugar.
3. Pack cucumber spears loosely into six, hot sterilized pint canning jars (photos, Cooking Class), leaving a ½-inch headspace. Add 1 Tbsp. dill seeds to each jar. Pour hot vinegar mixture into jars, maintaining the ½-inch headspace. Discard any remaining vinegar mixture. Wipe jar rims; adjust lids and screw bands.
4. Process filled jars in a boiling-water canner 10 minutes (start timing when water returns to boiling). Remove jars from canner; cool on a wire rack. Let stand at room temperature 1 week before serving.
Makes 6 pints.
each spear 11 cal., 0 g fat, 0 mg chol., 358 mg sodium, 2 g carb., 0 g fiber, 1 g sugars, 0 g pro.
Hot Garlic Pickles Prepare as directed, except substitute cider vinegar for the white vinegar. Before packing cucumbers in jars, add 1 to 2 fresh Thai chile peppers and 2 cloves garlic, halved, to each jar.
Makes 6 pints.
Crunchy Dill and Onion Chips In an extra-large bowl combine 12 cups sliced pickling cucumbers, 2 cups thinly sliced onions, and ⅓ cup pickling salt. Set a large nonreactive colander in an extra-large nonreactive bowl. In the colander alternately layer cucumber mixture and crushed ice, ending with a layer of crushed ice. Weight down mixture with a heavy plate. Chill 8 to 24 hours. Remove any ice remaining in cucumber mixture; discard any liquid in bowl. In a 4- to 5-qt. nonreactive heavy pot combine 4 cups water, 4 cups white vinegar, and ½ cup sugar. Bring to boiling, stirring to dissolve sugar. Pack cucumbers and onions into jars as directed in Step 3 and continue as directed.
Makes 5 pints.
Sweet Dill Pickles Prepare as directed, except increase sugar to 3 cups.
Makes 6 pints.
Refrigerator Pickles Prepare as directed through Step 3, except add 1 or 2 sprigs fresh dill to each jar. Store pickles in the refrigerator up to 1 month.
Makes 6 pints.
CUCUMBERS we prefer for pickling include Kirby, Persian, and gherkin varieties. Look for the best pickling cucumbers at your local farmers market in early to midsummer. Choose those that are firm and bright-colored with no soft spots.
Zucchini Relish
hands-on time 55 minutes
stand 3 hours
process 10 minutes
- 5 cups finely chopped zucchini (about 4 medium)
- 1½ cups finely chopped onions
- ¾ cup finely chopped green sweet pepper
- ¾ cup finely chopped red sweet pepper
- ¼ cup pickling salt
- 1¾ cups sugar
- 1½ cups white vinegar
- ¼ cup water
- 1 tsp. celery seeds
- 1 tsp. ground turmeric
- ½ tsp. mustard seeds
- 1 to 2 drops green food coloring (optional)
1. In a large bowl combine zucchini, onions, and sweet peppers. Sprinkle the pickling salt over vegetables. Pour enough water (about 4 cups) over vegetables to cover. Cover; let stand 3 hours. Drain vegetables in a colander; rinse and drain well.
2. In an 8- to 10-qt. nonreactive heavy pot (tip, Pick a Pot) combine sugar, vinegar, the ¼ cup water, the celery seeds, turmeric, and mustard seeds. Bring to boiling; reduce heat. Simmer, uncovered, 3 minutes. Stir in drained vegetables and, if desired, green food coloring. Return to boiling; reduce heat. Simmer, uncovered, 10 minutes.
3. Ladle hot relish into five hot, sterilized half-pint canning jars (photos), leaving a ½-inch headspace. Wipe jar rims; adjust lids and screw bands.
4. Process filled jars in a boiling-water canner 10 minutes (start timing when water returns to boiling). Remove jars from canner; cool on a wire rack.
Makes 5 half-pints.
each 1 tbsp. 21 cal., 0 g fat, 0 mg chol., 350 mg sodium, 5 g carb., 0 g fiber, 5 g sugars, 0 g pro.

ZUCCHINI RELISH
About The Vinegar
The acidity level in any pickled food (including relishes) is extremely important because it’s directly related to the safety, taste, and texture of the final product. Play it safe by always using the type of vinegar called for in each recipe. When you purchase vinegar for pickling, be sure it has at least 5% acidity.
Corn Relish
hands-on time 1 hour
cook 25 minutes
process 15 minutes
- 16 to 20 ears of corn
- 2 cups water
- 3 cups chopped celery
- 1½ cups chopped red sweet peppers
- 1½ cups chopped green sweet peppers
- 1 cup chopped onion
- 2½ cups vinegar
- 1¾ cups sugar
- 4 tsp. dry mustard
- 2 tsp. pickling salt
- 2 tsp. celery seeds
- 1 tsp. ground turmeric
1. Remove husks from ears of corn. Scrub with a stiff brush to remove silks; rinse. Cut kernels from cobs; do not scrape. Measure 8 cups kernels.
2. In an 8- to 10-qt. nonreactive heavy pot (tip, Pick a Pot) combine the 8 cups corn kernels and the 2 cups water. Bring to boiling; reduce heat. Simmer, covered, 4 to 5 minutes or until corn is nearly tender; drain.
3. In the same pot combine corn, celery, sweet peppers, and onion. Stir in remaining ingredients. Bring to boiling, stirring to dissolve sugar; reduce heat. Simmer, uncovered, 25 minutes, stirring occasionally.
4. Ladle hot relish into five hot, clean (tip, Cooking Class) pint canning jars, leaving a ½-inch headspace. Wipe jar rims; adjust lids and screw bands.
5. Process filled jars in a boiling-water canner 15 minutes (start timing when water returns to boiling). Remove jars from canner; cool on a wire rack.
Makes 5 pints.
each 2 tbsp. 43 cal., 0 g fat, 0 mg chol., 75 mg sodium, 10 g carb., 1 g fiber, 7 g sugars, 1 g pro.
CORN RELISH
Sweet Pickle Relish
hands-on time 1 hour
stand 2 hours
cook 10 minutes
process 10 minutes
- 6 cups finely chopped cucumbers, seeded if desired*
- 3 cups finely chopped green and/or red sweet peppers*
- 3 cups finely chopped onions*
- ¼ cup pickling salt
- 3 cups sugar
- 2 cups cider vinegar
- 1 Tbsp. mustard seeds
- 2 tsp. celery seeds
- ½ tsp. ground turmeric
1. In an extra-large bowl combine cucumbers, sweet peppers, and onions. Sprinkle with pickling salt; add cold water to cover. Let stand at room temperature 2 hours.
2. Drain vegetables through a colander. Rinse; drain well. In an 8-qt. nonreactive heavy pot (tip, Pick a Pot) combine remaining ingredients. Bring to boiling. Add vegetables; return to boiling. Cook, uncovered, over medium-high heat 10 minutes, stirring occasionally.
3. Ladle hot relish into four hot, sterilized pint canning jars (photos, Cooking Class), leaving a ½-inch headspace. Wipe the jar rims; adjust lids and screw bands.
4. Process filled jars in a boiling-water canner 10 minutes. Remove jars; cool on a wire rack.
Makes 4 pints.
*Note For faster prep, use a food processor to chop vegetables.
each 1 tbsp. 22 cal., 0 g fat, 0 mg chol., 218 mg sodium, 5 g carb., 0 g fiber, 5 g sugars, 0 g pro.

SWEET PICKLE RELISH
cooking class
Know your tomatoes—Any variety can be canned, but your results will vary. ROma tomatoes have meaty flesh and less juice; Fresh heirlooms are so juicy, you’ll end up with extra liquid in your jars. The best for canning are somewhere in between.
Can-Your-Own Tomatoes
hands-on time 15 minutes
process 1 hour 25 minutes
- 1¼ to 1½ lb. ripe tomatoes per each pint jar or 2½ to 3½ lb. per each quart jar
- Bottled lemon juice
- Salt (optional)
1. Peel skins off tomatoes (photos, opposite). If desired, cut tomatoes in half.
2. Pack tomatoes into hot, clean (tip, Cooking Class) pint or quart canning jars, pressing the tomatoes into jars until spaces between tomatoes are filled with juice. Leave a ½-inch headspace. Add 1 Tbsp. lemon juice to each pint or 2 Tbsp. lemon juice to each quart. If desired, add ¼ to ½ tsp. salt to each pint or ½ to 1 tsp. salt to each quart. Wipe rims; adjust lids and bands (photos, Cooking Class).
3. Process filled pint or quart jars in a boiling-water canner 85 minutes (start timing when water returns to boiling). Remove jars from canner; cool on wire racks. (Yield varies.)
each ¼ cup 13 cal., 0 g fat, 0 mg chol., 4 mg sodium, 3 g carb., 1 g fiber, 2 g sugars, 1 g pro.
Hot-Pack Tomatoes in Water Prepare tomatoes as directed in Step 1; place in a nonreactive heavy pot. Add enough water to cover. Bring to boiling; reduce heat. Simmer, uncovered, 5 minutes. Pack jars with tomatoes and cooking liquid (photo, opposite, bottom right), leaving a ½-inch headspace. Add lemon juice and, if desired, salt as directed in Step 2. Wipe jar rims; adjust lids and screw bands. Process filled jars in a boiling-water canner 40 minutes for pints, 45 minutes for quarts (start timing when water returns to boiling). Remove jars from canner; cool on wire racks.
Raw-Pack Tomatoes in Water Prepare tomatoes and fill jars as directed in Steps 1 and 2, except do not press on tomatoes. Pour boiling water into each jar, maintaining the ½-inch headspace. Wipe jar rims; adjust lids and screw bands. Process in a boiling-water canner 40 minutes for pints, 45 minutes for quarts (start timing when water returns to boiling). Remove jars from canner; cool on wire racks.
Crushed Tomatoes Peel tomatoes (photos, opposite); cut into quarters. Add enough tomatoes to a nonreactive heavy pot (tip, opposite) to cover the bottom. Crush with a wooden spoon. Bring to boiling, stirring constantly. Slowly add the remaining quartered tomatoes, stirring constantly. Simmer, uncovered, 5 minutes. Pack jars with tomatoes, leaving a ½-inch headspace. Add lemon juice and, if desired, salt as directed in Step 2. Wipe jar rims; adjust lids and screw bands (photos, Cooking Class). Process in a boiling-water canner 35 minutes for pints, 45 minutes for quarts (start timing when water returns to boiling). Remove jars from canner; cool on wire racks.

THE TOMATO weights we give here are for each pint or quart jar. For example, you will need 5 to 6 lb. tomatoes to fill 4 pint jars. Or 10 to 14 lb. to fill 4 quart jars. Only fill as many jars as your canner will hold at one time. After processing the first batch, you can prepare, fill, and process additional jars.

boost acidity
Tomatoes are higher in acidity (lower in pH) than many vegetables, but they still require the addition of lemon juice to make them safe for water-bath canning. This ups the acidity level enough to create an environment in which harmful bacteria won’t grow. Always use bottled lemon juice (tip).
True colors
To avoid a muddy-colored mixture, use only one color of tomato in each jar (i.e., don’t mix yellow, green, and red varieties).
PICK A POT
When we call for a nonreactive pot, we are referring to the type of material the pot is made from—such as stainless steel or enamel. Other types of metal pots and pans, such as aluminum, might react with the acidity in certain recipes and produce off-flavors in the finished food. When a heavy pot is called for, choose one that feels heavy in the hand and has a thick bottom to it—this will prevent scorching and burning during simmering.
canning tomatoes is easy. Start with this Quick peeling tip, then pick your canning method—crushed, hot-pack, or raw-pack.

To peel tomatoes, use a sharp knife to cut a shallow “X” into the blossom end of each tomato.
Working in batches, immerse tomatoes in boiling water 1 to 2 minutes or until the skins begin to split open. Use a slotted spoon to transfer the tomatoes to a large bowl of ice water. When cool enough to handle, use your fingers or a knife to peel off skin.
For Hot-Pack Tomatoes (opposite), pack tomatoes into jars as tightly as you can without crushing them. Check headspace. Top with hot liquid as specified in the recipe; push out air bubbles with a thin nonmetal spatula. Recheck headspace. Process as directed.

For Crushed Tomatoes (opposite), cover the bottom of a large pot with a layer of tomato quarters. Use a wooden spoon to crush and break apart tomatoes. Stir in the remaining quartered tomatoes (these added tomatoes will break apart when simmering). Simmer, uncovered, 5 minutes.
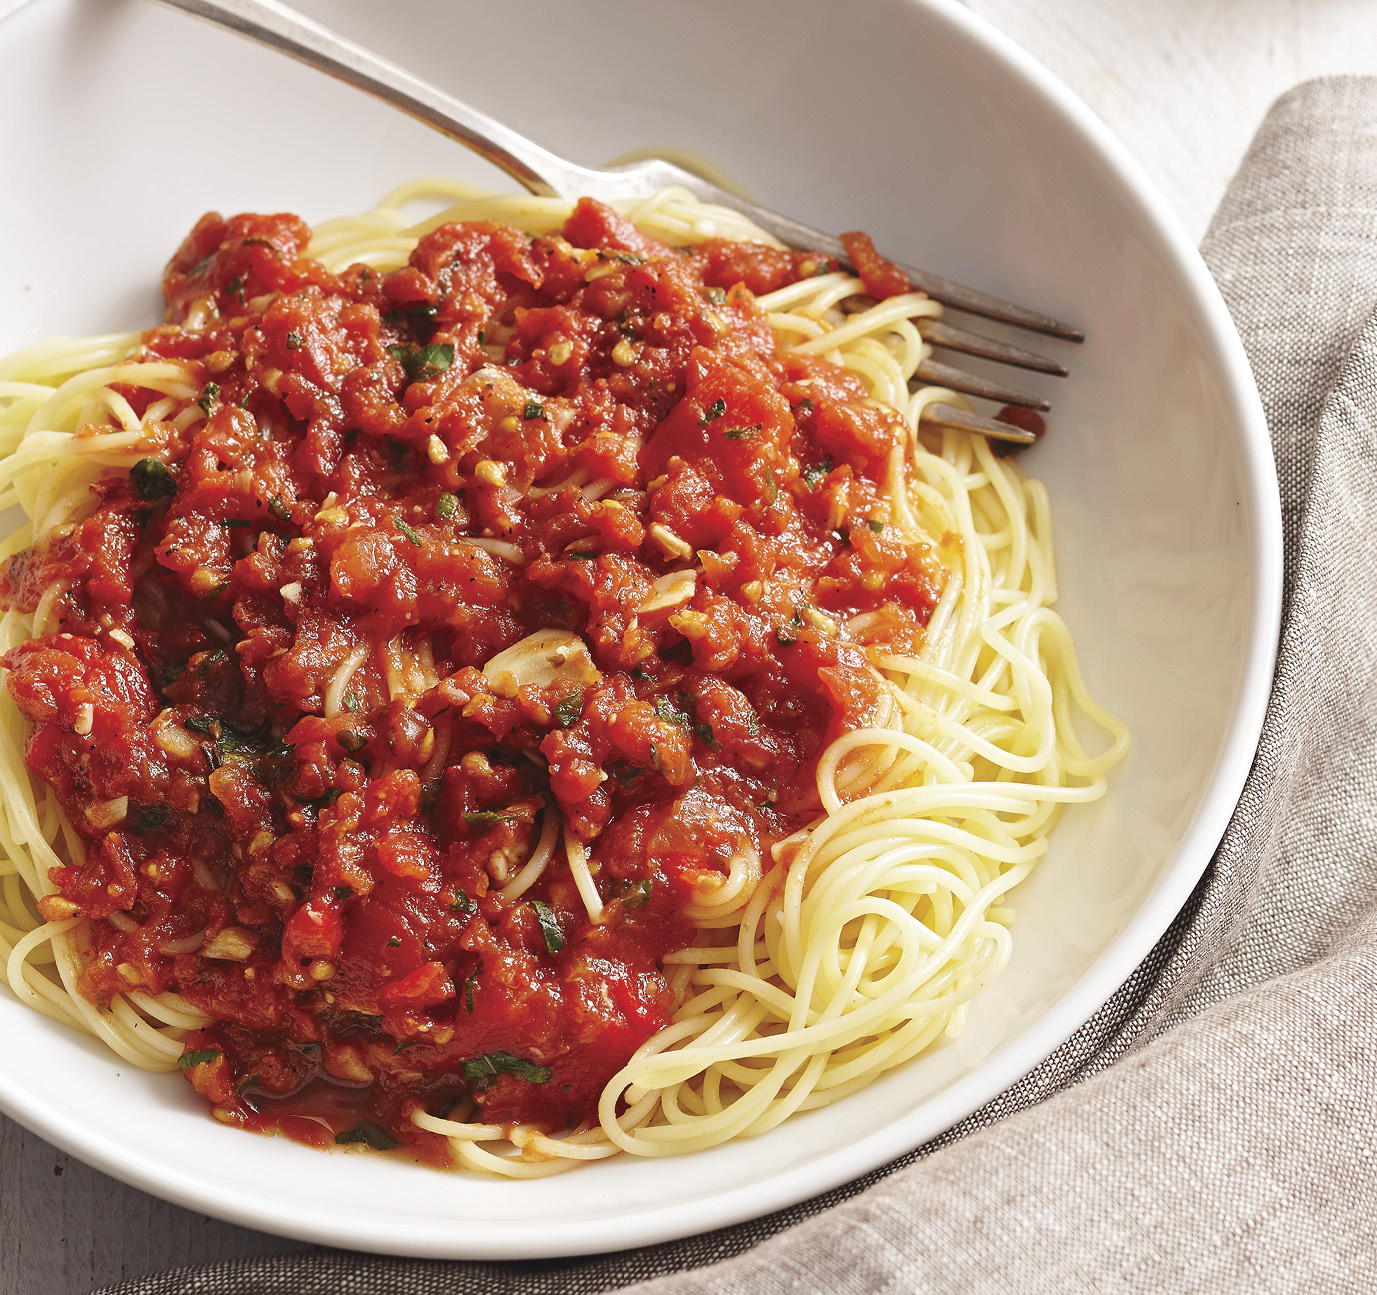
Roasted Garlic Pasta Sauce
hands-on time 2 hours 30 minutes
roast 40 minutes at 400°F
cook 1 hour
process 35 minutes
- 6 bulbs garlic
- 3 Tbsp. olive oil
- 4 medium red, yellow, and/or green sweet peppers, halved and seeded
- 12 lb. ripe tomatoes (about 25 tomatoes), peeled (photos, Pick a Pot)
- 3 Tbsp. packed brown sugar
- 2 Tbsp. kosher salt or 4 tsp. salt
- 1 Tbsp. balsamic vinegar
- 1 tsp. black pepper
- 2 cups lightly packed fresh basil leaves, chopped
- 1 cup lightly packed assorted fresh herbs (such as oregano, thyme, parsley, Italian parsley, and basil), chopped
- 6 Tbsp. bottled lemon juice
1. Preheat oven to 400° F. Peel away the dry outer layers of skin from garlic bulbs, leaving skins and cloves intact. Cut off the pointed top portions (about ½ inch), leaving bulbs intact but exposing the individual cloves. Place the garlic bulbs, cut sides up, in a 1- or 1½-qt. casserole. Drizzle with about 1 Tbsp. of the olive oil. Cover casserole. Arrange peppers, cut sides down, on a foil-lined baking sheet; brush with remaining olive oil. Roast garlic and peppers about 40 minutes or until cloves of garlic are soft and pepper skins are charred. Cool garlic on a wire rack until cool enough to handle. Pull up sides of foil to fully enclose peppers. Let peppers stand 15 to 20 minutes or until cool enough to handle. When peppers are cool enough to handle, peel off skins and discard; chop peppers.
2. Remove garlic cloves from papers by squeezing the bottoms of the bulbs. Place garlic cloves in a food processor. Cut peeled tomatoes into chunks and add some chunks to the food processor with garlic. Cover and process until chopped. Transfer chopped garlic and tomatoes to a 7- to 8-qt. nonreactive heavy pot (tip, Pick a Pot). Repeat chopping remaining tomatoes, in batches, in the food processor. Add all tomatoes to the pot.
3. Add brown sugar, salt, vinegar, and black pepper to the tomato mixture. Bring to boiling. Boil steadily, uncovered, 50 minutes, stirring occasionally. Add chopped peppers to tomato mixture. Continue boiling 10 to 20 minutes more or until mixture is reduced to about 11 cups and reaches desired sauce consistency, stirring occasionally. Remove from heat; stir in basil and assorted herbs.
4. Spoon 1 Tbsp. lemon juice into each of six hot, clean pint canning jars (tips and photos, Cooking Class). Ladle sauce into jars with lemon juice, leaving a ½-inch headspace. Wipe jar rims; adjust lids and screw bands.
5. Process filled jars in a boiling-water canner 35 minutes (start timing when water returns to a full boil). Remove jars from canner; cool on a wire rack.
Makes 6 pints.
each ½ cup 95 cal., 3 g fat (0 g sat. fat), 0 mg chol., 542 mg sodium, 17 g carb., 4 g fiber, 10 g sugars, 3 g pro.
ROASTED GARLIC PASTA SAUCE
Pizza Sauce
hands-on time 45 minutes
roast 30 minutes at 450°F
cook 1 hour
process 35 minutes
- 10 lb. ripe roma tomatoes
- 1 garlic bulb
- Olive oil
- 1 cup dry red wine
- 2 Tbsp. sugar
- 4 tsp. kosher salt
- 1 cup lightly packed fresh basil leaves, chopped
- ½ cup lightly packed fresh oregano leaves, chopped
- ½ tsp. black pepper
- ¼ tsp. crushed red pepper
- ½ cup bottled lemon juice
1. Preheat oven to 450°F. Line two shallow roasting pans or 15×10-inch baking pans with foil. Cut one or two small slits in each tomato. Place tomatoes in a single layer in the prepared pans. Cut off the top ½ inch of garlic bulb to expose ends of individual cloves. Leaving garlic bulb whole, remove loose, papery outer layers. Place bulb, cut end up, in a custard cup. Drizzle bulb with a little oil; cover with foil. Roast tomatoes and garlic on separate oven racks 30 minutes or until tomato skins are blistered and garlic is soft; cool.
2. Coarsely chop tomatoes, discarding loose skins and excess juice. Squeeze roasted garlic from individual cloves. Transfer tomatoes and garlic to a 6- to 8-qt. nonreactive heavy pot (tip, Pick a Pot). Stir in wine, sugar, and salt. Bring to boiling over medium-high heat, stirring occasionally; reduce heat. Simmer, uncovered, 15 minutes, stirring occasionally.
3. Press tomato mixture through a food mill fitted with a coarse disk. (Or working in batches, transfer tomato mixture to a food processor or blender. Cover and process or blend until smooth. Press pureed mixture through a sieve.) Discard seeds and skins.
4. Return the strained mixture to the pot. Stir in basil, oregano, black pepper, and crushed red pepper. Bring to boiling; reduce heat. Simmer, uncovered, 45 to 50 minutes or until reduced to 8 cups. Remove from heat. Stir in lemon juice.
5. Ladle hot sauce into hot, clean half-pint canning jars (tips and photos, Cooking Class), leaving a ½-inch headspace. Wipe jar rims; adjust lids and screw bands.
6. Process filled jars in a boiling-water canner 35 minutes (start timing when water returns to boiling). Remove jars from canner; cool on wire racks.
Makes 8 half-pints.
each 2 tbsp. 19 cal., 0 g fat, 0 mg chol., 127 mg sodium, 4 g carb., 1 g fiber, 2 g sugars, 1 g pro.

PIZZA SAUCE
Chili starter
hands-on time 30 minutes
cook 1 hour
process 40 minutes
- 12 lb. ripe tomatoes
- 1½ cups chopped onions
- 1½ cups chopped green sweet peppers
- 1 large fresh jalapeño pepper, chopped (tip)
- 1 6-oz. can tomato paste
- 6 cloves garlic, minced
- 2 Tbsp. packed brown sugar
- 3 to 4 Tbsp. chili powder
- 4 tsp. ground cumin
- 1 Tbsp. salt
- 1 Tbsp. dried oregano, crushed
- 1 tsp. black pepper
- ¼ cup cider vinegar
- ¼ cup lime juice
1. Peel skins off tomatoes (photos, Pick a Pot). Cut peeled tomatoes into chunks; add some chunks to a food processor. Cover and process until almost smooth. Transfer tomato puree to a 7- to 8-qt. nonreactive heavy pot (tip, Pick a Pot). Repeat with remaining tomatoes.
2. Add next 11 ingredients (through black pepper) to puree in pot. Bring to boiling, stirring frequently; reduce heat. Simmer, uncovered, about 60 minutes or until mixture is reduced to about 20 cups and is desired sauce consistency, stirring occasionally. Remove from heat; stir in vinegar and lime juice.
3. Ladle hot mixture into five hot, clean quart canning jars (tips and photos, Cooking Class), leaving a ½-inch headspace. Wipe jar rims; adjust lids and screw bands.
4. Process filled jars in a boiling-water canner 40 minutes (start timing when water returns to boiling). Remove jars from canner; cool on wire racks.
Makes 5 quarts.
each ⅔ cup 48 cal., 1 g fat (0 g sat. fat), 0 mg chol., 310 mg sodium, 11 g carb., 3 g fiber, 7 g sugars, 2 g pro.

make chili
In a 3- to 4-qt. saucepan cook 8 oz. ground beef over medium-high heat until browned; drain off fat. Add one 15-oz. can kidney beans, rinsed and drained, and 1 jar Chili Starter. Cook and stir over medium-high heat until heated through, stirring occasionally. Makes 6 servings.
USING THE FOOD PROCESSOR and sieve instead of a food mill will result in a thinner pizza sauce because more solids will be removed. You won’t have as much mixture to cook down to 8 cups, so adjust the cooking time in Step 4 to 15 to 20 minutes.
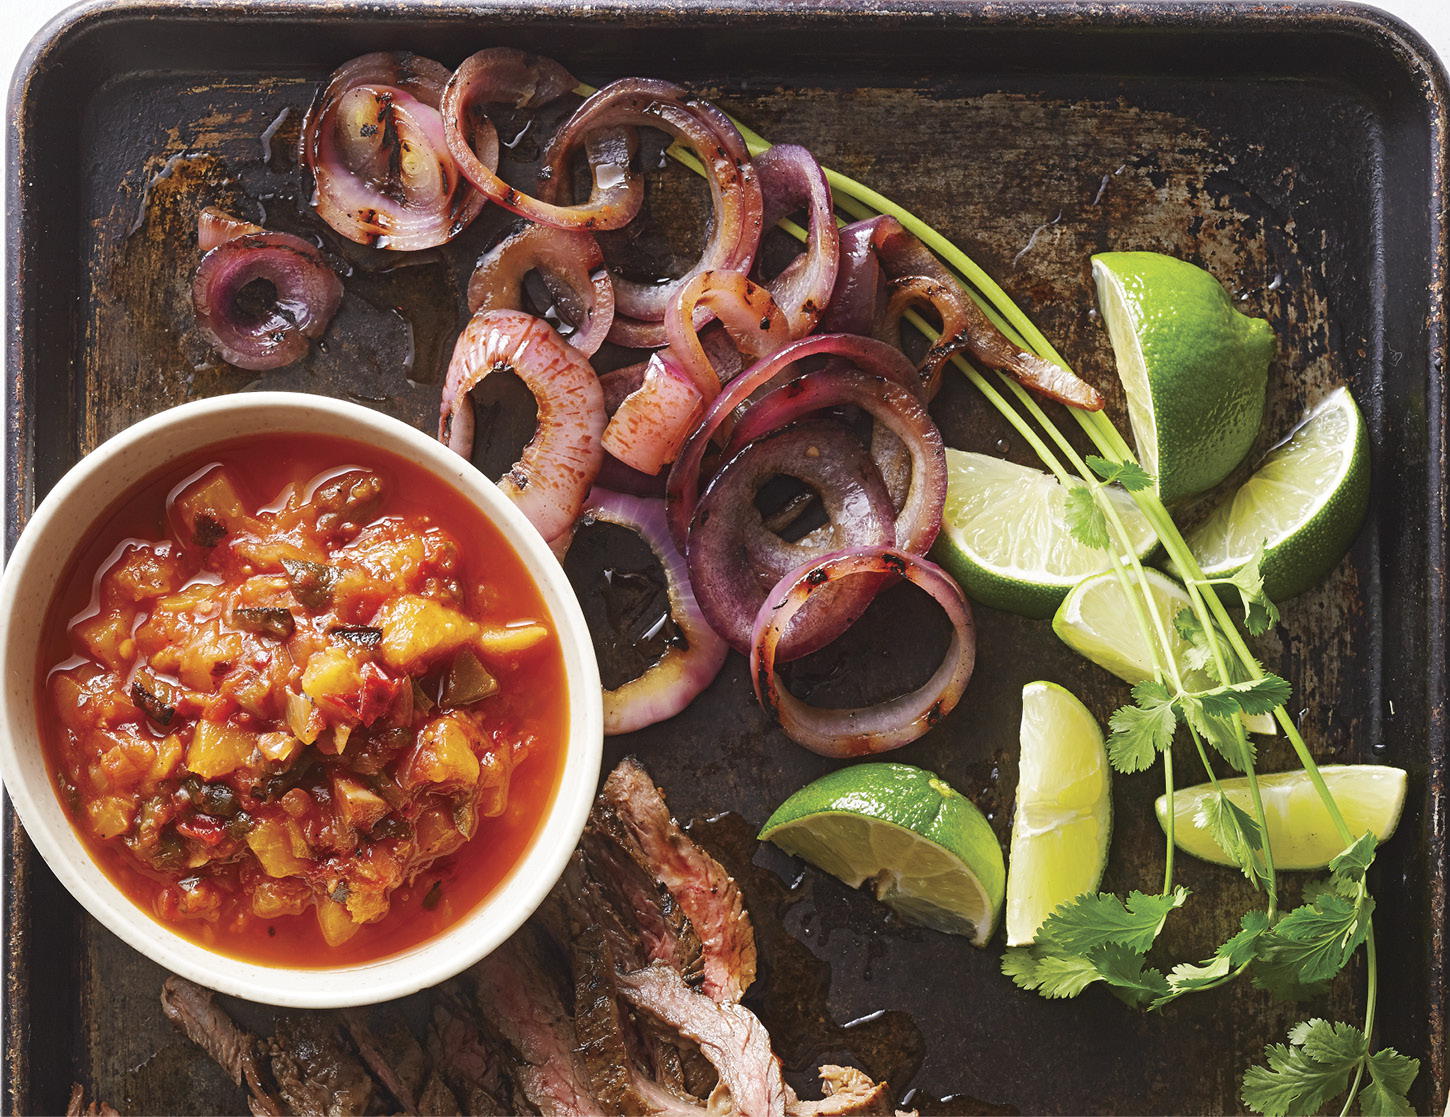
Smoky Honey- Peach Roasted Poblano Salsa
hands-on time 45 minutes
roast 25 minutes at 450°F
stand 10 minutes
cook 20 minutes
process 20 minutes
- 3 lb. roma tomatoes, cored
- 3 medium sweet onions, cut into ¾-inch wedges
- 3 fresh poblano chile peppers, stemmed, halved, and seeded (tip)
- 3 to 4 fresh jalapeño chile peppers, stemmed, halved, and seeded (tip)
- 9 cloves garlic, peeled
- 3 Tbsp. olive oil
- 6 large peaches (about 3½ lb.), peeled, pitted, and chopped (6¾ cups)
- 1 cup cider vinegar
- ⅓ cup honey
- 3 Tbsp. finely chopped canned chipotle peppers in adobo sauce
- 1 Tbsp. kosher salt
- 1½ tsp. ground cumin
- 1½ tsp. black pepper
1. Preheat oven to 450°F. Place tomatoes, onion wedges, poblano and jalapeño peppers, and garlic in two 15×10-inch baking pans. Drizzle with olive oil. Roast 15 minutes. Remove garlic; mince and set aside. Turn vegetables and roast 10 to 15 minutes more or until vegetables are charred. Cover pan with foil; let stand about 10 minutes. When peppers are cool enough to handle, use a sharp knife to gently remove skins; discard skins. Remove and discard tomato skins.
2. Transfer the garlic and the roasted vegetables and cooking juices to a food processor (in batches, if necessary); cover and pulse with several on/off turns until all ingredients are chopped.
3. Transfer tomato mixture to a 4- to 6-qt. nonreactive heavy pot (tip, Pick a Pot). Add remaining ingredients. Bring to boiling; reduce heat. Simmer, uncovered, 20 minutes, stirring occasionally.
4. Ladle hot salsa into six hot, clean pint canning jars (tips and photos, Cooking Class), leaving a ½-inch headspace. Wipe jar rims; adjust lids and screw bands.
5. Process filled jars in a boiling-water canner 20 minutes (start timing when water returns to boiling). Remove jars from canner; cool on a wire rack.
Makes 6 pints.
each 2 tbsp. 18 cal., 1 g fat (0 g sat. fat), 0 mg chol., 64 mg sodium, 3 g carb., 0 g fiber, 2 g sugars, 0 g pro.
SMOKY HONEY-PEACH ROASTED POBLANO SALSA
fill it up
If you have remaining salsa that won’t fill a jar up to the recommended headspace, cover and refrigerate the leftovers.
Cherry-Ancho Barbecue Sauce
hands-on time 1 hour 30 minutes
cook 2 hours 45 minutes
process 20 minutes
- 10 lb. ripe tomatoes
- 2 lb. tart red cherries, stemmed and pitted, or 1¾ lb. frozen pitted tart red cherries
- 3 cups chopped red onions (3 large)
- 2¼ cups chopped celery
- 4 to 6 dried ancho chile peppers, stemmed, seeded, and chopped (tip)
- 4 cloves garlic, quartered
- 2 cups cider vinegar
- 1½ cups honey
- ½ cup packed brown sugar
- 3 Tbsp. Worcestershire sauce
- 4 tsp. salt
- 2 tsp. ground coriander
- ½ tsp. black pepper
1. Remove stem ends and cores from tomatoes. Cut tomatoes into quarters. In a 10- to 12-qt. nonreactive heavy pot (tip, Pick a Pot) combine tomatoes and cherries. Bring to boiling; reduce heat. Simmer, covered, over medium-low heat about 15 minutes or until tomatoes are soft, stirring occasionally. Stir in onions, celery, ancho peppers, and garlic. Bring to boiling; reduce heat. Simmer, uncovered, 30 minutes, stirring occasionally.
2. Press tomato mixture through a food mill (tip, Pizza Sauce). Discard seeds and skins. Measure 18 cups tomato mixture; return to pot. Measure the depth of the mixture with a ruler. Bring to boiling; reduce heat. Simmer, uncovered, 1 to 1¼ hours or until mixture is reduced by half, stirring occasionally. (Measure the depth again with a ruler; should be half of original depth.)
3. Stir in remaining ingredients. Simmer, uncovered, about 1 hour more or until sauce is desired consistency, stirring frequently.
4. Ladle hot sauce into eight hot, clean half-pint canning jars (tips and photos, Cooking Class), leaving a ½-inch headspace. Wipe jar rims; adjust lids and screw bands.
5. Process filled jars in a boiling-water canner 20 minutes (start timing when water returns to boiling). Remove jars from canner; cool on wire racks.
6. After opening a jar, store any remaining sauce in the jar in the refrigerator up to 2 weeks.
Makes 8 half-pints.
to freeze Prepare as directed through Step 3. Place pot of sauce in a sink filled with ice water; stir to cool. Ladle into clean wide-mouth half-pint freezer containers, leaving a ½-inch headspace. Seal and label. Freeze up to 10 months.
each 1 tbsp. 32 cal., 0 g fat, 0 mg chol., 92 mg sodium, 8 g carb., 1 g fiber, 7 g sugars, 1 g pro.

CHERRY-ANCHO BARBECUE SAUCE
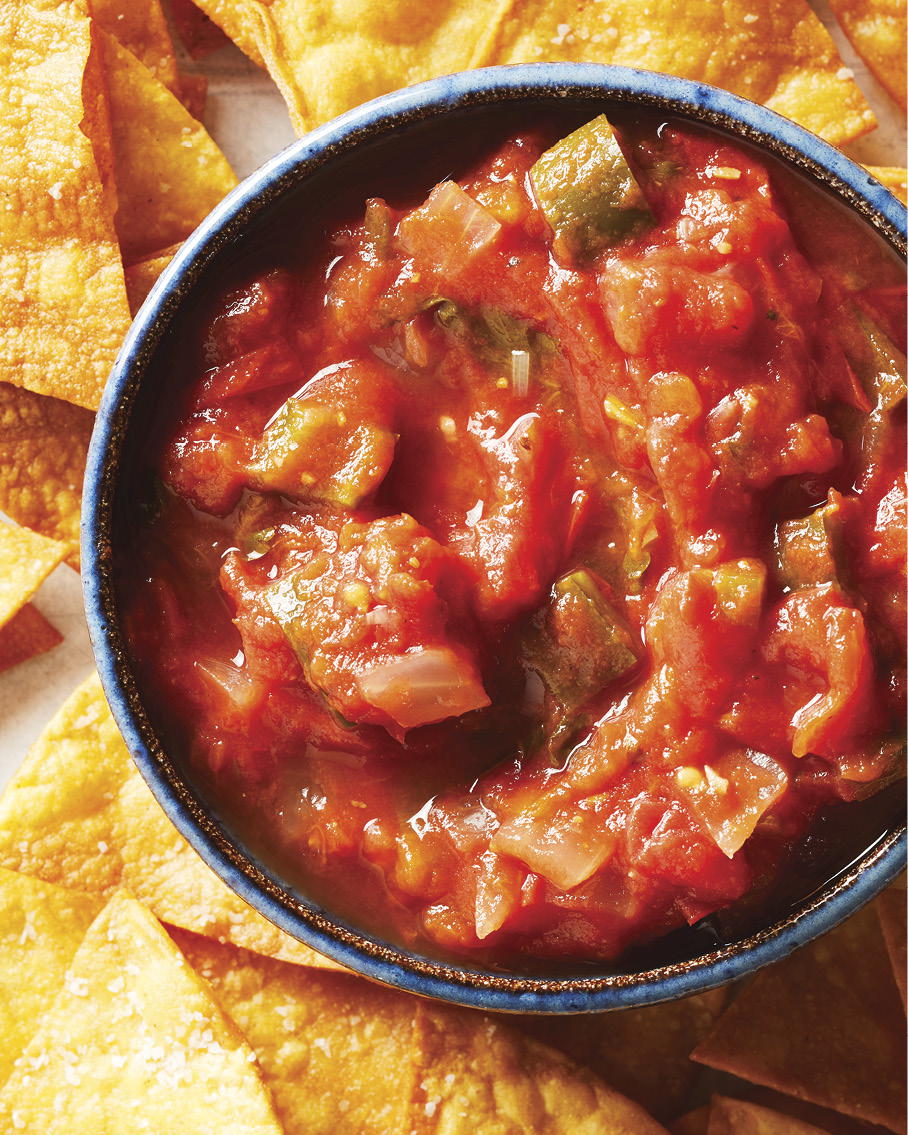
Classic Chunky Salsa
hands-on time 2 hours
stand 30 minutes
cook 1 hour 40 minutes
process 15 minutes
- 8 lb. ripe tomatoes (about 16 medium)
- 2 cups chopped, seeded fresh Anaheim or poblano chile peppers (tip)
- ⅓ to ½ cup chopped, seeded fresh jalapeño chile peppers (tip)
- 2 cups chopped onions
- ½ cup chopped fresh cilantro
- ½ cup lime juice
- ½ cup white vinegar
- ½ of a 6-oz. can tomato paste (⅓ cup)
- 5 cloves garlic, minced
- 1 tsp. cumin seeds, toasted and crushed*
- 1 tsp. salt
- 1 tsp. black pepper
1. If desired, peel tomatoes (tips, Pick a Pot). Seed, core, and coarsely chop tomatoes (about 15 cups). Place tomatoes in a large nonreactive colander. Let drain 30 minutes.
2. Place drained tomatoes in a 7- to 8-qt. nonreactive heavy pot (tip, Pick a Pot). Bring to boiling; reduce heat. Boil gently, uncovered, about 1½ hours or until desired consistency, stirring occasionally. Add remaining ingredients. Return to boiling; reduce heat. Simmer, uncovered, 10 minutes. Remove from heat.
3. Ladle hot salsa into hot, clean pint canning jars (tips and photos, Cooking Class), leaving a ½-inch headspace. Wipe jar rims; adjust lids and screw bands.
4. Process filled jars in a boiling-water canner 15 minutes (start timing when water returns to boiling). Remove jars from canner; cool on a wire rack.
Makes 5 pints.
*Note To toast cumin seeds, place seeds in a small dry skillet over medium heat 1 to 2 minutes or until lightly toasted, shaking skillet occasionally. Remove seeds from heat; allow to cool before crushing with a mortar and pestle.
each 2 tbsp. 13 cal., 0 g fat, 0 mg chol., 40 mg sodium, 3 g carb., 1 g fiber, 2 g sugars, 1 g pro.
CLASSIC CHUNKY SALSA
WAIT FOR IT
The flavors of condiments such as barbecue sauce will improve and intensify if the jars are allowed to stand for several weeks before opening. Once the jars are opened, refrigerate and use within 2 weeks.
Chutney or Conserve? hailing from India, Chutney is a thick mixture of fruit, vinegar, and sugar. Conserve is a thick, sweet spread with added dried fruit and/or nuts.
Apple-Cherry Chutney
hands-on time 30 minutes
cook 1 hour
process 10 minutes
- 3 lb. apples, peeled, cored, and chopped (8 cups)
- 1½ cups dried tart red cherries
- 2 cups packed brown sugar
- 2 cups cider vinegar
- 1 cup chopped sweet onion
- 1 cup chopped red sweet pepper
- 2 tsp. ground cardamom
- ½ tsp. salt
1. In a 6- to 8-qt. heavy pot stir together all ingredients. Bring to boiling; reduce heat. Simmer, uncovered, about 1 hour or until thickened, stirring occasionally.
2. Ladle hot chutney into seven hot, sterilized half-pint canning jars (photos, Cooking Class), leaving a ½-inch headspace. Wipe jar rims; adjust lids and screw bands.
3. Process filled jars in a boiling-water canner 10 minutes (start timing when water returns to boiling). Remove jars from canner; cool on wire racks.
Makes 7 half-pints.
each 2 tbsp. 76 cal., 0 g fat, 0 mg chol., 31 mg sodium, 19 g carb., 1 g fiber, 17 g sugars, 0 g pro.

APPLE-CHERRY CHUTNEY
Blueberry-Maple-Pecan Conserve
hands-on time 25 minutes
cook 30 minutes
process 10 minutes
- 4 cups blueberries
- 1 cup water
- 1 cup pure maple syrup
- 2 Tbsp. bottled lemon juice
- 2 cups packed brown sugar
- 1 cup dried currants
- 1 cup chopped pecans
- 1 tsp. ground cinnamon
1. In a 4- to 6-qt. heavy pot combine blueberries, the water, maple syrup, and lemon juice. Using a potato masher, slightly crush the blueberries. Bring to boiling; reduce heat. Simmer, covered, about 5 minutes or until blueberries are tender, stirring occasionally.
2. Stir brown sugar and currants into blueberry mixture. Return to boiling, stirring until sugar dissolves; reduce heat. Simmer, uncovered, about 30 minutes or until mixture thickens, stirring occasionally. Remove from heat. Stir in pecans and cinnamon.
3. Ladle hot conserve into five hot, sterilized half-pint canning jars (photos, Cooking Class), leaving a ¼-inch headspace. Wipe jar rims; adjust lids and screw bands.
4. Process filled jars in a boiling-water canner 10 minutes (start timing when water returns to boiling). Remove jars from canner; cool on a wire rack.
Makes 5 half-pints.
each 2 tbsp. 111 cal., 2 g fat (0 g sat. fat), 0 mg chol., 5 mg sodium, 24 g carb., 1 g fiber, 23 g sugars, 1 g pro.

BLUEBERRY-MAPLE-PECAN CONSERVE
Get-Together
Feature any of these chutney, jam, and conserve recipes on a cheese board (Cheese and meat Board). Add crackers or bread, several soft and hard cheeses, and in-season fresh fruit.
Double peach-pistachio conserve
hands-on time 40 minutes
cook 30 minutes
process 5 minutes
- 5 lb. fresh medium peaches, peeled, pitted, and chopped
- 1 cup honey
- ½ cup water
- ¼ cup champagne vinegar or white wine vinegar
- 2 cups sugar
- 1 cup snipped dried peaches or apricots
- 1 cup chopped pistachio nuts
- ½ tsp. ground cardamom
1. In a 6- to 8-qt. heavy pot combine the first four ingredients (through vinegar). Use a potato masher to slightly crush the peaches. Bring to boiling; reduce heat. Simmer, covered, about 5 minutes or until peaches are tender, stirring occasionally.
2. Stir sugar and dried peaches into peach mixture in pot. Return to boiling, stirring to dissolve sugar; reduce heat. Boil gently, uncovered, about 30 minutes or until mixture is syrupy, stirring occasionally. Remove from heat. Stir in pistachios and cardamom.
3. Ladle hot conserve into six hot, sterilized half-pint canning jars (photos, Cooking Class), leaving a ¼-inch headspace. Wipe jar rims; adjust lids and screw bands.
4. Process filled jars in a boiling-water canner 5 minutes (start timing when water returns to boiling). Remove jars from canner; cool on wire racks.
Makes 6 half-pints.
each 1 tbsp. 46 cal., 1 g fat (0 g sat. fat), 0 mg chol., 7 mg sodium, 10 g carb., 0 g fiber, 9 g sugars, 0 g pro.

DOUBLE PEACH-PISTACHIO CONSERVE
cooking class
our two best tips for jam-making success: First, Make a single batch at a time (doubling the recipe prevents proper jelling and causes scorching). Second, always Use the exact amount of sugar specified (pectin requires a specific ratio of sugar to pectin for perfect jelling).
Strawberry Jam
hands-on time 35 minutes
process 5 minutes
- 12 cups hulled fresh strawberries
- 1 1.75-oz. pkg. regular powdered fruit pectin or 6 Tbsp. classic powdered fruit pectin
- ½ tsp. butter
- 7 cups sugar
1. Place 1 cup of the strawberries in an 8-qt. heavy pot. Using a potato masher, crush berries. Continue adding and crushing berries. Measure 5 cups crushed berries. Stir in pectin and butter. Bring to a full rolling boil, stirring constantly. Quickly stir in sugar. Return to a full rolling boil over high heat, stirring constantly. Boil hard 1 minute, stirring constantly. Remove from heat. Skim off any foam with a metal spoon.
2. Ladle hot jam into seven hot, sterilized half-pint canning jars (photos, Cooking Class), leaving a ¼-inch headspace. Wipe jar rims; adjust lids and screw bands.
3. Process filled jars in a boiling-water canner 5 minutes (start timing when water returns to boiling). Remove jars from canner; cool on wire racks.
Makes 7 half-pints.
each 1 tbsp. jam and variations 54 cal., 0 g fat, 0 mg chol., 0 mg sodium, 14 g carb., 0 g fiber, 13 g sugars, 0 g pro.
Raspberry Jam Prepare as directed, except replace the 12 cups strawberries with 12 cups fresh raspberries. If desired, press half of the 5 cups crushed berries through a sieve before stirring in the pectin and butter.
Makes 7 half-pints.
Strawberry and Ginger Ale Jam Prepare as directed, except add ½ cup ginger ale before skimming off the foam in Step 1.
Makes 8 half-pints.
Strawberry-Marsala-Thyme Jam Prepare as directed, except add ½ cup Marsala wine with the pectin and butter. Add ¼ cup chopped fresh thyme after skimming off the foam.
Makes 7 half-pints.
PECTIN is a soluble fruit-derived fiber that gives jams and jellies thickness and body. Pectin comes in powdered and liquid forms and in a formulation suitable for low-sugar recipes. Always use the type of pectin and exact amount of sugar specified in the recipe; a specific ratio of sugar to pectin is needed for each type of pectin to work properly.

Unless otherwise specified in the recipe, bring mixture to a full rolling boil (bubbles break the surface so rapidly that you can’t stir them down).

Boiling creates foam that you need to remove before filling jars. To skim foam, quickly glide a metal spoon over the surface, catching the foam; remove and discard the frothy bubbles.
Use a clean canning funnel and ladle for filling sterilized canning jars with jams and jellies. A funnel helps prevent sticky liquid from getting on the rim or running down the outsides of the jars.
Right Side Up
Vintage recipes used to recommend cooling jars of jam upside down so chunks of fruit wouldn’t float to the top. We found cooling this way disrupted the seal on the jar, so we recommend you cool and store your jam right side up. If the fruit pieces aren’t distributed evenly when the gel sets, stir the jam before serving.
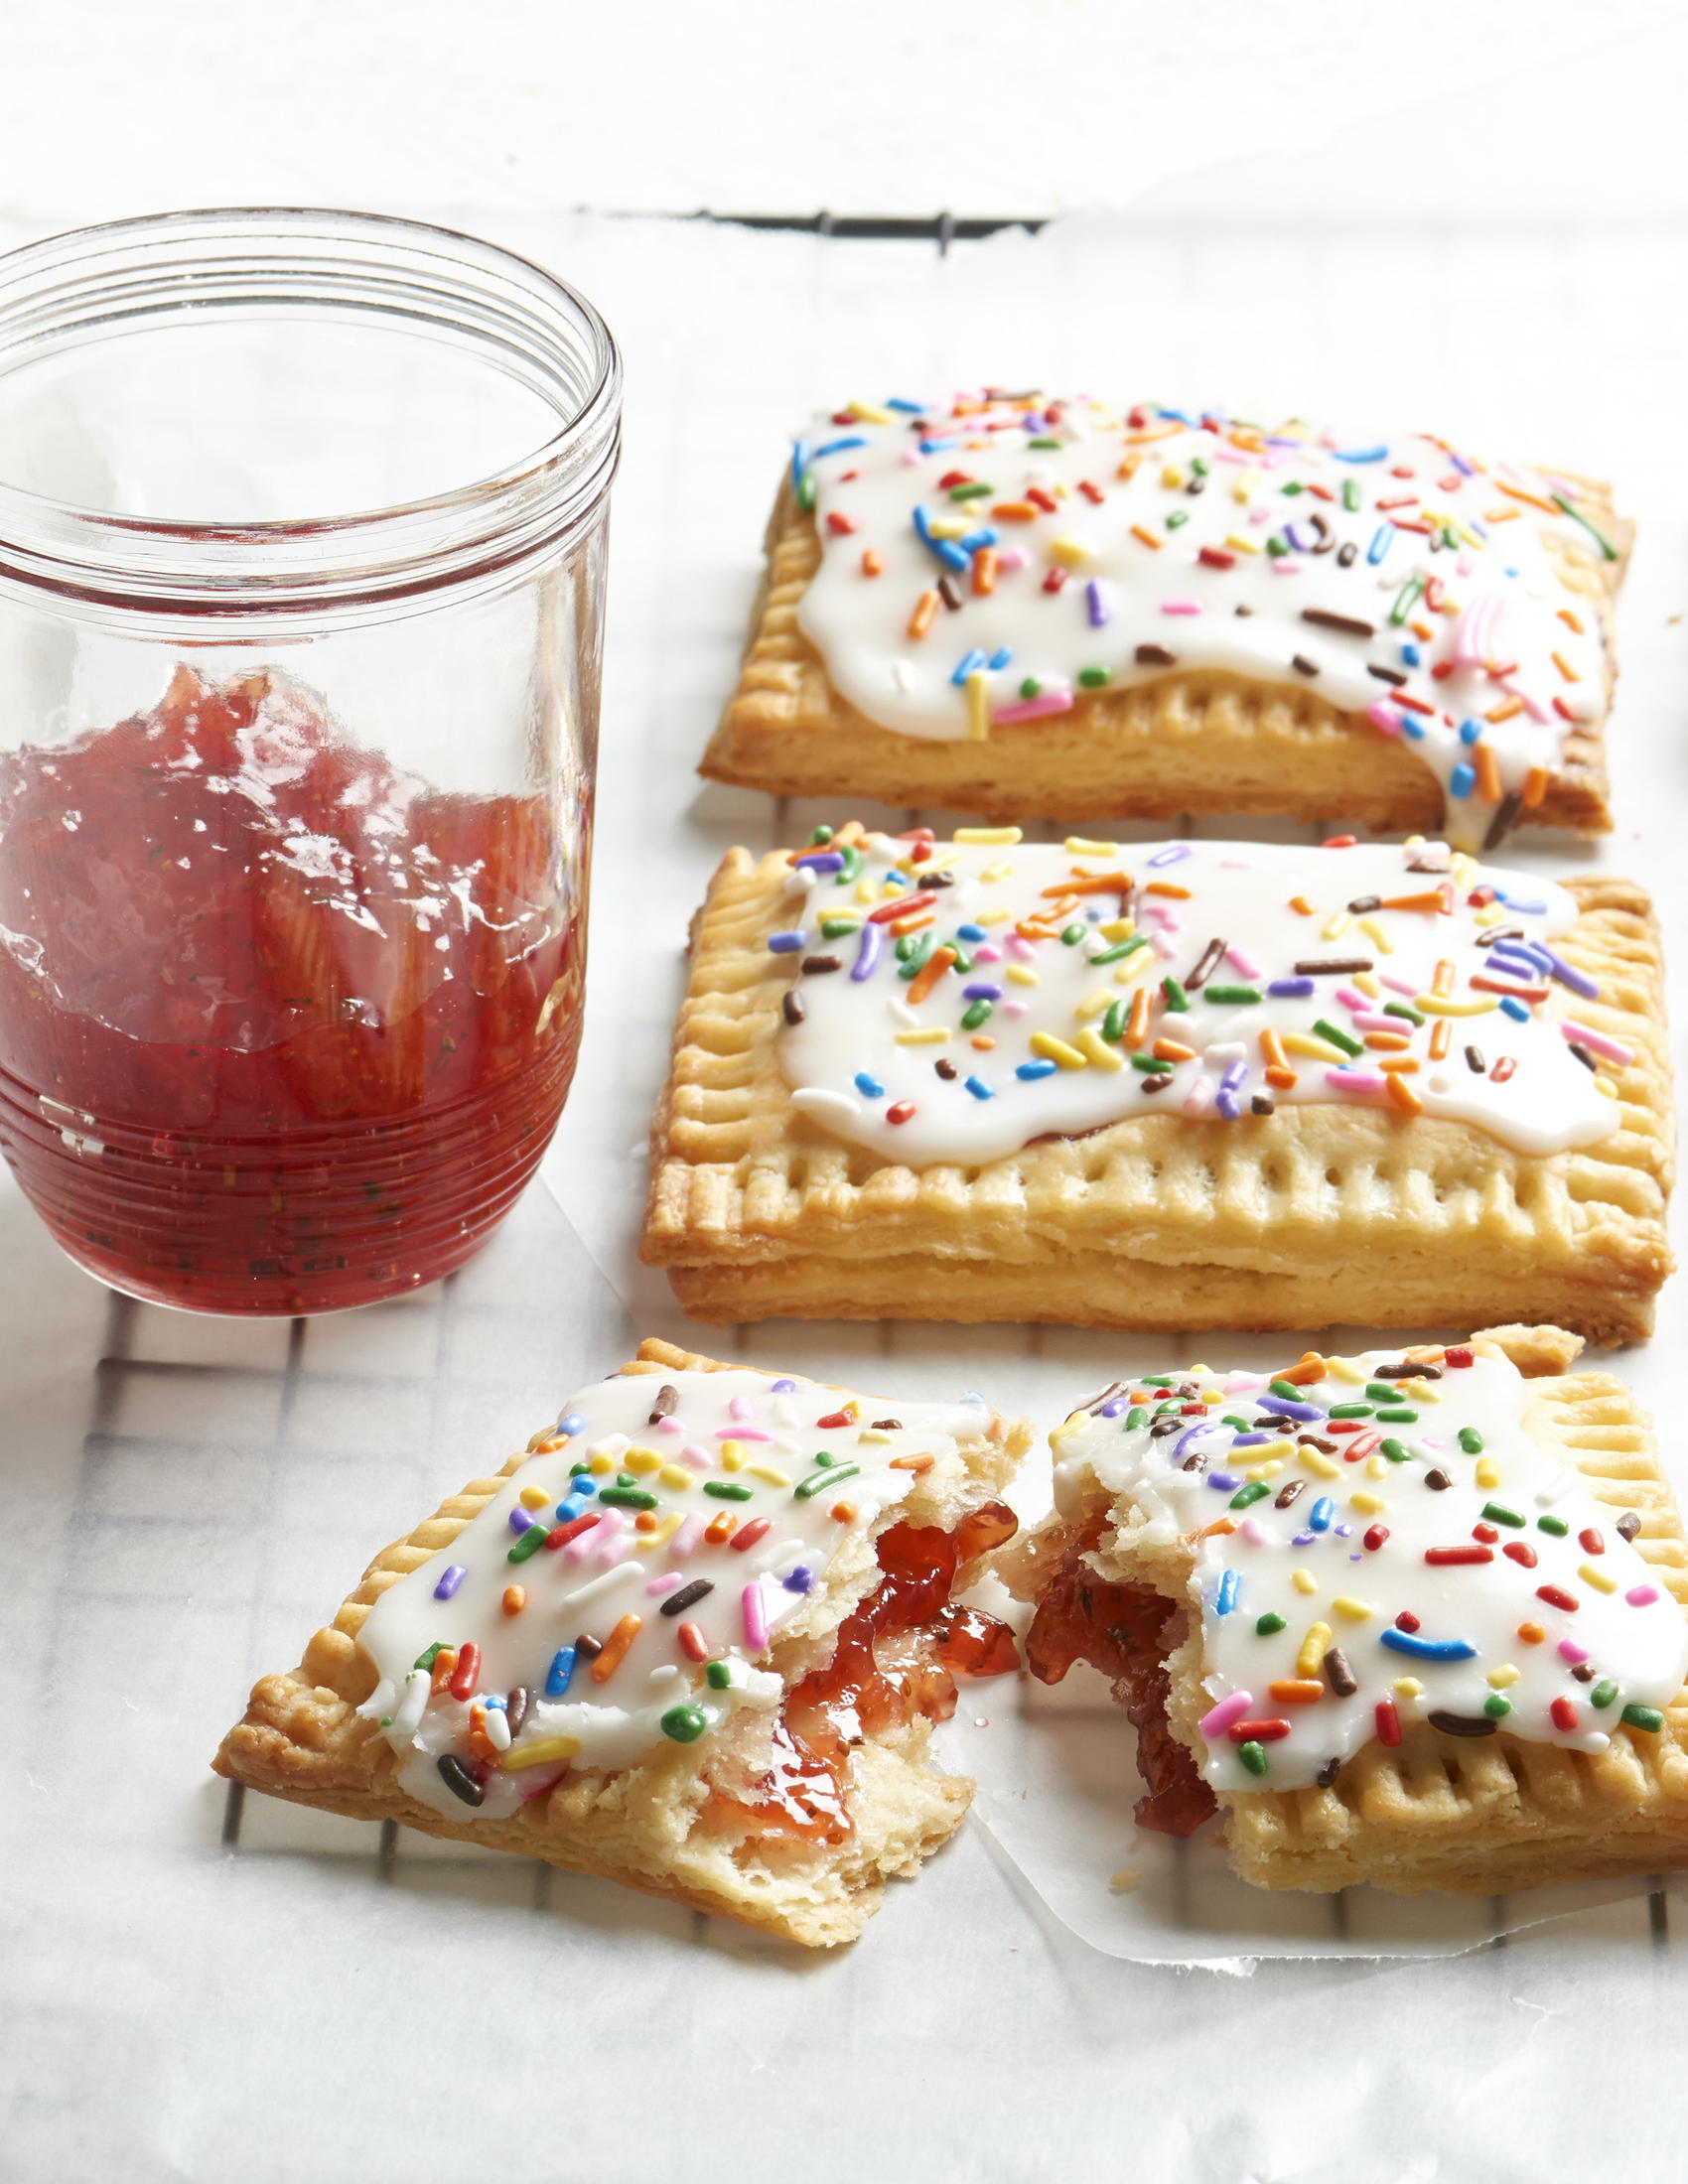
Breakfast tarts
To make these yummy strawberry jam-filled tarts, follow the Hand Pies recipe Cherry Hand Pies, filling each tart with jam or jelly instead of fruit filling. Drizzle with icing and top with sprinkles.
Lemon-Lime-Orange Marmalade
hands-on time 55 minutes
process 5 minutes
stand 1 week
- 3 medium oranges
- 1 medium Meyer lemon
- 1 medium lime
- 1½ cups water
- ⅛ tsp. baking soda
- 5 cups sugar
- ½ of a 6-oz. pkg. (1 foil pouch) liquid fruit pectin
1. Use a paring knife to score the peels of the oranges, lemon, and lime into four lengthwise sections; remove peels. Scrape off white pith; discard. Cut peels into thin strips. In a 3-qt. saucepan bring peels, the water, and the baking soda to boiling; reduce heat. Simmer, covered, 20 minutes; do not drain.
2. Meanwhile, working over a bowl, remove fruit sections (cut between a section and the membrane) (photo, Cutting). Cut back between the section and the next membrane to release the section. Repeat until all fruits are sectioned. Add sections and juices to saucepan; return to boiling. Simmer, covered, 10 minutes (3 cups fruit mixture).
3. In an 8- to 10-qt. heavy pot combine fruit mixture and sugar. Bring to boiling, stirring constantly to dissolve sugar. Quickly stir in pectin. Bring to a full rolling boil (photos, Strawberry Jam), stirring constantly. Boil hard 1 minute, stirring constantly. Remove from heat. Quickly skim off foam with a metal spoon.
4. Ladle hot marmalade into five hot, sterilized half-pint canning jars (photos, Cooking Class), leaving a ¼-inch headspace. Wipe jar rims; adjust lids and screw bands.
5. Process filled jars in a boiling-water canner 5 minutes (start timing when water returns to boiling). Remove jars from canner; cool on a wire rack. Allow jars to stand at room temperature at least 1 week for marmalade to set.
Makes 5 half-pints.
each 1 tbsp. 52 cal., 0 g fat, 0 mg chol., 2 mg sodium, 13 g carb., 0 g fiber, 13 g sugars, 0 g pro.

LEMON-LIME-ORANGE MARMALADE
Peach Jam
hands-on time 30 minutes
process 5 minutes
- 7 cups sugar
- 4 cups finely chopped, peeled ripe peaches* (about 3 lb. fresh or 2 lb. frozen, thawed)
- ¼ cup fresh lemon juice
- ½ of a 6-oz. pkg. (1 foil pouch) liquid fruit pectin
1. In a 6- to 8-qt. heavy pot combine sugar, peaches, and lemon juice. Cook over high heat until mixture comes to a full rolling boil, stirring constantly. Quickly stir in pectin. Return to a full rolling boil (photos, Strawberry Jam), stirring constantly. Boil hard 1 minute, stirring constantly. Remove from heat. Quickly skim off foam with a metal spoon.
2. Ladle hot jam into seven hot, sterilized half-pint canning jars (photos, Cooking Class), leaving a ¼-inch headspace. Wipe jar rims; adjust lids and screw bands.
3. Process filled jars in a boiling-water canner 5 minutes (start timing when water returns to boiling). Remove jars from canner; cool on wire racks.
Makes 7 half-pints.
*Note If desired, place small batches of cut-up peeled peaches in a food processor. Cover and pulse until peaches are finely chopped.
each 1 tbsp. 51 cal., 0 g fat, 0 mg chol., 0 mg sodium, 13 g carb., 0 g fiber, 13 g sugars, 0 g pro.

PEACH JAM
Grape Jelly
hands-on time 30 minutes
cook 10 minutes
stand 30 minutes
process 5 minutes
- 3 lb. Thomcord grapes*
- ½ cup water
- Bottled unsweetened grape juice (optional)
- 1 1.75-oz. pkg. regular powdered fruit pectin or 6 Tbsp. classic powdered fruit pectin
- 4½ cups sugar
1. Wash and stem grapes. In a 6- to 8-qt. heavy pot crush grapes with a potato masher. Add the water. Bring to boiling; reduce heat. Simmer, covered, about 10 minutes or until grapes are very soft.
2. Line a colander or sieve with several layers of 100%-cotton cheesecloth. Place colander over a large bowl. Pour grapes and cooking liquid into colander. Let stand at room temperature 30 minutes or until dripping has almost stopped (do not squeeze cheesecloth). Discard grapes in colander. Measure 3 cups juice (add unsweetened grape juice if necessary to equal 3 cups).
3. Place strained juice in same pot. Stir in pectin. Bring to a full rolling boil (photos, Strawberry Jam), stirring constantly. Quickly stir in sugar. Return to a full rolling boil over high heat, stirring constantly. Boil hard 1 minute, stirring constantly. Remove from heat. Quickly skim off foam with a metal spoon.
4. Ladle hot jelly into five hot, sterilized half-pint canning jars (photos, Cooking Class), leaving a ¼-inch headspace. Wipe jar rims; adjust lids and bands.
5. Process filled jars in a boiling-water canner 5 minutes (start timing when water returns to boiling). Remove jars from canner; cool on a wire rack.
Makes 5 half-pints.
*Note The amount of juice you get from the grapes may vary depending on the freshness of the grapes. If you can’t find these grapes, you may use 3 cups bottled unsweetened Concord grape juice and omit Steps 1 and 2.
each 1 tbsp. 55 cal., 0 g fat, 0 mg chol., 0 mg sodium, 14 g carb., 0 g fiber, 14 g sugars, 0 g pro.

GRAPE JELLY
change it up
Add a touch of savory flavor to Peach Jam. After skimming off the foam in Step 1, stir in ½ cup chopped fresh basil or ¾ tsp. freshly ground cardamom.
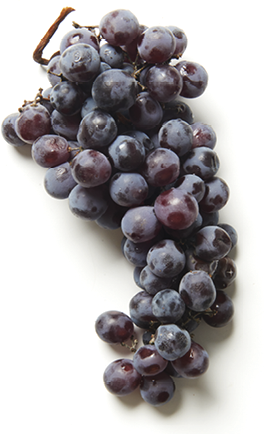
THOMCORD GRAPES are available in supermarkets during late summer and early fall. This hybrid combines the deep, lush flavor and color of Concord grapes (which are more difficult to find) with the light, mellow sweetness of Thompson grapes. Another bonus is they’re seedless. Don’t use regular table grapes for this recipe.
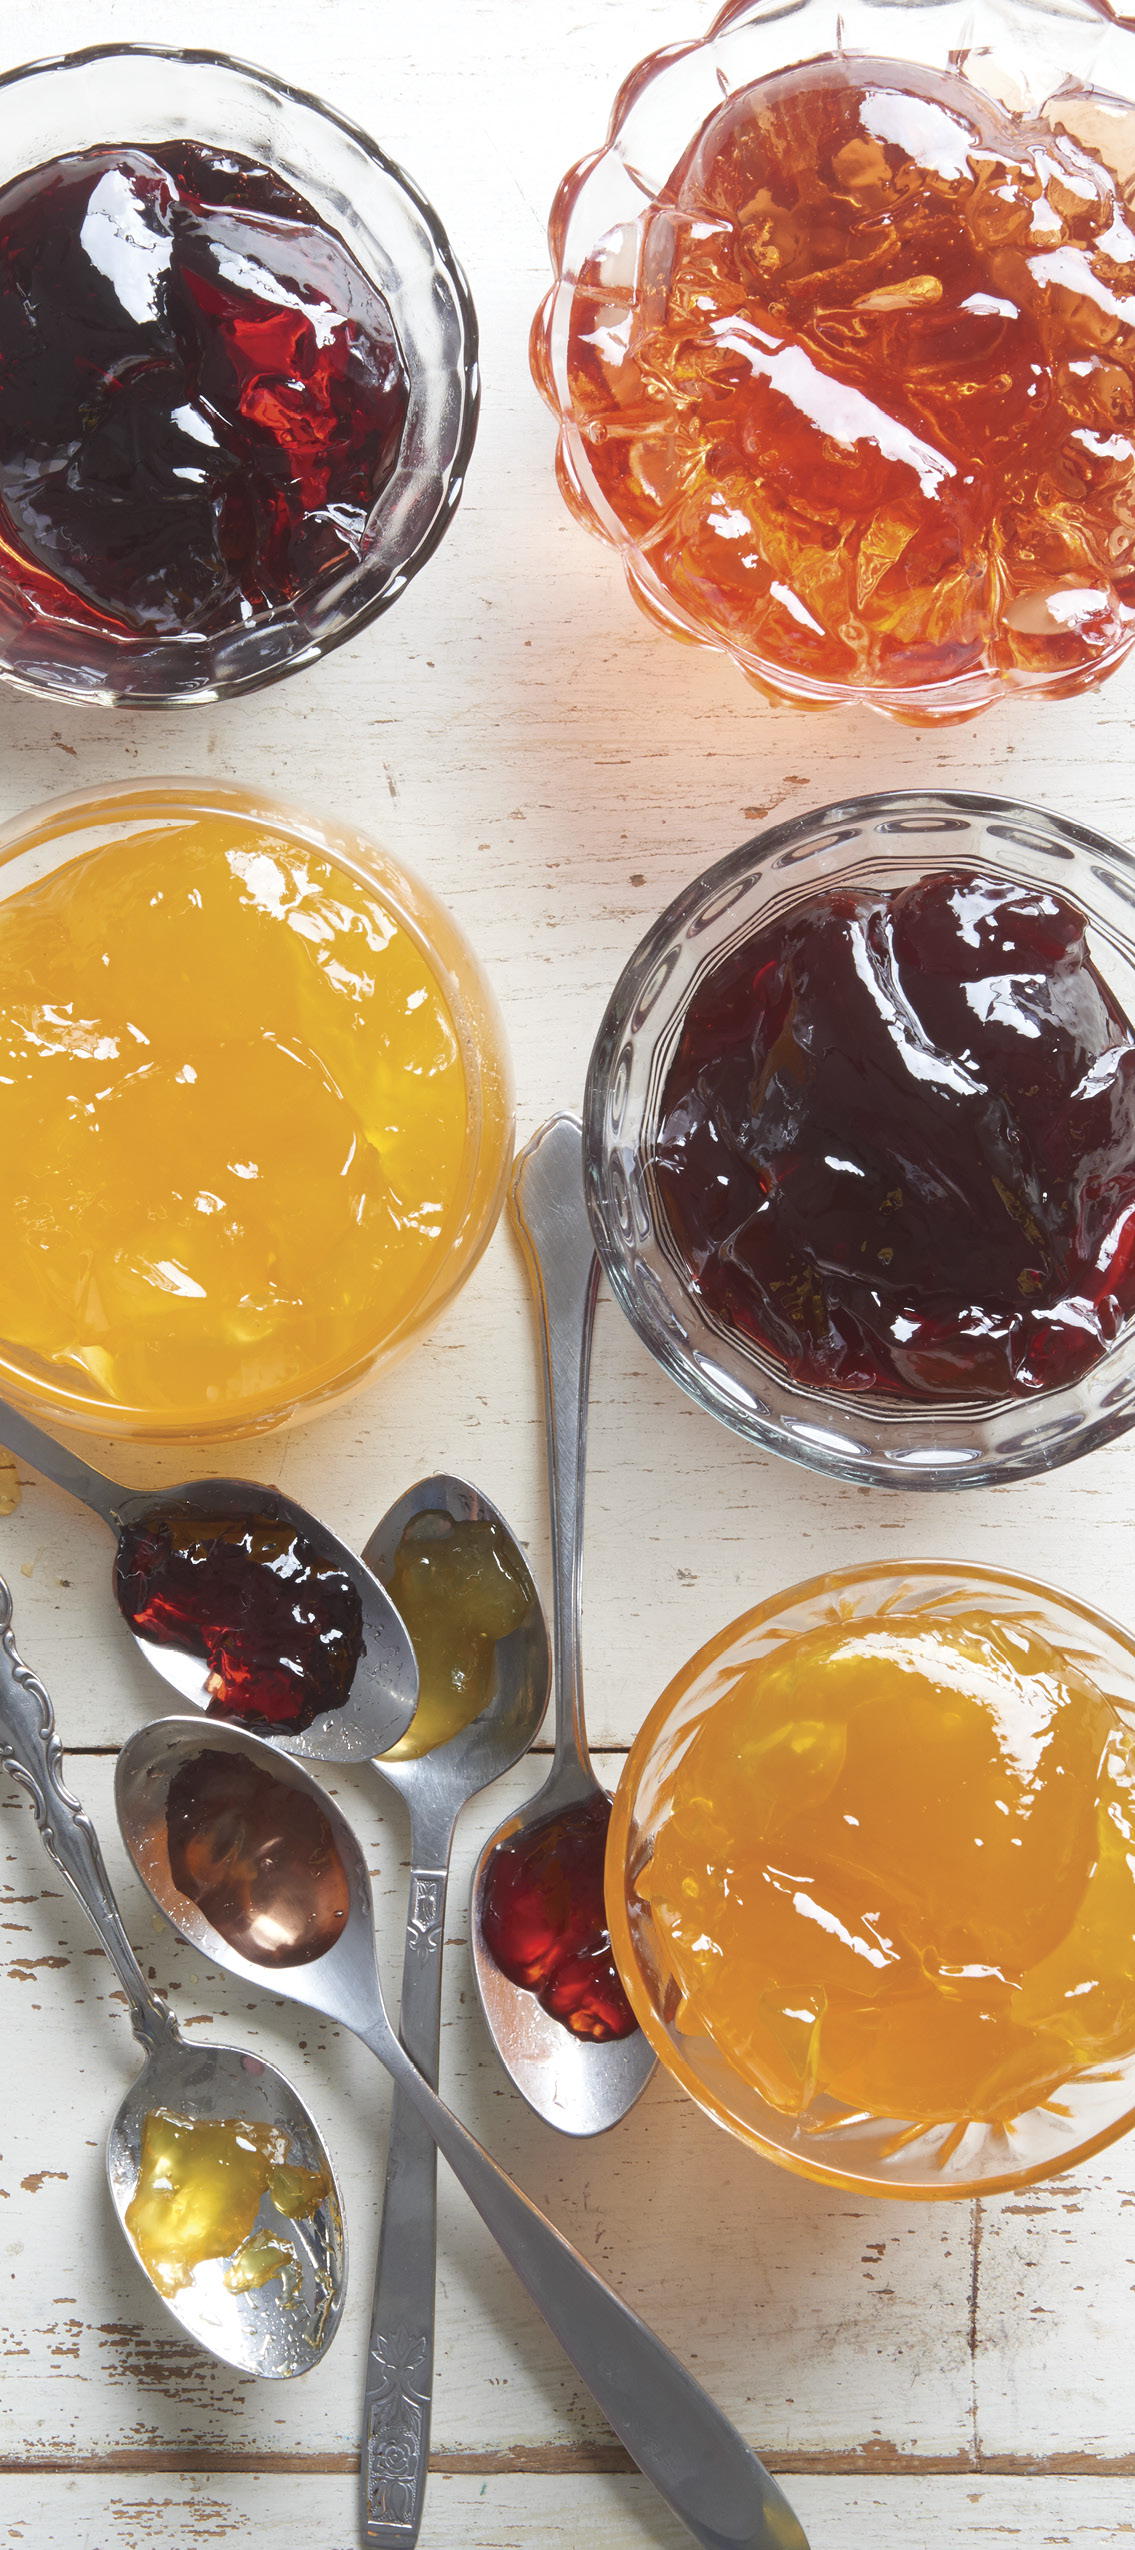
Gift it
Extra jars of jams and jellies make sweet holiday and hostess gifts. Tie a ribbon around the lid or secure a small square of fabric under the screw band for a vintage look.
Juice Jelly
hands-on time 30 minutes
process 5 minutes
- 3 cups bottled unsweetened grape juice (options, right)
- 1 1.75-oz. pkg. regular powdered fruit pectin or 6 Tbsp. classic powdered fruit pectin
- 4½ cups sugar
1. In a 6- to 8-qt. heavy pot combine juice and pectin. Bring to a full rolling boil (photos, Strawberry Jam), stirring constantly. Quickly stir in sugar. Return to a full rolling boil over high heat, stirring constantly. Boil hard 1 minute, stirring constantly. Remove from heat. Quickly skim off foam with a metal spoon.
2. Ladle hot jelly into five hot, sterilized half-pint canning jars (photos), leaving a ¼-inch headspace. Wipe jar rims; adjust lids and bands.
3. Process filled jars in a boiling-water canner 5 minutes (start timing when water returns to boiling). Remove jars from canner; cool on a wire rack.
Makes 5 half-pints.
each 1 tbsp. 57 cal., 0 g fat, 0 mg chol., 2 mg sodium, 14 g carb., 0 g fiber, 14 g sugars, 0 g pro.
JUICE JELLY
more juice
These juices also make excellent Juice Jelly.
fruit juices
- Apple juice or apple cider
- Orange juice
- Cranberry juice
vegetable juices
- Purple carrot, beet, and green apple vegetable juice blend with fruit
- Yellow and orange carrot, sweet potato, and orange vegetable juice blend with fruit
IS IT READY?
You’ll know this fruit butter is ready to ladle into the jars when it has thickened enough to mound on a spoon. Be sure to stir it often to keep it from sticking.
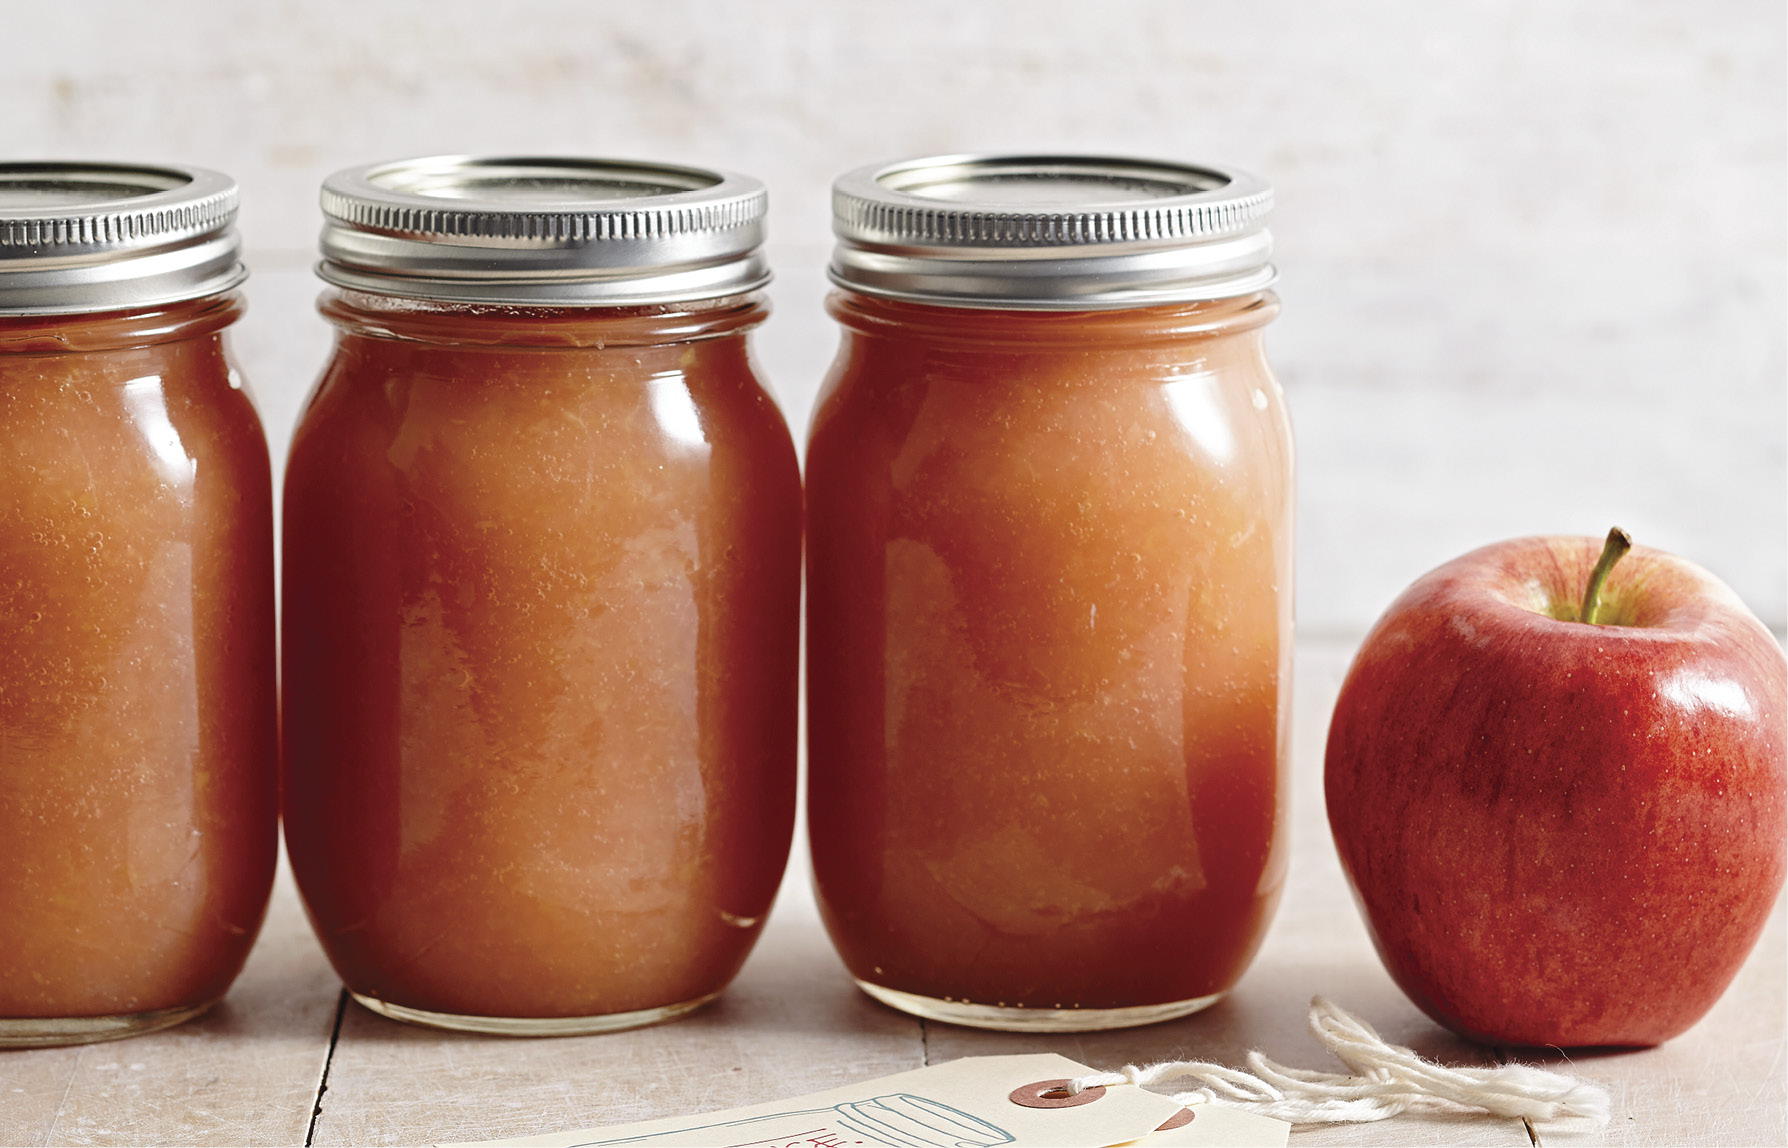
Apple Butter
hands-on time 45 minutes
cook 2 hours
process 5 minutes
- 4½ lb. tart cooking apples, cored and quartered (about 14 medium)
- 3 cups apple cider or apple juice
- 2 cups granulated sugar
- 2 Tbsp. fresh lemon juice
- ½ tsp. ground cinnamon
1. In an 8- to 10-qt. heavy pot combine apples and cider. Bring to boiling; reduce heat. Simmer, covered, 30 minutes, stirring occasionally. Press apple mixture through a food mill or sieve until you have 7½ cups. Return pulp to pot.
2. Stir in granulated sugar, lemon juice, and cinnamon. Bring to boiling; reduce heat. Cook, uncovered, over very low heat 1½ to 1¾ hours or until very thick and mixture mounds on a spoon, stirring often.
3. Ladle hot apple butter into six hot, sterilized half-pint canning jars (photos, Cooking Class), leaving a ¼-inch headspace. Wipe jar rims; adjust lids and screw bands.
4. Process filled jars in a boiling-water canner 5 minutes (start timing when water returns to boiling). Remove jars from canner; cool on a wire rack.
Makes 6 half-pints.
to freeze Place pot of apple butter in a sink filled with ice water; stir to cool. Ladle into clean wide-mouth half-pint freezer containers, leaving a ½-inch headspace. Seal and label. Store in refrigerator up to 2 weeks or freeze up to 6 months. Apple butter may darken slightly on freezing.
each 1 tbsp. plain and variations 28 cal., 0 g fat, 0 mg chol., 0 mg sodium, 7 g carb., 0 g fiber, 7 g sugars, 0 g pro.
Apple-Pear Butter Prepare as directed, except substitute 2 lb. cored, quartered ripe pears for 2 lb. of the apples.
Caramel Apple Butter Prepare as directed, except decrease granulated sugar to ½ cup and add 1½ cups packed brown sugar.
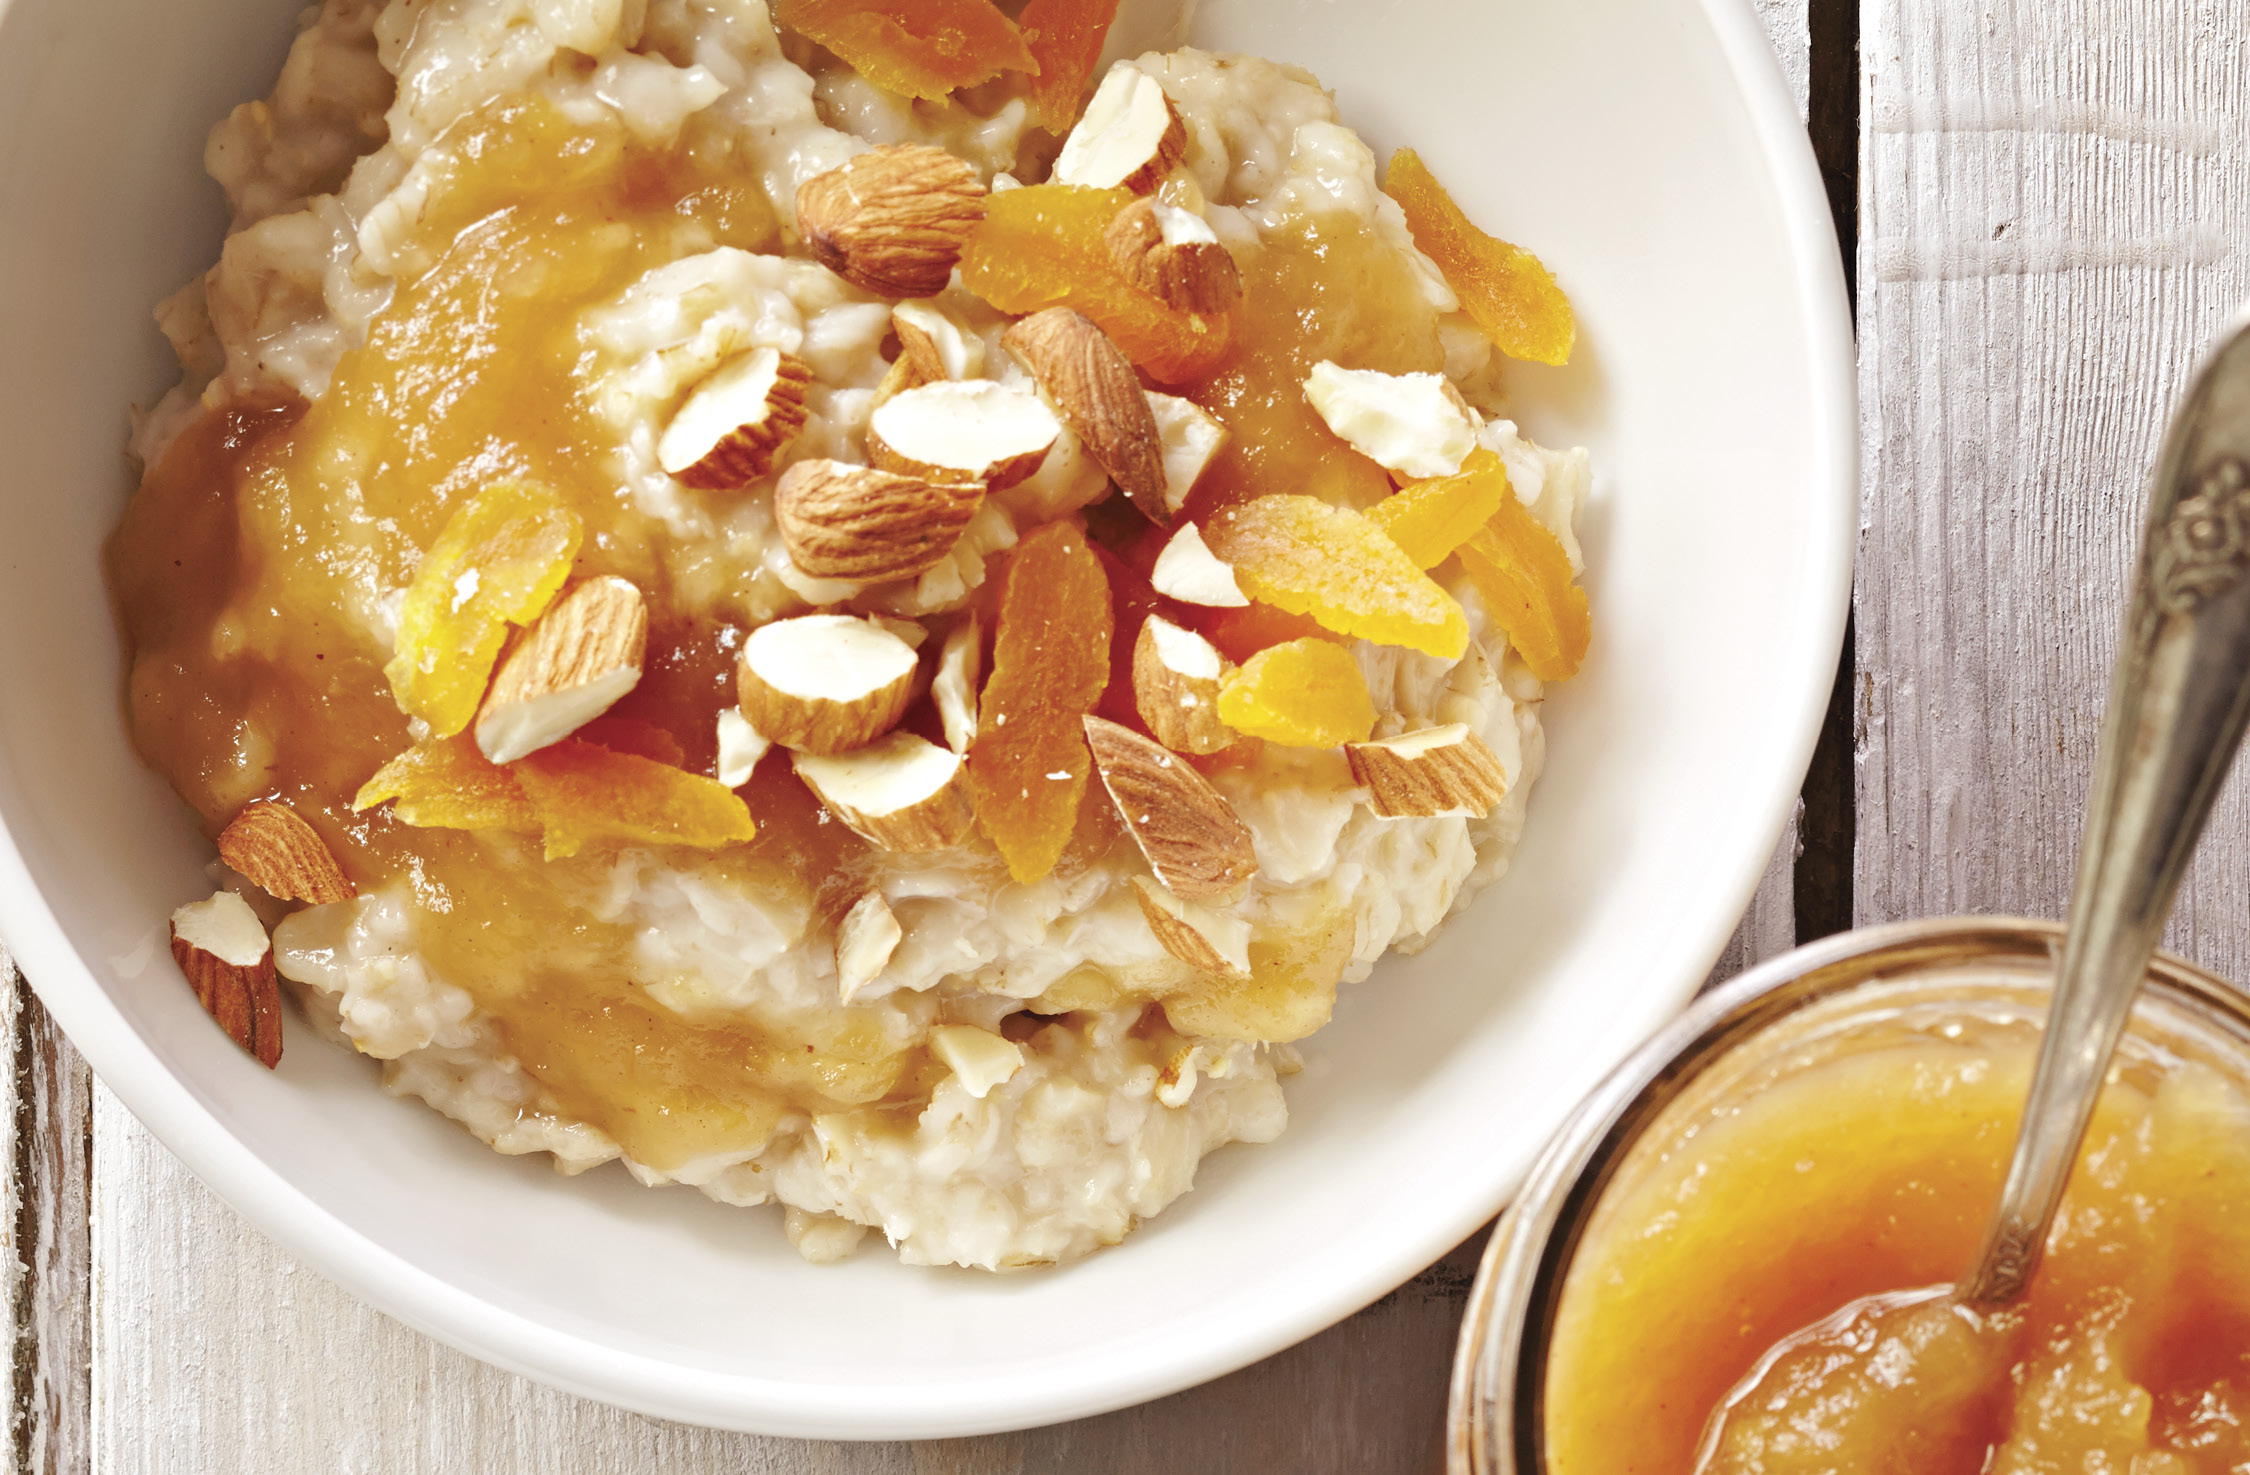
APPLE BUTTER
Applesauce
hands-on time 1 hour
cook 25 minutes
process 15 minutes
- 8 lb. cooking apples, cored and quartered (24 cups)
- 2 cups water
- ¼ cup fresh lemon juice
- ¾ to 1¼ cups granulated sugar
1. In an 8- to 10-qt. heavy pot combine apples, the water, and lemon juice. Bring to boiling; reduce heat. Simmer, covered, 25 to 30 minutes or until apples are very tender, stirring often.
2. Press apples through a food mill or sieve. Return pulp to pot; discard skins. Stir in sugar to taste. If necessary, add ½ to 1 cup water for desired consistency. Bring to boiling.
3. Ladle hot applesauce into hot, clean pint or quart canning jars (tips and photos, Cooking Class), leaving a ½-inch headspace. Wipe jar rims; adjust lids and screw bands.
4. Process filled jars in a boiling-water canner 15 minutes for pints and 20 minutes for quarts (start timing when water returns to boiling). Remove jars from canner; cool on wire racks.
Makes 6 pints or 3 quarts.
to freeze Place pot of applesauce in a sink filled with ice water; stir to cool. Ladle into clean wide-mouth half-pint or quart freezer containers, leaving a ½-inch headspace. Seal and label. Store in refrigerator up to 2 weeks or freeze up to 8 months.
each ½ cup plain and variations 81 cal., 0 g fat, 0 mg chol., 1 mg sodium, 21 g carb., 2 g fiber, 18 g sugars, 0 g pro.
Spiced Applesauce Prepare as directed, except add 10 inches stick cinnamon and 1½ tsp. apple pie spice in Step 1. Simmer as directed. Remove stick cinnamon and discard. Substitute ¾ cup packed brown sugar for the granulated sugar. Stir in enough additional brown sugar to taste (¼ to ¾ cup).
Very Berry Applesauce Prepare as directed, except replace 1 lb. (4 cups) of the apples with 1 lb. (4 cups) fresh or frozen thawed raspberries and/or strawberries and decrease water to 1½ cups in Step 1.
canning fruits with syrups
If you want to can fruits with syrup (chart, follows), choose the syrup that best suits your tastes. Sour fruits are best with heavier syrups; mild fruits are best with lighter syrups.
preparing syrup To prepare a syrup, place the recommended amounts (below) of sugar and water in a 3-qt. saucepan. Heat until sugar dissolves. Skim off any foam. Use the syrup hot for canned fruits and chilled for frozen fruits. Allow ½ to ⅔ cup syrup for each 2 cups fruit.
very thin syrup 1 cup sugar and 4 cups water to yield about 4 cups syrup.
thin syrup 1⅔ cups sugar and 4 cups water to yield about 4¼ cups syrup.
medium syrup 2⅔ cups sugar and 4 cups water to yield 4⅔ cups syrup.
heavy syrup 4 cups sugar and 4 cups water to yield about 5¾ cups syrup.
canning fruit
Wash all fruits with cool tap water, but do not soak them. Drain well and follow the preparation directions below. Also see notes on canning fruits with syrup (above).
fruit: apples & pears
PREP: Allow 2 to 3 lb. per quart. For apples, select varieties that are crisp, not mealy, in texture. Peel and core; halve, quarter, or slice; dip into absorbic-acid color-keeper solution (tip, p. 678); drain.
raw-pack: Not recommended.
hot-pack: Simmer fruit in syrup (syrups, opposite) 5 minutes, stirring occasionally. Fill jars with fruit and syrup, leaving a ½-inch headspace. For apples, process pints and quarts 20 minutes. For pears, process pints 20 minutes and quarts 25 minutes.
fruit: APRICOTS, NECTARINES & PEACHES
PREP: Allow 2 to 3 lb. per quart. To peel peaches (peeling nectarines and apricots is not necessary), immerse in boiling water 30 to 60 seconds or until skins start to split; remove and plunge into cold water. Halve and pit. If desired, slice. Treat with ascorbic-acid color-keeper solution (tip); drain.
raw-pack: Fill jars, placing fruit cut sides down. Add boiling syrup or water, leaving a ½-inch headspace (tip). Process pints 25 minutes and quarts 30 minutes. Do not raw-pack apricots. (Hot-packing generally results in a better product.)
hot-pack: Add fruit to hot syrup; bring to boiling. Fill jars with fruit (placing cut sides down) and syrup (syrups, opposite), leaving a ½-inch headspace (tip). Process pints 20 minutes and quarts 25 minutes.
fruit: berries
PREP: Allow 1 to 3 lb. per quart. Can or freeze blackberries, blueberries, currants, elderberries, gooseberries, huckleberries, loganberries, and mulberries. Freeze (chart) boysenberries, raspberries, and strawberries (do not can).
raw-pack: Fill jars with berries. Shake down gently. Add boiling syrup, leaving a ½-inch headspace (tip). Process pints 15 minutes and quarts 20 minutes.
hot-pack: Simmer berries in water 30 seconds; drain. Fill jars with berries and hot syrup (syrups, opposite), leaving a ½-inch headspace (tip). Process pints and quarts 15 minutes.
fruit: cherries
PREP: Allow 2 to 3 lb. per quart. If desired, treat with ascorbic-acid color-keeper solution (tip); drain. If unpitted, prick skin on opposite sides to prevent splitting. take this folio off since it overlaps photo and we have one on other page?
raw-pacK: Fill jars, shaking down gently. Add boiling syrup or water, leaving, a ½-inch headspace (tip). Process pints and quarts 25 minutes.
hot-pack: Add cherries to hot syrup (syrups, opposite); bring to boiling. Fill jars with fruit and syrup, leaving a ½-inch headspace (tip). Process pints 15 minutes and quarts 20 minutes.
fruit: rhubarb
PREP: Allow 1½ lb. per quart. Discard leaves and woody ends. Cut into ½- to 1-inch pieces. Freeze for best quality.
raw-pacK: Not recommended.
hot-pack: In a pot sprinkle ½ cup sugar over 4 cups fruit; mix. Let stand until juice forms. Bring slowly to boiling, stirring. Fill jars with hot fruit and juice, leaving a ½-inch headspace (tip). Process pints and quarts 15 minutes.