fermenting
this form of food preservation depends upon naturally occurring “good” gut-friendly flora (organisms) to convert natural sugars in foods into acids. the process creates a less-friendly environment for the bacteria that cause spoilage.
fermenting basics
Cultivating your own crop of good gut-friendly bacteria through fermenting is worth trying. Without getting too much into the science behind it, here’s the bottom line: Research shows that probiotics—such as the Lactobacillus strain—from fermented foods help aid digestion and boost immune health. In addition, studies show that fermentation increases the vitamin content and digestibility of those foods. Start by eating small amounts of fermented foods so your digestive tract can get used to these new little friends.
use only tested recipes from a reliable source (such as this book and the United States Department of Agriculture [USDA]). Do not alter the vinegar, salt, food, or water proportions in your recipe.
use additive-free salt, such as pickling salt or natural fine sea salt (tip, Fermented Whole Grain Mustard).
selecting and cleaning produce are important. Select only unblemished foods for fermenting. Bruises and cuts can breach the natural antimicrobial barriers of fruits and vegetables. Look for firm but ripe fruits and vegetables. Soft or overripe produce may contain undesirable yeasts and/or molds. Thoroughly rinse all produce that is to be used for fermentation. Most microbial pathogens are found on the surfaces of fruits and vegetables. When applicable, peel and/or trim produce before washing to reduce the risk of surface contamination.
food must remain fully submerged (at least 1 to 2 inches) under the brine while fermenting. If you don’t own fermenting weights that fit inside your container, use a dinner plate or glass pie plate weighted down to keep food submerged.
cover the fermentation container with a clean towel or cloth that keeps dust and particles out but allows air into the crock. Don’t use plastic wrap or any other airtight cover; this will disrupt the fermenting process.
A temperature range of 70°F to 75°F is ideal for fermentation to occur within the recipes’ recommended timings. At 60°F to 65°F, fermentation will take considerably longer. Avoid fermenting foods at temperatures higher than 75°F due to the risk of spoilage. After fermenting the food at room temperature for the recommended times, store it in the refrigerator to halt the process.

about crocks
It’s important to select the proper size and type of container for fermentation. A general rule is to use a 1-gal. vessel for every 5 lb. of fresh vegetables. Use only food-safe ceramic, glass, or plastic containers with straight edges. Avoid using metal containers that might react with the acids in the foods.
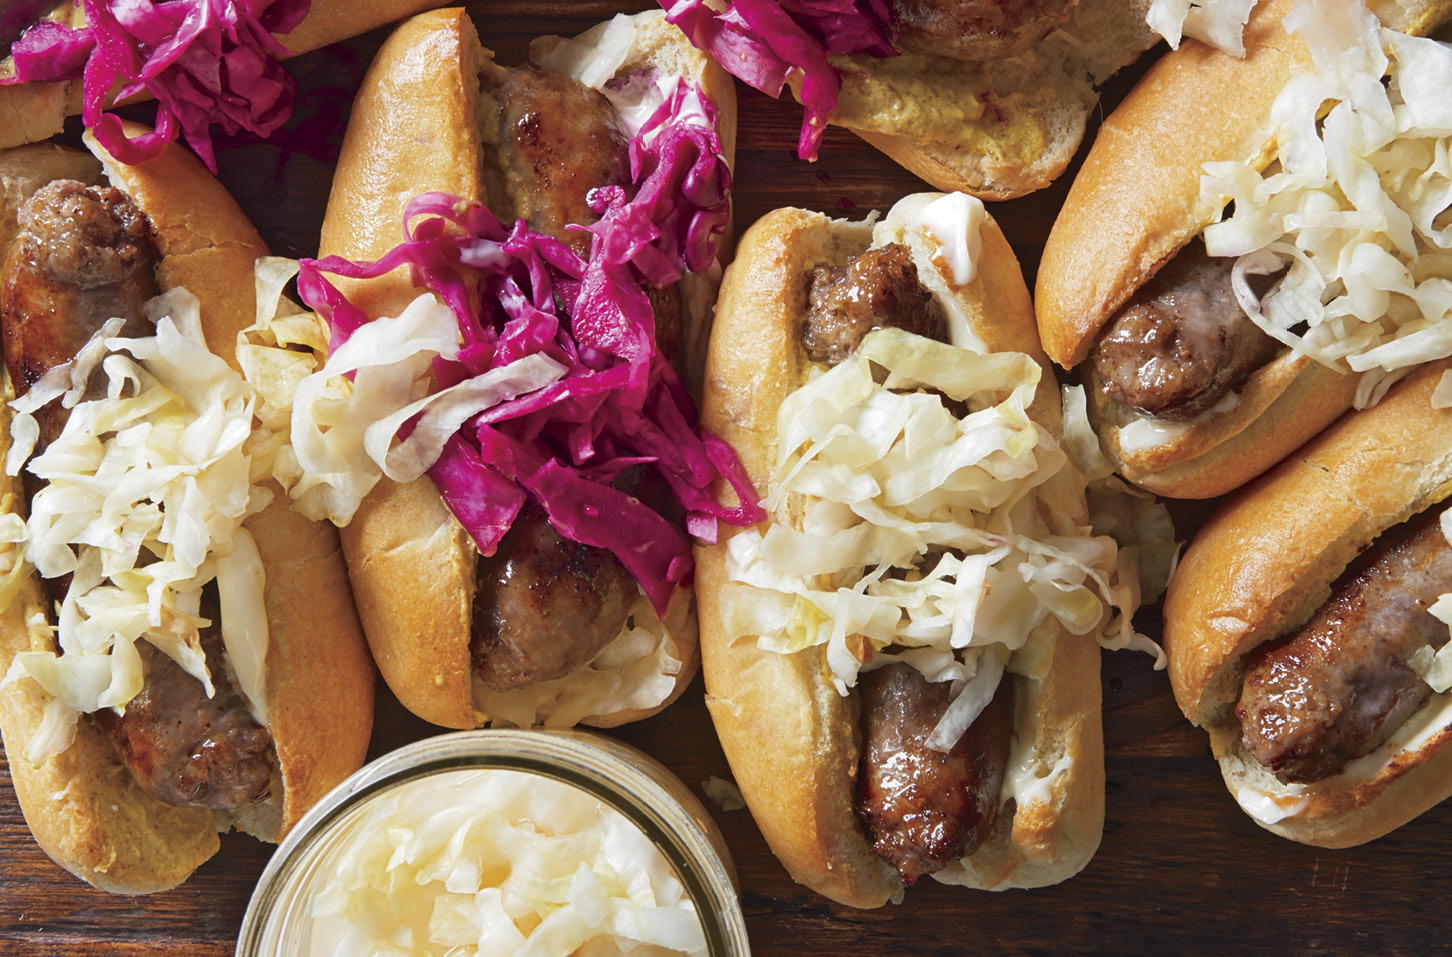
Homemade Sauerkraut
hands-on time 45 minutes
stand 2 hours + 10 minutes
ferment 3 weeks
- 3 to 4 lb. green or red cabbage
- 1½ Tbsp. pickling salt (tip, Fermented Whole Grain Mustard)
- 1 Tbsp. sugar
- 4 tsp. pickling salt
1. Remove outer leaves from cabbage. Quarter cabbage heads lengthwise; remove cores. Using a mandoline, food processor, or large chef’s knife, finely shred cabbage. Measure 2½ lb. shredded cabbage.
2. Place the 2½ lb. shredded cabbage in a large ceramic crock, glass container, or plastic food container that holds at least 1 gallon. Add the 1½ Tbsp. pickling salt and the sugar. Using very clean hands or tongs, toss cabbage with pickling salt and sugar. Let stand 10 minutes. Using a clean, heavy plate that fits just inside the container, press plate down on cabbage. Let stand at room temperature 2 to 24 hours, tossing cabbage and pressing plate down on cabbage every hour or until enough liquid is released to cover cabbage by at least 1 inch. (If the cabbage does not release enough liquid, you will need to add additional brine to the cabbage. Make a brine by combining water and pickling salt in a ratio of 1 cup water to 1 tsp. pickling salt; add just enough of this brine to cover the cabbage.)
3. Place a large resealable plastic bag filled with 1 qt. water plus the 4 tsp. pickling salt (or a clean 1-gal. jug full of water) on the plate to weight it down. Cover container with a clean dishcloth or loose-fitting lid. Place container in a cool place out of direct sunlight to ferment. At temperatures between 70°F and 75°F, fermentation will take 3 to 4 weeks; at 60°F to 65°F, fermentation will take 5 to 6 weeks.
4. Every 2 or 3 days, replace dishcloth with a clean dishcloth, skim off any scum that forms on surface of cabbage, and clean and replace the plate. If any discolored cabbage appears at the top, remove and discard it. If the water level gets too low, add enough brine to cover. It must be submerged completely in brine to ferment safely. The sauerkraut is ready when it has a slightly crunchy texture and pleasantly tangy flavor.
5. Transfer undrained sauerkraut to canning jars or airtight containers; seal and label. Store in the refrigerator up to 2 months.
Makes 8 cups.
each ¼ cup 10 cal., 0 g fat, 0 mg chol., 338 mg sodium, 2 g carb., 1 g fiber, 2 g sugars, 0 g pro.
Safety Rules (illo coming of a fermentation crock)
1. Use only tested recipes
2. Use only additive-free salt,
3. Cover 4. Food must remain fully submerged
The White Stuff
Did a white film or residue appear on the surface of your sauerkraut or hot sauce while it was fermenting? No worries. What you’re seeing are wild yeasts that tend to form at the higher end of the fermenting temperature range—and they are completely safe. Skim off what you can and continue with the recipe as directed. However, if furry, colorful mold appears on the surface, or if you detect an unpleasant odor, throw out the food and start over.

Combine the shredded cabbage with pickling salt and sugar, tossing and squeezing the cabbage with your hands to help it release liquid.

Pack the cabbage, along with its liquid, into a container and cover with a plate.

Press the cabbage down with a weight, allowing the liquid to rise above the cabbage and around the edges of the weight on the plate.
Fermented Whole Grain Mustard
hands-on time 10 minutes
stand 26 hours
chill 3 days
- ¾ cup cider vinegar
- ⅓ cup yellow mustard seeds
- ⅓ cup brown mustard seeds
- 1 tsp. fine sea salt
- 3 Tbsp. honey
- 2 cloves garlic, peeled
- 1 Tbsp. liquid whey*
1. In a medium bowl combine vinegar, yellow and brown mustard seeds, and salt. Cover and let stand at room temperature 24 hours (the seeds will absorb some of the liquid).
2. Place mustard seed mixture, honey, garlic, and whey in a food processor. Cover and process 1 to 2 minutes until a thick, chunky paste forms. Spoon into a clean 2-cup crock; cover tightly. Let stand at room temperature 2 hours. Refrigerate 3 days to blend flavors before serving. Store in the refrigerator up to 2 months.
Makes 1 ⅓ cups.
*Note For liquid whey, place 6 oz. (¾ cup) plain yogurt (do not use Greek yogurt or yogurt that contains gelatin) in a fine-mesh sieve lined with 100%-cotton cheesecloth or a coffee filter. Place the sieve over a small bowl. Cover and chill 24 hours. The liquid that collects in the bowl is whey. Save the yogurt to serve as a dip or with desserts. (Or purchase liquid whey from a health food store.)
each 1 tsp. 12 cal., 1 g fat (0 g sat. fat), 0 mg chol., 35 mg sodium, 1 g carb., 0 g fiber, 1 g sugars, 0 g pro.

Fermented Whole Grain Mustard
SALT for fermentation needs to be free of additives such as potassium, iodine, and anticaking agents, which could impede the fermentation process.
Kimchi
hands-on time 20 minutes
stand 4 hours + 10 minutes
ferment 2 days
- 1 medium head napa cabbage
- 3 Tbsp. kosher salt
- ½ cup coarsely shredded daikon or carrots
- ½ cup coarsely shredded carrot
- ¼ cup chopped green onions
- 2 Tbsp. fish sauce
- 1 to 2 Tbsp. Korean chili powder or flakes (gochugaru) (tip, opposite)
- 1 Tbsp. grated fresh ginger
- 2 cloves garlic, minced
- 1 tsp. sugar
1. Remove any wilted outer leaves from cabbage. Core and chop cabbage into 2-inch pieces. Measure 12 cups cabbage pieces. Toss cabbage with the 3 Tbsp. kosher salt; place in a large colander set over a bowl. Let stand 2 to 3 hours or until wilted.
2. In a large clean bowl combine the remaining ingredients. Rinse cabbage; drain well. Add cabbage to daikon mixture; toss to combine. Let stand 10 minutes.
3. Transfer cabbage mixture to a large ceramic crock, glass container, or plastic food container. Using a clean, heavy plate that fits just inside the container, press plate down on cabbage mixture. Let stand at room temperature 2 to 24 hours (5 to 24 hours if fermenting in the refrigerator), tossing cabbage and pressing plate down on cabbage every hour or until enough liquid is released to cover cabbage by at least 1 inch. (If the cabbage does not release enough liquid, you will need to add additional brine to the cabbage. Make a brine by combining water and kosher salt in a ratio of 1 cup water to 1 tsp. kosher salt; add just enough of this brine to cover the cabbage.)
4. Place a large resealable plastic bag filled with 1 qt. water plus 4 tsp. kosher salt over the plate to weight it down. Cover container with a clean dishcloth.
5. To ferment at room temperature, set container in a cool place out of direct sunlight; let stand 2 to 3 days. To ferment in the refrigerator, chill 3 to 6 days. The kimchi is ready when it is bubbling.
6. Transfer kimchi to jars or airtight containers; seal and label. Store in the refrigerator up to 3 weeks.
Makes 4 cups.
each ¼ cup 15 cal., 0 g fat, 0 mg chol., 561 mg sodium, 3 g carb., 1 g fiber, 1 g sugars, 1 g pro.

KIMCHI
what is kimchi? This spicy fermented cabbage mix is a korean condiment that’s spooned over rice, noodles, eggs, and stir-fries.
Gochugaru
Korean chili powder is a traditional ingredient in authentic kimchi and is available in mild or hot varieties. Look for it in Asian or specialty food stores and online. Store the opened bag in the freezer.
Sriracha-Style Asian Chili Sauce
hands-on time 25 minutes
ferment 8 days
cook 5 minutes
- 1½ lb. hot red chile peppers, such as Thai, stemmed and chopped (tip)
- ¼ cup packed brown sugar
- ¼ cup water
- 1 Tbsp. kosher salt
- 5 cloves garlic, smashed and peeled
- ½ cup rice vinegar
- 1 tsp. fish sauce (optional)
1. In a food processor or blender combine chile peppers, brown sugar, the water, salt, and garlic. Process 3 minutes or until smooth.
2. Transfer mixture to a 2-qt. food-safe ceramic, glass, or plastic bowl or container. Cover with a clean dish towel or 100%-cotton cheesecloth. Place in a dark, dry place at room temperature and let stand 8 days to ferment, stirring once every day. After 2 to 3 days, you should notice bubbling in the mixture, showing that fermentation is occurring.
3. Return mixture to food processor or blender. Add vinegar. Cover and process until very smooth. Strain mixture through a fine-mesh sieve into a 3-qt. saucepan; discard solids.
4. Bring to boiling; reduce heat. Simmer, uncovered, 5 to 10 minutes or until slightly thickened, stirring frequently (the sauce will thicken a bit more as it cools). Remove from heat. If desired, stir in fish sauce. Cool to room temperature.
5. Transfer chili sauce to canning jars or airtight storage containers. Seal and store in the refrigerator up to 6 months.
Makes 1¾ cups.
each 1 tsp. 7 cal., 0 g fat, 0 mg chol., 71 mg sodium, 1 g carb., 0 g fiber, 1 g sugars, 0 g pro.

SRIRACHA-STYLE ASIAN CHILI SAUCE
cooking class
First rule of making Kombucha—embrace the SCOBY (symbiotic culture of bacteria and yeast). The SCOBY starts as a residue on the surface of sweetened green or black tea. it gets thicker, growing to fill the diameter of the jar, all the while working its (good) bacterial magic as it ferments.

safety first
Altering ingredients, method, and/or timings of this tested recipe can compromise its safety.
Keep it clean
Wash all containers and utensils that will be used to make Kombucha with hot, soapy water; rinse well. Scrub your hands and nails before handling the SCOBY.
scoby dos
Cover the fermented mixture with clean cheesecloth or a paper towel to keep out dust, dirt, pests, and anything else that might disrupt fermentation.
Look closely
Fermenting involves a delicate balance of organisms. If your Kombucha or SCOBY looks moldy (furry) or has an off smell, discard the mixture and start over.
temp tip
Kombucha fermenting works best in a temperature that is on the warmer side. Keep it between 70°F and 75°F.
To store SCOBY
Place SCOBY in a clean jar in enough homemade or purchased kombucha to cover. Cover jar and store in the refrigerator up to 1 month.
Health Claims
Kombucha tea drinkers claim its health benefits include promoting digestion, strengthening the immune system, and aiding in a variety of other ailments. Currently there are not enough scientific studies to support these claims, so the tea should not be used to treat any illness. Talk to a doctor if you are pregnant, nursing, or have any health concerns. As with many consumables, Kombucha should be enjoyed in moderation. Start by drinking small amounts and keep the total to about 8 oz. or less a day.
A Little History
Kombucha tea is thought to have originated in East Asia more than 2,000 years ago. It was introduced to Europe in the early 20th century; its popularity spread to the United States in the 1990s. Look for purchased kombucha in supermarkets (it’s widely available). You’ll need it to start your batch.

The SCOBY
A SCOBY looks like a pancake and feels gelatinous. It can vary in texture and color but is usually creamy tan.
To make SCOBY
To make your own SCOBY, bring 4 cups water to boiling. In a large heatproof glass bowl or pitcher combine the boiling water and ½ cup sugar; stir to dissolve. Add 4 black tea bags. Let stand 1 hour. Remove tea bags. Stir in 3 cups water. Transfer to a clean 2- to 3-qt. jar. Stir in 1 cup purchased plain kombucha. Cover jar with 100%-cotton cheesecloth or paper towels and secure with a rubber band. Let stand in a dark place where the temperature is between 70°F and 75°F for 3 weeks. Remove SCOBY with clean hands; discard liquid. You can also purchase a SCOBY online (use reliable sources only).
Kombucha
hands-on time 20 minutes
stand 1 hour
ferment 1 week
- 14 cups water
- 1 cup sugar
- 8 black tea bags
- 2 cups purchased plain kombucha
- 1 recipe SCOBY (opposite)
1. Bring 4 cups of the water to boiling. In an extra-large heatproof glass bowl or pitcher combine the boiling water and sugar; stir to dissolve. Add tea bags. Let stand 1 hour or until cool. Remove and discard tea bags. Add the remaining 10 cups water and the purchased kombucha. Transfer to a clean 1-gal. jar. Add SCOBY. Cover jar with paper towels and secure with a rubber band. Let stand in a dark place where temperature is between 70°F to 75°F for 1 week.
2. Remove SCOBY with clean hands and store (tip, opposite). If desired, reserve enough Kombucha (2 cups) to make another batch of Kombucha. If desired, strain remaining Kombucha through a sieve lined with 100%-cotton cheesecloth; transfer to clean bottles with swing-top seals, leaving a 2-inch headspace. Seal bottles. To carbonate, let stand in a dark place where temperature is between 70°F and 72°F for 2 to 3 days. Store in the refrigerator up to 1 month.
Makes 16 cups.
each 1 cup 53 cal., 0 g fat, 0 mg chol., 10 mg sodium, 14 g carb., 0 g fiber, 13 g sugars, 0 g pro.

Ginger Kombucha Prepare as directed through Step 1. Remove SCOBY. Add 1 oz. fresh ginger, peeled and thinly sliced, to the jar. Cover and chill 1 to 2 weeks. Remove and discard ginger. Continue with Step 2.
Orange Kombucha Prepare as directed through Step 1. Remove SCOBY. Add 1 orange, peeled and thinly sliced, to the jar. Cover and chill 1 to 2 days. Remove and discard orange slices. Continue with Step 2.

THIS GLASS JAR is a USDA-approved 1-gallon container perfect for brewing Kombucha (without the lid).
pick a bottle
Measure out and store prepared Kombucha in resealable glass bottles. The swing-top cap creates an airtight seal that ensures successful carbonation for maximum fizziness. Plus, they’re reusable.