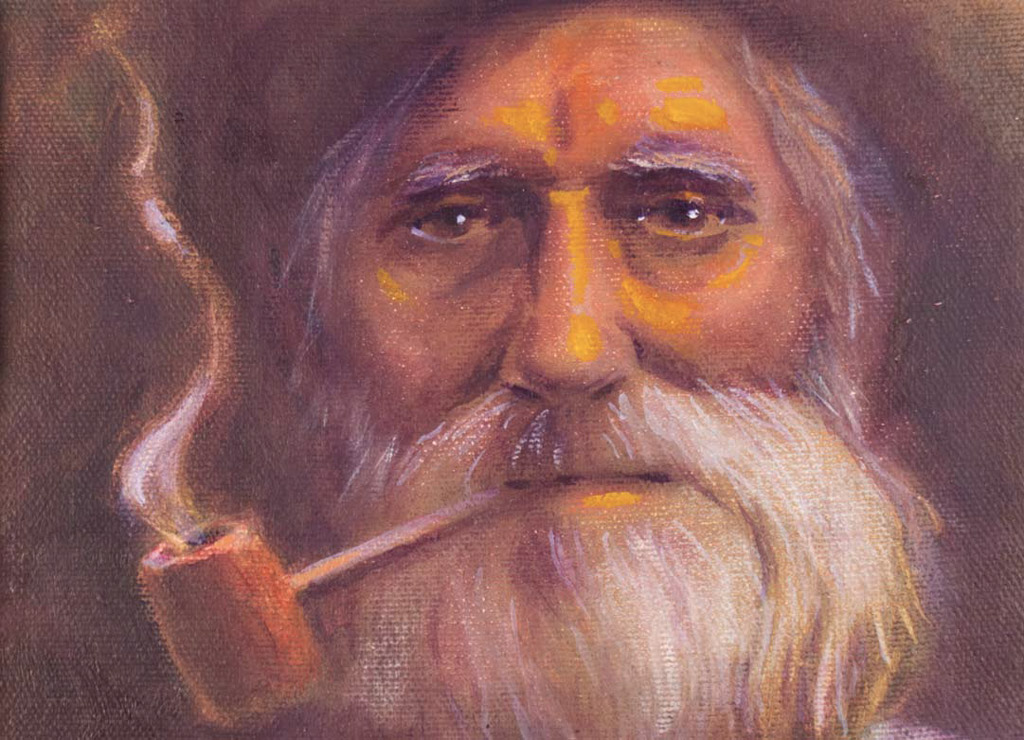
Smoke and Shadows
oil on stretched canvas
5" × 7" (13cm × 18cm)
Now that you know about materials and basic principles, it's time to have some fun learning about and practicing oil painting techniques. It's important to understand these techniques and the results they produce. Once you become comfortable with these different painting techniques, it will be easy to choose techniques that will create the desired effects. For example, the fast-paced nature of alla prima painting is well suited to painting en plein air, while glazes are more appropriate for painting a detailed portrait. Keep your supplies handy so that you can actively participate in this chapter.

oil on stretched canvas
5" × 7" (13cm × 18cm)
Mixing the paint is one of the joys of oil painting. For the best results, use the correct colors and mix enough paint for the size of your painting. In general, make sure the paint is blended thoroughly on the palette. However, sometimes you may want to blend the paints on the painting surface rather than on the palette. Mixing is fun and easy once you learn some of these simple suggestions.
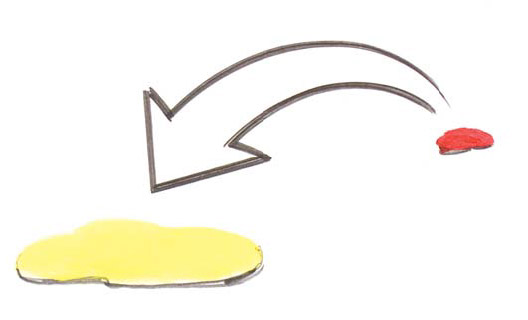
Dark colors are more dominant than light colors. When mixing paint, start with the lighter color then add small amounts of the darker color. If you try to do the reverse, you may have to mix more paint than you need to get the color you want. Similarly, when placing paints on your palette, add pea-size amounts of the dark colors and be a bit more generous with the light colors. You can always add more paint as you go, but it's hard to keep oil paints fresh once they have been placed on the palette.
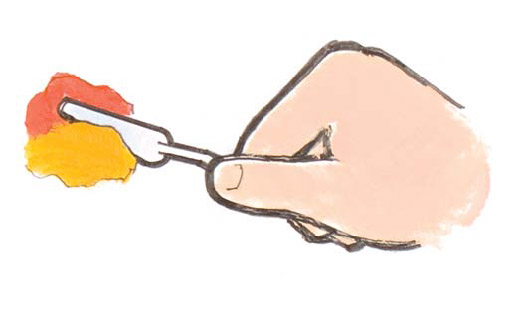
Though it is common to use the brush that you are painting with to mix paint, a palette knife is also useful for mixing paint. Try mixing some paint with a brush, then switch to a palette knife. With the knife, you can scoop freely without clogging or damaging your brush.
When using thinner or medium, avoid dragging the brush against the lip of the palette cup so the paint doesn't release from the brush into the cup and dirty the thinner or medium.
How much paint do you want on your brush? The amount of paint you load on a brush depends on how you plan to apply the paint. Push loading and pull loading are two ways to load a brush. Use the push loading method if you want to grab a lot of paint onto your brush for applying a thick layer of paint. Use the pull loading method to load a smaller amount of paint onto your brush.
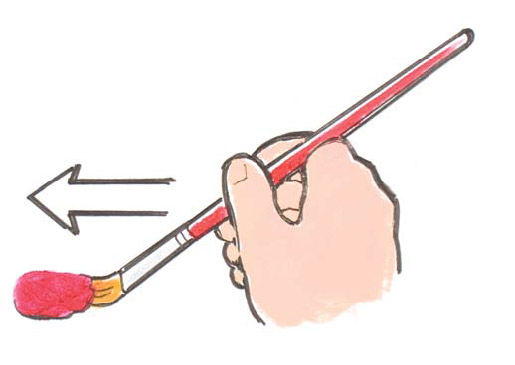
This method involves pushing the brush into the paint. Pushing the brush is hard on the hairs. For this reason, flat and filbert bristle brushes work best for the push loading method. If you push a round brush into your paint, it will splay the bristles, ruining its nice tip.
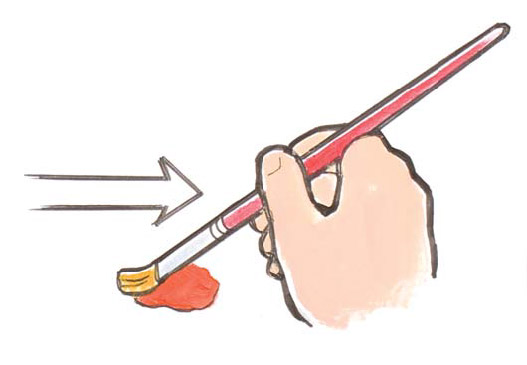
This method requires pulling the brush into a quantity of paint on the palette. The angle of the brush determines how much paint is put onto the brush.
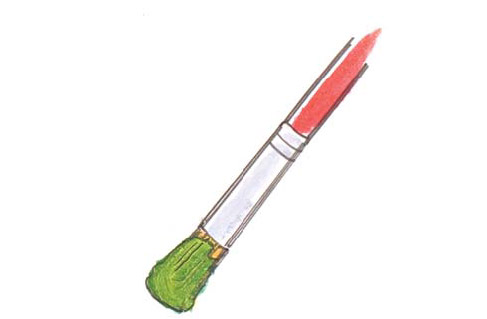
Paint brushes work best when they are not overloaded with paint. Overloading makes the paint harder to control, and paint worked into the ferrule can damage the brush. If the brush becomes choked with paint, wipe it clean.
If you want just a bit of paint on the tip of your brush, use the push loading method to jab the tip of your brush into your paint.
Thorough cleaning is essential for maintaining brushes. Proper care of brushes ensures that you get the most use out of them. Be gentle with fine hair and round brushes while using or cleaning them.
Be careful with your brushes. If the hairs are splayed too much, they can become permanently damaged and never return to their intended shape.
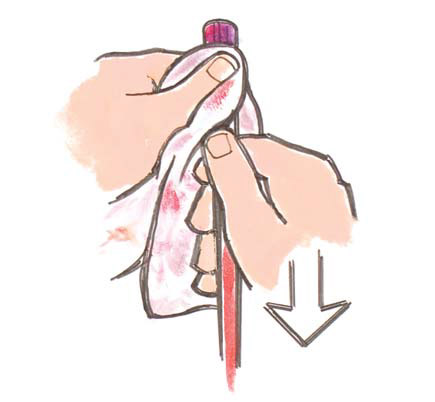
To remove paint from a brush, wrap it with a paper towel or rag, then squeeze the bristles with one hand and pull the brush through the towel with the other hand.
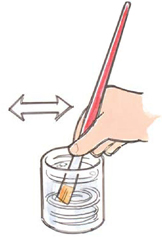
Swish the brush back and forth in a brush wash. If necessary, drag the brush along the screen or coil to remove paint from the brush.
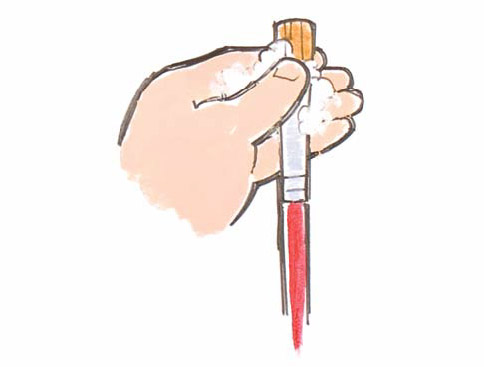
One of the best benefits of using water-soluble paints is that brushes can be cleaned with just soap and water. Brush soap or cleaner comes in liquid, gel or bar form. After your brush is clean, many of these special soaps can be left lathered on your brush to shape and condition the bristles. Just follow the manufacturer's instructions. After cleaning, reshape the brush hairs and let dry.
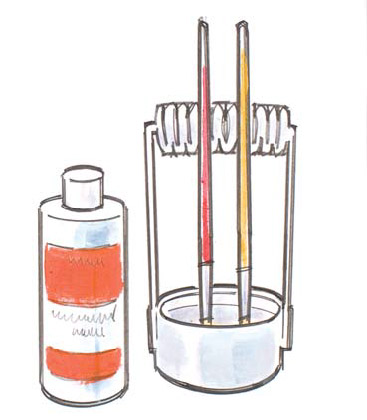
Soak brushes gummed up with old paint in a brush cleaner. Just follow the manufacturer's directions, then clean the brushes with soap and water, reshape their bristles and let dry.
The way you hold a brush affects the types of brushstrokes it makes, from big and bold to small and detailed. Here are some common ways to hold a brush for oil painting.
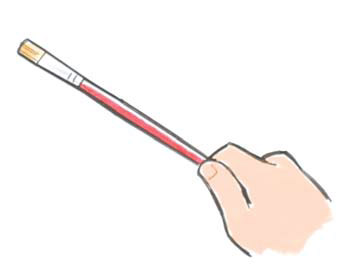
Like a music conductor, hold the brush with the end under the palm. This grip is good for creating loose strokes while standing at a distance from the painting.
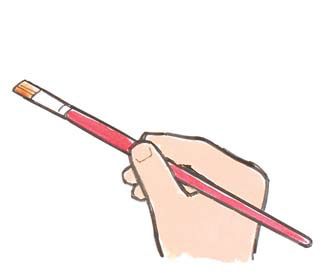
This grip places the middle of the handle over the hand for more controlled stokes.
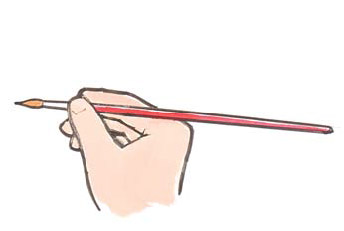
Holding the brush at the ferrule is good for making smaller, detailed strokes. Use a mahlstick to ensure steady paint application.
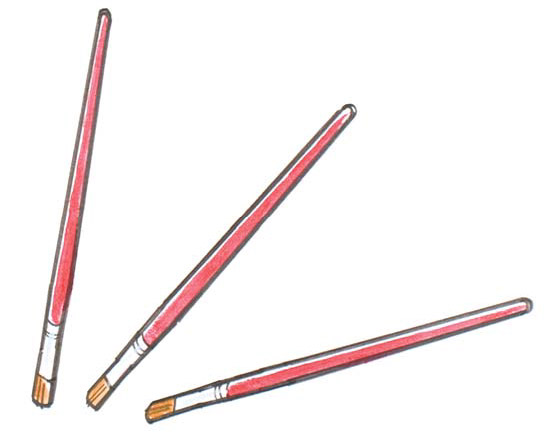
The angle of the brush in relation to the painting surface can affect the texture and application of the paint. To move and spread paint, I may work with the brush perpendicular to the painting surface. To blend the paint, I may angle the brush more. To dab heavy paint onto wet paint, I may position the brush more parallel to the painting surface. This will probably become natural to you as you practice your painting techniques.
A single brush can make many different strokes, and these strokes can be altered by your grip and the angle of the brush. Here are some practical tips for common brushstrokes used in oil painting.
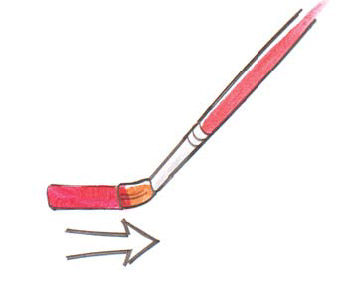
Make this stroke with the brush edge perpendicular to the direction of the stroke to use the width of the bristles.
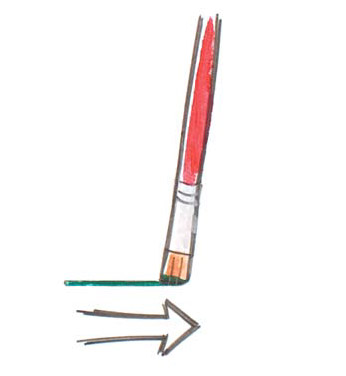
Make thin strokes with a flat or filbert by holding it perpendicular to the painting surface so that only the edge touches the painting surface, then pull the brush sideways to draw a line.

To deposit paint on a wet surface, place the loaded brush almost flat to the surface and dab with the flat part of the brush.
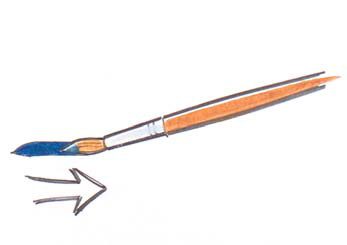
To make this stroke, lay the round brush somewhat flat to the painting surface, making contact with the body rather than the tip of the brush.
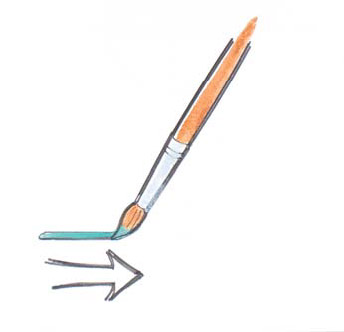
Small rounds and riggers can make thin strokes easily. If using a large round, keep the brush upright so that only the tip touches the paint surface.
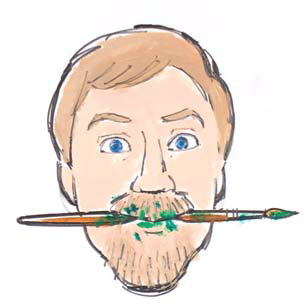
Even though water-soluble paints don't require toxic solvents, some pigments such as cadmium are health hazards. Don't put any part of the brush in your mouth because it may have paint on it.
During the painting process, any combination of techniques can be used to apply the paint. Though there are many different ways to paint the same subject, through experience you will discover the techniques that you enjoy most for achieving the look that you like. The more you paint, the more comfortable you will be when you do it. Here are some basic techniques to explore.
To allow proper adhesion and to prevent cracking and flaking, apply paint with more oil or “fat” over leaner, less oily paint. This is especially important if the paint is drying between layers. If you are going to work on the same painting for more than one session, add a little medium or oil to the paint.
Start with thinner layers of paint and work gradually toward thicker layers. Working this way allows the initial layers to dry before the subsequent layers. This is especially important when working in multiple painting sessions or if the paint has dried between layers because it helps prevent the paint from cracking over time. If you add a layer of thin paint over a thick layer of previously applied and dried paint, your painting is liable to crack.
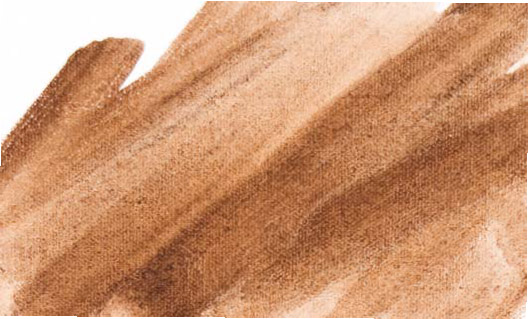
A wash is a transparent application of paint that has been diluted with water or thinner. Commonly used to lay a ground, this technique can be used singularly or with other techniques.

Glazing involves applying thin, fluid paint over dry layers. This technique can achieve finely detailed results, but the drying time necessary for multiple layers can be a problem.
Drying time can vary with each paint color, so research the manufacturer's information and take this into consideration when painting with methods that involve drying time between layers of paint.

This technique involves brushing undiluted paint over dry paint. Some of the dry paint's color and texture will show through the newly applied paint. The difference between glazing and scumbling is that with scumbling the paint is undiluted.
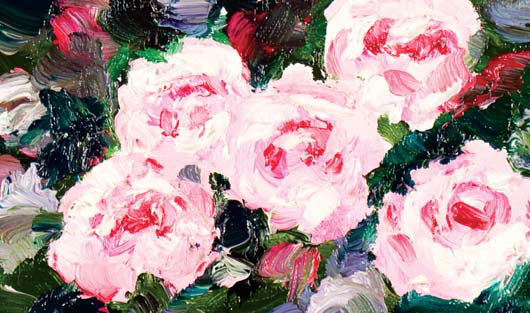
Italian for “paste” or “dough,” impasto refers to thick applications of paint. This method of painting can use much more paint than other methods, such as glazing.
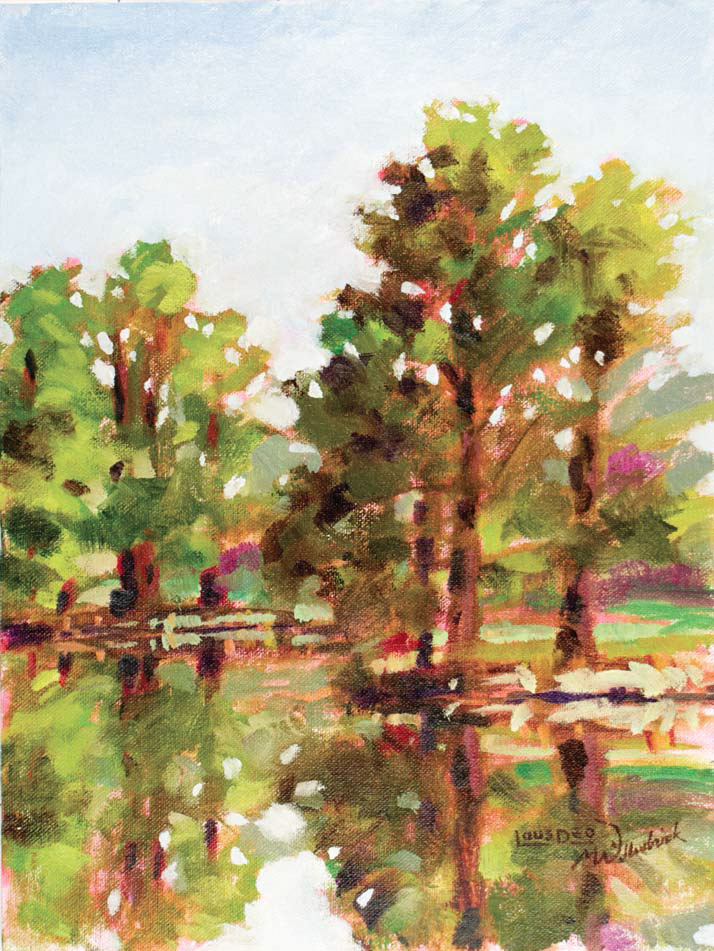
oil on canvas on board
12" × 9" (30cm × 23cm)
This technique derives its name from the Italian, meaning “at first.” To use this method, quickly paint the painting, in general, as it will appear when it is completed. After laying down the structure and colors, add details to complete it. Quick, single-session plein air paintings are often completed in this manner.
Quick, single application painting techniques, such as alla prima, are considered direct painting, whereas techniques that require multiple layers, such as glazing, are termed indirect painting.
With this exercise you will learn how to paint wet-into-wet. It starts with the paint surface covered with wet paint, and then wet paint is added and blended. For an inexpensive practice surface, try painting on a small sheet of canvas pad taped on all four sides to board mounted on your easel. Experiment with different colors and different sizes of flat or filbert brushes as you try these exercises.
5" × 8" (13cm × 20cm) canvas
Magenta, Yellow Ochre
no. 8 or 1⁄2-inch (12mm) flat
no. 12 or 1-inch (25mm) flat
palette, palette knife, rags or paper towels, easel, smock or apron, water, brush wash
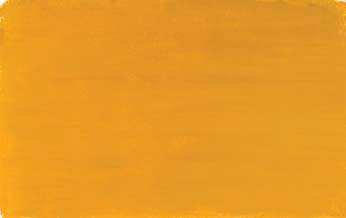
Paint a base color of Yellow Ochre over the painting surface with a no. 12 flat.
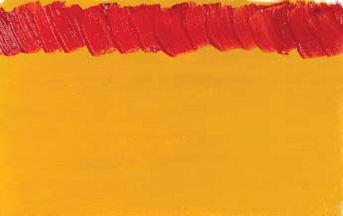
With a no. 8 flat, paint Magenta at the top over the wet base color. Do not begin blending yet.
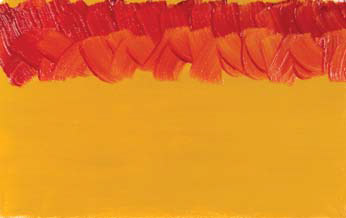
Brush the previously applied Magenta over the Yellow Ochre with crisscross strokes, starting at the top corner and working one row across.
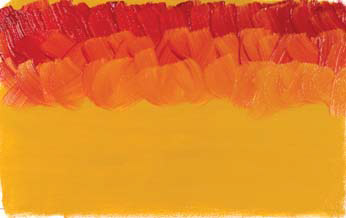
Repeat the previous step, moving down and working the next row across. Repeat with as many rows as necessary to accomplish the desired blend. Don't be tempted to go back or jump ahead in the process, as this will interrupt the smooth transitional look.
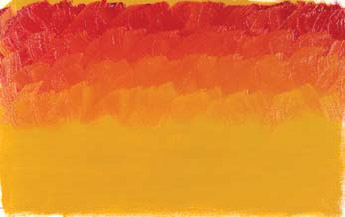
Brush with crisscross strokes, starting at the beginning and continuing over the sections already worked to blend the colors more evenly.
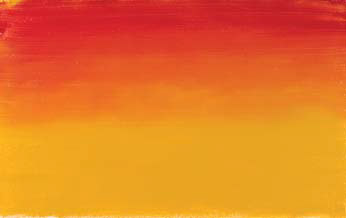
For a smoother finish, start at a top corner with a clean brush and pull it all the way across the canvas. Move down and work the next row across from the opposite direction. Continue back and forth in this manner, working down row by row. Repeat this process so that the colors blend seamlessly into each other.
This method is similar to painting wet-into-wet, except that the base color is dry, so the paint mixing characteristics are different. You can apply a thin base color or even use a wash if you want it to dry more quickly.
5" × 8" (13cm × 20cm) canvas
Dioxazine Purple, Magenta
no. 8 or 1⁄2-inch (12mm) flat
no. 12 or 1-inch (25mm) flat
palette, brush wash, palette knife, rags or paper towels, easel, smock or apron
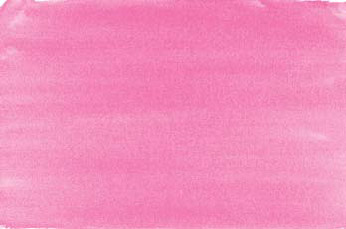
Paint a base color of Magenta over the painting surface with a no. 12 flat and allow the paint to dry.
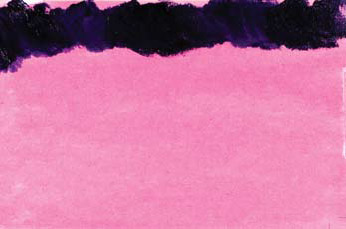
Paint Dioxazine Purple over the Magenta with a no. 8 flat. Do not start blending yet.
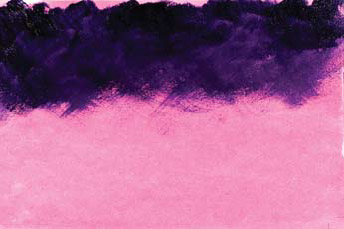
With crisscross strokes, start at a top corner and work one row across, brushing the Dioxazine Purple over the Magenta. The Dioxazine Purple will gradually become thinner, allowing the Magenta to show through.
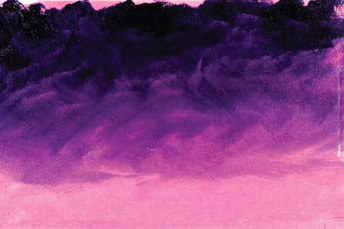
Repeat the previous step by moving down and working one row across, then the next row and so on. Repeat as necessary. Do not go back or jump ahead in the process, as this will interrupt the smooth transitional look.

For a smoother appearance, start at the top corner with a clean brush and pull the brush across the surface. Move down and pull the brush in the opposite direction. Continue working down row by row until completed. You can repeat this process if you want the colors to blend seamlessly into each other.
Some artists enjoy the unique results and thick textural effects they can create by painting with palette knives. Use palette knives to complete an entire painting, or use them to accent or aid in the process of painting, such as to smooth out or remove a heavy buildup of paint.
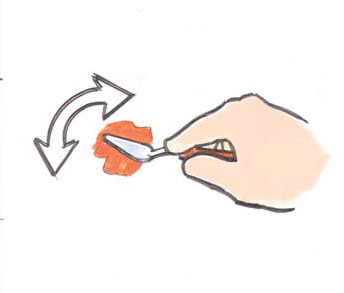
Scoop paint onto the underside of the knife, then squish the paint onto the painting surface and spread.
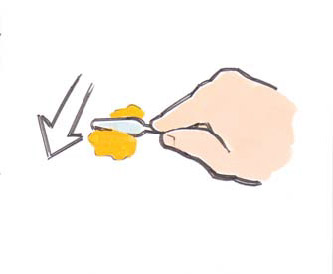
Use the knife to move or thin paint from one region of the surface to a different region. Place the back of the knife edge perpendicular to the painting surface and pull it through the paint.
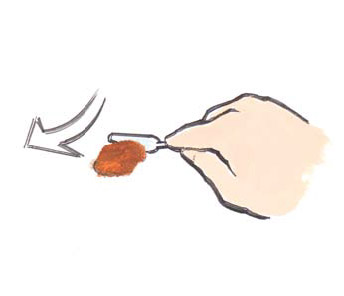
To lift paint, place the front edge of the palette knife on the painting surface and pull it under the paint, scooping it onto the knife.
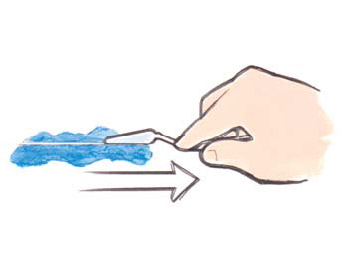
Deposit or remove paint by placing the edge perpendicular against the paint surface and pulling sideways. Scraping the knife tip up and down is a common technique for indicating grass.
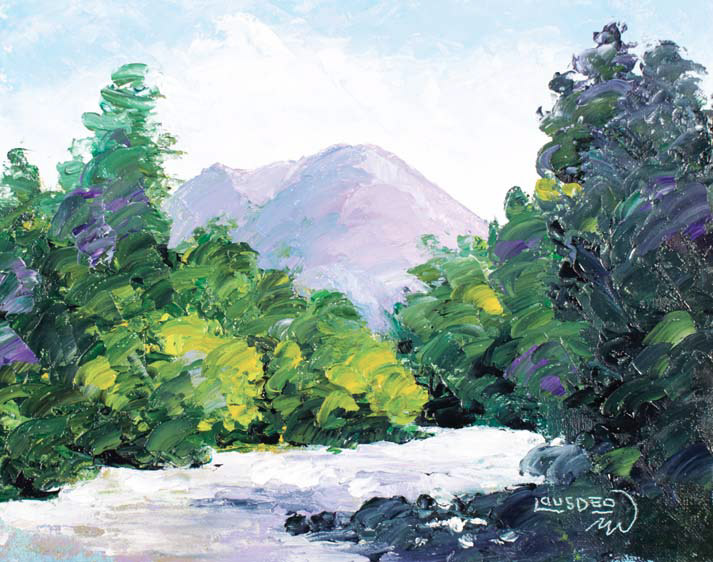
Palette knife painting can bring out your creativity. Try experimenting with different palette knives for different results.
Oil painting is changeable. During the painting process, you may want to remove or change a small spot or an entire region of wet paint. Knowing how to lift and wipe off paint is especially useful for washes, glazes and underpainting.
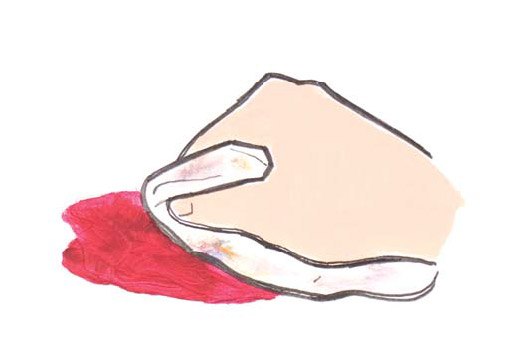
Simply wipe up the excess paint with a flattened rag or paper towel. Use a lint-free rag or paper towel to avoid leaving unwanted fibers. Twist the rag or paper towel to make a smaller end to lift paint from a small space.
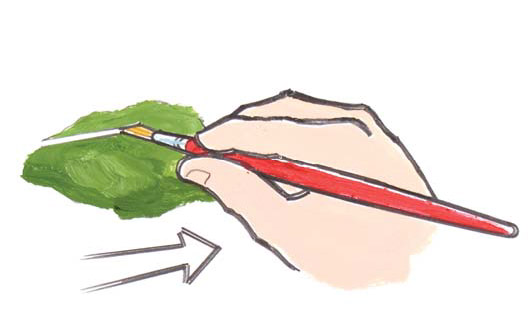
Especially good when working with washes, flat brushes can be used to chisel away or lift unwanted paint.
You can also use a credit card, rag or paper towel to spread or remove paint.
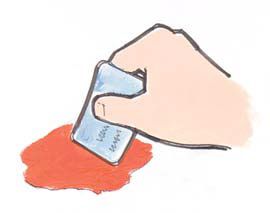
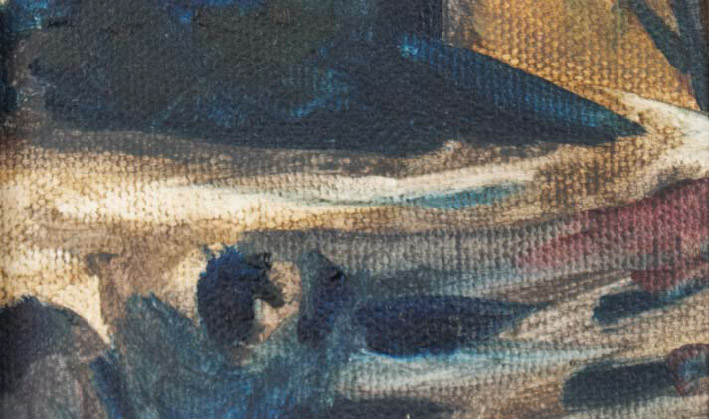
Lifting paint is part of the painting process, and lifted areas can become part of the finished painting.
Positive and negative painting refers to the direct or indirect way the forms are made on the painting surface. Positive painting is the more common form of painting. While negative painting is not as common, many artists use this approach to work around a subject already painted or to create a painting with a unique twist in its presentation.
canvas pad cut into 6" × 4" (15cm × 10cm) sheets
Sap Green, Titanium White, Ultramarine Blue
no. 8 or 1⁄2-inch (12mm) flat
no. 2 or 1⁄4-inch (6mm) filbert
no. 4 or 5⁄16-inch (8mm) filbert
thinner, brush wash with water
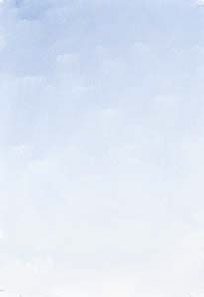
Paint the background with a no. 8 flat and a mix of Titanium White and Ultramarine Blue.
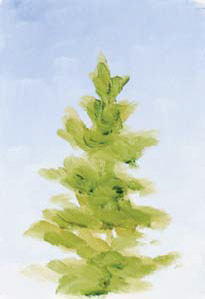
Paint the positive image of the subject on the background using Sap Green and a no. 4 filbert.

Paint Sap Green over all of the painting surface using a no. 8 flat.
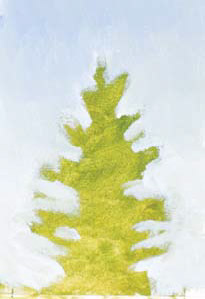
Add the background color with a mix of Titanium White and Ultramarine Blue, painting around and forming the shape of the subject with a no. 8 flat. Use a no. 4 filbert for more detailed areas around the tree.

Paint the background with a mix of Titanium White and Ultramarine Blue and a no. 8 flat.
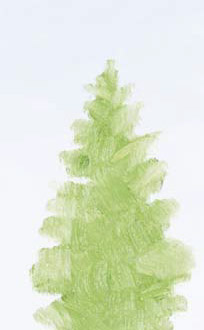
Paint the positive image of the subject with Sap Green on the background, using limited details and a no. 4 filbert.
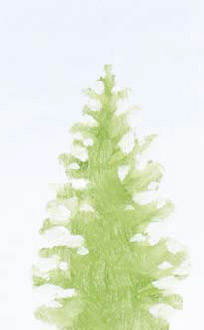
Define the form by adding the background mix of Titanium White and Ultramarine Blue over the form using a no. 2 filbert.
Forms can be painted with hard or soft edges that influence how defined they are. Hard edges define a form distinctly and can give an impressive or clear viewpoint. Soft edges may give a more romantic feel to a floral arrangement or a misty feel to a landscape. Using both hard and soft edges strategically can create the impression of depth.
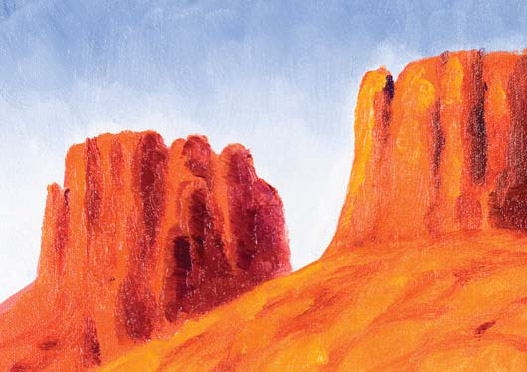
Forms with hard edges are sharply defined. As you paint, keep the colors separate to create hard edges.
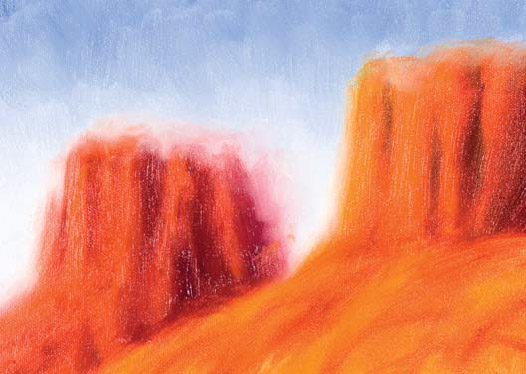
Forms with soft edges are less defined and blend with their surroundings. Make soft edges by very lightly brushing the paint while it is still wet.
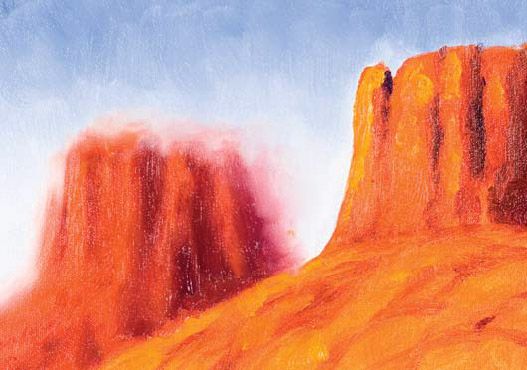
Use hard and soft edges in the same painting to emphasize depth and to direct the focal point. The hard edges of the mountain on the right catch your eye, and the close-up details tell your brain it's closer than the mountain on the left. The soft edges and lack of detail on the mountain on the left imply that it's farther away.
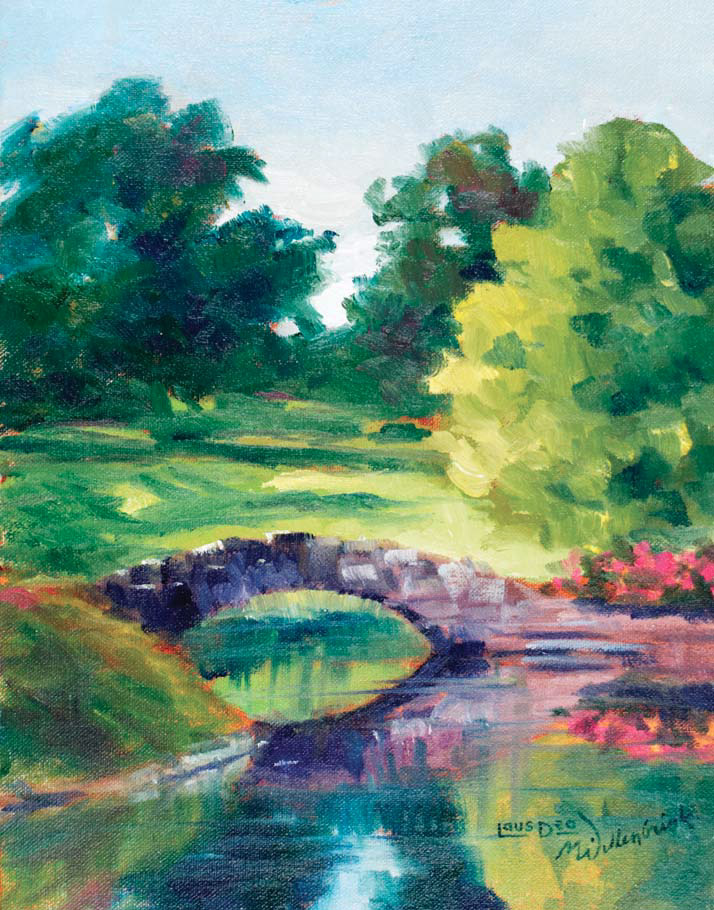
Plein air refers to painting outdoors. There's nothing wrong with working from a still life or photo, but you can't replace the experience that comes from studying landscapes with the natural light of the sun playing with the highlights, shadows and colors of your setting.
oil on canvas mounted on board
12" × 9" (30cm × 23cm)
When painting en plein air, it is essential to work quickly to capture the scene without too many changes. You can see that I didn't work on detail in this scene, but instead used quick, loose brushstrokes to capture the experience.
oil on canvas mounted on board
9" × 12" (23cm × 30cm)
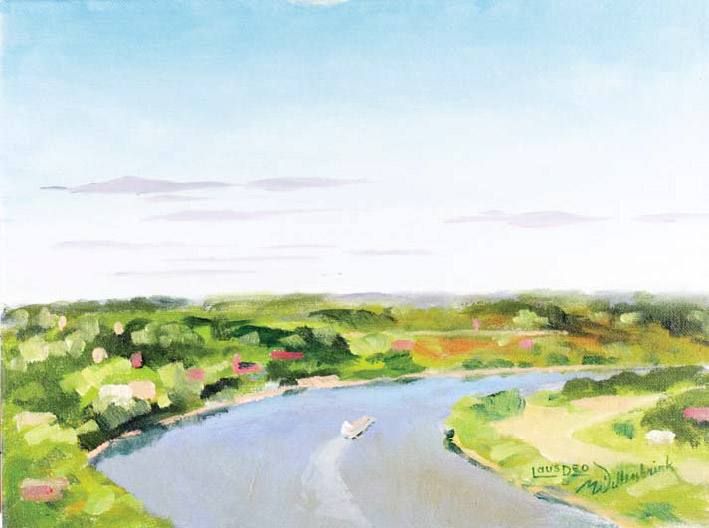
Capturing a constantly changing landscape can be a challenge. When I painted this scene the sky changed, the sun moved, shadows shifted, light areas changed and the barge slowly moved up the river. First I did a quick underdrawing of the river and horizon, then I placed the large groupings of colors, after which I started to blend colors and add more detailed brushstrokes. This painting took about two hours to complete.
oil on canvas mounted on board
8" × 10" (20cm × 25cm)
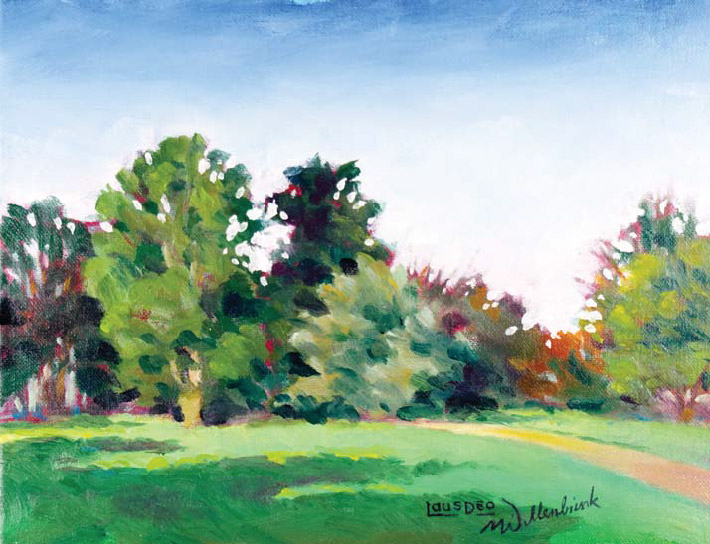
This is a plein air study of trees that I did one afternoon. I used red (the complementary color to green) to paint an underpainting of the trees. Then, as I added different colors of green, I let some of the red show or blend with the paints for a nice contrast and variation.