Building a Private Minecraft Server
In This Chapter

- Creating a Minecraft server on your Raspberry Pi
- Working with Java
- Configuring your Minecraft server settings
- Accessing your server remotely
Minecraft is one of the most popular games of the last several years. It’s available on PC and Mac, Android and iOS, Xbox, PlayStation, and countless other devices. Your Raspberry Pi makes an excellent Minecraft server you and your friends can access to build your own world. And with your Raspberry Pi, you can leave your server running all day without incurring a lot of electricity costs.
If you’ve already installed Raspbian on your Raspberry Pi, you’ve probably noticed that Minecraft is usually included with it, but this is a little different. Instead of just playing Minecraft on your Raspberry Pi, in this chapter, you turn your Raspberry Pi into a server. This means anyone on your network can access and play in your Minecraft world, which could lead to some great collaboration.
The version of Minecraft included with Raspbian is just a single-player game. You can’t connect and play online. So instead, you need to purchase a copy of Minecraft for your computer to use this server. If you don’t already have it, you can buy it from minecraft.net.
In this chapter, you take a look at Minecraft as a game, learn a little about servers, and set up your own private Minecraft server. In addition, you discover how to customize your Minecraft world.
What You Get with a Minecraft Server
A Minecraft server is a little different from a regular game of Minecraft. You can customize the settings in a number of ways to make it work however you want, and you can play with a select group of friends, which makes world-building a much more collaborative effort.
First off though, let’s talk about what Minecraft really is.

PI POINTER
Your Raspberry Pi isn’t the only device that can run a Minecraft server. Any computer with Minecraft installed can do it. What makes the Raspberry Pi nice is the fact that you can just plug it in and leave it running all the time and it won’t consume a lot of power. Likewise, if you have another personal computer, it doesn’t take up memory running in the background.
Getting to Know Minecraft
Minecraft is an open-world sandbox game originally created by developer Markus “Notch” Persson. More recently, it’s been developed and published by the company he founded, Mojang.
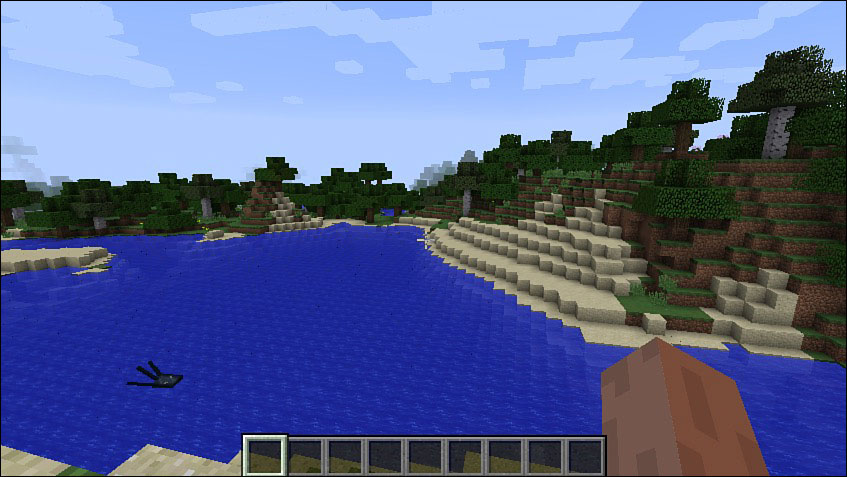
Minecraft is a world you can explore and make your own.
The original version of Minecraft was released as a public alpha version in 2009. Originally, the game was simply a playground where players could build and craft items. Over time, the game was updated with new features, including a survival mode where players are tasked with staying alive by building houses and gathering resources.
Minecraft was moved out of alpha and into beta in 2011. By that time, 1 million copies had sold. As of April 29, 2014, Minecraft had sold 54 million copies across all its platforms with more than 100 million registered users. It’s still in development today and is available on Windows, Mac, Linux, Raspberry Pi, Xbox 360, PS3, Vita, PS4, Xbox One, Android, and iOS.
Minecraft is now best known as an open-world game that allows players to do whatever they want. There are no specific goals or game elements. Instead, the core gameplay revolves around breaking blocks and placing them to build structures. The game looks decidedly old, with a blocky, 1980s look.
The Minecraft world itself is procedurally generated; it’s created on the fly, at random, each time you launch a new game. So the world is a little different every time you play. Amazingly, the world itself is also nearly infinite because it’s generated by the computer as you reach the edge of the map.

DEFINITION
Procedurally generated means the world map is randomly generated with an algorithm each time you start a new world. Essentially, there’s no game designer who creates the world; rather, it’s created by the computer. Nearly infinite world maps can be created. Every world is a little different, and no two games are the same.
The Minecraft world consists of all types of terrains, including plains, forests, caves, mountains, and bodies of water. You also can come across everything from jungles to snowfields.
As you explore, you encounter all kinds of animals, villagers, and enemies, such as zombies, skeletons, and spiders. One of the most popular of the enemies is the Creeper, which sneaks up on you and tries to explode.
Minecraft has four basic game modes: Survival, Creative, Adventure, and Multiplayer. In Survival mode, you’re tasked with staying alive as long as possible as enemies attempt to kill you. You can do this by building a shelter to keep you safe as well as seeking out resources to craft weapons, better shelters, and more.
Creative mode is more about building a world. Unlike Survival mode, you instantly have access to everything you need in Creative mode to build whatever you want. You can even fly around the map to anywhere you want without worrying about enemies.
Adventure mode works more like a traditional game where you’re trying to achieve a goal. The goals are defined by other users just like you.
Multiplayer mode is what you’ll be using with your Raspberry Pi. As the name implies, it’s all about playing with other people. With multiplayer mode, people can access your server with your predefined rules and play Minecraft together in any mode.
The appeal of Minecraft is hard to pin down because so much depends on the player. Some people love Survival mode, while plenty of others just enjoy building their worlds. The beauty of running your own server means you’ll be able to customize your game however you like.
Minecraft Versus a Server
Running your own Minecraft server comes with some caveats. The main difference between your own server and running Minecraft on your computer is that you’ll be able to play with anyone you want. You and the other players can run around the world together, fight monsters in tandem, or just build up the world as a team.
With your own server, everything you and your friends do is recorded and saved on the server. As long as your Raspberry Pi is powered on, you and your friends can access the server.
The best part about running your own server is the customization options. You can restrict the size of the world, get rid of enemies, or change the game in countless other ways. You can determine what gains experience points, change the weather, or instantly create any blocks you need in a particular moment.
Otherwise, Minecraft on your server is pretty much the same as Minecraft on your own.
Installing Raspbian
For this lesson, you’re going to install Minecraft on your Raspbian SD card. If you haven’t made one, refer to Chapter 8 for instructions.
Technically, you can use pretty much any Linux distribution for this, but Raspbian makes things a little easier. You do need to change some of Raspbian’s main settings though. You’re going to overclock your Raspberry Pi to make it a bit faster, change the memory configuration so the device can use more of its CPU power, and enable SSH so you can remotely log in to your Raspberry Pi from your home computer. Because this is a server, there’s no real reason to have your Raspberry Pi connected to a TV or monitor.
Configuring Raspbian with Optimal Minecraft Settings
Minecraft is a bit of a resource hog, so you’ll want to give your Raspberry Pi all the power you can for it to work well. It’s not recommended that you try this on Models A+, B, or B+. The extra RAM in the Model 2 (1GB versus the Model A+’s 256MB and Models B and B+’s 512MB) make it a much better option for Minecraft.
Here’s what you need to do to get your Raspberry Pi ready:
- Load the Raspbian configuration file by pulling up the command line. Type in
sudo raspi-config, and press Enter. - In raspi-config, select Overclock. Choose the last option, Warp5 1000MHz ARM, 500MHz core, 600MHz SDRAM, 6 overvolt, and press Enter. This overclocks your Raspberry Pi to take full advantage of the processor and make it fast enough to run your server. You’ll get some warnings about this when you enable it, but don’t worry. Your device will be safe.
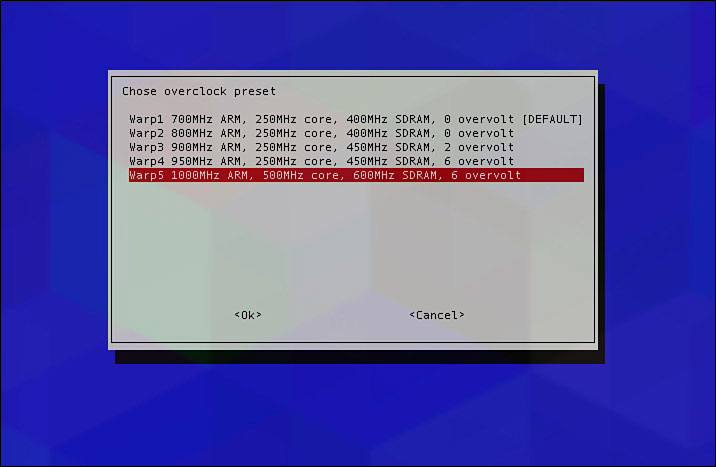
For your Minecraft server, you need to overclock your Raspberry Pi.
- Back at the main raspi-config menu, select the Enable Boot to Desktop/Scratch option, select Console Text console, and press Enter.
- At the main raspi-config menu again, select Advanced Options and press Enter.
- Select SSH, and enable it. This gives you remote access to your Raspberry Pi.
- Load Advanced Options again, and select Memory Split. Change the memory on the GPU to 16MB. You do this because your Minecraft server runs without a graphical user interface, and you don’t need the GPU to have that much memory.
- Back in Advanced Options, select Hostname and press Enter.
- Change the hostname to whatever you want. If you want people to be able to find it easily, Minecraft is a good name.
- Scroll down to the bottom of the screen, select Finish, and press Enter.
With that, your Raspberry Pi will reboot and you can move on to getting Minecraft set up and working.

PI POINTER
Overclocking your Raspberry Pi this much can cause some instability. If you have troubles with your Raspberry Pi, drop down the overclocking a bit. Overclocking is officially supported by the Raspberry Pi Foundation, so it won’t void your warranty. And the worst-case scenario is that your SD card won’t work anymore. If that happens, you’ll just need to remake the Raspbian image.
Setting Up SSH
You’re going to run your Raspberry Pi in headless mode, or without a monitor. Therefore, it’s best to set up and use SSH so you can control your Raspberry Pi from your personal computer. This step is totally optional, if you want to use your keyboard, mouse, and monitor on your Pi that’s fine, but this makes things a little easier.
Windows:
On Windows, you need to download some software before you can SSH into your Raspberry Pi:
- Head to www.chiark.greenend.org.uk/~sgtatham/putty/download.html and download PuTTY.
- Once it’s downloaded, open putty.exe.
- Enter your Raspberry Pi’s IP address under Host Name.
- Tap Enter to open a command line.
- Enter your Raspberry Pi’s username and password, and press Enter.
Now, your Windows computer is connected to your Raspberry Pi. You can control your Raspberry Pi from the command line just as if you were sitting in front of it.
If you own a Mac, you already have SSH built into your computer and you can access your Raspberry Pi using the Terminal app. Here’s what to do:
- Launch Terminal on your Mac from Applications > Utilities > Terminal.
- Type in
ssh pi@yourIPaddress, and replacing yourIPaddress with the IP address of your Raspberry Pi. For example,ssh pi@192.168.1.105. - When prompted for your Raspberry Pi password, type it in and press Enter.
That’s it. You can now control your Raspberry Pi from Terminal on your Mac just like you would from the command line on the Raspberry Pi itself.
Installing Java
In order for Minecraft to work, you need the newest version of Java installed on your Raspberry Pi. As is the case with most things on the Raspberry Pi, Java is free and open source.

DEFINITION
Java is the programming language Minecraft was written in, and it’s universal across a variety of platforms. Java was originally released in 1995 by Sun Microsystems. Because Java is made to run on every platform imaginable, its original promise was to allow programmers to “Write once, run anywhere.”
Why You Need Java
Java isn’t always installed on computers out of the box. Typically, most operating systems avoid installing Java because it’s often a security risk. Java wasn’t optimized to work on the Raspberry Pi at first either, but now a version of Java is built specifically for ARM computers and works terrifically on the Raspberry Pi.
The reason you need it is simple: Minecraft was coded in Java and requires Java to run. Java is a programming language that’s compatible on a ton of different systems, so it’s a good way to develop for different platforms without learning an entirely new type of coding.
In this case, Java was used simply because that’s the language Markus Persson knew best. Because of this, Minecraft has been built on Java since the alpha was first launched. When you play Minecraft on your computer or game console, you probably don’t even realize this, but when you’re running your own server you’ll have to launch it using a specific Java command, so you’ll become familiar with it pretty quickly.
Downloading and Installing Java
Installing Java is a pretty straightforward process. Many distributions of Linux already have it, but it’s a good practice to check and be sure you have the most recent version before you proceed.
Here’s what to do:
- At the command line, type in
sudo apt-get install oracle-java7-jdk. This downloads and installs the most recent version of Java for the Raspberry Pi.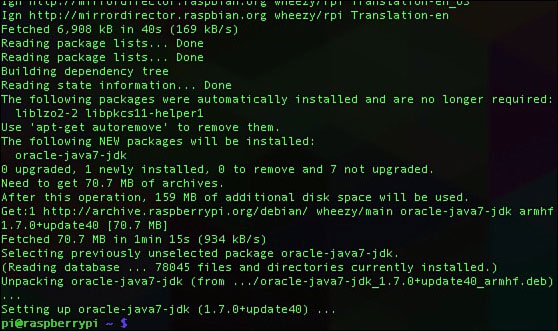
The Java install will take a bit of time, so be prepared to wait.
- Type in
java -version, and press Enter to ensure the newest version of Java was installed.
With that, Java is now installed on your Raspberry Pi.
Installing and Setting Up the Minecraft Server
Let’s download and set up your Minecraft server. First, you’re going to download the server files directly from the Minecraft site.
Installing the Minecraft Server Files
If you’re not already there, head back to the command line:
- Type in
cd /MCServer, and press Enter. - Type in
sudo wget https://s3.amazonaws.com/Minecraft.Download/versions/1.8/minecraft_server.1.8.jar, and press Enter. - Wait for the file to download.
- You’ll need to agree to the terms of service. Type in
sudo nano eula.txt, and press Enter. - Scroll down to eula=false, and change it to
eula=true. - Press Ctrl+X to save the file and exit.
Minecraft is updated fairly often, so if the link in step 2 doesn’t work, head to minecraft.net/download and look for the link in the Multiplayer Server section.
That’s it for the installation of the server. It’s time to launch it.

PI POINTER
As of this writing, the official Minecraft server files are the only ones available. However, until recently, another version called Spigot was available specifically for the Raspberry Pi. Spigot was taken offline due to some copyright violations, but if those are worked out and it’s re-released, it’s a good alternative to the official Minecraft files. Check at spigotmc.org to see if it’s available. If you want to use Spigot, the instructions throughout this chapter are the same with the exception of from where you download the file.
Starting and Stopping Your Server
Because your server is open to the world, you don’t want to leave it on all the time. When you and your friends aren’t using it, it’s best you turn it off.
You’ll start and stop your Minecraft server from the command line. The process is pretty straightforward:
- To start the server, type in
sudo java -Xms256M -Xmx496M -jar.
minecraft_server.1.8.jar nogui - Press Enter.
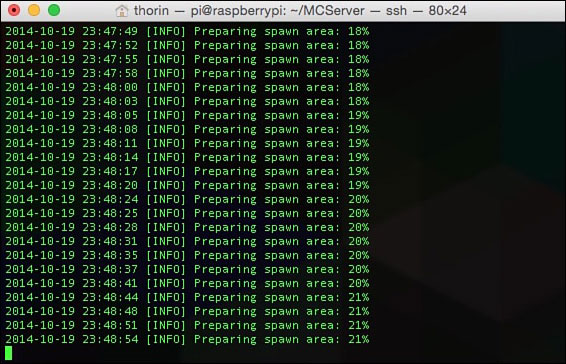
Starting the server works just like starting any other program, but the screen is packed with information about the server itself.
It’ll take a long time to get started, so sit back and let it do its work. This is telling Java to open the Minecraft server file with no graphical user interface, keeping it nice and lightweight. The Xms and Xmx commands are for your memory distribution. You’re assigning RAM and CPU speed to your Minecraft server so it can run fast enough.
Here’s how to stop the server:
- At the command line, type
stop. - Press Enter.
With that, you server is running. You’ve also learned how to launch any other Java program you might come across in your Raspberry Pi adventures.
Accessing Your Minecraft Server from Your Computer
Now you need to load your server on your copy of Minecraft. Here’s how:
- Open Minecraft on your computer, and be sure you’re connected to the same Wi-Fi network as your Raspberry Pi.
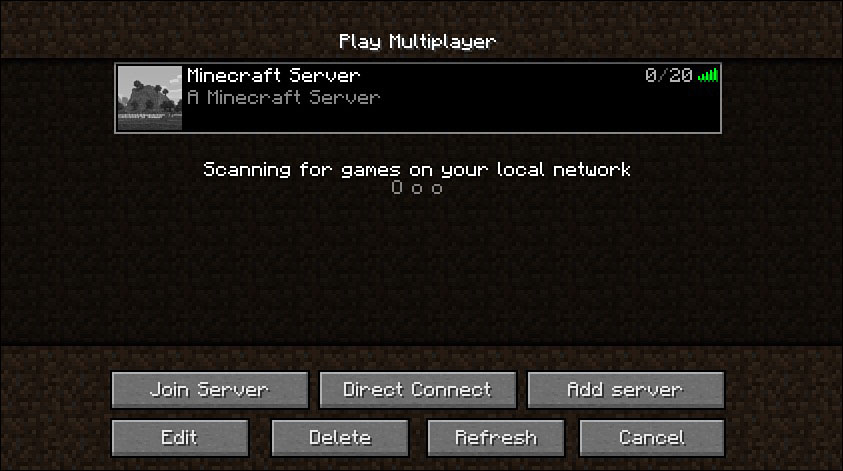
- Click Multiplayer.
- Look for your server name in the list, click it, and click Join Server.
Find your Minecraft server on the list of available servers. It should be the only one on your network.
You’re now ready to play around in your private Minecraft world. It might be a little clunky right now, so it’s worth adjusting some of the settings to get it running smoothly.

PI POINTER
As long as people are on your home network, they’ll be able to connect to your Minecraft server as easily as this. If they have trouble, they can click the Direct Connect button and type in your Raspberry Pi’s IP address to access the server directly.
 Changing Your Server’s Settings
The best part of running your own Minecraft server is that you can customize the settings. You can change when it gets dark, if animals are on the map, and so much more. You do this by editing the Properties file.
Here’s what to do:
- At the command line, type in
sudo nano server.propertiesand press Enter. - Here, you’ll find all the various server settings. I’ve changed a few settings to help it run better on the Pi, so make yours match the following:
#Minecraft server properties #(File modification datestamp)op-permission-level=4allow-nether=falselevel-name=worldenable-query=falseallow-flight=falseannounce-player-achievements=trueserver-port=25565level-type=DEFAULTenable-rcon=falseforce-gamemode=falsemax-build-height=256spawn-npcs=truewhite-list=truespawn-animals=truehardcore=falsesnooper-enabled=trueonline-mode=truepvp=truedifficulty=1enable-command-block=falseplayer-idle-timeout=0gamemode=0max-players=10spawn-monsters=truegenerate-structures=trueview-distance=5spawn-protection=16motd=Pi server - When you’re finished editing the file, tap Ctrl+X to save and exit the file.
You can play with the settings as you like, and once you get into running your own Minecraft server, you’ll likely want to alter a few settings. Most are pretty self-explanatory, but you can find a specific explanation for each line on the Minecraft Wiki page at minecraft.gamepedia.com/Server.properties.
Setting Your Server to Start on Boot
If you’re not using your Raspberry Pi for anything other than a Minecraft server, you might want to have it launch automatically each time you boot up. This is optional, of course, so only work through this step if you’re interested in running only your Minecraft server on your Raspberry Pi. You can set this up in many different ways, but you’re going to use a service called Crontab.
- At the command line, type in
sudo crontab -e, and press Enter. - Add the line
@reboot sudo java -Xms256M -Xmx496M -jar.
minecraft_server.1.8.jar nogui - Press Ctrl+X to exit and save the file.
Now your Minecraft server will automatically start when you boot your Raspberry Pi. If you want to stop this behavior, just follow these steps and remove the @reboot sudo java -Xms256M -Xmx496M -jar minecraft_server.1.8.jar nogui command.

PI POINTER
If you’re using your Raspberry Pi for anything other than a server, you probably don’t want to launch it automatically on boot. Your Minecraft server takes a ton of resources to work, so you likely won’t be able to do much else on it.
Moderating Your Server
Running your own server isn’t just about playing Minecraft; it’s also about playing with your friends. To get the best experience, assign yourself operator status. Operator status gives you moderation capabilities so you can ban players, access server commands, and move around the map quickly.
Here’s what to do:
- At the command line, type in
cd MCServer, and press Enter. - Type in
sudo nano ops.txt, and press Enter. - Add your Minecraft username to the TXT file, and press Ctrl+X to exit and save the file.
You can do your moderator tasks by launching the Minecraft chat window. To launch the window, press /. Here, you can enter commands to trigger actions in Minecraft, much like you do from the command line.
As a moderator on your Minecraft server, you can do all kinds of cool things.
There are a ton of commands available, but here are some of the most useful:
Giving achievements: You can give players achievements with the achievement command. For example, you can type in achievement give achievement.overkill username to give someone named username the overkill achievement. Replace give with take to remove an achievement.
Rewarding players: Want to reward someone for their hard work? You can grant them experience points. Type in xp amount username to reward them. For example, xp 5000 username gives the player username 5,000 points.
Giving items: To give a user an item, use the give command in place of clear. If you’re busy building a world and need to give a player a specific item, type in give username itemname amount. For example, you could type in give username minecraft:planks 40.
Removing inventory: Removing items from a player’s inventory is also possible. You just need to use the clear command. For example, if you want to remove everything from someone’s inventory, type in clear username. If you’d prefer to remove a single item, type in clear username minecraft:itemname.
Banning players: You can completely ban players from being allowed on your server if they’re not behaving. Type in ban username to ban someone with the name username. If you need a refresher on who you’ve banned, type in banlist players at any point.
Kick players off your server: If someone’s causing you grief, you can easily kick them off of your server with the kick command. Just type in kick username to remove them. Unlike banning, this is a temporary suspension.
Changing game mode: You can change the default game mode for your server very easily. Type in defaultgamemode followed by the game mode name—survival, creative, adventure, or spectator. For example, to set the game mode to survival, type in defaultgamemode survival.
Adjusting difficulty levels: You can change the difficulty of Minecraft on your server very easily with the difficult command. Just type in difficult followed by the level you want—peaceful, easy, normal, or hard.
Changing the weather: Not a fan of the current weather on your server? Type in toggledownfall to change it. If it’s raining or snowing, it’ll stop. If it’s a clear day, it’ll start to rain or snow. Likewise, you can set the weather directly with the weather command. Type in weather followed by either clear, rain, or thunder, and follow that with the duration you want it to last in seconds. For example, weather thunder 60 would make it thunder for 1 minute.
Debugging your server: If you’re having issues on the server, you can start a debug mode to get more information. Type in debug start to load the debug menu. You can stop the debugging with debug stop.
Removing status effects: If someone on your server has some nasty status effects and needs your help, you can assist with the effect command. Type in effect username clear to remove status effects from any player. Likewise, you can give an effect by typing in effect username effectname.
Checking who’s playing: If you need to quickly see who is on the server at any point, type in list to see everyone who’s connected.
Saving: By default, your server is saving its state every few minutes, but you can manually save them as well. Type in save-all to save the server files to the disk manually.
That’s just a few of the more useful tools you’ll use, but there are tons more. At any point, type in help to get a list of every command available to you.

PI POINTER
Moderating your server might seem like a lot of work, but it’s actually the best part about running your own server. You control who has access, what they get, and how they play. Think of it like being your own game designer.
Accessing Your Server Remotely
As it stands now, your Minecraft server is only accessible by people on your Wi-Fi network. That’s great, but if you want to play with friends who live out of town, you’ll need to do a little more work. Specifically, you’ll need to set up port forwarding on your home router.
Every router works a little differently, so I can’t give you an exact guide on how to set up your specific router, but you can usually find your router’s manual online if you don’t have one.
The process usually goes something like this:
- Connect to your home router and log in. (Remember, your router’s address is usually something like 192.168.1.1.)
- Find the port forwarding section. It’s usually listed under a tab titled NAT/QoS or Services.
- Click the Add button to create a new port forward.
- Type the name
Minecraftinto the Application, Label, or Name section. - Select TCP/UDP under Protocol.
- Under External Port (sometimes also called Redirect Port), type in
25565. - Under Internal IP Address, type in your Raspberry Pi’s IP address. If you don’t know it, head back to your device, type in
ifconfig, and look for the number listed after inet address. - To access your server remotely, you’ll need to figure out your computer’s public IP address. Head to yougetsignal.com/tools/open-ports and you’ll see your IP address. It should be a number that reads something like 24.56.65.205. For players to access your server, they’ll need to add this number followed by the port to their Minecraft game. For example,
24.56.65.205:25565.
You’ll now be able to access your server from anywhere, provided it’s turned on. As always, be careful with this. You’re giving people access to your home network this way, and although they should only be able to use it to play Minecraft with you, be cautious about who you give it to.
- You can create a private Minecraft server for you and your friends fairly easily.
- Setting up your own Minecraft server gives you full control over how it works and who plays.
- You can get your server set up and working on any copy of Raspbian you already have on an SD card.
- You can access your server from any computer with an internet connection.
