9.3 Changing the Default Printer
In the SAP system, the printers are defined centrally and assigned to individual users.
[»] Printer Setup
In a live SAP system, the administrator of your SAP system is responsible for the printer configuration, not you. However, for testing purposes, it may be necessary to use an installed Microsoft Windows or network printer, which you may need to manage.
It’s also possible to use the default Windows printer—the one the Windows operating system proposes when you use the print function in an Office application to output a document. To set up the default printer in the SAP system, follow these steps:
-
Open System • User Profile • Own Data in the menu bar. Then click the Defaults tab (Figure 9.12).
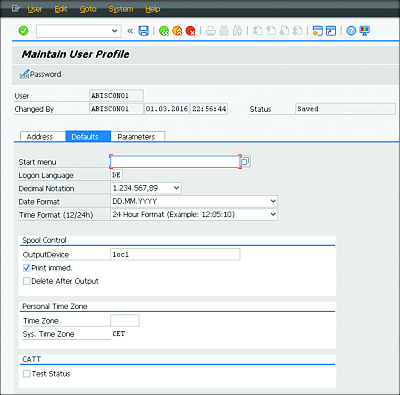
Figure 9.12 Defaults Tab
-
Select 1oc1 in the OutputDevice field to use the default Windows printer. You can also select the output device in the input help for the
 field, and copy it by double-clicking it.
Make sure that the Print immed. checkbox is activated. This way, the system will generate an output request immediately after the spool request, and the output will be carried out directly after the print command. The Delete After Output setting ensures that print formatting (spool) doesn’t remain in the SAP system. This means that the spool doesn’t need to be regenerated for a new output.
The next section illustrates how you can create screenshots of the SAP system.