9.4 Creating Screenshots
If you have to create documentation, it’s useful to illustrate your text with images from the SAP system, known as screenshots or hardcopy in the SAP system. There are two methods for creating screenshots:
To create screenshots using standard Microsoft functions, follow these steps:
- Open the required screen, and select a section (if applicable).
- Copy the screenshot to the clipboard with (Ctrl)+(Print).
-
You can then insert the screenshot from the clipboard in various applications using (Ctrl)+(V):
- Open Microsoft Paint via the Windows Start menu, insert the screenshot with (Ctrl)+(V), and store it as a *.tif file.
- Open Microsoft PowerPoint, insert the screenshot with (Ctrl)+(V), and save the presentation.
- Open Microsoft Word, insert the screenshot with (Ctrl)+(V), and save the Word document.
- Then you can further process the created screenshots in the programs mentioned in various ways.
You can also directly output a screenshot in the SAP system on a default Windows printer by following these steps:
-
In the standard toolbar, click the Adapt Local Layout
 button (Figure 9.13). Then click the Hard Copy button. You can also use the key combination (Shift)+(H) in the displayed menu.
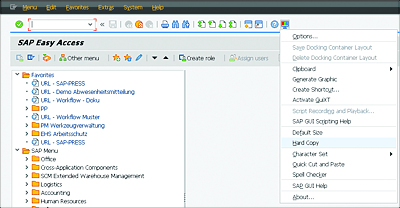
Figure 9.13 The Hard Copy Button
- The screenshot is output on the printer.
This chapter introduced you to print functions in the SAP system. Printing in SAP usually requires a spool request and an output request. You can output documents, lists, and reports.