
It takes only a few basic tools to make a batch of soap. As you progress in your soapmaking journey, you can acquire additional tools that will make the process easier and allow you to create more elaborate designs. To start out, however, you need just a few things that can be found in a kitchen store or a thrift store.
When looking for equipment, think about long-term durability and safety. For example, wooden tools are not a good choice because they degrade over time and eventually can splinter in the soap. Choose heat-resistant glass bowls that are tempered to withstand repeated heating and exposure to lye.
The basic equipment for soapmaking can be found in any kitchen, but it’s not a good idea to use your cookware to make soap. Buy a separate set of utensils and store them where they cannot be mistakenly used for food preparation.
You’ll also need a large supply of newspaper or flattened cardboard to protect your entire work surface. If you don’t have a dedicated soaping space, you can put a layer of heavy plastic under the papers to further protect your countertops.
Protective wear. Lye-water and raw soap can burn and irritate skin and damage eyes. Protecting your eyes from start to finish is essential. Use goggles with a protective lip that fully covers your eyes (including your glasses, if you wear them) or use a full-face shield and air filter. This equipment can be found at a local hardware store. Wear gloves: the best type are disposable medical gloves (latex or nitrile), although you can use rubber dishwashing gloves. The tighter the fit, the less chance of clumsy mistakes.
A scale. Most ingredients in soapmaking, including liquids and oils, are measured by weight, not volume. Weight is more precise than volume, and in the science of soapmaking, precision matters. An inexpensive digital scale is easy and accurate, but a manual model works fine also. Choose a scale that can weigh heavy enough amounts for soaping. For example, don’t get a scale that can’t weigh amounts over 16 ounces if you plan on making large batches of soap.
Measuring cups and spoons. In addition to using them to measure ingredients, the cups are handy for coloring small portions of soap batter and for use as a design tool. A standard set of measuring cups works fine, but ones with pouring spouts are preferable. The longer the spout, the easier it is to do more elaborate designs. Measuring spoons are useful for ensuring precision with dry additives, such as exfoliants, colorants, and clays.
Choose ones made of heat- and chemical-resistant material, never aluminum. Typically, fragrance and essential oils are weighed in glass containers. Some plastic containers can erode and degrade if used for pure essential or fragrance oils.
This can’t be stressed enough: Never use anything made of or containing aluminum to make soap. Aluminum reacts with sodium hydroxide to form hydrogen, a poisonous and explosive gas. At the very least, it will ruin your soap, and it could cause a serious accident.
Lye-water container. A heat-resistant measuring bowl (glass or plastic) with a handle and spout is critical for mixing water and lye and adding it to the oils. It’s useful to have both a 2-quart and a 4-quart version; buy the larger one if you want to start with just one. It’s important to allow plenty of headspace when mixing lye-water.
Thermometer. Monitoring the temperature of your ingredients is important. You want to be sure that delicate ingredients do not get scorched, to prevent soap volcanoes, and to ensure even emulsification and saponification. You can use a candy thermometer or a digital thermometer.
Heat-resistant bowls. You can use plastic, stainless steel, or glass bowls for mixing lye-water and soap batter, as long as they are heat- and chemical-resistant. Choose two or three bowls large enough to fit different-size soap batches with plenty of extra room — filling a bowl to the top, especially when mixing lye-water, invites spills that can burn you or ruin your countertops. Ideally, you should have 1-, 2-, and 3-quart capacity bowls on hand. Additionally, easy-pour containers with handles and long pouring spouts make it much easier to transfer the batter to the mold and perform delicate swirling techniques.
Spoons, whisks, and spatulas. You need at least one long-handled spoon for mixing batter and for creating designs. Whisks in a couple of different sizes are essential for mixing in fragrance oils and additives. They are also useful for maintaining the appropriate trace as you work. Spatulas are used to scrape the last of the soap batter out of mixing bowls and create intricate soap designs. Stainless steel is the ideal material for mixing utensils; silicone or heavy-duty rubber is acceptable. Over time, wood will degrade and splinter off into your soap.
Stick blender. Also known as an immersion blender, this is a soapmaker’s best friend. It reduces the tracing process from a 30- to 90-minute process to just a few minutes or even seconds, depending on your recipe. When choosing a stick blender, look for a model that will not whip much air into the soap. (I recommend those made by Cuisinart.) Buy one with a stainless steel shaft; a plastic shaft will eventually weaken and break. If the shaft detaches from the electrical unit, it is easier to clean.
Knife for cutting bars. You can purchase a specially designed wire soap-cutter, but a sharp, non-serrated knife works just fine. A serrated knife will leave drag marks along the edges of your bars.
Small glass bowls. You can never have too many small glass bowls to hold measured amounts of additives, fragrance oils, essential oils, and colorants. Many ingredients, such as essential oils, are corrosive enough to damage plastic.
Technically, you could use equipment from your own kitchen to make soap, which, after all, is what is used to clean kitchenware, but it’s worth repeating that this is not a good idea. Invest in a separate set of bowls, measuring cups, and other utensils and store them away from all equipment used for preparing food.
Unsaponified soap could get into crevices, and fragrances do leach into glass and plastic. Also, preparing food and soap using the same tools will not allow you to properly follow Good Manufacturing Practices set by the Food and Drug Administration (FDA).

The following items aren’t critical for making soap, but having them makes the process easier and more convenient. Some of these tools are necessary for making particular patterns or delicate designs.
Isopropyl rubbing alcohol. Spraying 99% pure rubbing alcohol on your soap before it cures in the molds is optional, but it helps to prevent a layer of soda ash from forming on the surface of the bars.
Skewers or chopsticks. These are used for making delicate swirls and designs in your soap. Wooden ones are fine in this case, as long as you wipe it off immediately after using to avoid degrading the wood. If cleaned quickly, skewers and chopsticks can last a long time.
Funnel. A funnel of any size is helpful for filling squirt bottles and is necessary for making complex designs such as the White Tea Faux Funnel Pour.
Plastic squirt bottles. Plastic condiment bottles are used for creating swirly, multilayered designs in soap. They help with accurate, even distribution of colors. You can also use them to store diluted lab colors. If you are using recycled containers, wash them thoroughly with soap and rinse with hot water before using for soapmaking.
Eyedropper or small pipette. This is handy for precisely measuring fragrance and essential oils and for manipulating tiny amounts of soap batter to make designs.

Double boiler. It is faster to infuse herbs and colorants using heat, and a double boiler allows you to evenly heat a larger amount of oil.
Mini mixer. You can use the back of a spoon to mash powdered colorants into oil or water, but a mini mixer — often sold as a latte or milk frother — is handy for evenly and speedily mixing colorants and clays.
Fine-mesh strainer. A small strainer is useful for sprinkling pigments in layers to create designs.
Spice/coffee grinder. A spice or coffee grinder is useful for pulverizing additives, including colors, to reduce clumping and make them easier to blend. A mortar and pestle also works.
Mesh tea ball. A mesh tea ball is useful for straining unmixed clumps of colorants out of oils before soaping; for putting lines of colorant between layers; and for adding mica or herb toppings.
Soap beveller. This specialty tool creates clean 45-degree angles on your soap edges, giving them a professional appearance. You can use a vegetable peeler for close to the same effect.
Cheese grater. A cheese grater is useful in shredding blocks of old soap to make rebatch soap or add confetti soap design elements.

There are many options when thinking about molds for soapmaking. You can make your own from shoeboxes lined with freezer paper or reuse dairy-product containers and beverage cartons. You can utilize common kitchen containers (think Tupperware). Or you can buy wooden, plastic, or silicone molds made specifically for soap.
As you get into soapmaking, you will start noticing many things around your house that appear to be fantastic options for soap molds. Yogurt and tofu containers, waxed-cardboard milk and juice cartons, the round tubes that potato chips and other snacks are sold in, and plastic food-storage containers (the kind that always seem to be missing their lids) — these all make excellent molds for soaps. Most of them can only be used once, though you can get more use out of sturdier plastic ones or by lining the molds with freezer paper.
Whatever you use needs to have some “give” to it, in order to release the soap after it has set. Metal and glass are not good materials for molds — the soap will stick and be nearly impossible to get out. Anything made of cardboard or wood must be lined with freezer paper. If you do want to use a particular metal mold, never use one made of aluminum, even if you are lining it.
Use only containers that held food or nontoxic materials. Before using a temporary soap mold, clean it thoroughly with soap and hot water.
There are many sizes and shapes of soap molds on the market, and they come in a variety of materials. The two most common shapes are vertical (tall and skinny) and horizontal (wide and flat). They create different bar shapes and offer different design options. Molds can be made of silicone, plastic, or wood. Raw wooden molds must be lined with either freezer paper or a silicone liner. Waxed paper will flake into your soap.
Loaf (or log) molds are typically used for impressive swirling, layering, and landscape designs. Loaf molds (wooden or silicone) come in all sizes, up to 95 pounds. When choosing a wooden mold, look for things that will help with unmolding, such as sides that flip down, or bottoms that slide out, or silicone inserts that fit in the mold. You can purchase specialty loaf molds made out of high-density plastic that do not require lining. They have their own set of challenges: they’re often more expensive than wooden molds, soap can stick to the plastic, and depending on the material, they can expand and contract with heat. Many soap molds come with cutters that allow you to cut bars of even sizes.
A multi-pour sectioning tool is called for in some recipes that use this type of mold; it allows you to customize the look of your bars and create certain designs. It differs from standard dividers used in slab molds in that it is removed before the bars set up.
Horizontal, slab, or “divider molds” provide a wider canvas for designs such as Lemon Linear Swirls. Most horizontal molds come with optional dividers to form uniform bars that are easily unmolded. Horizontal molds are typically made from wood and need to be lined, though some are available in plastic. Dividers are typically made from a high density, heat-safe plastic.
Silicone molds — the kind commonly used for baking — are available in all shapes and sizes and work great for soap. They are less expensive than wooden molds, require no lining, and make unmolding easier, although it can be tricky to release soap as the soft sides make it possible to dent the bars. Choosing a recipe that is harder or using a soap-hardening agent such as salt or sodium lactate will help the unmolding process.
One downside is that silicone can produce pock marks in the final product if the soap overheats. To prevent this, keep your temperatures low (below 120°F [49°C]) when using silicone molds. Pock marks are solely aesthetic and do not affect the final feel or performance of the soap.

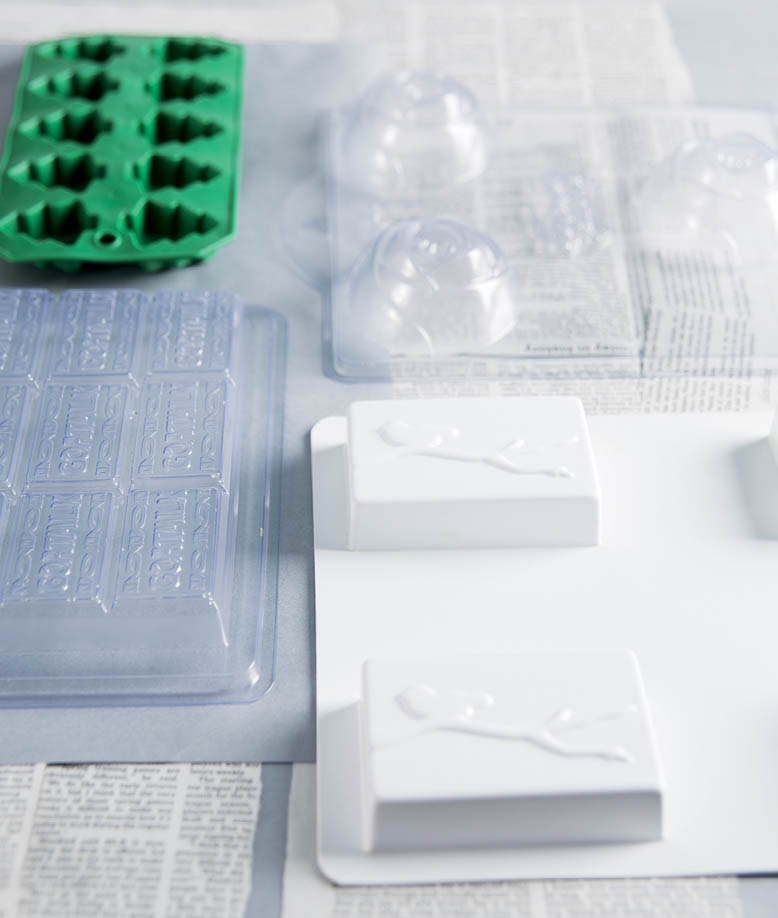
Specialty soap molds let you produce shapes you cannot achieve with other types of molds (say, a flying pig or a Celtic knot), so they are often worth the extra time and effort it takes to use them. Because they are made of heavy-duty plastic (HDPE or PVC), these molds have little flexibility, so unmolding them can be challenging.
They are best used with recipes for hard soap, or you can add sodium lactate to your lye-water to make the final bars easier to unmold. Another option is to lubricate the inside of the mold liberally with cyclomethicone (a liquid silicone) or a non-saponifying oil such as mineral oil. Cotton swabs can be handy for this process.
Candy molds or craft store quality molds that are made of thinner, less sturdy plastic can easily break during the soapmaking process. You can use them but if you do, choose a recipe that is extremely hard and be prepared to let the soap sit in the mold for a few extra days.
Some soap molds are designed specifically for creating embeds to put into larger batches of soap for interesting texture and patterns. Embeds need to be made ahead of the main batch, so those recipes take extra planning and time.
Cleaning up after making soap is like cleaning any very oily pot or pan. It takes hot water and strong detergent, plus some elbow grease. Wear gloves while cleaning. Remember: The soap is still caustic and can burn you. Do not put soapy or oily soapmaking dishes in the dishwasher.
While it’s tempting to use handmade soap for washing oily equipment, it takes a commercial detergent to cut down on major oil slicks in your plumbing. (Dawn is my favorite brand for this. There’s a reason rescuers use it to clean off birds and other animals after oil-spill disasters.) Isopropyl rubbing alcohol is handy to have around — it cuts through grease when cleaning spills and wiping out soapmaking containers. Distilled vinegar can also be used to break up oil and wipe down the work surface once you are finished soaping.