Appendix B. Registering Chrome Apps with Google
Before a Chrome App can access Google APIs, you must register it with Google. Registration is documented by Google (read the “User Authentication” section), but as of October 2014, the Google Developers Console user interface has been updated, and the step-by-step instructions are out whack with what the website does. What follows here works as of this writing, but be warned that it might change again by the time you read it.
Registering a Chrome App and Getting a Client ID
To register your Chrome App and obtain a client ID, you need to do the following:
- Go to the Google Developers Console.
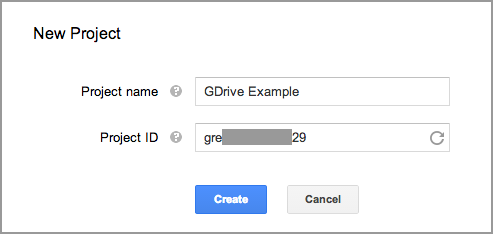
- Click the Create Project button. In the New Project window that opens, type the project name and then click the Create button, as shown in Figure B-1.
- In the Developers Console, in the “APIs & auth” section, click APIs and turn on any APIs your app needs. For the example in Accessing Google APIs, this would be Drive API, as shown in Figure B-2. (A few others are also enabled by default.)

- Again, in the “APIs & auth” section, click Credentials and then click CREATE NEW CLIENT ID under OAuth. In the dialog box that opens, click the “Installed application” radio button and then Chrome Application. Enter the app ID and click Create Client ID, as shown in Figure B-3. (See Fixing the App ID to see how to establish a fixed app ID.)
- The client ID displays, as shown in Figure B-4.
Copy the client ID and update your manifest with OAuth2 client ID and scopes:
{
   "app": {
      "background": {
         "scripts": [ "background.js" ]
      }
   },
   "manifest_version": 2,
   "name": "GDrive",
   "version": "1.0.0",
    "permissions": [
        "identity"
    ],
    "key": "MIIBIjANB...yyltEwIDAQAB",
    "oauth2": {
        "client_id": "2546277...3kj.apps.googleusercontent.com",
        "scopes": [
            "https://www.googleapis.com/auth/drive"
        ]
    }
}


On the first call to
chrome.identity.getAuthToken(see Accessing Google APIs), you are asked to confirm the permissions, as shown in Figure B-5.

Fixing the App ID
Generally, while you’re developing a Chrome App you’ll load it in unpacked form by clicking the “Load unpacked extension” button on the Extensions page, as described in Chapter 1. That causes an app ID to be assigned to the app, but then if you install the app, either by dropping a .crx file onto the Extensions page or downloading it from the Chrome Web Store, a different app ID will be assigned. If you go back to developing the app as unpacked, you might get the earlier app ID, or perhaps even a different one.
Usually you don’t care what the app ID is, but when you register an app, you need to supply a specific app ID, and it’s annoying if it changes because you have to keep updating the app’s registration and getting a new client ID. It’s much easier to fix the app ID so that it never changes during development.
Here’s what you do:
- Early in the app’s development, on the Extensions page, pack it by clicking “Pack extension,” which generates a .crx file, as shown in Figure B-6.
- If you have an unpacked version of the new app loaded, unload it by clicking the trashcan icon.
-
Install the packed extension by dragging the
.crxfile to the Extensions page. Verify that the app is installed and runs by clicking its “launch” link on the Extensions page. (It may no longer be at the top of the page, so scroll down until you find it.)

- Find the manifest.json file stored inside Chrome (not the one you used for development). Begin by using the Mac Finder, Windows Explorer, or whatever your system offers to navigate to the user data directory. Instructions for finding it are at the Chromium Project’s User Data Directory page. For example, on Mac OS X it’s at ~/Library/Application Support/Google/Chrome/Default, and on Windows Vista, 7, or 8 it’s at C:\Users\<user>\AppData\Local\Google\Chrome\User Data\Default, where <user> is your username.
- On the Extensions page, find the app ID, as shown in Figure B-7.

- Find the corresponding directory in the user data directory, as shown in Figure B-8, and navigate down to the installed manifest.json file.

-
Copy the
keyproperty from the installed manifest and paste it into the manifest.json file in your development source. With thekeyin place there, Chrome will always use the same app ID, whether the app is loaded as unpacked or installed. You can then use that app ID when you register the app, and you no longer need to worry about it changing. Accordingly, the client ID will be permanently fixed, as well. (You will have to remove thekeyproperty before you upload the app to the Chrome Web Store, and you may get a different app ID then.)