MALTS and MASHING
Mashing, Sparging, and Water Adjustment
Extraction Rates and Evaporation Rates
Infusion Mash with a Protein Rest
RECIPE: IMPERIAL STOUT / IRISH STOUT (PARTI-GYLE)
MALTS
MALTING A GRAIN, barley or otherwise, essentially means sprouting it and then stopping it. In short, the grain is soaked in water several times and allowed to sprout to the degree that the maltster desires. Then the grain is dried and kilned to stop the germination process. At this point, the grain has created a large amount of starch, along with enzymes to break that starch down into sugars. These starches would have been used by the plant for energy if it had continued growing, but we can use the enzymes and starch to make beer instead.

BASE MALTS
When brewers talk about malt, they’re referring almost always to malted barley. Many other malted grains are available—oats, wheat, rye, spelt—but they’re rarely used as the primary malt in a beer recipe.
Every brewing region has base malts tied to its brewing history, and each type of base malt has subtle variations in taste and appearance. The UK is well known for its pale-ale malt. Europe has pilsner, Vienna, and Munich malts. North America has its own traditional 2-row and 6-row malts. Over the last few decades, these boundaries have blurred: you can find German pale-ale malt, British pilsner malt, and U.S. Munich malt. It’s a good idea, however, to go with the traditional regions for the type of malt you want. Nobody makes pilsner malt like the German maltsters, and nobody makes a pale-ale malt quite like a traditional British malt house.
These malts typically make up the majority of a recipe and provide the enzymes needed for the conversion of starch into sugar during the mash. All modern base malts have enough enzymes to convert themselves easily, and most have the power to help convert grains without enzymes (a.k.a. adjuncts) when they make up 15 percent or less of your grain bill.
Base Malts at a Glance

Note: If you have a recipe that includes more than 20 percent starch adjuncts (rice, corn, pumpkin, etc.), it’s a good idea to use North American 2-row or 6-row malt. These malts tend to have the most excess enzymes, which help convert the additional starches.
American
North American 2-row malt (1–2°L): If you want a crisp, clean malt taste without a lot of toasty, biscuit tastes, this is your go-to malt. The neutral taste also allows brewers to make strong beers (6–10% ABV) that are much more drinkable than an identical beer made with a British or European malt. There’s not a lot of difference from maltster to maltster, but my favorite North American maltster is Great Western. Rahr also is an excellent choice.
Note: With 2-row, be careful when sparging your mash. If you oversparge or use water that’s too hot or has a high pH on 2-row, you’ll definitely extract a husky taste.
North American 6-row malt (1–2°L): This malt is similar to North American 2-row but with more protein and more husk, which can lead to hazy beer and an increased chance of picking up husky flavors. The higher levels of protein and husk make this malt useful for large breweries, which often use a hefty amount of rice or corn in their beers. The extra husks help keep the adjuncts in the mash from sticking, and the rice’s or corn’s lack of protein dilutes the protein. Just because large breweries use 6-row doesn’t mean you shouldn’t use it on a homebrew scale. In fact, 100 percent of 6-row lagers can taste great and score well in competitions. Don’t be afraid of 6-row, but make sure to do a protein rest (page 48) and take the same precautions as 2-row when it comes to sparging.
British
British pale-ale malt (3–4°L): While many recipes simply call for “British pale-ale malt,” many varieties are available, including Golden Promise, Halcyon, Maris Otter, Optic, and Pearl. Any variety will work fine in a British ale, but Maris Otter, with its strong, toasty malt flavor, is the most recognizable. Brewers differ in their opinions on Maris Otter. Some swear by it, while others don’t think it makes much of a difference. I like the malt’s flavor but find it can taste too toasty in some recipes. I’ll often mix it with a less flavorful malt, such as North American 2-row. Golden Promise is another standout with which some brewers notice a marked difference. It’s a Scottish malt with a distinctive sweet flavor, making it a good choice for Scottish ales (no surprise there).
If you start paying close attention and playing with a variety of British pale-ale malts, you’ll soon come across floor-malted varieties. Floor malting indicates that the malt was turned manually while sprouting, as opposed to being turned by machines. It doesn’t necessarily guarantee a better product, but it’s more traditional and can serve as a sign of how much care a maltster is putting into the product.
German
German pilsner malt (1.5°L): The palest malt made in Europe, this malt is often used for 100 percent of a grain bill to make pilsners. It has a sweet flavor, with hints of graham crackers and honey. It’s essential for re-creating European pale beers such as Kölsch, helles, and of course pilsner.
Vienna malt (4°L): Vienna is a slightly darker version of pilsner malt. When used at 100 percent of a grain bill, it will produce a deep, golden beer with a slightly more pronounced malt flavor. It’s often used to beef up the malt flavor in amber lagers (and occasionally in ales) without adding too much color. Bell’s® Two Hearted Ale® supposedly uses 10–15 percent Vienna, for example.
Munich malt (6–8°L): An even darker base malt than Vienna, Munich produces a light amber-colored beer with an intense malt aroma and taste when used at 100 percent. It’s commonly used in the 10 percent range to add complexity to a large variety of beers, including IPAs and brown ales. Traditionally, it’s an essential component in alt beers, dunkels, and bock beers, where it can make up all of the grain bill. Munich malt also comes in a dark version (15–20°L) that I prefer over the regular Munich malt. It has a flavor that just screams “German!” If you’re substituting dark Munich into a recipe, use half as much as regular Munich malt and substitute pilsner malt for the rest. You also can make a beer with a heavy-handed use of dark Munich malt. Some of the best Munich Dunkel recipes use 50–60 percent dark Munich for the grain bill.
Beyond Barley
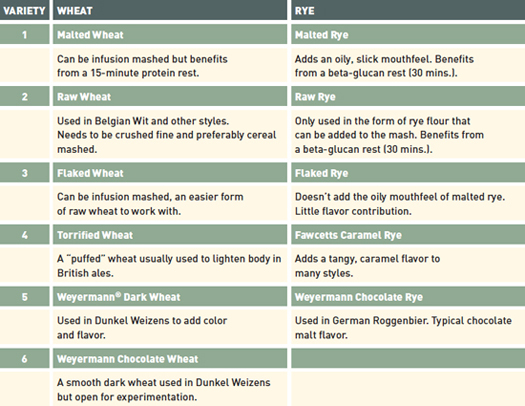
Malted wheat: Wheat gives a softer, rounder mouthfeel to beers and a pleasant grainy flavor. The protein in the wheat can give beer a haze, which is desirable in most wheat beers. It’s an old homebrewer’s belief that wheat enhances head retention, but this hasn’t proven true in my experience. Beers with large amounts of wheat in them can have worse head retention than an all-barley beer. Wheat doesn’t have a husk, so if you try to mash 100 percent wheat, you’ll end up with a gummy mess. You can use rice hulls, which are just flavorless husks, in the mash to facilitate sparging or just keep the wheat at no more than 70 percent of your total grain bill. Raw wheat, which isn’t malted, has a tangy, rustic flavor that’s different from that of its malted brother. Other specialty wheats also are available. See the chart below.
Malted rye: Rye malt is hardly ever used in amounts greater than 15 percent except in a German Roggenbier. Some breweries tout the spicy flavor of rye, but malted rye does more to alter the mouthfeel of a beer than the flavor. It contributes an oily-feeling or “slick” quality that can be perceived as added body, which can be helpful in a session beer. Flaked rye doesn’t seem to have this effect, and my experiments with using it up to 50 percent have shown that it has little flavor contribution compared with malted rye. Some maltsters are creating special types of malted rye along with specialty wheats. See the chart below.
Types of Wheat and Rye

CRYSTAL/CARAMEL MALTS
Crystal malts are base malts mashed to develop sugars, but because the grains are left whole, the sugars are trapped inside the grain. The sugar-filled grains then are kilned to caramelize the sugars inside. The flavors and colors produced from the kilning can range from barely notable to intense. It’s hard to make generalizations about crystal malts because they vary wildly from maltster to maltster. North American and German crystal malts aren’t as complex and don’t give as much sweetness as others. British crystal malts are more complex and aggressive, whereas Belgian crystal malts fall somewhere between British and North American ones. The terms “caramel” and “crystal” are used for the same product, depending on where it was produced.
Light Crystal Malts (10–30°L)
Examples: British Light Crystal (sometimes called Caramalt or Carastan), North American Crystal (10–30°L), German Carahell (10°L), German Caravienne (25°L)
American and German light crystal malts have a slight golden color but not a lot of caramel flavor or sweetness. I’ve made numerous pale ales with 30 percent light crystal malts, and the results have consistently underwhelmed. There’s minimal sweetness or body contribution even when mashing at high temperatures. It may help to think of these malts as more like a base malt on par with Vienna when it comes to their character.
If you want a light crystal malt with more flavor, try substituting aromatic or melanoidin malt or try using British light crystal malts, such as Carastan or Caramalt, that contribute a delicate, toasty malt flavor without too much caramel character.
Medium Crystal Malts (40–80°L)
Examples: British Crystal 45–70°L (big difference between maltsters); North American Crystal 40–80°L (no real difference between maltsters); Belgian Caramunich; German Caramunich I, II, and III, (45, 60, and 75°L, respectively)
Malts in this category tend to contribute a smooth caramel flavor and an amber color with usage in the 5–10 percent range. A handful of craft breweries, such as Rogue Ales, use large amounts of medium crystal malts in their beers, but most brewers feel that heavy-handed use of these malts muddies up the flavor and competes with the hops. It’s a matter of personal preference, but if you find your beers are thick on the palate and your hop flavor seems muted, try easing up on the medium crystal malts. You can get your color with a small amount of darker malt instead.
Unlike with light crystal malts, selecting the right medium crystal for a recipe is crucial. British crystals tend to bring more raisin and burnt-sugar character and can vary quite a bit from maltster to maltster (and even batch to batch from the same maltster.) I like most British crystal malts in the 25–50°L range; they aren’t too raisiny and add a lot of complexity without a ton of color. In contrast to the British malts, the German crystal malts are über-consistent but fairly restrained. I usually use only German caramel malts for German styles and the same for Belgian caramel malts and Belgian-style beers. North American medium crystal malts are similar to the German malts in that they’re available in dozens of varieties that all have a crisp, clean flavor. Use them in pale ales, IPAs, and especially West Coast IPAs (where you don’t want the crystal competing with the hops).
Dark Crystal malts (120–160°L)
Examples: Belgian Special B (150°L), Briess Extra Special Malt (135°L), Weyermann Caraaroma (130°L), Fawcett Dark Crystal (150°L)
Dark crystal malts typically contribute strong raisin, toffee, and burnt-sugar aromas and tastes. They quickly can become overpowering if you use too much (no more than half a pound of any in a 5-gallon batch). Since most types of dark crystal have their own character, it’s better to discuss the most popular ones individually.
Special B (150°L): Probably the most intense of the dark crystal malts, Special B has a strong raisin—almost winey—aroma and taste. It’s made in Belgium and considered essential for many dark Trappist styles. In general, keep it below 5 percent.
Extra Special Malt (135°L): Made by Briess in America, Extra Special Malt is much milder than Special B and gives a complex flavor without any winey notes. Highland Brewing, a regional brewery on the East Coast, uses this malt as the only specialty malt in its tasty Gaelic Ale.
Caraaroma (130°L): Made by the Weyermann malt house in Bamberg, Germany, Caraaroma gives beers a beautiful ruby-red color and is similar in flavor to the Extra Special Malt above. As with any of these malts, half a pound in 5 gallons is plenty.
British Extra Dark (150°L): With lots of burnt-sugar and toffee character, this malt is great in red ales, extra special bitters (ESBs), or any beer that needs a deep mahogany color and lots of intense flavors.
CHARACTER MALTS
Character malts are like base malts on steroids. They pack a much more aggressive malt flavor. They can be used discreetly (5–10 percent of a grain bill) to add complexity, or they can go as high as half of the grain bill for a truly intense malt aroma and taste. Although this sounds great in theory, an overuse of these malts can produce cloyingly sweet beers, and the poor balance of flavors impedes the drinkability of the finished product.
Aromatic (25°L): This malt has an intense, almost exaggerated malt aroma and taste. At 5–10 percent, it’s a great choice for bringing up the color and malt flavor of a beer without adding a caramel flavor. As the only character malt in an imperial IPA (at around 10 percent), it gives an attractive orange color and a complex malt flavor that isn’t too sweet. Franco-Belges has a malt called “Special Aromatic,” but it’s really just a Vienna or Munich malt.
Melanoidin (23–30°L): Melanoidin is similar to aromatic but less intense. It was created to simulate the flavors from a decoction mash, which technically aren’t melanoidins but Maillard reactions. It can be substituted for aromatic malt in most recipes.
Honey Malt (20°L): A unique malt from Gambrinus Malting in Canada, this tastes similar to honey, with an intense, sweet character. It’s a no-brainer in a honey blonde recipe or in Belgian blonde or tripel. It can be quite intense for such a low Lovibond malt, so keep it under 5 percent to start with.
Biscuit/Victory®, Amber, and Special Roast (25°L): All of these malts are toasted malts that add a dry, nutty flavor to beer. Biscuit (Belgium), Amber (England), and Victory (U.S.) malts have a biscuity, peanut shell–like flavor. Special Roast is slightly darker than Biscuit and Amber at 55°L. It adds a tangy, almost sourdough aroma and taste. These malts can be used in the 5–10 percent range and are good malts to try in experimental pale ales.

Joseph Lovibond was a commercial brewer whose brewery existed until 1959. His lasting legacy, however, is his color scale. Invented in 1921, the scale is still the standard for commercial brewers today.
The palest malt you’re likely to come across as a brewer will be about 1.5 degrees Lovibond (or 1.5°L). This would be an expected Lovibond rating for North American 2-row or 6-row malt and German pilsner malt. Malts continue up the scale to the blackest of the roasted malts at 550°L.
While the Lovibond rating conveys the color of malted barley and specialty malts, a scale known as the Standard Reference Method (SRM) denotes the color of the finished beer. The two scales are related: If you add the Lovibond ratings of the grain used and then divide by the number of gallons of beer, you get the SRM. For example, if you used 10 pounds of pale malt at 1.5°L plus ¾ pound of 60°L crystal in a 5-gallon batch, you would use this formula:
[(10 × 1.5) + (0.75 × 60)] ÷ 5 = 12 SRM
Here are some color descriptions commonly used for beer and the corresponding SRMs:

Europe uses a scale known as the European Brewing Convention (EBC). It’s basically twice the Lovibond rating. (60 Lovibond is the same as 118 EBC.) When following someone else’s recipe—especially someone from a foreign country—it’s important to know which scale is being used. If a recipe from Germany calls for Crystal 65, then you need to know if that’s Lovibond or EBC.
Roasted Malts
Roasted or dark malts usually fall between 300°L and 550°L—any darker than that and the grain would catch on fire! These malts contribute a dark color and tastes that range from chocolate to scorched toast. It may seem counterintuitive, but you can and often should use these malts to a higher percentage than crystal malts. For example, my house stout recipe uses 1½ pounds of black malt in a 5-gallon batch (page 63) to achieve a smooth dark-chocolate flavor. Let’s start with the lightest and work up the list.
Brown malt (60°L): This is the original malt used to make traditional porter and stouts. A great secret ingredient in any dark ale, it gives a complex coffee and roast taste and varies greatly among maltsters. I really like Thomas Fawcett’s version.
Coffee malt (165°L): This malt is similar to pale chocolate malt (below) but has an unmistakable coffee flavor. Brewers tend either to love it or hate it. Try it in a brown ale at 5 percent and see what you think.
Pale chocolate malt (215°L): This malt is a lighter version of chocolate malt, which is useful when you want to get some complex chocolaty flavors but don’t want a lot of color. It’s a great choice for brown ales and ESBs. It’s usually used at 3–5 percent.
Chocolate malt (about 350°L): This malt can add enough color to make a beer opaque without adding any burnt flavors. Unsurprisingly, it has a chocolaty aroma and taste that work well in any dark amber to black beer. Each maltster’s chocolate malt has its own flavor, so definitely experiment. It’s usually used in the 5–8 percent range.
Roasted barley (about 500°L): This is the black sheep of the specialty malts because it’s the only one made from raw barley that hasn’t been malted. This gives it a distinct flavor: slightly more ashy and burnt compared to black malt. It’s traditionally used at around 10 percent in beers such as Irish-style stouts. Small amounts (2–3 percent) add color to Scottish ales as well.
Black malt (usually 400–550°L): Black malt is a fairly generic term that covers a huge range of malts with wildly different flavors. This category used to be called “black patent malt,” and that name is still kicking around—especially for British malts. Black malts can range from smooth, bittersweet chocolate flavors to charcoal. The only way to get to know these different malts is to brew with them. Develop a simple house stout recipe with around 10 percent black malt and repeatedly substitute different black malts every time you brew. With a good base recipe, it always will be tasty, and it always will be different. Here are a few black malts that stand out:
![]() British black malt: This one has a wonderful smooth, bittersweet chocolate flavor but doesn’t bring any harsh character to the beer. It’s my go-to malt for American black ale and roasty stouts, and I usually use Crisp or Thomas Fawcett brand.
British black malt: This one has a wonderful smooth, bittersweet chocolate flavor but doesn’t bring any harsh character to the beer. It’s my go-to malt for American black ale and roasty stouts, and I usually use Crisp or Thomas Fawcett brand.
![]() Dehusked Carafa malt: Removing the husk minimizes any chance of harsh bitterness. This malt has a more refined flavor than British black malt, but it sacrifices complexity in order to get it. It’s a great malt to use when making dark German or Czech lagers, Baltic porters, and black IPAs. It also can be used in small amounts to get a hint of color in many amber beers. It comes in three degrees of roast: Carafa I, II, and III (330, 410, and 525°L, respectively). The Carafa name is a trademark of Weyermann, but other manufacturers use the terms “debittered” or “dehusked” to designate a similar product.
Dehusked Carafa malt: Removing the husk minimizes any chance of harsh bitterness. This malt has a more refined flavor than British black malt, but it sacrifices complexity in order to get it. It’s a great malt to use when making dark German or Czech lagers, Baltic porters, and black IPAs. It also can be used in small amounts to get a hint of color in many amber beers. It comes in three degrees of roast: Carafa I, II, and III (330, 410, and 525°L, respectively). The Carafa name is a trademark of Weyermann, but other manufacturers use the terms “debittered” or “dehusked” to designate a similar product.
![]() Midnight Wheat®: A black wheat malt made by Briess that’s similar to the Carafa malts, Midnight Wheat has no husk because it’s wheat. It’s unusual in that you can use it to make a pitch-black beer with virtually no roast flavor. That feature makes it a great choice for black IPAs or Belgian dark ales, where you want a strong ratio of color contribution to flavor.
Midnight Wheat®: A black wheat malt made by Briess that’s similar to the Carafa malts, Midnight Wheat has no husk because it’s wheat. It’s unusual in that you can use it to make a pitch-black beer with virtually no roast flavor. That feature makes it a great choice for black IPAs or Belgian dark ales, where you want a strong ratio of color contribution to flavor.
![]() North American black malts: These usually are made with 6-row malt and have a very intense and distinct flavor. I would describe them as having dark molasses and licorice taste at normal usage (5–10 percent). At higher rates, the flavors become harsh and almost phenolic (plastic-like aroma).
North American black malts: These usually are made with 6-row malt and have a very intense and distinct flavor. I would describe them as having dark molasses and licorice taste at normal usage (5–10 percent). At higher rates, the flavors become harsh and almost phenolic (plastic-like aroma).
OTHER MALTS
Smoked Malts
Back in the day, all grain was dried after sprouting by using wood smoke (or perhaps peat in Scotland), so all beer had a bit of smoke flavor. Nowadays, smoked beer is making a comeback among craft brewers, especially with smoked porters. Some brewers use pre-smoked malt, which is available from several maltsters, and some prefer to smoke their own. Smoking a large quantity of malt is a huge endeavor, but for homebrewers who need only a few pounds, it’s more manageable.
Peat-smoked malt: This malt from Scotland, which is used to make scotch, has a phenolic aroma that most drinkers find objectionable. Some brewers continue to use it. I would never use more than 1–2 percent in a Scottish ale, and I strongly recommend starting with another smoked malt for better aroma and taste.
Beechwood smoked malt: This German malt is used to make the famous rauchbiers in Bamberg. These malts often are used for up to 90 percent of the recipe, but I would start at 40–50 percent and work up from there. Drinking 5 gallons of an intensely smoky beer can become a chore!
Other smoked malts: Briess makes an intense cherrywood-smoked malt that gives an intense, smoky flavor to a beer when used as little as 5–10 percent. Weyermann Malt also makes a special wheat malt smoked using oak instead of the beechwood they use to smoke their barley. Like the German smoked barley, it can be used as up to 90 percent of the mash, but keep it at 70 percent or lower.

Acid Malt
Its own naturally occurring lactic acid sours this malt from Germany. It traditionally was used to lower the pH of the mash by brewers who followed Reinheitsgebot, which forbids using anything other than malt, hops, yeast, and water when brewing beer. Brewers not restricted by outdated Bavarian brewing laws can add lactic or phosphoric acid to lower the pH of their mash if necessary. (See page 56 for more on pH.)
Although it’s tempting to throw several pounds of acid malt right into your mash for an easy sour beer, you need to remember that the enzymes in malt need a particular pH in order to convert the starch in the malt. If you add enough acid malt to make the mash sour, then you’re also making the mash too acidic for the enzymes to do what they need to do. If you really want to go this route, adding lactic acid to taste in the finished beer is a better solution.
TOP MASHING AND COLD STEEPING
Brewers occasionally want to add color to a beer but keep the flavor impact more subdued than a normal mash. (Typically they’re trying to avoid the deep roasty flavors that usually come with the darker malts.) Here are three ways to add color and subdued flavor with dark malts.
 Top mashing is a simple technique: You wait until your main mash completes, sprinkle the dark malts on top of the mash, then begin sparging. This minimizes the contact time of the dark malts and results in a smoother, mellower flavor while still extracting color. This was a popular procedure among homebrewers before the new dehusked black malts were available, and it remains a useful technique.
Cold steeping is a method taken from the coffee industry. You mix the crushed dark malt with enough cold water to cover it and let it sit overnight. Then strain the mixture through a coffee filter into a jar. It’s usually added to the kettle at the end of the boil. The advantage of this method is that you can add just enough of the tea to get the color you want with minimum flavor contribution.
Sinimar® is a commercial malt extract made entirely of black malt. You can add it at any time, from the kettle to the kegged beer. It’s a great way to make color adjustments late in the game or even to change a beer into a different style. Use it to turn your hefeweizen into a dunkelweizen in a matter of minutes.
TOASTING SPECIALTY MALTS
Modern specialty malt manufacturers can get a vast array of colors and flavors that are consistent from batch to batch. Toasting malt at home in your oven can yield good results, but it can be pretty inconsistent from batch to batch. You might wonder why you’d want to make your own. My answer is that it’s still fun—and you learn about the toasting process. Even if the toasting schedule isn’t exactly repeatable, there’s still something to be said for starting with a sack of pale malt and being able to make a variety of specialty malts from it.
YOU NEED
oven
baking sheet
aluminum foil
2–3 pounds North American or British 2-row malt
paper bag
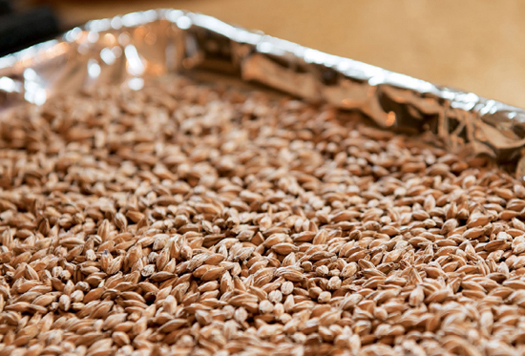
Making Toasted Malt
The simplest of specialty malts to make at home is a toasted malt. A lightly toasted pale malt would be in the 20°L range and would be similar to Biscuit malt. If you keep heating the grain, you get into the Amber malt or Special Roast–type malts. These give more of a red hue and a distinct bready flavor to a beer. You can even wait until the malt starts to turn a light-brown color and create a brown malt with an almost coffee-like character.
1. Preheat your oven to 350°F.
2. Cover your baking sheet with foil and place malt on top. (The foil makes removing the grain from the pan much easier.)
3. Place the sheet in the oven. Toast for 20 minutes, stirring occasionally, for malt in the 20°L range. Toast for 30–40 minutes for malt in the 40–60°L range. For an even darker malt, along the line of an 80°L brown malt, turn the oven up to 400°F and leave the malt in for almost an hour. Stir it occasionally, but stir it very frequently near the end.
4. Remove the sheet from the oven and let the malt cool.
5. After the malt is cool, fold the foil into a makeshift funnel and pour the malt into a paper bag. Most people who regularly home-toast recommend letting the malt sit for a few weeks before using it. This curing process allows the grain to release some volatile flavors.
6. After it rests, spotlight your malt in a beer so you can taste the results! A simple amber ale with a clean base-malt flavor and not too much going on in the hop department works. See page 40 for my recipe.
Making Crystal/Caramel Malts
Making crystal malt is similar to making toasted malt except that you need to develop the sugars in the grain before toasting it. This is the same technique as mashing, but the grain isn’t crushed first, and you aren’t going to try to rinse the sugars off the grain afterward. Instead, you want the starch inside the grain to convert into sugar. Then you caramelize those sugars by heating them up.
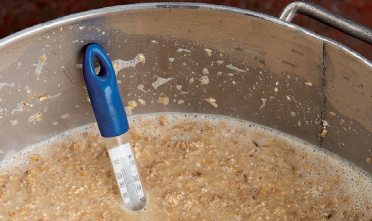
In addition to the supplies needed for toasted malts, at left, you’ll also need a large pot to hold 2 pounds of uncrushed pale malt, filtered water, and a thermometer.
1. In a pot, soak 2 pounds of uncrushed pale malt in room-temperature filtered water (enough to barely cover the grain).
2. Heat the mixture to 155–160°F and hold it for another hour.
3. Preheat the oven to 250°F. Drain the grain and spread it on a baking sheet as with the toasted malt. The malt needs to be dried before toasting, so put it in the preheated oven for about 2 hours.
4. When the malt is dry, you could stop and have a light crystal malt around 10°L. Turning up the oven to 350°F and waiting 15–20 minutes will give you a medium crystal in the 40–60°L range, and waiting for 45 minutes will give you a full-flavored dark crystal malt in the 100–120°L range. As with the toasted malts, crystal malts should age in a paper bag to mellow for at least two weeks.
Making Roasted Malts
Making roasted malts is very tricky without the right equipment. In a malt house, a roaster activates a water spray to chill the grain quickly right before it catches fire. Oh yeah—there’s a lot of smoke involved. You really don’t want to do this in your kitchen! But if you’re in a postapocalyptic scenario and you need to make stout from a sack of pale malt, here’s what you should do.
1. Preheat your oven to 450°F.
2. Start out like you’re making toasted malt, stirring the malt often for about an hour.
3. When the malt starts turning chocolate brown, keep a close eye on it. When you smell the slightest hint of smoke, take the pan from the oven and put it outside. Wrap the grain up in foil and let it cool.
4. Store it in a paper bag for about two weeks to mellow.
5. You’ll have to judge by taste how much you want to use in a recipe: 5 percent should give you a smooth porter or brown ale, while 10 percent should give you an almost black stout. Even if the beer comes out great, you’ll appreciate being able to buy roasted malt at your local homebrew shop from now on!
DIY AMBER
Since this beer is designed as a showcase for your home-toasted malt (page 38), the color and flavor depend entirely on how dark you go with your toasting. It may be deep gold with a delicate biscuit flavor or dark brown with roasted flavors. The hop bitterness stays low so it doesn’t interfere with the malt.
YOU NEED
basic brewing equipment (page 3)
8½ gallons filtered brewing water (page 12)
9 pounds pale malt (81.8%)
2 pounds home-toasted malt (page 38) (18.2%)
7 alpha acid units Willamette hops at 60 minutes (25 IBU)
1 Whirlfloc tablet
2 vials or packages California Ale WLP001/American Ale WY1056 yeast (or a 2-liter starter made from 1 pack; page 110)
3¾ ounces dextrose/corn sugar (optional, use only for bottling)
TARGETS
Yield: 5 gallons
OG: 1.053–1.055
FG: 1.012
IBU: 25
1. Mix the malt with 3½ gallons of water at 170°F or the appropriate temperature to mash at 155°F. Mash for 60 minutes.
2. Recirculate the wort until it’s fairly clear. Run off the wort into the kettle.
3. Sparge with 5 more gallons of water at 165°F. Run off the wort into the kettle.
4. Bring the wort to a boil. Boil it for 15 minutes, then add the hops and continue to boil for 60 minutes. Add the Whirlfloc tablet at 30 minutes. Put your wort chiller into the wort at least 15 minutes before the end of the boil.
5. When the boil finishes, cover the pot with a lid or a new trash bag and chill to 65°F. Siphon the wort into your sanitized fermentor and pitch two packs of liquid yeast or a 2-liter starter.
6. Ferment at 65°F for one week. During the second week, let the temperature rise to 68–70°F.
7. Keg or bottle the beer. If you’re bottling, use 3¾ ounces of dextrose/corn sugar for this beer.

SMASH IPA
The only way to know exactly how a specific hop or malt tastes is to brew a beer using the hop or malt in isolation. A Single Malt and Single Hop (SMaSH) beer kills two birds with one stone—it gives the spotlight to one variety of malt and one type of hop. The overall character of the beer can vary greatly depending on your choices. A beer made with Munich malt and Centennial hops will be a different animal than one brewed with floor-malted Maris Otter and Fuggles. Make sure to take good tasting notes.
YOU NEED
basic brewing equipment (page 3)
9 gallons filtered brewing water (page 12)
13 pounds base malt (your choice, 100%)
15 alpha acid units hop of your choice at 60 minutes (54 IBU)
1 Whirlfloc tablet
1 ounce same hop at 15 minutes (10–20 IBU)
3 ounces same hop at end of boil (0 IBU)
2 vials or packages California Ale WLP001/American Ale WY1056 yeast (or a 2-liter starter made from 1 pack, page 110
3 ounces same hop after primary fermentation (dry hop)
4.4 ounces dextrose or corn sugar (optional, use only for bottling)
TARGETS
Yield: 5 gallons
OG: 1.060–1.064
FG: 1.010
IBU: Around 70
1. Mix the malt with 4 gallons of water at 165°F or the appropriate temperature to mash at 150°F. Mash for 60 minutes.
2. Recirculate the wort until it’s fairly clear. Run off the wort into the kettle.
3. Sparge with 5 more gallons of water at 165°F. Run off the wort into the kettle.
4. Bring the wort to a boil. Boil it for 15 minutes, then add the hops and continue to boil for 60 minutes. Add the Whirlfloc tablet at 30 minutes. Put your wort chiller into the wort at least 15 minutes before the end of the boil. Put in the other hop additions.
5. When the boil finishes, cover the pot with a lid or a new trash bag and chill to 65°F. Siphon the wort into your sanitized fermentor and pitch two packs of liquid yeast or a 2-liter starter.
6. Ferment at 65°F for one week, then let it warm to 68–70°F for the second week. Add the dry hops after primary fermentation slows down, usually after 5 to 7 days. Keg or bottle the beer. If bottling, use 4.4 ounces of dextrose or corn sugar for this beer.

MASHING, SPARGING, AND WATER ADJUSTMENT

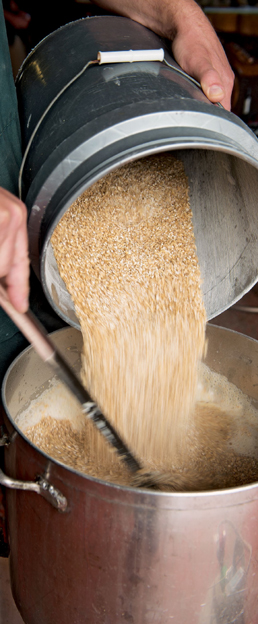
MASHING
Mashing is simply mixing grain and hot water together in order to let the enzymes in the malt convert the starches into sugars. The temperature of the mash determines to some extent the fermentability of the wort and, therefore, the body of the finished beer. The length of a mash can be as short as 20 minutes or as long as several hours, although 60 minutes is commonly accepted as an adequate amount of time. There’s little difference between mashing on a commercial scale and homebrewing except that professional brewers have a grist hydrator, a tool that sprays the water onto the grain as it enters the mash tun. Some commercial breweries have mash rakes that rotate in the mash tun to mix the grain and water together, but others use a paddle and manpower. The mash tuns in commercial breweries have slotted bottoms—commonly known as false bottoms—that allow the wort to separate from the grain. Homebrewers have invented a myriad of straining mechanisms (page 4).
The Temperature Zones
For some of the various mashing options that follow, it helps to understand a bit about the effect that certain temperature ranges have on malt. Many brewers don’t know that as soon as malt meets water, things are going on at an enzymatic level—no matter what the temperature! Even at room temperature, starch begins hydrating and slowly converting, and the pH of the mash slowly drops. Old German brewmeisters called this an acid rest, but for modern brewers it’s little more than a historical tidbit. Modern mashing doesn’t require an acid rest, and even when a commercial brewer wants to adjust the pH, he or she typically uses acid malt or food-grade acid instead of an acid rest.
Raising the mash temperature to between 115° and 117°F is a rarely used rest known as a beta-glucan rest. Brewers find it useful when their recipe contains large amounts of gluey malts or adjuncts such as rye or oats. This rest will help break down the sticky beta-glucans (long-chain, unfermentable sugars) and hopefully make the mash and sparge more manageable.
Raising the mash temperature to between 122° and 135°F is known as a protein rest. This temperature zone energizes the proteolytic enzymes that will break up the proteins that can cause haze in a finished beer. These enzymes also can impact head retention and mouthfeel adversely, so a limited amount of time should be spent at this range. On the rare occasions that I do a protein rest, I aim for the higher end of the range (around 132°F) and hold it for just 10 to 15 minutes.
Once the mash is between 140° and 148°F, you’re at the low end of the saccharification rest. In this range, diastatic enzymes known as beta amylases kick-start and begin to make short-chain sugars from the starch, which are highly fermentable. The longer the mash stays in this temperature range, the crisper and drier your finished beer will taste. Raise the mash temperature above 150°F for at least 10 to 15 minutes after this rest to ensure that all the starch in the barley is gelatinized and available to the enzymes.
Note: To gelatinize a grain means that you are getting it to absorb as much water as it possibly can. Because enzymes can’t work on starches that haven’t been gelatinized, it’s important that any starch you use is fully gelatinized. Since grains don’t absorb much cold water, hot water is required for complete gelatinization. How hot the water needs to be depends on the particular starch and how finely it’s ground. Crushed barley is gelatinized at normal mash temperatures, but other grains should be boiled for up to an hour (page 161).
The next step up is from 149° to 160°F. This is the high end of the saccharification rest and the range most brewers mean when they refer to a saccharification rest. This rest turbo-charges enzymes known as alpha amylases. These enzymes create longer-chain sugars and dextrins from the starch, which are less fermentable than the short-chain sugars and contribute to the mouthfeel of the beer. This alpha-amylase zone is typically the only temperature range used by modern brewers. It’s the optimal temperature in which many enzymes work their magic and completely convert nearly all of the starch in the mash to sugar in as few as 15 minutes. However, 45- to 60-minute mashes are more common.
The final temperature range, when the entire mash temperature is raised to 170°F, is often referred to as mashout. This temperature facilitates the runoff of the wort and deactivates the majority of the enzymes. It helps lock down the fermentability of the wort. Commercial brewers rarely use it, mostly because of equipment limitations, but homebrewers commonly use it—especially when mashing grains that can cause a stuck mash, such as rye or wheat.
Extraction Rates and Evaporation Rates
Points per pound per gallon (PPG) is the amount of sugar (in gravity units) that 1 pound of grain or sugar will add to 1 gallon of water. For example, 1 pound of cane sugar in 1 gallon of water gives you a gravity of 1.046 or 46 PPG. Dividing by 5 will give you the gravity for 5 gallons: 46 ÷ 5 = 1.009.
Different grains yield different PPG. Base malts such as pilsner, pale ale, or 2-row have the potential to give you 37 PPG, but that’s in a laboratory setting. Most homebrewers get 65–75 percent of the potential extract, which is called your “efficiency.” To find out the efficiency of your particular brew system, mash 10 pounds of base malt and collect 6 gallons of wort. The theoretical maximum is 10 (pounds) × 37 (PPG) ÷ 6 (gallons) = 61 or 1.061. If the actual gravity of your wort is 1.046, then your brewhouse efficiency is 46 ÷ 61, or 75 percent.
Once you know your efficiency, you can determine the gravity of your wort fairly accurately based on the grain used. It gets a little tricky when you start throwing in different specialty malts because they have varying PPG depending of the level of roasting. Here are some typical PPG for various malts with a standard efficiency of 75 percent:
Base malts (2-row, pilsner, pale ale) |
28 PPG |
Dark base malts (Munich, Vienna) |
26 PPG |
Crystal malts |
25 PPG |
Chocolate malts (300–400°L) |
21 PPG |
Black malts (400°L+) |
19 PPG |
Raw grains can vary wildly in PPG depending on gelatinization temperatures and on how finely they’re milled. See “Raw Wheat Experiment,” page 160.
With this information you can calculate the gravity of a 6-gallon batch of porter with the following recipe:
9 pounds pale malt
1 pound Munich malt
1 pound crystal malt
½ pound chocolate malt
½ pound black malt
The PPG of each malt above is easy to figure out.
Pale malt: 9 × 28 (PPG) ÷ 6 = 42
Munich malt: 1 × 26 ÷ 6 = 4.3
Crystal malt: 1 × 25 ÷ 6 = 4.2
Chocolate malt: 0.5 × 21 ÷ 6 = 1¾
Black malt: 0.5 × 19 ÷ 6 = 1.6
Adding these together gives the PPG for the porter: 54 or 1.054.
Of course, this is your pre-boil gravity. Your gravity will increase as you evaporate the water and concentrate the wort. Usually you’ll concentrate the wort from 6 gallons to 5 gallons, which will give you a starting gravity of 1.065 in this scenario. (Divide the above formulas by 5 instead of 6 to get the post-boil numbers.)
Evaporation rates can be difficult to predict, however, because they depend on the intensity of the boil, the surface area of the kettle, and even humidity. Commercial brewers talk about evaporation as a percentage. When they say they get 10 percent evaporation, it means that they lose 10 gallons for every 100 gallons during a typical boil. However, homebrewers tend to think about evaporation in terms of gallons. If you typically lose 1 gallon for every 60 minutes of the boil (or 1½ gallons during a 90-minute boil), that means you’ll need 6½ gallons of wort in the kettle for a 60-minute boil or 7 gallons for a 90-minute boil to end up with 5½ gallons at the end. After a few brews, you’ll know how much typically evaporates and collect enough wort so you end up with the desired volume at the end of the boil.
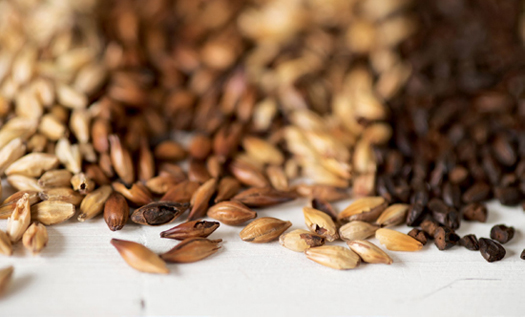
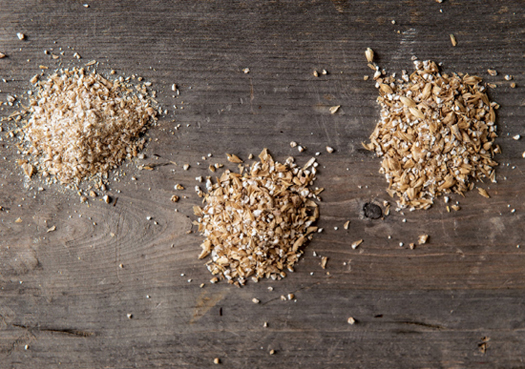
Theoretically the perfect crush would be almost completely intact grain husks, with the inside of each husk crushed into flour. This would allow easy and complete gelatinization and saccharification of the starch flour while ensuring a good filter bed from all the large husk material. In practice, this is almost impossible to achieve. If you adjust your grain mill with too tight a gap, then the husks will tear to bits—possibly resulting in a husky, astringent flavor and a stuck mash. If you adjust your mill with too much of a gap, then you will have uncrushed kernels, and your efficiency will drop like a rock. The happy medium that brewers want is to have no uncrushed grains and a good amount of large pieces of husk to form a good filter bed. If you notice overly low efficiency from your mash (less than 65%), then try a tighter crush on your malt. Sometimes running the malt through the mill a second time also can help. Of course, if you start having stuck mashes or a harsh, tannic flavor in your beer, then you may want to crush a little more gently and just add an extra pound or two of grain.
Note: The grain on the left has been crushed too finely. Notice how the husks aren’t as intact as those in the piles to the right. The crush on the far right has gone too far in the other direction. You can see whole pieces of barley that slipped through the mill uncrushed. The ideal crush is the one in the middle.
MASHING OPTIONS
How does a brewer decide what kind of mash regimen to use? For one, he or she may be limited by equipment. A plastic cooler doesn’t allow for multiple steps without adding large amounts of boiling water. The grain bill might make a protein rest undesirable (all British malt), optional (German malts), or necessary (lots of rye/oats). In this section, we’ll go over the various mashing methods and when to use them.
Single-Infusion Mash
Modern commercial brewers rarely concern themselves with anything other than an infusion mash at a single temperature somewhere between 146°F and 160°F. As I mentioned in the “The Temperature Zones” (page 45), the lower the temperature, the more fermentable the wort will be; the higher the temperature, the less fermentable it will be. Most breweries, however, settle on a happy medium for most brews and mash at 150–153°F for 45 to 60 minutes. This suits modern brewing systems, which rarely allow the heating of the mash (and it avoids the financial increases in energy and time required to perform multiple-step mashes).
Here’s an example of the type of mash that the majority of commercial breweries use: a simple infusion mash that uses strike water around 15°F hotter than the desired mash temperature (20°F if the grain is cold). The grain absorbs some of the heat, which drops the mash temperature into the desired range. This works extremely well with British malts and also is appropriate for most North American and European malts.
Infusion Mash with a Protein Rest
If a brewery is doing anything other than a basic infusion mash, chances are they’re doing a two-step mash so they can utilize a protein rest. Basically, this means mashing in at a lower temperature (122–135°F) and resting there for 10 to 20 minutes before ramping up to the conversion temperature range. Because most modern malt has had its protein degraded during the malting process, the overwhelming majority of commercial craft breweries would rather save the money and time and skip this step, but it still has its place for some breweries and in some recipes. Many if not most old-school European breweries continue to use a protein rest—and who can argue with tradition? I perform a 15-minute rest at 132°F whenever I’m using North American 6-row malt or European pilsner malt and am concerned about beer clarity. It’s worth noting, though, that this slight increase in clarity has to be weighed against a potential decrease in body and head retention, although this is more likely with a rest of 30 minutes or longer. It depends on the malt: You want to break the excessive protein down to an appropriate level but not to eliminate it completely. Some malts might take 5 minutes; others may take 20 minutes or more.
MASH TEMPERATURE EXPERIMENT
Common brewing knowledge tells us that mashing at a higher temperature will give us more unfermentable sugars and, therefore, a fuller body, while a lower-temperature mash should yield more fermentable sugars, consequently giving us a drier, crisper beer.
For this experiment, we tested that hypothesis with two identical mashes. Batch 1 was mashed at 146°F and Batch 2 was mashed at 164°F. The recipe was:
4 pounds British pale-ale malt
4 pounds German pilsner malt
1 pound German Caramunich II
8 alpha acid units Fuggle at start of boil
The original gravity of both beers was exactly 1.044, so there was no difference in extraction. It was pitched with California Ale WLP001 yeast and fermented at 68°F for 10 days.
Batch #1 (146°F mash) final gravity: 1.006
Batch #2 (164°F mash) final gravity: 1.016
A difference of .010 in final gravity is pretty substantial. The higher gravity should result in more body and sweetness, but surprisingly the opposite seemed to be true! I gave a side-by-side blind tasting to 10 professional brewers and beer judges, and nine of them chose the low-temperature mash as having more body (although just slightly). This flies in the face of conventional wisdom and implies that final gravity has little to no impact on perceived body.
I assume that the extra alcohol created in the low-temperature mash gives the impression of sweetness and body. What I take away from this experiment is that the only reason to mash at high temperatures is to limit the amount of alcohol in a session beer. Otherwise, keep those mash temperatures in the 148–152°F range.
Decoction Mash
Before the invention of thermometers, brewers figured out that if they mashed in at room temperature and then kept taking a portion of the mash, boiling it, and adding it back to the main mash (known as a “decoction”), they would get better results. Different brewers performed single, double, or even triple decoctions. (Talk about a long brew day!) Looking at it with a modern eye, we see that they likely were hitting the classic temperature ranges: 122°F, 145°F, and 162°F. But another benefit was the flavors created by the Maillard reaction, which happens when proteins encounter high heat.
Some brewers claim that the flavor contribution is negligible, while others swear they can taste the difference between a decoction-mashed beer and a standard mash. Regardless of whether there’s any notable difference with decoction mashing, I still enjoy employing it on ultra-traditional styles such as Munich Dunkel or traditional bocks and dopplebocks. I enjoy the connection with the brewers of the past and traditional ways of brewing.
Key Temperatures for Decoction Mashing
Room temperature: This is mostly for historical purposes. It can take several hours to lower the pH of the mash to desired levels.
117–120°F: This range is commonly used for German hefeweizens, but only if you want to increase the spicy clove-like character. It also can be used for a grain that has a lot of beta-glucan in it (such as rye.) Rest it for about 30 minutes.
132–135°F: Mashing in this range may help with clarity by getting rid of chill haze, but it also also may hurt head retention and body. The ideal amount of time to keep it here is about 10–15 minutes. Never hold it for longer than 20 minutes, if possible.
146–162°F: This is the range required for the conversion of starches. With most modern malts, aim for the low end for a more fermentable wort and for the high end for less fermentable wort. Rest for 60 minutes for complete starch conversion.
Kesselmaishe (My Favorite Decoction Mash)
When I want to make a beer with a decoction mash, I turn to an old style known as Kesselmaishe (German for “kettle mash”). The beauty of Kesselmaishe is that it allows you to go through a standard mashing schedule, drain off the enzyme-rich wort, boil the entire mash, and then add the wort back for a final conversion and mashout. In other decoction techniques, you typically must stay at certain rests for longer than you would like as you go through the process of boiling the decoction. This results in a protein rest of 30 to 45 minutes, which isn’t desirable. Kesselmaishe not only protects the wort that’s full of enzymes, but it also boils the full mash—which results in maximum Maillard reactions and, therefore, maximum flavor contributions from the added work you’re doing! If you want to perform a decoction mash for fun, nostalgia, or flavor, this is the technique I recommend.
STUCK MASHES
A stuck mash occurs when the flow of wort from the mash tun stops or slows to a trickle. It typically occurs only when using a large percentage of wheat, rye, or oats. While you can fix a stuck mash, the best approach is to try and avoid one in the first place. Adding half a pound of rice hulls to a mash will help considerably, as will doing a mashout. If you’re using a lot of rye or oats, you also can perform a 30-minute rest at around 117°F to break down their sticky beta- glucans.
If you still have a problem with your runoff, try blowing back through the tubing attached to your mash tun. This will remove compacted grain from around the strainer and usually will restart the flow. Then keep the flow on the slow side to prevent compacting the grain bed. If that doesn’t work, you may have to scoop out the grain into a bucket or cooler, clean out the mash tun and screen, and start over with some additional rice hulls.
1. Conduct the mash as you normally would, including a protein rest if desired. After you have reached the saccharification rest (146–155°F), wait 30 minutes, then drain all the liquid from your mash into a bucket or container large enough to hold the enzyme-rich wort.
2. Add enough of your sparge water—preferably with the pH adjusted to below 6 (see “Why pH is Important” on page 58)—to the mash so it’s loose enough to stir, about 1 gallon for a 5-gallon batch. If you’re mashing in a cooler, transfer the grain to your boiling kettle or an appropriate-size pot. Crank up the heat and—stirring continuously—bring it to a boil. Reduce the heat to a simmer and boil the mash for 10 to 30 minutes. (Dark beers need the longer time.) Stir the boiling mash every few minutes to prevent scorching.
3. Turn the heat off. Transfer the reserved wort back to the mash, adding cold water as necessary to hit a temperature of 160–167°F. This will allow the alpha amylase enzymes to convert any starch freed up from the boiling of the decoction. Wait 20 minutes and begin sparging.
Parti-Gyle Mash
This is the way that beer was brewed in the British Isles for several hundred years. A few modern brewers, such as Fuller’s, still use this archaic method, which dates back to a time when breweries had huge mash tuns and several smaller kettles. The brewer took the runnings of the first mash and added them to the first kettle, the second runnings to the second kettle, and then the final runnings to yet another kettle. Each kettle had its own hop additions, and each part of the batch fermented separately. The brewer blended these three separate beers together in various percentages to make different beers. One mash could result in an ordinary bitter, a best bitter, a special bitter, a strong ale, and a barleywine.
This type of mashing comes in handy when you’re brewing strong beers such as barleywine or imperial stout. It seems so wasteful to cut off the sparging when the gravity of the wort is still coming from the mash at 1.060. You don’t want to dilute your imperial stout, but that’s still potential tasty beer coming out! You simply continue sparging, collecting the wort until you get the gravity you want or the runnings drop below 1.008/2° Brix on your refractometer. Then treat it like a separate beer, figure out the appropriate amount of hops, and boil it as you normally would. In a recent small-batch barleywine, I collected 5 gallons of wort at 1.120, and then, instead of dumping the grain, I continued to sparge and ended up with 10 gallons of water at 1.045 wort. That’s a lot of potential beer! So why doesn’t every homebrewer do this? Well, the downside of parti-gyle is that to take advantage of it, you need multiple kettles and burners as well as lots of fermentation space.
A simplified parti-gyle mash that yields two different beers with one mash is a great way to get two beers with only a slight increase in the length of the brew day. If you have two burners and two kettles, it’s child’s play. Simply stagger the boils so that you can swap out your wort chiller from one kettle to the next at the right time. If you have only one kettle and burner, it’ll have to be a long brew day. If you want to give this a try, turn to page 64 for a recipe that yields 5 gallons of imperial stout with a bonus 5 gallons of Irish stout.
To modify this technique, add fresh grain before sparging for your second beer. This allows you to beef up the second runnings or add the color and flavor that your primary mash was lacking. Thus, your first runnings could be an amber-colored barleywine and your second runnings could be a black stout. As long as the malts are in the crystal malt or roasted malt families, they don’t need to be converted, and they can be added to the mash without worry.
Parti-Gyle Gravities
This first table shows the gravities of the first third of the wort drawn off (2 gallons of a 6-gallon batch) and the gravity of the rest of the wort (the remaining 4 gallons.)
FULL BATCH OG |
FIRST RUNNINGS (⅓) |
SECOND RUNNINGS (⅔) |
1.050 |
1.075 |
1.038 |
1.060 |
1.090 |
1.045 |
1.070 |
1.105 |
1.053 |
1.080 |
1.120 |
1.060 |
The table below shows the gravities of the first half of the wort drawn off (3 gallons of a 6-gallon batch) and the gravity of the rest of the wort (the remaining 3 gallons.)
FULL BATCH OG |
FIRST RUNNINGS (½) |
SECOND RUNNINGS (½) |
1.050 |
1.067 |
1.033 |
1.060 |
1.080 |
1.040 |
1.070 |
1.093 |
1.047 |
1.080 |
1.106 |
1.053 |
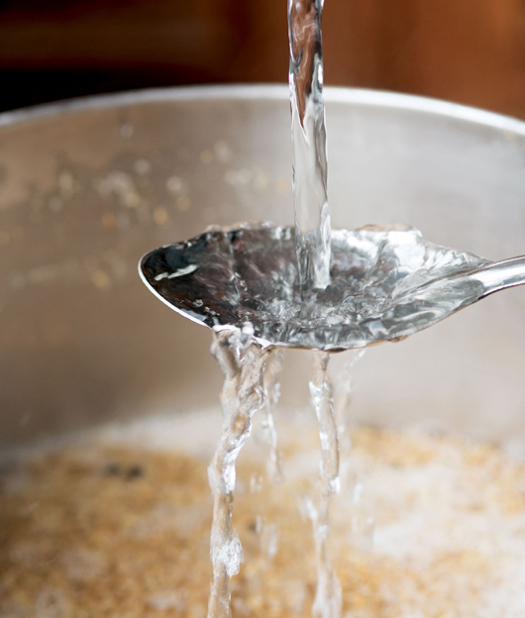
SPARGING
Once you mash, you need to separate the sweet wort you’ve just created from the spent grains that are no longer needed. Unless you plan to use the no-sparge method, don’t forget to vorlauf, or recirculate! This is a German brewing term most commercial brewers still use. Basically, it means that when you’re finished mashing, you want to recirculate the wort back through the mash until it’s fairly clear, with no pieces of malt in it. Then you can run it off to collect your first runnings and proceed to the sparge.
No-Sparge Method
This method is just what it sounds like: At the end of your mash, before you vorlauf, pour the volume of water you’d normally use to sparge right into the mash tun. Give it a stir, do a quick vorlauf, and drain it out. It’s not only quick, but it also will eliminate any chance of harsh off-flavors extracting from the mash during sparging. Many homebrewers also note an improvement in malt flavor.
Sounds like a win-win, right? Well, the downside is that this inefficient method involves leaving fermentable sugars behind. To compensate, you typically need to increase your grain bill by about 30 percent. That means almost no commercial brewers skip sparging altogether—30 percent is a big hit to the bottom line! But on the homebrewing side, the inefficiency is less of an issue. If you’re ordering grain in bulk, what’s an extra few dollars for a faster and less risky brew day?
PROS  It’s speedy, and the increased malt flavor might give you a slight edge in a competition.
CONS  You need a big mash tun, and it’s more expensive.
Batch Sparging
This is similar to the no-sparge technique, but the water is added in two or three stages, and you do get some additional sugars rinsed from your grain. First, you drain the wort from the mash, then you add a portion (typically half or a third) of your sparge water and restir the mash. Recirculate the wort until it’s clear, and drain the mash again. Repeat until you collect the proper amount of wort.
PROS It’s fairly quick and good for getting all the sugars from the nooks and crannies of a mash—especially with mash tuns that have a single strainer.
CONS It’s tricky to work out the proper amount of water to add in order to get the desired amount in the kettle.
Fly Sparging
The classic version of sparging, this is what commercial breweries do. At home, it works well with mash tuns that have a false bottom covering the entire bottom. The process works like this: Slowly run off your wort and replace the water on top of the mash with sparge water, trying to balance the output from your mash tun to the input of sparge water. Continue until you collect the desired amount of wort.
PROS It’s easy once you calibrate it—you just keep going until you get the volume you need.
CONS You run the risk of oversparging and extracting tannins. This method also may result in lower extraction when using mash tuns with a single strainer.

WATER ADJUSTMENT
You can’t talk about mashing without talking about water. Commercial brewers always know what’s in their water. Larger craft brewers sometimes take the water source into consideration when building a new brewery! It makes sense because water is one of the core ingredients in beer.
Homebrewers, on the other hand, tend to fall into two camps: those who know nothing about their water and those who obsessively adjust their water. This could be because most homebrewers start by brewing with malt extract. When you use malt extract, the minerals contained in the water at the malt-extract manufacturer were concentrated with the malt itself. So the brewing water was embedded with the powder or liquid extract.
The nice thing about homebrewing in the twenty-first century is that good, clean water is pretty easy to come by. If you can’t filter your own water at home to your satisfaction, the local grocery store will have reverse-osmosis water or filtered water of a comparable quality. Unless you buy reverse-osmosis water or bottled water, you should read on about removing chlorine. Other than that, taking your water chemistry any further is optional.
Removing Chlorine
The single most important thing you should do to your water is remove any chlorine. (If you’re using well water, you shouldn’t have to worry about chlorine, but check the iron levels). Removing chlorine can be accomplished in a few ways:
![]() Use a carbon-water filter: You can buy a carbon-filtering device at your local home-improvement store. The only equipment you’ll need are a few feet of old siphon tubing and a garden-hose attachment. Don’t run your filter too fast—some chlorine could sneak by. The rule of thumb is 1 gallon of water per minute.
Use a carbon-water filter: You can buy a carbon-filtering device at your local home-improvement store. The only equipment you’ll need are a few feet of old siphon tubing and a garden-hose attachment. Don’t run your filter too fast—some chlorine could sneak by. The rule of thumb is 1 gallon of water per minute.
![]() Boil the water ahead of time: Bringing water to a boil and turning the heat off is enough to volatilize any chlorine. However, many cities now use chloramines in the water instead of chlorine, which can be more difficult to drive off by boiling. In this case, filtering is a better option.
Boil the water ahead of time: Bringing water to a boil and turning the heat off is enough to volatilize any chlorine. However, many cities now use chloramines in the water instead of chlorine, which can be more difficult to drive off by boiling. In this case, filtering is a better option.
![]() Add potassium metabisulfite tablets (Campden tablets): These tablets are sold by most homebrew suppliers, and one tablet will treat up to 20 gallons of water. Just follow the instructions for the tablets you buy. Most tablets remove chlorine in a few minutes.
Add potassium metabisulfite tablets (Campden tablets): These tablets are sold by most homebrew suppliers, and one tablet will treat up to 20 gallons of water. Just follow the instructions for the tablets you buy. Most tablets remove chlorine in a few minutes.
Measuring and Adjusting pH
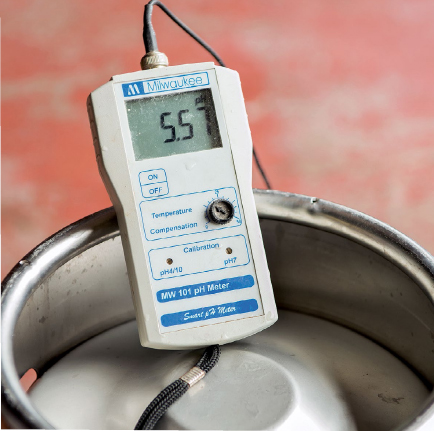
In addition to dechlorinating the water, I like to use a technique that I learned from the Sierra Nevada Brewing Company. They lower all their brewing water to a pH of 5.5, which ensures that no harsh tannins can be extracted. (See “Why pH is Important” on page 66.) The alternative is to adjust the mash pH by using acid malt or adding different minerals to the mash, but this works only up to a point, and you still have to deal with the sparge water’s pH separately. The other nice thing about adjusting your brewing water is that you have to do it only once to find out how many milliliters of acid you need—then you can add that amount every time. That means you either can borrow a pH meter from someone or purchase some good pH-indicator strips such as ColorpHast.®
The night before you brew, start with 5 gallons of water and add 2 milliliters of phosphoric or lactic acid (available from your local homebrew supplier). A plastic syringe with milliliter markings works best. Make sure you either stick with the same acid or figure out the amounts for both, because they’re different concentrations. Stir well and wait for 5 minutes, then test with your meter or paper strips. If you’re above 6.0, then add another milliliter and repeat until your pH falls between 5.5 and 6. Write down the amount of acid needed so you can repeat it in the future without having to take readings. For example, my brewing water requires 3 milliliters of phosphoric acid (10 percent) per 5 gallons to bring the pH to 5.5. The only time you shouldn’t use this technique is when brewing beers with very large amounts of dark malts (such as an imperial stout), because the roasted malts are very acidic and could drop the pH too low. Still adjust the sparge water pH, however, to less than 6 to prevent tannin extraction.
Adjusting Minerals
Some brewers add minerals to adjust the pH of their mash. This works to a certain degree and will drop the pH of the mash slightly. But you’re also affecting the flavor of the beer by adding so many minerals, and it won’t be enough if you have a very high water pH (more than 8). For that reason, I recommend adjusting all your brewing water to the proper pH before the mash as described previously.
You may want to add minerals for other reasons. Yeast cells require 50 parts per million (ppm) of calcium and 10 ppm of magnesium for optimal health, and local water supplies can lack these levels. Even outside yeast health—which certainly affects flavor—minerals affect the taste of the beer by enhancing the malt or the hop character, depending on the mineral. It’s a subtle effect, but it allows the brewer to fine-tune the final taste of the beer.
If you’re going to adjust the minerals in your water, you need to know the water you’re working with. If you buy reverse-osmosis water, you can assume that all of your minerals will be close to zero. If you’re using city water, you’ll need to request and read a water report. Here’s an example of a water report:
Water Report for Asheville, NC
Test |
Result |
Total dissolved solids (TDS) |
57 PPM |
Sodium |
14 PPM |
Calcium |
< 1 PPM |
Magnesium |
< 1 PPM |
Total hardness |
4 PPM |
Sulfate |
< 1 PPM |
Chloride |
7 PPM |
Carbonate |
< 1 PPM |
Bicarbonate |
38 PPM |
Total alkalinity |
31 PPM |

Many of the enzymatic and chemical reactions in brewing are affected by pH. For instance, the conversion of starch into sugar during mashing heavily depends on pH. Also, you can avoid the extraction of harsh tannins during sparging with the proper pH. Hop isomerization and beer stability also are affected by pH.
When you brew with water with a pH between 5.5 and 6.0, your mash naturally will fall into the appropriate range of 5.1 to 5.4. The sparge water will never extract tannins from the grain because the pH of the sparge water is adjusted as well.
How much you need to worry about pH depends on your water supply. If you’re buying reverse-osmosis or spring water from the store, then you’re probably fine without adjusting the pH, but some communities have very alkaline water that will make poor-quality beer if you don’t adjust the pH. For example, when I was brewing in New Orleans, the tap water’s pH was about 10 to avoid extracting lead from the old pipes. Brewing with that water without any adjustment would have created all kinds of problems.
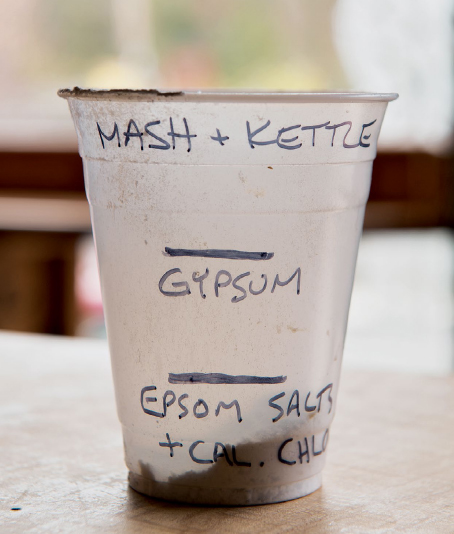
The important lines in the water report are calcium (Ca), magnesium (Mg), chloride (Cl), and sulfate (SO4) levels. As you can see in my local water, the calcium is below 1 ppm. That’s troubling, because yeast cells require at least 50 ppm for optimal health. Malt does contribute some calcium, but I’d like to see the water itself above 50 ppm. Calcium chloride and calcium sulfate (gypsum) are both forms of calcium and can be added to get the overall calcium levels to acceptable levels. You could use either one, but your choice can affect the flavor of the beer. (If you’re making a hop-forward beer, use calcium sulfate. If you’re making a malt-forward beer, use calcium chloride.) Magnesium is another mineral necessary for proper yeast health. You generally want 10–30 ppm, and, as you can see, my water contains less than 1 ppm. I would increase that to at least 15 ppm using Epsom salts (magnesium sulfate).
Commercial brewers often talk about the amount of sulfate to chloride as a ratio. A 3:1 ratio is considered optimal for pale ales and IPAs, a 1:1 ratio is best for balanced beers, and a 1:3 ratio is best for malty beers. The Epsom salts you use to bring up the magnesium levels also contain sulfate, so consider that as part of your numbers.
If all this sounds complicated, don’t worry! Nobody figures out their mineral additions on paper. The Internet offers free water calculators. I often use the EZ Water Calculator (ezwatercalculator.com). It allows you to adjust amounts up and down until you get the water profile you want. Since my water is almost as devoid of minerals as reverse-osmosis or distilled water, I have a blank slate to work with. At right are two water profiles that I use, which you can use as well if you start with similarly neutral water.

Hop-Forward Water Profile
Goal: More than 50 ppm calcium and more than 10 ppm magnesium, which is good for yeast health, and a 3:1 sulfate-to-chloride ratio, which will make the hops pop.
Target numbers: 65 ppm calcium, 18 ppm magnesium, 164 ppm sulfate, and 58 ppm chloride
Add to mash: 2 grams gypsum, 1.5 grams calcium chloride, 2.5 grams Epsom salts
Add to kettle: 2.9 grams gypsum, 2.1 grams calcium chloride, 3.6 grams Epsom salts
Malt-Forward Water Profile
Goal: More than 50 ppm calcium, just more than 10 ppm magnesium, which is good for yeast health, and around a 1:2 sulfate-to-chloride ratio, which will enhance the malt character in bocks, brown ales, and similar beers.
Target numbers: 62 ppm calcium, 11 ppm magnesium, 50 ppm sulfate, and 112 ppm chloride.
Add to mash: 3 grams calcium chloride, 1.5 grams Epsom salts
Add to kettle: 4.3 grams calcium chloride, 2.1 grams Epsom salts
UMLAUT DUNKEL
This is one of my favorite beers to have on tap at home. Its alcohol content is so low that I don’t feel guilty about breaking out the half-liter mug, but this beer still has plenty of malt complexity. German and Czech brewers would decoction mash this one. If you have the urge to follow their lead and be traditional, see page 50 for more details. Otherwise, a simple infusion mash will work fine thanks to the melanoidin-rich malts in the grain bill.
YOU NEED
basic brewing equipment (page 3)
8½ gallons filtered brewing water (page 12)
6 pounds German dark Munich malt (60%)
3 pounds German Vienna malt (30%)
¾ pound German Caramunich III malt (7.5%)
¼ pound German Carafa Spezial II (2.5%)
4 alpha acid units German Hallertau hops, or any other German hops, at 60 minutes (14.5 IBU)
1 Whirlfloc tablet
3 vials or packages German Lager WLP838/Bavarian Lager WY2206 yeast (or a 2-liter starter made from 1 pack, page 110)
3¾ ounces dextrose/corn sugar (optional, use only for bottling)
TARGETS
Yield: 5 gallons
OG: 1.048–1.050
FG: 1.012
IBU: 14.5
1. Mix the malt with 3½ gallons of water at 168°F or the appropriate temperature to mash at 153°F. Mash for 60 minutes.
2. Recirculate the wort until it’s fairly clear. Run off the wort into the kettle.
3. Sparge with 5 more gallons of water at 165°F. Run off the wort into the kettle.
4. Bring the wort to a boil. Boil it for 30 minutes. Add the hops and continue to boil for 60 minutes. Add the Whirlfloc tablet at 30 minutes. Put your wort chiller into the wort at least 15 minutes before the end of the boil.
5. When the boil finishes, cover the pot with a lid or a new trash bag and chill to 48°F if possible. If you can’t chill that low, get it as cool as possible, siphon the wort into your sanitized fermentor, and cool it in your lagering fridge overnight. When the wort hits 48°F, pitch three packs of liquid yeast or a 2-liter starter.
Note: When brewing lagers, it’s very important to chill to fermentation temperatures before oxygenating and pitching the yeast.
6. Ferment at 48°F for two days, then let the temperature rise to 50°F for another three days. Raise the temperature to 55°F for seven days, then raise it again to 65–68°F for the last three days. Crash the temperature down to 32°F for one week.
7. Keg or bottle the beer. (If you’re bottling, I recommend 3¾ ounces of dextrose/corn sugar for this beer.)

BLACK ________
I’m always changing the name of this beer. I’ve called it Black Sabbath, Black Sunday, Black Magus, and dozens of other things. The name may change, but the recipe is dialed in for the perfect black ale to have on tap at my house. What kind of beer is it? It’s comparable to a foreign-export stout. But it sounds weird to call it that when it’s neither foreign nor exported, so I just refer to it as a black ale.
YOU NEED
basic brewing equipment (page 1)
10 gallons filtered brewing water (page 12)
11 pounds North American 2-row malt (73%)
1½ pounds British black malt (10%)
1 pound dark Munich malt (6.7%)
1 pound flaked barley (6.7%)
½ pound U.S. crystal 80°L (3.3%)
13 alpha acid units Columbus hops at 60 minutes (36 IBU)
8 alpha acid units Columbus hops at 30 minutes (17 IBU)
1 Whirlfloc tablet
2 vials or packages California Ale WLP001/American Ale WY1056 yeast (or a 2-liter starter made from 1 pack; page 110)
3¾ ounces dextrose/corn sugar (optional, use only for bottling)
TARGETS
Yield: 5 gallons
OG: 1.063–1.068
FG: 1.014
IBU: 66
1. Mix the malt with 5 gallons of water at 165°F or the appropriate temperature to mash at 150°F. Mash for 60 minutes.
2. Recirculate the wort until it’s fairly clear. Run off the wort into the kettle.
3. Sparge with 5 more gallons of water at 165°F. Run off the wort into the kettle.
4. Bring the wort to a boil. Boil it for 15 minutes. Add the hops and continue to boil for 60 minutes. Add the Whirlfloc tablet and the other hop addition at 30 minutes. Put your wort chiller into the wort at least 15 minutes before the end of the boil.
5. When the boil finishes, cover the pot with a lid or a new trash bag and chill to 65°F. Siphon the wort into your sanitized fermentor and pitch two packs of liquid yeast or a 2-liter starter.
6. Ferment at 65°F for one week, then let it warm up to 68–70°F for the second week.
7. Keg or bottle the beer. (If you’re bottling, I recommend 3¾ ounces of dextrose/corn sugar for this beer.)
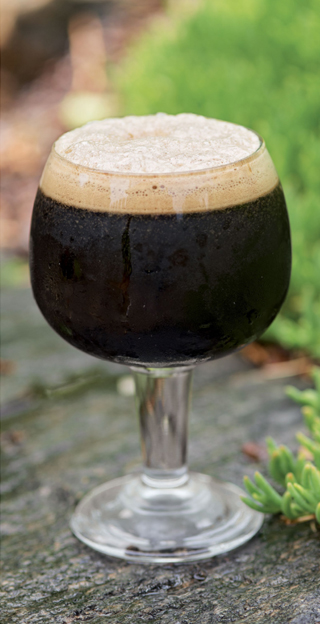
IMPERIAL STOUT/IRISH STOUT (PARTI-GYLE)
This beer is based on a recipe from the Courage Brewery that dates back to 1914. It uses only brown malt and black malt as specialty malts. Because the original recipe calls for a huge amount of Fuggle hops, I substituted a hop with a higher alpha-acid percentage so I’d have less hop residue in the kettle. This beer is so intensely flavored that the hop variety is pretty much irrelevant anyway. The imperial stout is inky black with an intense bittersweet-chocolate flavor. At more than 10% ABV, it’ll be good for a decade, so bottle it and sample the bottles over the years. As a bonus, you get a free Irish Stout from the second runnings. It’s a low-gravity stout similar to
Guinness that’s the very definition of a session beer: easy drinking yet complex.
YOU NEED
basic brewing equipment (page 3)
18 gallons filtered brewing water (page 12)
20 pounds British pale-ale malt (76.9%)
4 pounds brown malt (15.4%)
2 pounds British black malt (7.7%)
30 alpha acid units Columbus hops at 75 minutes for the imperial stout (131 IBU, calculated)
1 Whirlfloc tablet
8 alpha acid units Target hops or any British hops at 75 minutes for the Irish Stout (35 IBU)
4 vials or packages Irish Ale WLP004/WY1084 yeast (or a 1-gallon starter made from 1–2 packs or pitch on the yeast cake from a previous batch; page 110) plus an additional 1 vial or package for the Irish Stout made from the second runnings
3¾ ounces dextrose/corn sugar (optional, use only for bottling) or 7½ ounces if bottling both batches
Note: Dry yeast also is ideal for a beer this big. Safale US-05 is a good choice, and two 11.5-gram packs provide enough cells.
TARGETS (IMPERIAL STOUT)
Yield: 5 gallons
OG: 1.097–1.102
FG: 1.020–1.025
IBU: 131 (calculated)
TARGETS (IRISH STOUT)
Yield: 5 gallons
OG: 1.038–1.040
FG: 1.008–1.010
IBU: 35
1. Mix the malt with 8 gallons of water at 175°F or the appropriate temperature to mash at 150°F. Because of the huge amount of grain in this recipe, you need to heat the mash water higher than normal. Mash for 60 minutes.
2. Recirculate the wort until it’s fairly clear. Run off the wort into the kettle.
3. Sparge with enough water at 165°F to collect 6½ gallons of wort. You should have a gravity of around 1.086. Boil the wort, adding the Columbus hops at the beginning of the boil. Boil for 75 minutes, adding the Whirlfloc tablet with 30 minutes left in the boil. Put your wort chiller into the wort at least 15 minutes before the end of the boil. You should end up with 5½ gallons of OG 1.100 + wort.
4. Meanwhile, collect the Irish Stout wort. Add 3 gallons of 165°F sparge water into the mash and stir well. Recirculate until fairly clear, then start to collect the runoff. Continue to sparge until you collect 6½ gallons of wort. You should have a gravity of about 1.030–1.032. When you’re done boiling the imperial stout, you’ll boil this up, adding the Target or Northern Brewer hops at the beginning of the 75-minute boil. You’ll end up with an OG of 1.038–1.040. Proceed as with a typical brew, adding one vial or package of yeast. Ferment and package just like the imperial stout. You can start drinking the Irish Stout right away.
5. When the imperial stout finishes boiling, cover the pot with a lid or a new trash bag and chill to 65°F. Siphon the wort into your sanitized fermentor and pitch four packs of liquid yeast, two packs of dry yeast, a 1-gallon starter, or the yeast cake from a previous beer.
6. Ferment at 65°F for one week, then let it warm up to 68–70°F for the second week.
7. Keg or bottle the beer. (If you’re bottling, I recommend 3¾ ounces of dextrose/corn sugar for this beer.) Age the imperial stout for at least three months before sampling.