
CHAPTER 7
BLAZE FARM
IF YOU ARE KEEN ON MAKING lots of potions, or if you’d like to have a great way to up your XP, you’ll want to go a step further and make your own Blaze farm. This farm collects spawning blazes into an increasingly smaller funnel. They are pushed down into a single block where you can kill them to reap a bounty of rods and XP.
Blazes can spawn at higher light levels, so the best way to prevent them from spawning is to block in their spawn area completely. Since you will be digging down below the spawner, make sure that you’ll be protected from falling into lava. Guard against ghast fireballs with temporary cobblestone walls and shelters, and add single rows of blocks in corridors to prevent wither skeletons from getting closer. You will also want enchanted armor and weapons to help protect against Blaze fireballs (Fire/Projectile damage) and Ghast fireballs (Explosion/Projectile damage). An Efficiency enchanted pick to help you break blocks faster is a help, and potions for protection and healing are a huge aid.
Step by Step
1. To prevent blazes from spawning from the spawner, fill in the spawn area with blocks that are easy to break. Fill in a 9x9x5 area, centered vertically and horizontally on the spawner.
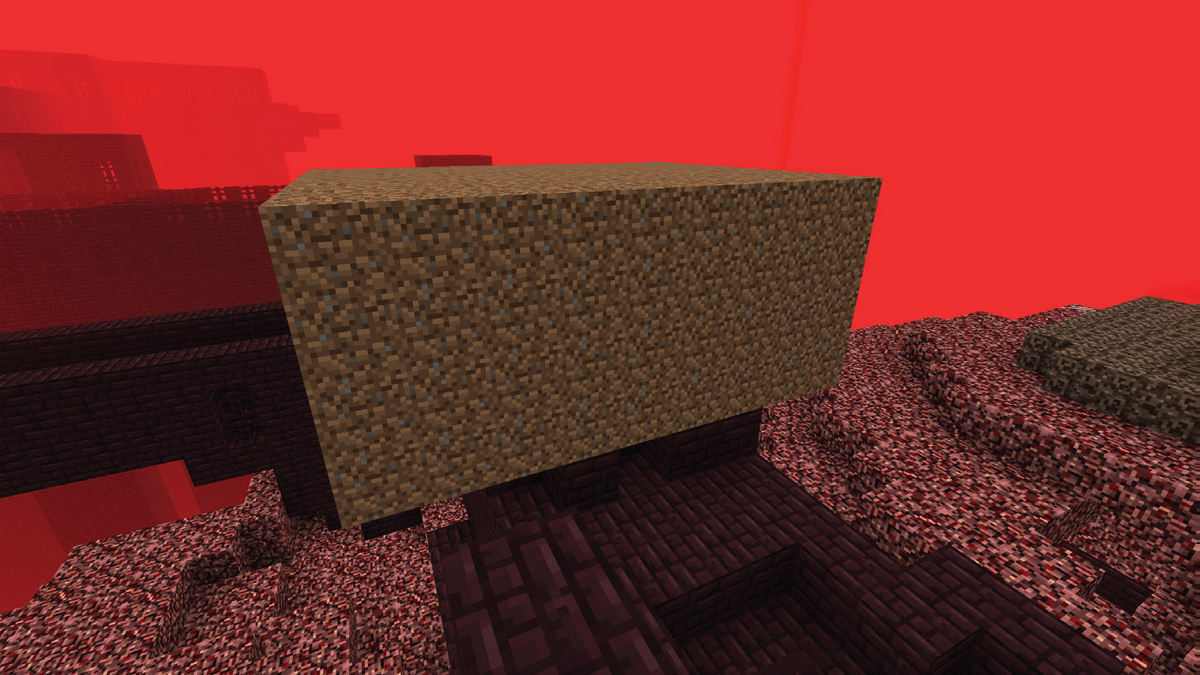
Now we’ll begin creating the funnel, with layers of pistons that will push blazes toward the center as they fall. (We can’t use water, because water doesn’t work in the Nether!) The images for these next steps will usually only show the blocks that must be placed. However, in order to place these blocks shown, you will likely need to place some temporary blocks first, especially to help with positioning the pistons. Dirt is a good option, as it is easy to break.
To make illustrating the build clearer, let’s move to a creative Overworld!
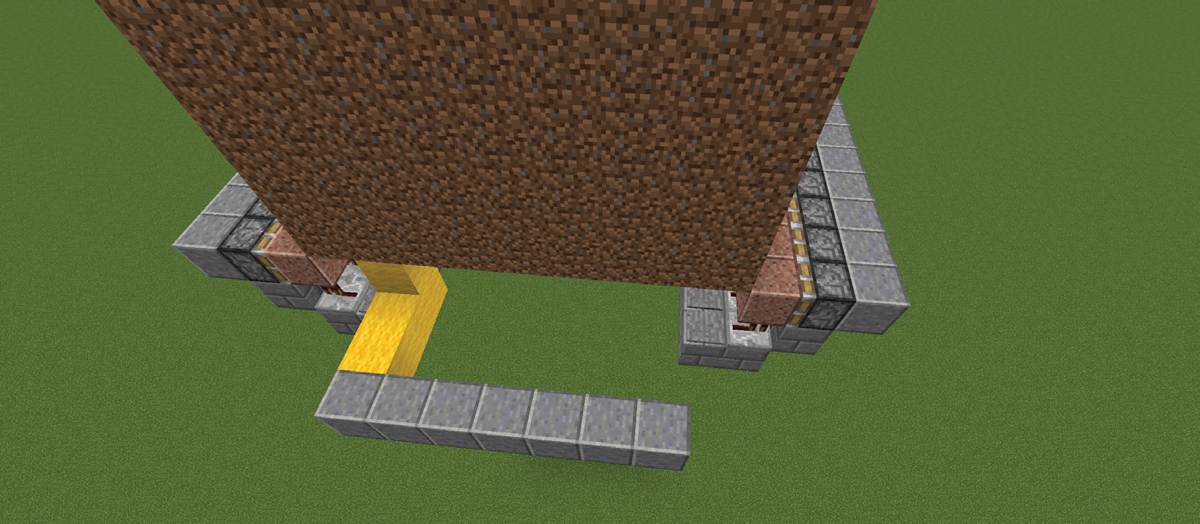
2. On one side of the spawn area, 1 block down and 3 blocks out (leaving a 2-block space), place a row of 9 building blocks. (I’ve used polished andesite.) These blocks will be used to help place pistons and as a guard against ghast fireballs. I’ve used temporary yellow wool blocks just to show the spacing here.

3. Repeat Step 2 on the opposite wall of the dirt cuboid.

4. Place 2 rows of 9 sticky pistons each (18 total) against the 2 building block rows.

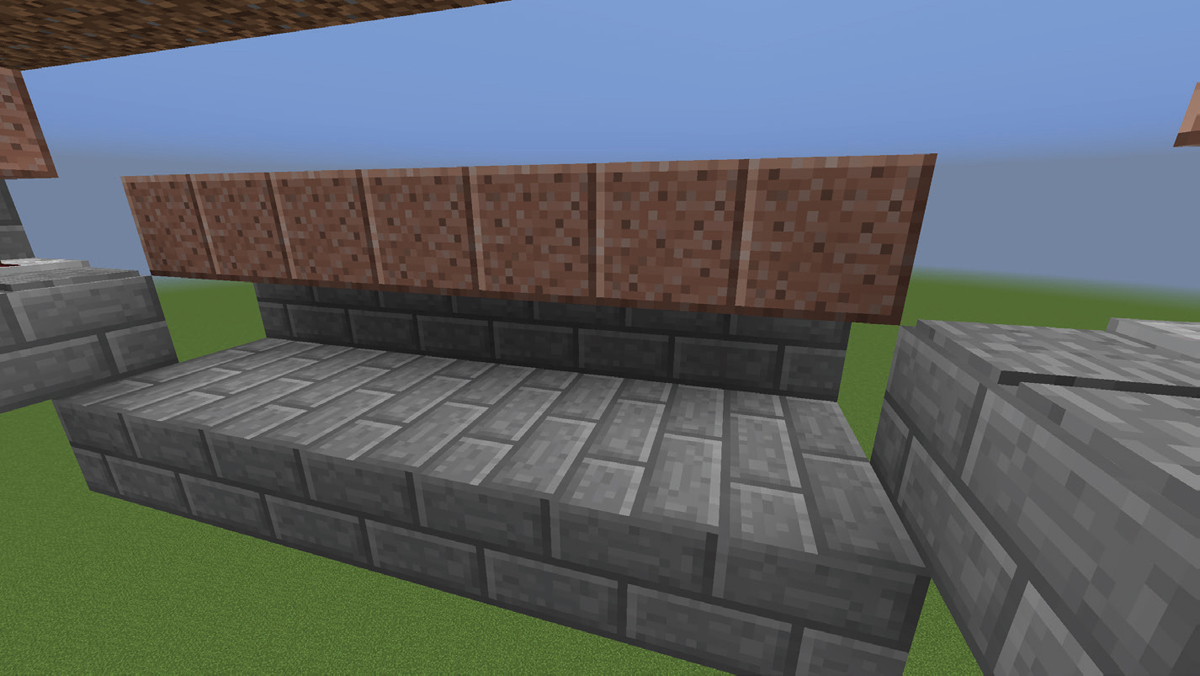
5. Now place 2 rows of 9 solid blocks in front of the piston rows. (I’ve used polished granite.) These blocks are used to push the blazes into the center.

6. Underneath each row of pistons, place a row of solid blocks. (I’ve used stone bricks.)
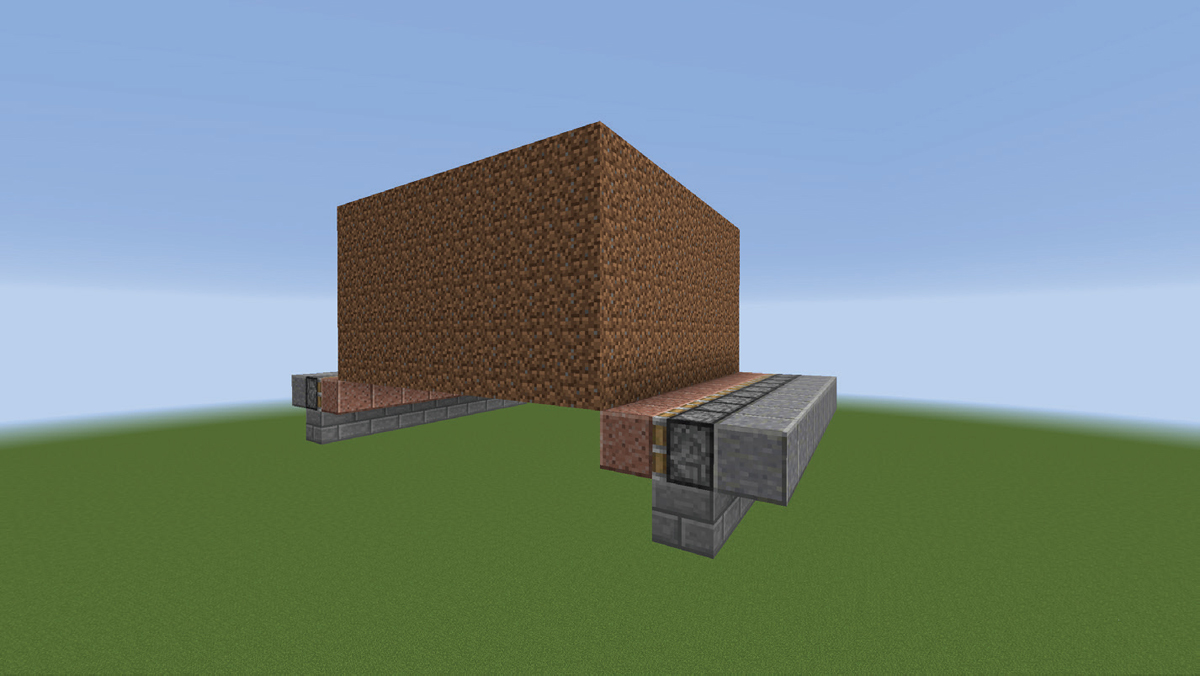
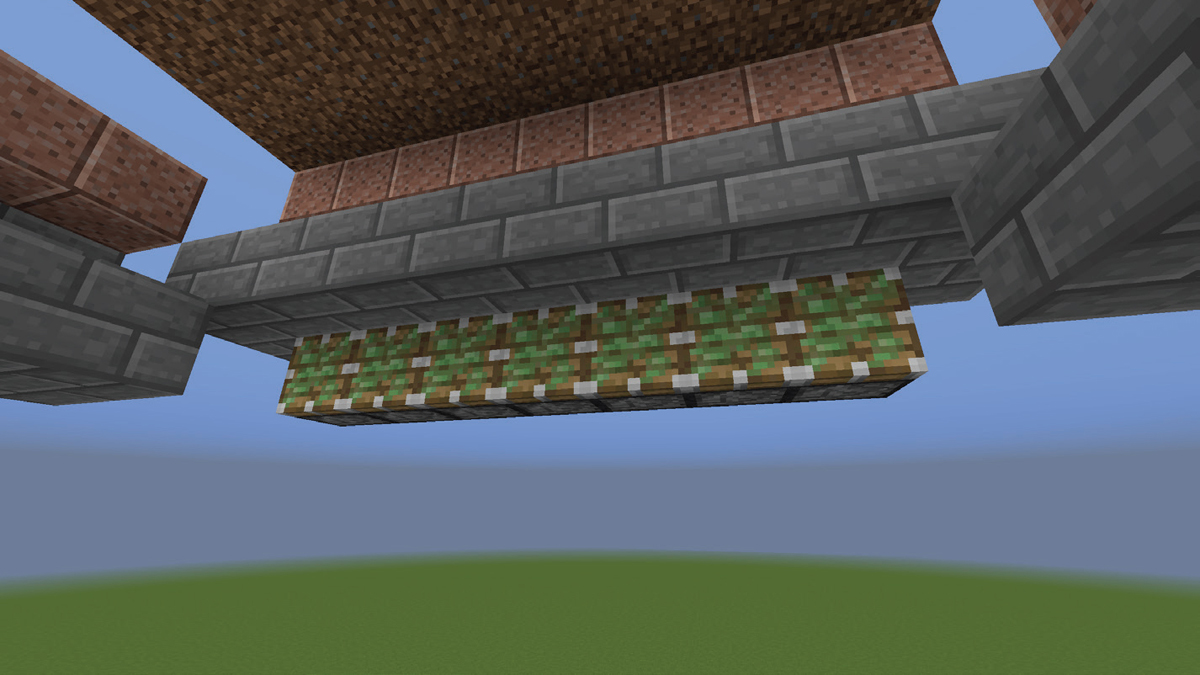
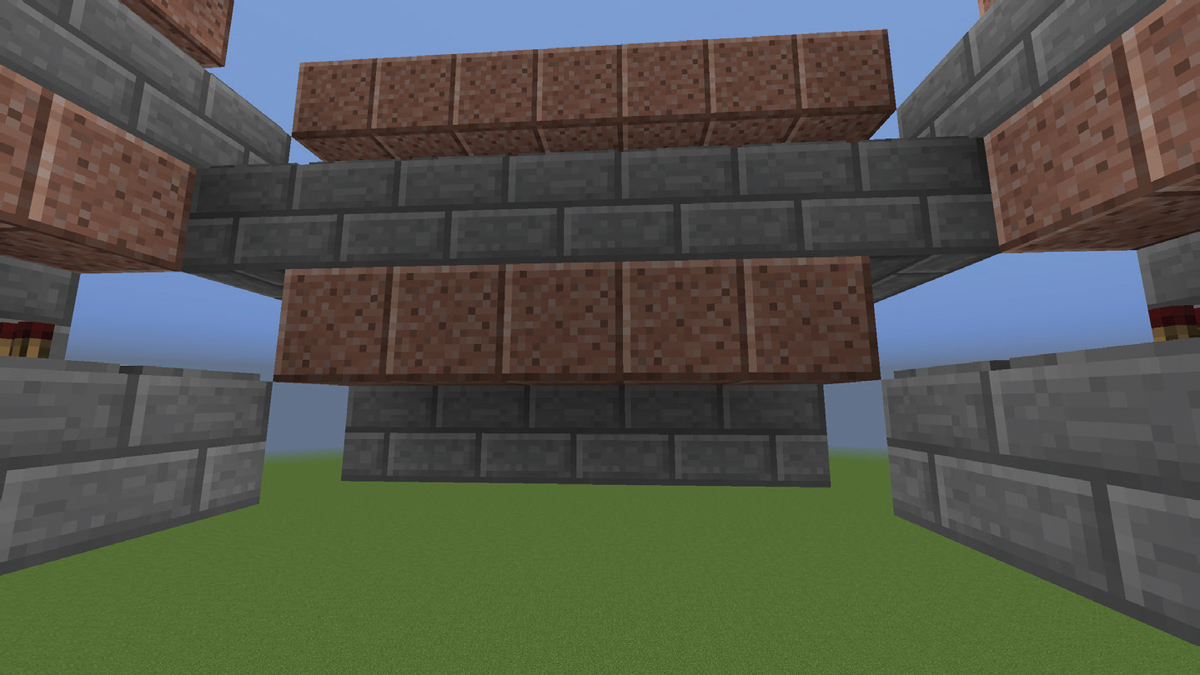
7. Just 1 block below and 1 block in from the row placed in Step 6, add a 2-block-wide row of 9 solid blocks, as shown.

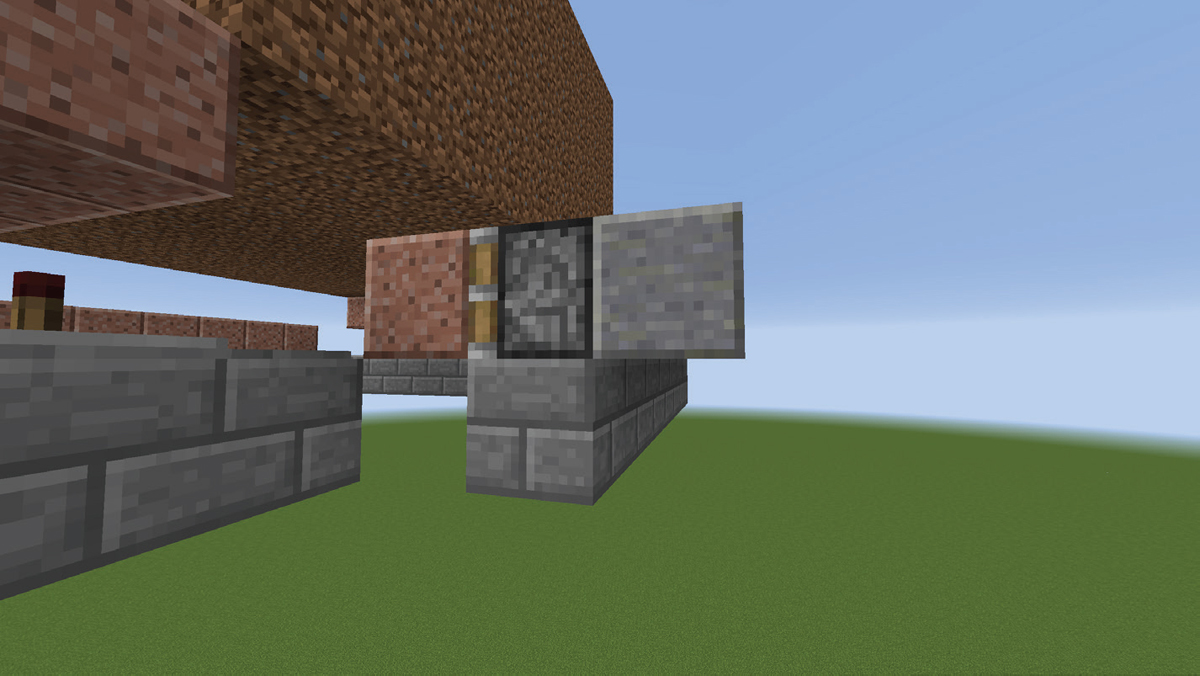
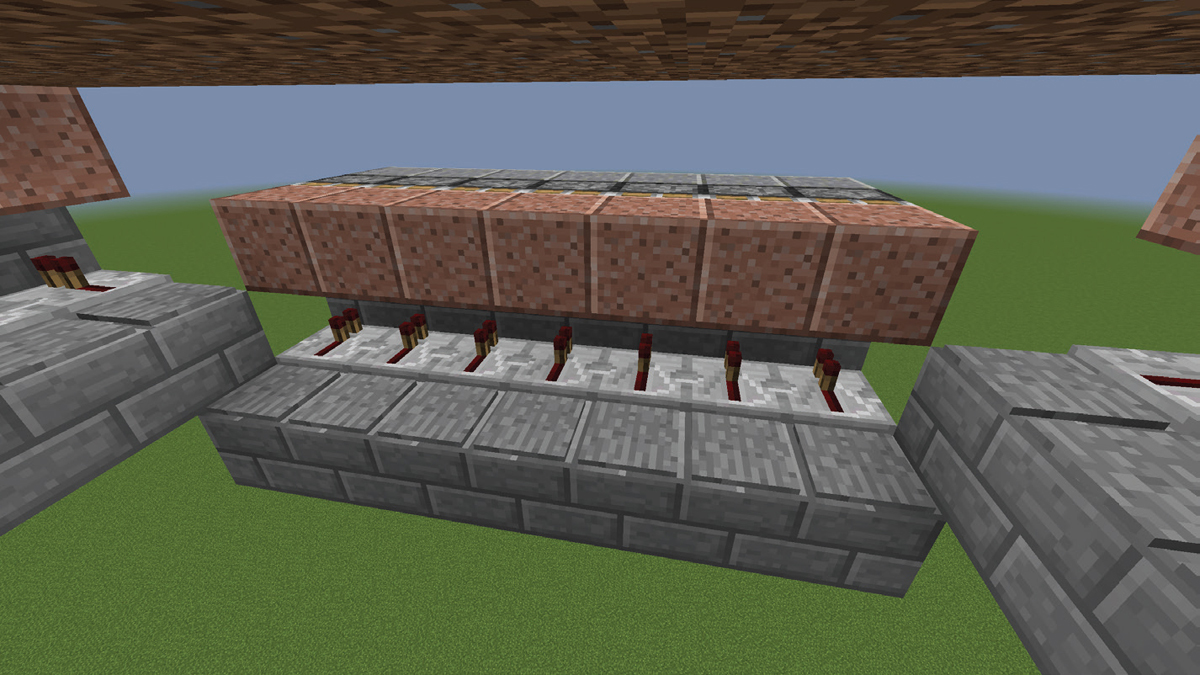
8. Place a row of 9 repeaters, facing outward, toward the row of blocks placed in Step 6. In front of these, place a row of stone pressure plates. Do this on both sides. This is the first layer of pistons that will push blazes toward the center. If a blaze lands on one of these pressure plates, a signal will carry through the repeater and into the block it faces. The piston above will activate and extend, and the block it pushes will force the blaze 1 block in to the center. Then the piston and its block will move back to their original position.
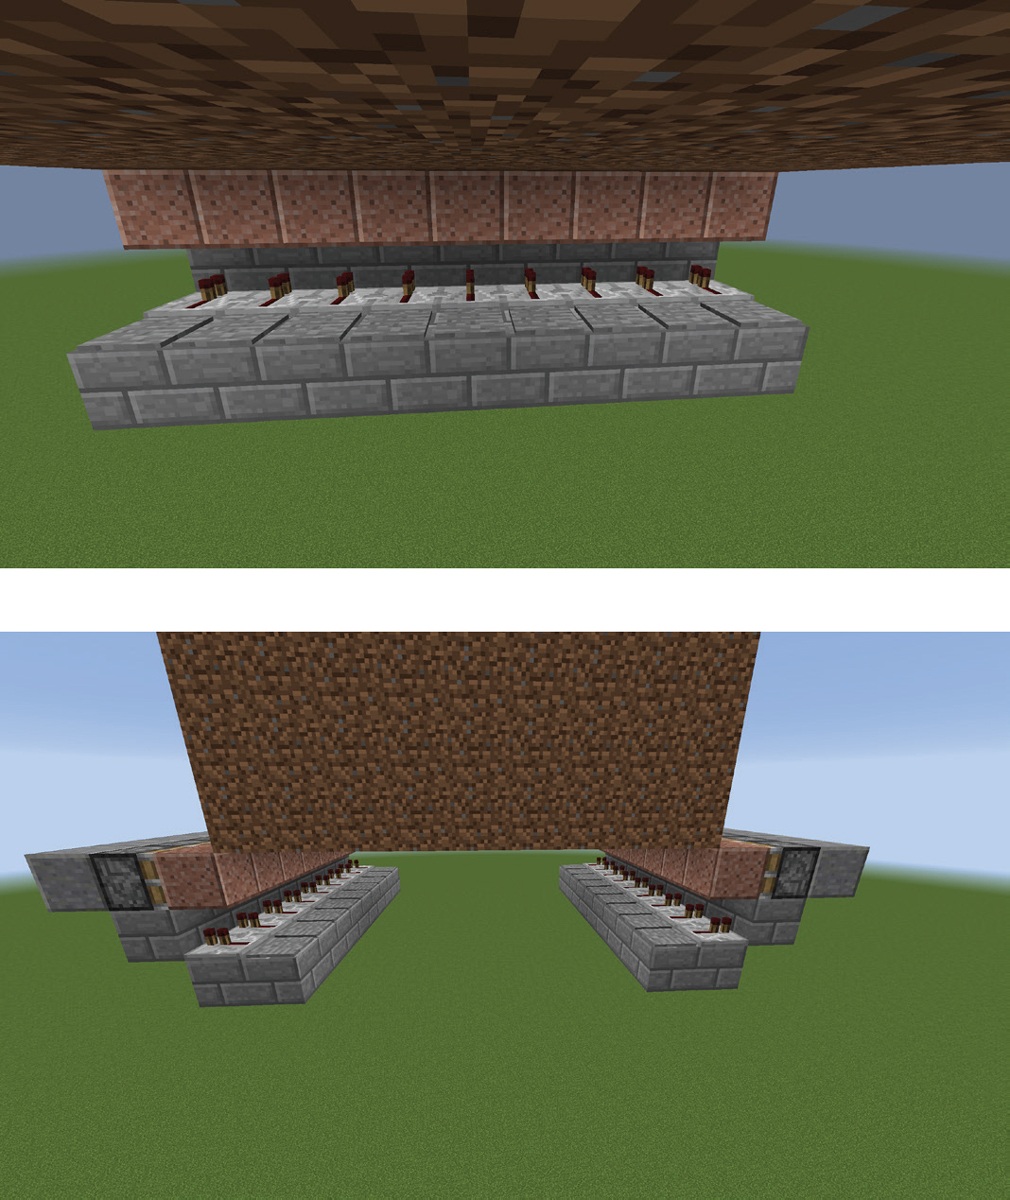
To complete the next level of the funnel, we’ll repeat Steps 2 through 8, but work on the other 2 sides of the spawn area. We’ll also move 1 block down and 1 block in from either corner. Along with the following steps, you can use the diagram on page 122 to help place blocks.
9. Move to one of the sides between the existing rows of pistons. At 1 block down and 3 blocks out from the dirt cuboid (leaving a 2-block space), and 1 block in from each corner, place a row of 7 building blocks. (I’ve used polished andesite again.) Temporary yellow wool blocks show the spacing. Do this on the opposite side as well.
10. In front of each of the 2 new rows of building blocks, place a row of 7 sticky pistons and a row of 7 solid blocks in front of the pistons.

11. Below the 2 new rows of pistons, place a row of building blocks.
12. Below these, and a block in, place a 2-wide row of building blocks.
13. On the blocks placed in Step 12, place a row of 7 repeaters and a row of 7 stone pressure plates. Do this on both sides.
14. Now we turn to the other pair of opposite walls. We’ll place another 2 rows of the pushing mechanism, 1 row down but still 7 blocks wide. First, place a row of 7 pistons right below the row of solid blocks placed in Step 6. Repeat on the opposite side.
15. In front of the pistons, place a row of 7 solid blocks. Do this on the opposite side, as well.

16. On both sides, directly below the pistons, place another row of 7 blocks, and in front of these and down 1 block, place the 2-wide row of blocks that will hold the 7 repeaters and 7 pressure plates.

17. Add the row of 7 repeaters and 7 pressure plates on top of the 2-wide platforms built in Step 16. Do this on the opposite side as well.

The next steps are basically exactly the same as Steps 9 through 17, except that the length of the rows is now 5.
18. Place a row of 5 pistons below the row of building blocks that the repeaters are on, which were built in Step 12. Do this on the opposite side as well.

19. Place 5 building blocks (I’ve used granite) in front of the pistons on each side.

20. Below the pistons, place a row of building blocks (stone bricks, here). Do this on both sides.
21. In front of these and 1 block down, place the 2-wide row of building blocks that the repeaters and pressure plates go on. Again, do this on both sides.

22. On each side, place the 5 repeaters and 5 pressure plates on the 2-wide platform, as shown.

23. Moving to the second pair of opposite sides, place 5 pistons below the row built in Step 16. Make sure to perform these steps on the opposite wall as well.

24. Place building blocks in front of the pistons (granite, here).

25. Below the pistons, place a row of building blocks (stone bricks, here).

26. In front of and down 1 from the row built in Step 25, add the 2-wide row that will hold the 5 repeaters and 5 pressure plates.

27. Add the 5 repeaters and 5 pressure plates.

We’re now ready to reduce the sides of the funnels to 3 pistons long. This final set of 4 walls each with 3 pistons will force the blazes into the very center single block of space. Again, remember to perform these steps on the opposite walls as well.
28. Below the blocks placed to hold repeaters in Step 22, add a row of 3 pistons.
29. In front of the 3 pistons, place a row of 3 solid blocks (here, polished granite).

30. Below the pistons, add another row of building blocks.

31. In front of, and down 1 block from the row in Step 30, add the 2-side platform that will hold the 3 repeaters and 3 pressure plates.
32. Place the 3 repeaters and 3 pressure plates on the platform.

33. Repeat Steps 28 through 32 on the second pair of opposite walls.

Now, we’ll just need 2 final pistons, on opposite sides of the funnel, to push the blazes into a single block space.
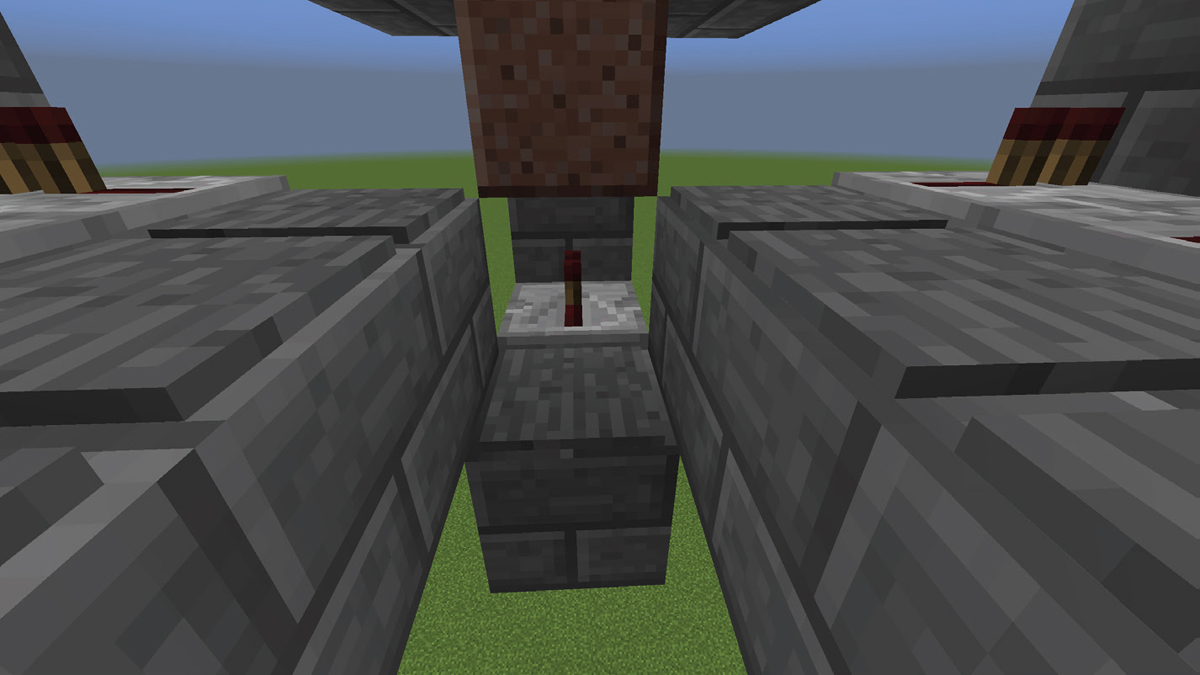
34. Below the blocks holding the repeaters that you built in Step 26, add a single piston on each wall.

35. Place a block in front of the piston.

36. Place a block beneath the piston.

37. Place a 2-wide platform (1 long), in front of and 1 down from the block placed in Step 36.

38. Add a repeater and pressure plate above the platform as shown.
39. Add 2 building blocks to the bottom of the 2 sides of the funnel that are higher than the other 2, as shown.
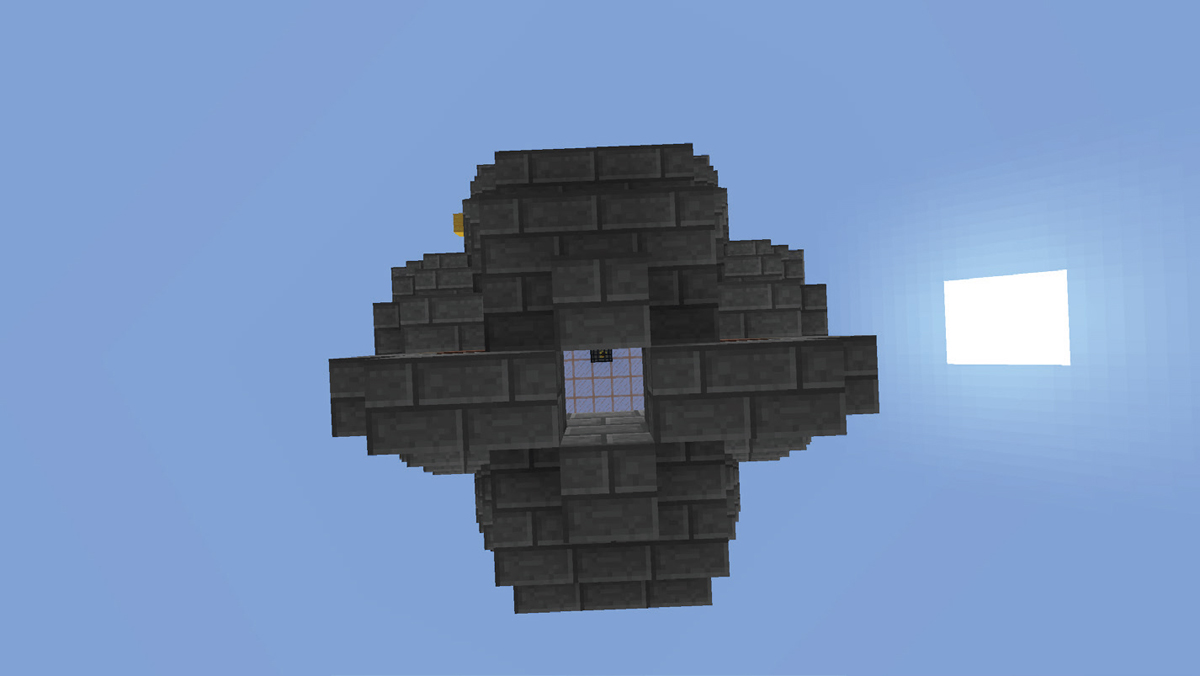
40. Below the bottom 4 blocks of the funnel, add another 4 glass blocks.
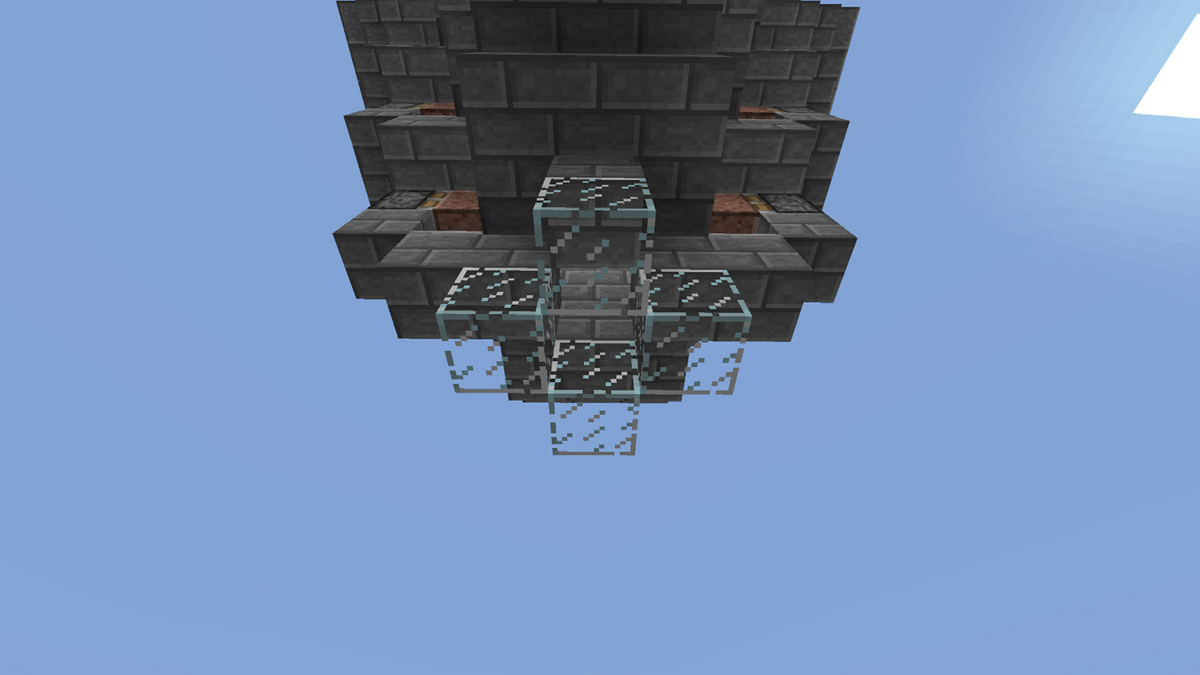
41. Add another 4 blocks of glass below these.

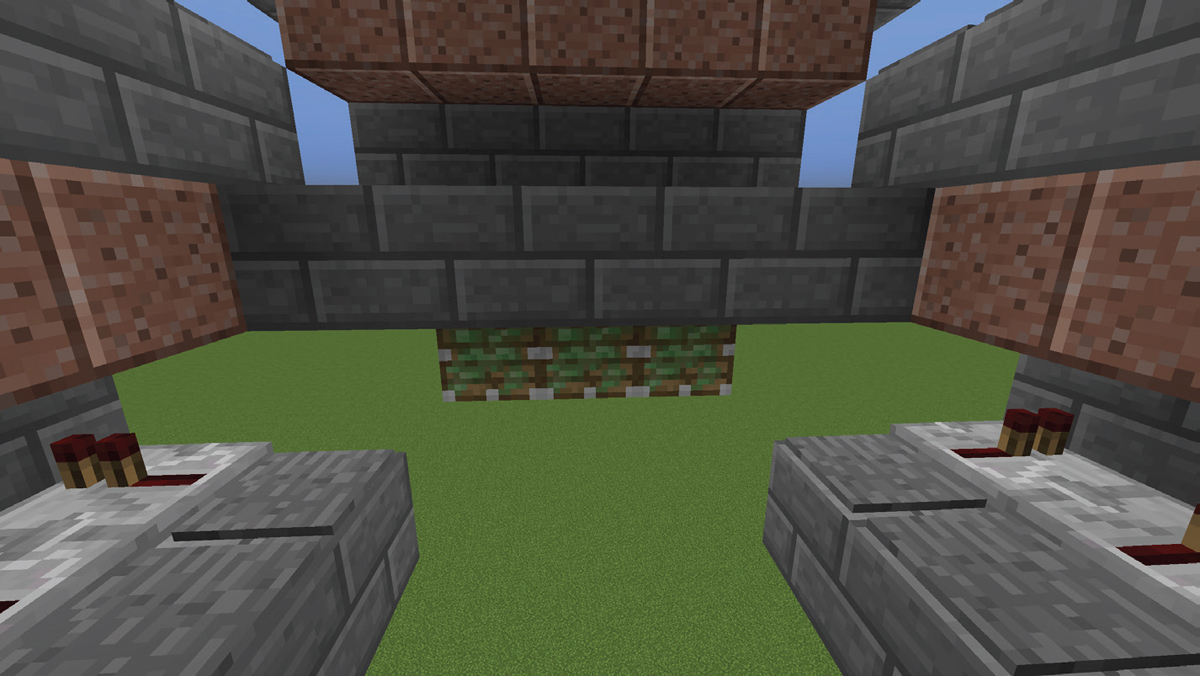
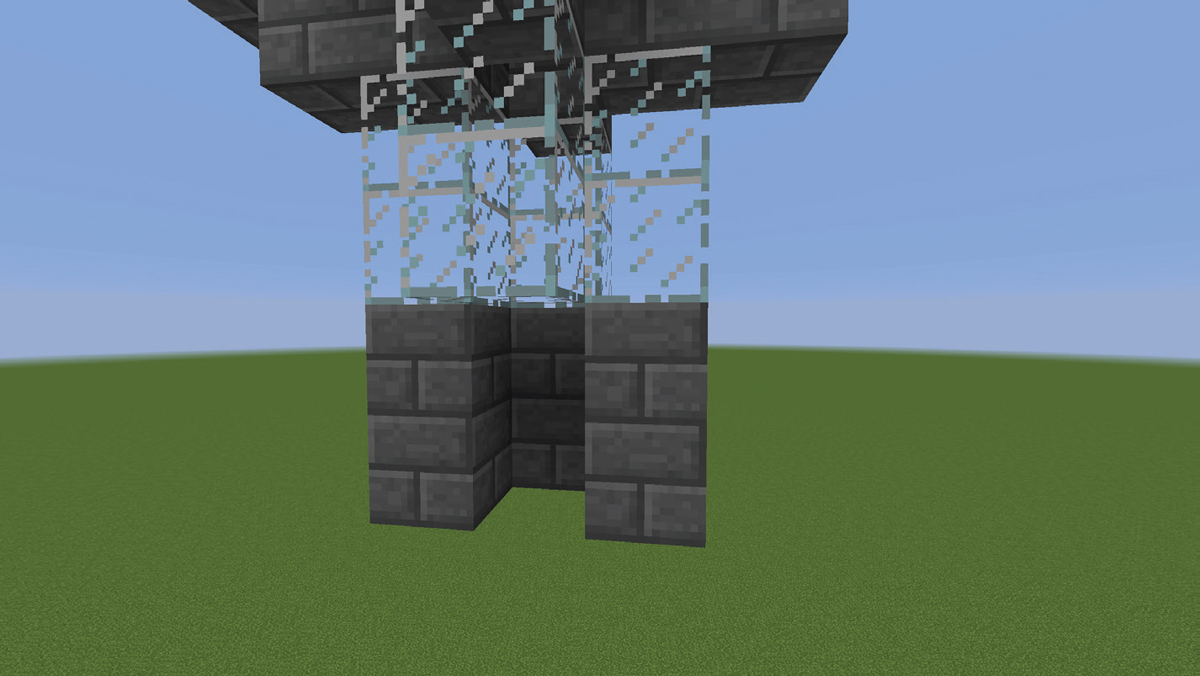
42. Below each of the back and 2 side glass blocks, add 2 stone blocks. Once enclosed, this will be the killing area.
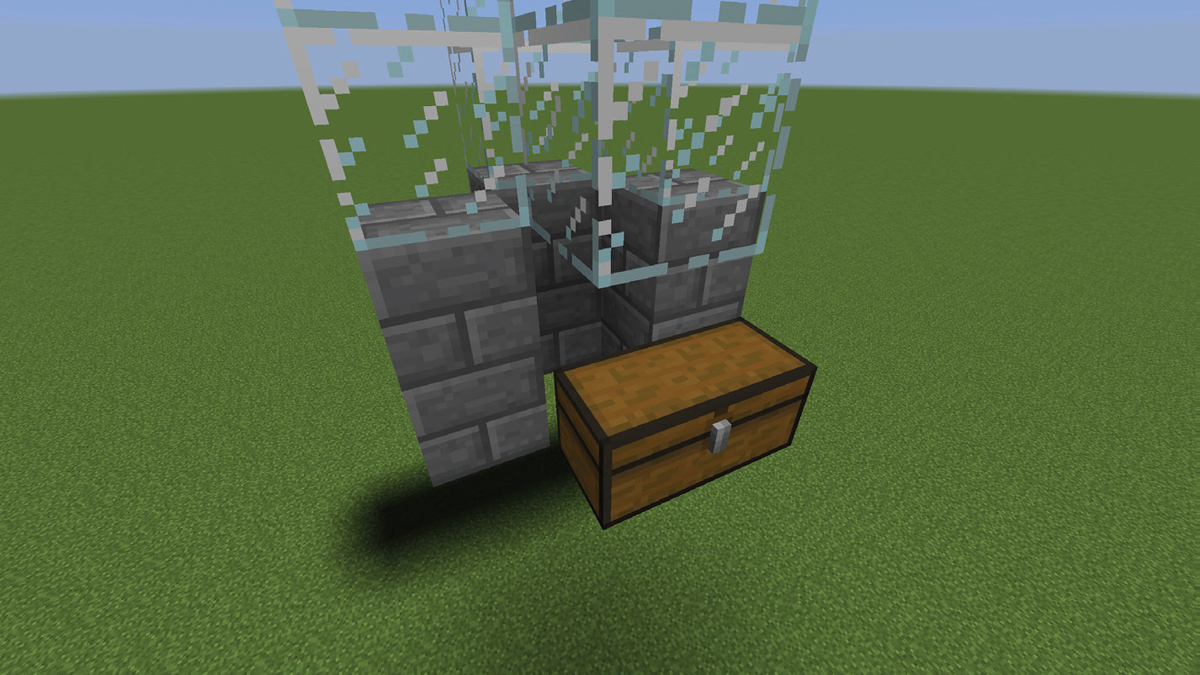
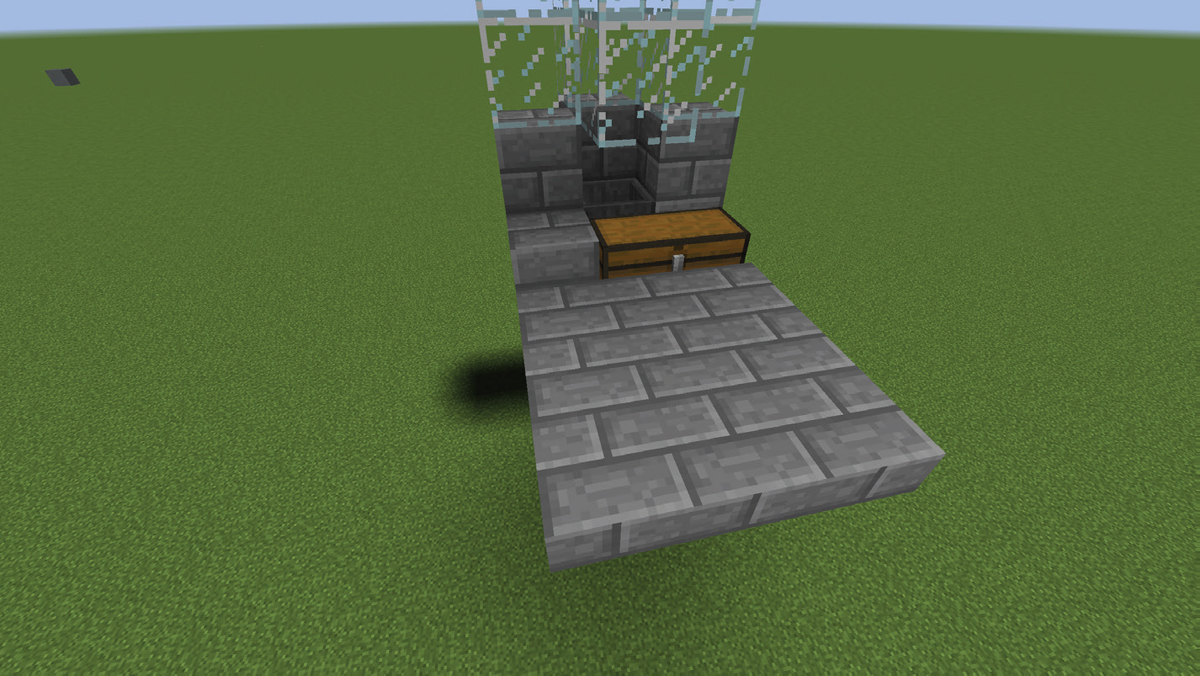
43. In front of the killing area, add a double chest, as shown.
44. Place a hopper behind the double chest and pointing into the chest. This will collect the blaze rods.

45. Add a stone block to the side of the double chest.

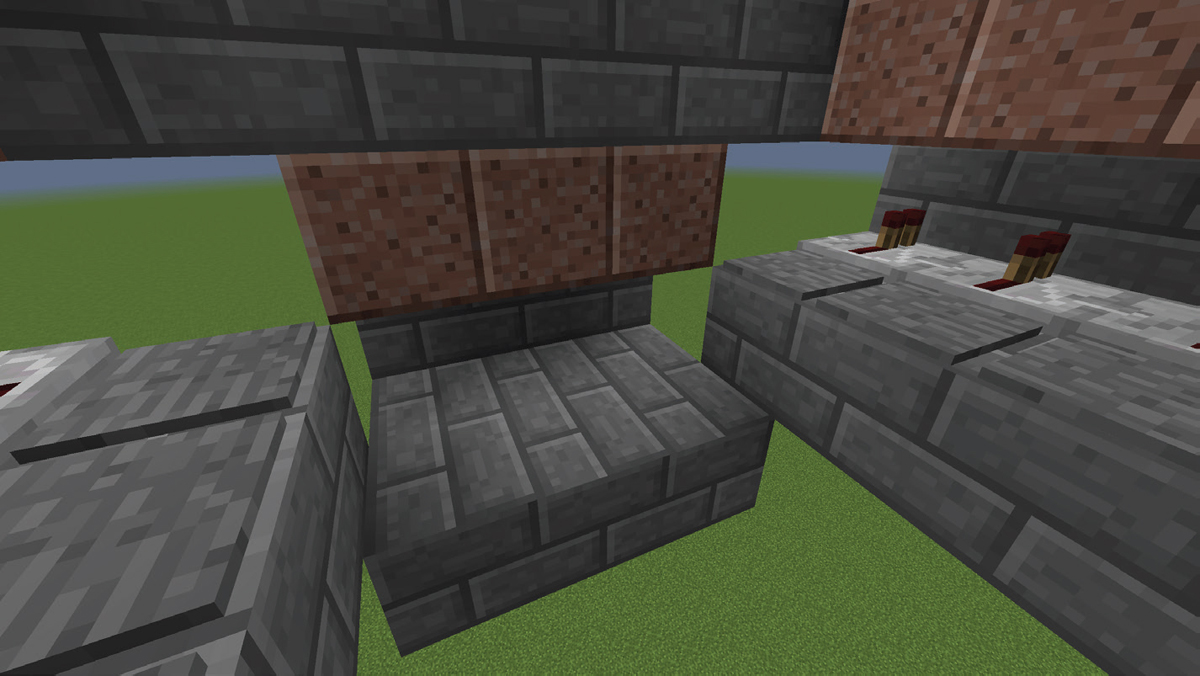
46. In front of the chest, add a 3x3 platform of bottom slabs.
47. At one of the front corners of the 3x3 platform, add a top slab.

48. On top of the doubled slab, add 4 building blocks. When you stand at the top of this pillar, you will be within range of the blaze spawner and blazes will spawn and be funneled down to the killing area. (They’ll stop spawning when you are below this pillar’s top.)

49. Add a way to get down quickly to the killing area from the pillar.

50. Almost complete! Now, all you have to do is enclose the dirt cuboid covering the spawn area and the blaze farm funnel so that ghast balls can’t get in or hit the pistons. Plan out an escape from the interior before you get rid of the dirt cuboid! Here, I’ve used red nether brick and orange glass to finish off the blaze farm. You will also want to add protective building for yourself while you’re at the farm. You can add bottom slabs above blocks to prevent spawnage of unwanted mobs.

