Chapter 8. Testing Deployment Using a Staging Site
Is all fun and game until you are need of put it in production.
It’s time to deploy the first version of our site and make it public. They say that if you wait until you feel ready to ship, then you’ve waited too long.
Is our site usable? Is it better than nothing? Can we make lists on it? Yes, yes, yes.
No, you can’t log in yet. No, you can’t mark tasks as completed. But do we really need any of that stuff? Not really—and you can never be sure what your users are actually going to do with your site once they get their hands on it. We think our users want to use the site for to-do lists, but maybe they actually want to use it to make “top 10 best fly-fishing spots” lists, for which you don’t need any kind of “mark completed” function. We won’t know until we put it out there.
In this chapter we’re going to go through and actually deploy our site to a real, live web server.
You might be tempted to skip this chapter—there’s lots of daunting stuff in it, and maybe you think this isn’t what you signed up for. But I strongly urge you to give it a go. This is one of the chapters I’m most pleased with, and it’s one that people often write to me saying they were really glad they stuck through it.
If you’ve never done a server deployment before, it will demystify a whole world for you, and there’s nothing like the feeling of seeing your site live on the actual Internet. Give it a buzzword name like “DevOps” if that’s what it takes to convince you it’s worth it.
Note
Why not ping me a note once your site is live on the web, and send me the URL? It always gives me a warm and fuzzy feeling … obeythetestinggoat@gmail.com.
TDD and the Danger Areas of Deployment
Deploying a site to a live web server can be a tricky topic. Oft-heard is the forlorn cry—”but it works on my machine!“.
Some of the danger areas of deployment include:
- Static files (CSS, JavaScript, images, etc.)
- Web servers usually need special configuration for serving these.
- The database
- There can be permissions and path issues, and we need to be careful about preserving data between deploys.
- Dependencies
- We need to make sure that the packages our software relies on are installed on the server, and have the correct versions.
But there are solutions to all of these. In order:
- Using a staging site, on the same infrastructure as the production site, can help us test out our deployments and get things right before we go to the “real” site.
- We can also run our functional tests against the staging site. That will reassure us that we have the right code and packages on the server, and since we now have a “smoke test” for our site layout, we’ll know that the CSS is loaded correctly.
- Virtualenvs are a useful tool for managing packages and dependencies on a machine that might be running more than one Python application.
- And finally, automation, automation, automation. By using an automated script to deploy new versions, and by using the same script to deploy to staging and production, we can reassure ourselves that staging is as much like live as possible.[9]
Over the next few pages I’m going to go through a deployment procedure. It isn’t meant to be the perfect deployment procedure, so please don’t take it as being best practice, or a recommendation—it’s meant to be an illustration, to show the kinds of issues involved in deployment and where testing fits in.
As Always, Start with a Test
Let’s adapt our functional tests slightly so that it can be run against a staging site. We’ll do it by slightly hacking an argument that is normally used to change the address which the test’s temporary server gets run on:
functional_tests/tests.py (ch08l001).
importsys[...]classNewVisitorTest(StaticLiveServerCase):@classmethoddefsetUpClass(cls):#
forarginsys.argv:#
if'liveserver'inarg:#
cls.server_url='http://'+arg.split('=')[1]#
return#
super().setUpClass()cls.server_url=cls.live_server_url@classmethoddeftearDownClass(cls):ifcls.server_url==cls.live_server_url:super().tearDownClass()defsetUp(self):[...]
OK, when I said slightly hacking, I meant seriously hacking. Do you remember I
said that LiveServerTestCase had certain limitations? Well, one is that it
always assumes you want to use its own test server. I still want to be able to
do that sometimes, but I also want to be able to selectively tell it not to
bother, and to use a real server instead.
-
setUpClassis a similar method tosetUp, also provided byunittest, which is used to do test setup for the whole class—that means it only gets executed once, rather than before every test method. This is whereLiveServerTestCase/StaticLiveServerCaseusually starts up its test server.-
We look for the liveserver command-line argument (which is found in
sys.argv).-
If we find it, we tell our test class to skip the normal
setUpClass, and just store away our staging server URL in a variable calledserver_urlinstead.
This means we also need to change the three places we used to use
self.live_server_url:
functional_tests/tests.py (ch08l002).
deftest_can_start_a_list_and_retrieve_it_later(self):# Edith has heard about a cool new online to-do app. She goes# to check out its homepageself.browser.get(self.server_url)[...]# Francis visits the home page. There is no sign of Edith's# listself.browser.get(self.server_url)[...]deftest_layout_and_styling(self):# Edith goes to the home pageself.browser.get(self.server_url)
We test that our little hack hasn’t broken anything by running the functional tests “normally”:
$ python3 manage.py test functional_tests
[...]
Ran 2 tests in 8.544s

OK
And now we can try them against our staging server URL. I’m hosting my staging server at superlists-staging.ottg.eu:
$ python3 manage.py test functional_tests --liveserver=superlists-staging.ottg.eu
Creating test database for alias 'default'...
FE
======================================================================
FAIL: test_can_start_a_list_and_retrieve_it_later
(functional_tests.tests.NewVisitorTest)
 ---------------------------------------------------------------------
Traceback (most recent call last):
  File "/workspace/superlists/functional_tests/tests.py", line 42, in
test_can_start_a_list_and_retrieve_it_later
    self.assertIn('To-Do', self.browser.title)
AssertionError: 'To-Do' not found in 'Domain name registration | Domain names
| Web Hosting | 123-reg'

======================================================================
FAIL: test_layout_and_styling (functional_tests.tests.NewVisitorTest)
 ---------------------------------------------------------------------
Traceback (most recent call last):
  File
"/workspace/superlists/functional_tests/tests.py", line 114, in
test_layout_and_styling
    inputbox = self.browser.find_element_by_id('id_new_item')
[...]
selenium.common.exceptions.NoSuchElementException: Message: 'Unable to locate
element: {"method":"id","selector":"id_new_item"}' ; Stacktrace:
 ---------------------------------------------------------------------
Ran 2 tests in 16.480s

FAILED (failures=2)
Destroying test database for alias 'default'...
You can see that both tests are failing, as expected, since I haven’t actually set up my staging site yet. In fact, you can see from the first traceback that the test is actually ending up on the home page of my domain registrar.
The FT seems to be testing the right things though, so let’s commit:
$ git diff # should show changes to functional_tests.py
$ git commit -am "Hack FT runner to be able to test staging"
Getting a Domain Name
We’re going to need a couple of domain names at this point in the book—they can both be subdomains of a single domain. I’m going to use superlists.ottg.eu and superlists-staging.ottg.eu. If you don’t already own a domain, this is the time to register one! Again, this is something I really want you to actually do. If you’ve never registered a domain before, just pick any old registrar and buy a cheap one—it should only cost you $5 or so, and you can even find free ones. I promise seeing your site on a “real” web site will be a thrill.
Manually Provisioning a Server to Host Our Site
We can separate out “deployment” into two tasks:
- Provisioning a new server to be able to host the code
- Deploying a new version of the code to an existing server
Some people like to use a brand new server for every deployment—it’s what we do at PythonAnywhere. That’s only necessary for larger, more complex sites though, or major changes to an existing site. For a simple site like ours, it makes sense to separate the two tasks. And, although we eventually want both to be completely automated, we can probably live with a manual provisioning system for now.
As you go through this chapter, you should be aware that provisioning is something that varies a lot, and that as a result there are few universal best practices for deployment. So, rather than trying to remember the specifics of what I’m doing here, you should be trying to understand the rationale, so that you can apply the same kind of thinking in the specific future circumstances you encounter.
Choosing Where to Host Our Site
There are loads of different solutions out there these days, but they broadly fall into two camps:
- Running your own (possibly virtual) server
- Using a Platform-As-A-Service (PaaS) offering like Heroku, DotCloud, OpenShift, or PythonAnywhere
Particularly for small sites, a PaaS offers a lot of advantages, and I would definitely recommend looking into them. We’re not going to use a PaaS in this book however, for several reasons. Firstly, I have a conflict of interest, in that I think PythonAnywhere is the best, but then again I would say that because I work there. Secondly, all the PaaS offerings are quite different, and the procedures to deploy to each vary a lot—learning about one doesn’t necessarily tell you about the others. Any one of them might change their process radically, or simply go out of business by the time you get to read this book.
Instead, we’ll learn just a tiny bit of good old-fashioned server admin, including SSH and web server config. They’re unlikely to ever go away, and knowing a bit about them will get you some respect from all the grizzled dinosaurs out there.
What I have done is to try and set up a server in such a way that it’s a lot like the environment you get from a PaaS, so you should be able to apply the lessons we learn in the deployment section, no matter what provisioning solution you choose.
Spinning Up a Server
I’m not going to dictate how you do this—whether you choose Amazon AWS, Rackspace, Digital Ocean, your own server in your own data centre or a Raspberry Pi in a cupboard behind the stairs, any solution should be fine, as long as:
- Your server is running Ubuntu (13.04 or later).
- You have root access to it.
- It’s on the public Internet.
- You can SSH into it.
I’m recommending Ubuntu as a distro because it has Python 3.4 and it has some specific ways of configuring Nginx, which I’m going to make use of next. If you know what you’re doing, you can probably get away with using something else, but you’re on your own.
Note
Some people get to this chapter, and are tempted to skip the domain bit, and the “getting a real server” bit, and just use a VM on their own PC. Don’t do this. It’s not the same, and you’ll have more difficulty following the instructions, which are complicated enough as it is. If you’re worried about cost, dig around and you’ll find free options for both. Email me if you need further pointers, I’m always happy to help.
User Accounts, SSH, and Privileges
In these instructions, I’m assuming that you have a nonroot user account set up that has “sudo” privileges, so whenever we need to do something that requires root access, we use sudo, and I’m explicit about that in the various instructions below. If you need to create a nonroot user, here’s how:
# these commands must be run as root
root@server:$ useradd -m -s /bin/bash elspeth # add user named elspeth
# -m creates a home folder, -s sets elspeth to use bash by default
root@server:$ usermod -a -G sudo elspeth # add elspeth to the sudoers group
root@server:$ passwd elspeth # set password for elspeth
root@server:$ su - elspeth # switch-user to being elspeth!
elspeth@server:$
Name your own user whatever you like! I also recommend learning up how to use private key authentication rather than passwords for SSH. It’s a matter of taking the public key from your own PC, and appending it to ~/.ssh/authorized_keys in the user account on the server. You probably went through a similar procedure if you signed up for Bitbucket or Github.
There are some good instructions
here (note that ssh-keygen is
available as part of Git-Bash on Windows).
Tip
Look out for that elspeth@server in the command-line listings in this
chapter. It indicates commands that must be run on the server, as opposed to
commands you run on your own PC.
Installing Nginx
We’ll need a web server, and all the cool kids are using Nginx these days, so we will too. Having fought with Apache for many years, I can tell you it’s a blessed relief in terms of the readability of its config files, if nothing else!
Installing Nginx on my server was a matter of doing an apt-get, and I could
then see the default Nginx “Hello World” screen:
elspeth@server:$ sudo apt-get install nginx
elspeth@server:$ sudo service nginx start
(You may need to do an apt-get update and/or an apt-get upgrade first.)
You should be able to go to the IP address of your server, and see the “Welcome to nginx” page at this point, as in Figure 8-1.

If you don’t see it, it may be because your firewall does not open port 80 to the world. On AWS for example, you may need to configure the “security group” for your server to open port 80.
While we’ve got root access, let’s make sure the server has the key pieces of software we need at the system level: Python, Git, pip, and virtualenv.
elspeth@server:$ sudo apt-get install git python3 python3-pip
elspeth@server:$ sudo pip3 install virtualenv
Configuring Domains for Staging and Live
We don’t want to be messing about with IP addresses all the time, so we should point our staging and live domains to the server. At my registrar, the control screens looked a bit like Figure 8-2.
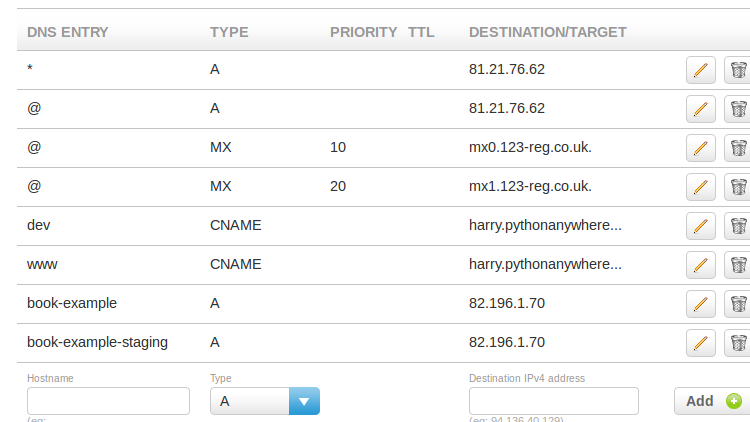
In the DNS system, pointing a domain at a specific IP address is called an “A-Record”. All registrars are slightly different, but a bit of clicking around should get you to the right screen in yours.
Using the FT to Confirm the Domain Works and Nginx Is Running
To confirm this works, we can rerun our functional tests and see that their failure messages have changed slightly—one of them in particular should now mention Nginx:
$ python3 manage.py test functional_tests --liveserver=superlists-staging.ottg.eu
[...]
selenium.common.exceptions.NoSuchElementException: Message: 'Unable to locate
element: {"method":"id","selector":"id_new_item"}' ; Stacktrace:
[...]
AssertionError: 'To-Do' not found in 'Welcome to nginx!'Deploying Our Code Manually
The next step is to get a copy of the staging site up and running, just to check whether we can get Nginx and Django to talk to each other. As we do so, we’re starting to move into doing “deployment” rather than provisioning, so we should be thinking about how we can automate the process, as we go.
Note
One rule of thumb for distinguishing provisioning from deployment is that you tend to need root permissions for the former, but we don’t for the latter.
We need a directory for the source to live in. Let’s assume we have a home folder for a nonroot user; in my case it would be at /home/elspeth (this is likely to be the setup on any shared hosting system, but you should always run your web apps as a nonroot user, in any case). I’m going to set up my sites like this:
/home/elspeth
├── sites
│   ├── www.live.my-website.com
│   │    ├── database
│   │    │     └── db.sqlite3
│   │    ├── source
│   │    │    ├── manage.py
│   │    │    ├── superlists
│   │    │    ├── etc...
│   │    │
│   │    ├── static
│   │    │    ├── base.css
│   │    │    ├── etc...
│   │    │
│   │    └── virtualenv
│   │         ├── lib
│   │         ├── etc...
│   │
│   ├── www.staging.my-website.com
│   │    ├── database
│   │    ├── etc...
Each site (staging, live, or any other website) has its own folder. Within that we have a separate folder for the source code, the database, and the static files. The logic is that, while the source code might change from one version of the site to the next, the database will stay the same. The static folder is in the same relative location, ../static, that we set up at the end of the last chapter. Finally, the virtualenv gets its own subfolder too. What’s a virtualenv, I hear you ask? We’ll find out shortly.
Adjusting the Database Location
First let’s change the location of our database in settings.py, and make sure
we can get that working on our local PC. Using os.path.abspath prevents any
later confusion about the current working directory:
superlists/settings.py (ch08l003).
# Build paths inside the project like this: os.path.join(BASE_DIR, ...)importosBASE_DIR=os.path.abspath(os.path.dirname(os.path.dirname(__file__)))[...]DATABASES={'default':{'ENGINE':'django.db.backends.sqlite3','NAME':os.path.join(BASE_DIR,'../database/db.sqlite3'),}}[...]STATIC_ROOT=os.path.join(BASE_DIR,'../static')
Now let’s try it locally:
$ mkdir ../database
$ python3 manage.py migrate --noinput
Creating tables ...
[...]
$ ls ../database/
db.sqlite3
That seems to work. Let’s commit it:
$ git diff # should show changes in settings.py
$ git commit -am "move sqlite database outside of main source tree"
To get our code onto the server, we’ll use Git and go via one of the code sharing sites. If you haven’t already, push your code up to GitHub, BitBucket, or similar. They all have excellent instructions for beginners on how to do that.
Here’s some bash commands that will set this all up. If you’re not familiar
with it, note the export command which lets me set up a “local variable”
in bash:
elspeth@server:$ export SITENAME=superlists-staging.ottg.eu
elspeth@server:$ mkdir -p ~/sites/$SITENAME/database
elspeth@server:$ mkdir -p ~/sites/$SITENAME/static
elspeth@server:$ mkdir -p ~/sites/$SITENAME/virtualenv
# you should replace the URL in the next line with the URL for your own repo
elspeth@server:$ git clone https://github.com/hjwp/book-example.git \
~/sites/$SITENAME/source
Resolving deltas: 100% [...]
Note
A bash variable defined using export only lasts as long as that console
session. If you log out of the server and log back in again, you’ll need to
redefine it. It’s devious because Bash won’t error, it will just substitute
the empty string for the variable, which will lead to weird results … if in
doubt, do a quick echo $SITENAME.
Now we’ve got the site installed, let’s just try running the dev server—this is a smoke test, to see if all the moving parts are connected:
elspeth@server:$ $ cd ~/sites/$SITENAME/source
$ python3 manage.py runserver
Traceback (most recent call last):
  File "manage.py", line 8, in <module>
    from django.core.management import execute_from_command_line
ImportError: No module named django.core.management
Ah. Django isn’t installed on the server.
Creating a Virtualenv
We could install it at this point, but that would leave us with a problem: if we ever wanted to upgrade Django when a new version comes out, it would be impossible to test the staging site with a different version from live. Similarly, if there are other users on the server, we’d all be forced to use the same version of Django.
The solution is a “virtualenv”—a neat way of having different versions of Python packages installed in different places, in their own “virtual environments”.
Let’s try it out locally, on our own PC first:
$ pip3 install virtualenv # will need a sudo on linux/macos.We’ll follow the same folder structure as we’re planning for the server:
$ virtualenv --python=python3 ../virtualenv
$ ls ../virtualenv/
bin  include  lib
That will create a folder at ../virtualenv which will contain its own
copy of Python and pip, as well as a location to install Python packages
to. It’s a self-contained “virtual” Python environment. To start using
it, we run a script called activate, which will change the system path
and the Python path in such a way as to use the virtualenv’s executables
and packages:
$ which python3
/usr/bin/python3
$ source ../virtualenv/bin/activate
$ which python  # note switch to virtualenv Python
/workspace/virtualenv/bin/python
(virtualenv)$ python3 manage.py test lists
[...]
ImportError: No module named 'django'
Note
It’s not required, but you might want to look into a tool called
virtualenvwrapper for managing virtualenvs on your own PC.
We’re seeing that ImportError: No module named django because Django isn’t
installed inside the virtualenv. So, we can install it, and see that it
ends up inside the virtualenv’s site-packages folder:
(virtualenv)$ pip install django==1.7
[...]
Successfully installed django
Cleaning up...
(virtualenv)$ python3 manage.py test lists
[...]
OK
$ ls ../virtualenv/lib/python3.4/site-packages/
django                       pip                     setuptools
Django-1.7-py3.4.egg-info  pip-1.4.1-py3.4.egg-info  setuptools-0.9.8-py3.4.egg-info
easy_install.py              pkg_resources.py
_markerlib                   __pycache__
To “save” the list of packages we need in our virtualenv, and be able to
re-create it later, we create a requirements.txt file, using pip freeze,
and add that to our repository:
(virtualenv)$ pip freeze > requirements.txt
(virtualenv)$ deactivate
$ cat requirements.txt
Django==1.7
$ git add requirements.txt
$ git commit -m"Add requirements.txt for virtualenv"
Note
While Django 1.7 isn’t quite out yet, you can use
pip install https://github.com/django/django/archive/stable/1.7.x.zip,
and just add the URL instead of the "Django==1.7" to requirements.txt;
pip is magic enough to figure that out. Test it by doing a
pip install -r requirements.txt locally, and you should see pip
concluding everything is already installed.
And now we do a git push to send our updates up to our code-sharing site:
$ git pushAnd we can pull those changes down to the server, create a virtualenv on
the server, and use requirements.txt along with pip install -r to
make the server virtualenv just like our local one:
elspeth@server:$ git pull  # may ask you to do some git config first
elspeth@server:$ virtualenv --python=python3 ../virtualenv/
elspeth@server:$ ../virtualenv/bin/pip install -r requirements.txt
Downloading/unpacking Django==1.7 (from -r requirements.txt (line 1))
[...]
Successfully installed Django
Cleaning up...
elspeth@server:$ ../virtualenv/bin/python3 manage.py runserver
Validating models...
0 errors found
[...]
That looks like it’s running happily. We can Ctrl-C it for now.
Notice you don’t have to use the activate to use the virtualenv.
Directly specifying the path to the virtualenv copies of python or
pip works too. We’ll use the direct paths on the server.
Simple Nginx Configuration
Next we create an Nginx config file to tell it to send requests for our staging site along to Django. A minimal config looks like this:
server: /etc/nginx/sites-available/superlists-staging.ottg.eu.
server{listen80;server_namesuperlists-staging.ottg.eu;location/{proxy_passhttp://localhost:8000;}}
This config says it will only work for our staging domain, and will “proxy” all requests to the local port 8000 where it expects to find Django waiting to respond to requests.
I saved[10] this to a file called superlists-staging.ottg.eu inside /etc/nginx/sites-available folder, and then added it to the enabled sites for the server by creating a symlink to it:
elspeth@server:$ echo $SITENAME # check this still has our site in
superlists-staging.ottg.eu
elspeth@server:$ sudo ln -s ../sites-available/$SITENAME \
/etc/nginx/sites-enabled/$SITENAME
elspeth@server:$ ls -l /etc/nginx/sites-enabled # check our symlink is there
That’s the Debian/Ubuntu preferred way of saving Nginx configurations—the real config file in sites-available, and a symlink in sites-enabled; the idea is that it makes it easier to switch sites on or off.
We also may as well remove the default “Welcome to nginx” config, to avoid any confusion:
elspeth@server:$ sudo rm /etc/nginx/sites-enabled/defaultAnd now to test it:
elspeth@server:$ sudo service nginx reload
elspeth@server:$ ../virtualenv/bin/python3 manage.py runserver
Note
I also had to edit /etc/nginx/nginx.conf and uncomment a line saying
server_names_hash_bucket_size 64; to get my long domain name to work. You
may not have this problem; Nginx will warn you when you do a reload if it has
any trouble with its config files.
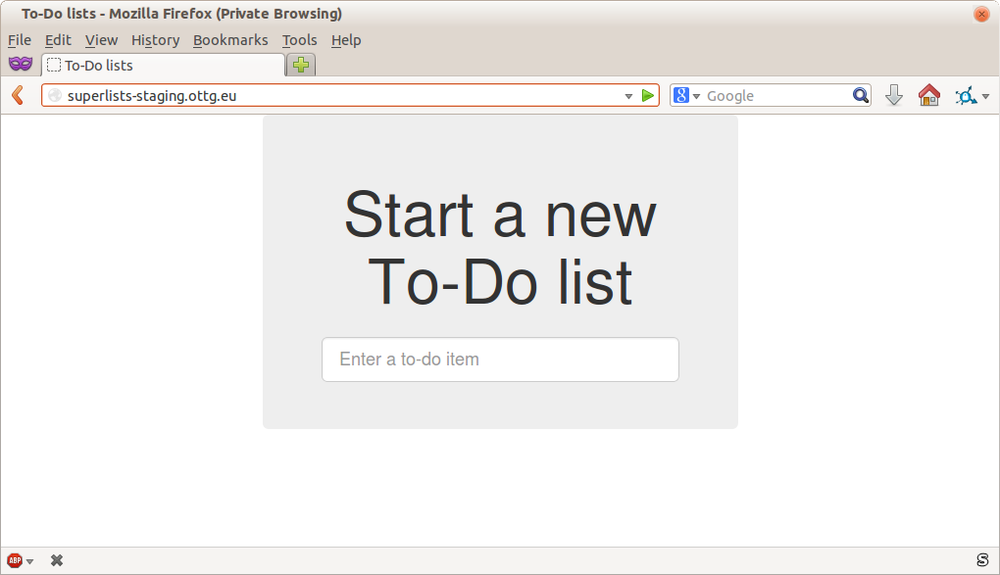
A quick visual inspection confirms—the site is up (Figure 8-3)!
Let’s see what our functional tests say:
$ python3 manage.py test functional_tests --liveserver=superlists-staging.ottg.eu
[...]
selenium.common.exceptions.NoSuchElementException: Message: 'Unable to locate
[...]
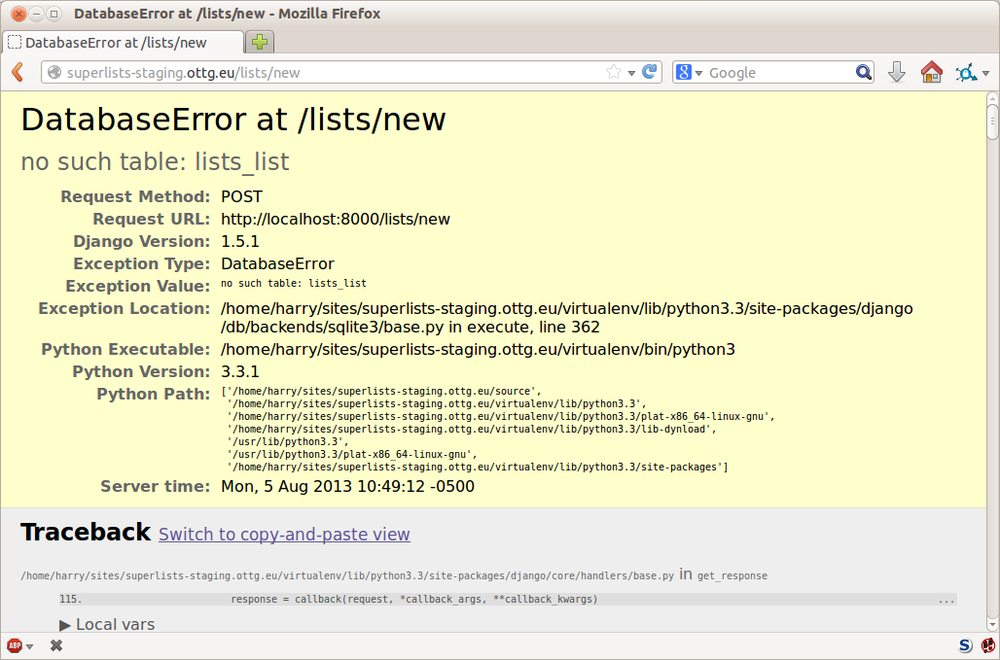
AssertionError: 0.0 != 512 within 3 deltaThe tests are failing as soon as they try and submit a new item, because we haven’t set up the database. You’ll probably have spotted the yellow Django debug page (Figure 8-4) telling us as much as the tests went through, or if you tried it manually.
Note
The tests saved us from potential embarrassment there. The site looked fine when we loaded its front page. If we’d been a little hasty, we might have thought we were done, and it would have been the first users that discovered that nasty Django DEBUG page. Okay, slight exaggeration for effect, maybe we would have checked, but what happens as the site gets bigger and more complex? You can’t check everything. The tests can.
Creating the Database with migrate
We run migrate using the --noinput argument to suppress the two little “are
you sure” prompts:
elspeth@server:$ ../virtualenv/bin/python3 manage.py migrate --noinput
Creating tables ...
[...]
elspeth@server:$ ls ../database/
db.sqlite3
elspeth@server:$ ../virtualenv/bin/python3 manage.py runserver
Let’s try the FTs again:
$ python3 manage.py test functional_tests --liveserver=superlists-staging.ottg.eu
Creating test database for alias 'default'...
..
 ---------------------------------------------------------------------
Ran 2 tests in 10.718s

OK
Destroying test database for alias 'default'...
It’s great to see the site up and running! We might reward ourselves with a well-earned tea break at this point, before moving on to the next section…
Tip
If you see a “502 - Bad Gateway”, it’s probably because you forgot to
restart the dev server with manage.py runserver after the migrate.
Getting to a Production-Ready Deployment
We’re at least reassured that the basic piping works, but we really can’t be
using the Django dev server in production. We also can’t be relying on
manually starting it up with runserver.
Switching to Gunicorn
Do you know why the Django mascot is a pony? The story is that Django comes with so many things you want: an ORM, all sorts of middleware, the admin site … “What else do you want, a pony?” Well, Gunicorn stands for “Green Unicorn”, which I guess is what you’d want next if you already had a pony…
elspeth@server:$ ../virtualenv/bin/pip install gunicorn==18Gunicorn[11]
will need to know a path to a WSGI server, which is usually
a function called application. Django provides one in superlists/wsgi.py:
elspeth@server:$ ../virtualenv/bin/gunicorn superlists.wsgi:application
2013-05-27 16:22:01 [10592] [INFO] Starting gunicorn 0.18.0
2013-05-27 16:22:01 [10592] [INFO] Listening at: http://127.0.0.1:8000 (10592)
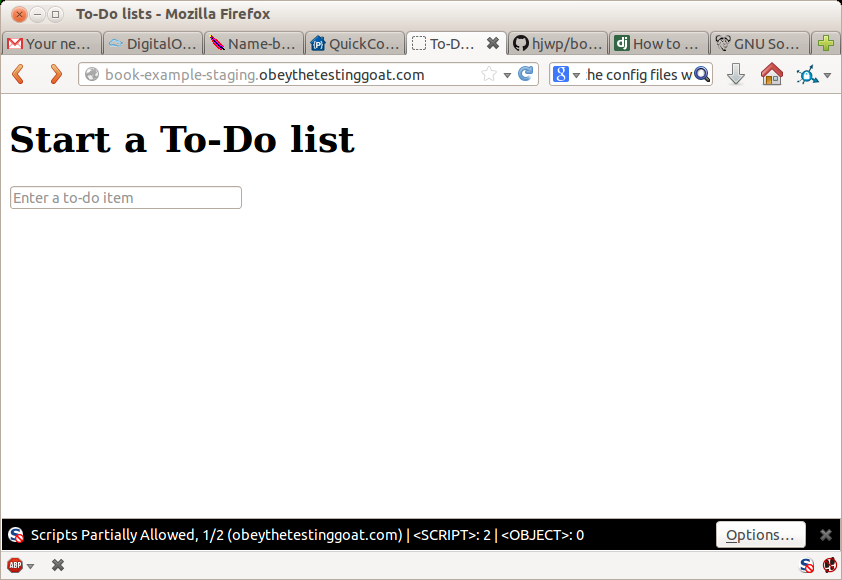
[...]If you now take a look at the site, you’ll find the CSS is all broken, as in Figure 8-5.
And if we run the functional tests, you’ll see they confirm that something is wrong. The test for adding list items passes happily, but the test for layout + styling fails. Good job tests!
$ python3 manage.py test functional_tests --liveserver=superlists-staging.ottg.eu
[...]
AssertionError: 125.0 != 512 within 3 delta
FAILED (failures=1)
The reason that the CSS is broken is that although the Django dev server will serve static files magically for you, Gunicorn doesn’t. Now is the time to tell Nginx to do it instead.
Getting Nginx to Serve Static Files
First we run collectstatic to copy all the static files to a folder where
Nginx can find them:
elspeth@server:$ ../virtualenv/bin/python3 manage.py collectstatic --noinput
elspeth@server:$ ls ../static/
base.css  bootstrap
Note that, again, instead of using the virtualenv activate command, we
can use the direct path to the virtualenv’s copy of Python instead.
Now we tell Nginx to start serving those static files for us:
server: /etc/nginx/sites-available/superlists-staging.ottg.eu.
server{listen80;server_namesuperlists-staging.ottg.eu;location/static{alias/home/elspeth/sites/superlists-staging.ottg.eu/static;}location/{proxy_passhttp://localhost:8000;}}
Reload Nginx and restart Gunicorn…
elspeth@server:$ sudo service nginx reload
elspeth@server:$ ../virtualenv/bin/gunicorn superlists.wsgi:application
And if we take another look at the site, things are looking much healthier. We can rerun our FTs:
$ python3 manage.py test functional_tests --liveserver=superlists-staging.ottg.eu
Creating test database for alias 'default'...
..
 ---------------------------------------------------------------------
Ran 2 tests in 10.718s

OK
Destroying test database for alias 'default'...
Switching to Using Unix Sockets
When we want to serve both staging and live, we can’t have both servers trying to use port 8000. We could decide to allocate different ports, but that’s a bit arbitrary, and it would be dangerously easy to get it wrong and start the staging server on the live port, or vice versa.
A better solution is to use Unix domain sockets—they’re like files on disk, but can be used by Nginx and Gunicorn to talk to each other. We’ll put our sockets in /tmp. Let’s change the proxy settings in Nginx:
server: /etc/nginx/sites-available/superlists-staging.ottg.eu.
[...]location/{proxy_set_headerHost$host;proxy_passhttp://unix:/tmp/superlists-staging.ottg.eu.socket;}}
proxy_set_header is used to make sure Gunicorn and Django know what domain
it’s running on. We need that for the ALLOWED_HOSTS security feature, which
we’re about to switch on.
Now we restart Gunicorn, but this time telling it to listen on a socket instead of on the default port:
elspeth@server:$ sudo service nginx reload
elspeth@server:$ ../virtualenv/bin/gunicorn --bind \
    unix:/tmp/superlists-staging.ottg.eu.socket superlists.wsgi:application
And again, we rerun the functional test again, to make sure things still pass:
$ python3 manage.py test functional_tests --liveserver=superlists-staging.ottg.eu
OK
A couple more steps!
Switching DEBUG to False and Setting ALLOWED_HOSTS
Django’s DEBUG mode is all very well for hacking about on your own server, but leaving those pages full of tracebacks available isn’t secure.
You’ll find the DEBUG setting at the top of settings.py. When we set this
to False, we also need to set another setting called ALLOWED_HOSTS. This
was
added
as a security feature in Django 1.5. Unfortunately it doesn’t have a helpful
comment in the default settings.py, but we can add one ourselves. Do this on
the server:
server: superlists/settings.py.
# SECURITY WARNING: don't run with debug turned on in production!DEBUG=FalseTEMPLATE_DEBUG=DEBUG# Needed when DEBUG=FalseALLOWED_HOSTS=['superlists-staging.ottg.eu'][...]
And, once again, we restart Gunicorn and run the FT to check things still work.
Note
Don’t commit these changes on the server. At the moment this is just a
hack to get things working, not a change we want to keep in our repo. In
general, to keep things simple, I’m only going to do Git commits from the local
PC, using git push and git pull when I need to sync them up to the server.
Using Upstart to Make Sure Gunicorn Starts on Boot
Our final step is to make sure that the server starts up Gunicorn automatically on boot, and reloads it automatically if it crashes. On Ubuntu, the way to do this is using Upstart:
server: /etc/init/gunicorn-superlists-staging.ottg.eu.conf.
description"Gunicorn server for superlists-staging.ottg.eu"start on net-device-upexec../virtualenv/bin/gunicorn\\superlists.wsgi:application
Upstart is joyously simple to configure (especially if you’ve ever had the
dubious pleasure of writing an init.d script), and is fairly
self-explanatory.
-
start on net-device-upmakes sure Gunicorn only runs once the server has connected up to the Internet.-
respawnwill restart the process automatically if it crashes.-
setuidmakes the process run as the “elspeth” user.-
chdirsets the working directory.-
execis the actual process to execute.
Upstart scripts live in /etc/init, and their names must end in .conf.
Now we can start Gunicorn with the start command:
elspeth@server:$ sudo start gunicorn-superlists-staging.ottg.eu
And we can rerun the FTs to see that everything still works. You can even test that the site comes back up if you reboot the server!
Saving Our Changes: Adding Gunicorn to Our requirements.txt
Back in the local copy of your repo, we should add Gunicorn to the list of packages we need in our virtualenvs:
$ source ../virtualenv/bin/activate # if necessary
(virtualenv)$ pip install gunicorn
(virtualenv)$ pip freeze > requirements.txt
(virtualenv)$ deactivate
$ git commit -am "Add gunicorn to virtualenv requirements"
$ git push
Note
On Windows, at the time of writing, Gunicorn would pip install quite happily, but it wouldn’t actually work if you tried to use it. Thankfully we only ever run it on the server, so that’s not a problem. And, Windows support is being discussed…
Automating
Let’s recap our provisioning and deployment procedures:
- Provisioning
- Assume we have a user account and home folder
-
apt-get nginx git python-pip -
pip install virtualenv - Add Nginx config for virtual host
- Add Upstart job for Gunicorn
- Deployment
- Create directory structure in ~/sites
- Pull down source code into folder named source
- Start virtualenv in ../virtualenv
-
pip install -r requirements.txt -
manage.py migratefor database -
collectstaticfor static files - Set DEBUG = False and ALLOWED_HOSTS in settings.py
- Restart Gunicorn job
- Run FTs to check everything works
Assuming we’re not ready to entirely automate our provisioning process, how should we save the results of our investigation so far? I would say that the Nginx and Upstart config files should probably be saved somewhere, in a way that makes it easy to reuse them later. Let’s save them in a new subfolder in our repo:
$ mkdir deploy_toolsdeploy_tools/nginx.template.conf.
server{listen80;server_nameSITENAME;location/static{alias/home/elspeth/sites/SITENAME/static;}location/{proxy_set_headerHost$host;proxy_passhttp://unix:/tmp/SITENAME.socket;}}
deploy_tools/gunicorn-upstart.template.conf.
description"Gunicorn server for SITENAME"start on net-device-up stop on shutdown respawn setuid elspeth chdir /home/elspeth/sites/SITENAME/sourceexec../virtualenv/bin/gunicorn\--bind unix:/tmp/SITENAME.socket\superlists.wsgi:application
Then it’s easy for us to use those two files to generate
a new site, by doing a find & replace on SITENAME.
For the rest, just keeping a few notes is OK. Why not keep them in a file in the repo too?
deploy_tools/provisioning_notes.md.
Provisioning a new site=======================## Required packages:*nginx*Python 3*Git*pip*virtualenv eg, on Ubuntu: sudo apt-get install nginx git python3 python3-pip sudo pip3 install virtualenv ## Nginx Virtual Host config*see nginx.template.conf*replace SITENAME with, eg, staging.my-domain.com ## Upstart Job*see gunicorn-upstart.template.conf*replace SITENAME with, eg, staging.my-domain.com ## Folder structure: Assume we have a user account at /home/username /home/username └── sites └── SITENAME ├── database ├── source ├── static └── virtualenv
We can do a commit for those:
$ git add deploy_tools
$ git status # see three new files
$ git commit -m "Notes and template config files for provisioning"
Our source tree will now look something like this:
$ tree -I __pycache__
.
├── deploy_tools
│   ├── gunicorn-upstart.template.conf
│   ├── nginx.template.conf
│   └── provisioning_notes.md
├── functional_tests
│   ├── __init__.py
│   ├── [...]
├── lists
│   ├── __init__.py
│   ├── models.py
│   ├── static
│   │   ├── base.css
│   │   ├── [...]
│   ├── templates
│   │   ├── base.html
│   │   ├── [...]
├── manage.py
├── requirements.txt
└── superlists
    ├── [...]
“Saving Your Progress”
Being able to run our FTs against a staging server can be very reassuring. But, in most cases, you don’t want to run your FTs against your “real” server. In order to “save our work”, and reassure ourselves that the production server will work just as well as the real server, we need to make our deployment process repeatable.
Automation is the answer, and it’s the topic of the next chapter.
[9] What I’m calling a “staging” server, some people would call a “development” server, and some others would also like to distinguish “preproduction” servers. Whatever we call it, the point is to have somewhere we can try our code out in an environment that’s as similar as possible to the real production server.
[10] Not sure how to edit a file on the server? There’s always vi,
which I’ll keep encouraging you to learn a bit of. Alternatively, try the
relatively beginner-friendly nano. Note you’ll also need to use sudo
because the file is in a system folder.
[11] I’m using version 18 because, as of July 2014, v 19 had a bug. Feel free to try upgrading it if a newer release is out. And let me know, so I can update the book!