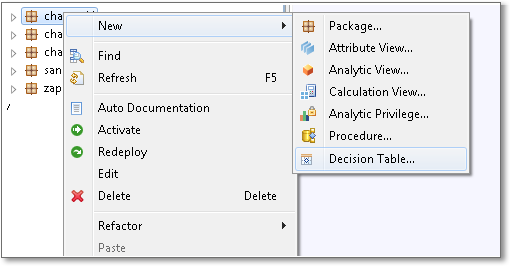
Figure 11.1
Creating a Decision Table (Part 1)