Chapter 7
Week 3: Seated Poses to Improve Alignment, Range of Motion, and Strength
Most of us spend the vast majority of our days sitting down—often with poor posture. Slumped sitting can be a major contributor to back and neck pain and can also negatively impact breathing, circulation, digestion, and bone health. This chapter teaches healthy sitting alignment, which can help bring ease during your practice and throughout your day. The practices introduced here are also important tools for enhancing your ability to move your joints through a normal, pain-free range of motion, which can be a determining factor in your ability to live an independent, vital life.108 Remember to start with the Three-Part Breath exercise, warm up with the Range-of-Motion Sequence, and finish with Relaxation pose.
Learning to always sit and stand “tall” with a neutral spine is one of the best ways to relieve and sometimes eliminate back and neck pain.
Functional Benefits of the Seated Practice
Relieves back and neck pain. Sitting with a neutral spine can reduce pressure and pain in the back and neck.
Increases range of motion. Enhancing arm and shoulder mobility can increase our ability to reach things we want—whether it’s an item on a higher shelf at home or in a store, or a tall loved one we’d like to hug.
Encourages fluid breathing. Articulation of the arms, shoulders, and spine can help improve breathing efficiency by reducing muscular holding patterns that interfere with a fluid breath.
Promotes independence. Strengthening the thighs is vital to being able to get up out of your chair, which is why the thighs are considered the muscles of independence.
Improves fine motor skills. Stretching and strengthening the hands and fingers can ease stiffness and increase suppleness, enhancing our ability to do activities that require fine motor skills, such as using a computer, cooking, and knitting.
Increases stability. Since our feet are our foundations for balance, stretching and strengthening the feet and toes enhances our stability, in addition to easing stiffness and decreasing foot pain.
As a reminder, you can download audio for week 3’s practice at http://www.newharbinger.com/33643 .

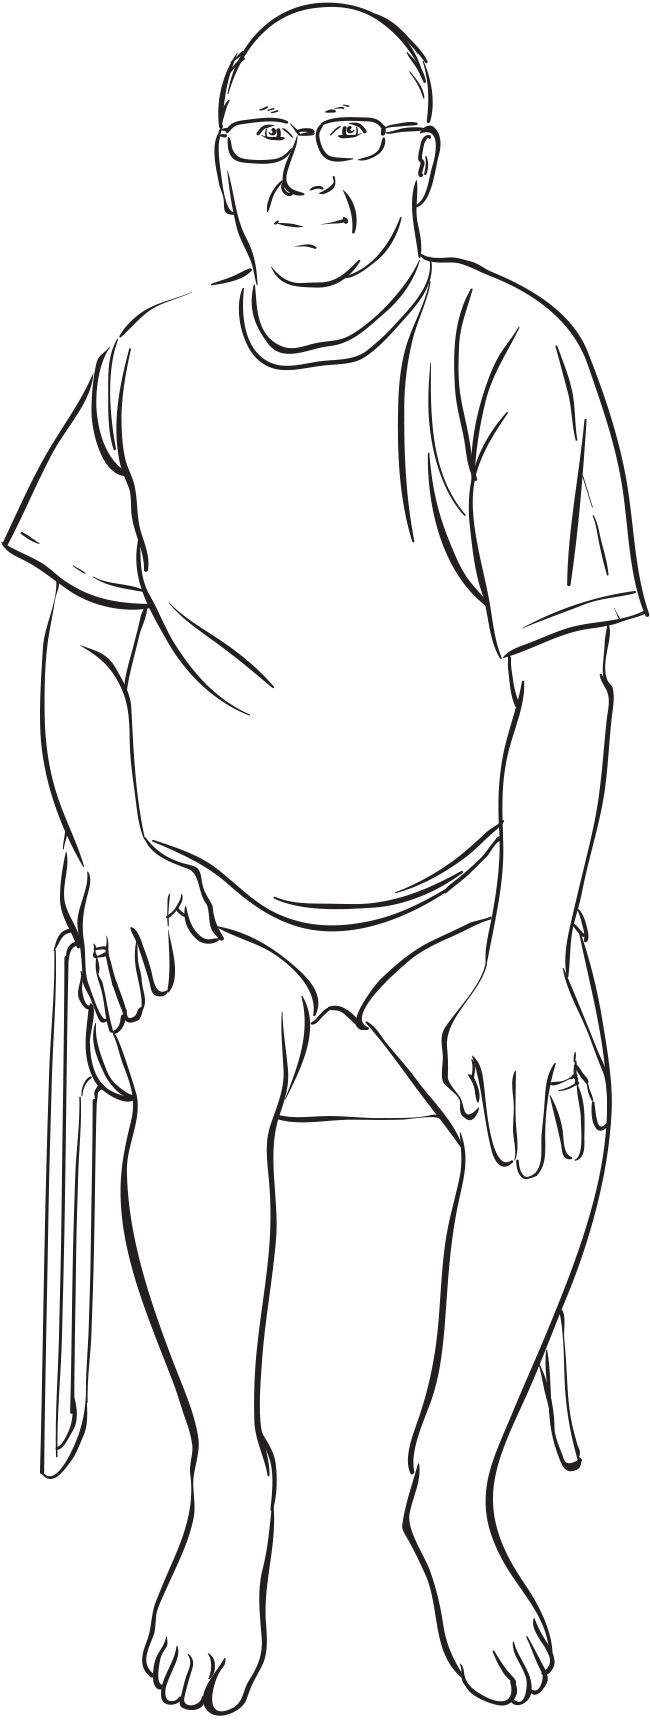
Figure 7.1 Seated Mountain pose
Setup
Sit slightly forward of the back of your chair, and place your feet on the ground, hip-width apart. If your feet don’t reach the ground, use a folded blanket or towel to “raise” the ground to meet your feet.
Movement
- Reach under your bottom to find your sit bones—those two hard “knobs” at the base of your pelvis.
- Move the flesh away so that your sit bones can release down into the support of your chair.
- Lift up from the top of your head, inviting your spine to lengthen up and your chest to lift a bit.
- Relax your shoulders and your neck.
- Keep your eyes forward with a soft gaze.
- Rest your hands on your thighs or in your lap, wherever they are most comfortable (see figure 7.1).
- Soften your face and release the hinge of your jaw, so your teeth gently part and your lips barely touch.
- Soften the inside of your mouth.
- Breathe into the stability of the Seated Mountain pose. Linger here for three to five easy breaths, feeling the dual action of your sit bones releasing down into the chair and the top of your head lifting up toward the sky.
Remember
- • It can be surprisingly demanding to sit without the support of the back of your chair. If you begin to fatigue, feel free to scoot your hips back to rest your back against the chair.
- • You may also put a rolled towel between your spine and the back of the chair for a nice gentle support as you build the strength to sit without support.
- • When we get tired, we tend to round forward and collapse the chest. Try to keep the center of your chest gently lifted.
Caution
- • Sitting with the spine slumped forward can put excess pressure on vertebral bodies, which may be problematic for people with back pain and/or low bone density. Do your best to sit with good posture.


Sit tall in Seated Mountain pose: sitting slightly forward of the back of your chair, feet hip-width apart on the ground (or a prop).
Movement
- Bend your elbows and open your hands wide—palms facing forward.
- Curl your fingers into a soft fist—make sure there is no tension in your hands, arms, or shoulders.
- Inhale and fling your fingers open.
- Exhale and make a soft fist.
- Repeat several times.
- Shake out your hands and rest them on your lap.
- Keep your heels on the ground, but lift the tops of your feet up.
- Fling out your toes, seeing if you can spread them wide so no toe touches another toe.
- Fist your toes, curling them in.
- Continue with this a few more times. Sit tall and keep your breath flowing.
- Next, spread your toes and, with your heels still grounded, move your feet side to side, as if they were windshield wipers.
- Next, move your feet out and in.
- Relax your feet, sit tall, and notice echoes of the movement.
- Next, as you sit tall and keep your breath flowing, fling out your fingers and toes (figure 7.2), then fist your fingers and toes (see figure 7.3). Do this several times.
- Next, fling out your right hand and right foot. Then fling out your left hand and left foot.
- Next, fist your right hand and left foot. Then fist your left hand and right foot.
- Shake them out and relax.
- Breathe into the stability of Seated Mountain pose. Notice any echoes of movement.
Remember
- • Keep your breath flowing. Avoid holding your breath.
- • Notice the sense of invigoration in the feet and hands.
- • Notice any thoughts that arise. How did your heart and mind respond to this playful practice? Just notice.
Sit tall in Seated Mountain pose: sitting slightly forward of the back of your chair, feet hip-width apart on the ground (or a prop).
- Rest your hands in your lap.
- Bring attention to the top of your right shoulder and lift it up toward your right ear as you drop your left shoulder down toward your hip.
- Slide your right shoulder back as your move your left shoulder forward (see figure 7.4).
- Drop your right shoulder down toward your hip as you lift your left shoulder toward your ear (see figure 7.5).
- Bring your right shoulder forward as you slide your left shoulder back.
- Explore making this figure eight, or infinity loop, through your shoulder girdle for several cycles, moving slowly and keeping your breath easy.
- Next, change directions for a few cycles.
- When you are done, pause and simply notice your experience here and now, sitting in stillness.
Remember
- • Notice where the body feels tight and where it feels more fluid.
- • Try pausing in a particularly tight or sticky place, and welcome breath into that area.
- • Stay present as the subtler sensations fade and the body integrates the experience.
Sit tall in Seated Mountain pose: sitting slightly forward of the back of your chair, feet hip-width apart on the ground (or a prop).
Movement
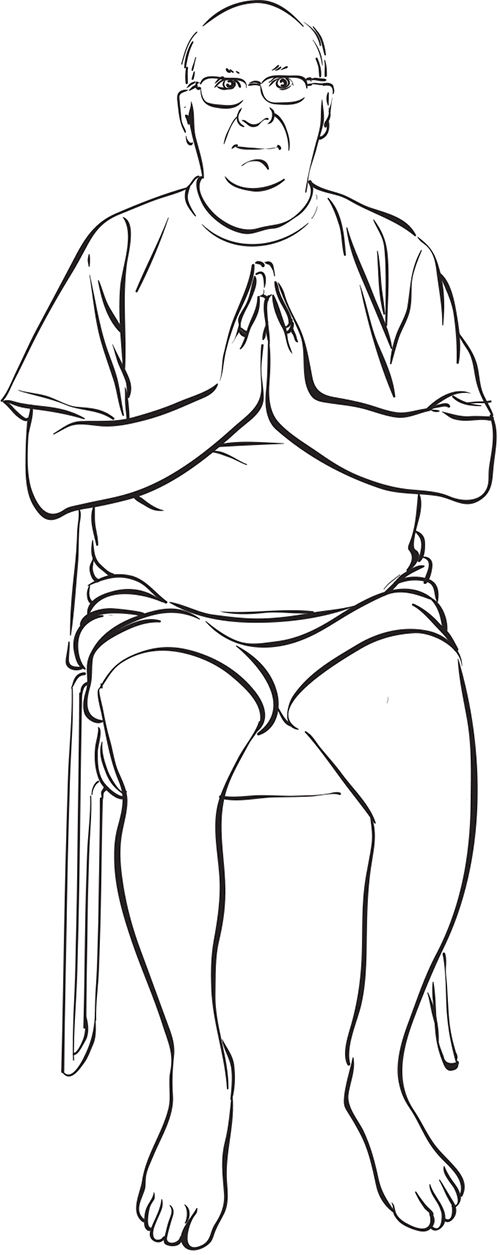
- Bring your palms together in front of your breastbone (see figure 7.6).
- Pause and feel your breath.
- Interlace your fingers.
- Inhale and float your elbows up toward the sky (see figure 7.7).
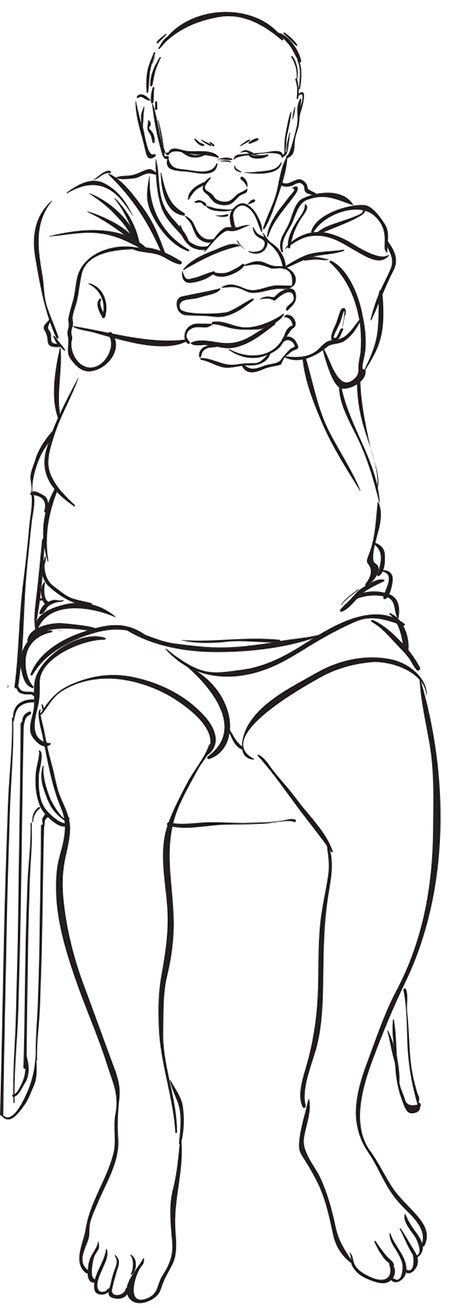
- Exhale and turn your knuckles forward as you extend your arms forward, dropping your head toward your heart (see figure 7.8). Be sure to keep your chest lifted—not collapsed—as you do this.
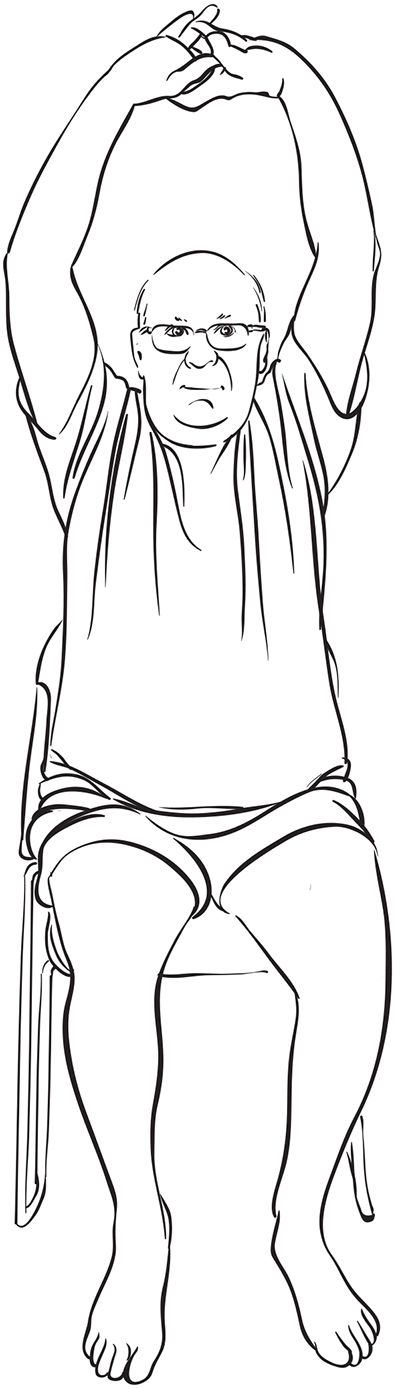
- Inhale and turn your palms away from your chest, keeping your fingers interlaced, as you extend your arms up toward the sky (see figure 7.9).
- Exhale and sweep your arms out to the sides.
- Inhale as you bring your palms together in front of your breastbone.
- Exhale as you interlace your fingers.
- Repeat the sequence two or three more times, synchronizing your movement with your breath.
- When you are done, pause in Seated Mountain pose and rest in the wave of the breath.
- • Sit tall with a neutral spine and relaxed shoulders.
- • Notice the response of your body.
- • Notice the waves of sensation.
- • Notice the currents in your heart.
- • Notice any reflections in your mind.
Sit tall in Seated Mountain pose: sitting slightly forward of the back of your chair, feet hip-width apart on the ground (or a prop).
Movement
- Sit tall and tune in to your breath.
- Let your right arm hang by your right side.
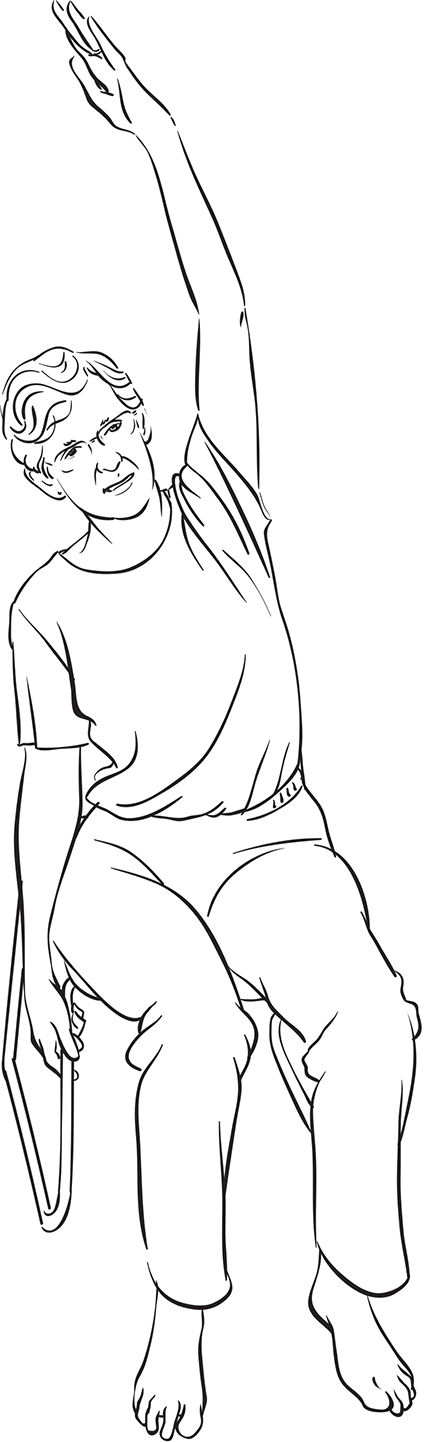
- Inhale your left arm out to the side and up toward your ear, rotating your arm so your palm faces in.
- Exhale and tilt your torso to the right (see figure 7.10).
- Balance the weight evenly in the left and right buttocks.
- Breathe into the left side of your body.
- Inhale the left arm back toward the sky as you bring your torso back to center.
- Exhale and sweep the left arm down to rest in your lap.
- Repeat on the other side.
- When you are done, come back to Seated Mountain pose and rest here for a few breaths.
Remember
- • Avoid letting the raised arm collapse forward toward the chest.
- • The lifted arm can extend out to the side if that is more comfortable for the shoulder.

Sit tall in Seated Mountain pose: sitting slightly forward of the back of your chair, feet hip-width apart on the ground (or a prop).
Movement
- Sit tall and tune in to your breath.
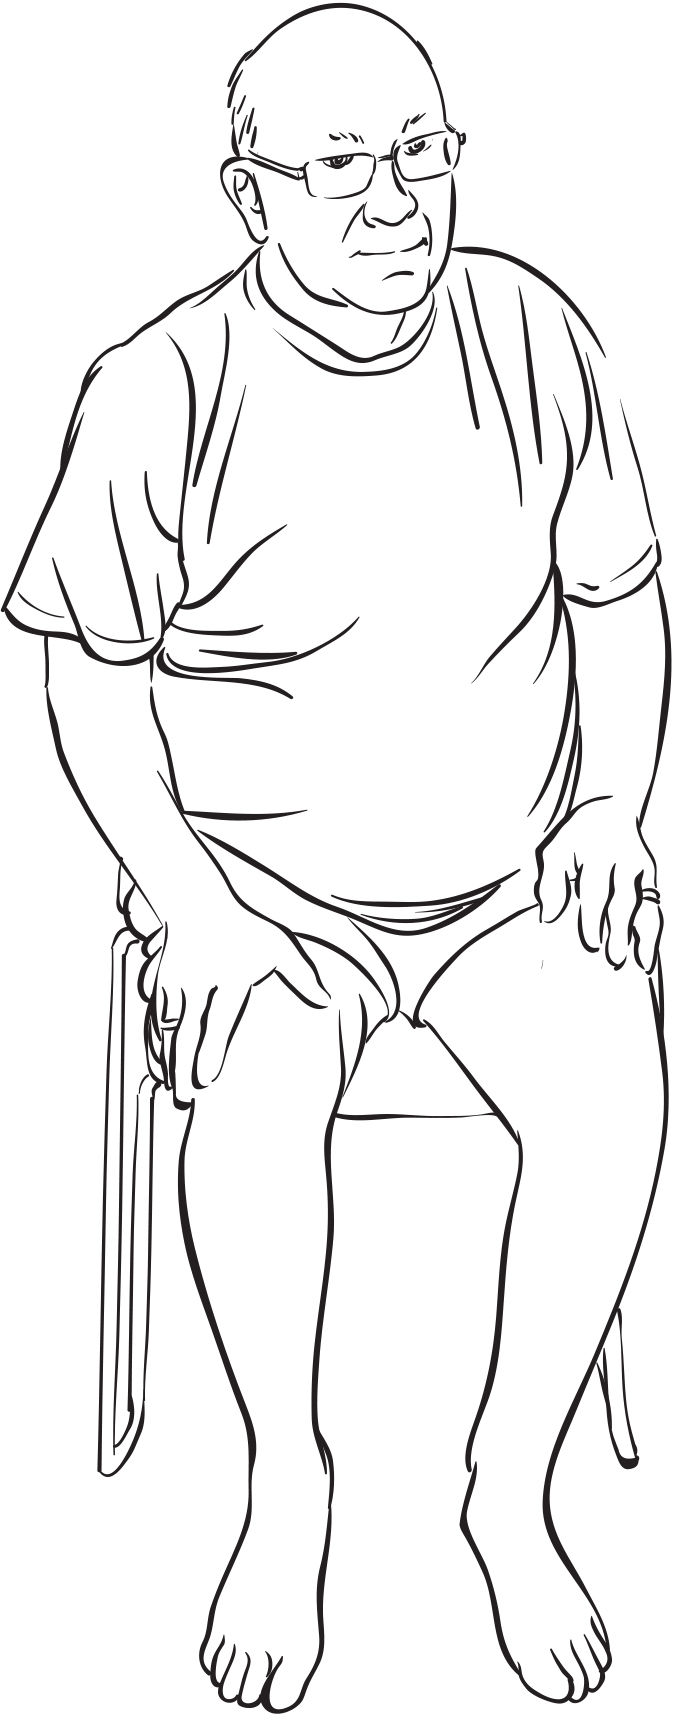
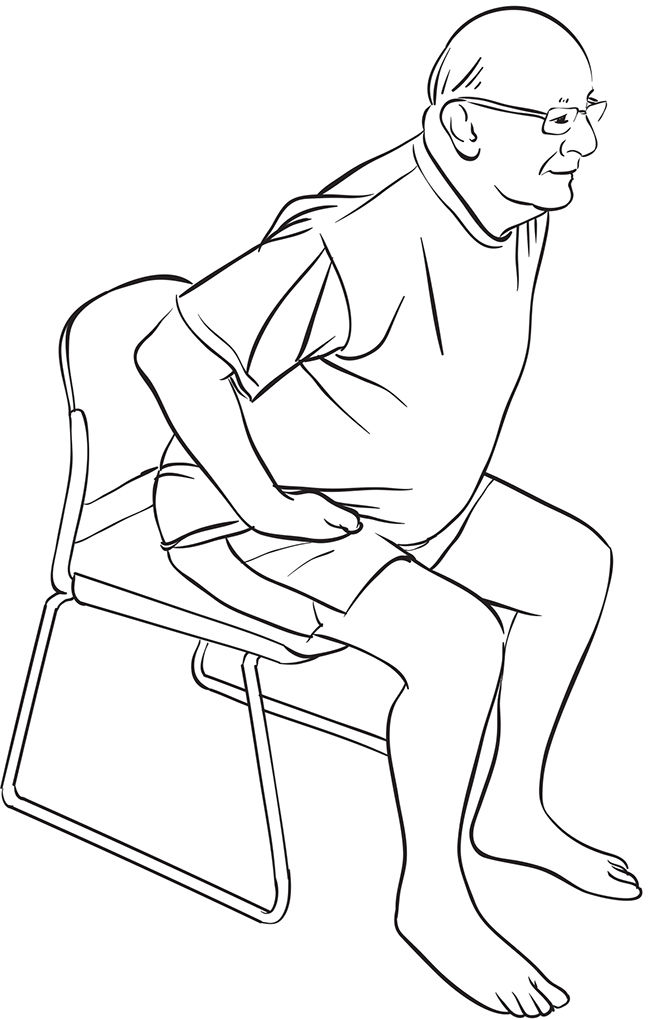
- Bring your hands to your hip hinges, the place where your legs meet your torso (see figure 7.11).
- Inhale and lengthen your spine.
- Exhale and root firmly into your feet as you hinge slightly forward at your hips (see figure 7.12). Be sure to keep your spine long and your chest lifted.
- Activate your body as if you were going to come to standing.
- Inhale as you return your spine back to an upright position and relax your legs.
- Explore taking your body through this movement “as if” you were going to stand. Repeat several times.
Remember
- • Feel your thighs, lower legs, and buttocks enliven then relax.
- • This practice builds thigh strength, which can be very important in maintaining function and independence.
- • If you choose to come to a standing position, root your feet into the ground and use the strength of your legs to come up and out of the chair. Keep your chest lifted and avoid rounding your back. It is best to work toward being able to stand up from a chair using the strength of your legs rather than needing to use your arms.
Sit tall in Seated Mountain pose: sitting slightly forward of the back of your chair, feet hip-width apart on the ground (or a prop).
Movement
- Sit tall and tune in to your breath.
- Inhale your arms out to your sides at shoulder height.
- Exhale and relax your shoulders, keeping your arms extended and parallel with the ground.
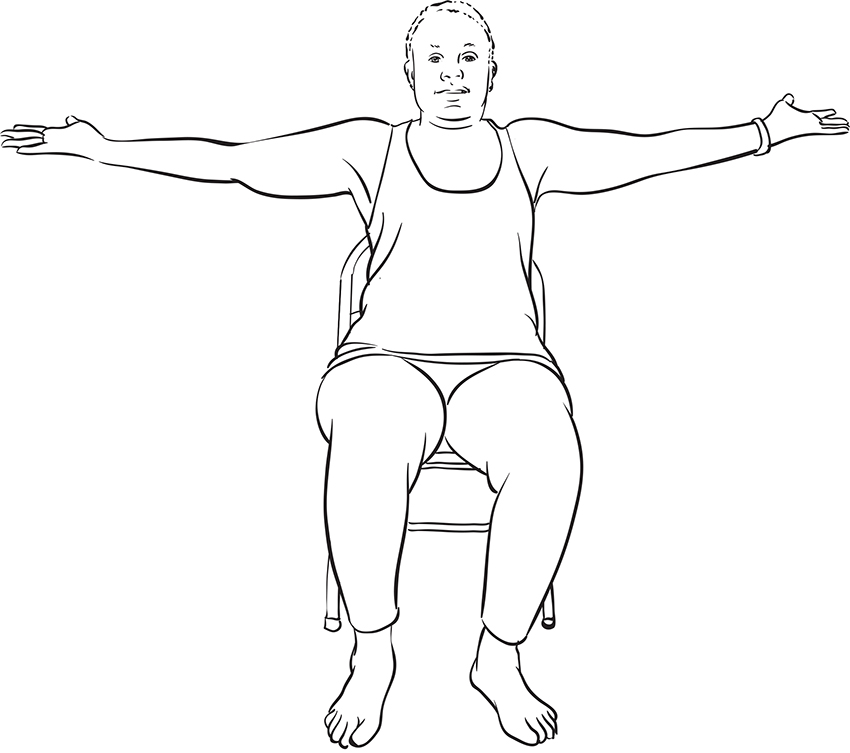
- Inhale as you rotate your palms up and “spread your wings,” extending your arms farther out to the sides (see figure 7.13).
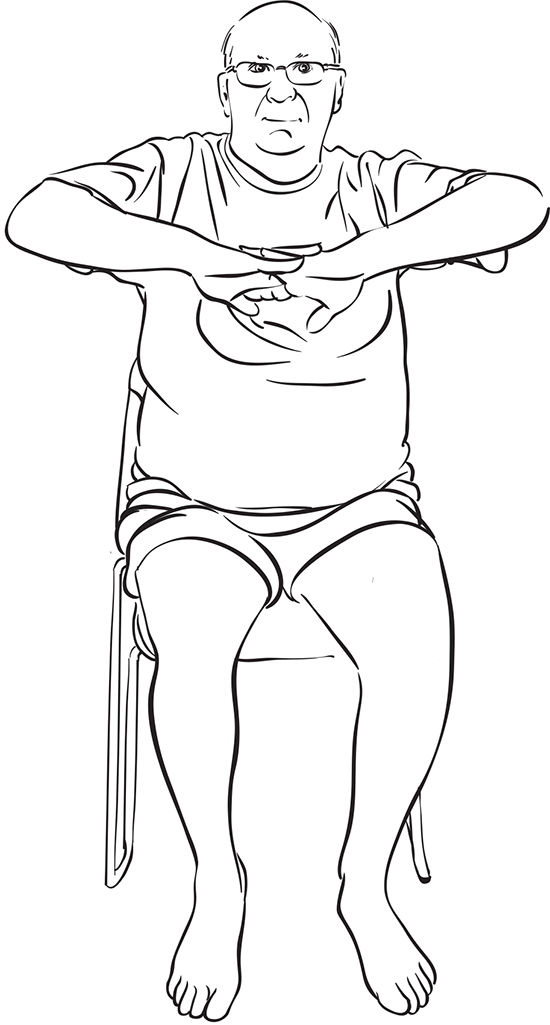
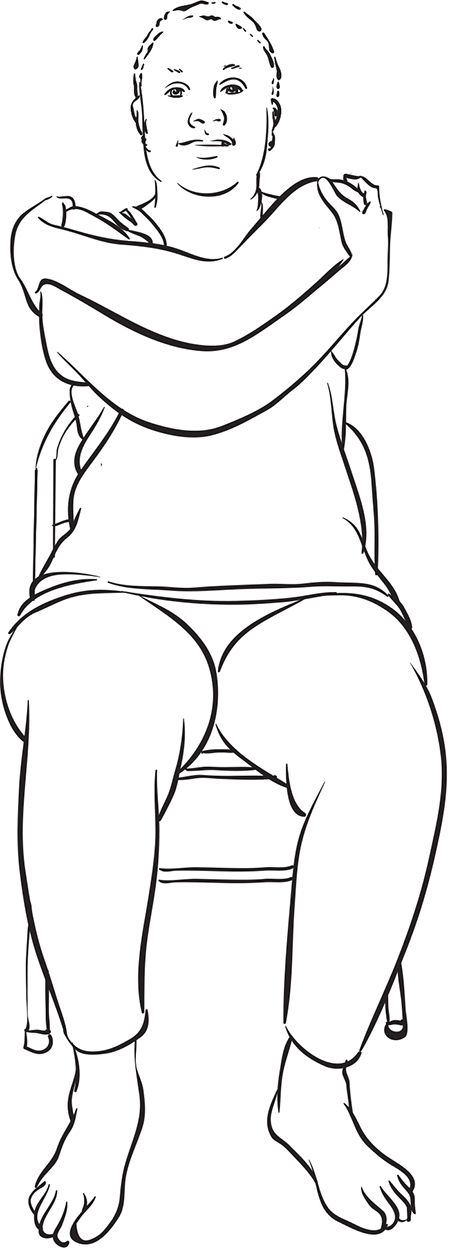
- Exhale and cross your left arm over your right as close to your chest as is comfortable.
- Keep your breath flowing as you wrap your hands around your upper body and give yourself a hug (see figure 7.14).
- Soften your shoulders and gently twist your upper body by rotating slightly to the right and left.
- Return to center.
- Explore lifting your elbows up off your chest and then releasing the elbows down.
- Return to center.
- Keeping your chest lifted, let your head relax down toward your heart.
- Breathe into the back of your neck, upper back, and shoulders.
- Return your head to the starting position.
- Inhale and uncross your arms, reaching them out to the left and right.
- Exhale your arms down to rest in your lap. Linger here for a few breaths and notice how this feels.
- Repeat this entire sequence, this time crossing your right arm over your left.
Remember
- • Keep the twists gentle. Do not force your body into its maximum rotation.

Figure 7.15 Seated Backbend
Setup
Sit tall in Seated Mountain pose: sitting slightly forward of the back of your chair, feet hip-width apart on the ground (or a prop).
- Sit tall with your hands holding the seat of the chair behind your hips.
- Lengthen your spine from your tailbone all the way up to the crown of your head.
- Shrug both shoulders back and down.
- Inhale and lift your breastbone toward the sky.
- Exhale and slide your shoulder blades toward each other as you continue to lift your chest.
- Let your gaze extend up, but be sure to keep both the front and back of your neck long (see figure 7.15).
- Take a couple of easy breaths in this seated backbend position, then release back to sitting tall.
- Explore this practice several times, then sit quietly and observe the effects.
Remember
- • Notice how your body responds after the backbend.
- • Notice how your emotional heart responds.
- • Notice how your mind responds.
Caution
- • Do not drop your head back. Keep the length in the back of your neck.