The caveman cliché is hard to avoid when it comes to first exploring the Paleo way of eating. As a result, it’s easy to envision that the AIP might be made up of meat-centric menus filled with giant servings of (expensive) steak at every meal. That causes a problem—it’s easy to assume that the AIP must be extremely costly. The recipes in this chapter will show you that following the AIP doesn’t have to break the bank—and that there’s more to eating well than Fred Flintstone–size meals!
We’ve talked a little about how it’s important to buy the best quality meat you can afford to get the best health benefits—this chapter will show you how to do that in a budget-friendly way! I’ll show you how to season and flavor inexpensive ground-meat dishes that are nevertheless packed with international flavors, like Baked Swedish Meatballs and Pastitsio Pie. You’ll learn how to use cheaper and perhaps unfamiliar cuts of meat and transform them through simple long oven-braising or slow-cooker methods into mouthwatering meals like Slow Cooker Pork Shanks with Mushroom Gravy or tender Perfect Sliced Roast Beef, the homemade alternative to commercially processed cold cuts. I’ll even show you tasty ways to incorporate those nutritional powerhouses: organ meats. If you think you don’t like liver, you need to try The Ultimate Liver Hater’s Pâté!
This chapter has a little something for everyone. I’ve tried to include quick weeknight meals like Beef & Broccoli Slaw Stir-Fry, along with one-pot meals like Braised Spring Chicken. I really wanted to show you that AIP-friendly food can be packed with flavor. It doesn’t have to be bland or boring! Coming into the AIP, it seems at first like you’ll never be able to enjoy some of your favorite foods again. But don’t worry! Got a craving for curry? Try the Chicken Curry. How about a hankering for Thai food? Try the Grilled Thai Beef Skewers. This chapter shows how versatile the AIP can be … and how many food options are still there for you. So get cooking and tuck in!
This is probably one of my favorite recipes of all time. Why? Well, it turns often-uninspiring leftover shredded chicken into an awesome AIP “taco” by piling it on top of thinly sliced jicama—no grain products needed. What’s not to love about messy food that you have to eat with your hands?! My favorite part is the blueberry salsa: It’s a little unexpected and adds a great not-too-sweet fruity flavor that is delicious alongside the avocado cream. Don’t skip the cinnamon—it’s what makes the salsa so darned addictive!
MAKES 12–16 MINI TACOS

FOR THE BLUEBERRY SALSA
1 cup (150 g) blueberries
¼ cup (35 g) onion, diced
2 tbsp (5 g) cilantro leaves, chopped
1 tbsp (15 ml) lime juice
Pinch of ground cinnamon
FOR THE AVOCADO CREAM
½ cup (120 g) mashed avocado
¼ cup + 2 tbsp (60 ml + 30 ml) coconut milk
2 tsp (10 ml) fresh lime juice
Pinch of salt
Handful of chopped fresh cilantro leaves to garnish
FOR THE CHICKEN “TACOS”
1 jicama
2 cups (200 g) leftover chicken, shredded
SQUISH: In a bowl, mix together all the blueberry salsa ingredients. Press down on the blueberries lightly with the back of a spoon to release some of their juices. Stir to combine and set aside for now.
BLEND: In a mini food processor or similar, add all the avocado cream ingredients. Process until smooth and creamy. Add a splash or two of water if it is too thick. Set aside while you make the “tacos.”
ASSEMBLE: Peel the jicama and slice off the top and bottom. Use a mandoline set at approximately ⅛ inch (3 mm) and slice the jicama into 12–16 slices. The slices need to be thin enough to act as foldable “tacos,” but not so thin that they crack easily. Divide the jicama slices between plates and use them as a base for your “tacos.” Top the tacos with the shredded chicken, followed by the blueberry salsa and a scoop of avocado cream. You can pick these bad boys up and chow down on them just like the real thing!
NOT CRAZY ABOUT COCONUT? Leave out the coconut milk and add an extra ¼ cup (60 g) of mashed avocado and 1 teaspoon (5 ml) of lime juice. Alternatively, serve the tacos with the Grilled Pineapple Guacamole.
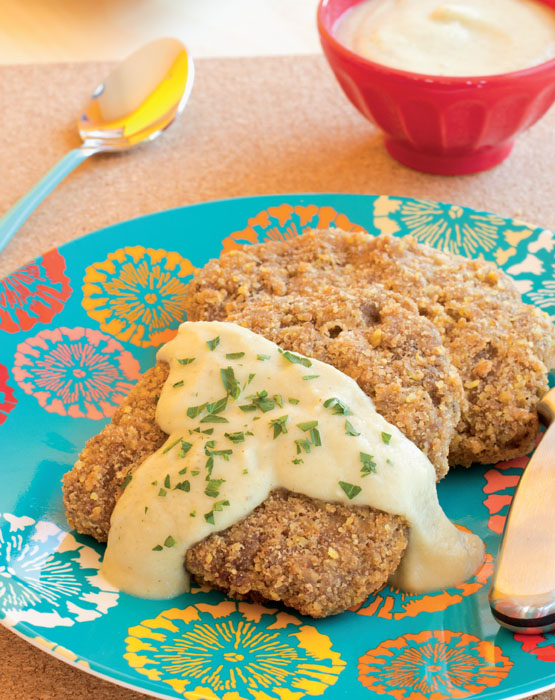
Anybody who has tried to make egg-free breading knows how sad that stuff can be. It can fall off completely if you try to fry it, or end up frustratingly soggy when you try to bake it. The usual go-to for Paleo peeps when it comes to trying to make a crispy coating is usually a nut flour—which is totally out of the question for us AIP-ers. The good news? I’ve spent hours in the kitchen testing different egg- and nut-free breading versions, so you don’t have to! The trick to making it stick is a little strange: adding a little ground chicken blended into some coconut milk, which provides the necessary protein to make the breading layers bind. Trust me on this one, it works perfectly. This recipe has all the comfort-food qualities you’re looking for: tender beef, a crispy coating and a rich, creamy gravy with just a hint of herbs.
SERVES 4–6 (DEPENDING ON THE SIZE OF YOUR CUBE STEAKS)
FOR THE GRAVY
1 cup (140 g) diced onion
4 oz (120 g) parsnip, peeled and sliced
1 clove garlic, peeled and smashed
½ cup (120 ml) Chicken Broth
½ cup (120 ml) coconut milk
1 tbsp (15 ml) bacon fat
½ tsp salt
¼ tsp dried thyme
2 tbsp (30 ml) water
1 tsp arrowroot starch
FOR THE STEAK
¼ cup (30 g) tapioca starch
1 tsp (5 g) salt
½ tsp garlic powder
3 oz (85 g) ground chicken
¾ cup (180 ml) coconut milk
3 tbsp (45 ml) water
8 oz (225 g) plantain chips (see note below)
1½ lbs (680 g) cube steak, cut into portions
Coconut or avocado oil for frying
BLEND: In a saucepan, add the onion, parsnip and garlic. Add the chicken broth and cover the pan with a lid. Bring the liquid to a simmer and cook until the parsnip is fork tender, about 10 minutes. Remove the pan from the heat and pour in the coconut milk, stirring to combine. Add the bacon fat, salt and thyme to the pan. Whisk together the water and arrowroot powder until combined and add to the pan. Use an immersion blender to blend into a smooth gravy. Set the gravy aside and keep warm while you make the chicken fried steak.
SET UP: You will need three bowls large enough to fit the largest piece of cube steak. Combine the tapioca starch, salt and garlic powder in one bowl. Add the ground chicken, coconut milk and water to a high-sided container just wide enough to fit the head of your immersion blender. Blend together until completely smooth and pour into the second bowl. In a food processor, pulse the plantain chips until you have a superfine bread crumb–like dust. Place the plantain crumbs into the third bowl.
BREAD: This is going to work just like the classic breading method. First, dip each piece of cube steak into the starch, gently patting off the excess. Next, dip each piece of cube steak into the coconut milk mixture, making sure both sides are evenly covered. Let any excess liquid drip off the cube steaks. Lastly, dip the cube steaks into the plantain crumbs, making sure to coat both sides and the edges. Transfer the cube steaks to a large plate or cutting board when they are breaded.
FRY: In a large skillet, add enough oil so that the breaded cube steaks will be at least halfway submerged in the oil. Heat the oil over medium-high heat until it starts to shimmer, then carefully drop your breaded cube steaks into the pan—you may need to do this in batches. Cook until the breading is golden brown on both sides, about 6 minutes per side. Serve smothered in the onion gravy and pretend you’re at your favorite diner for dinner!
NOTE: Make an unseasoned version of the Crunchy Salad Topper, to ensure that your plantain chips have been cooked in an AIP friendly fat.
Traditional Swedish meatballs are usually pan fried, but baking them the way I do in this recipe is much more efficient: There’s no need to stand over the stove supervising batches of meatballs or splattering grease everywhere, plus it saves time because the gravy can be made while the meatballs are baking. The other neat thing about this recipe is that the ingredients used to help bind the meatballs together also form the base of the gravy recipe. Minimal ingredients, maximum flavor—I’m all about that in the kitchen. I couldn’t crack this recipe until my friend Peter was kind enough to share some original Swedish meatball recipes … and translate them for me, thankfully! That’s when I learned that it is traditional to use potato as a binder, which gave me the final piece of the puzzle for this recipe. These super-tender meatballs have a unique, almost spicy flavor that comes from using plenty of mace as seasoning, plus a lovely richness from the combination of both beef and pork. Thanks, Peter!
SERVES 4
2½ cups (600 ml) Beef Broth, divided
1 tbsp (7 g) powdered gelatin
2 tsp (10 ml) coconut or avocado oil
¼ cup (35 g) diced onion
½ cup (120 ml) coconut milk
1 cup (240 g) white sweet potato, baked and cooled
½ lb (227 g) ground beef
½ lb (227 g) ground pork
1 tsp (5 g) salt
½ tsp ground mace
BLEND: Pour ½ cup (120 ml) of the beef broth into a bowl and sprinkle the powdered gelatin over it. Set aside to let the gelatin bloom. In a small saucepan over medium heat, add the oil and cook the diced onion until softened. Reduce the heat and pour in the coconut milk. Once the coconut milk in the pan is warm, add the bloomed gelatin to the pan and stir until the gelatin dissolves into the liquid. Remove the saucepan from the heat and pour the liquid into a blender. Add the white sweet potato and 1 cup (240 ml) of beef broth, then blend on high until smooth, scraping down the sides as needed. Take the lid off the blender and let the pureed mixture cool.
BAKE: Line a baking tray with parchment paper. In a mixing bowl, add the beef, pork, salt and mace. Pour ½ cup (120 ml) of the pureed sweet potato mixture over the meat. Don’t panic when it looks like there is way too much liquid in the bowl! I promise there isn’t: As you begin to mix the meatball mixture together (using your hands is easiest), the liquid will be absorbed. The meatball mixture will be a little softer than normal to work with. Use a 2 tablespoon (30 ml) scoop to divide the mixture into approximately 16 meatballs. With damp hands or while wearing gloves, roll the meatballs and drop them onto the lined baking tray, evenly spaced. Preheat the oven to 400°F (205°C). Put the baking tray of meatballs into the refrigerator to firm up a little while the oven comes to temperature. Bake the meatballs for 20 minutes.
REDUCE: While the meatballs are baking, pour the remainder of the pureed sweet potato mixture from the blender into a skillet large enough to fit all the meatballs in a single layer once they are baked. Add the remaining 1 cup (240 ml) of beef broth to the skillet: This will make the gravy for the meatballs. Bring the gravy to a simmer and cook until thickened enough that you can pull a spatula through the pan without the gravy instantly filling in the gap. As the gravy is cooked it will darken, too. Taste the gravy and add salt, to taste, if needed. Once the gravy is thickened to your liking, add the meatballs to the pan and toss to coat with the gravy and warm through before serving.
NOT CRAZY ABOUT COCONUT? Omit the coconut milk, add an extra 2 tablespoons (30 ml) of Beef Broth and an extra ¼ cup (60 g) of baked sweet potato to the blender.
Pork and apple is a classic flavor pairing, but you wouldn’t necessarily expect it in a carnitas recipe. Here apple juice does double duty as both marinade and cooking liquid, adding a gentle sweetness that contrasts gorgeously with the warm hint of cinnamon. Throw out all those ideas about “healthy” always meaning low-fat! Pastured pork is full of good fatty acids like omega-3s and is a rich source of both vitamin D and E. And where are these great vitamins stored? In the fat! Healthy animals make healthy vitamin-filled fat. What does this mean for you? You can eat ridiculously delicious, crispy-edged Pork Belly Carnitas while nourishing your body at the same time. Yay!
SERVES 4
2 cups (480 ml) unsweetened apple juice
2 tbsp (24 g) garlic powder
2 tbsp (4 g) dried oregano leaves
1 tbsp (15 g) salt (reduce or omit if using broth with salt in it)
2 tsp (2 g) ground cinnamon
1 tsp (2 g) ground sage
4 dried bay leaves
2½ lbs (1.1 kg) skinless pork belly, cut into 1½-inch (4-cm) cubes
2 cups (480 ml) Pork or Chicken Broth
MARINATE: In a large container or freezer bag, combine the apple juice, garlic powder, oregano, salt, cinnamon, sage and bay leaves. Add the pork belly pieces and refrigerate while they marinate, for at least 2 hours and up to overnight.
BRAISE: Preheat the oven to 350°F (180°C). Put the pork belly pieces into a large Dutch oven in a single layer, fat-side up. Then pour the marinade over the pork belly. Add the broth to the Dutch oven and cook, covered, for 2 hours. After 2 hours, remove the lid and cook the pork belly for another hour. This will cook off the remaining liquid and finish rendering the pork fat.
FRY: Remove the pork belly from the oven. Remove and discard the bay leaves, then transfer the pork pieces to a large flat-bottomed skillet. Spoon off as much of the fat as you can from the Dutch oven and add it to the skillet with the pork belly pieces. Avoid any solids from the bottom of the Dutch oven as these will burn! Over low-medium heat, continue to cook the pork belly in its own rendered fat. The fat should bubble, but not be so hot that it spits. Flip the pork belly pieces so that they brown evenly on all sides. This should take about 30 minutes. When all sides of the pork belly are brown and crispy, remove them from the pan and drain any excess fat on a paper towel–covered plate. Shred the pork belly carnitas with two forks and enjoy!
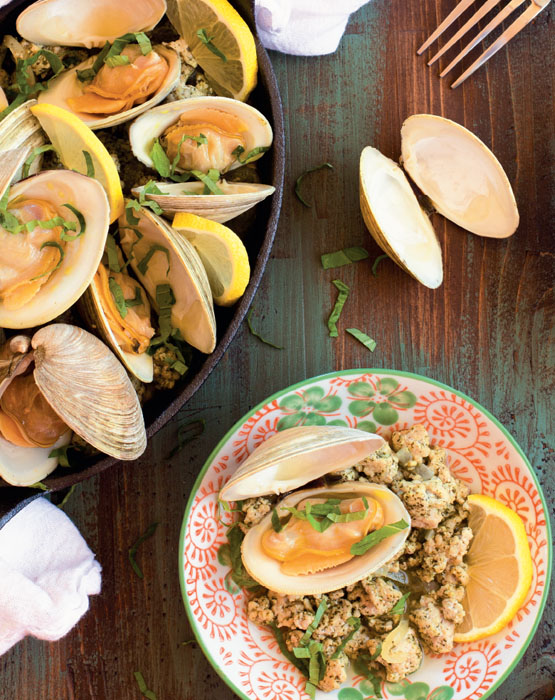
I absolutely adore clams. They’re naturally sweet, but refreshingly briny at the same time. But since they’re sold per pound, most of which is shell, they’re not the cheapest source of protein. So to stretch my dollars a little further, I like to pair them with pork. This recipe uses light and fragrant ground pesto pork as a base for the dish—and lets the clams really shine as the highlight. Steaming the clams on top of the pork keeps them out of the steaming liquid without having to mess about with steaming racks—and makes some of the juiciest, most tender clams ever.
SERVES 4
2 lbs (900 g) wild-caught littleneck clams
½ packed cup + 2 tbsp (20 g + 5 g) fresh basil leaves, divided
¼ cup (60 ml) avocado oil
2 cloves garlic, peeled
1 tbsp (15 ml) lemon juice
1 lb (454 g) lean ground pork
1 onion, cut in half and sliced finely
1 cup (240 ml) Seafood Stock or Pork Broth
PREP: Rinse the littleneck clams under cold running water and use a stiff brush to get rid of any sand or sediment on the outside of the shells. Put the scrubbed clams into a bowl and cover them with cold water. If any of the clams are open, tap them on the edge of the bowl and see if they close. If they close, they are still alive and edible; any clams that don’t close should be discarded. Let the clams sit for 10 minutes, then discard the dirty water and refill the bowl. Let the clams soak while you make the pesto.
MIX: Add ½ cup (20 g) of the basil leaves to a mini food processor, reserving the rest to use as garnish later. Add the avocado oil, garlic and lemon juice, then process until a smooth pesto is formed. In a bowl, mix together the ground pork and pesto until just combined. Discard the water covering the clams, then rinse them a final time. Pop the cleaned clams into the fridge in a bowl while you cook the pork.
COOK: Add the pesto pork to a skillet over medium heat and cook until no longer pink in the middle, breaking up large pieces with the back of a spoon. Use a slotted spoon to transfer the cooked pork to a bowl, leaving behind the juices from the meat. Reduce the heat a little and add the sliced onions to the pan. Cook until they are softened and just beginning to take on a little color at the edges, about 10 minutes. Return the cooked pork to the pan and add the stock or broth. Turn up the heat and bring the liquid to a simmer. Place the clams on top of the pork and onions, then cover the pan with a lid and steam until the clams open and are cooked through, about 5 minutes. Slice the reserved basil into thin strips and scatter over the top and serve immediately.
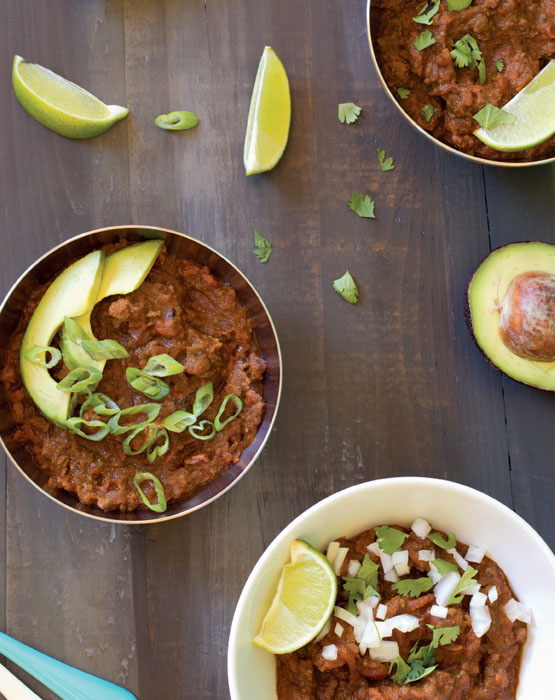
This rich and thick “chili” is downright sneaky. It has no tomatoes or, well, chili in it—and yet it is packed with layers of flavor: The richness of the meat meets the umami from the mushrooms and is elevated by the brightness and slight spiciness of the Taco Seasoning. All of these elements come together to make a “chili” that is just as satisfying as the real thing. Since this is made in the slow cooker, it’s also super-easy to make—and freezes well, to boot! With almost three pounds (1.3 kg) of vegetables in this recipe, who knew chili could be so healthy?
SERVES 8
2 lbs (900 g) ground bison
¼ cup (25 g) Taco Seasoning, divided
3 cups (420 g) diced onion
¾ lb (340 g) carrots
½ lb (225 g) beets
3 cups (720 ml) Beef Broth
¾ cup (180 ml) pumpkin puree
6 oz (175 g) mushrooms
2 tbsp (30 ml) apple cider vinegar
1 tsp (5 g) salt
1½ tbsp (10 g) arrowroot or tapioca starch
Juice of 1 lime
BROWN: In a large skillet over medium heat, work in batches to brown the ground bison. Transfer the browned meat with a slotted spoon to your slow cooker and keep covered. If you need to, pour out any excess fat from the skillet, leaving behind 1 tablespoon (15 ml) to cook the vegetables in. Add the Taco Seasoning to the reserved fat in the skillet and cook until fragrant, about 30 seconds. Add the diced onion to the pan and toss to coat. Use a box grater or the medium shredder blade of your food processor (much less messy!) to coarsely grate the carrots and beets. Add the shredded vegetables to the skillet and toss to combine again. Cover the pan with a lid and cook until the carrots and beets begin to soften, about 10 minutes, stirring a few times as you go so that they don’t stick.
BLEND: Once the vegetables are softened, remove the pan from the heat. Transfer about a third of the vegetables to the slow cooker and the rest to a blender. Add the broth, pumpkin puree and mushrooms to the blender with the other vegetables, then blend until smooth. Pour the blended sauce into the slow cooker and add the apple cider vinegar and salt. Stir everything through to combine, then cook on high for 3 hours.
THICKEN: Mix the arrowroot or tapioca starch with a little water to make a paste, then add to the chili in the slow cooker. Add the lime juice to the chili and season to taste with extra salt if needed. Cook on low for another hour to thicken. Here at Meatified HQ, we like our chili thick and chunky. If you like a thinner chili that is closer to a soup, add a little extra broth before you cook the chili for the final hour. Can be eaten straight away, but is best the next day to give the flavors time to marry and develop.
While I do love cauliflower rice, it just doesn’t have the right texture to mimic larger grains like those found in warm wintry grain salads. That’s what prompted me to come up with the basic recipe for what we nickname “protein rice” here at home! All the flavors of fall—herby “grains,” roasted butternut squash and lots of greens—combine here to make a delicious warm salad that will have even non-AIP-ers asking for seconds. Packed with protein and with plenty of calcium coming from the leafy greens, this salad is a winner nutritionally, too.
SERVES 4
4 cups (560 g) butternut squash
2 tsp + 1 tbsp (10 ml + 15 ml) coconut or avocado oil, divided
1 tsp (5 g) salt, divided
1 lb (454 g) ground chicken
1 tsp (4 g) garlic powder
1 tsp (2 g) ground sage
1 tsp dried rosemary leaves
½ cup (70 g) diced onion
8 oz (225 g) Swiss chard
4 oz (115 g) spinach
Squeeze of lemon juice
ROAST: Preheat the oven to 425°F (220°C). Cut the butternut squash into ½-inch (13-mm) cubes and toss with 2 teaspoons (10 ml) of the oil and ½ teaspoon of salt. Line a baking tray with parchment paper and spread the squash out in a single layer. Roast the squash until it is tender and beginning to brown and caramelize at the edges, about 15–20 minutes. Reserve the cooked squash for later.
COOK: Add the remaining 1 tablespoon (15 ml) of oil to a skillet over low-medium heat. When the pan is hot, add the ground chicken, breaking it into a few large pieces with your hands before dropping it into the pan. Don’t break up the chicken in the pan any further or it will overcook and become very dry. Sprinkle the remaining ½ teaspoon of salt, garlic powder, sage and rosemary over the chicken and cover the pan with a lid. Cook the chicken, covered, until it is cooked through and there is no pink inside, about 5-6 minutes, turning the chicken over halfway through. Do not overcook the chicken—it should release juices into the pan and still be tender when cooked through. Use a slotted spoon to transfer the cooked chicken to a paper towel–lined plate. Add the diced onion to the pan and cook until softened, about 5 minutes, then remove the pan from the heat.
ASSEMBLE: Crumble the cooked chicken into the bowl of a food processor. Pulse 3–5 times, until the chicken is broken up into little “grains.” Do not overprocess, or you will end up with a sticky paste! Finely slice the chard and spinach. Toss together the “grains,” roasted squash, chard and spinach back in the pan with the onion and all the pan juices. Squeeze a little lemon juice over the salad, to taste, and toss together to combine. The salad can be eaten straightaway, but also refrigerates nicely so you could make it ahead of time and serve it as a cold “grain” salad, too. When it’s warmer, I like to swap the butternut squash for roasted asparagus, beets or summer squash and lighter greens, but the possibilities are almost endless!
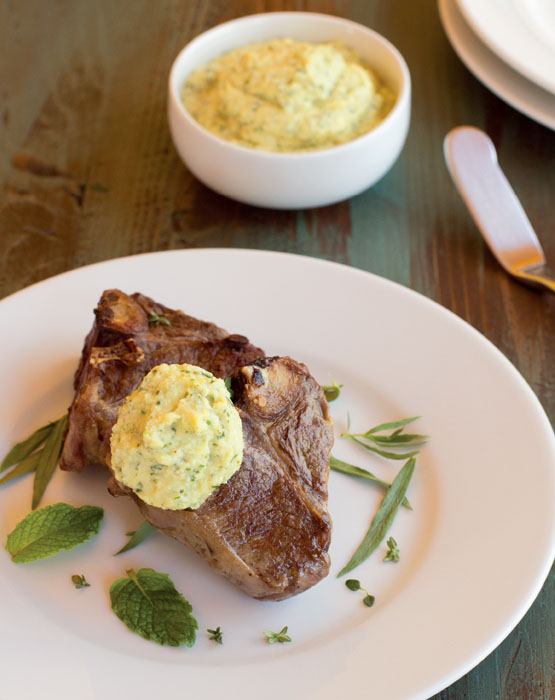
These small lamb loin chops are perfect for a quick dinner since they are so quick to cook. Before I stopped eating dairy, I used to love lamb paired with yogurt-based sauces. This is a little play on those recipes, without needing to rely on dairy for creaminess, because the artichoke hearts become rich and fluffy when they’re whipped. The garlic, herbs and lemon juice make this dish light and tangy—a perfect balance against the richness of the lamb, without overshadowing its natural flavor.
SERVES 4
2 lbs (900 g) small bone-in lamb loin chops, about 1-inch (2.5-cm) thick
1 tsp (5 g) salt
¼ cup (60 ml) + 1 tbsp (15 ml) avocado oil, divided
4.5 oz (130 g) drained artichoke hearts
1–2 cloves garlic, to taste
1 tbsp (3 g) fresh mint leaves
1 tbsp (3 g) fresh basil leaves
1½ tsp (1 g) fresh thyme leaves
2 tsp (10 ml) lemon juice
1 tbsp (15 ml) reserved pan juices
SEAR: Lay out the lamb chops on a chopping board and sprinkle both sides of them lightly with salt, as well as the layer of fat on the outside ease of the chops. Let the salted chops sit at room temperature for about 15 minutes. Heat a cast-iron skillet on high—and fire up a vent fan if you have one. These need to sear in a screaming-hot pan and will smoke! When the skillet is hot, drop in 1 tablespoon (15 ml) avocado oil and swirl it so that it evenly coats the skillet. Working in batches as needed, put the lamb chops into the pan, fat side down and cook until the fat renders and browns, about 5 minutes. This will give you lots of delicious fat to sear the chops in. Flip the chops over and sear them until browned, about 4–5 minutes per side for medium. Remove the pan from the heat, reserving the cooking juices in the pan, and transfer the chops to a plate to rest while you make the whipped artichokes.
WHIP: If the artichokes are in brine, rinse them before draining to get rid of any excess salt. Add the drained artichokes, along with the remaining avocado oil, to a mini food processor and process until combined. Add the garlic, mint, basil, thyme, lemon juice and the reserved pan juices then process again. Divide the lamb chops between 4 plates and spoon a little of the whipped artichokes on top of each chop.
Everybody knows that chicken soup is one of the most comforting things ever—and everybody thinks their mom’s/grandma’s/own version is the best, of course! My favorite version of chicken soup has always been a creamy version with a boatload of seasoning, Thai style. This soup is made with my AIP version of Thai Green “Curry” Paste, which gives the same layers of flavor that I used to love, while being gentle on my tummy. It’s perfect for when you’re feeling a little rundown or want a bowl of something soothing and delicious—the healthy fats from the coconut milk make it super satisfying and the gut-healing broth is an added bonus!
SERVES 4
2 tsp (10 ml) coconut or avocado oil
3 tbsp (45 ml) Thai Green “Curry” Paste
4 cups (960 ml) Chicken Broth
1 lb (454 g) chicken breast or thighs, sliced thinly
2 cups (480 ml) coconut milk
1 tbsp (15 ml) gluten-free fish sauce
2 tbsp (30 ml) lime juice
4 cups (120 g) fresh spinach leaves
4 green onions, chopped, reserving the green ends for garnish
2 tbsp (5 g) fresh cilantro leaves, roughly chopped
2 tbsp (5 g) fresh basil leaves, roughly chopped
COOK: Add the oil to a saucepan over medium heat. When the oil is hot, add the Thai Green “Curry” Paste and fry for a minute or two. Add the chicken broth to the pan and bring almost to a boil. Reduce the heat to a simmer and add the sliced chicken. Cook for 5 minutes, until the chicken is almost cooked through, then add the coconut milk and fish sauce.
SIMMER: Reduce the heat so that the coconut milk will simmer but not break. When the coconut milk–laced broth is hot, add the lime juice. Taste and adjust seasonings as needed: Add more fish sauce for extra saltiness or more lime juice for sourness if you like.
WILT: Add the spinach leaves and white parts of the chopped green onions. Cook until the spinach has just wilted. Divide the soup between 4 bowls and top with the reserved green onion slices, cilantro and basil leaves.
NOT CRAZY ABOUT COCONUT? Swap the coconut milk for an extra 2 cups (480 ml) of Chicken Broth.
These Thai-inspired beef skewers make the perfect quick grilling food and can even be broiled if the weather’s not on your side. They’re packed full of flavor from the Thai “Curry” Paste, with an extra bit of zing from fresh lime juice and coconut aminos. No need to miss nightshade spices when you’re chowing down on these bad boys!
SERVES 4
¼ cup (60 ml) Thai “Curry” Paste
½ cup (120 ml) coconut milk
2 tbsp (30 ml) coconut aminos
2 tbsp (30 ml) lime juice
1 lb (454 g) sirloin steak, sliced thinly
20 bite-size chunks fresh pineapple (about ¼ of a fresh pineapple)
20 (1-inch [2.5-cm]) pieces green onion (about 5 green onions)
MARINATE: In a bowl, whisk together the Thai “Curry” Paste, coconut milk, coconut aminos and lime juice. Slice the sirloin steak into long strips, about 1-inch (2.5-cm) wide. Put the steak into a bowl or freezer bag and pour over the marinade, tossing the steak to make sure it is coated evenly. Refrigerate and marinate for at least 1 hour. If you are going to use wooden skewers, soak them in cold water now, too.
SKEWER: Remove the steak strips from the marinade and shake off any excess. Thread the beef, pineapple and green onion pieces onto the skewers, alternating the ingredients as you go.
GRILL: Heat an outside grill for high, direct heat or indoor broiler on high. If broiling the skewers indoors, line a baking tray with foil and place the skewers onto the tray, with the tray about 4 inches (10 cm) from the broiler on high. If grilling outside, lay the skewers directly onto the grill. Grill or broil for 3–5 minutes per side, turning once. Serve immediately!
NOT CRAZY ABOUT COCONUT? Swap the coconut milk for avocado oil and replace the coconut aminos with 1 tablespoon (15 ml) of gluten-free fish sauce.
Grass-fed beef is much leaner than conventionally raised beef, which means burgers can rapidly become dry and tasteless instead of juicy and delicious. My secret weapon? Duck fat. Not only does it add that much-needed extra fat that lean grass fed beef lacks, it gives a hint of extra smokiness to the patties, even if you cook them on the stovetop rather than an outdoor grill. For extra awesomeness, these burgers are topped with an umami-filled avocado spread that adds even more smoky flavor and topped with fresh mango slices for an element of contrasting sweetness. This combination of muscle-building protein and healthy fats is a winner on all counts.
SERVES 4
1 lb (454 g) grass-fed ground beef
2–3 green onions, minced
½ tsp salt
2 tbsp (30 ml) duck fat, divided
8 leaves butter lettuce
4 slices red onion
¼ cup (60 ml) Smoky Avocado Spread, chilled
1 mango, peeled and sliced
MIX: Add the ground beef, minced green onion, salt and 1 tbsp (15 ml) of the duck fat into a bowl. Use your hands to mix all the ingredients together until they are just combined and the green onions are evenly distributed. Divide the meat mixture into 4 equal parts and shape into burger patties.
COOK: Heat a large skillet or griddle over medium-high heat. Add the remaining duck fat to the pan and swirl to coat evenly. Cook the burgers in the duck fat until browned and cooked through, about 5 minutes per side. Rest the burgers for a few minutes before plating.
STACK: Put each burger on top of two butter lettuce leaves. Top with the red onion slices and a spoonful of Smoky Avocado Spread. Top the stack with mango slices and revel in the meaty goodness of your meal! Oh, and bring plenty of napkins, you’ll need them.
This is a Cuban-inspired beef dish that is packed with flavor: Beef is simmered in a vegetable-filled sauce with plenty of rich beef broth and a hint of cinnamon, then finished off with buttery green olives. Picadillo can be served a bunch of different ways: on top of cauliflower “rice” or your favorite mashed root vegetables, on top of salad greens or taco-bowl style, topped with guacamole. However you serve it, this is sure to be a hit! In place of the usual tomato-based sauce, I’ve used beets and carrots—a sneaky way to get some extra antioxidants and vitamins into a meal.
SERVES 4
1 tbsp (15 ml) coconut or avocado oil
2 cups (210 g) fresh grated beets
1½ cups (180 g) grated carrots
2¼ cups (540 ml) Beef Broth
1 tbsp (15 ml) red wine vinegar
1 lb (454 g) ground beef
1 cup (140 g) diced onion
4 cloves garlic, minced
2 bay leaves
2 tsp (2 g) dried oregano leaves
¾ tsp ground cinnamon
½ tsp ground mace
½ cup (75 g) green olives, sliced
BLEND: Add the oil to a large skillet over low-medium heat and cook the grated beets and carrots until softened, about 10–15 minutes. Transfer the cooked vegetables to a blender, along with the beef broth and red wine vinegar. Blend until smooth and reserve for later.
BROWN: Add the ground beef to a large skillet and cook until browned, breaking it up into smaller pieces with the back of a spoon. Use a slotted spoon to transfer the browned beef to a bowl; reserve the beef for later. If there is any excess beef fat in the pan, drain it off now, then add the diced onion and minced garlic. Cook until they are softened, about 5 minutes, then add the beef back to the pan.
SIMMER: Add the bay leaves to the pan and sprinkle the oregano, cinnamon and mace over the meat. Pour over the blended vegetables from earlier and stir through to combine, then reduce the heat to low. Cover the pan and simmer for 15 minutes. Uncover the pan and stir through the sliced green olives, cooking for another 5 minutes. Taste and add extra salt if needed just before serving.
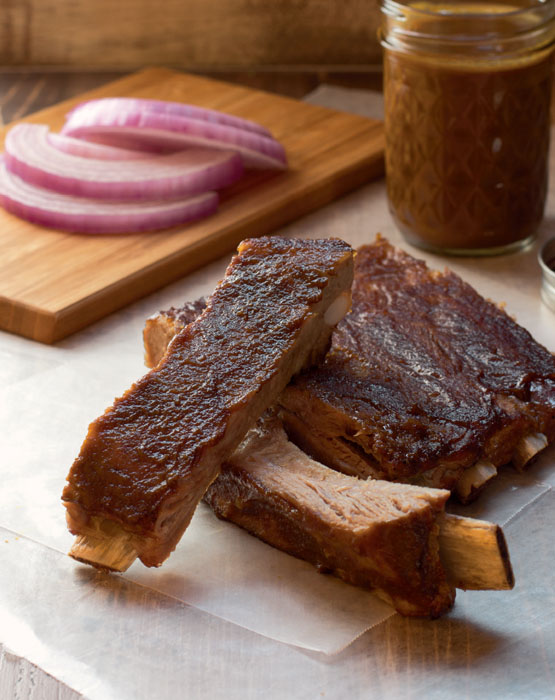
Not everybody has the luxury of being able to grill outside and enjoy that delicious smoke-infused flavor of traditional BBQ. So I came up with this foolproof method of baking ribs in the oven that produces ribs that are just as tender. Doused in my AIP-friendly no-nightshade BBQ sauce, they broil up to sticky, saucy, messy rib perfection.
MAKES 1 RACK OF RIBS
3½ lbs (1.5 kg) rack of pork back ribs
1 tsp (5 g) salt
1 tsp (4 g) garlic powder
½ tsp ground ginger
½ tsp ground sage
¼ tsp dried thyme leaves
¼ cup (60 ml) Pork or Chicken Broth
½ cup (120 ml) BBQ Sauce
PREP: Pat the ribs dry and put them on a cutting board. Trim your ribs: if there is any gristle at the ends of the bones, cut it off and discard. Flip the ribs over so they are bone-side up. Make a shallow cut across the bone and slide your fingers underneath the translucent membrane until you can get a grip on it. Use a piece of paper towel to hold onto the membrane and pull on it firmly so that it comes off the ribs—discard it and flip the ribs back over so the meaty side is facing up. Mix together the salt, garlic, ginger, sage and thyme. Spread the dry rub evenly over the meat and press into place so that it adheres to the meat. Lay out a sheet of aluminum foil large enough to wrap around the rack of ribs, then place a piece of parchment paper that is the same size on top of the foil. Transfer the ribs to the parchment paper. Wrap the parchment paper and foil together around three sides of the ribs. Carefully pour the broth into the foil and parchment package, then wrap the final side up tightly and place the wrapped ribs on a baking tray.
COOK: Preheat the oven to 225°F (105°C). Bake the ribs for 3 hours, then remove them from the oven. Turn off the oven and preheat the broiler on high, setting the oven rack about 6 inches (15 cm) away from the broiler. Carefully unwrap the ribs—there will be lots of cooking liquid underneath the ribs, which means steam escaping when you open up the foil. Line a second baking tray with foil, then use two sets of tongs to transfer the ribs to it carefully.
BROIL: Baste the ribs with BBQ sauce and broil the ribs for 2–3 minutes. Baste the ribs again and broil for another 2–3 minutes, until the sauce is bubbling. Baste the ribs one last time before slicing up the ribs to serve. Have lots and lots of paper towels for the inevitable messy eaters!
NOT: This recipe yields ribs that are perfectly tender, but still have a little “bite” and will stay on the bone when they are sliced. If you want fall-off-the-bone ribs, you will need to increase the original cooking time to 4 hours before broiling.
Most people think of beef when it comes to jerky, but that’s not the only option. This recipe uses pork infused with Chinese-inspired flavors that lighten up the traditional dried meat snack—without relying on a heavy dose of soy sauce. I’ve kept this recipe coconut amino–free, too, so it’s suitable for almost everyone.
MAKES ABOUT 12 OZ (340 G)
2 lbs (900 g) lean pork, such as tenderloin, sliced ⅛-inch (3-mm) thick (see tips below)
FOR THE MARINADE
¼ cup (60 ml) freshly squeezed orange juice
3 tbsp (45 ml) gluten-free fish sauce
2 tbsp (30 ml) avocado oil
2 tbsp (30 ml) ume plum or white wine vinegar
6 green onions, sliced
1½ tbsp (9 g) ground ginger
1 tbsp (12 g) garlic powder
¾ tsp ground cinnamon
MARINATE: Cut the pork into evenly-sized strips about 1 inch (2.5 cm) wide. Use an immersion blender to combine all the marinade ingredients. Put the sliced pork into a freezer bag and pour the marinade over. Mix the pork and marinade together so that the pork is evenly coated, then seal the bag and put it into a bowl to catch any leaks. Marinate the pork in the refrigerator for at least 3 hours.
COOK: Preheat the oven to 300°F (150°C). Line two baking trays with foil—this is just to catch any marinade that drips. Place two oven-safe wire racks onto the baking trays. Shake any excess marinade from the pork strips and lay them out on the wire racks, making sure none of the pieces are touching each other. Bake for 20 minutes, until the pork is fully cooked and has an internal temperature of at least 140°F (60°C). Don’t skip this step! This is how we avoid any bacterial nasties that could potentially cause sickness.
DRY: Reduce the oven temperature to 170°F (75°C)—or the lowest temperature your oven will reach. Bake until the jerky is dry, but still pliable, about 3 hours, rotating the trays half way through the cooking time. Store in an airtight container in the fridge.
TIPS: Make sure to use avocado oil in the marinade. Coconut oil will clump up and solidify in the fridge, which means the marinade won’t coat evenly and will fall off.
My butcher will very kindly slice my pork super thin for me. However, if that’s not an option for you, the easiest way to slice the pork very thinly is to put it into the freezer for 20–30 minutes to firm up before you slice it with a knife. You can also buy thicker-cut pork and use a meat tenderizer to pound it out thinly. If that’s not an option, you can make this jerky with thicker pieces, but you will need to increase both the marinating and drying times: ¼-inch (6-mm) thick pieces will need about 6 hours of drying time.
This is a really great way to prepare an inexpensive cut of beef. The marinade tenderizes the beef so the result is a juicy, delicious umami-laden steak without spending big bucks. Sliced thin, a little goes a long way and makes fantastic leftovers for salads or whatever you choose!
SERVES 6–8
FOR THE “PONZU”
2 tbsp (30 ml) coconut aminos
2 tbsp (30 ml) ume plum vinegar
1 tbsp (15 ml) yuzu or lime juice
2 tsp (10 ml) Chicken Broth
1 tsp (5 ml) lemon juice
1 tsp (5 ml) gluten-free fish sauce
FOR THE STEAK
⅓ cup (80 ml) orange juice
2 cloves garlic, minced
2 lbs (900 g) sirloin or flank steak, about 1-inch (2.5 cm) thick
1 tsp (5 ml) coconut or avocado oil
¼ cup (30 g) grated daikon radish
2–3 green onions, sliced, green tops only
MARINATE: In a small bowl, whisk together all the “ponzu” ingredients, then add the orange juice and minced garlic. Place the steak in a freezer bag or bowl and pour the marinade over, making sure the steak is evenly coated. Seal or cover and marinate in the refrigerator for 4 hours, turning the steak halfway through.
SEAR: Take the steak out of the refrigerator 30 minutes prior to cooking. Discard the marinade and pat the steak dry. Rub each side of the steak with coconut oil. Heat a cast-iron skillet on high—you will know it’s hot enough if a drop of water evaporates immediately when it touches the skillet. Cook the steak in the hot skillet for 3–4 minutes on each side (for rare steak), then remove it from the heat and transfer to a chopping board to let rest for 10 minutes.
SLICE: Slice the rested steak into thin strips against the grain. Serve immediately, topped with the grated daikon and sliced green onions.
NOT CRAZY ABOUT COCONUT? Omit the coconut aminos and add 1 tablespoon (15 ml) of fish sauce and an extra 1 teaspoon (5 ml) of chicken broth.
Finding any kind of lunch or deli meat that is AIP compliant is pretty tough, since nightshades and pepper seem to sneak in everywhere. That’s one of the reasons I love this brined roast beef recipe. Instead of brining a beef roast for days in advance, like a traditional corned beef recipe, this method allows you to cook a beef roast from frozen and then brine it afterwards for added juiciness and flavor. It makes delicious sliced beef for lunch boxes, snacks, salads and more. I like to use a small beef round cut because it’s inexpensive, makes nice-size slices and is quicker to cook than a larger roast. If I need to make a larger batch, I simply double the recipe and use two roasts instead of one larger piece. This is a great weekend recipe that will prepare you for those weekday lunches ahead!
MAKES ABOUT 1¾ LBS (800 G) OF SLICED BEEF
2 lb (900 g) frozen lean boneless beef roast, such as bottom round
⅓ cup (80 g) kosher salt
1 cup (240 ml) hot filtered water
4 cloves garlic, minced
3 bay leaves
1½ tsp (2 g) dried rosemary leaves
1 tsp (1 g) dried thyme leaves
½ tsp ground oregano
½ tsp ground mace
3 cups (700 ml) cold filtered water
ROAST: Preheat the oven to 190°F (88°C). Line a baking tray with foil—this is just to catch any drips—and place an oven-safe rack onto the tray. Put the frozen beef roast onto the rack and roast until it reaches an internal temperature of 135°F (57°C), about 5 hours. Remove the beef from the oven and rest it while you make the brine.
BRINE: Pour the kosher salt and the hot water into a freezer bag large enough to fit the cooked beef roast. Place the bag into a bowl to stop it spilling over while you add the rest of the seasonings. When the salt has almost entirely dissolved, pour in the cold water. Place the cooked beef roast in the brine and twist the bag shut so that the brine covers the whole roast. Put the bag in a bowl, secure the twisted bag with a clip and seal it shut. Brine the beef roast in the refrigerator for 3 hours.
DRY: Remove the beef from the brine and pat it dry. Wrap the finished beef up and allow it to rest overnight in the refrigerator. Once it has rested overnight, it is ready to be sliced and used however you wish!
NOTE: If you cook the beef to medium-rare, it will let out some additional liquid while it is resting overnight—this isn’t anything to worry about! If you prefer your meat a little more well-done, cook the roast to an internal temperature of 140°F (60°C).
(See picture here)
These short ribs are definitely a weekend cooking project because of the long cooking time, but they’re simple to make and don’t require much hands-on time at all. Normally gravies rely on all kinds of flours or starches that need to be avoided on the AIP, but this recipe makes its own gravy simply by blending together the braised vegetables and the juices from the short ribs. The result is a rich, decadent dish from a few simple ingredients: You won’t miss normal gravy at all!
SERVES 8
6 lbs (2.7 kg) bone-in short ribs
¼ cup (60 ml) coconut or avocado oil, divided
2 onions, diced
2 carrots, diced
6 cloves garlic, minced
4 cups (960 ml) Beef Broth
6 sprigs fresh rosemary
Salt, to taste
SEAR: In a large skillet, in batches as needed, sear the short ribs in 3 tablespoons (45 ml) of the oil over medium heat. Cook for 2–3 minutes per side, until nicely browned. Once all the short ribs have been browned, set them aside in a large, high-sided roasting pan.
BRAISE: Preheat the oven to 325°F (163°C). Add the remaining oil to the skillet and soften the onions and carrots, about 5 minutes. Add the minced garlic and cook until fragrant, about 1 minute. Remove the vegetables from the heat and transfer them to the roasting pan, laying them in between the short ribs. Pour over the beef broth and tuck the rosemary sprigs into the pan. Cover the roasting pan with foil and make a hole in the foil for steam to escape. Place the roasting pan in the oven and cook for 3 hours covered, turning the short ribs once halfway through. Remove the foil and cook uncovered for an additional hour to brown and reduce the pan juices, turning the short ribs halfway through the cooking time.
PUREE: Remove the roasting tray from the oven. Remove the short ribs from the pan and let them rest while making the pan gravy. Remove and discard the rosemary stems. Use an immersion blender to puree together the vegetables and liquid in the pan to make the gravy. If you like a thinner gravy, add a little extra broth. Season to taste with salt. Serve the short ribs smothered with gravy and tuck in!
I’ll be honest, this is about as much a pie as shepherd’s pie is, in that it is topped with vegetables rather than crust. But it is ridiculously delicious, so I don’t think you’ll hold the crustlessness against me! The traditional Greek dish is a cinnamon-spiked lamb filling with pasta and a rich béchamel sauce, but my version shows that you don’t need the pasta to create a dish with pizzazz! I’ve kept the warmly spiced lamb and created my own twist on a creamy sauce using butternut squash to replace the traditional dairy. This is a family-friendly meal with hidden vegetables, and a great recipe to keep in your arsenal.
SERVES 8
FOR THE MEAT FILLING
1 tsp coconut or avocado oil
2 lbs (900 g) lean ground lamb
1½ cups (210 g) diced onion
2 cloves garlic, minced
2 tsp (2 g) ground cinnamon
1 tsp (1 g) dried oregano leaves
½ tsp ground thyme
1 tsp (5 g) salt
¾ cup (180 ml) Beef Broth, divided
1 cup (240 ml) coconut milk
1 cup (240 ml) pumpkin puree
2 cups (60 g) fresh spinach leaves
FOR THE SAUCE
12 oz (340 g) peeled and chopped butternut squash
¾ cup (180 ml) coconut milk
1 clove garlic
⅛ tsp ground mace
BROWN: In a large skillet, add the oil and, working in batches, brown the ground lamb until just cooked through. Remove all but a tablespoon (15 ml) of rendered fat from the skillet. Add the diced onion to the skillet and cook over low-medium heat until the onion has softened. Break up any large lumps in the ground lamb with the back of a spoon or spatula.
SIMMER: Add the minced garlic to the meat mixture in the pan, as well as the cinnamon, oregano, thyme and salt. Cook until the garlic and herbs are fragrant, then add ½ cup (120 ml) of the beef broth. Simmer until the broth has reduced and add the coconut milk to the pan. Reduce the heat and simmer until the liquid in the pan has reduced and the lamb is lightly coated. Add the pumpkin puree and remaining beef broth, cooking until warmed through and combined, about 5 minutes. Stir through the spinach and remove from the heat.
ASSEMBLE: Add all the sauce ingredients to a high-power blender and blend until smooth, seasoning to taste with salt if needed. Preheat the oven to 350°F (175°C). Spoon the meat filling into a 9×13-inch (23×33-cm) baking dish and press down on the filling with the back of a spoon to level the top. Place the baking dish on a baking tray, then pour the sauce over the top of the meat mixture. Bake until the filling is piping hot and the surface of the sauce has just set, about 35 minutes. Rest the pie for 5 minutes before serving.
NOT CRAZY ABOUT COCONUT? Leave out the coconut milk from the meat filling and add an extra ¼ cup (60 ml) of pumpkin puree and an extra ½ cup (120 ml) of beef broth. Omit the coconut milk from the sauce and add 2 tablespoons (30 ml) of avocado oil and ¼ cup (60 ml) of additional beef broth.
Most chicken wing recipes are either slathered in processed sugar or doused in hot sauce. Neither of those options is exactly AIP friendly. I’m getting a stomachache just thinking about them. Thankfully, there is another way! My version of chicken wings have a secret fruit ingredient that most people can’t guess—mango. The natural sugars help create that caramelized glaze but don’t interfere with the flavor coming from a combination of coconut aminos, fish sauce and plenty of fresh garlic and ginger. These wings are perfect for game day, parties or potlucks!
SERVES 8
6 cloves garlic, peeled
12 oz (340 g) mango peeled, pitted & cubed
¼ cup (60 ml) fresh lime juice (about 2 limes)
¼ cup + 2 tbsp (90 ml) coconut aminos
¼ cup (60 ml) coconut or avocado oil
¼ cup (60 ml) (or more) water
3 tbsp (20 g) minced ginger
1 tbsp (15 ml) gluten-free fish sauce
Zest of 2 limes
6 lbs (2.7 kg) chicken wings
MARINATE: Add all of the ingredients (except the chicken wings!) to a blender and process until combined. In a large freezer bag or container, pour the marinade over the chicken wings and toss to coat them evenly. If the marinade is a little thick, add an extra splash or two of water. Marinate the wings for at least 30 minutes.
PREP: Preheat the oven to 400°F (205°C). Line two baking trays with foil. Place an oven-safe wire rack on each tray. Divide the chicken wings evenly between the two trays. Shake off any excess marinade and lay the wings on top of the wire racks.
BAKE: Cook the chicken wings for 30 minutes. Remove the wings from the oven and use tongs to turn them over. Turn the oven up to 425°F (220°C). Return the wings to the oven and continue to bake until golden-brown, about 10 minutes.
NOTE: Frozen mango chunks work perfectly in the marinade. I find I get the best crisping results in a convection oven. If your wings are not crisped to your liking after cooking, pop them under a broiler to finish up for a few minutes.
NOT CRAZY ABOUT COCONUT? Omit the coconut aminos and add another 2 tablespoons (30 ml) of avocado oil, as well as an additional 2 tablespoons (30 ml) of fish sauce.
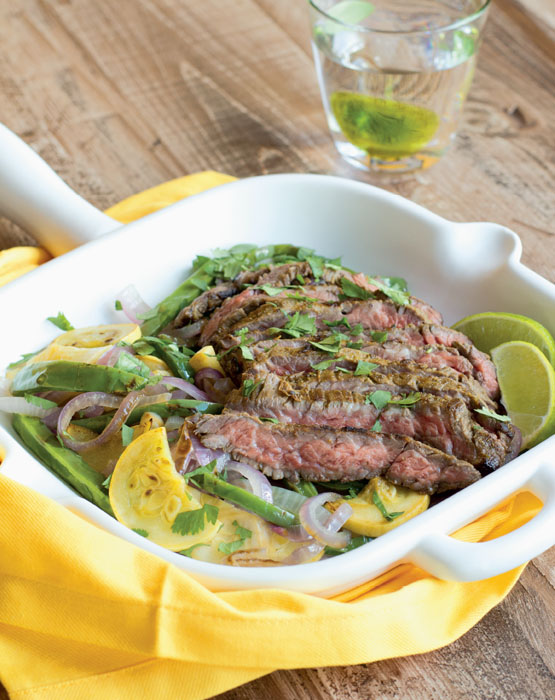
Typical fajitas are filled with AIP no-no ingredients like peppers and chili. This recipe shows you how to make a flavorful and tender steak marinade without nightshades or seed spices that is just perfect for fajitas. Swapping the usual grilled peppers for nopales, or cactus paddles, adds a little extra Mexican flair and a lovely bright fresh citrus flavor to the vegetables, too!
SERVES 4–6
2 lbs (900g) skirt steak
½ cup + 2 tbsp (120 ml + 30 ml)
avocado oil, divided
3 tbsp (18 g) Taco Seasoning
⅓ cup (80 ml) fresh lime juice
1 tsp (5 g) salt
2 red onions
4 nopales/cactus paddles
2 yellow summer squash
TIP: Avocado oil remains liquid when refrigerated, while coconut oil solidifies, which is why this recipe uses avocado oil—cold, clumping coconut oil doesn’t sear evenly. If you do use coconut oil, bring the marinated skirt steaks up to room temperature first so that the marinade is evenly distributed across the surface of the meat.
MARINATE: Prep your skirt steak by trimming off any excess fat from the surface. You don’t need to trim off every last bit of fat, just the thick outer layer so that the meat is exposed—there should still be nice layers of fat throughout the meat itself. If you see any membrane left behind, pull that off, too. Cut the skirt steak into 4 evenly sized pieces—this just makes it easier to handle. Whisk together ½ cup (120 ml) of the avocado oil with the Taco Seasoning, lime juice and salt. Place the skirt steak pieces into a freezer bag and pour the marinade over—make sure that each side of the meat is evenly coated, then refrigerate and marinate for 1–3 hours before cooking.
SEAR: You can cook your steaks on a super-hot cast-iron griddle on the stovetop, or on the grill—whichever you prefer. Remove the steak pieces from the marinade and shake off any excess. Sear them on the hot griddle or grill until the outside has a great deep-colored crust and the internal temperature of the meat is about 120°F (49°C) for medium rare or 130°F (54°C) for medium: about 3–5 minutes per side. Set the seared steaks aside on a chopping board to rest while you get the vegetables ready.
PREP: Cut the onions in half and discard the skin, then slice them about ¼-inch (6-mm) thick. Carefully pick up the nopales—it is possible to buy them with the thorns already removed, but handle them carefully, just in case! If you need to remove the thorns, carefully cut around the side and base of the cactus paddle, discarding the edges. Then use the flat of your knife to cut off the thorns from both sides of the paddles. Discard those sharp bits! Slice the nopales diagonally across into strips the same thickness as the onions. Trim the summer squash ends, then slice them in half lengthwise. Cut the summer squash halves into half moons, about the same thickness as the other vegetables. Add the sliced onions to a bowl with the remaining 2 tablespoons (30 ml) of the avocado oil.
GRILL: Heat a cast-iron skillet on the stovetop or grill—it needs to be hot enough that the vegetables sizzle as soon as they’re added to the pan. Once the pan is hot enough, shake the excess oil from the onions and add them to the pan. Cook until they begin to soften, stirring occasionally. Toss the summer squash in the remaining oil—once the onions have begun to color, add the squash to the pan and cook until they just begin to soften, about 3 minutes. Add the sliced nopales to the pan and cook until they are tender-crisp and bright green, about 2 more minutes.
SERVE: Remove the vegetables from the heat and pile them onto a large platter. Slice the rested steak into strips against the grain and add to the platter. Pour any steak juices over the veggies. Let everybody make up their own plates from the shared platter and serve the fajitas with extra lime wedges.
Most people reach for beef when it comes to burgers, but there are plenty of reasons to swap that for some ground lamb instead. It has a more robust flavor than beef that really works well with burgers or grilled recipes. Here I paired the lamb with another springtime ingredient: leeks. The natural sweetness of slightly caramelized leeks makes a nice, simple twist on the classic beef burger. Ground lamb is the cheapest way to get the nutritional benefits of grass-fed lamb, which include being a fabulous source of protein, having plenty of good-for-us omega-3 fatty acids and being a great source of conjugated linoleum acid (CLA), which is another significant anti-inflammatory fatty acid. So … go, team lamb!
MAKES 4 BURGERS
FOR THE BURGERS
1 cup (45 g) leeks, washed and chopped
1 tbsp (15 ml) coconut or avocado oil, divided
1 lb (454 g) ground lamb
½ tbsp (6 g) garlic powder
½ tsp salt
FOR THE “CREAM”
½ cup (120 ml) coconut cream
1 tbsp (5 g) lemon zest
MIX: Add the chopped leeks and half of the coconut oil to a pan and cook over low-medium heat until the leeks are softened, about 5 minutes. Transfer the leeks to a bowl and chill them in the refrigerator. To a second bowl, add the ground lamb, garlic powder and salt. Once the leeks are no longer hot to the touch, add them to the bowl with the meat and use your hands to gently combine the mixture. Divide into 4 evenly-sized patties.
COOK: Add the remaining oil to a skillet. Over medium heat, add the patties and cook each side until browned, about 5 minutes per side, making sure the lamb is cooked all the way through. Rest the burgers while you make the lemon cream.
CREAM: In a bowl, stir together the coconut cream and lemon zest. Use to top the cooked burgers just before serving.
NOT CRAZY ABOUT COCONUT? Try topping with ½ cup (115 ml) of Spinach Artichoke Dip, instead.
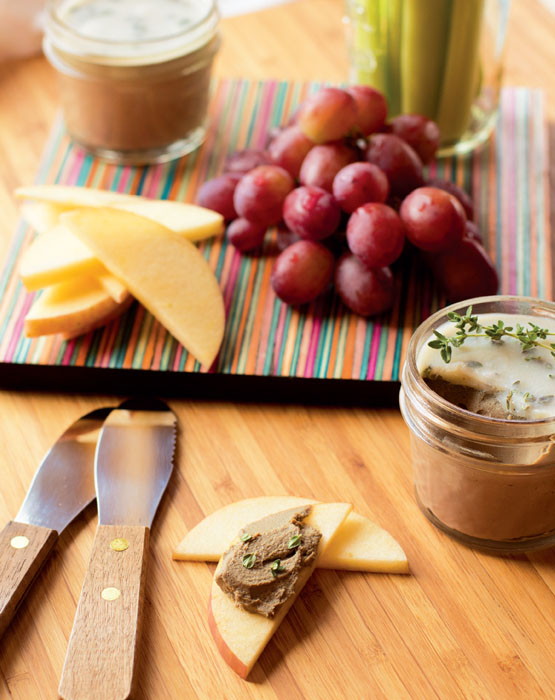
Liver is a superfood in its own right, since it’s one of the best sources of vitamin A and contains plenty of vitamin B12, not to mention minerals that we need, like selenium, potassium and zinc, just to name a few. Most people aren’t falling over themselves to eat it, though, because it’s so easy to overcook—and so often is overcooked! Mr. Meatified was a resolute liver-hater after a childhood of dubiously prepared liver and onions. This pâté, though? It’s a game changer. This is the pâté that got him to realize that liver can be decadent and delicious! This recipe has a creamy, whipped texture and extra flavor from using both bacon and bacon fat to make it so smooth. Add in the subtle sweetness from the apple and a little herb-y hit from the thyme and you’ve got an addictive spread! Try this recipe on your very own liver-haters. And if you want to be extra sneaky … slowly increase the amount of liver in the recipe until you are making it with up to a pound (454 g) of liver. They’ll never know!
MAKES AT LEAST 1½ CUPS (360 ML)
½-1 lb (225-454 g) chicken livers
4 oz (115 g) bacon (about 4 slices)
2 shallots, chopped
1 apple, peeled, cored and chopped
1 tbsp (2 g) fresh thyme
1 tsp (1 g) dried rosemary leaves
2 tbsp (30 ml) Chicken Broth
¼ cup (60 ml) bacon fat
COOK: Trim the chicken livers of any fat or connective tissue, then refrigerate until needed. Chop the bacon finely and add to a skillet over medium heat. Cook the bacon until it begins to brown, then reduce the heat a little and add the chopped shallots, apple, thyme and rosemary. Cook until the shallots and apples have softened, about 10 minutes. Add the chicken livers to the pan and cook for a few minutes, turning so that each side browns but the inside remains a little pink. Transfer everything from the skillet to a blender. Return the skillet to the heat and add the chicken broth. Bring to a boil and scrape up any browned pieces from the pan, then pour the broth into the blender, too. Puree on high until the pâté is completely smooth, then add the bacon fat and blend together.
CHILL: Spoon the pâté into mason jars or ramekins and chill overnight. Serve with apple slices and your favorite salad vegetables.
I love one pot dishes and this one is fantastic. Roasting the pork on top of the black grapes creates the base for a sauce that tastes incredibly rich but only has a few ingredients. The grape sauce gives a similar depth of flavor to a red wine sauce, without having to use (and cook off) alcohol.
SERVES 4
3½ lbs (1.6 kg) bone-in pork shoulder (see note)
2 tbsp (30 ml) bacon fat
2 tsp (8 g) garlic powder
2 tsp (4 g) ground sage
1 tsp (5 g) salt
1 lb 6 oz (624 g) black or red grapes
1 cup (140 g) diced onion
3 sprigs fresh rosemary
10 sprigs fresh thyme
2 tbsp (30 ml) balsamic vinegar
1 tsp (2 g) arrowroot powder
SEAR: Pat the pork shoulder dry. Mix together the bacon fat, garlic, sage and salt in a small bowl. Rub the pork shoulder on both sides with the fat and seasoning mixture. Heat a Dutch oven over medium heat. Sear the pork shoulder until it browns, about 3–5 minutes per side. Set the pork shoulder aside on a plate for now.
ROAST: Preheat the oven to 325°F (163°C). Add a splash of water to the Dutch oven to scrape up the fond, then place the grapes, onion, rosemary and thyme in the bottom. Place the seared pork shoulder on top and cover it with a lid. Roast the pork until the internal temperature reaches 135°F (57°C), about 45 minutes. Once cooked, let the pork shoulder rest while you make the sauce and transfer the Dutch over to the stovetop.
REDUCE: Remove the herb sprigs from the Dutch oven and add the balsamic vinegar. Use an immersion blender to puree the fruit into a sauce. Cook over medium heat so that the sauce simmers and thickens, about 10–15 minutes. Mix the arrowroot powder with a little water until smooth. Remove the fruit sauce from the heat and stir through the arrowroot mixture. To serve, slice the pork shoulder thinly. Pile up your plates with pork, drizzle with roasted grape sauce and enjoy!
NOTE: This recipe works best with a pork shoulder cut about 1-2 inches (2.5-5 cm) thick. You can use thicker pieces, but you will need to increase the cooking time.
The first time I ate tongue, I was totally shocked. I was expecting something lean and kind of dry: In reality, it is some of the richest and most delicious beef you will ever eat. Seriously! Traditionally, tongue is boiled for a long time to tenderize the meat, but I didn’t want to watch over a pot for a few hours. So I came up with an easy slow-cooker method instead. Once the beef tongue is shredded, it’s crisped up and fried with onions for a little extra sweetness. This wrap is a perfect way to enjoy the meat: the slight bitterness of the collard greens is a great contrast and adding some extra zing from the herbed horseradish sauce cuts the richness of the meat beautifully. You can actually follow the first step of this recipe and then refrigerate the meat for future meals, which is what I do: I slow-cook the tongue over the weekend and then whip up this quick meal during the week. Yay for batch cooking ahead!
SERVES 4
2 cups (480 ml) Beef Broth
2½ lbs (1.1 kg) beef tongue
2 onions, divided
2 tsp (10 g) salt
3 tbsp (45 ml) coconut or avocado oil, divided
½ cup (120 ml) Horseradish Sauce
1 tbsp (2 g) fresh thyme leaves
1½ tbsp (1 g) fresh chopped tarragon
1 tsp (4 g) garlic powder
8 fresh collard green leaves
SLOW-COOK: Pour the broth into the bottom of a large slow cooker. Place the tongue in the broth. Slice one of the onions into chunks and add to the broth, too. Sprinkle the beef tongue with the salt. Pop the lid on the slow cooker and cook the tongue on high for 8 hours. Carefully transfer the cooked tongue to a chopping board and allow to cool enough to handle. Use a knife to make a cut into the meat through the skin, then carefully peel off the skin and discard it. Use two forks to shred the meat and reserve it for later.
CRISP: Heat a large skillet over medium heat and add 1 tablespoon (15 ml) of the oil. Slice the remaining onion in half and then into thin slices. Toss the sliced onion in the oil and cook until the edges begin to caramelize, stirring occasionally, about 10 minutes. Remove the onion from the pan and reserve for later. Increase the heat to medium-high and add the remaining oil to the pan. When the oil is hot and shimmering, add the shredded beef tongue, spreading it across the pan in an even layer, pressing it flat with the back of a spatula. Cook until the beef begins to crisp and brown in the oil, then flip over to the other side and repeat. It should take 3–4 minutes per side to crisp up. Toss the shredded beef one more time and cook for another 3–4 minutes, until there are lots of crispy edges on the beef. Add the onions back to the pan and stir through. Remove the pan from the heat and allow the meat to cool slightly, enough to handle the wraps.
ASSEMBLE: Make the herbed horseradish sauce first, stirring the thyme, chopped tarragon and garlic powder through the horseradish sauce. Remove and discard the tough lower stems of the collard greens that don’t have any greens attached to them. Use a paring knife to carefully shave off most of the middle stems so that they are about the same thickness as the leaves: This will make them much easier to roll. Lay two collard greens so that they overlap each other in the middle. Spread a little of the horseradish sauce over the leaves, then divide the crispy beef evenly between “wraps,” leaving enough room for the leaves to be wrapped around the filling. Fold the edges of the collard green leaves lengthwise over the filling until they overlap in the middle, then roll the leaves from the bottom edge, making a burrito-like “wrap.”
I don’t know about you, but one of the things I used to love about a good flatbread was the slightly chewy texture. If you’ve made any grain-free versions, you’ll probably know what I mean when I say: they’re so often like giant crackers. Not that I have anything against grain-free crackers … but they’re for dip. Sorry, crackers. This flatbread isn’t brittle and won’t shatter when you bite into it. Then I went overboard and loaded it up with peppery arugula, salty prosciutto and sweet plums. You’re welcome!
SERVES 2-4
1 cup (120 g) tapioca starch
¼ packed cup (40 g) coconut flour, sifted
1 tsp (5 g) salt
2 tsp (2 g) dried rosemary leaves
11 oz (310 g) peeled and chopped plantains (about 2)
¼ cup (60 ml) coconut or avocado oil
4 oz (110 g) arugula
2 tbsp (30 ml) extra-virgin olive oil
½ tbsp (8 ml) lemon juice
6 slices of prosciutto
4 plums, sliced thinly
MIX: Preheat the oven to 375°F (190°C) and put a baking tray into the oven on the center rack. In a mixing bowl, add the tapioca starch, coconut flour, salt and rosemary, stirring to combine. In a food processor or high-power blender, combine the chopped plantains and oil, processing until smooth. Pour the plantain batter into the mixing bowl with the dry ingredients and use a spatula to combine into a dough. You should be able to press on the dough without the edges cracking—if it’s a little dry, add a little water.
BAKE: Lay out a piece of parchment paper the size of your baking tray and place the dough in the middle. Gently press down on the dough with your hands, stretching it out until it is about ¼-inch (6-mm) thick. Carefully transfer the parchment paper and dough to the hot baking sheet. Bake until the edges of the flatbread are just beginning to brown, about 20 minutes. Remove from the oven and transfer the flatbread to a chopping board.
TOP: Toss the arugula in a bowl with the olive oil and lemon juice. Top the flatbread with the dressed arugula, followed by the prosciutto slices and finally the sliced plums. Cut into slices and serve while still warm.
TIP: The dough works best with plantains that are beginning to ripen. They should be yellow with a few black spots and just a hint of green at the tips.
I’m not going to lie, I was totally thinking about nachos when I came up with this recipe. Since traditional nachos are laden with nightshades, that wasn’t really going to work out for me. But you know what would work? BBQ nachos! All I needed was to spice up some already baked and shredded chicken with my 100 percent AIP-friendly BBQ sauce! Instead of engaging in fiddly and time consuming chip-making, I decided to bake up some sweet potatoes. And instead of using a gut-punching “cheez” product, I made my own sweet-potato “cheese” sauce to drizzle over the top, flavored with nutritional yeast for a savory kick. The end result is pure comfort food!
SERVES 4
2 lbs (900 g) sweet potatoes (about 2 large)
3 cups (300 g) cooked and shredded chicken
1½ cups (360 ml) BBQ Sauce
¼ cup (60 ml) water
¼ cup (60 ml) coconut milk
¼ cup (60 ml) Chicken Broth
2 tbsp (8 g) nutritional yeast flakes
1 tbsp (15 ml) avocado oil
½ tsp salt
¼ tsp garlic powder
4 green onions, sliced
¼ packed cup (10 g) fresh cilantro leaves, chopped
BAKE: Preheat the oven to 425°F (220°C). Scrub the sweet potatoes with a brush and pat dry. Line a baking tray with parchment paper or foil. Carefully poke the sweet potatoes with a knife a few times on each side, then place them on the baking tray. Bake until the sweet potatoes are just tender, about 45 minutes, then remove them from the oven and keep them warm.
SAUCE: Add the shredded chicken to a saucepan with the BBQ Sauce and water. Warm the BBQ chicken through over a low-medium heat, stirring occasionally, while you make the “cheese” sauce.
BLEND: Cut the sweet potatoes in half, then scoop a little out of each half until you have ½ cup (120 g) of cooked sweet potato reserved and each of the potatoes has a nice hollow you can load up with filling later. Add the reserved sweet potato to a food processor or blender. Add the coconut milk, chicken broth, nutritional yeast, avocado oil, salt and garlic powder. Blend until you have a thick, smooth and pourable “cheese” sauce. Top the sweet potato halves with the warmed BBQ chicken, then drizzle with the “cheese” sauce. Finish off with the sliced green onions and chopped cilantro, then dig in!
NOT CRAZY ABOUT COCONUT? To make this coconut-free, omit the coconut milk and add an extra tablespoon (15 ml) of avocado oil and an extra 2 tablespoons (30 ml) of chicken broth when making the “cheese” sauce. Follow the instructions for making the Sweet & Tangy BBQ Sauce coconut-free.
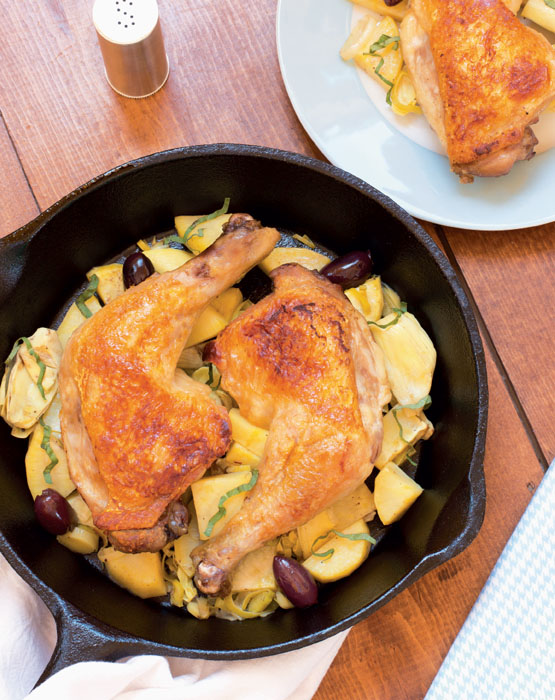
This dish is full of my favorite things: crispy-skinned chicken, leeks, artichokes and olives. It’s spring in a pan! Adding in the white sweet potatoes keeps the chicken out of the sauce so that the skin stays crispy and makes this an easy family-friendly, one-pot meal! It even makes its own pan sauce.
SERVES 6
1 tbsp (15 ml) coconnut or avocado oil
3½ lbs (1.6 kg) bone-in chicken leg quarters (about 6)
2 medium leeks, white and pale-green parts only
1 lb (454 g) white sweet potato, peeled and chopped into bite-size pieces
7 oz (200 g) quartered artichoke hearts
¾ cup (110 g) kalamata olives in olive oil, drained (see Note)
2 cloves garlic, peeled and minced
Juice and zest of one lemon
1 tbsp (5 g) fresh minced sage
½ tsp salt
¾ cup (180 ml) Chicken Broth
Handful of fresh basil, cut into strips
BROWN: In a large skillet over medium-high heat, add the oil. In batches, place the chicken leg quarters skin-side down in the pan and cook until the skins are browned and some of the fat has rendered. Put the chicken aside, skin-side up, while you get the rest of the dish ready for the oven. Reserve the pan juices.
BRAISE: Preheat the oven to 425°F (220°C). Slice the leeks finely and chop the sweet potato into bite-size pieces. Put the leeks, white sweet potato, artichoke hearts, olives, garlic, lemon juice and zest, sage and salt into a large 4.8-quart (4.5-liter) baking dish. Add 2 tablespoons (30 ml) of the reserved pan juices and toss the vegetables to coat. Pour over the chicken broth and cook for 30–35 minutes, until a thermometer inserted into the thickest part of the chicken reads 165°F (74°C). Stir through the fresh basil and serve the chicken legs with the roasted vegetables, drizzled with the pan sauce.
NOTE: You can use olives that come in a brine—just rinse them to remove extra salt before adding them to the dish.
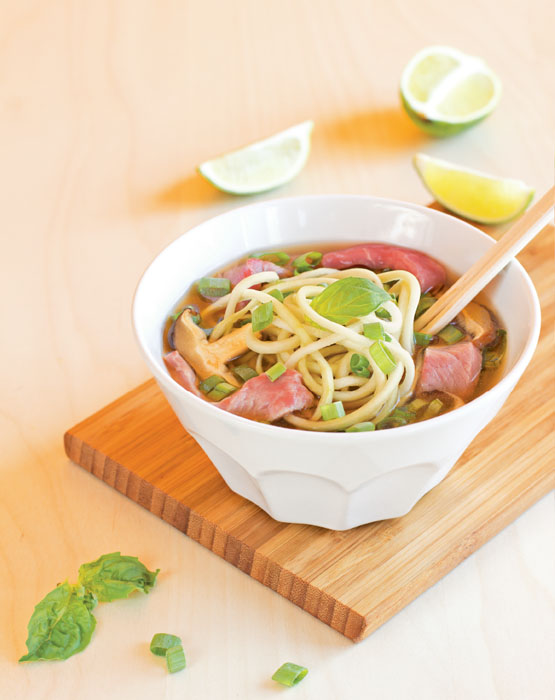
Good broth is so nourishing and soothing … but this bowl upgrades broth to comfort-food status, jammed full of flavor from rich beef, shiitake mushrooms and plenty of aromatics. Extra fun and slurp factor comes from finishing the bowl with zucchini noodles!
SERVES 4
2 tsp (10 ml) coconut or avocado oil
½ onion
4-inch (10-cm) piece peeled ginger root
6 garlic cloves
1 cinnamon stick
2 whole dried cloves
8 cups (1.9 liters) Beef Broth
½ oz (15 g) dried shiitake mushrooms
4 zucchini
1 lb (454 g) beef sirloin
1 tbsp (15 ml) gluten-free fish sauce
AS GARNISH
½ onion
2 limes
Fresh cilantro leaves
Fresh basil leaves
Fresh mint leaves
Green onions
INFUSE: In a saucepan, heat the oil over low-medium and add the onion half, cut-side down. Cut the ginger into slices and add to the pan. Peel the garlic and lightly smash the cloves with the back of a knife, then add those to the pan, too. Cook until the ginger and garlic are softened, about 5 minutes, then add the cinnamon stick and cloves. Pour in the beef broth and turn the heat up, bringing to a simmer. Keep at a simmer for 30 minutes to infuse the broth with flavor.
PREP: While the broth is infusing, soak the shiitake mushrooms in just enough hot water to cover them. Peel the zucchini, then use a mandoline, spiralizer or julienne peeler to make long strips of zucchini to act as “noodles.” Reserve those in the fridge for later. Slice the beef thinly against the grain and pop the sliced beef in the fridge, too. Thinly slice the onion, quarter the limes and roughtly chop the cilantro, basil, mint and green onions. Set out the garnishes in bowls or on a platter for people to choose their own soup toppings.
FINISH: Use a slotted spoon to remove the onion, ginger, garlic, cinnamon and cloves from the broth and discard. Add the mushrooms along with the soaking liquid, as well as the fish sauce to the still-simmering broth. Divide the zucchini “noodles” and thinly sliced beef between 4 bowls and ladle the hot broth over the top—the beef will cook through in the broth. Allow everybody to top their “noodle” bowls as they wish before serving.
Traditional curry is laden with ingredients that we need to avoid on the AIP. I’m looking at you, seed-based spices and nightshades! Instead, this recipe mimics the warmth of a mild curry by building flavor with ginger, cinnamon and turmeric. The turmeric in the spice blend and marinade does more than add color—it’s a natural anti-inflammatory. Pumpkin puree thickens the curry without any need for dairy and adds a touch of sweetness, not to mention a nutritional boost because of its high vitamin A content. In fact, each serving of this Pumpkin Chicken Curry has over 200 percent of the recommended daily allowance of vitamin A!
SERVES 4–6
FOR THE MARINADE
⅓ cup (80 ml) coconut cream
4 garlic cloves, minced
2 tbsp (30 ml) lime juice
1 tsp (2 g) ground turmeric
1 tsp (2 g) ground ginger
1 tsp (5 g) salt
FOR THE CURRY
1½ lbs (680 g) boneless skinless chicken thighs
1 tbsp (15 ml) coconut or avocado oil, divided
1 cup (140 g) dried onion
4 cloves garlic, minced
1 tbsp (6 g) fresh ginger, minced
2 tsp (4 g) ground ginger
2 tsp (4 g) ground turmeric
2 tsp (2 g) dried oregano leaves
1 tsp (1 g) ground cinnamon
15 oz (425 g) pumpkin puree
13.5 oz (400 ml) coconut milk
2 tsp (10 ml) lime juice
1 tsp (5 g) salt
2 bay leaves
MARINATE: Mix all the marinade ingredients together in a baking dish or freezer bag. Add the chicken thighs and coat evenly in the marinade. Marinate in the refrigerator for an hour or as long as overnight.
BROWN: Heat ½ tablespoon (7 ml) of coconut oil in a skillet at medium heat. Remove the marinated chicken from the refrigerator and shake off any excess marinade. Place the chicken thighs in the hot pan and cook until each side is browned, about 5 minutes per side. Remove the chicken thighs from the pan and rest them on a plate while you make the curry.
SIMMER: Add the remaining oil to the skillet over low-medium heat and scrape up any pieces of chicken left behind in the pan. Add the onion and cook until softened, about 5 minutes. Stir in the minced garlic and fresh ginger. Cook for 1 minute. Combine the ground ginger, turmeric, oregano leaves and cinnamon with the softened onion, garlic and ginger. Cook for a minute or so, until fragrant. Stir in the pumpkin puree and coconut milk—keep stirring until the sauce is evenly combined, then add the lime juice, salt and bay leaves. Simmer until the sauce is hot and beginning to thicken. Chop the rested chicken thighs into bite-size pieces and add them back to the sauce, along with any meat juices from the plate. Simmer until the chicken is cooked through and the sauce is thickened to taste. Remove the bay leaves before serving.
NOT CRAZY ABOUT COCONUT? Substitute ¼ cup (60 ml) of avocado oil for the coconut cream in the marinade. Replace the coconut milk in the curry sauce with 1 cup (240 ml) of Chicken Broth.
I love lamb and it goes perfectly with Greek-inspired flavors. I wanted to make a sauce that could stand in for the traditional tzatziki. Without dairy and without relying on coconut products for creaminess, this cucumber sauce fits the bill and is super simple to whip up! This is a great recipe to have on hand for quick weeknight meals, especially since you can make and refrigerate the sauce in advance.
SERVES 4
FOR THE SAUCE
1 cup (150 g) English cucumber
¼ cup (60 g) mashed avocado
1 tbsp (15 ml) olive oil
1 tbsp (15 ml) lemon juice
1 tsp (1 g) dried dill leaves
FOR THE LAMB
2 tsp (10 ml) coconut or avocado oil
1 cup (140 g) diced onion
3 cloves garlic, minced
1 lb (454 g) ground lamb
2 tsp (2 g) dried oregano leaves
1 tsp (1 g) dried thyme leaves
½ tsp salt
¼ tsp ground cinnamon
⅛ tsp ground mace
1 tbsp (15 ml) lemon juice
Lettuce leaves, to serve
BLEND: Peel the cucumber and scrape out the seeds. Add all of the sauce ingredients to a food processor and blend until smooth. Place a fine-mesh sieve over a bowl and pour the cucumber sauce into the sieve. Put the bowl and sieve in the fridge for the sauce to chill, for about 15 minutes. This will help remove any excess water from the sauce, making it thicker and creamier.
SEASON: Add the oil to a large skillet over medium-low heat. Add the onion and cook for about 5 minutes, then add the garlic and cook for another minute. Add the ground lamb to the pan and cook until browned. Strain off all but 1 tablespoon (15 ml) of rendered fat from the pan. Add the oregano, thyme, salt, cinnamon, mace and lemon juice to the pan, stirring to coat the meat, then cook for another minute or so.
ASSEMBLE: Spoon the seasoned lamb mixture into lettuce cups to serve, then top with cucumber sauce before serving.
It turns out that the answer to the problem of tasteless, dry chicken burgers, like so many problems in the kitchen, is to add bacon. Adding bacon gives a lovely smoky flavor and creates a super-juicy chicken burger. I love how the green onions lighten up the burger, cutting through the richness and making these burger bites super flavorful and fresh tasting. Choose the best-quality bacon you can as it will be the backbone to this burger’s flavor.
MAKES 16
¼ lb (115 g) bacon (about 2–3 thick-cut slices)
1 lb (454 g) ground chicken
½ cup (35 g) chopped green onion
1 tsp (2 g) ground sage
½ tsp garlic powder
MIX: Roughly chop the bacon slices and put them in the food processor. Process until the bacon resembles ground meat, but not so long that the bacon becomes a paste. Add the ground chicken, green onion, sage and garlic powder to the food processor. There should be plenty of salt in the mixture already, thanks to the bacon! Pulse until the meat mixture is just combined and you can see that the green onions are evenly distributed throughout.
SHAPE: Preheat the oven to 350°F (175°C) and line a baking tray with parchment paper. Use a 2 tablespoon (30 ml) scoop to measure out 16 equal-size portions of the meat mixture and drop them onto the lined baking tray. Use your hands to roll each portion into a round mini meatball shape
BAKE: Cook the burger bites for 20 minutes and rest them for 5 minutes on the baking tray before serving. These are great paired with either BBQ Sauce or Creamy Green Onion Dressing.
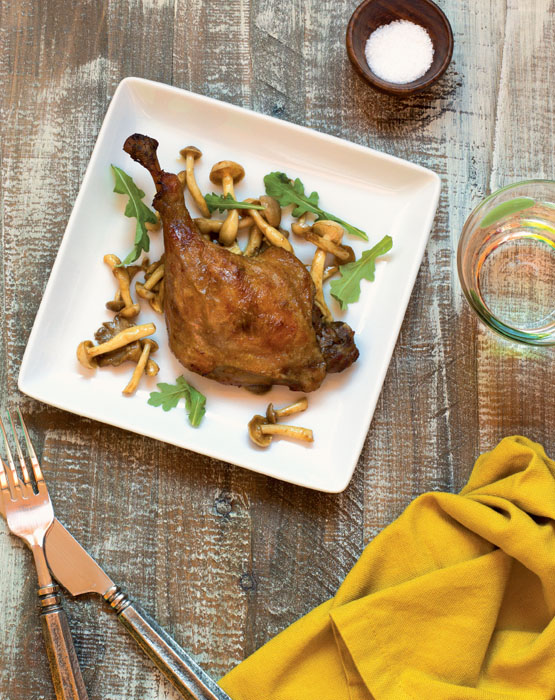
Pork shanks … they’re the short rib of the porcine world! These bone-in beauties are economically priced, full of flavor and because they’re pretty lean they are perfect for the slow cooker. My favorite trick with this dish is that it makes its own gravy with just a little help from a blender.
SERVES 8
2 tsp (10 ml) coconut or avocado oil
4½ lbs (2 kg) bone-in pork shanks (see tip below)
3¼ cups (455 g) diced onion
2 cups (280 g) halved and sliced carrots (about 3 medium)
2 tsp (10 g) salt, divided
1½ lbs (680 g) white mushrooms, divided
2 cloves garlic, peeled and smashed
Juice and zest of 1 lemon
½ cup (120 ml) Pork or Chicken Broth
2 tsp (2 g) dried oregano leaves
2 tsp (2 g) dried thyme leaves
½ tsp ground sage
COOK: Heat a large skillet over medium-high heat and add the oil. Sear the pork shanks until golden-brown, about 8 minutes per side, working in 2–3 batches. Set the pork aside in a large bowl to rest while you prep the vegetables. Add the onion, carrots and 1 teaspoon of the salt to the skillet you used to brown the pork shanks. Cook until the onion is softened, about 5 minutes. Chop 1 pound (454 g) of the mushrooms in half through the stem and add them to the skillet along with the garlic. Cook until they start to take on some color and release some of their juices into the pan, about 10 minutes. Pour the softened vegetables and the pan juices into the bottom of a 6-quart (5.5-liter) slow cooker and add the lemon juice and zest. Place the pork shanks on top of the vegetables—it’s okay if you need to double-stack them on top of each other. Pour the broth over the pork shanks and cook on high for 3 hours.
BLEND: Carefully remove the pork shanks from the slow cooker and pop them into a bowl, reserving them for later. If you’re making this dish for a family with small humans, take a minute to take the pork off the bones and discard them. Carefully transfer the cooking liquid and vegetables from the slow cooker to a blender. Make sure to leave a gap for the steam to escape when blending hot food—my blender has a flip-top pouring spout that I leave open. Don’t fill your blender more than one-third full—work in batches if you need to, or you’ll have a dangerous exploding blender! Pop a folded dish towel on top of the lid and hold the lid secure while you blend everything into a smooth gravy. Return the gravy to the slow cooker.
FINISH: Slice the remaining mushrooms in half and stir them through the gravy, along with the oregano, thyme and ground sage. Add the pork shanks back to the slow cooker and stir so that they are covered by the gravy. Cook for another hour, on high, until the mushrooms and the pork are fork tender.
TIP: The shank has two bones because it’s cut from the lower leg above the hock. My butcher cuts pork shanks so that there is one bone per piece, making them look and braise just like beef short ribs. If your shanks have been cut as a cross section and have two bones, simply cut each piece in half between the two bones before browning.
When I was growing up, my grandma would make an amazing vegetable-filled rabbit stew that was one of my favorite meals ever. Rabbit is perfect for slow cooking because it is incredibly lean—but that leanness means that it needs a little help in the flavor department. This recipe amps up the flavor by using the richness of porcini mushrooms as a foil to the shredded rabbit, while the texture is similar to a comforting chicken stew. Here I’ve used a slow cooker to make this meat sauce really easy to make—it’s perfect over spaghetti squash or your favorite vegetable mash. This is a great recipe to keep up your sleeves for kids, too—the gravy is full of hidden vegetables. Just don’t mention the bunny, okay?
SERVES 4
4 oz (120 g) bacon (about 4 slices)
3 lbs (1.4 kg) whole rabbit, cut into 6 pieces
5 cups (225 g) sliced leeks
2 cups (200 g) diced carrots
1 cup (140 g) diced onion
1 cup (120 g) diced celery
4 cloves garlic, minced
3 oz (85 g) dried porcini mushrooms
2½ cups (600 ml) Chicken Broth, divided
2 tbsp (30 ml) red wine vinegar
2 bay leaves
1 tbsp (3 g) dried rosemary leaves
2 tsp (2 g) dried thyme leaves
1 tsp (5 g) fine sea salt
BROWN: Chop the bacon into pieces and add them to a skillet over medium heat. Cook until the fat has rendered and the bacon is browned. Remove the cooked bacon with a slotted spoon and transfer it to the slow cooker. Reserve 1 tablespoon (15 ml) of the bacon fat and remove the rest from the pan—save it for cooking something else! Pat the rabbit pieces dry, then add them to the pan. Working in batches as needed, cook the rabbit in the bacon fat until you have a nice golden-brown sear on the meat, about 5 minutes per side. Reserve the browned rabbit on a plate.
COOK: Add the leeks, carrots, onion, celery and garlic to the pan and cook until softened, stirring occasionally, about 10 minutes. Transfer the softened vegetables to the slow cooker and add the dried mushrooms, too. Nestle the browned rabbit pieces on top of the vegetables and pour over any meat juices. Return the skillet to the stove and add 1 cup (240 ml) of the chicken broth. Scrape up any browned pieces from the bottom of the pan, then add that liquid to the slow cooker, along with the red wine vinegar, bay leaves, rosemary, thyme and salt. Put the lid on the slow cooker and cook on high for 3 hours.
BLEND: Carefully remove the rabbit from the slow cooker and shred the meat with two forks, discarding the bones. Add the rest of the chicken broth to the slow cooker and use an immersion blender to puree the vegetables until smooth. Add the shredded rabbit back to the slow cooker and cook until tender, about another 2 hours on high.
If you like beef short ribs, you will love beef cheeks. They are just as tender and flavorful when slow cooked, but they have much less fat and make a decadent thick, rich gravy because of their natural collagen content. And when I say tender … I mean fork tender. In fact, beef cheeks are now my favorite slow-cooking or stew meat. The other bonus point? They’re usually much, much cheaper than short ribs, making them budget-friendly, to boot.
SERVES 6
3 lbs (1.4 kg) trimmed beef cheeks
1 tbsp (15 ml) coconut or avocado oil
2 cups (280 g) diced onion
4 cloves garlic, minced
3½ cups (840 ml) Beef Broth, divided
4 sprigs fresh thyme
2 bay leaves
7 oz (200 g) cauliflower florets
12 oz (340 g) frozen, peeled pearl onions
½ lb (225 g) mushrooms, sliced
½ tsp salt
BRAISE: Trim off any excess fat from the beef cheeks and cut them into 2-inch (5-cm) pieces. Heat the oil in a Dutch oven over medium-high heat on the stove top and brown the beef cheeks in batches, about 3-4 minutes per side. Reserve the browned beef cheeks on a plate to catch any juices. Preheat the oven to 325°F (163°C). Reduce the heat on the stove top to medium and add the diced onion and garlic to the Dutch oven. Cook until fragrant and just softened, about 5 minutes. Add the beef broth to the Dutch oven and scrape up the fond. Add the thyme sprigs and bay leaves, then return the browned beef cheeks to the Dutch oven and pour over any meat juices from the plate. Add the cauliflower and pop the lid onto the Dutch oven before putting it in the oven on a lower shelf. Cook for 2½ hours.
BLEND: Use a slotted spoon to transfer the beef cheeks to a bowl and keep them warm. Remove and discard the thyme sprigs and bay leaves. Use an immersion blender to puree everything into a smooth gravy.
COOK: Return the beef cheeks and any juices to the Dutch oven and add the pearl onions, sliced mushrooms and salt. Stir the beef through the gravy until all the ingredients are combined, then put the lid back on the Dutch oven and return to the oven to cook for a further 30 minutes. Serve immediately!
This recipe was inspired by the classic Brazilian steakhouse preparation of chicken hearts, which are skewered and quickly grilled. To add more smoky deliciousness, I’ve wrapped these perfectly sized bites in bacon. Soaking the chicken hearts in a brine first helps to tenderize them, so don’t skip that step. Organ meats like heart are the best and most concentrated source of nutrients like vitamins, minerals, good fats and essential amino acids. This is a great way to introduce them into your diet since heart is a muscle with a texture similar to that of the regular meat of the animal it comes from. Also, this recipe has bacon. You’re welcome.
SERVES 6-8
1 lb (454 g) chicken hearts
2 tbsp (30 g) kosher salt
2 cups (480 ml) filtered water
¾–1 lb (340–454 g) bacon (see note below)
BRINE: Trim the chicken hearts, cutting off any exposed arteries and using the flat side of a knife to scrape off any excess fat. Pour the kosher salt into a freezer bag and add the water to make a quick brine and add the chicken hearts. Seal the bag and refrigerate the hearts for at least 2 hours in the brine.
WRAP: Pour off the brine and pat the hearts dry. Wrap each heart tightly with about half a strip of bacon—just enough to wrap around the heart without lots of overlap. Thread the bacon-wrapped hearts onto metal skewers or wooden skewers that have been presoaked for an hour beforehand to keep them from burning.
BROIL: Lower the oven rack to the middle of the oven—this will prevent lots of smoke from overheated bacon fat. Place the skewers on a baking sheet and broil until the bacon is crisp, about 7 minutes. Watch carefully because the bacon fat can spit or burn if it’s overheated. You could also make these on an outdoor grill or on a stove-top cast-iron griddle.
NOTE: Thinly sliced bacon will crisp up better than a thick cut slice. The amount of bacon you will need will depend on the thickness of the bacon you use and the size of the chicken hearts: you will need approximately half a slice of bacon to wrap each chicken heart.
This is one of my favorite baked chicken recipes. It’s got crispy skin, an easy and addictive fruity sauce and minimal ingredients. Throw in some extra light greens, like spinach, to wilt in the sauce and you’ve got everything you need in one pot—that’s what I call winning!
SERVES 4-6
FOR THE CHICKEN
2 tsp (10 ml) coconut or avocado oil
2½ lbs (1.1 kg) bone-in, skin-on chicken thighs
1 large onion, sliced in half and then into ¼-inch (6-mm) thick crescents
1 tsp (5 g) salt
2 tsp (1 g) dried marjoram
FOR THE PEACH SAUCE
1 cup (240 ml) water
½ cup (70 g) chopped onion
½ lb (225 g) chopped peaches (about 1 large)
2 tbsp (30 ml) apple cider vinegar
2 tsp (10 ml) coconut or avocado oil
2 tsp (10 ml) coconut aminos
2 tsp (10 ml) bacon fat
1 tsp (2 g) ground ginger
¼ tsp gluten-free fish sauce
SEAR: Heat a large Dutch oven over medium-high heat and add the oil. Place the chicken thighs in the pan, skin-side down and cook until golden-brown, about 5 minutes. You may need to do this in batches, depending on the size of your Dutch oven. Rest the chicken on a plate while you prep the rest of your ingredients. Remove any excess fat from the Dutch oven, leaving about 2 teaspoons (10 ml) in the pan to soften the onions. Preheat the oven to 400°F (205°C). Reduce the heat to medium and add the onions, salt and marjoram. Toss the onions through the oil until coated and cook until softened and just beginning to brown at the edges. Remove the Dutch oven from the stove top and place on a trivet while you make the peach sauce.
BLEND: Add all the ingredients for the peach sauce to a high-power blender and blend on high until completely smooth. It will look way too thin and that’s okay! It will thicken up as the chicken bakes. Pour the peach sauce into the Dutch oven and stir it through the onions. Put the seared chicken thighs on top of the sliced onions and peach sauce, keeping the browned skin out of the sauce so that it will crisp up as it cooks.
BAKE: Pop the chicken into the oven, uncovered so that the sauce will thicken as it bakes. Bake the chicken for 25–30 minutes, until the chicken is fully cooked and the sauce has thickened and reduced.
NOT CRAZY ABOUT COCONUT? Omit the coconut aminos and add an extra teaspoon (5 ml) of fish sauce.
Duck with crispy skin is one of my favorite things. You simply can’t beat the contrast of delicious tender duck that is topped off with crispy “duck bacon,” as we call it over at Meatified HQ! This is the sort of dish that looks like it’s all kinds of fancy and complicated, but it’s actually super simple! When I created this recipe, I couldn’t decide whether to go with classic French flavors, or a little more out there with some Asian flair, so I combined the two ideas and came up with a fragrant orange and vanilla duck that’s served with umami-laden mixed mushrooms that are glazed in the pan drippings. Super simple and ridiculously delicious!
SERVES 4
2 lbs (900 g) duck legs (about 4)
2 tsp (10 g) salt
3 cups (720 ml) Chicken Broth
3 cloves garlic, minced
6 sprigs fresh thyme
1 tbsp (15 ml) vanilla extract
Juice and zest of an orange
2 bay leaves
1 cinnamon stick
1 tbsp (15 ml) balsamic vinegar
¾ lb (340 g) mixed Asian mushrooms, such as beech, oyster or enoki
BRAISE: Trim any big pieces of loose, excess skin from the duck legs, making sure to leave enough skin to cover the leg meat completely. Pat the duck legs dry and sprinkle with salt. Working in batches as needed, place the duck legs skin-side down in a hot Dutch oven on the stovetop at medium-high heat. Cook until the skin is golden brown and the fat from the skin has rendered, about 5–8 minutes. Transfer the browned duck legs to a plate. Preheat the oven to 325°F (163°C). Pour off and reserve the duck fat—keep that duck fat in the refrigerator for future cooking projects! Add the chicken broth to the Dutch oven and bring to a simmer, scraping up the fond with a spatula. Add the minced garlic, fresh thyme, vanilla extract, orange juice and zest, bay leaves and the cinnamon stick to the pan, then add the duck legs and any juices too. Cover with a lid and put the duck into the oven to braise until it is tender, about 2 hours.
CRISP: Transfer the duck to a baking dish and return the Dutch oven to the stove top. Preheat the oven to 400°F (205°C). When the oven is hot, roast the duck legs until the skin is crisp, about 15 minutes. Keep warm until ready to plate.
GLAZE: While the duck is roasting, remove and discard the thyme sprigs, bay leaves and cinnamon stick from the Dutch oven. Reserve 1 cup (240 ml) of the cooking juices and discard the rest. Bring the pan juices to a simmer over medium heat, then add the balsamic vinegar. Cook until the liquid has reduced by two thirds, then add the mushrooms. Cook until the mushrooms are tender and the liquid has reduced to a glaze, about 5 minutes. Serve the duck legs on a bed of the mixed mushrooms.
Pumpkin, sage and long slow cooking go hand in hand when it comes to the flavors and cooking methods that I turn to in the fall. In this dish, though, it’s the pork cheeks that are the hero! Unlike other braising-friendly meats, pork cheeks aren’t marbled with fat, and yet they still cook to fork tenderness because of the amount of connective tissue they contain, which means they’re another great source of collagen and amino acids. If you’ve been drinking your bone broth lately, you’ll know that collagen is fantastic for gut healing and something we want to incorporate into our diet as often as possible. This recipe is a great, tasty way to do that!
SERVES 6
3 lbs (1.4 kg) pork cheeks
1 tbsp (15 ml) coconut or avocado oil
2 cups (280 g) diced onion
6 cloves garlic, minced
2 cups (480 ml) Pork or Chicken Broth
15 oz (425 ml) pumpkin puree
1 tbsp (5 g) ground sage
1 tsp (5 g) salt
10 oz (300 g) fresh spinach leaves
BROWN: Trim the pork cheeks of any large pieces of fat. Discard the fat and pat the pork cheeks dry. Heat a large Dutch oven over medium heat and add the oil. Cook the pork cheeks, working in batches as needed, until they are nicely browned, about 5 minutes per side.
BRAISE: Reserve the pork cheeks on a plate and preheat the oven to 300°F (150°C). Reduce the heat on the stove top and add the onion to the Dutch oven. Cook until softened slightly, about 5 minutes, stirring occasionally. Add the minced garlic and cook for another minute, then pour in the broth and bring to a simmer, scraping up any browned pieces from the pan with a spoon. Add the pumpkin, sage and salt, stirring to combine into a smooth sauce. Add the browned pork cheeks back to the Dutch oven and pour over any meat juices. Put on the lid and cook, covered, for 3 hours.
REDUCE: Remove the pork cheeks from the oven and add extra salt to taste, if needed—the pork cheeks should be almost fork tender at this point. Return the pork cheeks to the oven without the lid and cook, uncovered, for a further 30 minutes to reduce and thicken the sauce. Take the pork cheeks from the oven and add the spinach to the pan, stirring it through the sauce to wilt just before serving.
Don’t let the list of ingredients fool you. This is a simple weeknight dinner that is packed with flavor and speedy to assemble. I always keep a bag of broccoli slaw mix on hand—it’s a great no-chopping-needed backup to round out a meal and here it’s the backbone of this family-friendly stir-fry, standing in for typical noodles. Broccoli stalks are a great source of calcium and potassium, so being able to include them without lots of prep is a double bonus!
SERVES 4
1 lb (454 g) ground beef
3 cloves garlic, minced
2 tbsp (12 g) fresh minced ginger
6 green onions, chopped
¼ cup + 2 tbsp (60 ml + 30 ml) Beef Broth
2 tbsp (30 ml) fresh orange juice
¼ cup (60 ml) coconut aminos
2 tsp (4 g) arrowroot powder
½ tsp gluten-free fish sauce
1½ tbsp (23 ml) ume plum or white wine vinegar
2 tsp (10 ml) coconut or avocado oil
12 oz (340 g) broccoli slaw mix
⅓ lb (150 g) fresh shiitake mushrooms, sliced OR 1 oz (30 g) dried shiitakes (see note)
8 oz (225 g) sliced water chestnuts, drained
BROWN: Heat a skillet over medium heat and add the ground beef. Cook the ground beef until it begins to brown, breaking up large chunks into bite-size pieces with the back of a spoon. While the ground beef is browned on the outside but still a little pink in the middle, discard any excess fat from the pan.
SIMMER: Add the garlic and ginger to the pan, cooking for a minute or so, until fragrant. Stir through the green onions, reserving the green ends for later. Add the beef broth and orange juice to the pan, then increase the heat until the liquid in the pan is bubbling gently. In a small bowl, whisk together the coconut aminos and the arrowroot powder. When the liquid in the pan has reduced by about half and the ground beef is fully cooked through, pour in the arrowroot mixture. Reduce the heat and cook until the liquid in the pan has thickened and the beef is lightly coated. Stir through the fish sauce and ume plum vinegar before removing the pan from the heat and setting aside for later.
STIR FRY: In a wok or very large high-sided skillet, add the oil over medium-high heat. When the oil is hot and shimmering, add the broccoli slaw mix, shiitake mushrooms and water chestnuts. Cook until the broccoli slaw mix begins to soften slightly, about 2 minutes. Add the seasoned beef mixture to the pan and cook until the beef is hot and the vegetables are tender. Serve immediately.
NOTE: If you’re using dried shiitake mushrooms, put them in a bowl and cover them with warm water to reconstitute before you start browning the beef. When it’s time to add them to the stir-fry, drain the water and pat the shiitakes dry before adding them to the pan. You can also swap the fresh shiitake mushrooms for any other mushrooms you and your family like.
NOT CRAZY ABOUT COCONUT? Omit the coconut aminos and salt. Add an extra 2 tablespoons (30 ml) of fish sauce and ½ tablespoon (8 ml) of vinegar.