Tools and Technique
The following is intended to provide you with tools to enable you to dive into these recipes. An amazing amount has been published on bread baking in the last twenty years, so for more in-depth detail, please refer to the Resources section (see this page), where I have listed my recommendations for further reading.
Measuring + Baking by Feel
Most of the world measures their ingredients by weight; in the United States, we still measure with cups. The problem with measuring by volume (cups) is that it is inherently imprecise, even with commodity roller-milled flour blended to specification, and an industry standard for the weight of a cup of roller-milled flour. Enter regionally stone-ground flour, whose lack of homogeneity is valued, where the weight of a cup of stone-ground flour varies from region to region and mill to mill, and the equation becomes even more challenging.
In bread baking, adjustments are made proportionately, and measuring by weight is pretty much essential. For this reason, in the following pages, all of the bread recipes require a digital kitchen scale. If you don’t have a kitchen scale, please get one. They are inexpensive and a worthy addition to your kitchen.
In the following nonbread recipes, volume has been included as a secondary measure. If you are without a scale, use the Spoon and Sweep method to measure your flour (and cocoa): Pour your flour into a bowl and stir it a few times, then lightly spoon the flour into the measuring cup until the flour mounds to nearly overflowing (don’t shake the cup or pack down the flour). Using a straightedge, cleanly level off the top of the flour, sweeping the straightedge over the top of the cup a few times. (Don’t use this method for brown sugar. For brown sugar: firmly pack brown sugar into your measuring cup, using a straightedge to level it off. It should hold its shape when emptied into your bowl.)
All of the following recipes were written by weight, which means as long as one has a scale, flour from any regional mill can be used. If you want to use stone-ground flour in recipes written for roller-milled flour, simply use the weight measure, and if weight is not provided, follow the industry standard that 1 cup of roller-milled all purpose or bread flour weighs 125 grams per cup; and 1 cup of roller-milled pasty flour weighs 120 grams per cup.
Because the recipes were created with metrics as the primary measure, you’ll find that volume equivalencies vary slightly across recipes. Sometimes ½ cup of butter will weigh a gram or two more or less in different recipes. This isn’t an error. This is written so that those using the volume measures don’t have to measure super precise quantities, such as ½ cup plus 1⁄16 teaspoon.
Beyond measure, even with the greatest precision, one may need to make adjustments (whether stone-ground or roller-milled). In bread applications, you may need to add or withhold some of the water (the value of becoming acquainted with Baker’s Percentage, this page) is having this easy tool at one’s disposal to make adjustment to a bread formula). And in pastry applications, developing an intuitive sense for what something should look or feel like will help you engage not only with the recipe, but also with the ingredients themselves, giving you the confidence to add a splash of this or a pinch of that. Repetition will make you a better baker, and opting for freshly stone-ground flour will amplify the flavor of your resulting baked goods, whether a total success or a work in progress.
Baking Terminology
Autolyze: This technique involves premixing your first two or three ingredients: flour and water, and sometimes leaven. The mixture is then covered and left to rest in the bowl for at least 20 minutes and up to 4 hours, or even longer (this longer period is without leaven). This process jump-starts fermentation by activating the amylase enzymes in the flour, which convert starch to sugar, which in turn feeds yeast. It also allows for improved absorption of water (hydration) in the dough. And it begins the process of gluten development.
Couche: A linen cloth used for the final proofing of shaped, unbaked loaves. The cloth is floured, and the shaped loaves are placed side by side on the cloth, with a folded crease of cloth dividing each.
Hydration: This simply refers to the liquid in a dough. On the ideal amount of hydration, Sharon Burns-Leader says, “Everyone and their mother has an opinion about which hydration is best. There is no ‘best.’ There’s just bread.”
Leaven: The substance that enables dough to develop into a risen loaf of bread is known as the leaven. This can be commercial baking yeast or a natural leavening agent such as sourdough. Although the term sourdough is used interchangeably to refer to natural leavening, not all natural leavening is technically sourdough, and thus not all sourdough is sour. We have provided more than one technique for making natural leavening; for simplicity’s sake, leaven will be the term used in the following bread recipes when natural leavening is called for, as opposed to commercial baking yeast.
Pre-ferment: A portion of the dough that is made several hours before mixing the final dough.
Proof: This is the final fermentation or rising of a shaped dough. This period allows the gases formed by fermentation to expand into a risen loaf. Aim for loaves to be 85 to 90 percent proofed when loading them into the oven; learning what this looks like takes some time and repetition. One approach to check if your dough is ready is with the pad of your finger, gently make an indentation, pressing down about ½-inch deep, in the center of your dough for 2 seconds. If the indentation quickly springs back, your dough is not ready. If it slowly and evenly retreats, leaving just a shadow of the indentation, then your dough is ready to load into the oven. If it does not spring back at all, the dough has overproofed, which will result in a flattened loaf, as the gluten strands have lost their strength.
Scald: A portion of flour covered with boiling water and then allowed to soak for some number of hours is known as a scald. Scalding a portion of the flour to be used in a dough partially gelatinizes the flour’s starches, contributing pliability to the dough. It also allows for increased hydration in the dough.
Score: The surface of proofed, shaped unbaked loaves is scored with a razor or other sharp blade before the dough goes into the oven to create an intentional pattern for expansion to occur.
Sourdough Discard: This is what is removed from your sourdough before feeding your sourdough. It can either be composted or used in recipes such as Hemp Crisp Breads (this page) or Mississippi Market Galettes (this page).
Warm water: When warm water is called for, aim for 85°F to 90°F.
Equipment
Baker’s lame or razor blade: Used to score your proofed loaves.
Bowls: I like stainless-steel bowls and am well served by a few small (4¾-inch) bowls and a couple medium (8-inch) and large (11-inch) ones.
Digital scale: I prefer OXO scales, but everyone has their favorite.
Dough knife (aka bench knife or bench scraper): This is a metal scraper with a wooden handle.
Dutch oven: Made from cast iron or enameled cast iron, the heavy, tight-fitting lid of the vessel traps in the steam, contributing to both oven spring and a crisp, caramelized crust. Other forms achieving the same concept (an enclosed baking vessel that traps the steam) is a Baking Clouche and Combo Cooker.
Nearly all the hearth-style breads in this book range from 510 grams to 1,500 grams in weight. A large 5½-quart Dutch oven, about 10½ inches in diameter and 4¾ inches deep, should cover most of the bases in terms of various bread sizes (though having an extra large, 7¼-quart one, at least 13 inches in diameter, will enable you to bake the large miche from Flat Rock Bakery on this page and Weaver Street Market Bakery on this page).
Another point of reference is choose a Dutch oven that is larger in diameter than the basket your loaves proof in.
Loaf Pans: Most of the following rye bread recipes call for a Pullman loaf pan (either a 9 x 4-inch or a 13 x 4-inch). These straight-sided pans are ideal for rye-heavy breads, providing the characteristic square bottom and assisting in more even baking.
Parchment paper
Pastry brush: A silicone brush is easy to clean, though I prefer a 1½ to 2-inch natural bristle brush.
Plastic dough scraper(s): I religiously use two different plastic dough scrapers—a flexible one that is also known as a bowl scraper, and a hard plastic (less flexible) one, that professional bakers know as “the orange scraper,” though they’re not all orange.
Proofing basket (aka banneton or brotforms): These breathable baskets used for final proofing of shaped loaves come in various sizes and shapes—oblong, round, or even triangular. They can be lined with linen or unlined (which results in a lovely impression of the basket on the finished loaf). The size of the basket depends on the size of your loaf. The breads in this book range from 510 grams to 2,000 grams. Other than the miche that require a round proofing basket, I use oval baskets left over from my bakery—oval wicker-style baskets I obtained from a restaurant supply store (sold as “bread baskets,” for serving, not proofing bread). They measure 9 inches long x 7 inches wide x 3 inches tall and are made of a poly material, so they can be washed. With these, I forgo the linen cloth and just flour the baskets well.
Oval baskets:
8-inch basket—small loaf (500 to 600 grams)
9-inch basket—medium loaf (up to 850 grams)
10-inch basket—large loaf (up to 1,200 grams)
13-inch basket—extra large loaf (2,000 grams)
Round baskets:
10-inch Basket—large loaf (1,500 grams)
11½-inch Basket—extra large loaf (2,000 grams)
Silicone baking mat: A great option in place of parchment paper on a baking sheet.
Thermometer: I like to have more than one type, both instant-read digital and dial for safe measure, as batteries die and I have found dial thermometers can lose their accuracy over time.
Ingredients
MALT FLOUR: In the following recipes, when malt flour is called for, this is a diastatic malt. We mill Riverbend Malt House’s floor-malted barley that bakers use in bread application to assist in fermentation, or in pastry as a flavor-forward sweetener.
Nuts and Seeds: Opt for raw, and organic if possible. Because of the high oil content, nuts and seeds should be stored in a cool, dark place. I store all of mine in air-tight containers in the freezer.
Salt: The function of salt, especially in bread, is no small thing. In bread applications, the autolyze period, during which the flour and water have time to integrate without the obstruction of salt; jump-starts fermentation. Salt slows down the fermentation process to a pace that results in a balanced flavor. It also tightens the gluten structure of the dough, providing strength. With just three or four ingredients, the choice of salt used matters to me. In all the recipes in this book, fine sea salt is called for. In my own bakery, I used Celtic Sea Salt, which is mineral-rich and unrefined.
Sweeteners: When granulated sgar is called for, opt for an unrefined organic cane sugar, ideally. Where sorghum syrup is called for, one can use cane molasses (though not blackstrap) as a substitute, but adjustments may need to be made, as sorghum is sweeter than molasses, so one may want to increase the amount of sugar called for, up to one-third of the amount specified.
Water: I highly recommend using filtered water in general, and specifically in bread making. Chlorinated water straight from the tap can interfere with microbial activity, and so narrowing the scope of one’s conditions can lead to greater success.
Baker’s Percentage
For all of the following bread recipes, baker’s percentage can be found listed in the Baker’s Percentage Index (this page). If you’re not familiar with baker’s percentage, it is the percentage by weight of the ingredients in relation to the flour in the recipe. For example, if water is shown with a baker’s percentage of 75, this is 75 percent of the weight of the flour. Why provide this information? Baker’s percentage is an incredibly useful tool for understanding a recipe or formula (bakers don’t actually follow recipes, we follow formulas).
The basic architecture of a bread formula is flour, water, leaven, and salt. Understanding these components in relation to each other reveals a lot—whether a dough will be wet or stiff, or when considering fermentation time; for example, in many rye breads, one will see a much higher percentage of leaven than in most wheat bread formulas. Baker’s percentage is also a tool for the baker who wants to alter a formula, for example, by increasing the water (the hydration) in a dough. Learning how to use baker’s percentage enables you to make changes to a formula while adjusting the ratio of ingredients proportionately. As a baker running my Natural Bridge Bakery, having this tool at my disposal allowed me to methodically take risks, going beyond the established limits of a bread formula. You can use the following bread recipes/formulas without engaging with baker’s percentage, but don’t let it intimidate you. The value of having this in your baking toolbox cannot be understated. It becomes especially relevant when working with stone-ground and regional flours, as these flours have not been blended to a specified industry standard (although even an industrial roller-milled flour blended to spec will have variation, as it is an agricultural product).
Because baker’s percentage expresses the proportion of ingredients by weight as it relates to the flour in a recipe, the baker’s percentage of flour always equals 100. The most basic way to understand this is to consider a dough made with 1,000 grams of flour (I credit the French for this approach, and baker and author Chad Robertson for writing it down and sharing it with the rest of us):
|
Ingredients |
Quantity |
Baker’s percentage |
|
Flour |
1,000 grams |
100 |
|
Water |
800 grams |
80 |
|
Leaven |
200 grams |
20 |
|
Salt |
20 grams |
2 |
In the above bread formula, the water, or hydration, of the dough is 80 percent, the leaven is 20 percent, and the salt is 2 percent; 800 grams, 200 grams, and 20 grams respectively. If one wanted to pull back on hydration (decrease the water) to, say, 75 percent, then the quantity of water would be 750 grams.
To take this a step further, said formula makes 2,020 grams, or just over 2 kilograms, of dough:
|
Ingredient |
Quantity |
Baker’s Percentage |
|
Flour |
1,000 grams |
100 |
|
Water |
800 grams |
80 |
|
Leaven |
200 grams |
20 |
|
Salt |
20 grams |
2 |
|
Total |
2,020 grams |
202 |
The equation is as follows:
Flour: (100 ÷ 202) x 2,020 = 1,000 grams
Water: (80 ÷ 202) x 2,020 = 80 grams
Leaven: (20 ÷ 202) x 2,020 = 20 grams
Salt: (2 ÷ 202) x 2,020 = 2 grams
Are you are still reading? Taking this even deeper, if you wanted to use baker’s percentage to convert a bread formula from roller-milled flour to stone-ground flour, you would likely want to increase hydration to account for the higher percentage of soluble fiber in stone-ground flours, and perhaps reduce the leaven, as there is often higher enzymatic activity in stone-ground flours as well as a higher quantity of minerals and sugars, resulting in a more active dough. You could dive in deep with this, or simply proceed with the formulas as is and keep baking, since by far the best way to understand bread baking is by repetition.
Leavening
There are many ways to create natural leavening or a sourdough culture, each harnessing yeast and bacteria to leaven bread. We offer a couple different methods. The first, made from whole rye flour, is a liquid leaven; the second, made from whole-wheat flour, is a stiff leaven. Liquid and stiff refer to the amount of hydration, or water, in relation to the amount of flour. Although in the following pages, wheat leaven is called for in some recipes while rye leaven is called for in others, you don’t need to keep two different cultures. The starter is the seed that, with the addition of flour and water, will become the leaven for your bread, and it can be pulled from either a wheat culture or a rye culture. That being said, for my Natural Bridge Bakery, I kept a wheat culture, a cracked rye culture, and a Khorasan (Kamut) culture, and at one point I also kept a rye flour culture and a spelt culture. Each had a different scent. They were part of my bakery’s family. I could have whittled it down to one culture—I just didn’t want to.
Now for the adventure to begin, Sharon Burns-Leader of Bread Alone Bakery sets the stage for us and then walks us through building a sourdough culture with rye flour. I bring up the rear with instructions for building a desem culture with whole-wheat flour.
Sharon’s Pro Tips
Feed the Baby: I call the daily refreshment of the sourdough “feeding the baby,” as in, “Did you feed the baby?” It has been my personal experience that folks rarely forget to feed the baby, and if they do, bad things happen. “Feeding the mother,” on the other hand, is a routinely overlooked kindness. Yes, this should change, but until it does—keep feeding that baby.
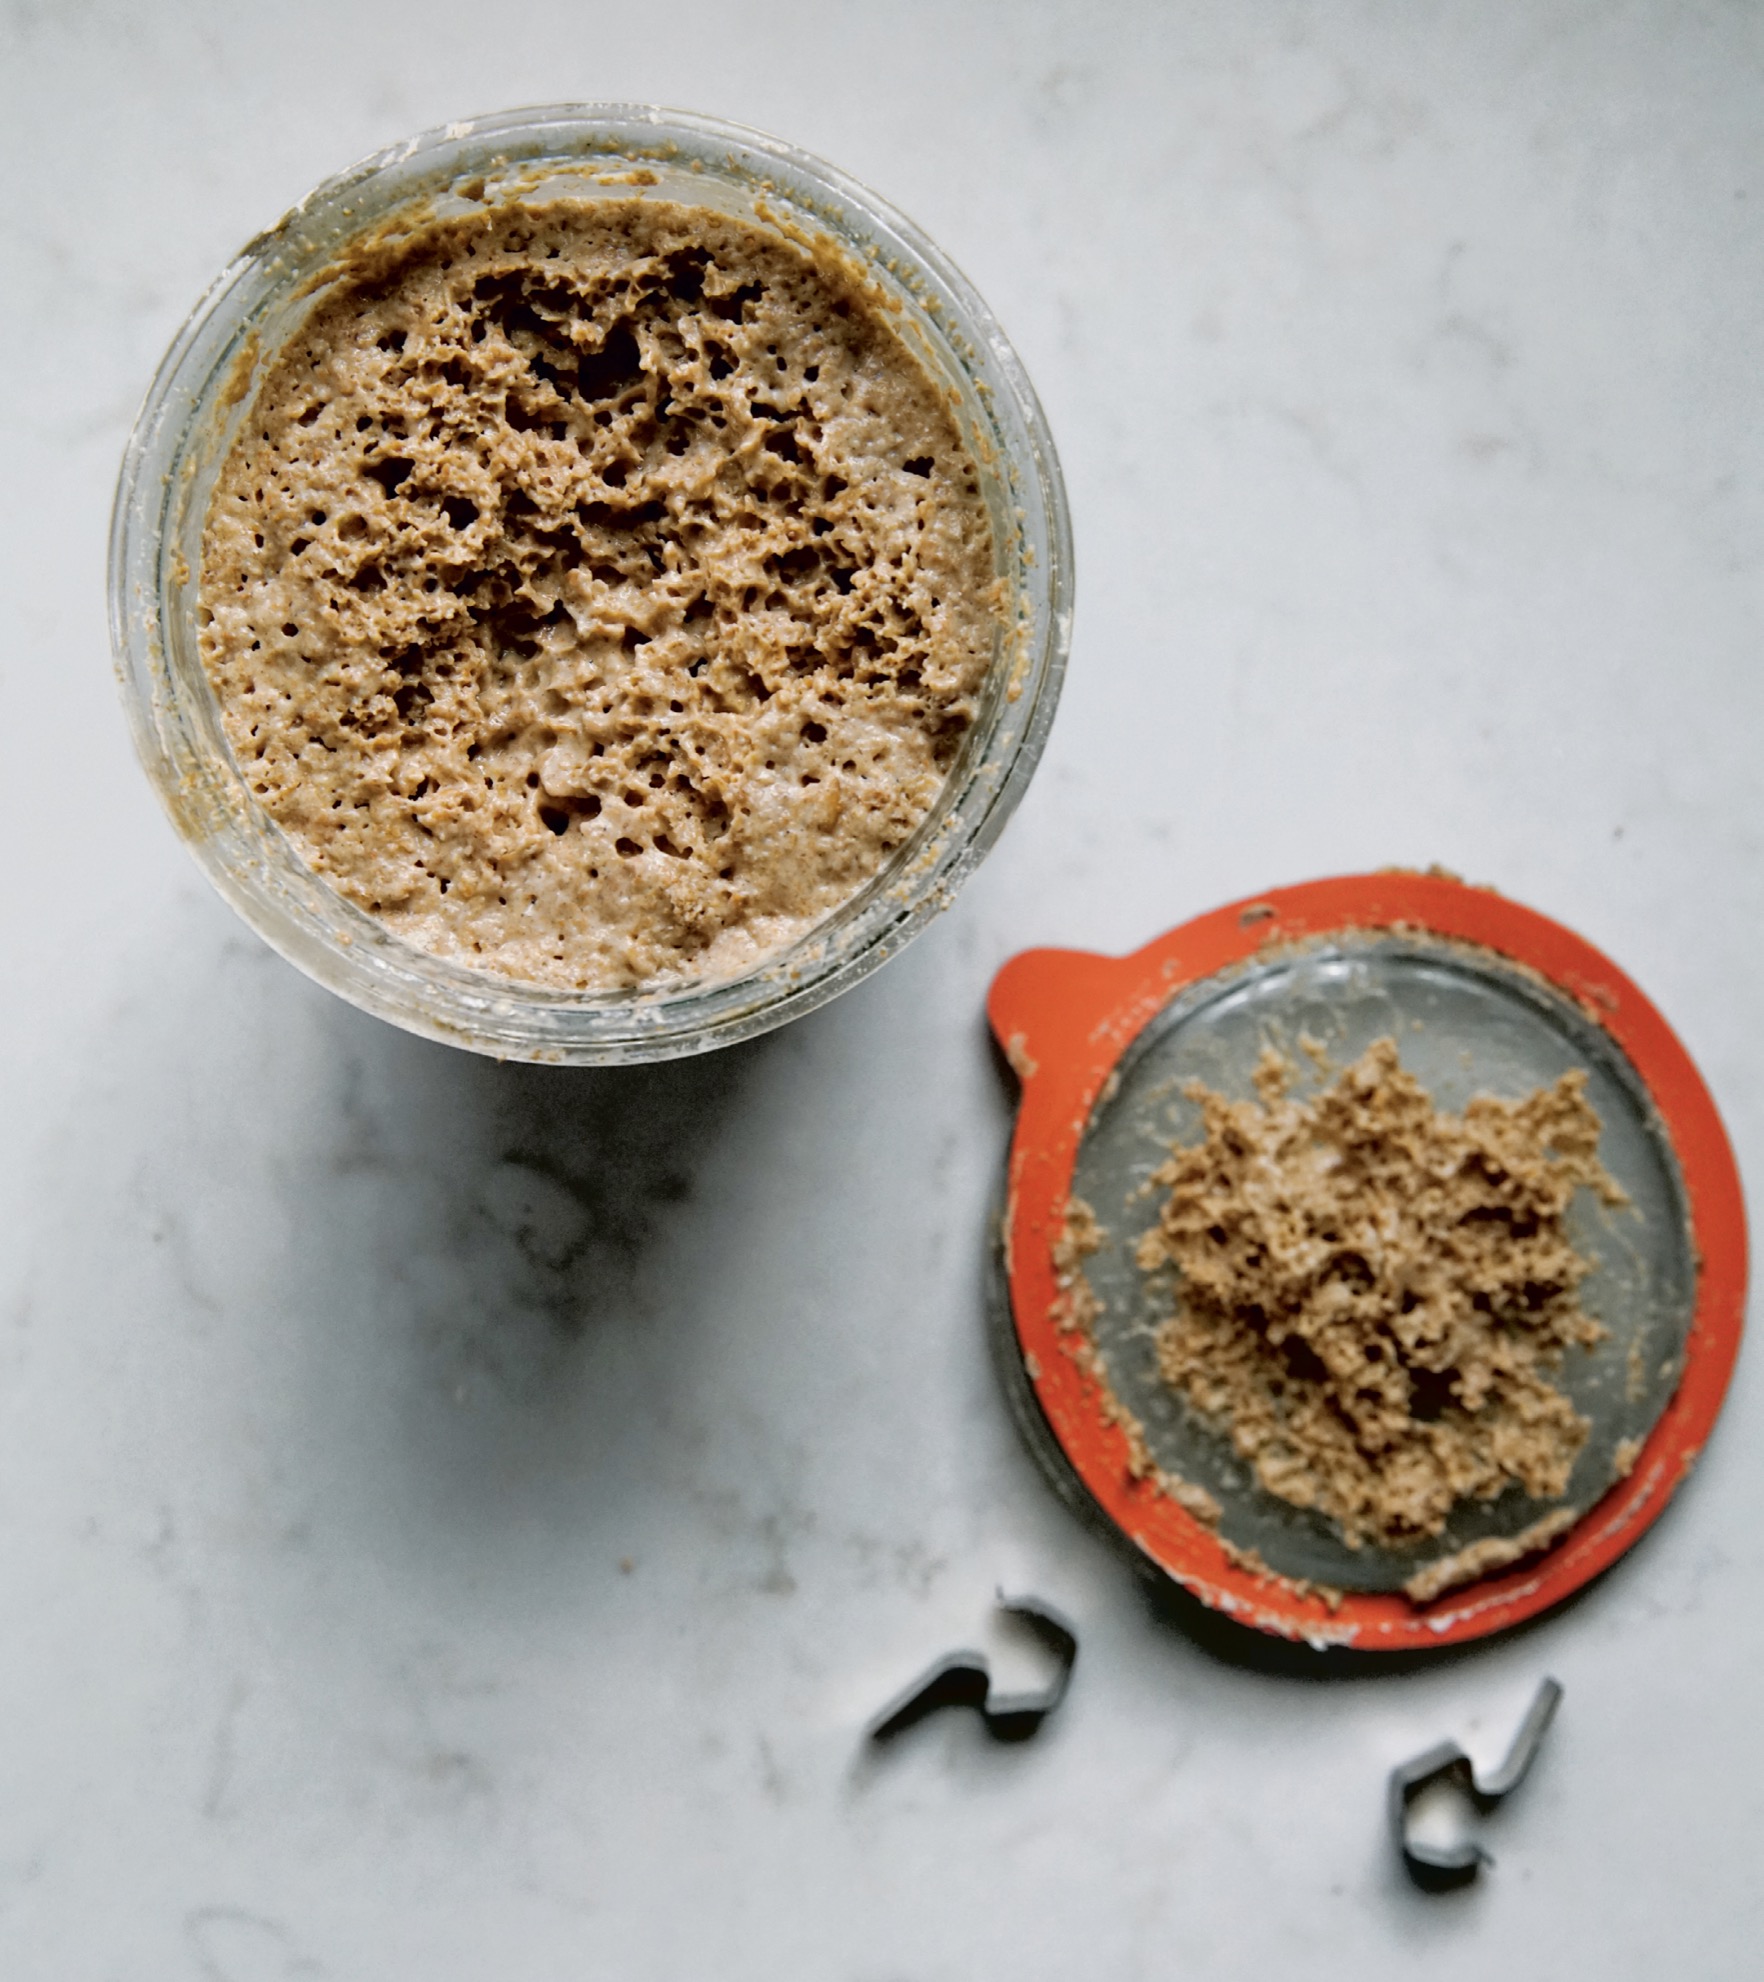
DISCARD AND FEED: Before you can “feed the baby,” you will first discard or remove a portion of your sourdough. We discard before we feed so that the quantity of sourdough does not grow exponentially, and also, so that the proportion of fresh flour (or food for you sourdough) remains relatively the same.
Containers with Instructions on the Lid: Take two containers (I like Weck jars) that share one lid size. Using masking tape and a marker, put the feeding instructions on the lid. Try to feed the baby daily by using one clean container to add the starter, flour, and water according to the instructions on the lid. Discard (or use the leftover baby in Hemp Crisp Breads [this page] or Cornmeal Crackers [this page]) and replace the lid. Clean the soiled container for the next day’s use.
Float Test: While this is not 100 percent accurate, it is a good indication that there is enough microbial activity in the flour-water network to rise a loaf of bread: Take a jar of water and place a teaspoon of ripe starter on the surface. If it floats, it may give you a nice loaf. The blob of starter should stay together in a blob and float. If it dissipates and floats, it’s probably overripe and should be fed at least twice over a twenty-four-hour period to bring it back in balance.
NOBODY PUTS BABY IN A CORNER: If you need a break from feeding the baby, mix in twice the amount of flour you usually use to create a thick, dry starter. Place the baby in the refrigerator. When you feel up to feeding the baby as before, pull from the refrigerator and refresh it by adding water and flour as usual, keeping it on the counter at room temperature.
Sourdough Thoughts
by Sharon Burns-Leader
Bread Alone Bakery, Boiceville, New York
Starting a culture is a bit of a misnomer. You aren’t starting anything. You are a vehicle for creating conditions in which a culture can grow. Kind of like throwing a party.
If you want to have a successful party, you think about things like whom you will invite (two acerbic wits are one too many, for instance), what you will provide for refreshments (yes, Virginia, there is such a thing as too much mezcal), and where you will entertain your guests (maybe just close the door to the den). You think about what time folks will arrive and how long they will stay. If it’s a hot time of year, you think about staying cool, or during the winter months, you center the activity around the fireplace.
In effect, you are creating the correct atmosphere for maximum fun. You are—if you’ll permit a lame baker’s pun—fermenting the fun.
Baking is just like that.
Baking with sourdough takes the party to the next level. Yes, perhaps a keg party was fun once, but now you enjoy craft beers made from elderberries and it’s time to kick it up. Lose the commercially processed yeast and the wine coolers and learn how to party the old-fashioned way.
Natural leavening requires a maximum infusion of yeast cells grown in the organic manner: over time. This last item is the most important ingredient of all. Time. The other two ingredients—flour and water—need time applied by a conscientious human in order to maximize the potential for fermenting grain. Fermentation opens up a host of microbial and enzymatic activity, which together produce an edible, nourishing, endlessly flavorful baked item that can feed multitudes and cause grown women to cry—both from delight and from utter frustration. But enough about my life, let’s get you started.
Building a Sourdough Culture
This process will take five days, or longer. Try to mix at the same time every day. Use a clear jar or container so you can see the fermentation. Keep the mixture covered and on the counter. Although you can use whatever flour you prefer, organic whole rye flour provides maximum potential for natural yeast presence. Use filtered water if your tap water is chlorinated.
DAY 1
|
Ingredient |
Quantity |
Baker’s Percentage |
|
Organic rye flour |
60 grams |
100 |
|
Water |
80 grams |
133 |
Mix the flour and water thoroughly.
DAY 2
Mix thoroughly, but no need to add any water or flour.
DAY 3
You should see tiny bubbles today. (If you don’t see bubbles, mix again and wait until tomorrow to continue—just pretending it’s still Day 3.) Now you start to “discard and feed” your culture.
|
Ingredient |
Quantity |
Baker’s Percentage |
|
Organic rye flour |
60 grams |
100 |
|
Water |
80 grams |
133 |
|
Baby |
50 grams |
83 |
In a clean jar, dissolve the baby (aka the Day 2 mixture) in the water. Add the flour.
DAY 4
|
Ingredient |
Quantity |
Baker’s Percentage |
|
Organic rye flour |
60 grams |
100 |
|
Water |
80 grams |
133 |
|
Baby |
50 grams |
83 |
In a clean jar, dissolve the baby (aka the Day 3 mixture) in the water. Add the flour.
DAY 5
|
Ingredient |
Quantity |
Baker’s Percentage |
|
Organic rye flour |
60 grams |
100 |
|
Water |
80 grams |
133 |
|
Baby |
50 grams |
83 |
In a clean jar, dissolve the baby (aka the Day 4 mixture) in the water. Add the flour.
Your sourdough baby may be ready to make a starter from today; 5 to 6 hours from the last time you fed the baby, do a float test (see this page). Also smell and taste your starter: it should be sweet and tangy—musty and pungent are indications of a starter out of balance!
If your starter needs more time and attention (yes, sometimes it takes longer, due to temperature, available wild yeast, impurities in water, etc.), just keep up this daily feeding schedule:
DAYS 6–10
|
Ingredient |
Quantity |
Baker’s Percentage |
|
Organic rye flour |
60 grams |
100 |
|
Water |
80 grams |
133 |
|
Baby |
50 grams |
83 |
In the following bread recipes, to make the leaven, the starter is pulled from the “baby.” Once your sourdough baby is mature, she can be stored in the refrigerator for up to 2 weeks without feeding, though she should be fed at a less hydrated state. One hundred percent hydration (equal parts flour and water) is a good measure, though she can be kept in even stiffer form if she is getting away from you before you are able to bake. By giving her more flour, or less water, you are slowing her down. By keeping her at cooler temperatures (in the refrigerator), you are slowing her down.
Dr. Erin McKenney on Sourdough
Humans have been baking bread for over fourteen thousand years. Bread has nourished us across the world and across time, making microbial cultures central to human culture. The microbes in sourdough starters digest sugars and starch to produce carbon dioxide, acids, and other flavors, transforming a glorified papier-mâché paste into a thriving microbial garden that increases the nutritional value and shelf life of bread. And those of us who keep starters are transformed, too. Of all the public science projects undertaken by the Rob Dunn Lab at North Carolina State University, the participants in the Sourdough Project are uniquely invested, not only in learning about their sourdough starters but also in the scientific process. Sourdough bakers tend to their starters daily, weekly, or biweekly. With that care over time, bakers build an intimate knowledge of their starter’s behavior, its “preferences” for certain flour types, temperatures, and other conditions; they build a more direct, physical connection as well, as the starter is colonized with microbes from the home—in our dust and on our bodies—and it gives as much as it gets. Recent research by Dr. Anne Madden and Dr. Rob Dunn suggests that each baker bestows a personal microbial signature on their sourdough, which imparts unique flavors to their bread, and just as we change our sourdough starters, our starter changes us. When Anne and Rob studied the microbes on bakers’ hands, they found that bakers harbor up to ten times more Lactobacillus compared to nonbakers!
The average modern Western human spends up to 23.5 hours per day inside. Megan Thoemmes’s research comparing different styles of homes suggests that modern houses, so carefully sealed off from the outside environment, have become an echo chamber for bodily microbes and pathogens. Even something as simple as opening a window might help to let the outside in, to remind our immune systems what the world is like and help minimize risk of allergies. But how much more diverse the houses of bakers must be, with our sourdough microbes in the mix!
I have always loved bread. I grew my first sourdough starters as soon as I started my postdoctoral research on the Sourdough Project. But I continue to bake as a way to stay connected, both to other people who bake and to the daily wonder of microbial alchemy.
Building a Desem Culture
Not too long after discovering desem bread in The Laurel’s Kitchen Bread Book, I came upon Thom Leonard’s The Bread Book, in which he, too, devotes a chapter to this naturally leavened bread. Thom provides the most apt description of what makes the culture that leavens this bread so special: “Like good wine that is a product of the vineyard, fermented only by the indigenous organisms from the skin of the fruit, bread from this starter is truly a product of the wheat and of the earth from which it sprang.”
Freshly milled flour is the first step in the process. From this flour, one creates a stiff dough ball of flour and water, then buries the ball in a sack of flour, which is then stored in a cellar or basement or any other location that maintains cool temperatures between 50° and 62°F. I use the term naturally leavened as opposed to sourdough to describe desem, as the scent of a desem culture is anything but sour. The desem culture should be fragrant, expressing a fruitiness that hints of apple cider. Begin with a 5-pound bag of stone-ground organic whole-wheat flour, and use filtered water if your tap water is chlorinated. It takes about two weeks to develop a culture; from there, she can be stored in the refrigerator.
|
Ingredient |
Quantity |
Baker’s Percentage |
|
Whole-wheat flour |
50 grams |
100 |
|
Water |
25 grams |
50 |
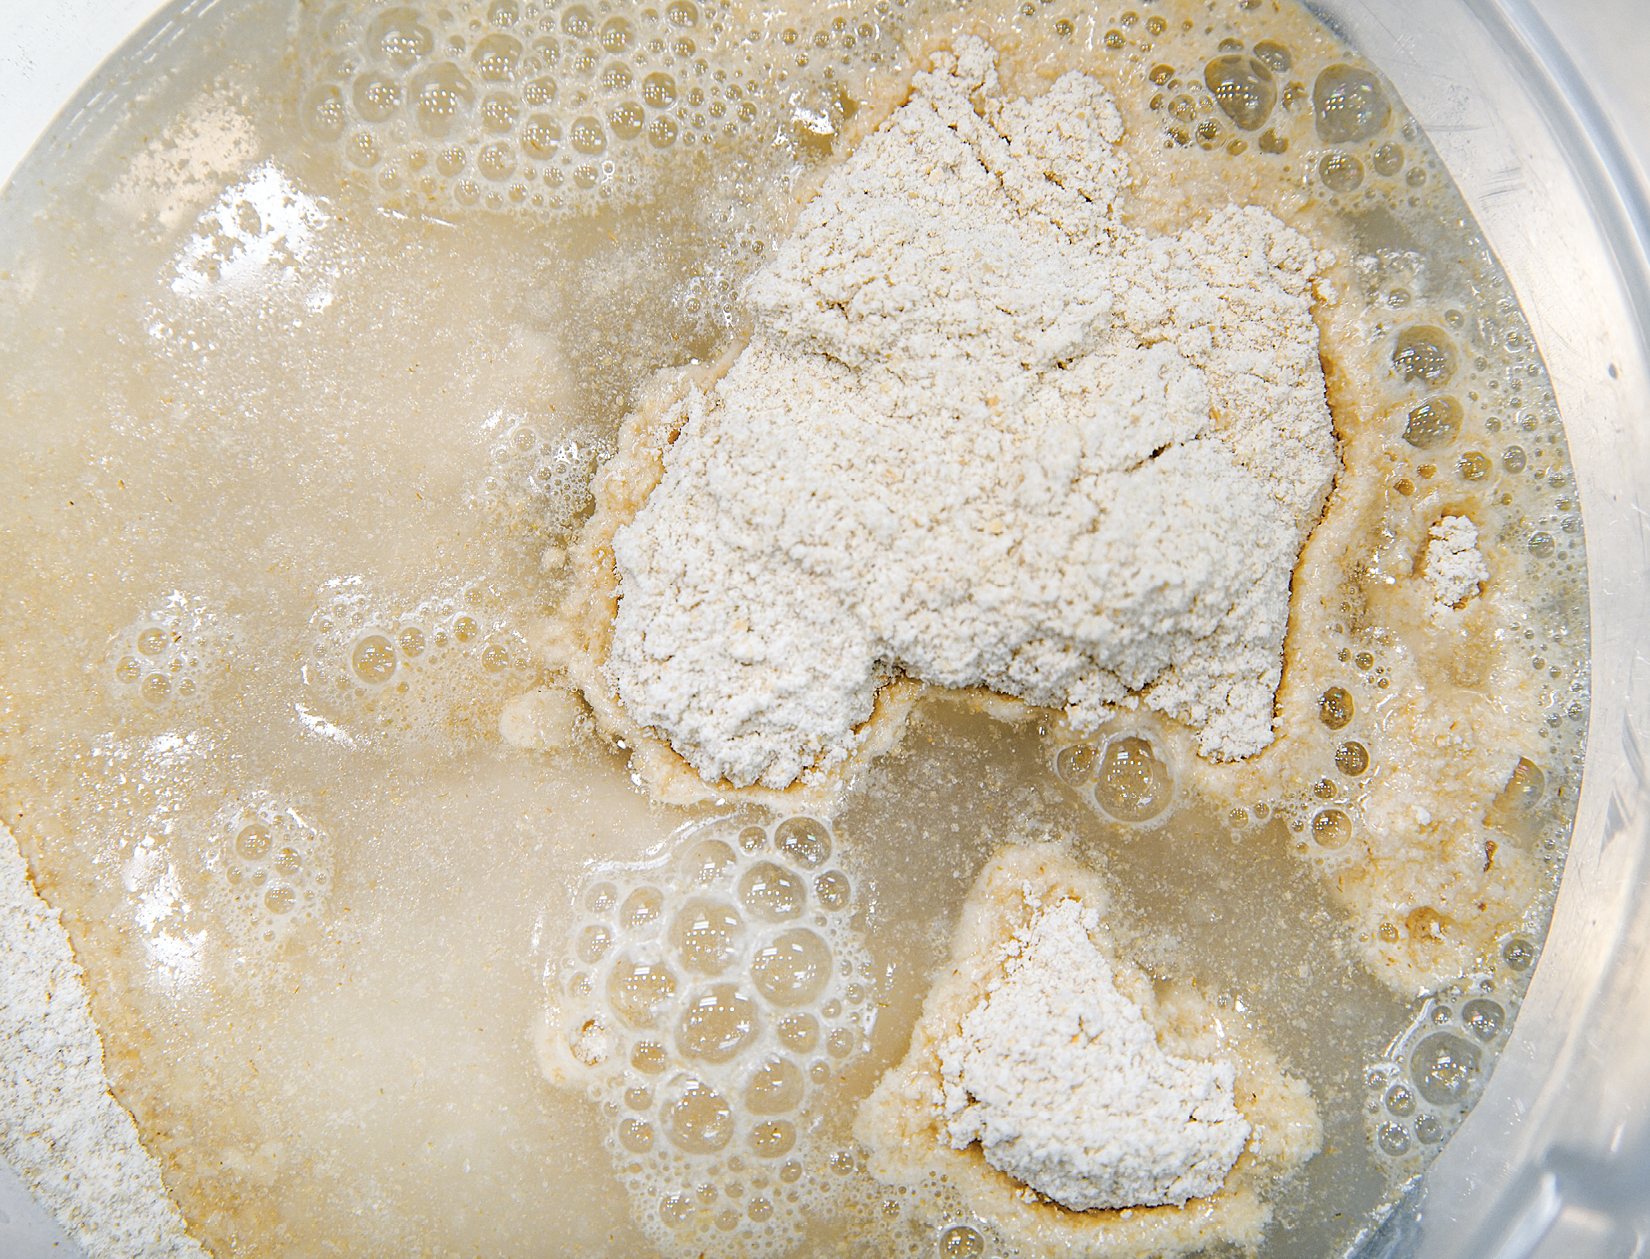
Measure the flour (drawing from your 5-pound bag) into a medium bowl and add the water. Mix and form into a stiff dough ball. Bury this ball deep into the bag of flour, about halfway down, so the dough is fully immersed and surrounded by flour. Close the bag and place it in a container such as a bucket or crock and cover with a lid. Store the container in a cool place, ideally a basement. You want the temperature to remain around 55°F (though if you end up with 62°F, that works, too—you will just have to feed her more often).
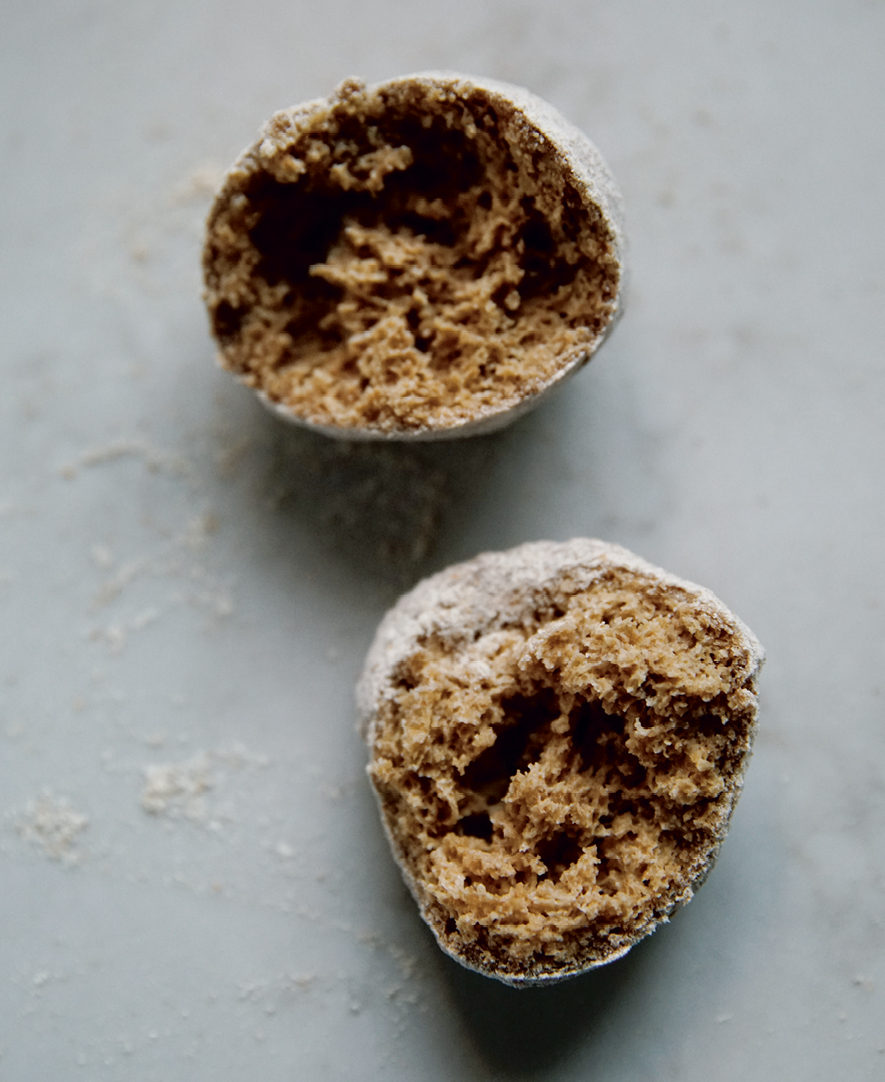
Every two or three days, retrieve the dough ball from the bag of flour. Initially, you’ll notice the exterior of the ball beginning to dry out; eventually, a rind will form. Pre–rind stage, use both hands to pull open the dough ball and scoop out the dough from the center, discarding the dried-out exterior. (Eventually, you will be simply peeling away the rind to access the dough within.) Measure 25 grams of water into a medium bowl and dissolve the dough in the water. Add 50 grams of flour (pulled from the 5-pound bag of flour). Mix and form into a stiff dough ball. Bury the ball into the bag of flour and store the bag as before.
Continue this process for two weeks. As the culture develops, take note of the scent. You’re aiming for a floral scent. Sometimes the developing culture can initially have an off smell and then land in the floral zone after a few days, so don’t worry if a few feedings don’t smell quite right; however, if she begins to smell very wrong (trust your senses), discard most of the dough ball—all but about a dime’s worth—dissolve the portion you’ve retained in 25 grams of water, and add 50 grams of flour. Mix and form into a dough ball, and continue the process as before, perhaps this time engaging with your developing culture daily, instead of every few days, to ensure success.
How will you know when your culture is fully developed? Trust your nose—as Sharon mentioned on this page, musty and pungent are indications of a starter out of balance. And there’s always the float test, described on this page.
I refer to my desem culture as my “mother culture” aka sourdough culture, or as Sharon prefers, “sourdough baby.” Once fully developed, she is stored in an airtight container in the refrigerator. In choosing the container, I personally prefer glass over plastic, and as a home baker, I use a half-pint mason jar, though a plastic pint container works, too. Place your mother culture in the container, then sprinkle a spoonful of flour on top, cover the container with a lid and store in the refrigerator.
To use, pull the required amount of starter directly from your mother culture. (The starter will then be extended to become the leaven for your dough.) To replenish what has been taken from the mother culture, she will be fed at a more hydrated state than when she was stored in the basement. The increased hydration accounts for the fact that she is now being stored at a colder temperature.
Maintaining Your Mature Desem Culture
|
Ingredients |
Quantity |
Baker’s Percentage |
|
Whole-wheat flour |
25 grams |
100 |
|
Water |
18 grams |
75 |
Before replenishing her, scoop out some of that excess flour that was sprinkled on top of the mother, plus about a heaping tablespoon of the mother culture and toss it (into the compost). Next, add water directly to the container with the culture, breaking apart the culture with a spoon (I prefer a tablespoon-size stainless-steel spoon). Then, add the flour and, using the spoon, mix into a cohesive form. Sprinkle flour on top, cover the container with a lid, and place the container back in the refrigerator. In the colder months, you may want to leave her out on the counter at room temperature for an hour or two just to wake her up a bit. You will establish a relationship with your culture and begin to understand her needs.
Rescuing Your Desem Culture
|
Ingredients |
Quantity |
Baker’s Percentage |
|
Whole-wheat flour |
25 grams |
100 |
|
Water |
18 grams |
75 |
|
Mother culture |
7 grams |
25 |
If your mother culture gets really out of balance or if it has been way too long since she has been replenished, you may need to rescue her. For this, get a separate container (another glass jar or plastic pint container), pull 7 grams from the center of your culture, and add it to your clean container along with 18 grams of water. Break apart the culture with a tablespoon-size spoon and then add 25 grams of flour and, using the spoon, mix into a cohesive form. Leave the container at room temperature; every 6 to 12 hours, scoop out and discard a heaping tablespoon of the mother culture, then replenish with 18 grams of water and 25 grams of flour. Continue this process until she comes back into good form. This may take three or four feedings, after which she can be drawn from as your starter, replenished, and placed back in the refrigerator.
Bread Method
I think what I love most about bread baking is that as long as you understand the basic principles, there is no one single method or sole approach. You can shape your baking schedule and adjust your methods to fit your particular set of circumstances. When I was apprenticing in Marin County, California, our conditions were ideal: we were tucked back in the hills above Tomales Bay and received daily four o’clock winds. It never got too warm, and while I was there, it was the dry season. The house where we baked hovered at a temperature of about 62°F, wonderful conditions for good fermentation (especially for baking desem, which loves cool temperatures). Our final proofing was done at 95°F and 100 percent humidity, an environment we created with a plastic-covered speed rack filled with proofing loaves and a hot plate at the base with a pot of boiling water producing steam.
When I left California to start my bakery in Tennessee, my ambient conditions were completely different. I ditched the final proofing setup and simply proofed my loaves at room temperature instead. After moving to North Carolina, I eventually added a cool room, so I could control some of my proofing conditions. My cool room’s temperature ranged between 48° and 52°F, so I did my bulk fermentation in the cool room for 12 hours and my final proofing at room temperature for a shorter period, always responding to the changing seasons. In the winter, my final proof might require rolling the speed rack of proofing loaves up close to the oven; summertime might require that I roll the rack back into the cool room, if the final proofing needed slowing down. When I shifted roles from baker to miller, I had to learn how to become a home baker, which came with its own learning curve. Without a cool room, instead of a long, slow bulk fermentation at cool temperatures, I shifted to a shorter bulk fermentation at room temperature, applying a series of stretches and folds, again responding to the conditions around me.
Most of the bread recipes in this book follow this method. It’s a good method, a solid foundation for a home baker, but if you want to veer from this path, do it. Experiment. This is just one method. The one golden rule with any approach is to be sure your leaven is fully developed before mixing the dough. Always pay attention to your baby.
Make the leaven
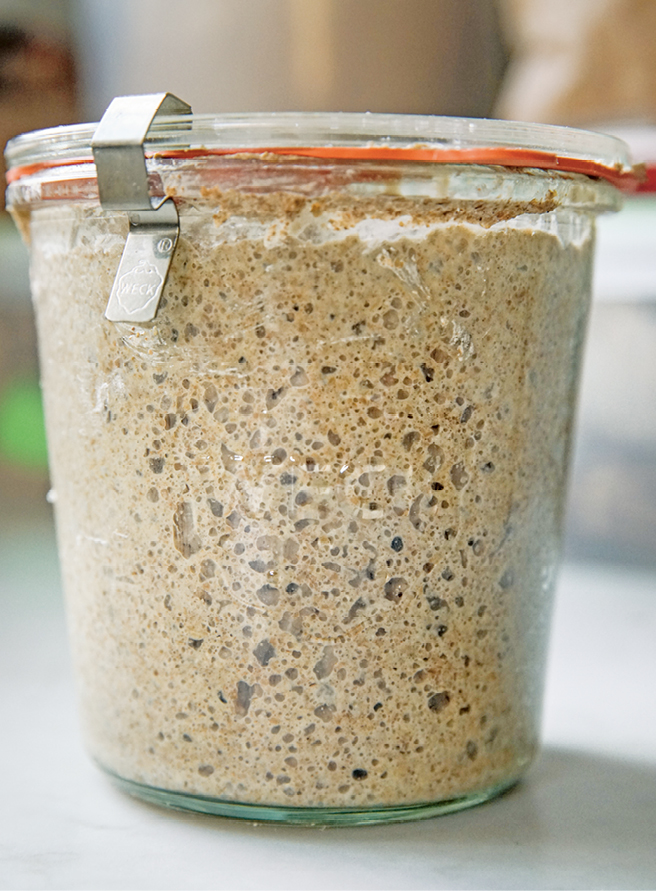
Measure the water into a clear container such as a Weck or mason jar (or even a clear plastic container; using a clear vessel allows you to see the fermentation in action), then add your starter (this is pulled from your mother culture or sourdough culture). Using a spoon (I prefer a tablespoon-size stainless-steel spoon) or your fingers, break apart the starter into the water. Add the flour and mix until fully incorporated. Cover with a lid and let stand at room temperature until fully developed before making the dough. This can take anywhere from 4 to 16 hours depending on how active your sourdough culture is, the temperature of your kitchen, and depending on the actual recipe—the amount of hydration, the amount of starter, and/or the particular flour called for in the recipe. All of these factors can affect the timeline. Using a clear container will help you understand what fully developed looks like, as you should see a series of bubbles and your leaven will have expanded, feeling aerated when scooped with a spoon. (Helpful hint: Place a rubber band around your jar to mark your undeveloped leaven so you can observe the growth in progress.)
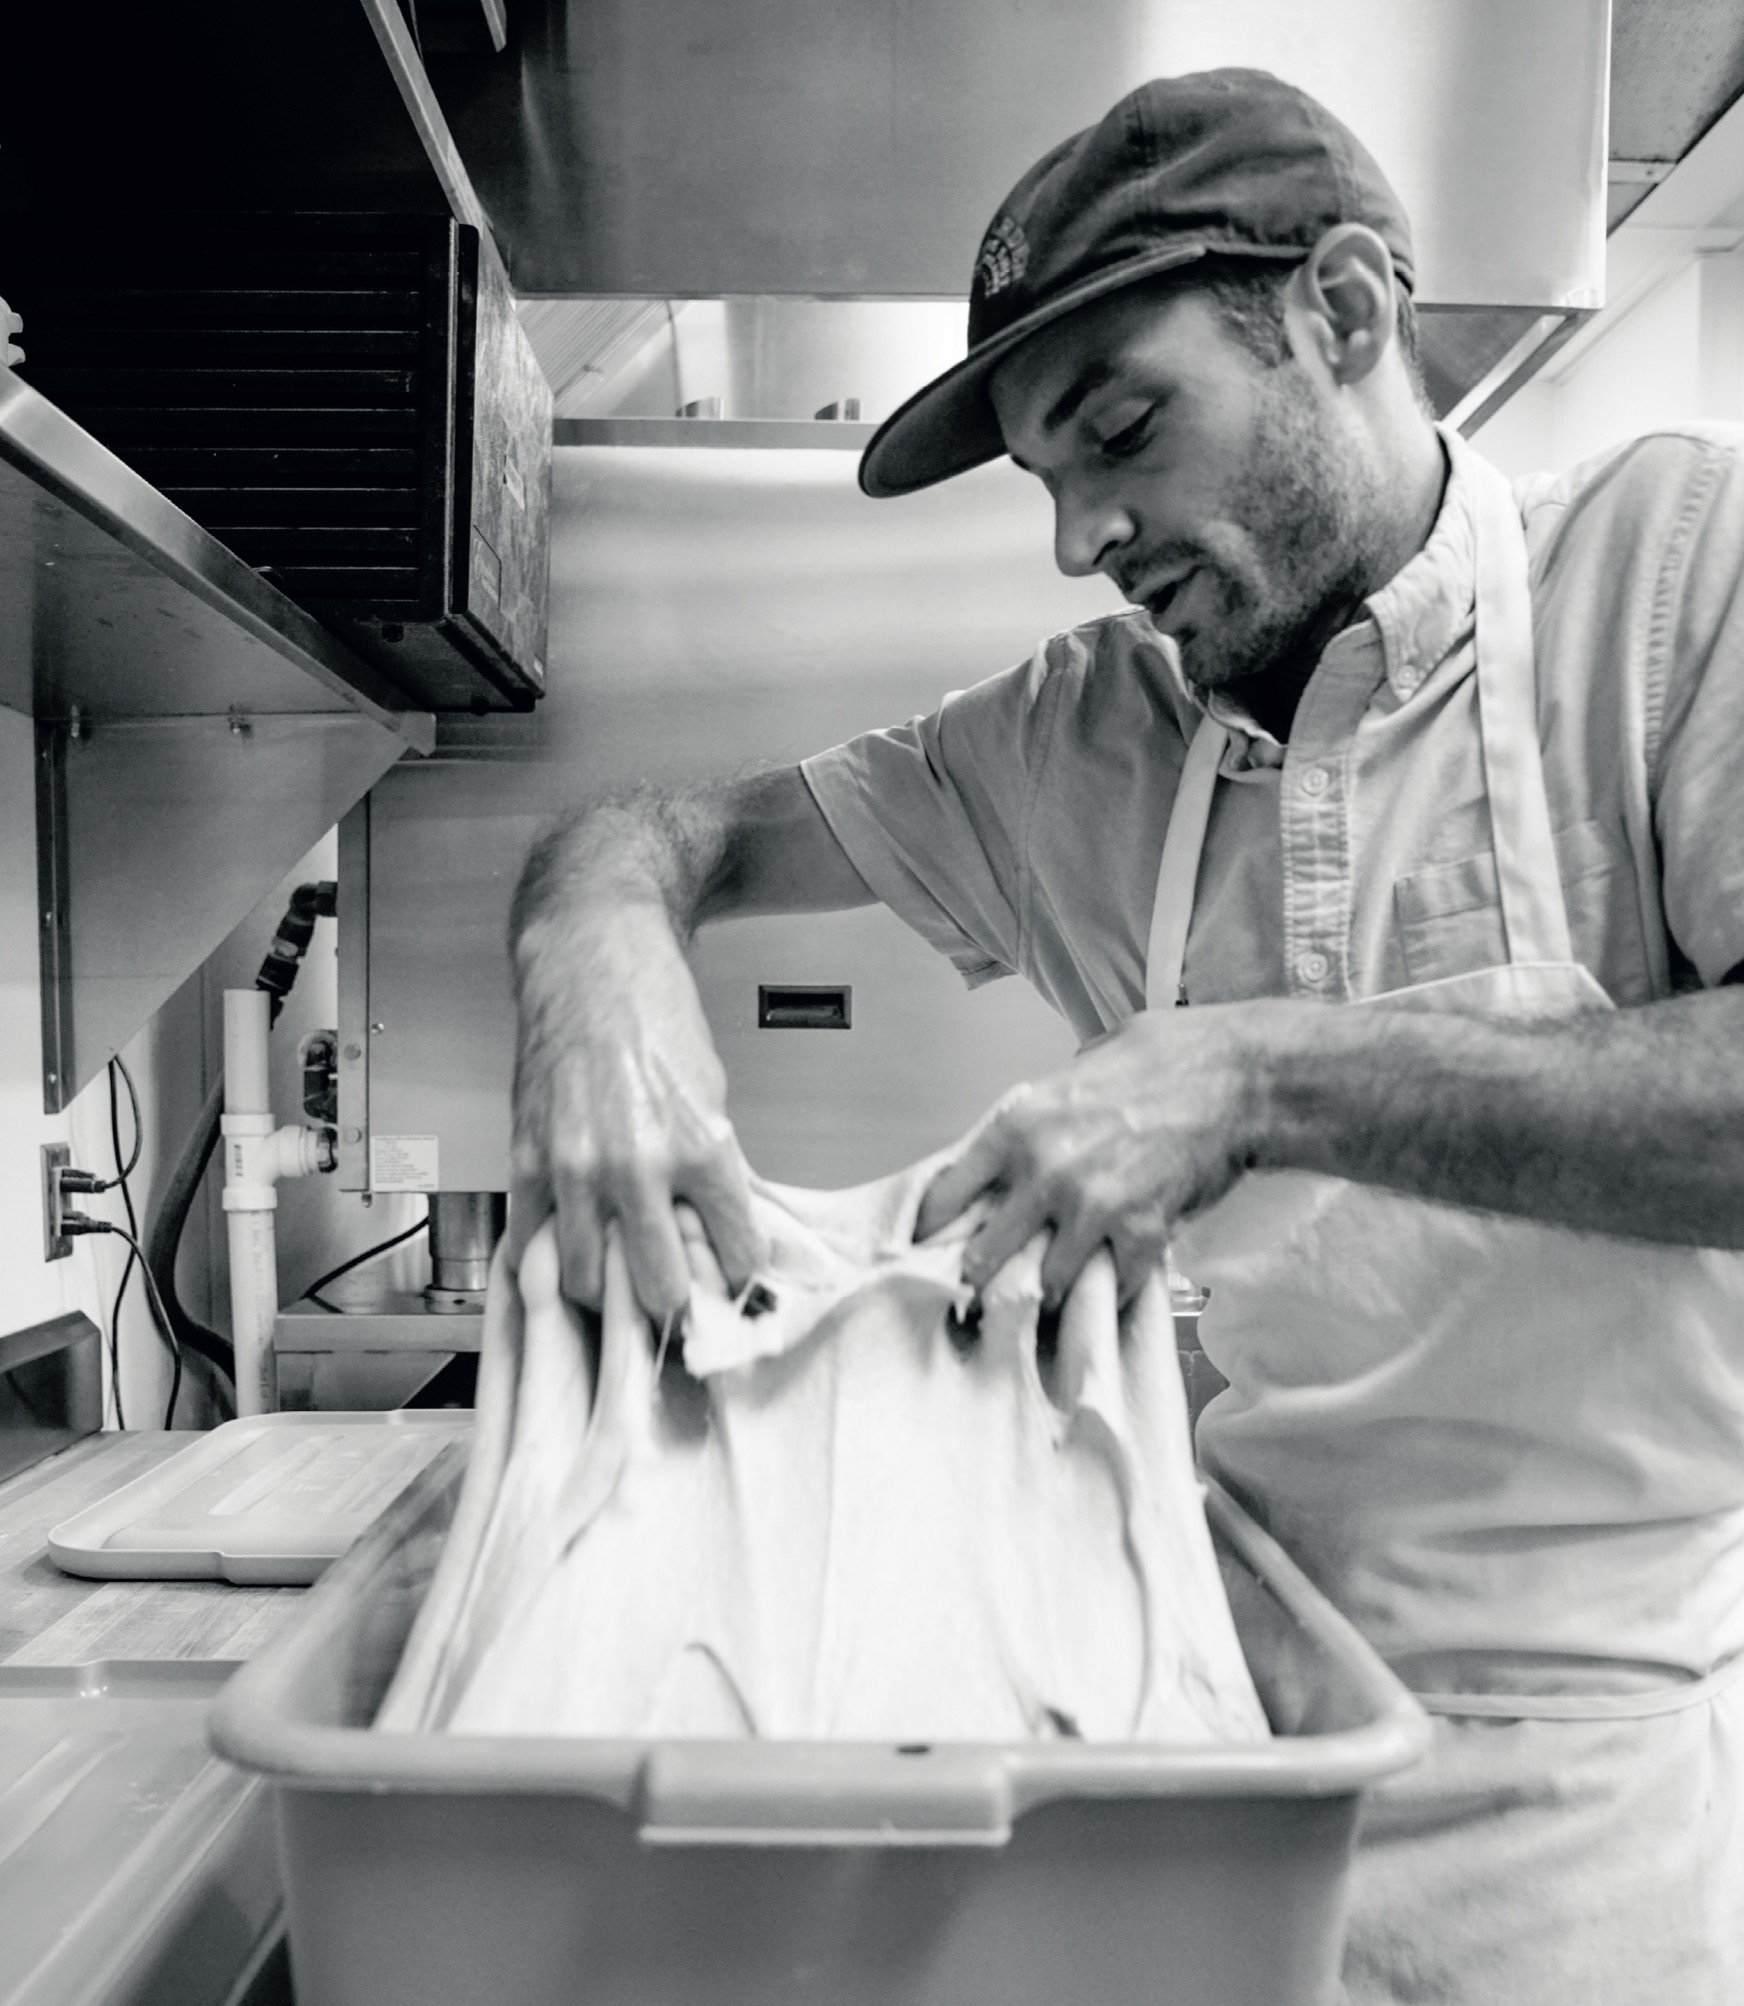
Baker Michael Matson of Nashville, Tennessee.
Make the dough
Step 1: Mix the flour, water, and culture (autolyze). Once your leaven is ready, measure your water into a large bowl, then add the leaven and dissolve it in the water. (For stiffer cultures, I squeeze the leaven between my fingers so that it breaks apart.)
Next, incorporate the flour: Add the flour to the bowl. Keep one hand clean and dry and use that hand to hold the edge of the bowl. With the other hand, take a flexible plastic scraper and scoop down underneath the ingredients, then fold them onto themselves. Continue this process while rotating the bowl. With each scoop and fold, rotate the bowl, continuing until the ingredients are fully integrated and have become a homogenous dough, making sure no lumps or dry bits remain. Cover the bowl with a cotton or linen kitchen towel and let the dough rest at room temperature for 1 hour.
Step 2: Add the salt. Sprinkle the salt evenly over the dough. You want to fully incorporate the salt into the dough, and there are various ways to do this. My approach is to fold the dough over itself. Have a small bowl of water within reach, and wet your hands just enough so they don’t stick to the dough, but shaking off any excess water so you are not incorporating too much water into the dough. Hold the edge of the bowl of dough with one hand, and use your other hand to fold the dough over itself, then repeat, rotating the bowl with each fold until you’ve done a full rotation (or four folds). Pour the dough out onto the counter and use the heel of one hand to push into the dough and with the other hand, fold the dough over itself, rotating the dough with each push-fold action; repeat until you’ve done a full rotation.
Step 3: Bulk fermentation, with stretch and folds. Bulk ferment the dough at room temperature, applying a series of stretch and folds to the dough every 30 minutes to 45 minutes for the first 2 to 3 hours. (I highly recommend writing out your stretch-and-fold schedule on a piece of paper and placing it near the fermenting dough; mark each stretch and fold off the list as you go.) To do this, dip your hands in water to keep from sticking to the dough, but shake off any excess water so you are not incorporating too much water into the dough. With both hands, grab the underside of a section of dough and gently stretch it out until you feel resistance (but be careful not to tear the dough), then fold it over the top of the mass of dough. Rotate the bowl (or container) a quarter turn and repeat until you’ve done a full rotation, then turn the dough over so the folds are tucked underneath. By pulling and folding and resting in between over a period of time, you are strengthening the dough and building the gluten network necessary to provide shape and structure to your bread. With each stretch and fold, you should feel the dough develop strength, structure, and volume. After the last stretch and fold, if you are working with a particularly slack dough or weaker flour, you may want to add an additional fold, then allow the dough to rest until it has increased in volume by 20 to 30 percent and appears smooth and billowy. For this period, you can either leave the dough in the bowl and cover it with a cotton kitchen towel, or you can transfer the dough to a container with a lid—ideally a clear glass or plastic one, so you can see what is going on from the side of the container. Bread ferments from the bottom up, so having that side view is quite helpful. Choose a container large enough to allow the dough to expand, but not too large, so that as it expands, tension is created by constriction as the dough pushes against the container (this will not occur in a container that is too large). This period of bulk rise can take anywhere from 30 minutes to 2 hours, and sometimes longer, depending on the time of year.
Step 4: Preshaping. The purpose of preshaping is to begin to form the eventual shape of the bread. This is done in stages in order to give the dough a chance to relax. To preshape, use a bench knife or your hands to drag the dough across your work surface to create surface tension while shaping it into a tight ball.
Step 5: Bench rest. This period of 15 to 30 minutes enables the dough to relax before the final shaping. Bench rest is definitely a term I learned once I became a home baker. In the bakery, bench rest just happens—during the time it takes to preshape all your loaves, the loaves have time to rest before their final shaping. At home, preshaping one to three loaves goes pretty quickly, so it is important to be mindful of allowing the dough to rest before its final shaping.
Step 6: Final shaping. This really depends on the bread you are baking and/or the loaf shape you desire, but the aim is to create surface tension so the dough holds its form during the long proofing and baking periods that follow.
To shape the dough, flip your preshaped loaf onto a lightly floured surface, so that the seam side is up. Lightly pat down the dough just a bit (do not punch it down or flatten it—just give it a light and gentle patting down). Fold the bottom third of the dough up toward the center and then fold in the sides. Take the top of the dough and fold it down to the center. Then fold the bottom up past the center so the shaped loaf is now seam-side down with surface tension created. Allow the dough to rest for a few minutes so that the seam seals itself under the weight of the dough.
If making a hearth loaf: Generously dust a proofing basket with flour (rice flour, or a mixture of rice flour and another flour, works especially well for dusting proofing baskets, as it keeps the cloth from sticking to the dough) or line a proofing basket with a linen cloth and dust the cloth well with flour. Then transfer the dough seam-side up to the prepared basket.
If making a pan loaf: With a pastry brush dipped in olive oil or melted butter (or a combination of both), grease a loaf pan. You can line the pan with parchment paper as well. To do so, cut parchment paper to fit the length of the pan and wide enough to cover the two long sides (you can allow the parchment to hang over the long sides of the pan for easy removal); grease the parchment as well. The narrow ends of the pan are left uncovered, so brush them with extra oil. Transfer the dough seam-side down to the prepared pan.
Step 7: Final rise or final fermentation. Let the shaped loaves rise in the baskets or pans at room temperature for 2 to 3 hours, then transfer them to the refrigerator for an additional 8 to 24 hours of cold proofing. The long cold proof will provide the most complex flavor but some prefer the more mellow flavor profile of a same-day bake. If you opt to forgo the long cold proof and do a same-day bake, begin to look for visual cues that the bread is ready after 1½ to 2 hours. Dip your fingertip in flour and gently poke the dough. If the indentation slowly and evenly rises back, it is ready to bake.
Step 8: Baking in a Dutch oven. Place a Dutch oven on the lowest rack in a cold oven; place the lid on the rack as well. Preheat the oven to 500°F for 1 hour.
When ready to load the dough into the oven, cut a piece of parchment paper larger than your loaf but small enough to fit into the Dutch oven (it’s okay if it comes up the sides of the pot). Sprinkle coarse flour, cornmeal, or semolina onto the parchment and then flip the loaf from the proofing basket onto the parchment, seam-side down. Score the loaf, ⅛-inch to ¼-inch deep, in whatever pattern you desire.
Using oven mitts, open the oven door, place the loaf (still on the parchment) in the preheated Dutch oven, and place the lid on the pot. Bake for 20 minutes, then remove the lid from the pot and lower the oven temperature to 450°F. Bake, uncovered, for an additional 15 to 20 minutes, until the bread has a deep golden hue and the internal temperature reads between 195° and 210°F, depending on the bread.
Step 9: Cooling and storage. Remove from the oven and transfer the bread from the pot to a cooling rack (or if baking a pan bread, transfer from pan to cooling rack). Let cool as directed in the recipe (some loaves are best left to stand for 24 hours before slicing and serving, while others can be eaten after they’ve cooled completely.)
Wheat breads and rye breads are treated differently when it comes to short-term storage. In our household, we keep our bread (that is not rye), sliced side down on a cutting board covered with a linen cloth. If the loaf dries out, it can be revived by quickly running cold water over it to wet the crust (not soak, just wet), and placing in a hot oven (400°F) for 7 to 10 minutes, until the water has evaporated. This method works really well to bring life back into a loaf, but the bread must be eaten at one sitting or it will revert back to its dried-out state. High content rye breads, on the other hand, should be stored wrapped in plastic (or beeswax wrap) and placed in the refrigerator. This bread can keep for weeks, at least. For long-term storage, either bread—wheat or rye—can be frozen for up to 2 months. Be sure the loaves are fully cooled, and wrap as airtight as possible, in plastic or, as I prefer, in parchment paper and then plastic, before placing in the freezer.
On Time and Temperature: Time and temperature play a huge role in bread baking, especially when baking with sourdough. Your leavening will develop at room temperature, but room temperature varies from home to home and from season to season. Colder temperatures slow down fermentation, and conversely, warmer temperatures speed up fermentation. The amount of time required to fully develop your leaven will not be static. Your ability to take note of your conditions—the ambient temperature, water temperature, and the condition of your sourdough culture—within the changing seasons will serve you and your breads.
For most of the following recipes, the suggested amount of time that one’s leaven develops is overnight or for 8 to 10 hours but pay more attention to your own conditions than to the recipe at hand. For recipes that have many components—soakers and/or sprouting or a two-part feeding of the leaven—I have included timing in the ingredients list so that you can plan accordingly.