

Whole Chicken
Lemon and Oregano-Roasted Chicken
Pan-Roasted Half Chicken with Madeira, Rosemary, and Lemon
Chicken Breast
Chicken Leg
Chicken Wing
Next-Level Butchery
BACK IN THE EARLY ’80s, before most of my staff were born, and before the Internet and grunge and balsamic “glaze,” beef reigned supreme at the dinner table. Since then, chicken has usurped beef from its Formica throne, likely because of society’s obsession with fighting fat. First came exercise videos starring gurus in leggings and neon jumpsuits promoting aerobics and weight-loss regimens. Then came new government-sanctioned dietary guidelines telling people to reduce their fat intake. And then suddenly skinless, boneless chicken breast became the healthiest thing to eat since wheatgrass and bulgur.
Compared to larger animals, chickens are inexpensive to raise and slaughter, and home cooks like that it’s a naturally lean meat. It also comes in conveniently sized portions—a chicken leg or breast is usually good for one person, maybe even with a few leftovers. It also makes a great Sunday roast, an even better fried chicken, or a fantastic soup! Chicken is inexpensive, versatile, easily digested, and tasty. No wonder we sell more chicken than any other meat at the shop.
RAISING CHICKENS
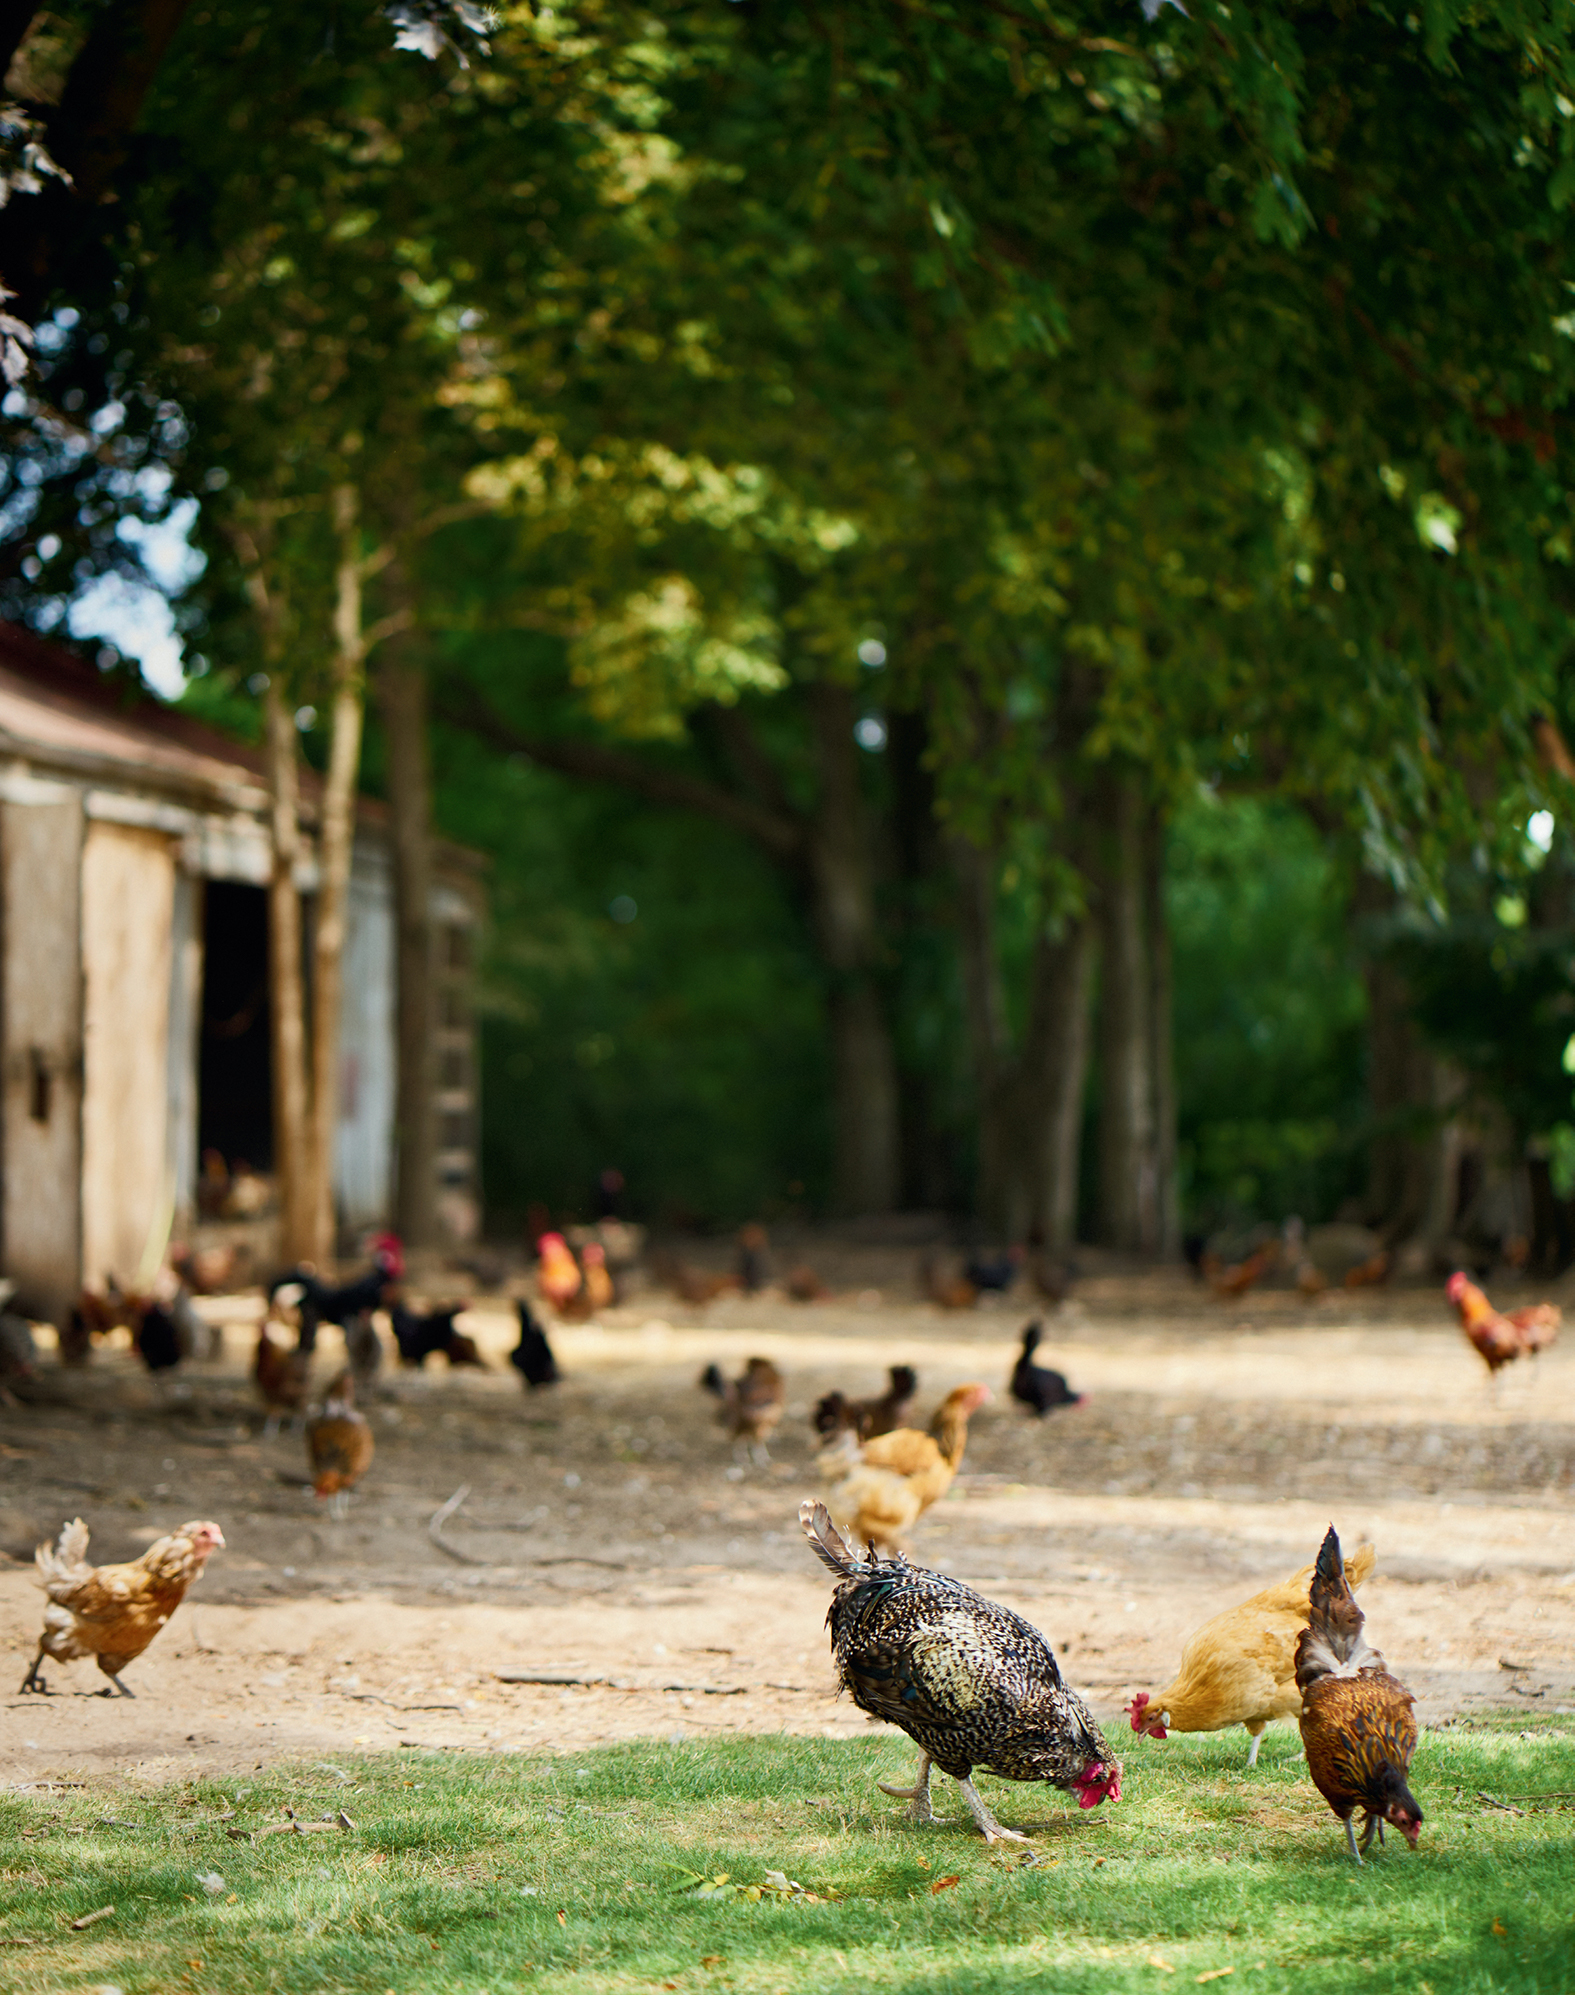
There are a few ways to raise chickens, some more virtuous than others. I believe that a good bird needs exercise, a grain-based diet, warmth, and a healthy amount of socialization.
Chickens definitely need space to spread their wings. Some farmers pasture-raise their birds, which means the birds roam in a field protected by chicken wire, usually in a movable pen, during the day and sleep in an enclosed coop overnight. Other farmers barn-raise their birds, which means the birds live in a building that receives a constant supply of fresh air through giant wall fans. These birds have plenty of room to run around and they aren’t caged or penned, but they also don’t get outside. This is the more common way of raising conventional birds, as it is cost-effective for the farmer and protects the birds against predators.
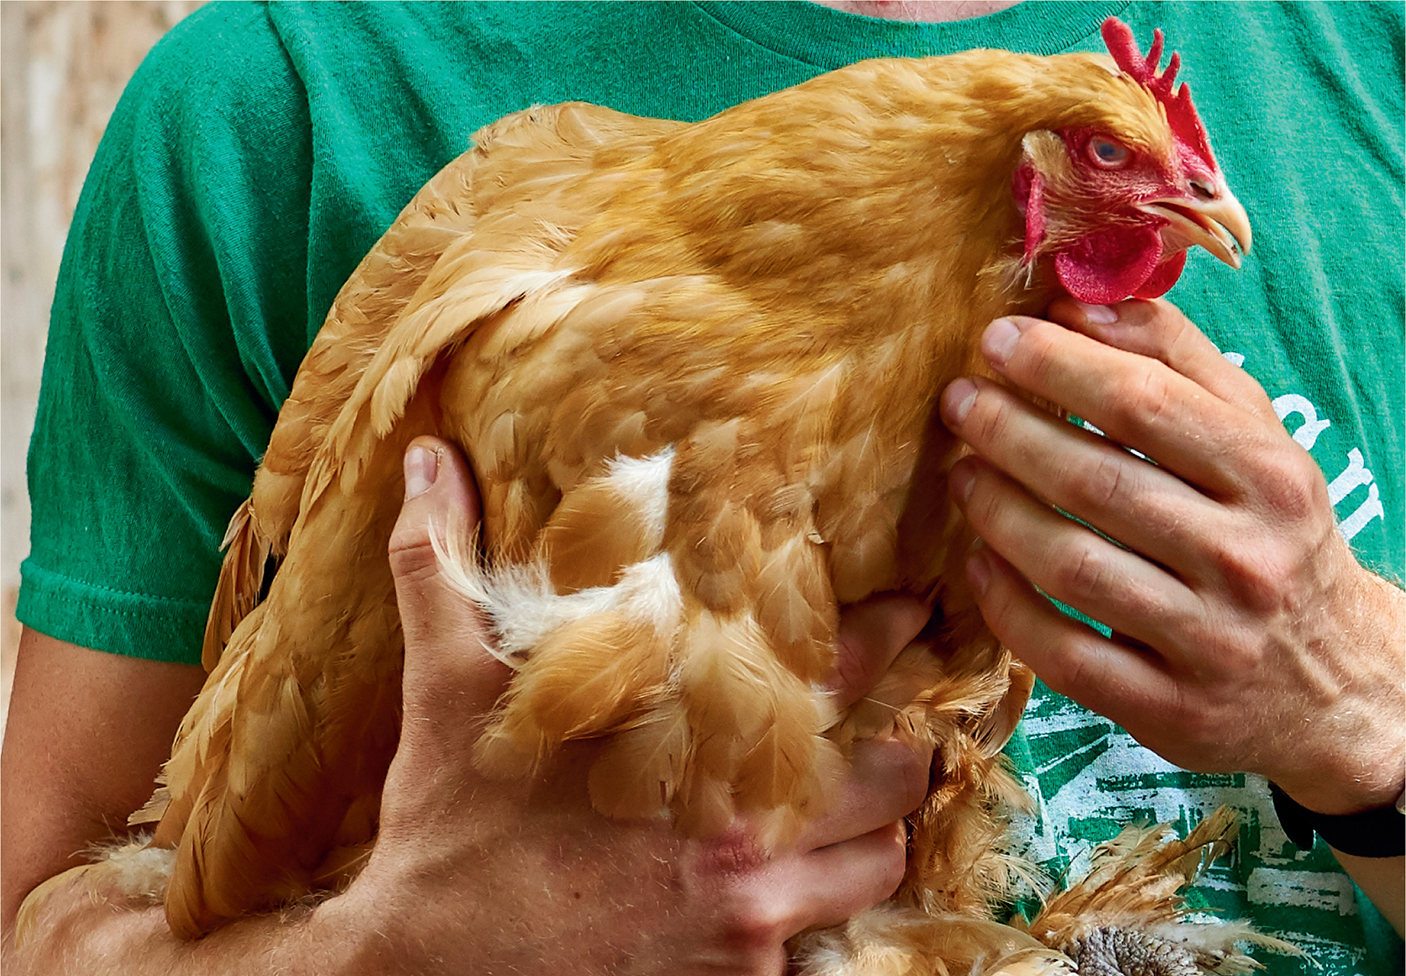
A responsible farmer wants to raise healthy birds that are consistently strong. The food the birds eat plays a big role in this. Our farmers feed their birds a vegetable and grain diet designed for optimal health. The amount of protein in the feed is monitored to restrict hormonal aggression (the chickens we get at the shop are male; when these birds reach market weight, they’re fully fledged teenagers—and act like teenage boys as well, jostling and pecking at each other), and the feed is augmented with vitamins and minerals. Chickens are omnivorous by nature, and the pastured birds get to peck around the grass for bugs and worms, the poultry world’s gold standard of meat, to round out their diets.
The farmer also has to maintain a secure environment for the birds to live in year-round. Responsible farmers therefore build heating units in their barns to ensure their birds don’t get too cold in winter, and this is the main benefit to the consumer of barn-raising. Pastured birds are really only available from mid-summer through fall. You can buy frozen pasture-raised product throughout the year, but for a good, fresh chicken in deepest February, you’re looking to get a barn-raised bird.
Some farmers raise their chickens in barns with access to the outdoors, normally via a flap or gate. These birds are known as free range because they can go outside if they want to. Not all birds are inclined to go outside, however. One of my farmers mused that due to cross-breeding over the years, the conventional chicken rarely wants to stray far from the food source. He once tried raising White Rocks (a common breed); these fat birds had to be lifted by hand out of the barn into the fresh air, and once outside, they would just run back in!
The chickens our farmers raise are social; they like to be close to each other, whether they’re raised indoors or out. This socialization is necessary for the birds to feel comfortable and stress-free, which leads to great-tasting meat.
BREEDS
Like most foods, chickens have been cross-bred over the years to create an ideal breed for the market: a bird that reaches market weight quickly, with a large breast and strong legs. If you ask a conventional farmer what breed they raise, their answer will probably be “a White Rock or a Cornish.”
In recent years there has been a push for farmers to raise heritage breeds of birds whose lineage dates back decades, if not centuries. Some of these heritage chickens include Rhode Island Reds, Chantecler, and Plymouth Rocks, all of which came to North America with the European explorers. While these breeds have almost died out, a dedicated group of farmers is working hard to bring them back into the public eye. Your best bet for finding them nowadays is to visit your local farmers’ market.
There are a couple of main differences between heritage chickens and conventional ones. A heritage chicken is usually an older bird, as it takes longer for it to reach market weight. Depending on the breed, it will be bigger (up to 8 pounds per bird) and have more muscle strength (the meat may seem tougher than you are used to). Because these birds take longer to raise, they are more expensive to purchase. However, I do think they make excellent roasting birds, and their flavor is something special—mainly because they are generally fattier than conventional birds. Note that heritage chickens are almost always sold whole.
SHOPPING FOR CHICKEN
When buying a chicken, look for a plump, dry bird (for a detailed breakdown on what chicken cuts to buy, see Chicken Cuts from this page to this page). Chickens need to be well chilled soon after slaughter to prevent bacterial growth, and the main thing that sets a good chicken apart from a crummy one is how that’s done. Many chicken factories cool their chickens in an ice-water bath in a machine designed to quickly lower the bird’s body temperature. The customer ends up paying more for water-chilled birds because they’re heavy with water, and the chicken will have an insipid flavor. An air-chilled bird, which has been hung to cool naturally in a refrigerated room soon after slaughter, has a tight muscle fabric, which means dense, flavorful meat. That’s the bird for me.
Look for chicken meat that smells clean. If you can ask to smell the bird, by all means do. A fresh chicken will barely have a smell. One that has seen better days will smell sour. That is the result of bacterial growth on the surface of the bird—and it’s most common around the bones. I find whole chickens, wings, and legs are the first products to develop that smell.
Chicken has about a six-day shelf-life from the time it was slaughtered. When buying fresh chicken, ask your butcher when they received the product. The slaughter day was probably the day before. Most slaughter facilities ship products the day following slaughter, after the birds have had time to go through rigor mortis. So, if your butcher received the chicken on a Thursday, it will likely be good until the following Tuesday, assuming it has been well refrigerated. If you are buying chicken to eat more than four days in advance, it is always a good practice to freeze the chicken when you purchase it, then defrost in your fridge the day before you want to cook it.


1. Whole Chicken
2. Chicken breast, whole
3. Chicken thigh
4. Chicken drumstick
5. Chicken wing
6. Chicken neck
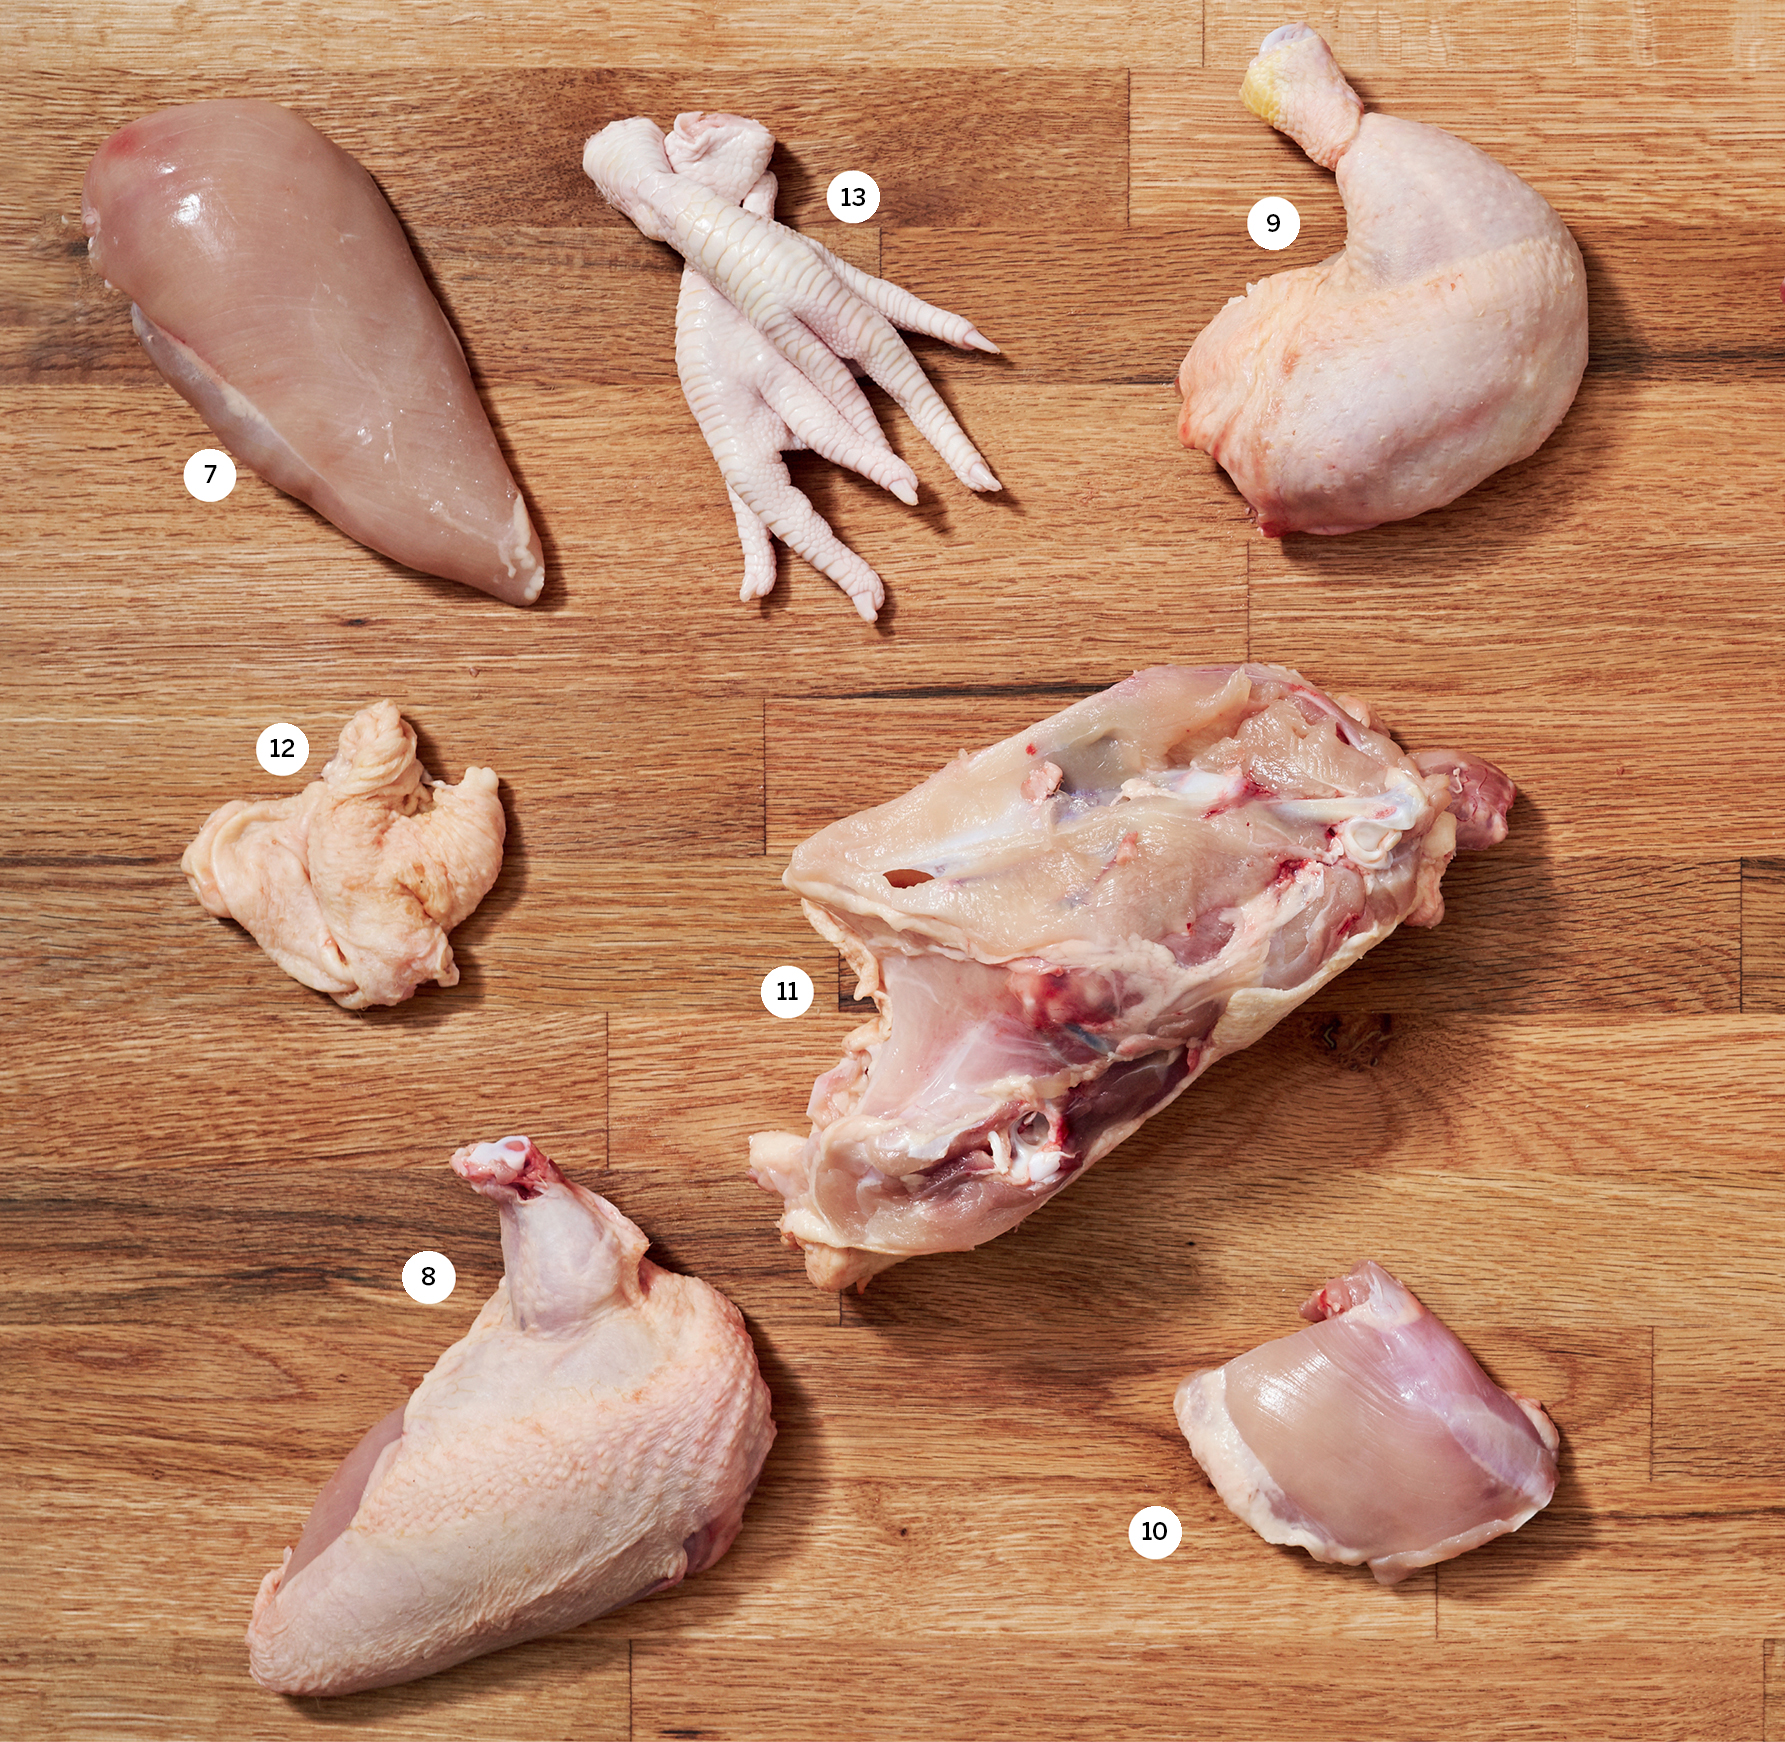
7. Chicken breast, boneless and skinless
8. Chicken supreme
9. Chicken leg, whole
10. Chicken thigh, boneless and skinless
11. Chicken carcass
12. Chicken skin
13. Chicken feet
Whole Chicken
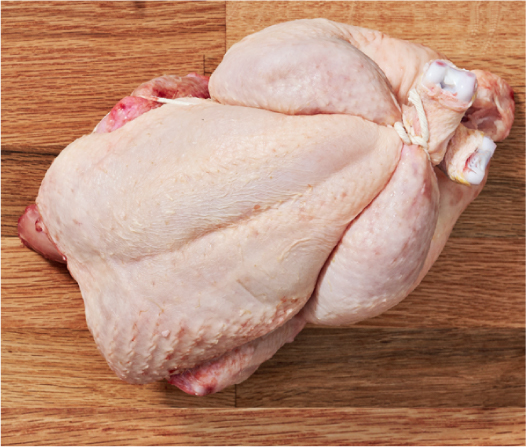
Whole chickens are usually sold in two weight ranges: “fryers” are 3 to 3½ pounds each and “roasters” are 4½ to 5½ pounds each. They both make great roasts, but the smaller birds tend to be more tender. Look for birds with a clean-smelling interior cavity and dry skin.
Good for: poaching, roasting, smoking
Chicken Breast, Whole
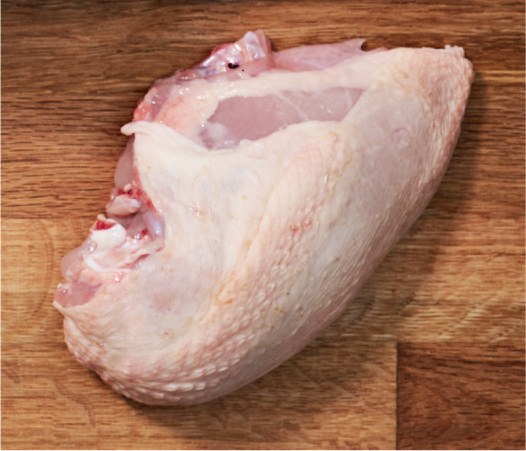
A whole chicken breast has the skin attached and the rib cage left in. This cut is great value, and roasting it on the bone ensures moister meat near the bone. (Home butchers looking to practice their knife skills can remove the breast bone and use it in a stock.)
Good for: grilling, roasting
Chicken Breast, Boneless and Skinless
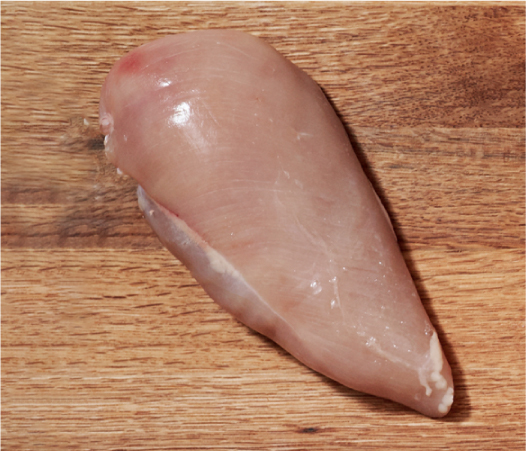
The best-selling protein in the shop is breast meat with the skin and bones removed. It carries many flavors well, so is excellent for marinating. The breast can also be cut into strips for breaded chicken fingers, or cubed and skewered for souvlaki.
Good for: grilling, pan-frying, poaching, smoking, sautéing
Chicken Supreme
Boneless chicken breast, with the skin left on and the wing tip left attached, is a popular cut in restaurants, hence its inclusion in my window, and it looks very attractive on the plate. A supreme gives diners the extra fun of eating a wing and getting some crispy skin.
Good for: pan-frying, poaching, roasting
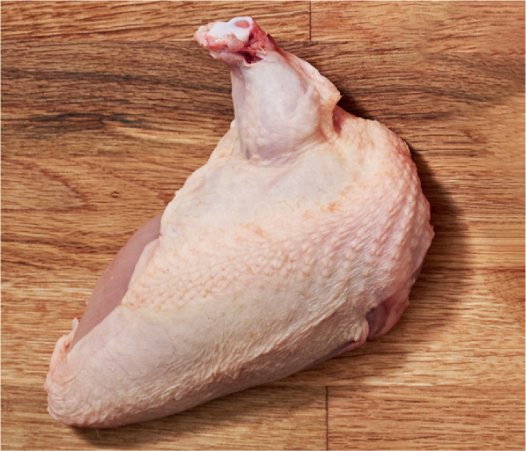
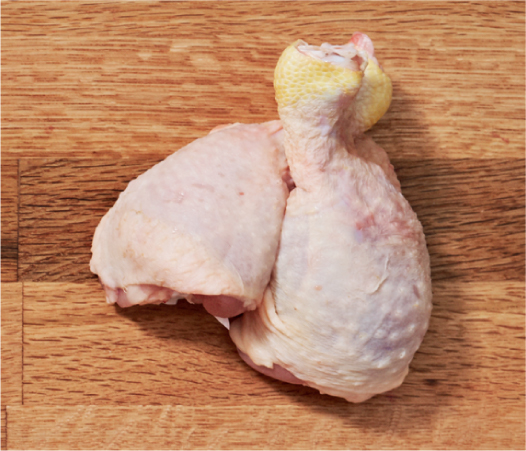
Chicken Leg, Whole
A chicken leg is the whole leg—including the thigh and the drumstick—attached at the joint. A whole leg can be sold with the backbone on or off. While the “back on” version is generally cheaper per pound, you’re paying for the backbone, which doesn’t make for great eating.
Good for: braising, grilling, poaching, pressure cooking, roasting, smoking
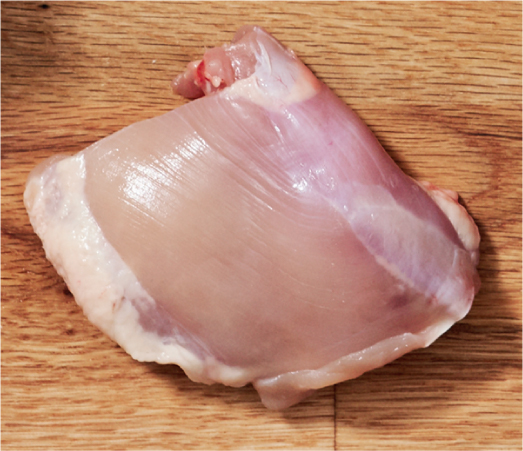
Chicken Thigh

The meatiest part of the leg, the thigh is the upper portion of the leg. It’s probably the best muscle for dishes like fried chicken or stewed chicken. The leg meat is generally a little fattier and carries more flavor and moisture than the breast, so it makes any chicken dish taste better.
Good for: braising, grilling, pan-frying, pressure cooking, roasting
Chicken Thigh, Boneless and Skinless
The thigh meat with skin and bones removed is the cut of choice for restaurants selling fried chicken because, without the bone, the portion size is very consistent. The down side is that the thigh can dry out more easily without the bone, so be wary when using them.
Good for: grilling, pan-frying, sautéing
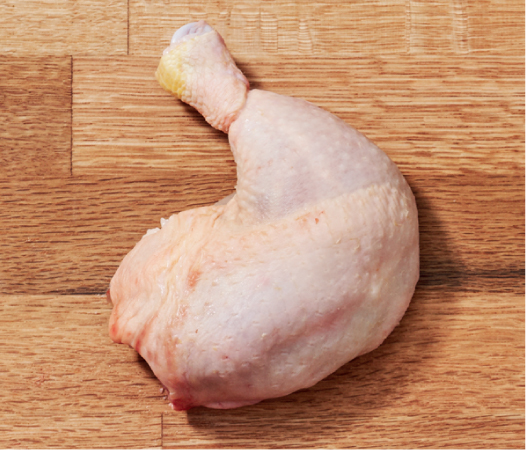
Chicken Drumstick
The drumstick is the lower leg or calf. It’s considered the black sheep of the chicken cut family because it lacks the meatiness of the thigh, the healthfulness of the breast, and the bar-food-prestige of the wing. However, it is a delicious cut, and excellent when marinated.
Good for: braising, grilling, pressure cooking, smoking
Chicken Wing

The wing can be sold whole or in two parts: the drumette, the meatier part next to the body, and the flat, the moister middle section (often with the wing tip attached). All wing cuts are delicious. Deep-fried, they’re a staple of bar menus; they’re also great oven-baked.
Good for: grilling, roasting, smoking
Chicken Feet
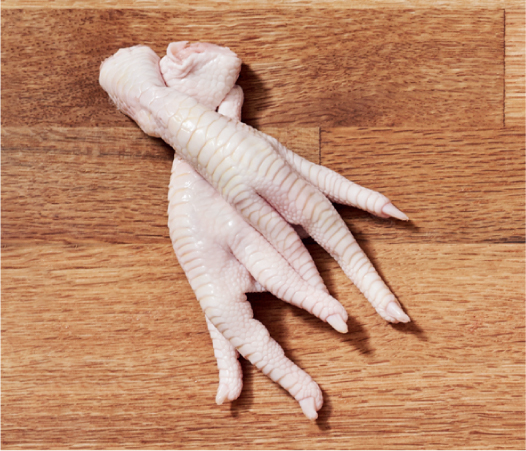
Chicken feet—the very bottom of the leg and the four “toes”—can be hard to find because they take a lot of cleaning to make them salable. However, they make a great addition to stocks and broths, and they are an important part of Chinese dim sum culture. Look for them in Asian markets.
Good for: braising, deep-frying, roasting
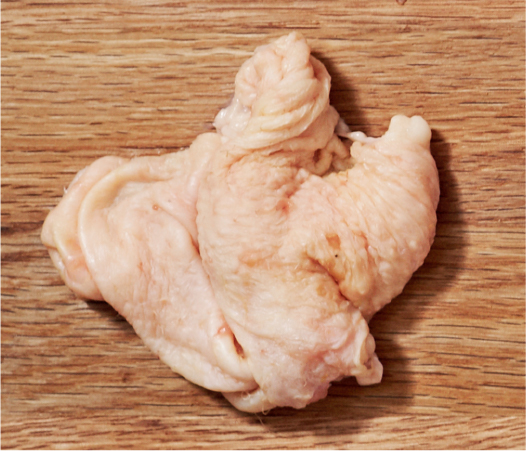
Chicken Neck
The neck is a long, tubular, lightweight muscle with a ton of collagen and meat bits that make for delicious stocks. Although it can be a little pricier than the carcass, it is a surprisingly popular cut.
Good for: boiling for stock and broth
Chicken Skin
Once plucked and rendered (slowly cooked over low heat to draw out the fat), chicken skin makes a fantastic fat for making fried rice and roasting chickens. If it’s cooked down with onions and seasoning, chicken fat becomes spreadable schmaltz, a delicious alternative to butter on bread.
Good for: using as a cooking fat
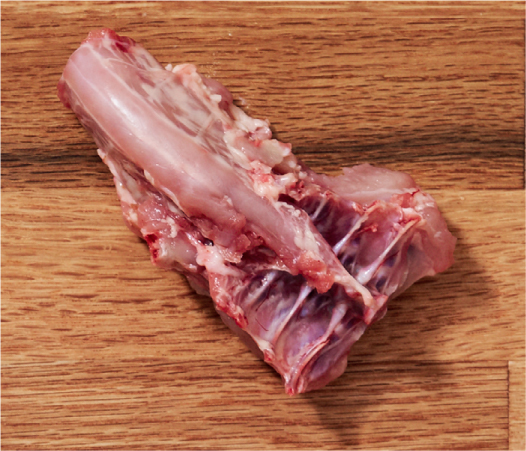
Chicken Carcass
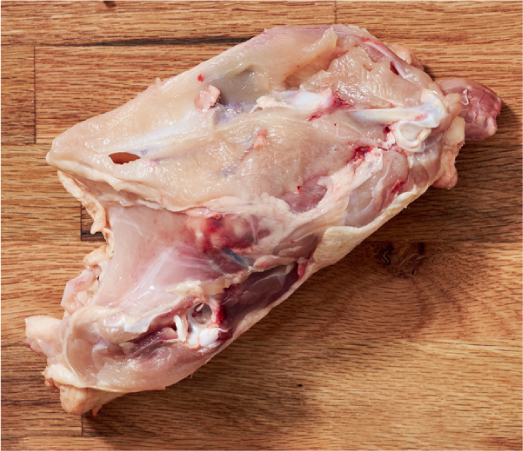
The carcass is what remains when all the meat has been removed. It’s crucial for making stocks and broths. Try to shop at a store that has bones available, as that usually means they are processing their own poultry and will have a wider variety of chicken cuts.
Good for: boiling, braising, poaching for soup and broth

The main chicken farm I work with has an onsite slaughter facility. This means the birds don’t travel far from barn to box, which I believe helps their stress levels. A slaughter facility is an interesting place to visit, and the most ingenious of its machines is the feather-plucker, as it quickly and efficiently does a job that takes forever to do by hand. I know this from experience.
A restaurant once asked me for aged chicken. You see, back in the day, fowl were killed and then “hung in feather”—which means hung without being eviscerated or plucked—in a cool room to tenderize. Much like the process of hanging beef, this breaks down the tough muscle tissue and produces tender meat. The practice is still popular in Europe, especially for game birds like pheasants and partridge. I was happy to source some dry-aged chicken, but I needed a farmer who was willing to try doing it. Luckily, I knew just the guy.
Mark Trealout used to raise beautiful vegetables and sell them at local farmers’ markets. He was an agri-hippie and a phenomenally positive energy in the sustainable food movement. I use the past tense because he has now moved on to teaching, but at one time he was definitely one of the more inventive farmers on the scene. I called Mark to ask if he was interested in testing the hanging-in-feather technique. He said yes—on one condition. I would have to come to his farm and help pluck the birds because that part is “a huge pain in the ass.” How could I resist?
One cool October morning I arrived at Mark’s farm around 10:00. Hanging above the riding lawnmower and the kids’ bikes in his tool shed were four beautiful chickens, their orange-red plumage lit up in the morning sun. They had been hanging for four days.
“Just in here?” I asked, wondering if the tool shed was cold enough. The overnight temperatures had only got down to about 42°F.
“Yep,” Mark replied, “they don’t need to be chilled when they’re in feather like this. They don’t spoil.”
I looked around at the prep area Mark had laid out for us. There were two chairs, four big plastic buckets lined with garbage bags, and a giant stockpot full of simmering water on top of a propane burner.
“Ok, here’s the drill,” Mark explained. “You take the bird and dunk it in the water four or five times to scald it. After plucking, the next step is to eviscerate it, using this.” He pulled out a small pocket knife that looked like a Leatherman multi-tool. “Don’t worry, it’s clean,” he assured me.
He demonstrated his technique, dunking the bird to scald the feathers and make plucking a lot easier. I copied him. Then we went at the feathers, pulling them out one by one and throwing them in the buckets. This took a really long time. Chickens have a lot of feathers, and even with the scalding they didn’t all want to come out easily. On top of their resistance to pulling, they also sometimes want to take bits of skin with them. Which was a problem, because no matter how long I spent trying to pull the feathers out perfectly, if there was even a slight tear in the skin I was going to have a chef on the other end of this transaction giving me shit for a poor product. So, slowly and carefully was the way to go.
Once all the feathers were removed, it was time for the evisceration. We cut the first bird open near its rear and pulled out its innards (not something I recommend trying at home). I’d have sworn that after four days of hanging in a barn at an average temperature of 50°F, the guts would have been putrid. But quite the opposite was true; in fact, I have never smelled a cleaner liver in my life. The aroma was similar to cultured butter’s. The innards went into a small plastic bag, and the rest of the bird (head and feet included) went into a garbage bag. And then we repeated the process on the other three chickens.
At the end of the day we had four nicely cleaned, if slightly torn, chickens and a small bag of offal. It was 2:30 p.m., and we had started just after 10:00 a.m. As we were cleaning up the yard, I thanked Mark.
“No problemo! I’ve always wanted to do this,” he said. “But you know what?”
“What?”
“I’m never plucking doing this again.”
“I’m with you on that one.”
So, the moral of this story is: pay the money to get someone else to do the work.
I love everything about roasting chickens. I love the way it makes your kitchen smell, the way the skin gets all crispy, the way the meat pulls away from the chicken’s ankle when it’s done. Most of all, I love that no matter what recipe you use to roast a bird, it will always be fantastic.
One recipe question is asked at the butcher shop more than any other: “How do I roast a chicken?” This book offers several options, but this simple recipe requires very little prep time and produces a juicy, flavorful chicken. A little salt, pepper, butter—a few extras perhaps—are all you need to add to accentuate the flavor of a good-quality chicken.
SIMPLE ROAST CHICKEN
Serves 4
1 (3½ pounds) whole chicken
Salt and pepper
1 lemon
1 bulb garlic, unpeeled
2 bay leaves
½ bunch thyme
1 cup butter, at room temperature
Preheat the oven to 450°F. Have a roasting pan with an elevated roasting rack ready (this allows hot air to circulate around your bird and cook it more evenly).
Season the chicken quite liberally with salt and pepper, taking a healthy pinch of each and let it fall like snow all over the chicken.
Cut the lemon in half widthwise, juice one half over the chicken, and stuff the other half into the cavity. Slice the whole bulb of garlic widthwise and put both halves into the cavity. Push the bay leaves and thyme into the cavity too.
Using your hands, rub the butter all over the chicken, massaging it into the crevices and putting a healthy coating over the entire bird. Set the chicken breast side up on the roasting rack. Roast the chicken for 15 minutes, then, without opening the door, turn the oven down to 350°F and roast for another hour.
Insert a meat thermometer into the thickest part of the thigh. It should read 175°F to 180°F. (If not, return the chicken to the oven for 5 to 10 minutes more and check again.) Turn the oven off, keep the door closed, and leave the chicken inside for another 15 minutes. This will allow the chicken to rest and the internal temperature to rise to about 165°F.
Remove the chicken from the oven and carve (this page). Arrange the meat on a serving platter. Strain the pan juices through a fine-mesh sieve into a gravy boat and pour it over your platter of carved chicken.
NOTE: After you’ve drained the juices from the roasting pan, rub a slice of baguette, ciabatta, or similar good-quality crusty bread all over the bottom of the pan, making sure you collect all the bits that have settled and caramelized on the bottom. Eat while drinking Champagne.
Roasting chicken with compound butter has become a game changer for me. By using a ton (the scientifically correct amount) of butter, you get a lot of tasty roasting fat at the bottom of the pan. Add a touch of flour, chicken stock, bay leaves, and a splash of brandy and you get a killer gravy. If preparing this meal isn’t the greatest thing you do all weekend, it had better be because you roasted the chicken right after Bruce Springsteen serenaded you while you got a foot massage from John Travolta.
BUTTERY ROAST CHICKEN
Serves 4
ROAST CHICKEN
1 cup butter, at room temperature, cubed
4 large shallots, finely chopped
4 garlic cloves, finely minced
½ bunch thyme, leaves picked and finely chopped
½ bunch sage, leaves picked and finely chopped
½ bunch rosemary, leaves picked and finely chopped
1 lemon, zest and juice
1 (3½ to 4 pounds) whole chicken
Salt and cracked black pepper
1 cup white wine
GRAVY
2 Tbsp butter
2 Tbsp all-purpose flour
1 cup pan juices from roasting the chicken
1 cup Chicken Stock (this page)
2 bay leaves
2 Tbsp brandy (optional)
Preheat the oven to 450°F. Have a roasting pan with an elevated roasting rack ready.
Place the butter in a mixing bowl. Add the shallots, garlic, thyme, sage, rosemary, and lemon zest and juice and mix thoroughly with a fork until well combined. Set aside this compound butter.
Using your hands, separate the skin from the breast meat of the chicken. Don’t be too forceful. You don’t want the skin to break—you want to create a “pocket” for the butter. Massage the butter, 1 Tbsp at a time, inside the pocket until the entire bird has butter under its skin.
Truss the bird (this page) to ensure even cooking, rub it all over with the oil, and season liberally with salt and pepper.
Set the bird on the roasting rack, breast side up, and place in the oven. Roast for 30 minutes. Turn the oven down to 350°F, add the white wine to the pan, and roast for another hour or so, until an internal thermometer stuck in the thickest part of the thigh reads 165°F. Remove the chicken from the oven and allow to cool in the pan for 10 minutes.
Using a pair of tongs, transfer the chicken to a serving platter. Tent the foil over it, cover with a clean kitchen towel to keep it warm, and allow it to rest for about 30 minutes while you make the gravy.
Scrape the bottom of the roasting pan with a wooden spoon to loosen the caramelized bits. Pour the cooking juices and bits of scraped-up meat into a bowl, and allow to sit for a couple of minutes to allow the fat to separate from the juice. Use a ladle to skim some of the fat from the top. (You can leave some fat, as it’s delicious.) Reserve for the gravy.
For the gravy, melt the butter in a small saucepan over medium heat. When it starts to foam, add the flour and stir with a wooden spoon until the mixture resembles toothpaste. Keep cooking this roux for about 5 minutes. Add the roasting juices and stir well to incorporate. When it’s smooth, gradually add the chicken stock and bay leaves. Bring to a simmer and cook until the sauce coats the back of a spoon. Add the brandy, if using, then strain through a fine-mesh sieve.
To serve, carve the chicken (this page) and arrange slices on individual plates. Pour the gravy into a gravy boat and set alongside the chicken.

Now that I have a kid, I often need to get food on the table in very short order. This quick whole-chicken recipe is super delicious and ridiculously easy, and it cooks in about an hour. That means I can get it ready and enjoy cocktail hour at the same time! These days, I like a little vermouth on the rocks while I cook. Pour yourself a drink and sip it while you work.
LEMON AND OREGANO-ROASTED CHICKEN
Serves 3 to 4
2 Tbsp olive oil
1 (3½–4 pounds) whole chicken, cut in 10 pieces (this page)
1 tsp grated nutmeg
Salt and pepper
DRESSING
3 Tbsp olive oil
1 lemon, zest and juice
1 Tbsp dried oregano
1 tsp chili flakes
1 tsp minced garlic
Salt and pepper
Preheat the oven to 425°F and line a baking tray with parchment paper.
Place the oil in a large bowl. Season the chicken pieces with the nutmeg, and salt and pepper to taste, then toss them in the oil. Arrange the chicken, skin side down, in a single layer on the baking tray and roast for 30 minutes.
To make the dressing, place the oil and lemon juice in a bowl. Add the oregano, chili flakes, garlic, and salt and pepper to taste. Mix until well combined. Set aside.
At the 30-minute point, remove the chicken from the oven and turn up the heat to 475°F. Turn the chicken pieces so they’re skin side up. Return the baking tray to the oven and roast until a meat thermometer inserted in the thickest part of the thigh reads 165°F, about 15 minutes. The meat around the thigh and drumstick pieces will be pulling away from the bone.
Add the hot cooked chicken to the dressing, mix gently to coat each piece, cover the bowl tightly with plastic wrap, and allow the chicken to sit at room temperature for 15 minutes to absorb the dressing.
To serve, arrange the chicken pieces on a large platter. Drizzle the dressing over top and serve immediately.
I first heard about beer can chicken when I was 19 or 20 and anything to do with beer was cool—especially the idea of shoving an open can of beer up a chicken’s cavity and then roasting it. Now that I’m older, cooking a chicken on a painted aluminum can just doesn’t seem so great. I still use the beer, obviously, because it makes the moistest roast bird imaginable without imparting too much flavor, but these days I use a small mason jar instead of a can. A jam jar that’s been thoroughly cleaned and scrubbed of all labels and glue bits also works well. I often use this recipe when cooking on the barbecue, but roasting in the oven also gives excellent results.
BEER-ROASTED CHICKEN
Serves 4
¼ cup BBQ Dry Rub (this page)
2 Tbsp vegetable oil
1 (3½ pounds) whole chicken, trussed (this page)
1 cup beer (a pilsner or lager is good here)
Preheat the oven to 375°F. Have a roasting pan with an elevated roasting rack ready.
Mix the spice rub and oil together in a small bowl. Using your hands, slather the mix all over the chicken, making sure you get it into all the little crevices.
Pour the beer into a clean mason jar just large enough to fit into the chicken’s cavity. Place the jar in the roasting pan, then press the chicken, butt down, over top. The jar should fit almost entirely in the chicken’s cavity, allowing the bird to balance standing up.
Roast the chicken until an internal thermometer stuck into the thickest part of the thigh reads 165°F (about 25 minutes per pound). Remove the roasting pan from the oven, tent the bird with aluminum foil, and allow it to rest in the pan for 30 minutes.
Using either tongs or a carving fork pierced far enough into the bird to lift it, and a kitchen towel (to pull off the jar), carefully pull the jar out of the chicken. A lot of hot juice may come out with it, so be careful. Discard the beer.
To serve, carve the chicken (this page), arrange it on a platter, and pass the plates!
NOTE: If you don’t want to use the BBQ Dry Rub, a little salt and pepper with olive oil is fine for seasoning as well.

When I worked at Mistura, I was introduced to a wet-roast method of roasting whole birds. This method works particularly well with game birds, as the liquid braises the legs while the breasts get browned by the dry heat. It also produces a particularly tasty sauce: a pool of butter-enriched red wine that the chicken swims lazily in.
RED WINE-ROASTED CHICKEN
Serves 4 to 6
1 (3½ pounds) whole chicken, trussed (this page)
Salt and pepper
1 small lemon
2 Tbsp vegetable oil
4 Tbsp butter, cold, cubed (divided)
1 small onion, diced
4 garlic cloves, minced
1 carrot, diced
1 celery stalk, diced
4 thyme sprigs
2 dried bay leaves
1 cup dry red wine
1 cup Chicken Stock (this page)
Preheat the oven to 425°F. Have a roasting pan with an elevated roasting rack ready.
Season the chicken liberally with salt and pepper. Using your hand and a bit of pressure, roll the lemon on your work surface to “loosen” the juice by breaking up the pulp. Using a toothpick, poke a few holes in the lemon. Place the lemon in the cavity of the chicken.
Pour the oil all over the bird and, using your hands, work it into the skin, getting into all the crevices. Place the chicken on the roasting rack, roast for 20 minutes, and then remove from the oven and set aside. Turn the oven down to 350°F.
While the bird is in the oven, melt 1 Tbsp of the butter over medium-low heat in an ovenproof pot large enough to hold the bird. Add the onions and cook, stirring frequently, until translucent. Add the garlic and sweat for a few minutes until fragrant. Add the carrots and celery and turn up the heat to medium, stirring constantly until the vegetables have softened. Season with salt and pepper.
Add the thyme and bay leaves, then deglaze the pot with the wine. Bring the liquid to a simmer and reduce by half, about 5 minutes. Add the stock and bring to a simmer over medium heat.
Transfer the chicken to the pot, along with any cooking juices from the roasting pan. Bring the liquid to a simmer again, then roast, uncovered, for about 1 hour. The chicken is cooked when an instant-read thermometer inserted in the thickest part of the thigh reads 165°F. Remove from the oven and let sit, still uncovered, for 20 minutes.
Transfer the chicken to a cutting board. Strain the roasting juices into a saucepan (discard the solids) and bring to a light boil over high heat. Reduce the sauce by one-quarter, about 5 minutes, and season with more salt and pepper, if necessary.
Turn down the heat to a simmer. Gradually add the remaining cold butter, whisking constantly to emulsify the sauce. Do not let the sauce come to a boil after adding the butter or it will split. Once the butter is incorporated, turn off the heat and set the sauce aside.
To serve, carve the chicken (this page). Arrange the meat (including the wings) on a deep platter and pour half the sauce over the chicken. Pour the remaining sauce into a gravy boat and serve on the side.

Poached whole chicken is one of the easiest and most satisfying one-pot meals you can make, and you can vary the ingredients according to your mood. In place of bread, this recipe is equally tasty with cooked rice or pasta to soak up the broth.
SIMPLE POACHED CHICKEN
Serves 6 to 8
POACHED CHICKEN
1 (3½ pounds) whole chicken
2 onions, cut in large dice
2 carrots, cut in large dice
2 turnips, cut in large dice
1 celery stalk, cut in large dice
1 leek, washed thoroughly and cut in large dice
5 garlic cloves, halved
2 Tbsp salt
1 Tbsp whole peppercorns
1 herb bundle (see Using Herbs and Spices in Braises, this page)
1 Tbsp butter
1 cup shredded cabbage (Savoy or green)
12 shiitake mushrooms, sliced
1 tsp finely chopped thyme
Salt and pepper
2 cups roughly torn stale French bread
MAYONNAISE SAUCE
¼ cup mayonnaise (store-bought is fine, but bonus points for homemade)
2 Tbsp finely sliced green onions or chives
Zest of 1 lemon
1 tsp lemon juice
Salt and pepper
The day before you plan to serve this dish, place the chicken, onions, carrots, turnips, celery, leeks, garlic, salt, peppercorns, and herb bundle in a deep pot and just cover with cold water. Bring the water to a low simmer over medium-low heat and poach the chicken, uncovered, for 1½ hours, skimming and discarding any fat and impurities that rise to the surface.
Insert a meat thermometer into the thickest part of the thigh. It should read 180°F. (If not, cook the chicken for 5 to 10 minutes more and check again.) The meat will be pulling away from the bone, especially around the leg knuckle. Turn off the heat and allow the chicken to cool in its own liquid before covering and refrigerating overnight.
30 minutes before you plan to serve the chicken, skim off and discard any solidified fat. Transfer the chicken to a cutting board, reserving the poaching liquid in the pot. Using a sharp knife, cut the breasts and legs away from the carcass. Using your thumb, strip off any meat clinging to the carcass and put it back into the pot with the vegetables. Discard the skin from the breasts and slice the meat before adding it to the pot. Discard the skin from the legs and strip the meat away from the bones. Place the leg meat back in the pot and discard the bones. Discard the herb bundle, then bring the broth to a simmer over medium-low heat.
For the sauce, mix the mayonnaise with the green onions (or chives) and lemon zest and juice. Season with salt and pepper and set aside.
To finish the chicken, melt the butter in a large frying pan over medium heat. Add the cabbage and mushrooms, stir well, and cover. Steam the vegetables until fully cooked, about 10 minutes. Season with the thyme and salt and pepper to taste, and keep warm.
To serve, place a few pieces of torn-up bread at the bottom of each bowl. Add a couple of tablespoons of the cabbage and mushroom mixture, then ladle a good amount of the chicken and vegetable mixture with some broth over everything. Top with a spoonful of the mayonnaise sauce and serve.

This recipe is a great way for beginners to learn how to butcher a chicken. If you want to do this ahead of time, use the bones to make the cup of stock you’ll need for this recipe. The cooking method is perfect for getting a beautifully roasted chicken skin as well, and the sauce is a pretty dynamite flavor combo.
PAN-ROASTED HALF CHICKEN WITH MADEIRA, ROSEMARY, AND LEMON
Serves 4
1 (3½ pounds) whole chicken
Salt and pepper
2 Tbsp olive oil
1 rosemary sprig
½ cup Madeira
½ lemon
1 cup Chicken Stock (this page)
2 Tbsp butter, cold, cut into pieces
Preheat the oven to 475°F.
To butcher the chicken, place it on a cutting board with the breasts up and the legs toward you. Using a boning knife, cut through the center of the bird on either side of the breast bone. As your knife comes to the ball joint between the backbone and the thigh bone, pop the knife in between the joint to separate it. Return to the breast and cut along the ribs; as your knife gets to the backbone, separate the breast. At the top of the bird, cut between the ball joint where the drumstick of the wing meets the backbone. Separate the wing flat from the drum and reserve for another purpose (wing night!). Leave the leg attached to the breast skin. Repeat the process on the other half of the chicken.
With the tip of your boning knife, slowly and carefully remove the thigh bone. Separate the bone from the ball joint where it meets the drumstick. You will now have 2 mostly boneless half chickens, and some bones and wings that you can freeze for making stock.
To cook the bird, set a large ovenproof frying pan over high heat. Season the half chickens liberally with salt and pepper and rub them with the oil. When the pan is very hot, add the chicken, skin side up, and sear for about 1 minute. Using tongs, flip the chicken over and brown the skin side for 4 minutes.
Without turning the chicken again, place the pan in the oven and roast until an internal thermometer inserted into the thickest part of the thigh reads 180°F, about 15 minutes.
Remove the pan from the oven and return it to the stovetop over medium heat. If the skin isn’t super golden and crispy, pan-fry it for a minute or so. Use tongs to transfer the chicken to a cutting board.
Add the rosemary to the pan, then deglaze the pan with the Madeira. Scrape up all the chicken bits with a wooden spoon, then squeeze the lemon over top. Allow the sauce to reduce by one-quarter, about 3 minutes, before adding the stock. Reduce by one-quarter again, then remove the sauce from the heat.
Add the cold butter all at once, stirring constantly to emulsify the sauce. It should be shiny.
To serve, cut each half chicken into 3 or 4 pieces and arrange on a platter. Strain the sauce through a fine-mesh sieve and serve it in a gravy boat or drizzled over the chicken.

There is something deeply satisfying about making your own fried chicken. It takes a bit of time and patience, but the results will be excellent. Many chefs use only thighs and drumsticks, as these muscles are the juiciest, but I like to use a whole chicken. You get the most cluck for your buck.
FRIED CHICKEN
Serves 6 to 8
BRINED CHICKEN
4 cups buttermilk (save 2 Tbsp for the dredge)
¼ cup Frank’s RedHot sauce
¼ cup salt
2 Tbsp pepper
1 (3½–4 pounds) whole chicken, cut in 10 pieces (this page)
2–3 cups vegetable oil
DREDGE
2 cups all-purpose flour
2 Tbsp baking powder
2 Tbsp salt
2 Tbsp paprika
2 Tbsp garlic powder
1 Tbsp onion powder
2 Tbsp buttermilk
To brine the chicken, stir together the buttermilk, hot sauce, salt, and pepper in a large bowl or a deep casserole. Submerge the chicken in the brine, cover tightly, and refrigerate for 2 hours.
Place 2 inches of oil in a deep-fryer and preheat it to 325°F (or fill a large, heavy-bottomed pot with 2 inches of oil and set it over medium heat). Arrange a layer of paper towels on a large plate.
Prepare a dredging station on your work surface. Stir together the dry dredging ingredients in a large bowl, then mix in the buttermilk to create a “wet-sand” texture. Beside this bowl, place a wire cooling rack on top of a baking tray to receive the chicken. Remove the chicken from the brine and place it in a large bowl.
Working with one piece at a time and using a bit of force, press the chicken into the dredging mixture, covering it completely and then shaking off any excess. Set the dredged chicken on the wire rack. Repeat until all the chicken is dredged.
Once the oil has reached 325°F (if you’re using a pot for frying, use a deep-fat or candy thermometer to test the temperature; if using a deep-fryer, the oil has been preheated to 325°F), use tongs to lower the chicken pieces, a couple at a time, into the fryer (or pot) and cook for about 15 minutes. Start with the thicker breast pieces, then cook the thighs and drumsticks, and finish with the wings, waiting about 30 seconds between each addition. (Adding the pieces all at once will cool the oil rapidly, which could make your chicken soggy.) As the chicken cooks, you may need to flip the pieces to ensure both sides fry evenly.
At the 15-minute point, insert a thermometer into the thickest part of each piece. When the temperature reads 180°F, the chicken is fully cooked. Transfer to the prepared plate and allow to drain on the paper towels for 5 to 10 minutes. To serve, arrange the fried chicken on a large platter and serve immediately.
NOTE: Start this dish at least 3 hours before you plan to serve it.

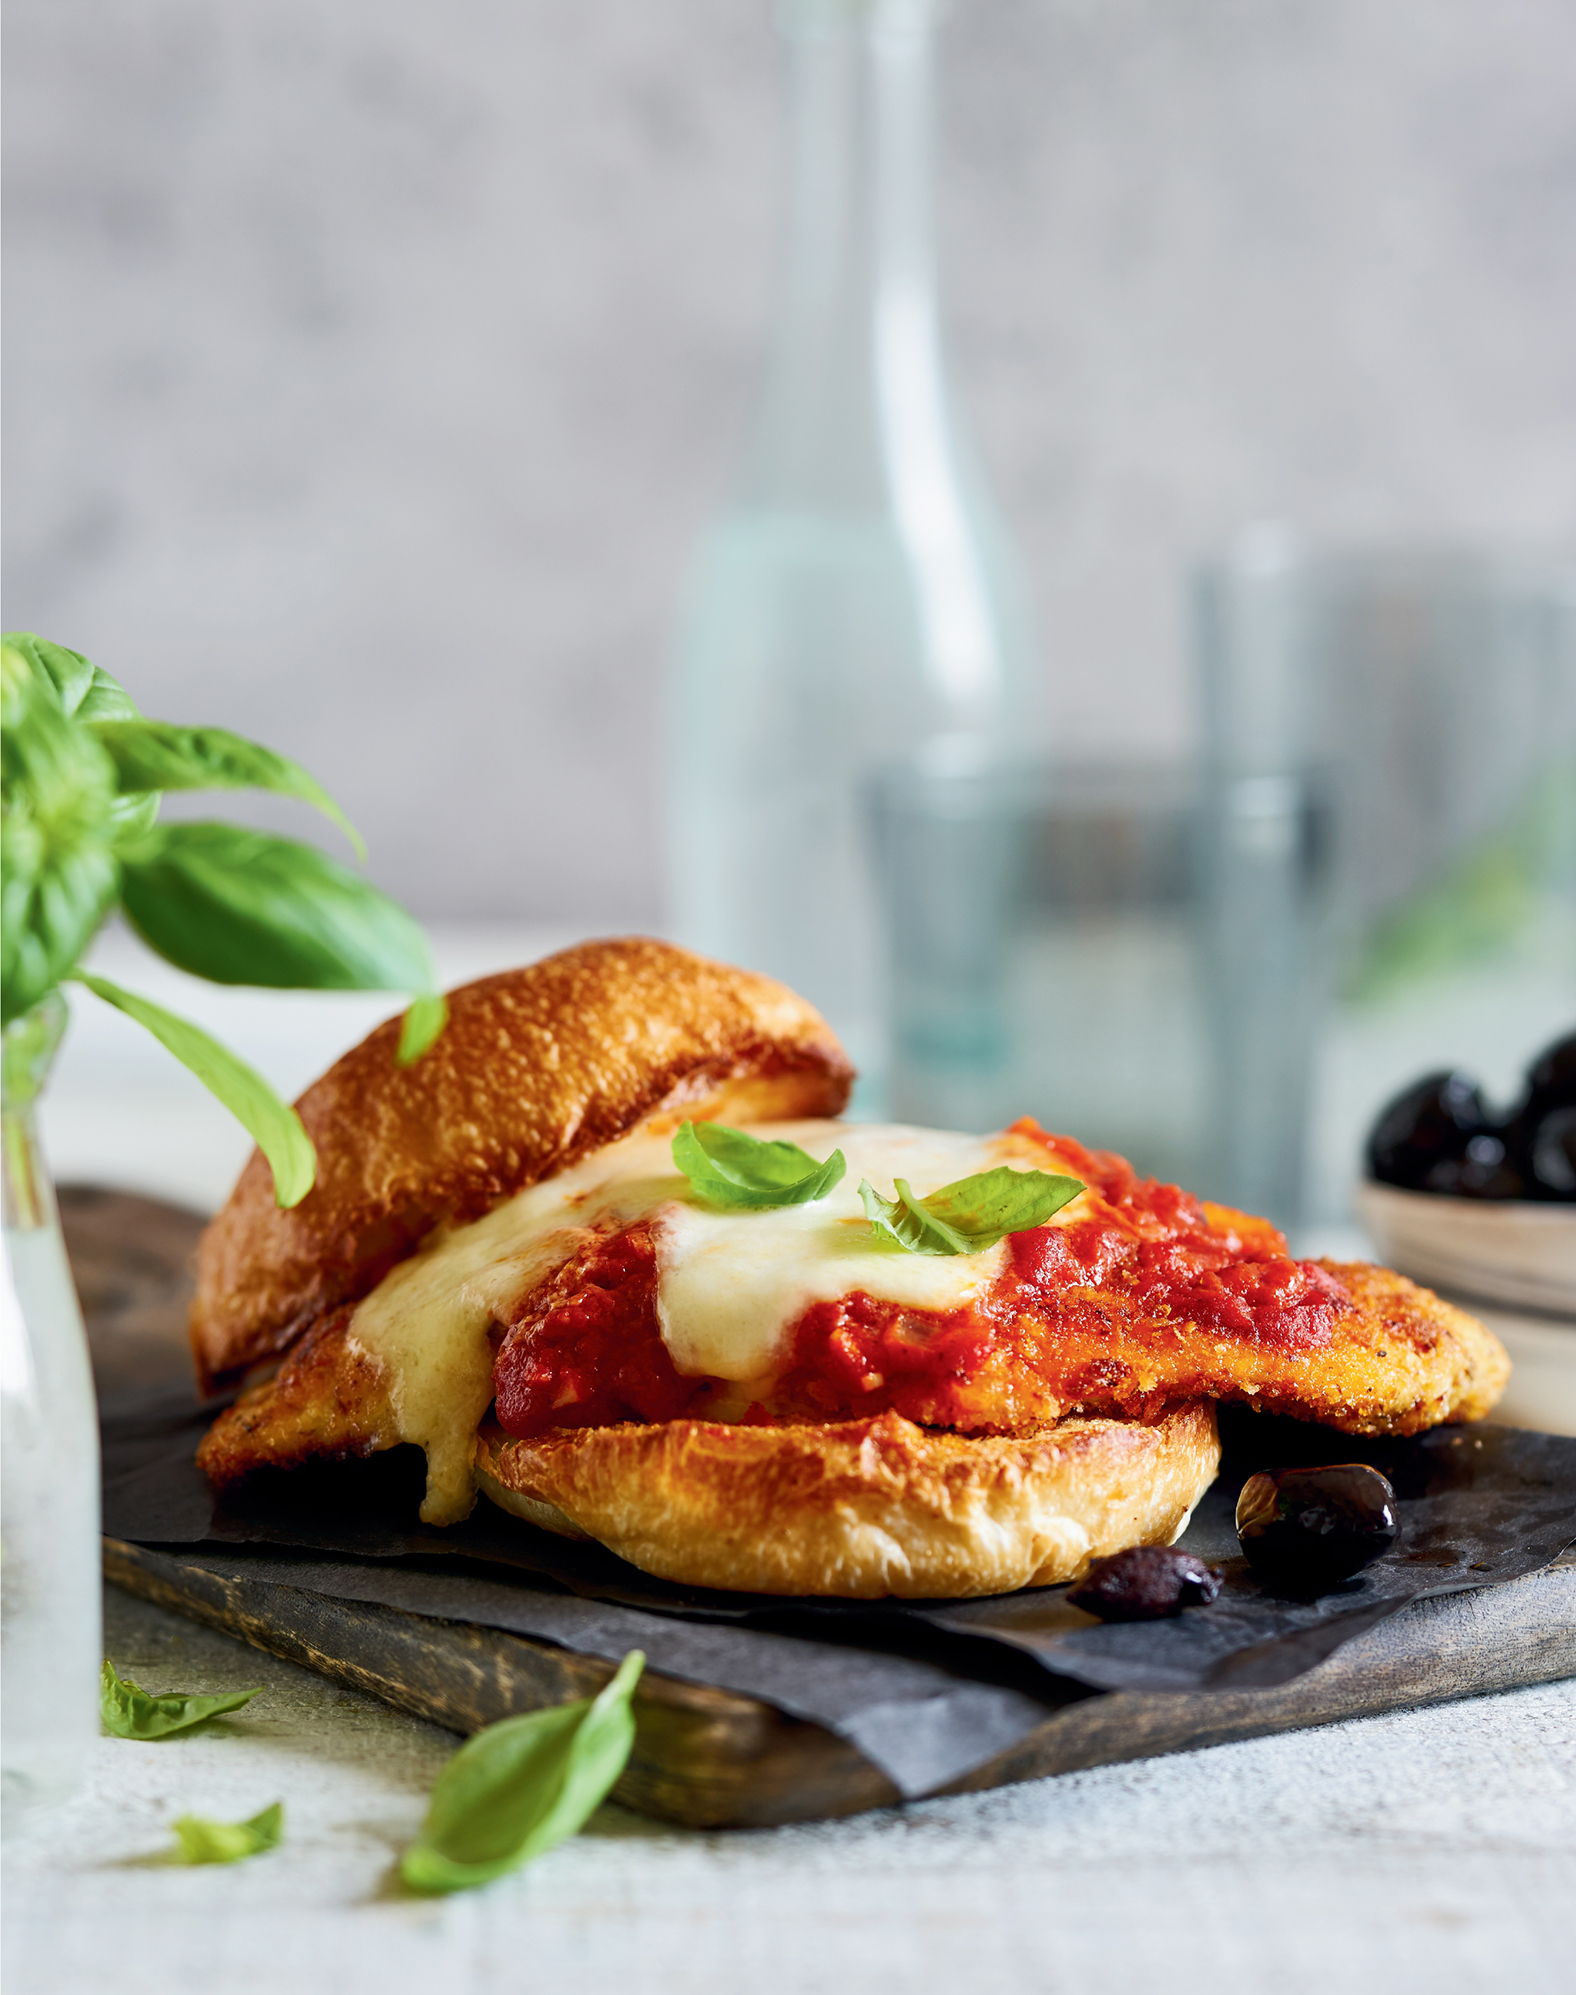
This pretty, classic breaded cutlet will be a winner in any household. Breading food (this page) is a fantastic technique to master, and Parmigiana toppings—Parmesan cheese, tomato sauce, and bread crumbs—are guaranteed to put a smile on every kid’s face! Fresh mozzarella balls sold in liquid in small bags are nicer in this recipe, but the regular mozzarella cheese sold in plastic packaging is fine too. Serve with a salad or a side pasta, or on a toasted bun.
CHICKEN PARMIGIANA
Serves 4
7 Tbsp olive oil (divided)
1 small onion, finely diced
2 garlic cloves, minced
1¼ cups passata (puréed tomatoes)
6 basil leaves, chopped
Salt and pepper
2 (each 9–10 ounces) boneless, skinless chicken breasts
1 cup all-purpose flour
2 eggs
1½ cups bread crumbs
1 tsp dried oregano
½ cup freshly grated Parmigiano-Reggiano cheese
8 ounces fresh mozzarella cheese, sliced in 8 rounds (or 2 cups shredded regular mozzarella)
Heat 1 Tbsp of the oil in a medium pot over medium heat. Add the onions and sweat until slightly caramelized, about 5 minutes. Stir in the garlic, turn down the heat to medium-low, and cook until fragrant, about 3 minutes. Add the passata and basil and simmer, uncovered, for about 30 minutes, until the sauce has thickened and tastes sweet. Season with salt and pepper and remove from the heat. Set aside.
While the tomato sauce is simmering, prepare the chicken. Lay each breast flat on your cutting board and slice them in half widthwise. Set aside.
Prepare a breading station on your work surface. Place the flour in a large bowl. Crack the eggs into a second bowl and whisk them well. In a third bowl, mix together the bread crumbs, oregano, 1 Tbsp salt, and 1 tsp pepper. Set a clean plate beside the bowls to receive the chicken.
One piece at a time, press the chicken into the flour, coating it on both sides and shaking off any excess. Next, dip the chicken in the egg mixture, shaking off any excess again, and then dredge it in the bread crumbs, ensuring it is well coated but shaking off any excess. Set the breaded chicken on the plate. Repeat until all the chicken is breaded.
Preheat the oven to 375°F. Line a baking tray with aluminum foil.
Heat the remaining 6 Tbsp oil in a large frying pan over medium heat. When the oil is hot, add the breaded chicken and fry until golden brown, about 5 minutes per side.
Arrange the chicken in a single layer on the baking tray. Cover each breast with a few spoonfuls of the tomato sauce, 2 Tbsp of the Parmigiano, and 2 pieces of mozzarella (or ½ cup grated mozzarella). Bake until the cheese is slightly golden and bubbly, about 10 minutes. Serve hot.
Everyone likes Shake ’n Bake seasoned bread crumbs, but I prefer to make my own, mostly because I like a lot of bread crumbs on my chicken. And this cheater’s breaded chicken skips the egg wash step and the frying bit, which means it’s both faster and less fatty than the standard recipe—perfect for a busy Tuesday night! I like Frank’s RedHot sauce best in this recipe, but you can use your own favorite or substitute ketchup or barbecue sauce if you have wussy kids. (But Frank’s RedHot really is the best: in the words of the old lady in the commercial, I put that s#!t on everything.)
FAKE ‘N’ BAKE CHICKEN FINGERS
Serves 4
2 Tbsp vegetable oil
2 (each 10 ounces) boneless, skinless chicken breasts
3 or 4 garlic cloves, minced
3 Tbsp sliced green onions
2 dashes hot sauce
2 cups bread crumbs
Salt and pepper
Preheat the oven to 350°F. Line a baking tray with a piece of aluminum foil and coat it with the oil.
Slice the chicken into long thin strips, about six per chicken breast. In a mixing bowl, combine the garlic, green onions, and hot sauce. Add the chicken strips and mix until well coated. Shake off any excess.
In a large bowl, season the bread crumbs with salt and pepper. Toss the chicken in the bread crumbs, using a little pressure to help the crumbs stick, until well coated.
Arrange the chicken in a single layer on the baking tray and bake for about 15 minutes. Turn the chicken strips and bake until a thermometer inserted in the thickest part of the breast reads 165°F, about 15 minutes.
To serve, arrange the strips on individual plates and serve with ketchup or barbecue sauce—or more hot sauce.
One of my favorite Filipino recipes is adobo, which is Spanish for “marinade” or “seasoning.” The soy-vinegar-based seasoning works well with pork, fish, vegetables, and especially chicken. My son is cared for by a woman named Annie who is from the Philippines and has been making adobo chicken for him since he could first chew. He still goes nuts for it. Once you make this recipe, you will too. Serve this dish with steamed white rice.
CHICKEN ADOBO
Serves 6 to 8
8 chicken legs, skin-on and bone-in, split between the thigh and the drumstick
10 garlic cloves, smashed with the side of a knife
3 bay leaves
1 Tbsp cracked black pepper
1½ cups white vinegar (see note)
1 cup water
¾ cup Japanese soy sauce (shoyu)
Place the chicken in a large pot. Add the garlic, bay leaves, pepper, vinegar, and water. Bring to a boil over high heat, then lower the heat to medium and simmer, uncovered, for 20 minutes.
Pour in the soy sauce, cover, and simmer until the meat easily pulls away from the bone, about 30 minutes.
Place your oven rack in the center of the oven (it mustn’t be directly below the broiler), then preheat the oven to broil. Line a baking tray with aluminum foil. Place the chicken on the baking sheet, skin side up. Pat the skin dry with a paper towel.
Over medium heat, reduce the liquid in the pot to 1 cup. Discard the bay leaves, skim any fat from the surface, and remove from the heat. Set aside.
Broil the chicken, rotating the pieces regularly, until they’re nicely caramelized, about 5 minutes.
To serve, arrange the chicken on a platter and pour the sauce over top.
NOTE: I like the bite of white vinegar in this recipe, but you can substitute cider vinegar, as many Filipino cooks would do, or, if you want to be super traditional, cane vinegar. You can also prepare this dish using a pressure cooker. Reduce the vinegar to 1 cup, omit the water, and cook the chicken for about 15 minutes.
Marrying a Jamaican woman changed my culinary life. Before Alia and I got together, my seasoning method consisted of adding some salt and pepper to allow the flavor of the ingredient to shine. I still primarily adhere to that philosophy, but the mix of Scotch bonnet (for flavor more than heat), green onions, garlic, thyme, and allspice that characterizes Jamaican jerk seasoning has become one of my favorite combinations. Cooks on the island use this spice mix, either dry or wet, on a variety of meats they cook slowly over a wood fire. Although you can easily purchase premade jerk marinade, there is nothing like the homemade version. Serve jerk chicken the traditional way, with Rice and Peas (this page).
JERK CHICKEN
Serves 4
MARINADE
3 Tbsp chopped garlic
1½ Tbsp seeded and chopped Scotch bonnet pepper (see note)
1 Tbsp chopped ginger
3 cups chopped green onions
½ cup soy sauce
¼ cup vegetable oil
¼ cup packed brown sugar
2½ Tbsp ground allspice
2 Tbsp fresh thyme leaves
2 tsp salt
1 tsp dried thyme
1 tsp ground cinnamon
½ tsp ground nutmeg
CHICKEN
4 chicken legs, skin-on and bone-in, split between the thigh and the drumstick
½ cup sliced green onions


