Stay Fit with the Apple Watch
The Apple Watch is as much a fitness companion as it is a timepiece or communication device. Sensors in the watch measure movement and track your heart rate, while the GPS chip provides location and acceleration data. Included apps use this data to help you be more active.
While the Activity app is a quiet reminder to stay active, the Workout app is the personal trainer pushing you to the next goal. Workout offers several common exercises (like walking, running, swimming, and cycling), as well as wheelchair workouts, and tracks your performance while you exercise. The Breathe app reminds you to take deep-breathing breaks.
Activity Tracking
Open the Activity ![]() app (from the Home screen or the Activity complication on some watch faces) to view your daily activity progress (Figure 78).
app (from the Home screen or the Activity complication on some watch faces) to view your daily activity progress (Figure 78).

Three rings represent the day’s activity so far. Rings close as you meet goals:
Calories: The red Move ring on the outside tracks calories burned during activity (computed based on your age, weight, sex, and activity amount).
Activity: A full circle of the green Exercise ring in the middle indicates 30 minutes of activity involving a consistently elevated heart rate and motion “at or above a brisk walk,” according to Apple. The algorithms are based on your general health information (age, height, weight, etc.) and change over time as you track more data. If you think the watch isn’t accurately tracking your activity, Calibrate the Sensors.
Standing: The blue inner Stand ring keeps count of how often you’ve stood up from a sitting position and moved around; the goal is to be in motion for at least one minute an hour out of 12 hours in a day. However, “stand” is somewhat misleading: the watch is really encouraging you to move around, not just stand up. Moving your watch arm for about 30 seconds will often count toward the Stand goal.
In the app, scroll down for details, such as a breakdown of when you burned calories, were active, and stood during the day (Figure 79). Keep scrolling to view the day’s total steps, if that’s one way to check in on your daily progress.

There are two ways to adjust the red ring’s calorie target:
Force-touch and tap the Change Move Goal button. Then, use the crown or tap the + or – button to set a new calorie goal. Tap Update.
Wait until the watch provides its Monday weekly progress report, which suggests a new goal and gives you the option to adjust it.
The Activity app on the iPhone provides the same breakdowns as the app on the watch, and it allows you to go back and compare previous days. Tap the month at the top of the screen to view a calendar of activity rings (Figure 80).
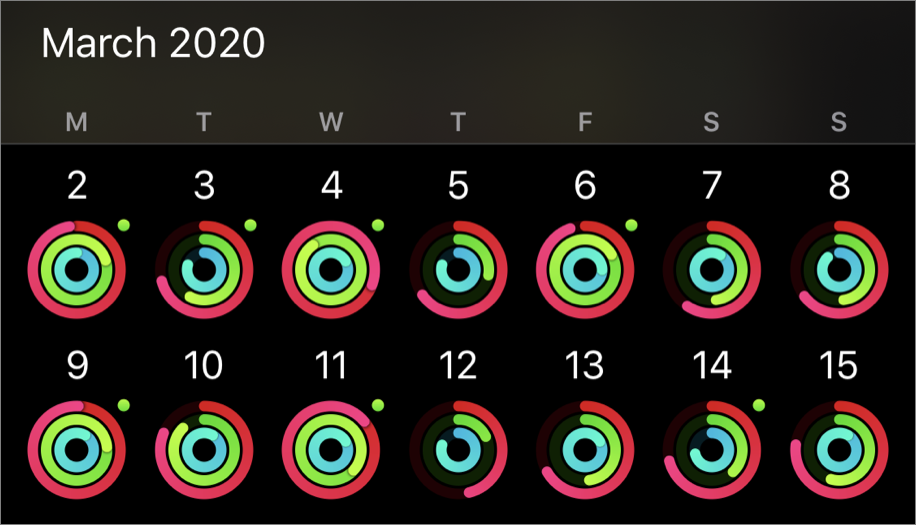
It also includes the Awards screen, a museum of awards you pick up for doing a great job of being active. Tap the Trends button to view a quick analysis of your data, with suggestions for which areas you need to improve.
Monitor Your Heart Health
The heart rate monitor in the watch is primarily used to keep track of your exercise and activity, but it can also provide data in other situations. Since the release of the Apple Watch, numerous people have identified underlying health problems based on the information, in some cases preventing serious illness.
Measure Your Heart Rate
Open the Heart Rate app or tap its complication on a watch face. After a few seconds of measuring, your current rate appears (Figure 81). It will continue to update as long as the app is active. Scroll down to view your resting heart rate and walking average.

Track Heart Rate Data
The watch uses its heart-rate sensor to help determine when you’re being active, but where can you see the data? Go here:
Open the Health app on the iPhone, and tap Browse at the bottom of the screen.
Tap Heart.
Tap Heart Rate under Today to see what’s been recorded so far. On this screen you can also view hourly, weekly, monthly, and yearly results.
Take an ECG Reading
The Apple Watch Series 4 and later models include the capability to measure your heart’s electrical output. This electrocardiogram (ECG) can help identify atrial fibrillation (AFib), or irregular heart rhythm.
To take an ECG reading, do the following:
Open the ECG app on the watch.
Rest your arms on a table or against your body, and hold your finger on the Digital Crown for 30 seconds (Figure 82).

Figure 82: As the ECG app measures electrical impulses, it gives you helpful messages if needed. In this case, I was reprimanded for trying to capture the screenshot. When the test is completed, the watch reports Sinus Rhythm (which is normal), Atrial Fibrillation, a low or high heart rate, or an inconclusive result. Scroll down and optionally tap the Add Symptoms button and choose any that you’re experiencing; those will be included with the report that gets saved to the Health app on the iPhone.
Monitor Your Hearing
The Noise app uses the watch’s microphone to detect loud noises and warns you if you’re in an unsafe acoustic environment. It runs on Series 4 and later models running watchOS 6 and above. To activate the feature on the watch, go to Settings  > Noise > Environmental Sound Measurements and turn Measure Sounds On.
You can view the noise levels in the Noise app on the watch or using the Noise complication on a watch face (Figure 83).
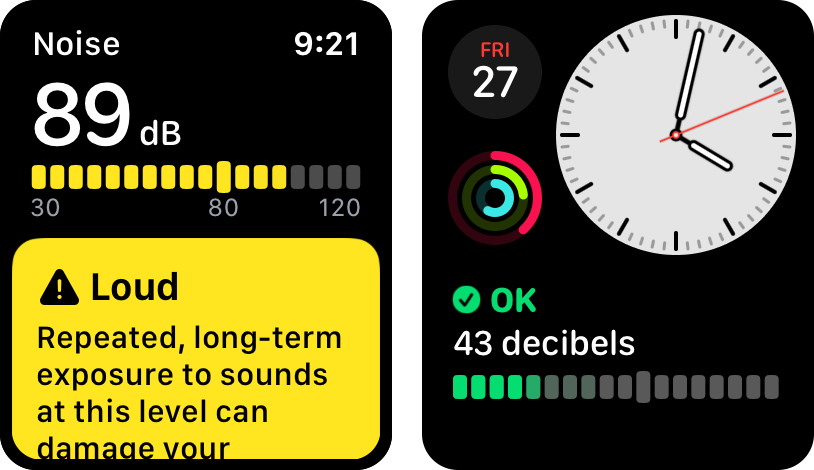
The watch alerts you when noise levels exceed 90 decibels (dB). Go to Settings > Noise > Noise Notifications and change the threshold for when a notification appears, or turn the alerts off.
Share Activity
watchOS makes it possible to share activity stats with any friend who also has an Apple watch. This includes mutual notifications of goals met, workouts completed, and achievements earned.
To share your stats:
Add friends: In the Activity app on the iPhone, tap Sharing at the bottom, then tap the plus
 icon in the upper-right corner. Enter a friend’s email address (or, for someone in your Contacts list already, their name). Tap Send. Once your friend accepts the invitation, you can see each other’s activity.
See friends’ activity: In the Activity app on your watch, swipe leftward to see the Sharing screen (Figure 84). Turn the Digital Crown to see other friends. Tap a friend to see their activity.
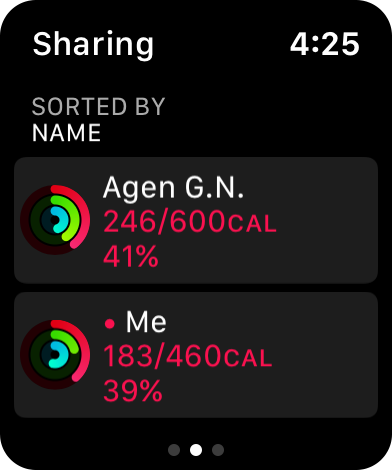
Figure 84: The Activity app’s Sharing screen lets you view your friends’ activity stats. Sort your friends list: In the Activity app on your watch, swipe leftward to see the Sharing screen. Force-touch the screen and tap Sort List to sort your list of friends by various criteria, such as name or progress in meeting various daily goals.
Adjust sharing: In the Activity app on the watch, swipe leftward to see the Sharing screen and then tap a friend. To remove that friend, tap Remove Friend. To hide your activity from that friend, tap Hide My Activity. To mute notifications from that friend, tap Mute Notifications.
Compete with friends: Sometimes a little friendly competition can inspire you to be more active. On the Sharing screen of the Activity app on the watch, tap a friend’s name and then tap Compete. Tap Invite to challenge them to a seven-day competition to see who can rack up the most points. Each percentage you add to your activity rings equals one point, with a maximum of 600 points possible per day.
Work the Workout
The best way to close that Exercise ring is to sweat it out. The Workout app includes dozens of workout types to measure your activity. To enable wheelchair workouts, go to the Watch app on the iPhone, tap Health > Edit, and set Wheelchair to Yes. The watch then substitutes pushes for steps in the Activity and Workout apps.
Start a Workout
When it’s time to start exercising, do the following:
Open the Workout
 app on your watch, or use Siri and say, “Open the Workout app.”
Choose a type of workout, such as Outdoor Walk (Figure 85) (see the sidebar Indoor vs. Outdoor Workouts). If you don’t see the one you want, scroll to the end of the list and tap Add Workout, then choose from the full list (fencing, anyone?).

Figure 85: Pick your pain (or pleasure). Your last workout appears at the top. To set a type of goal, tap the options
 button on the workout you want and tap one of the following options: Open (no goal), Calories, Distance, or Time (Figure 86).
Figure 86: Pick a goal. Tap Start to begin. After a 3-second countdown, the app begins recording time, heart rate, pace, and distance.
While you exercise, the Workout app remains active by default (overriding the watch’s Activate on Wrist Raise setting) when you view the screen (Figure 87). You can customize what shows here; see Customizing Displayed Data.
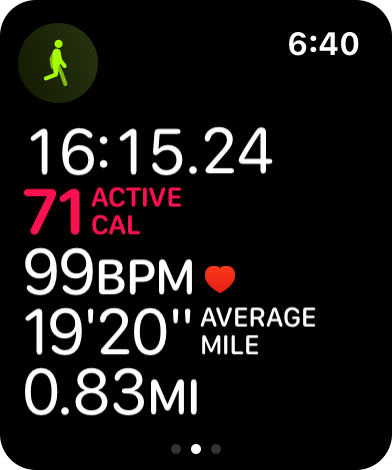
Figure 87: Keep tabs on stats during the workout. To pause a workout, press the side button and the Digital Crown at the same time. Or, to make the Workout app pause automatically when you stop during a run, open the Watch app on the iPhone, tap Workout, and turn on Running Auto Pause.
If you’re doing more than one workout in the same session, such as a run followed by an outdoor cycle session, swipe right and tap the New button. Choose the other type of workout and start it.
At the end of your workout, swipe right, or force-touch the screen, and tap End (Figure 88). (On this screen you can also pause/unpause the workout or lock the watch if accidental taps while exercising are interfering.) If you started another workout in the middle of the original one, tapping End finishes all active workouts.
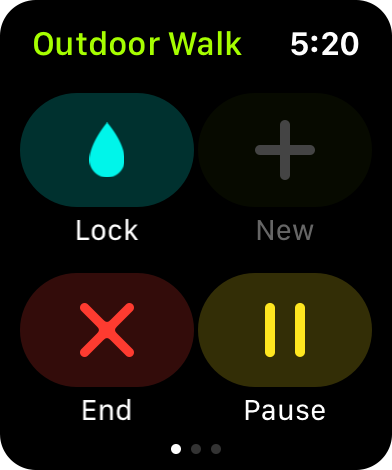
Figure 88: Finish or pause the workout. Before you collapse in a heap, scroll down to review the workout summary. For multiple workouts, tap each one for the data. Most important, tap the Done button to save the results to the Activity app on the iPhone. You can see them at the bottom of any day’s activity details.
Unfortunately, it’s not possible to export your workout data or route map in a format like GPXso that it can be viewed, analyzed, and shared in other workout systems, such as Strava or MapMyRun.
Automatic Workout Detection
In watchOS 5 and later, the watch can sense when you’ve begun some workouts, even if you didn’t start tracking it in the Workout app. Go to Settings > Workout and turn on Start Workout Reminder. Based on your movements, the watch will ask if you’ve started a run or walk (indoor or outdoor), an elliptical workout, rowing, or swimming (in a pool or open water).
Long on my list of desired features, the watch can also guess when you’ve completed a workout. Turn on End Workout Reminder in the same settings screen, and you’ll be asked if you’re finished based on the change in your activity. (Before this feature, I would frequently walk to a coffee shop, sit down, start working, and only after 30 minutes or so would I realize the watch thought I was still exercising, throwing off my average heart rate and workout timing data.)
For runners, a third option is available: Running Auto Pause temporarily suspends a running workout when you stop moving, and starts it up again once you get underway.
Swim Workouts
The Apple Watch (Series 2 and later) is water-resistant to 50 meters, making it safe to wear while swimming or bathing (although not while scuba diving, water skiing, or engaging in other activities in which the watch might be subjected to high water pressure).
Starting a swim workout automatically enables Water Lock; turn the Digital Crown after your workout to disable it.
Connect to an Exercise Machine
Some manufacturers have started to incorporate Apple’s GymKit developer frameworks to make it easy to connect an Apple Watch to treadmills, stationary bikes, and other exercise equipment. The readings from the machine are stored directly in your workout.
On the watch, go to Settings > Workout and enable Detect Gym Equipment. Holding the watch near compatible machines connects and starts the workout. If this option is off, you can still hold the watch near the machine and open the Workout app to start a workout.
Customize the Workout Display
The active Workout screen depicts several metrics, such as time elapsed, calories burned, and heart rate. Turning the Digital Crown highlights one of them to help you focus on it as you exercise. However, other methods of displaying workout data are available. Open the Watch app on the iPhone and tap Workout > Workout View:
To display just one type of data at a time while you exercise, tap Single Metric. You can then turn the Digital Crown to see other metrics (Figure 89).
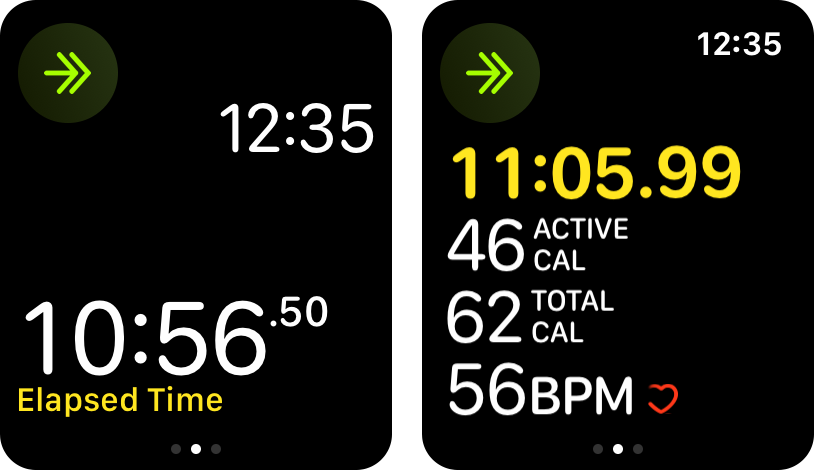
Figure 89: Use Single Metric view to reduce distractions (left) compared to Multiple Metric (right). Otherwise, tap Multiple Metric and then tap a type of workout, tap Edit, and tap the plus and minus buttons to include and remove items. You can also reorder them by dragging the handles.
Use the Stopwatch App
The directions for using the Stopwatch app ![]() vary slightly based on which view is active; these assume Analog view; the other views have prominent labeled buttons:
vary slightly based on which view is active; these assume Analog view; the other views have prominent labeled buttons:
Start: Tap the green Start
 button, which becomes a red Stop button after the stopwatch has begun.
Lap: Tap the white Lap
 button to track a second lap time; tap it again for additional splits.
Stop: Tap the red Stop
 button.
View: Any time during the timing session before you clear the times, you can use other views: force-press the screen to switch among Analog, Digital, Graph, and Hybrid readouts. Swipe up on the Analog view to see more detail at once; swipe up again to return to the single analog stopwatch view.
Clear/Reset: Once you’ve stopped recording, to clear the results, press the Lap
button again.
Calibrate the Sensors
One neat feature of the Apple Watch is that it can learn more about how you walk and run. Knowing your average stride helps it estimate calorie burn better, and enables it to track workout distance and pace even when you’re indoors (or using an early watch model without a GPS chip outdoors). The key is the watch’s accelerometer, which can detect steps.
Accelerometer calibration happens the first time you run the Workout app, but also as you continue to exercise. Following the directions in an Apple support document, you can calibrate the watch by walking or running for 20 minutes in a flat area outside where the GPS in your watch or iPhone will have a clear signal. For better results, repeat the 20-minute walk or run at different (consistent) speeds.
Track Your Cycle
Tracking a woman’s monthly menstrual cycle has several benefits, from anticipating the beginning and end days of her period to calculating fertile days when trying to become pregnant. It can also help to record events that don’t follow her schedule, such as spotting between periods, that could warrant a call to a physician.
The Cycle Tracking app on the watch, along with the Health app on the iPhone, makes it easy to track these variables:
In the Health app on the iPhone, tap the Cycle Tracking health category and answer the initial questions to record your most recent period.
When your next period begins, open the Cycle Tracking app on the watch and tap the oval for today’s date to record it (Figure 90). Below the daily tracker, you can optionally record the flow level and any associated symptoms, such as cramping or sleep changes.

As you enter more data, the app can do a better job of predicting when your period will start or when you’re in a fertility window. In the Health App on the iPhone, go to Cycle Tracking > Options to enable Period Prediction and Fertility Prediction (if applicable), and optionally turn on notifications that will give you a heads up and prompt you to log the events and symptoms.
Breathe
The Breathe app reminds you to take periodic breaks when you breathe slowly and deeply as a way of relaxing and focusing.
By default, the app prompts you to breathe every five hours. To change the frequency of reminders or turn them off, open the Watch app on the iPhone and tap Breathe > Breathe Reminders.
You can also start a session manually by opening the Breathe ![]() app on your watch and tapping Start.
app on your watch and tapping Start.
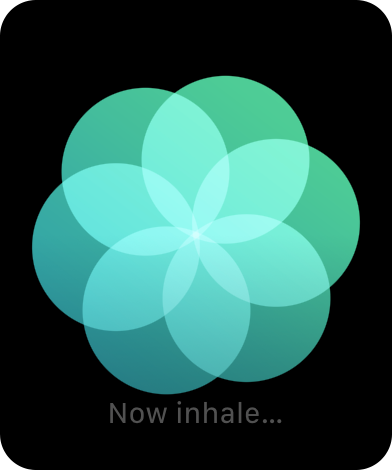
Either way, the app then tells you to be still and prompts you when to inhale and exhale (Figure 91) (both on screen and with a series of haptic taps).
To change the number of breaths per minute, open the Watch app on the iPhone and tap Breathe > Breath Rate.