Use Apple Pay and Wallet
The first time you use your Apple Watch to pay for something feels almost like science fiction: You activate Apple Pay, move your wrist close to a payment terminal, and then…well, that’s it. You may have to enter your debit card’s PIN, but otherwise you’re done. “Frictionless” is a perfect description. It’s also extremely safe. Instead of handing a credit card number over to be stored in a merchant’s database, Apple Pay sends a token that matches up with the card you set up; even if the data were to be intercepted, it’s useless to an attacker.
The Wallet app, where your credit card data is stored, is also a convenient holding area for items that use barcodes for transactions, such as store loyalty cards and tickets for flights, movies, baseball games, and more.
Set Up Cards for Apple Pay
If you’ve set up Apple Pay on your iPhone, your cards are not automatically added to the watch. You can add up to eight cards to the watch:
In the Watch app on the iPhone, tap Wallet & Apple Pay.
To add a card already on your phone, tap the Add button next to its name, follow the prompts, and skip the remaining steps below.
To add a new card, tap Add Card.
Follow the instructions provided, which entail scanning your credit or debit card using the iPhone’s camera—which is incredibly slick—or entering the details manually, and accepting terms of service.
You will also need to complete the verification process, which can be done via email, phone call, or text, depending on the provider.
To use your watch to Use Apple Pay on a Mac, turn on Allow Payments on Mac.
When you’re done, the cards appear in the Watch app and on the watch: open the Wallet ![]() app to view them (Figure 92).
app to view them (Figure 92).
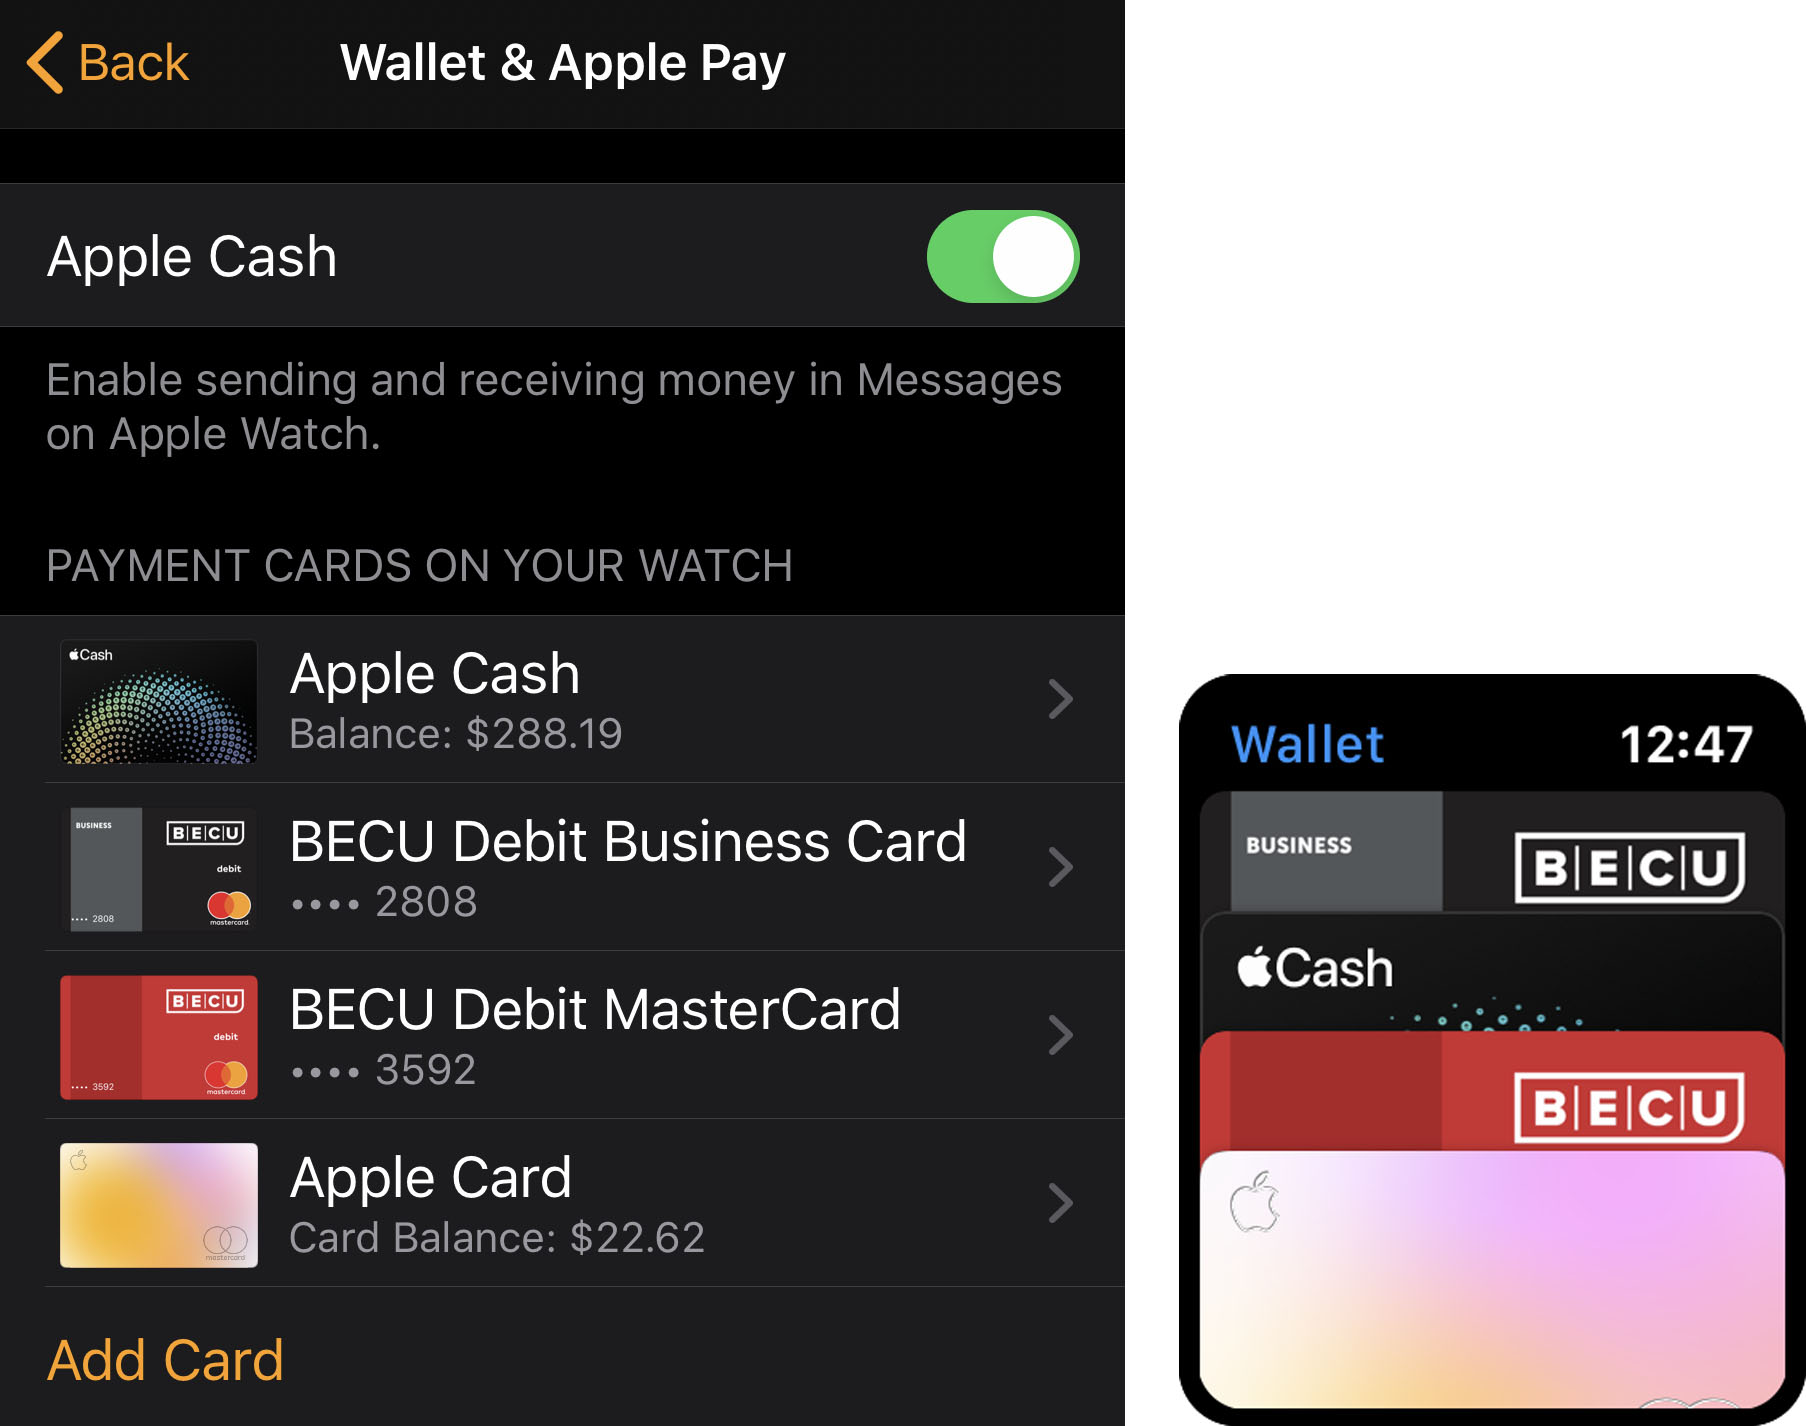
If you have multiple cards, tap Default Card in the Watch app on your iPhone and pick the one you want to use most.
Use Apple Pay in Person
When it’s time to pay at a compatible terminal, do the following:
Double-press the watch’s side button to activate Apple Pay.
If you’ve set up multiple cards, swipe left or right to choose the one you want to use (Figure 93).
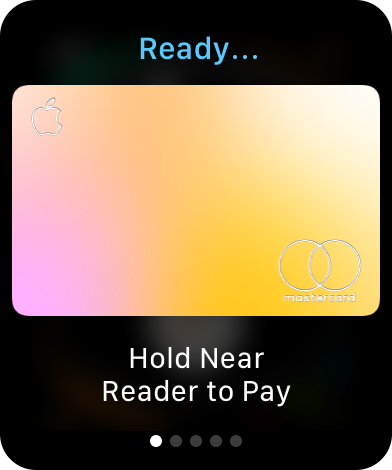
Figure 93: You’re only a couple of seconds from being done at this point. Hold the watch screen a few centimeters from the payment reader.
A haptic pulse and a tone indicate when the transaction occurs.
Depending on the reader and the card you used, you may need to enter a PIN or sign your name.
The display reads Done when finished.
Use Apple Pay on a Mac
Before you can complete a purchase from your wrist, your setup must meet these requirements:
The Mac is new enough to meet the Apple Pay Requirements.
Bluetooth is enabled.
The Mac is signed in to the same iCloud account as your iPhone.
You’ve turned on the Allow Payments on Mac switch on your iPhone in Settings > Wallet & Apple Pay.
In Safari on the Mac, choose Safari > Preferences > Privacy and confirm that the checkbox “Allow websites to check for Apple Pay and Apple Card” is selected (it is by default).
To check out:
Click the Pay or Buy with Apple Pay button.
Confirm your billing, shipping, and contact details and make any necessary changes. If you want to use a card other than the default, click the arrow
 icon and choose a card from the pop-up menu.
Double-press the side button on your watch.
The display reads Done when finished.
Work in Wallet
Wallet items are set up in the Wallet app on the iPhone, either from other apps or from email; for example, the Fandango app includes an Add to Wallet button when you buy tickets.
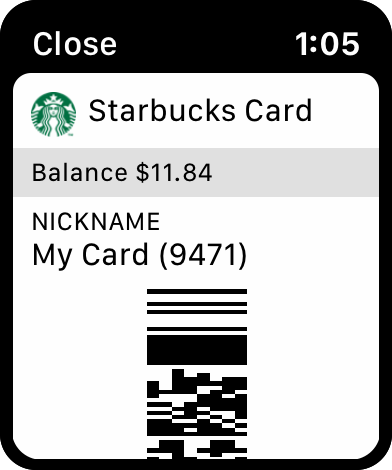
Those passes transfer automatically to the Apple Watch by default. When it’s time to use one, open the Wallet ![]() app on the watch, tap the item you want to use (Figure 94), and then scroll to fill the screen with the barcode.
app on the watch, tap the item you want to use (Figure 94), and then scroll to fill the screen with the barcode.
To rearrange the passes, open the Wallet app on the iPhone and drag them into place. The app is also where you can delete used or expired passes.