Buckwheat Walnut or Hazelnut Tuiles
Makes about forty 3-inch cookies
These crispy cookies make a sophisticated addition to a cookie assortment or an elegant counterpoint to a dish of creamy pudding or vanilla ice cream. The earthy, nutty flavor of buckwheat shines here, perfectly partnered with walnuts or hazelnuts—and butter, of course. If you want curved or shaped tuiles, see the box.
Note: Small measures of flour vary too much in weight for delicate cookies. A scale is best. If you do not have a scale, firmly packed and leveled measures will get as close as possible to the correct weights for this particular recipe.
2 tablespoons (28 grams) unsalted butter, melted, plus more for greasing the mats
2 large egg whites
2 teaspoons water
½ cup (100 grams) sugar
2 firmly packed tablespoons (22 grams) white rice flour —or—2 firmly packed tablespoons plus 2 firmly packed teaspoons (22 grams) Thai white rice flour
2 firmly packed tablespoons (22 grams) buckwheat flour
Scant ½ teaspoon salt
⅓ cup (35 grams) finely chopped walnuts or toasted skinned hazelnuts
Equipment
Baking sheets
Silicone baking mats or nonstick foil
Rolling pin or small cups for shaping (optional; see the box)
Line the baking sheets with silicone mats or nonstick foil (nonstick side up). For mats, grease them with a very thin (but thorough) coat of melted butter. For nonstick foil, simply smooth the foil to eliminate creases.
In a medium bowl, mix the egg whites with the water, sugar, rice and buckwheat flours, and salt until well blended. Stir in the butter and walnuts. Cover the bowl and let the batter rest for several hours or overnight in the refrigerator to let the flour absorb moisture.
Position racks in the upper and lower thirds of the oven (or one rack in the center if you are baking only one sheet at a time) and preheat the oven to 325°F.
Stir the batter well. Drop level teaspoons 2 inches apart on the prepared baking sheets. Use the back of the spoon to smear the batter into 2½-inch rounds.
Bake, watching carefully, for 12 to 15 minutes, rotating the pans from top to bottom and from front to back about halfway through the baking time, until the tuiles are mostly deep golden brown. If the cookies are not baked enough, they will not be completely crisp when cool.
For flat cookies, you can simply slide the mats or foil sheets onto racks and let the cookies cool on them. Or, if you need to reuse the mats, wait for a minute or two, then transfer the hot cookies to a rack to cool.
To retain crispness, put the cookies in an airtight container as soon as they are cool. They will keep for at least 1 month.
Shaping Tuiles
To make traditional curved tuiles, you must shape the cookies while they are still hot, so you might want to bake only one sheet at a time until you get the hang of it (baking time for a single sheet may be 2 to 3 minutes shorter). Slide a small metal spatula under each cookie immediately, or as soon as you can do so without deforming it. Drape cookies over a rolling pin (anchored so it will not roll) or into custard cups or any small container that will give them an interesting shape. Move the cookies to a cooling rack when they are cool enough to keep their shape. Repeat until all the tuiles are shaped. (If the cookies become too brittle, return them to the oven for a couple of minutes until they are hot and flexible again.)
If baking on nonstick foil, here’s a trick for shaping a whole sheet of tuiles at the same time: Carefully grasp the edges of the foil as soon as the sheet comes from the oven (without touching the hot pan or the cookies) and roll the foil into a fat cylinder, gently curving the attached cookies like potato chips. Crimp or secure the foil with a paper clip. When the tuiles are cool, unroll the foil carefully and remove them.

Makes about forty 3-inch cookies
Crispy, crunchy almond cookies are elegantly thin and buttery. They partner perfectly with creamy desserts like custards, pudding, and ice cream. Classic tuiles are cooled over a rolling pin (see the box on here for methods, including a shortcut) to make them resemble the roof tiles they are named for, but you can also skip that step and make them flat.
Note: Small measures of flour vary too much in weight for delicate cookies. A scale is best. If you do not have a scale, firmly packed and leveled measures will get as close as possible to the correct weights for this particular recipe.
2 tablespoons (28 grams) unsalted butter, melted, plus more for greasing the mats
2 large egg whites
2 teaspoons water
½ cup (100 grams) sugar
4 firmly packed tablespoons (44 grams) white rice flour —or—5 firmly packed tablespoons (44 grams) Thai white rice flour
¼ teaspoon pure almond extract
Scant ½ teaspoon salt
⅔ cup (70 grams) sliced almonds
Equipment
Baking sheets
Silicone baking mats or nonstick foil
Rolling pin or small cups for shaping (optional; see the box on here)
Line the baking sheets with silicone mats or nonstick foil (nonstick side up). For mats, grease them with a very thin (but thorough) coat of melted butter. For nonstick foil, simply smooth the foil to eliminate creases.
In a medium bowl, mix the egg whites with the water, sugar, rice flour, almond extract, and salt until well blended. Stir in the butter and almonds. Cover the bowl and let the batter rest for several hours or overnight in the refrigerator to let the flour absorb moisture.
Position racks in the upper and lower thirds of the oven (or one rack in the center if you are baking only one sheet at a time) and preheat the oven to 325°F.
Stir the batter. Drop level teaspoons 2 inches apart on the prepared baking sheets. Use the back of the spoon to smear the batter into 2½-inch rounds. Bake, watching carefully, for 12 to 15 minutes, rotating the pans from top to bottom and from front to back about halfway through the baking time, until the tuiles are mostly deep golden brown. If the cookies are not baked enough, they will not be completely crisp when cool.
For flat cookies, you can simply slide the mats or foil sheets onto racks and let the cookies cool on them. Or, if you need to reuse the mats, wait a minute or two, then transfer the hot cookies to a rack to cool.
To retain crispness, put the cookies in an airtight container as soon as they are cool. They will keep for at least 1 month.
Variations
Oat and Almond Tuiles
Substitute ¼ cup plus 1 tablespoon, both firmly packed (44 grams), gluten-free oat flour for the white rice flour.
Oat and Coconut Tuiles
Substitute ¼ cup plus 1 tablespoon, both firmly packed (44 grams), gluten-free oat flour for the white rice flour and substitute ⅓ cup (25 grams) unsweetened dried shredded coconut for the almonds.

Chunky Double-Chocolate Coconut Meringues
Makes 45 to 50 cookies
Add coconut flakes, salted almonds, and chunks of bittersweet and creamy coconut-flavored white chocolate to a light meringue cookie, and you get a riot of creamy, crunchy, chewy, sweet, and salty in every bite.
1 cup (140 grams) roasted salted almonds, coarsely chopped
4 ounces (115 grams) 70% cacao dark chocolate, cut into chunks, or ⅔ cup purchased chocolate chunks or chips
1 cup (40 grams) unsweetened dried flaked coconut (coconut chips)
2 ounces (60 grams) coconut white chocolate (such as Lindt), cut into ⅓-inch squares
3 large egg whites, at room temperature
⅛ teaspoon cream of tartar
½ cup plus 2 tablespoons (125 grams) sugar
Equipment
Stand mixer with whisk attachment, or handheld mixer
2 baking sheets, lined with parchment paper
Position racks in the upper and lower thirds of the oven and preheat the oven to 200°F.
In a small bowl, combine one-quarter of the almonds, dark chocolate, and coconut for sprinkling. Set aside.
In a medium bowl, mix the remaining almonds, chocolate, and coconut with the coconut white chocolate. Set aside.
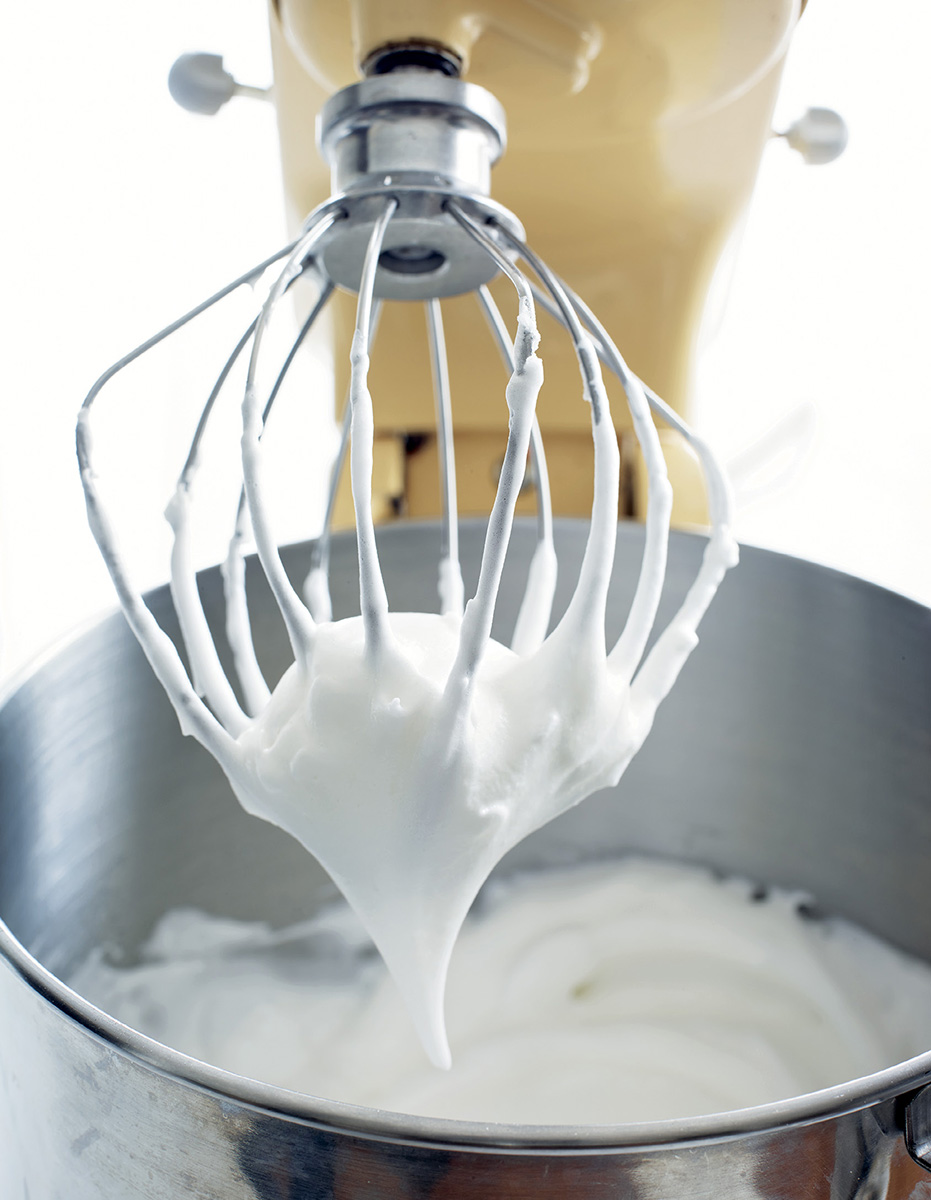
Combine the egg whites and cream of tartar in the bowl of the stand mixer fitted with the whisk attachment (or in a large bowl if using a handheld mixer). Beat on medium-high speed (or on high speed with the handheld mixer) until the egg whites are creamy white and hold a soft shape when the beaters are lifted. Continue to beat on medium to high speed, adding the sugar a little at a time, for 1½ to 2 minutes, until the egg whites are very stiff and have a dull sheen. Use a large rubber spatula to fold in the mixture of nuts, coconut, and both chocolates, just until blended. Do not let the batter sit.
Drop generous tablespoons of meringue 1½ inches apart on the prepared baking sheets. Make sure all the batter fits on the two sheets so all the meringues can be baked at once; if necessary, make each cookie a little bigger. Sprinkle the meringues with the reserved chocolate, almonds, and coconut.
Bake for 1½ hours, rotating the pans from top to bottom and from front to back halfway through the baking time. Remove a “test” meringue and let it cool completely before taking a bite. (Meringues are never crisp when hot.) If the test meringue is completely dry and crisp, turn off the oven and let the remaining meringues cool completely in the oven. If the test meringue is soft or chewy or sticks to your teeth, bake for another 15 to 30 minutes before cooling in the oven.
To prevent the cookies from becoming sticky, put them in an airtight container as soon as they are cool. They will keep for at least 2 weeks.
Makes about 2½ dozen cookies
Meringues come together quickly but require lots of time in the oven, so plan accordingly. Meringues also keep well, so you can have cookies, mushrooms (see the variation), or the makings of a fabulous dessert (just add ice cream, whipped cream, berries, and/or chocolate sauce) on hand at all times.
¼ cup (25 grams) chestnut flour
¾ cup (75 grams) walnut pieces, coarsely chopped
¾ cup (150 grams) sugar
3 large egg whites, at room temperature
¼ teaspoon cream of tartar
Equipment
Stand mixer with whisk attachment
2 baking sheets, lined with parchment paper
Position racks in the upper and lower thirds of the oven and preheat the oven to 200°F.
In a small bowl, mix the chestnut flour and walnuts with ⅓ cup (65 grams) of the sugar.
Combine the egg whites and cream of tartar in the bowl of the stand mixer fitted with the whisk attachment and beat on medium-high speed until the egg whites are creamy white and hold a soft shape when the beaters are lifted. Continue to beat on high speed, adding the remaining sugar a little at a time over 1½ to 2 minutes, until the egg whites are very stiff.
Pour the chestnut flour mixture over the egg whites and fold in with a rubber spatula just until combined. Do not let the batter sit.
Drop heaping tablespoons of meringue 1½ inches apart onto the prepared baking sheets. Make sure all the batter fits on the two sheets so all the meringues can be baked at once; if necessary, make each cookie a little bigger.
Bake for 1½ hours. Rotate the pans from top to bottom and from front to back halfway through the baking time. Remove a “test” cookie and let it cool completely before taking a bite. (Meringues are never crisp when hot.) If the meringue is completely dry and crisp, turn off the heat and let the remaining meringues cool completely in the oven. If the test meringue is soft or chewy or sticks to your teeth, bake for another 15 to 30 minutes before testing again.
To prevent the meringues from becoming moist and sticky, put them in an airtight container as soon as they are cool. They will keep for at least 2 weeks.
Variation: Chestnut Meringue Mushrooms
Make the meringue as directed, omitting the walnuts. Scrape the meringue into a pastry bag fitted with a plain tip with a ½-inch opening. Pipe pointed “kisses” about 1 inch high to make “stems.” Do not worry if the tips bend over or sag. Pipe domes to make mushroom “caps.” Sieve a light dusting of unsweetened cocoa powder over the caps and stems and fan them or blow on them vigorously to blur the cocoa and give the mushrooms an authentic look. Bake as directed. If not assembling immediately, store the caps and stems in an airtight container as soon as they are cool.
To assemble the mushrooms, place 2 ounces (55 grams) chopped milk or dark chocolate in a small stainless steel bowl set in a skillet of barely simmering water. Immediately turn off the heat and stir the chocolate until it is melted and smooth.
Use a sharp knife to cut ¼ to ½ inch off the tip of each stem to create a flat surface. Spread a generous coat of melted chocolate over the flat side of several mushroom caps. Allow the chocolate to set partially before attaching the cut surface of the stems. Repeat until all the mushrooms are assembled. Set the mushrooms aside until the chocolate has hardened and the caps and stems are “glued” together. Store in an airtight container, as soon as possible. Makes about 40 mushrooms with 1¼-inch caps.
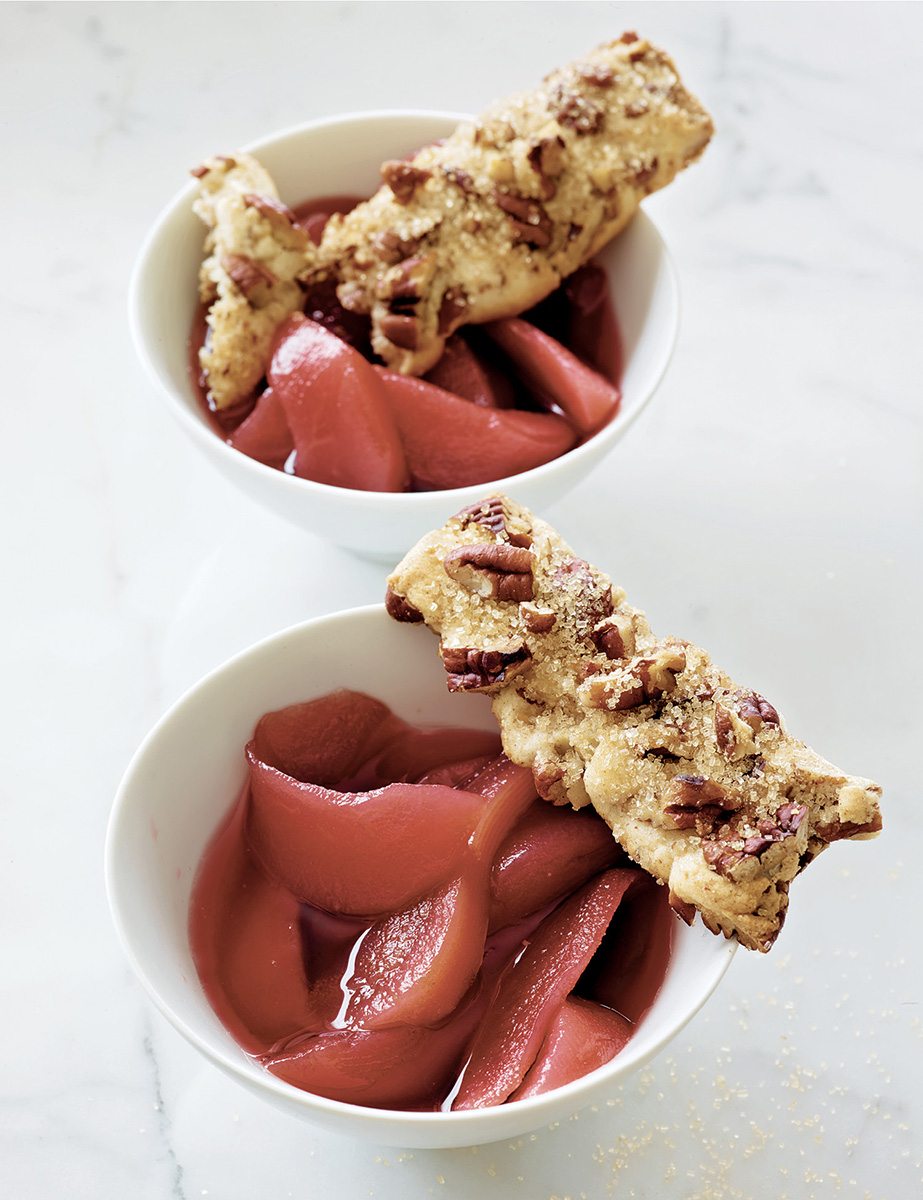
Makes 16 biscotti
These gorgeous spicy, nut-studded cookies are technically biscotti since they are baked twice (once on each side), and they have all the crunch of regular biscotti, but their nutty coating makes them extra crunchy and even more irresistible. They are delicious served on their own, but you can also use them to turn a simple dish of poached fruit, such as apples or pears, into a stunning dessert.
⅔ cup (100 grams) white rice flour —or—1 cup (100 grams) Thai white rice flour
¼ cup plus 2 tablespoons (50 grams) sorghum flour
¼ cup (50 grams) granulated sugar
⅛ teaspoon xanthan gum
1 teaspoon baking powder
¼ teaspoon salt
¼ cup plus 2 tablespoons milk (any percent fat)
8 tablespoons (1 stick/115 grams) unsalted butter, softened
¼ cup (50 grams) coarse sugar, such as turbinado
½ teaspoon cinnamon (preferably canela cinnamon)
2 cups (200 grams) coarsely chopped pecans
Equipment
Stand mixer with paddle attachment
Baking sheet, lined with parchment paper
Rolling pin
Combine the rice and sorghum flours, granulated sugar, xanthan gum, baking powder, salt, and milk in the bowl of the stand mixer fitted with the paddle attachment and beat for 2 minutes; the dough will be very stiff. It is important to beat the dough long enough or the biscotti won’t hold together; don’t worry about overbeating. Add the butter and beat until thoroughly incorporated. Scrape the dough into a flat patty, wrap in plastic, and refrigerate for about 2 hours, until firm.
Position a rack in the upper third of the oven and preheat the oven to 400°F.
Combine the coarse sugar, cinnamon, and pecans in a bowl and scoop about half of the mixture onto the parchment paper on the baking sheet. Turn the dough patty out onto the mixture and turn and press it to cover both sides with nuts. Place it in the center of the paper and cover with another piece of parchment. Roll out to an 8-by-10-inch rectangle about ½ inch thick. Peel off the top sheet of parchment and pat or roll the remaining nut mixture onto the dough. Using a long thin knife, cut the dough straight down to make 2 sections, each 5 by 8 inches, then cut each section into 8 bars, 1 inch wide and 5 inches long. Wipe the knife with a paper towel as needed. Use the knife or a spatula to move the bars so that they are evenly spaced on the same sheet. Press any stray nuts into the bars. Bake for 15 minutes. Remove from the oven and turn the biscotti over with a spatula, moving the browner ones to the center of the pan. Return to the oven and bake for 8 to 10 minutes, until the biscotti are lightly browned on top and bottom. Set the pan on a rack to cool. The biscotti will keep in an airtight container for several days.

Makes about 3 dozen 2½-inch cookies
When you need simple tasty cutout cookies for a child’s party or a themed occasion, these are a sure thing. To decorate, simply sprinkle them with colored sugar before baking, or bake and cool the cookies first and then ice them—or pipe melted chocolate on them—before affixing sugars, sprinkles, miniature candies, and so on (see the box on pages 62–63). For simpler slice-and-bake cookies, see the sablé variations.
1¼ cups plus 2 tablespoons (140 grams) gluten-free oat flour
¼ cup plus 2 tablespoons (55 grams) white rice flour —or—½ cup plus 1 tablespoon (55 grams) Thai white rice flour
¼ teaspoon salt
⅛ teaspoon baking soda
⅔ cup (130 grams) sugar
¼ cup (60 grams) cream cheese, cut into chunks
12 tablespoons (1½ sticks/170 grams) unsalted butter, softened and cut into chunks
1 teaspoon pure vanilla extract
Gluten-free oat flour for cutting out the cookies
Colored sugars for sprinkling (optional—see the box on pages 62–63 for decorating inspiration)
Equipment
Food processor fitted with the steel blade (optional)
Rolling pin
Cookie cutters
Baking sheets, lined with parchment paper
To make the dough by hand, put the oat and rice flours, salt, and baking soda in a large bowl and whisk until thoroughly blended. Add the sugar, cream cheese, butter, and vanilla. Use a fork or the back of a large spoon to mash and mix the ingredients together until all are blended into a smooth, soft dough.
To make the dough in a food processor, put the oat and rice flours, salt, and baking soda in the food processor. Pulse to mix. Add the sugar, cream cheese, butter, and vanilla. Pulse until the mixture forms a smooth, soft dough. Scrape the bowl and blend in any stray flour at the bottom with your fingers.
Form the dough into 2 flat patties. Wrap and refrigerate the dough for at least 2 hours, but preferably overnight (see Note).
Position racks in the upper and lower thirds of the oven and preheat the oven to 325°F.
Remove 1 patty from the refrigerator and let it sit at room temperature briefly, until supple enough to roll but still quite firm. It will continue to soften as you work. Roll the dough between two pieces of wax or parchment paper, or between heavy plastic sheets cut from a plastic bag, to a thickness of ⅛ inch. Turn the dough over once or twice while rolling it out to check for deep wrinkles; if necessary, peel off and smooth the paper or plastic over the dough before continuing to roll it. When the dough is thin enough, peel off the top sheet of paper or plastic and keep it in front of you. (If the dough is sticky, dust it with a little oat flour.) Invert the dough onto the sheet in front of you and peel off the second sheet.
Cut cookie shapes as close together as possible to minimize scraps, dipping the edges of the cookie cutters in oat flour as necessary to prevent sticking. Use the point of a paring knife to lift and remove scraps as you transfer cookies to the prepared baking sheets. Place the cookies ½ inch apart. If the dough gets too soft at any time—while rolling, cutting, removing scraps between cookies, or transferring cookies—slide a baking sheet underneath the paper or plastic and refrigerate the dough for a few minutes until firm. Repeat with the second piece of dough.
Press all the dough scraps together gently and reroll them as necessary. (Don’t worry that rerolling scraps will produce tough cookies.) Sprinkle the cookies with colored sugars, if desired, and pat to adhere.
Bake for 8 to 12 minutes, until golden brown at the edges but deep brown on the bottom, rotating the pans from top to bottom and from front to back halfway through the baking time. Repeat until all the cookies are baked.
Set the pans or just the liners on racks to cool. Cool the cookies completely before icing, stacking, or storing. They will keep in an airtight container for at least 2 weeks.
Slice-and-Bake Oat Sablés
Follow the instructions for making the dough, then scrape the dough onto a sheet of wax or parchment paper and form it into a 10-inch log about 1¾ inches in diameter. Wrap it tightly in the wax or parchment paper and refrigerate for at least 2 hours, but preferably longer or overnight. (The dough may be frozen for up to 3 months.) Use a sharp knife to cut the cold dough log into ¼-inch-thick slices. Place the cookies at least 1½ inches apart on the prepared baking sheets. Bake for 15 to 20 minutes, until the cookies are golden brown at the edges and well browned on the bottom. Rotate the pans from top to bottom and from front to back halfway through the baking time. Set the pans or just the liners on racks to cool. Cool the cookies completely before stacking or storing. They will keep in an airtight container for at least 2 weeks.
Nutty Oat Sablés
Add ½ cup (70 grams) of any raw or toasted nuts to the dough: If mixing by hand, add them to the dough at the end. If using a food processor, add nuts whole with the dry ingredients and pulse until they are the desired consistency. Proceed as directed in the main recipe if making cutout cookies, or the Slice-and-Bake Oat Sablés variation if you prefer to simply slice and bake the cookies.
Nibby Oat Sablés
Add a generous ¼ cup (35 grams) roasted cacao nibs to the dough with the butter. Proceed as directed in the main recipe if making cutout cookies, or the Slice-and-Bake Oat Sablés variation if you prefer to simply slice and bake the cookies.
Orange Sablés with Ancho Chile
Omit the vanilla and add 1½ teaspoons finely grated orange zest and 1½ teaspoons crumbled or powdered dried ancho chile with the butter. Proceed as directed in the main recipe if making cutout cookies, or the Slice-and-Bake Oat Sablés variation if you prefer to simply slice and bake the cookies.
Chai Sablés
Add 2 teaspoons pulverized chai (from a package of loose chai or from the contents of 2 to 3 chai tea bags) with the butter. Proceed as directed in the main recipe if making cutout cookies, or the Slice-and-Bake Oat Sablés variation if you prefer to simply slice and bake the cookies.
Note: Instead of chilling the dough first and rolling it later, you can roll the freshly made dough gently (it will be very soft) between sheets of wax or parchment paper immediately, then stack and refrigerate the rolled-out dough on a baking sheet for at least 2 hours or until needed.
Decorating with Sugar and Sprinkles
You can sprinkle unbaked cookies with colorful sugar just before baking. Or add colorful sugar or sprinkles to cookies decorated with icing or melted chocolate as described below.
Decorating with Chocolate
For piped or drizzled cookie decorations that dry hard and taste great, nothing beats pure melted chocolate. It’s simple to use (although it must be kept warm, and no moisture can be allowed to touch it) and requires no tempering as long as you drizzle or pipe onto rather than dip or coat the surface of cookies. (Drizzled and piped chocolate will usually dry without discoloring, but chocolate that is spread all over the surface or used for dipping will turn gray and streaky if not tempered.) Use chocolate bars or wafers or disks that are meant to be melted; chocolate chips do not melt well enough for this purpose. You may tint white chocolate with oil-based or powdered food colors designed especially for chocolate—regular water-based food colors are not compatible with chocolate.
To melt the chocolate for decorating, chop 3 ounces of chocolate (dark, milk, or white) into small pieces and place in a small, dry heatproof (preferably stainless steel) bowl. Bring a wide skillet with about ½ inch of water to a simmer, then turn it off. Set the bowl of chocolate in the water and stir with a dry spatula until the chocolate is melted and smooth. Or melt the chocolate in a microwave-safe container on medium or 50% power for dark chocolate (low or 30% power for milk or white chocolate) for 2 minutes. Stir well. Microwave a few more seconds at a time, as necessary, stirring well, until the chocolate is melted and smooth.
Drizzle the chocolate over cookies with a spoon or fork, or pipe it from the corner of a small plastic decorating bag or zipper-type plastic bag (fill it, close it, snip off the tip, and squeeze from the top). Top the chocolate drizzles with sprinkles, if desired, while the chocolate is still soft. Let chocolate set and harden before storing cookies between layers of wax paper. If the chocolate begins to harden in the bag, microwave on low power for 10 seconds at a time until the chocolate is warm and flowing again.
Decorating with Icing
Simple powdered-sugar icing is easy to make and versatile. You can color it with ordinary food colors and/or flavor it with extracts or oils. Spread it on with a small spatula, paint it on with a brush, or pipe it from the corner of a small plastic decorating bag or zipper-type plastic bag (fill it, close it, snip off the tip, and squeeze from the top). Top icing with sprinkles, if desired. Let icing set and harden before storing between layers of wax paper.
To make ¾ cup of powdered sugar icing for cookies, mix 3 cups (12 ounces) powdered sugar with 2 to 3 tablespoons of water, lemon juice (for lemon-flavored icing,), or 4 to 5 tablespoons of brandy or rum to the desired consistency. Adjust by adding powdered sugar or liquid. If you like, flavor to taste with drops of extracts or flavor oils and/or tint with ordinary food coloring. Note that food coloring intensifies with time, so tint icing lighter than you think it should be.

Quince and Orange–Filled Chestnut Cookies
Makes 20 to 24 cookies
With a filling of quince paste (available in better supermarkets or specialty stores) mixed with chopped candied orange peel or some grated orange zest, these homemade cookies look fancy on a holiday dessert bar. You can make a date variation by substituting chopped moist dates (such as medjools) for the quince paste.
For the Dough
1½ cups (150 grams) chestnut flour
⅓ cup plus 1 tablespoon (60 grams) white rice flour —or—½ cup plus 1 tablespoon (60 grams) Thai white rice flour
½ cup (100 grams) sugar
Scant ½ teaspoon salt
12 tablespoons (1½ sticks/170 grams) unsalted butter, slightly softened, cut into chunks
¼ cup (60 grams) cream cheese
For the Filling
⅔ cup (180 grams) quince paste
¼ cup (40 grams) finely chopped candied orange peel, or additional quince paste
Grated zest of ½ orange, if not using candied orange peel (optional)
Powdered sugar for dusting
Equipment
Food processor fitted with the steel blade (optional)
Baking sheets, lined with parchment paper
To make the dough by hand, put the chestnut and rice flours, sugar, and salt in a large bowl and whisk until thoroughly blended. Add the butter chunks and cream cheese. Use a fork or the back of a large spoon to mash and mix the ingredients together until all are blended into a smooth, soft dough.
To make the dough in a food processor, put the chestnut and rice flours, sugar, and salt in the food processor. Pulse to mix. Add the butter chunks and cream cheese. Pulse until the mixture forms a smooth, soft dough. Scrape the bowl and blend in any stray flour at the bottom of the bowl with your fingers.
Press the dough into a ball, wrap it in plastic, and refrigerate it for at least 2 hours, but preferably overnight and up to 3 days. (Or, to save work later, you can fill and shape the cookies immediately and then refrigerate them in a covered container for at least 2 hours.)
To make the filling, mash the quince paste with a fork and mix it with the candied orange peel or additional quince paste and orange zest. Shape level teaspoons (8 grams) of the quince paste into little balls (about ¾ inch in diameter) and set them on a plate or piece of wax or parchment paper.
Position racks in the upper and lower thirds of the oven and preheat the oven to 325°F.
Remove the dough from the refrigerator and let it soften for 10 or 15 minutes. Shape level tablespoons of dough (20 to 25 grams) into balls about 1¼ inches in diameter. Make a deep depression in the dough with a knuckle and widen it to form a little bowl. Press a ball of filling into the bowl and ease the dough up around the filling to completely enclose it. Set the cookie, seam side down, on the prepared baking sheets. You can leave the cookies round, or press them into a little beehive shape. Bake for 15 to 20 minutes, until the cookies are slightly golden brown and the bottoms are deep golden. Rotate the pans from top to bottom and from front to back a little over halfway through the baking time. Place the pans on racks, or slide the liners from the pans onto racks to cool. Sift a little powdered sugar over the cookies. Cool the cookies completely before stacking or storing. They will keep in an airtight container for at least 2 weeks. Resift with powdered sugar before serving, if desired.
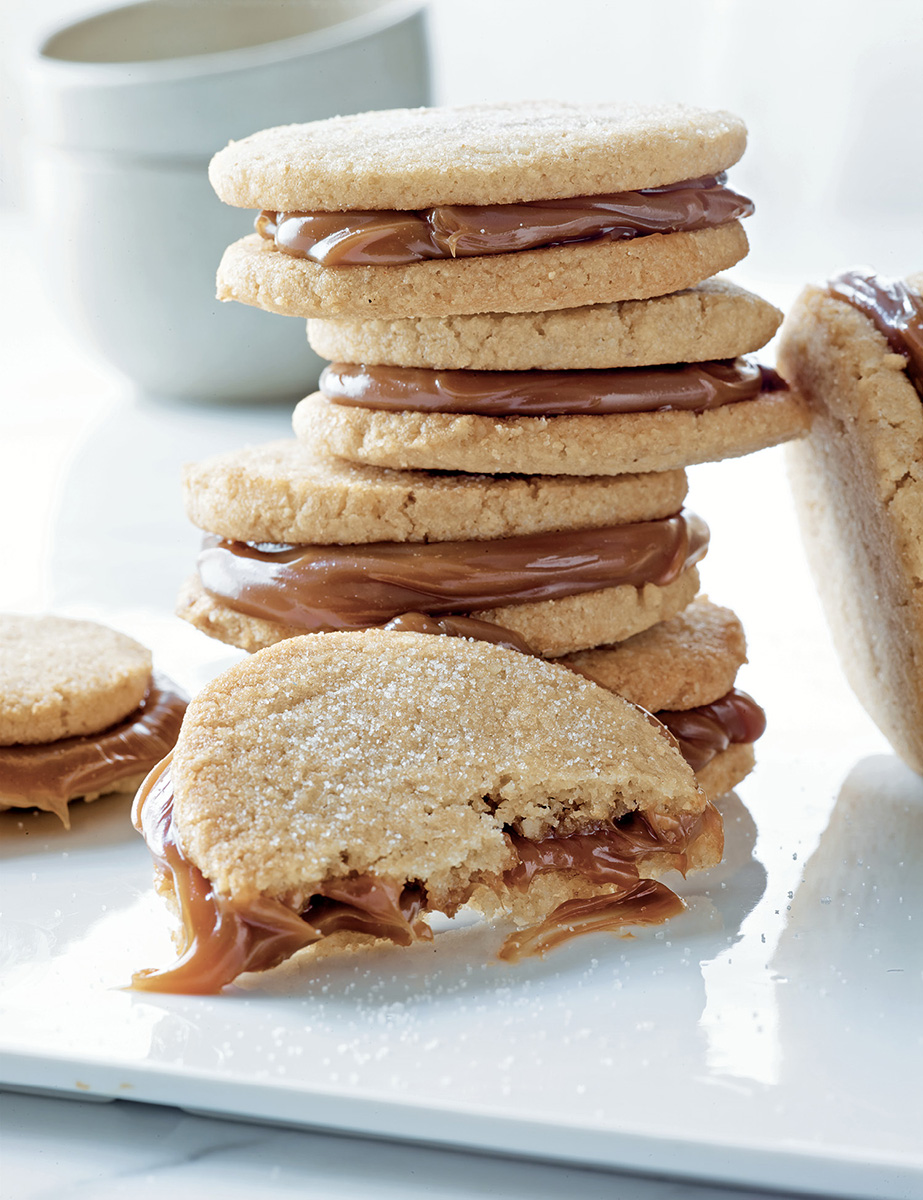
Makes twenty 2-inch sandwich cookies
Alfajores are luscious sandwich cookies filled with dulce de leche or cajeta. Every region makes alfajores with a different type of cookie, so you should never hesitate to invent your own new combinations. Here, the sweet caramelized milk balances the bitter tannins in the walnuts perfectly. If you’re a fan of Nutella, you can use it to fill the cookies instead of the dulce de leche.
Scant ½ cup (50 grams) coconut flour
1½ cups (150 grams) walnut pieces
¼ teaspoon baking powder
½ teaspoon salt
1 cup plus 2 tablespoons (225 grams) sugar
6 tablespoons (85 grams) unsalted butter, very soft
1 teaspoon pure vanilla extract
1 large egg white
⅔ cup dulce de leche or cajeta (see Note, here)
Equipment
Food processor fitted with the steel blade
Baking sheets, lined with parchment paper
Put the coconut flour, walnuts, baking powder, salt, and sugar in the food processor. Process until the walnuts are finely ground, about 15 seconds. Add the butter, vanilla, and egg white and pulse 8 to 10 times, or until the dough comes together. Form the mixture into a 10-inch log 2 inches in diameter on a sheet of wax or parchment paper. Wrap the log in the paper, keeping it as cylindrical as possible. Chill for at least 2 hours and up to 3 days, or wrap airtight and freeze for up to 3 months. Thaw before using.
Position racks in the upper and lower thirds of the oven and preheat the oven to 350°F.
Use a thin serrated knife to cut the dough into slices a little less than ¼ inch thick. Place the slices 1 inch apart on the prepared baking sheets. Bake for 9 to 11 minutes, until the cookies are golden on the bottom and browned at the edges; rotate the pans from top to bottom and from front to back halfway through the baking time. Place the pans on racks, or slide the liners from the pans onto racks to cool completely.
When the cookies are completely cool, fill with dulce de leche. Turn half of the cookies upside down. Spoon dulce de leche into one corner of a resealable plastic freezer bag. Clip about ¼ inch from the corner and pipe about 1½ teaspoons onto each upside-down cookie. Cover with a right-side-up cookie and press very gently to spread the filling toward the edges.
The filled cookies will keep in an airtight container for up to 3 days, although they will soften after the first day. Unfilled cookies may be stored for up to 1 week.
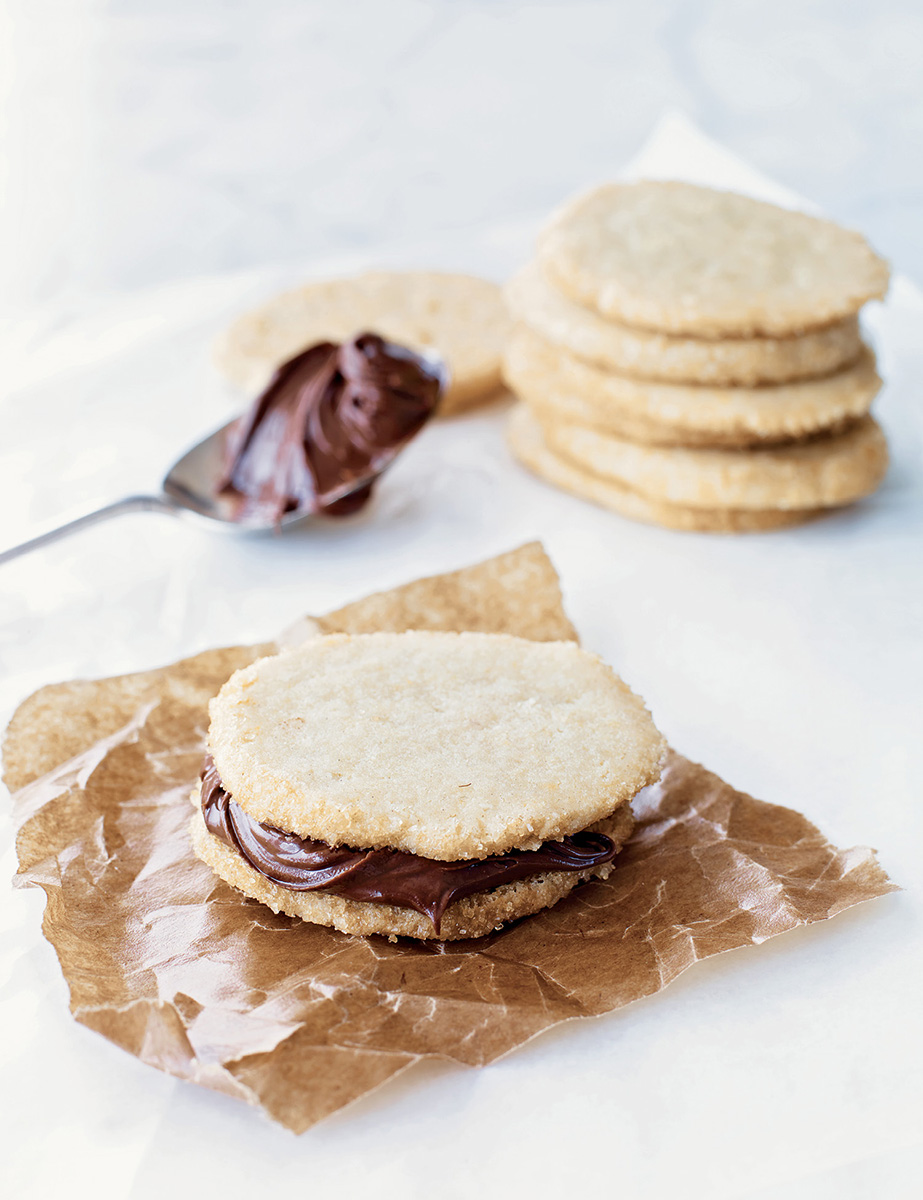
Makes about 25 sandwich cookies
Shortbread cookies filled with chocolate-hazelnut spread—what’s not to love? You can add ground hazelnuts to the cookie dough or not, as you like.
1 cup plus 2 tablespoons (150 grams) sorghum flour
⅓ cup plus 1 tablespoon (60 grams) white rice flour —or—½ cup plus 1 tablespoon (60 grams) Thai white rice flour
⅔ cup (130 grams) granulated sugar
½ teaspoon salt
1 cup (140 grams) hazelnuts (optional)
12 tablespoons (1½ sticks/170 grams) unsalted butter, slightly softened, cut into chunks
¼ cup (60 grams) cream cheese
1 tablespoon water
1 teaspoon pure vanilla extract
Coarse sugar, such as turbinado, for rolling
¾ cup chocolate-hazelnut spread, such as Nutella
Equipment
Food processor fitted with the steel blade
Baking sheets, lined with parchment paper
Put the sorghum and rice flours, granulated sugar, salt, and hazelnuts, if using, in the food processor and pulse until the hazelnuts are finely ground. Add the butter chunks, cream cheese, water, and vanilla. Pulse until the mixture forms a smooth, soft dough. Scrape the bowl and blend in any stray flour at the bottom of the bowl with your fingers. On a sheet of wax or parchment paper, shape the dough into a 12-inch log about 2 inches in diameter. Wrap the dough and refrigerate it for at least 2 hours, but preferably overnight.
Position racks in the upper and lower thirds of the oven and preheat the oven to 325°F.
Roll the chilled cookie dough in the coarse sugar, pressing it to adhere. Cut into slices less than ¼ inch thick and place them 1 inch apart on the prepared baking sheets. Bake for 20 to 25 minutes, until the cookies are golden brown at the edges. Rotate the pans from top to bottom and from front to back a little over halfway through the baking time. Place the pans on racks, or slide the liners from the pans onto racks to cool. Cool the cookies completely before stacking, filling, or storing. Unfilled cookies will keep in an airtight container for at least 2 weeks.
Turn half of the cookies upside down. Spoon the chocolate-hazelnut spread into one corner of a resealable plastic freezer bag. Clip about ¼ inch from the corner and pipe about 1½ teaspoons onto each upside-down cookie. Cover with a right-side-up cookie and press very gently to spread the filling toward the edges. The filled cookies will keep in an airtight container for up to 3 days, although they will soften after the first few hours.
Makes about 40 cookies
These super-simple slice-and-bake shortbread cookies are only slightly sweet, but they have great cocoa flavor and a beautiful dark color. While they are completely addictive with nothing added, you can dress them up endlessly. If you want fancier-looking cookies for holiday parties or gifts (or something fun to do with children), you can roll the dough into balls, dredge with sugar, and flatten them individually before baking (see Note), or you can roll out the dough for cutout cookies to decorate. Try the extra-bittersweet variation for even more chocolate flavor, and don’t miss the Chocolate-Mint Sandwich Cookies variation.
1 cup plus 2 tablespoons (150 grams) teff flour
⅓ cup plus 1 tablespoon (60 grams) white rice flour —or—½ cup plus 1 tablespoon (60 grams) Thai white rice flour
¼ cup plus 2 tablespoons (35 grams) natural unsweetened cocoa powder
⅔ cup (135 grams) sugar
Scant ½ teaspoon salt
⅛ teaspoon baking soda
12 tablespoons (1½ sticks/170 grams) unsalted butter, slightly softened and cut into chunks
¼ cup (60 grams) cream cheese
1 tablespoon water
1 teaspoon pure vanilla extract
Equipment
Food processor fitted with the steel blade (optional)
Baking sheets, lined with parchment paper
To make the dough by hand, put the teff and rice flours, cocoa, sugar, salt, and baking soda in a large bowl and whisk until thoroughly blended. Add the butter chunks, cream cheese, water, and vanilla. Use a fork or the back of a large spoon to mash and mix the ingredients together until all are blended into a smooth, soft dough.
To make the dough in a food processor, put the teff and rice flours, cocoa, sugar, salt, and baking soda in the food processor. Pulse to mix. Add the butter chunks, cream cheese, water, and vanilla. Pulse until the mixture forms a smooth, soft dough. Scrape the bowl and blend in any stray flour at the bottom of the bowl with your fingers.
On a sheet of wax or parchment paper, shape the dough into a 10-inch log about 2 inches in diameter. Wrap the dough and refrigerate it for at least 2 hours, but preferably overnight.
Position racks in the upper and lower thirds of the oven and preheat the oven to 325°F.
Slice the chilled cookie dough into ¼-inch slices and place them 1 inch apart on the lined sheets. Bake for 20 to 25 minutes, or until the cookies are firm to the touch (it is hard to tell by looking, but flip one cookie over and see if it is slightly browned on the bottom). Rotate the pans from top to bottom and from front to back a little over halfway through the baking time. Place the pans on racks, or slide the liners from the pans onto racks to cool. Cool the cookies completely before stacking or storing. The cookies will keep in an airtight container for at least 2 weeks.
Note: If you have time to be a little fussier, you can shape chilled dough into 1-inch balls and roll them in sugar before placing them 2 inches apart on the lined baking sheets. Flatten each ball to about ¼ inch by covering with a piece of wax paper and pressing with a flat-bottomed cup; peel off the wax paper and repeat with the remaining cookies. Bake as directed.
Spicy Chocolate Sablés
Add ¾ teaspoon ground cinnamon and ⅛ teaspoon each ground cayenne and freshly ground black pepper with the dry ingredients.
Extra-Bittersweet Chocolate Sablés
Put half of the sugar in the processor with 1½ ounces (45 grams) coarsely chopped unsweetened chocolate or a high-percentage cacao (70% or higher) dark chocolate. Pulse until the chocolate pieces are the size of sesame seeds. Add the remaining ingredients and proceed as directed. These cookies take extra time to crisp up after they are cool because the chocolate takes longer to set and harden.
Chocolate-Mint Sandwich Cookies
Melt 4 ounces (115 grams) dark, milk, or white chocolate (see here) and flavor with 2 drops (use an eye dropper!) of mint oil. Don’t use mint extract or any non-oil-based flavoring or the chocolate will seize. Taste and adjust the flavor with additional drops of mint oil if necessary.
Sandwich cookies with ½ teaspoon of the minty chocolate. Let them stand to set the chocolate before serving.

Makes about 1½ dozen 2-inch sandwich cookies
These pretty cookies look as though they are fussy to make, but they are actually slice-and-bake cookies, with holes cut from half of them about halfway through the baking time. Buckwheat pairs well with any dark berry or cherry flavor, so feel free to try different preserves. The cookies keep well, but they should be assembled only shortly before serving. Leftover filled cookies will soften a bit, but they will still taste great.
Buckwheat Shortbread Cookies dough (here), shaped into a log and chilled as directed
¼ cup blackberry (or other) preserves
Powdered sugar for dusting
Equipment
Food processor fitted with the steel blade (optional)
Baking sheets, lined with parchment paper
⅞-inch round cookie cutter (or bottle cap to improvise)
Fine-mesh strainer
Position racks in the upper and lower thirds of the oven and preheat the oven to 325°F.
Slice the chilled log less than ¼ inch thick and place the slices 1½ inches apart on the prepared baking sheets, dividing the total number equally between them. Bake for about 12 minutes. Remove the upper sheet of cookies and place it on the counter or stovetop. Press the cookie cutter gently into each cookie. If the centers lift out, fine; otherwise you can remove them later. Switch and rotate the pans, placing the first on the lower rack in place of the second. Bake for 10 to 15 minutes, or until the cookies are slightly darker at the edges and well browned on the bottom.
Set the pans or just the liners on racks to cool. Cool the cookies completely. Remove the cutouts. Unfilled cookies will keep in an airtight container for at least 2 weeks.
Shortly before serving, spread ½ teaspoon preserves on each of the cookies without holes. Sieve a little powdered sugar over the cookies with holes and place one on top of each jam-topped cookie.

Makes 4 Dozen cookies
Part of a great eastern European Jewish baking tradition, rugelach, though considered cookies, are really miniature pastries: flaky cream cheese dough rolled up around cinnamon sugar, jam, currants, and nuts (the traditional filling), or fanciful variations that may include bits of chocolate or cacao nibs or whatever good things a baker might have on hand. Not surprisingly, the oat flour is a perfect flavor partner for the fruits, nuts, and spices in this recipe and all the variations.
For the Dough
½ pound (2 sticks/225 grams) unsalted butter, cold
1⅓ cups (200 grams) white rice flour, plus more for rolling —or—2 cups (200 grams) Thai white rice flour, plus more for rolling
1¾ cups (175 grams) gluten-free oat flour
8 ounces (225 grams) cream cheese
2 tablespoons (25 grams) sugar
1 teaspoon xanthan gum
½ teaspoon baking soda
¼ teaspoon salt
¼ cup water, plus more as needed
For the Filling
¾ cup (235 grams) thick apricot jam or preserves
1 teaspoon ground cinnamon
1 cup (225 grams) finely chopped walnuts
½ cup (65 grams) chopped dried apricots
Salt
Cinnamon sugar: 2 tablespoons sugar mixed with ½ teaspoon ground cinnamon
Equipment
Box grater
Stand mixer with paddle attachment or handheld mixer
Rolling pin
Baking sheets, lined with parchment paper or foil
Food processor (optional)
To make the dough, using the largest holes on a box (or other) grater, grate the butter onto a plate lined with wax paper. Refrigerate until needed.
Combine the rice and oat flours in a small bowl and mix thoroughly with a whisk.
In the bowl of the stand mixer fitted with the paddle attachment or in a large bowl with a handheld mixer, mix the cream cheese, sugar, xanthan gum, baking soda, salt, and water for about 2 minutes on medium speed. The mixture will look wet and stretchy.
Add the flour mixture and beat on low speed until the mixture resembles coarse bread crumbs (it will not be smooth). Sprinkle the shredded butter into the bowl and mix on low speed to break the butter shreds into bits and distribute them. The mixture will resemble loose crumbs, sticking together only when pinched. If necessary, sprinkle and mix in another tablespoon of water. Do not try to form a cohesive dough. Divide the mixture into quarters. Dump one-quarter in the center of a sheet of plastic wrap. Bring the sides of the wrap up around the mixture on all sides, pressing firmly to form a patty about 5 inches in diameter. Wrap the patty tightly. Repeat with the remaining 3 portions of dough. Refrigerate the patties until firm, at least 2 hours and up to 3 days.
Position racks in the upper and lower thirds of the oven and preheat the oven to 350°F.
Remove 1 piece of dough from the refrigerator. If necessary, let it stand until pliable enough to roll but not too soft. Roll between sheets of wax or parchment paper into a 12-inch round a scant ⅛ inch thick. Slide the wax paper and dough onto a baking sheet and refrigerate. Repeat with the remaining pieces of dough, stacking them in the refrigerator. Chill the dough for at least 15 minutes. Meanwhile, to make the filling, pulse the preserves in a food processor if there are large pieces of fruit and stir in the cinnamon.
Set one piece of dough on the counter and peel off the top sheet of wax paper and turn it clean side up on the counter or a cutting board. Dust the dough very lightly with a little rice flour and flip it onto the paper and peel off the second sheet. Spread one-quarter of the preserves over the dough and sprinkle with one-quarter of the walnuts, one-quarter of the apricots, and a tiny pinch of salt. Cut the dough like a pie into 12 equal wedges. Roll the wide outside edge up around the filling toward the point, brushing off any excess rice flour as you go. Place the roll, with the dough point underneath to prevent it from unrolling, on a prepared baking sheet. Repeat with the remaining wedges, placing cookies 1½ inches apart. If at times the dough becomes too soft to roll, return it to the refrigerator to firm up. Fill, cut, and roll the remaining pieces of dough. Sprinkle with cinnamon sugar.
Bake for 18 to 20 minutes, until the cookies are golden brown at the edges and deep brown on the bottom. Rotate the pans from top to bottom and from front to back halfway through the baking time. Set the pans or just the liners on racks to cool. Let the rugelach cool completely before stacking or storing. The rugelach are always most exquisite on the day they are baked, but they remain delicious, stored in an airtight container, for about 5 days.
Variations
Blueberry Walnut Rugelach
Omit the apricot preserves. Mix the walnuts and cinnamon with 2 tablespoons (25 grams) granulated sugar, ½ cup (100 grams) packed brown sugar, and ½ cup (70 grams) dried blueberries (or substitute currants). Sprinkle one-quarter of the mixture over each round of dough, and roll over the filling with a rolling pin to press it gently into the dough before cutting into wedges. Sprinkle with salt, roll up, and bake as directed.
Chocolate-Hazelnut Rugelach
Combine ½ cup (100 grams) granulated sugar, 1 teaspoon pure vanilla extract, 1 cup (225 grams) finely chopped toasted and skinned hazelnuts, and 1 cup (170 grams) miniature chocolate chips. Use in place of the apricot filling as follows: Sprinkle one-quarter of the mixture over each round of dough, and roll over the filling with a rolling pin to press it gently into the dough before cutting into wedges. Sprinkle with salt, roll up, and bake as directed.
Combine 2 tablespoons (25 grams) granulated sugar, ½ cup (100 grams) packed light brown sugar, 1 teaspoon ground cinnamon, ½ cup (70 grams) dried currants, and ½ cup (55 grams) roughly chopped cacao nibs for the walnuts. Use in place of the apricot filling as follows: Sprinkle one-quarter of the mixture over each round of dough, and roll over the filling with a rolling pin to press it gently into the dough before cutting into wedges. Sprinkle with salt, roll up, and bake as directed.

Makes 25 small brownies
These very rich, very decadent brownies with a not-quite-grown-up flavor appeal to most grown-ups.
For the Chocolate Layer
8 tablespoons (1 stick/115 grams) unsalted butter, softened
4 ounces (115 grams) 66% to 72% cacao dark chocolate, coarsely chopped
1¼ cups (250 grams) granulated sugar
2 large eggs
1 teaspoon pure vanilla extract
¼ teaspoon salt
⅓ cup plus 1 tablespoon (60 grams) white rice flour —or—½ cup plus 1 tablespoon (60 grams) Thai white rice flour
For the Peanut Crunch Layer
4 tablespoons (½ stick/55 grams) unsalted butter, softened
½ cup (100 grams) packed light brown sugar
¼ teaspoon salt
1 large egg
½ teaspoon pure vanilla extract
½ cup plus 2 tablespoons (160 grams) salted crunchy natural peanut butter
⅓ cup plus 1 tablespoon (60 grams) white rice flour —or—½ cup plus 1 tablespoon (60 grams) Thai white rice flour
¼ teaspoon baking soda
Equipment
9-inch square metal baking pan, bottom and all four sides lined with foil
Position a rack in the lower third of the oven and preheat the oven to 350°F.
To make the chocolate layer, place the butter and chocolate in a medium stainless steel bowl set directly in a wide skillet of barely simmering water. Stir frequently until the chocolate is completely melted and the mixture is smooth and quite hot to the touch. Stir in the sugar and remove from the heat. Use a large spoon to beat in the eggs, vanilla, and salt. The mixture should be very smooth; if it is not, place the bowl back in the water bath over very low heat for 30 seconds, stirring constantly. Add the flour and beat with a spoon until the batter comes away from the sides of the bowl, about 1 minute. Set aside.
To make the peanut crunch layer, in a separate bowl, use a large spoon or spatula to mix all the ingredients until completely blended. Press the mixture evenly in the bottom of the prepared pan. Bake for 8 to 10 minutes, until the batter is slightly darker at the edges.
Remove the pan from the oven and spoon dollops of chocolate batter all over the hot crust. Spread gently to make an even layer. Return the pan to the oven and bake for 20 to 22 minutes, until the surface is dry and pulls away slightly from the sides of the pan. Cool completely in the pan on a rack. Lift the edges of the pan liner and transfer the brownies to a cutting board. Cut into 25 squares. The brownies will keep in an airtight container for 3 to 4 days.
Variation: Hazelnut Crunch Brownies
Substitute 2 cups (160 grams) hazelnut meal/flour plus ½ teaspoon salt for the peanut butter.

Makes twenty-five 2-inch cookies
These festive cookies are both tenderly crunchy and a little chewy from the dried fruit and candied ginger filling. You can sprinkle some chopped pecans onto the dough with the filling to make fruit- and nut-filled squares instead.
1 cup plus 2 tablespoons (150 grams) sorghum flour
⅓ cup plus 1 tablespoon (60 grams) white rice flour, plus more for the dough —or—½ cup plus 1 tablespoon (60 grams) Thai white rice flour, plus more for the dough
½ cup (100 grams) granulated sugar
Rounded ¼ teaspoon salt
12 tablespoons (1½ sticks/170 grams) unsalted butter, slightly softened and cut into chunks
¼ cup (60 grams) cream cheese
1 tablespoon water
1 teaspoon pure vanilla extract
1 cup (140 grams) diced dried peaches
3 tablespoons (30 grams) finely diced candied ginger
2 to 3 tablespoons coarse sugar, such as turbinado, for sprinkling
Whole nutmeg (optional, for grating)
Equipment
Food processor fitted with the steel blade (optional)
Baking sheets, both unlined and lined with parchment paper
To make the dough by hand, put the sorghum and rice flours, granulated sugar, and salt in a large bowl and whisk until thoroughly blended. Add the butter chunks, cream cheese, water, and vanilla. Use a fork or the back of a large spoon to mash and mix the ingredients together until all are blended into a smooth, soft dough.
To make the dough in a food processor, put the sorghum and rice flours, granulated sugar, and salt in the food processor and pulse to mix. Add the butter chunks, cream cheese, water, and vanilla. Pulse until the mixture forms a smooth, soft dough. Scrape the bowl and blend in any stray flour at the bottom of the bowl with your fingers.
Divide the dough in half. Use a dark pencil or a marker to draw a 10-by-10-inch square on each of two pieces of parchment paper. Turn one sheet upside down (to prevent the dough from touching the pencil or ink marks) on the counter and anchor the corners with tape.
Press and then spread (with a small offset spatula) one piece of the dough to make an even ¼-inch layer within the square. Check to be sure the center is not thicker than the edges. Remove the tape and slide the parchment onto a baking sheet. Distribute the peach pieces evenly over the dough, followed by the ginger pieces. Set aside.
Turn the second parchment sheet over and secure it to the counter. Spread the remaining dough over it as before and release the tape. Cover the fruit-topped dough with the second sheet of dough as follows: Place the pan with the fruit-topped dough next to the plain dough. Lift the far edge of the parchment under the plain dough until the dough dangles over the counter. Line up the dangling edge with the far edge of the fruit-topped dough. Let the edges touch, then lower the dough sheet toward you, to cover the fruit. (It’s easier to do than to describe!) Don’t peel the paper from the dough; just press very gently all over to adhere the dough and fruit. Put the baking sheet in the fridge and refrigerate for at least 2 hours, but preferably overnight.
Position racks in the upper and lower thirds of the oven and preheat the oven to 325°F.
Remove the dough from the refrigerator and peel the paper from the top. Dust the top of the dough and a cutting board very lightly with rice flour. Lift the parchment under the dough, flip the dough over onto the cutting board, and peel off the paper. Sprinkle with the coarse sugar, and grate a little nutmeg over the dough, if desired. Pat lightly to make sure the sugar adheres. Use a heavy knife to trim the edges. Use a straight-down “guillotine” stroke to cut 5 strips, then cut each strip into 5 pieces to make 25 pieces. Don’t worry if the dough cracks when you cut it. Use a spatula to lift and place the cookies 1 inch apart on parchment paper–lined pans.
Bake for 15 to 20 minutes, until the cookies are golden brown at the edges and deep golden brown when you peek underneath (carefully, as the cookies are very fragile while hot). Rotate the pans from top to bottom and from front to back a little over halfway through the baking time. Place the pans on racks, or slide the liners from the pans onto racks to cool. Cool the cookies completely before stacking or storing. They will keep in an airtight container for at least a week.