
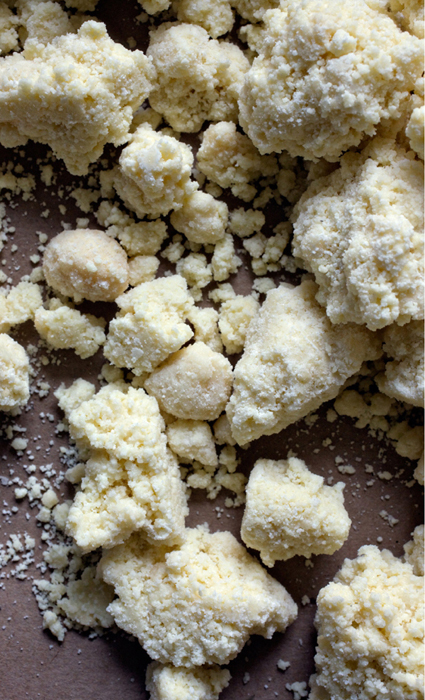
“The crumb” is our name for clumpy, crunchy, yet sandy little bits of flavor. I started using the crumb in the fancier plated desserts I made for Ssäm Bar and Ko: put some crumbs under a scoop of ice cream, and it won’t slide across the plate before it gets to the guest. Soon enough, leftover crumb made its way into the cookies I baked for family meal, then into birthday cakes, and then it was open season. As a result, almost all of our pie crusts at Milk Bar are based on a crumb that we grind with butter and salt before pressing into a pie tin.
My first face-to-face with the crumb was when I was a pastry cook at wd~50—Sam Mason, the pastry chef, called his crumbs “soils.” (Nearly every pastry chef I know has at least one crumb or soil on his or her menu these days.) At wd~50, we made chocolate soil, coffee soil (my favorite), cherry soil, onion soil, pea soil, and on and on. I was so enamored with the soils that I knew I wanted to have my own recipes, flavors, and uses for the technique for the day when I would be in charge of my own kitchen.

The basic technique to make the crumb is this: dehydrate and/or pulverize your flavor base (or use a flavorful dry substance, like cocoa powder or ground coffee); toss it with flour, sugar, and salt to balance the flavor base; bind it together with butter; and bake.
Years later at Milk Bar, I wanted to blow the lid off the crumb world by making crumbs in quirky flavors that no one else had. But I needed to change my approach to the makeup of ingredients and the major flavor bases. See, we’d used blanched almond flour (along with a small amount of regular flour) as the binder at wd~50, but with all the nut allergies we see at the restaurants, I knew the almond flour had to go—which sucked, because it really adds a nice flavor and richness.
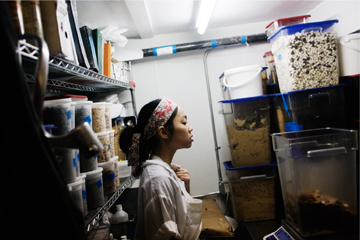
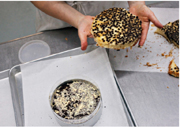
I went to my favorite 24-hour bodega down Second Avenue late one night and cleared out the dried and powdered goods selection (a regular routine of mine). I bought a world of powdered everything: honey powder, iced tea powder, Nesquik Strawberry Milk Powder, mustard powder. I walked back into the kitchen and stacked my finds on the dry goods shelf. But though I was sure they would all make interesting crumbs—at least I thought that they all could be really delicious—none struck me with the accessible yet subtle cleverness I wanted to convey. Then, down the kitchen, I spied the milk powder I use to make soft-serve ice cream. I looked at it sideways, wondered, “What if …?” I went for it. I tossed it with flour, sugar, salt, cornstarch (the binder I decided to use in place of almond flour), and melted butter.
Straight out of the oven, it wasn’t exactly the milky flavor I wanted it to be, but it was headed somewhere good. It needed more milkiness. I settled on melted white chocolate as the solution. In addition to elevating the creamy milkiness, white chocolate improved the texture—binding and moistening it, as well as sweetening it further—moving it away from a milk “soil” and toward a milk “crumb.”
I know it seems funny for me to say, but I don’t drink straight milk and haven’t since childhood, when my mom made me. Still, I am in love with the idea of the flavor I think milk should have—and these milk crumbs were the first perfect embodiment of that idealized milk flavor. They have a richness, butteriness, and sweetness (from that enrobing with white chocolate) that makes any hater want to love the flavor of milk.
I’ve come to love the milk crumb because it is an unobvious use for an obvious ingredient. Milk powder is on hand in nearly every professional pastry kitchen and plenty of home cupboards, but nobody takes advantage of its versatility. Our milk crumbs go in cookies, cakes, and pie crusts, and that’s just the beginning. With the addition of malt powder, they turn into malted milk crumbs; with instant tea, they take on the flavor of a really milky cup of black tea. Add a little freeze-dried peach powder, and suddenly they’re peaches-and-cream-flavored crumbs—and on and on.
There was no push to put “milky” things on the menu; like most successful Momofuku things, it just kind of happened. Milk Bar was already going to be Milk Bar before the milk crumb came into being, but I soon discovered my obsession with exploiting milk, milk crumbs, and cereal milk in a million different ways.
It’s the conversation I always have with Dave: the basis of our best dishes is making something out of nothing. I had a bunch of powdered goodness from the deli, but it was the milk powder already sitting in the kitchen that ended up as the catalyst that really sparked me. It’s a good challenge to keep in mind: make yourself see the unobvious in things you already have. Find a new use for the same products you use daily. You just have to look at them sideways and wonder, “What if …?”
MAKES ABOUT 260 G (2¼ CUPS)
40 g milk powder
[½ cup]
40 g flour
[¼ cup]
12 g cornstarch
[2 tablespoons]
25 g sugar
[2 tablespoons]
2 g kosher salt
[½ teaspoon]

55 g butter, melted
[4 tablespoons (½ stick)]
20 g milk powder
[¼ cup]
90 g white chocolate, melted
[3 ounces]
Elsewhere in this book: Milk crumbs are used in the White Peach Sorbet dessert.
1. Heat the oven to 250°F.
2. Combine the 40 g (½ cup) milk powder, the flour, cornstarch, sugar, and salt in a medium bowl. Toss with your hands to mix. Add the melted butter and toss, using a spatula, until the mixture starts to come together and form small clusters.
3. Spread the clusters on a parchment- or Silpat-lined sheet pan and bake for 20 minutes. The crumbs should be sandy at that point, and your kitchen should smell like buttery heaven. Cool the crumbs completely.
4. Crumble any milk crumb clusters that are larger than ½ inch in diameter, and put the crumbs in a medium bowl. Add the 20 g (¼ cup) milk powder and toss together until it is evenly distributed throughout the mixture.
5. Pour the white chocolate over the crumbs and toss until your clusters are enrobed. Then continue tossing them every 5 minutes until the white chocolate hardens and the clusters are no longer sticky. The crumbs will keep in an airtight container in the fridge or freezer for up to 1 month.
MAKES ABOUT 320 G (2½ CUPS)
Freeze-dried fruit! The range of delicious freeze-dried fruits and veggies can make your world of crumb possibilities seem endless. We grind down freeze-dried fruits and veggies into a powder in a blender or food processor and then toss them with milk crumbs to give pops of new flavor to an old crumb. We adjust the moisture with butter or white chocolate if necessary, based on the ingredients in the mix and our end goal.
1 recipe Milk Crumb
40 g freeze-dried cherry powder
[½ cup]
20 g freeze-dried blueberry powder
[¼ cup]
0.5 g kosher salt
[⅛ teaspoon]
Toss the milk crumbs with the berry powders and salt in a medium bowl until all of the crumbs are an evenly speckled red and blue, coated in the berry powder. The crumbs will keep in an airtight container in the fridge or freezer for up to 1 month.
MAKES ABOUT 375 G (2½ CUPS)
1 recipe Milk Crumb
60 g Ovaltine, malt flavor
[¾ cup]
90 g white chocolate, melted
[3 ounces]
Elsewhere in this book: Malted milk crumbs are used in the Chocolate Malt Layer Cake.
1. Toss the milk crumbs with the Ovaltine malt powder in a medium bowl until all of the crumbs are a light brown.
2. Pour the white chocolate over the crumbs and continue tossing until all of the clusters are enrobed. Then continue tossing them every 5 minutes until the white chocolate hardens and the clusters are no longer sticky. (The result will be just like the original milk crumb, but with a cheetah-like spotting of light brown malt powder.) The crumbs will keep in an airtight container in the fridge or freezer for up to 1 month.
MAKES ABOUT 350 G (2½ CUPS)
105 g flour
[¼ cup]
4 g cornstarch
[1 teaspoon]
100 g sugar
[½ cup]
65 g cocoa powder, preferably
[¼ cup Valrhona]
4 g kosher salt
[1 teaspoon]
85 g butter, melted
[6 tablespoons]
1. Heat the oven to 300°F.
2. Combine the flour, cornstarch, sugar, cocoa powder, and salt in the bowl of a stand mixer fitted with the paddle attachment and paddle on low speed until mixed.
3. Add the butter and paddle on low speed until the mixture starts to come together in small clusters.
4. Spread the clusters on a parchment- or Silpat-lined sheet pan. Bake for 20 minutes, breaking them up occasionally. The crumbs should still be slightly moist to the touch at that point; they will dry and harden as they cool.
5. Let the crumbs cool completely before using in a recipe or eating. Stored in an airtight container, they will keep fresh for 1 week at room temperature or 1 month in the fridge or freezer.
MAKES ABOUT 275 G (2¼ CUPS)
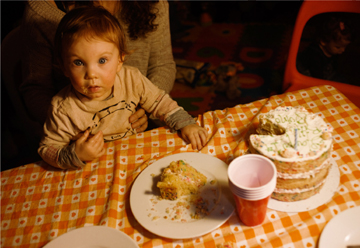
What’s better than box cake, you might ask? Nothing, actually. All I really want for breakfast, lunch, or dinner is box cake and its amazing wealth of by-products. I typically allow this 24-hour splurge only on my birthday.
The one thing that always eluded me, though, was how the hell do they get box cake to taste like that?! I have made coffee cake, soup, cookies, clusters, and cereal out of it. So we undertook the recipe development task of re-creating my favorite, and the ultimate birthday box cake, Funfetti, from scratch.
It took us four months to get there. And we still don’t make our own rainbow sprinkles (which Wylie Dufresne calls “cheating”). But I couldn’t be happier with the results: the crumbs, Birthday Cake, Birthday Cake Frosting, and Confetti Cookies. My dream come true.
100 g granulated sugar
[½ cup]
25 g light brown sugar
[1½ tablespoons tightly packed]
90 g cake flour
[¾ cup]
2 g baking powder
[½ teaspoon]
2 g kosher salt
[½ teaspoon]
20 g rainbow sprinkles
[2 tablespoons]
40 g grapeseed oil
[¼ cup]
12 g clear vanilla extract
[1 tablespoon]
1. Heat the oven to 300°F.
2. Combine the sugars, flour, baking powder, salt, and sprinkles in the bowl of a stand mixer fitted with the paddle attachment and mix on low speed until well combined.
3. Add the oil and vanilla and paddle again to distribute. The wet ingredients will act as glue to help the dry ingredients form small clusters; continue paddling until that happens.
4. Spread the clusters on a parchment- or Silpat-lined sheet pan. Bake for 20 minutes, breaking them up occasionally. The crumbs should still be slightly moist to the touch; they will dry and harden as they cool.
5. Let the crumbs cool completely before using in a recipe or scarfing by the handful. Stored in an airtight container, the crumbs will keep fresh for 1 week at room temperature or 1 month in the fridge or freezer.
MAKES ABOUT 350 G (2¾ CUPS)
These crumbs give all the flavor and none of the fuss of a traditional pie crust.
240 g flour
[1½ cups]
18 g sugar
[2 tablespoons]
3 g kosher salt
[¾ teaspoon]
115 g butter, melted
[8 tablespoons (1 stick)]
20 g water
[1½ tablespoons]
Elsewhere in this book: Pie crumbs are used in the Apple Pie Layer Cake.
1. Heat the oven to 350°F.
2. Combine the flour, sugar, and salt in the bowl of a stand mixer fitted with the paddle attachment and paddle on low speed until well mixed.
3. Add the butter and water and paddle on low speed until the mixture starts to come together in small clusters.
4. Spread the clusters on a parchment- or Silpat-lined sheet pan. Bake for 25 minutes, breaking them up occasionally. The crumbs should be golden brown and still slightly moist to the touch at that point; they will dry and harden as they cool.
5. Let the crumbs cool completely before using in a recipe or eating. Stored in an airtight container, the crumbs will keep fresh for 1 week at room temperature or 1 month in the fridge or freezer.
MAKES 12 TO 17 COOKIES
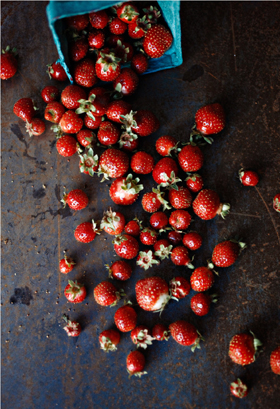
After the milk crumb phenomenon in the kitchen, we had to find a mainstream use for it, rather than just hiding it under some ice cream. It needed its moment in the sun. So I brainstormed. A peaches-and-cream cookie was my original thought. Momofuku does mean “lucky peach” in Japanese, after all. But I decided we needed something that would hit home even more for guests.
Did you know dried blueberries existed? I didn’t, until I surveyed Whole Foods’ dried fruit selection for a dried peach alternative. The clouds parted, and it was clear. We needed a blueberry-and-cream cookie, reminiscent of a blueberry muffin top (the best part of the muffin).
225 g butter, at room temperature
[16 tablespoons (2 sticks)]
150 g granulated sugar
[¾ cup]
150 g light brown sugar
[¼ cup tightly packed]
100 g glucose
[¼ cup]
2 eggs
320 g flour
[2 cups]
2 g baking powder
[½ teaspoon]
1.5 g baking soda
[¼ teaspoon]
6 g kosher salt
[1½ teaspoons]
½ recipe Milk Crumb
130 g dried blueberries
[¾ cup]
You can substitute Berry Milk Crumb for the milk crumbs to make the cookies more fruity. In a pinch, substitute 35 g (2 tablespoons) corn syrup for the glucose.
1. Combine the butter, sugars, and glucose in the bowl of a stand mixer fitted with the paddle attachment and cream on medium-high for 2 to 3 minutes. Scrape down the sides of the bowl, add the eggs, and beat for 7 to 8 minutes. (See notes on this process.)
2. Reduce the mixer speed to low and add the flour, baking powder, baking soda, and salt. Mix just until the dough comes together, no longer than 1 minute. (Do not walk away from the machine during this step, or you will risk overmixing the dough.) Scrape down the sides of the bowl with a spatula.
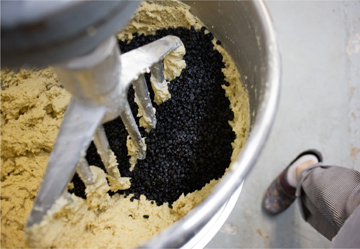
3. Still on low speed, add the milk crumbs and mix until they’re incorporated, no more than 30 seconds. Chase the milk crumbs with the dried blueberries, mixing them in for 30 seconds.
4. Using a 2¾-ounce ice cream scoop (or a ⅓-cup measure), portion out the dough onto a parchment-lined sheet pan. Pat the tops of the cookie dough domes flat. Wrap the sheet pan tightly in plastic wrap and refrigerate for at least 1 hour, or up to 1 week. Do not bake your cookies from room temperature—they will not bake properly.
5. Heat the oven to 350°F.
6. Arrange the chilled dough a minimum of 4 inches apart on parchment- or Silpat-lined sheet pans. Bake for 18 minutes. The cookies will puff, crackle, and spread. After 18 minutes, they should be very faintly browned on the edges yet still bright yellow in the center; give them an extra minute or so if that’s not the case.
7. Cool the cookies completely on the sheet pans before transferring to a plate or to an airtight container for storage. At room temp, the cookies will keep fresh for 5 days; in the freezer, they will keep for 1 month.
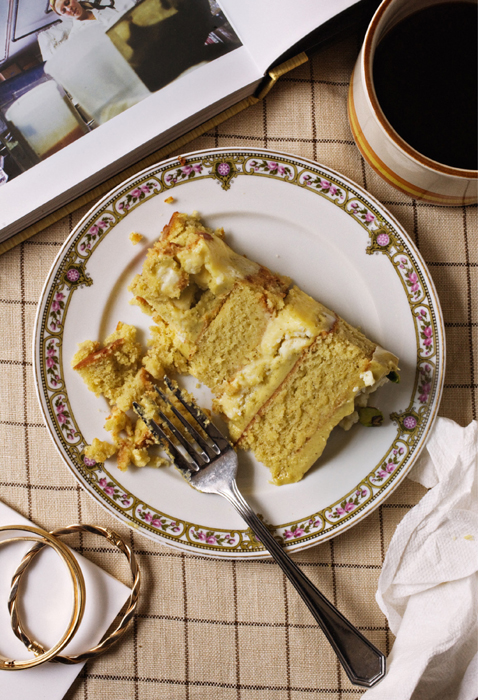
MAKES 1 (6-INCH) LAYER CAKE, 5 TO 6 INCHES TALL; SERVES 6 TO 8
This cake was a bestseller at Milk Bar right off the bat. If you’ve had it, chances are you were hooked at first bite. Though the recipe calls for a few things that you’ll have to source aside from your normal pantry ingredients, remember that amazon.com can be the love of your life too, and that this cake is well worth the effort.
1 recipe Pistachio Cake
65 g pistachio oil
[⅓ cup]
1 recipe Lemon Curd
½ recipe Milk Crumb
1 recipe Pistachio Frosting
special equipment
1 (6-inch) cake ring
2 strips acetate, each 3 inches wide and 20 inches long
Grapeseed oil can be substituted for the pistachio oil, but part of the toasted-pistachio depth of flavor will be lost.
1. Put a piece of parchment or a Silpat on the counter. Invert the cake onto it and peel off the parchment or Silpat from the bottom of the cake. Use the cake ring to stamp out 2 circles from the cake. These are your top 2 cake layers. The remaining cake “scrap” will come together to make the bottom layer of the cake.
layer 1, the bottom
2. Clean the cake ring and place it in the center of a sheet pan lined with clean parchment or a Silpat. Use 1 strip of acetate to line the inside of the cake ring.
3. Put the cake scraps inside the ring and use the back of your hand to tamp the scraps together into a flat even layer.
4. Dunk a pastry brush in the pistachio oil and give the layer of cake a good, healthy bath of half of the oil.
5. Use the back of a spoon to spread half of the lemon curd in an even layer over the cake.
6. Sprinkle one-third of the milk crumbs evenly over the lemon curd. Use the back of your hand to anchor them in place.
7. Use the back of a spoon to spread one-third of the pistachio frosting as evenly as possible over the crumbs.
layer 2, the middle
8. With your index finger, gently tuck the second strip of acetate between the cake ring and the top ¼ inch of the first strip of acetate, so that you have a clear ring of acetate 5 to 6 inches tall—high enough to support the height of the finished cake. Set a cake round on top of the frosting, and repeat the process for layer 1 (if 1 of your 2 cake rounds is jankier than the other, use it here in the middle and save the prettier one for the top).
layer 3, the top
9. Nestle the remaining cake round into the frosting. Cover the top of the cake with the remaining frosting. Give it volume and swirls, or do as we do and opt for a perfectly flat top. Garnish the frosting with the remaining milk crumbs.
10. Transfer the sheet pan to the freezer and freeze for a minimum of 12 hours to set the cake and filling. The cake will keep in the freezer for up to 2 weeks.
11. At least 3 hours before you are ready to serve the cake, pull the sheet pan out of the freezer and, using your fingers and thumbs, pop the cake out of the cake ring. Gently peel off the acetate, and transfer the cake to a platter or cake stand. Let it defrost in the fridge for a minimum of 3 hours (wrapped well in plastic, the cake can be refrigerated for up to 5 days).
12. Slice the cake into wedges and serve.
MAKES 1 QUARTER SHEET PAN CAKE
190 g pistachio paste
[¼ cup]
75 g glucose
[3 tablespoons]
6 egg whites
280 g confectioners’ sugar
[1¾ cups]
110 g blanched almond flour
[1¼ cups]
75 g pistachio oil
[½ cup]
55 g heavy cream
[¼ cup]
160 g flour
[1 cup]
6 g baking powder
[1½ teaspoons]
6 g kosher salt
[1½ teaspoons]
Pam or other nonstick cooking spray (optional)
In a pinch, substitute 35 g (2 tablespoons) corn syrup for the glucose.
If you substitute 150 g (1½ cups) blanched almond flour for the flour, this becomes a gluten-free cake! Almond flour can be found online, at Whole Foods, or you can make it yourself: In a food processor, grind blanched almonds down to a powder!
Grapeseed oil can be subbed for the pistachio oil, but part of the toasted-pistachio depth of flavor will be lost.
2. Combine the pistachio paste and glucose in the bowl of a stand mixer fitted with the paddle attachment and beat on medium-low for 2 to 3 minutes, until the mixture turns into a sticky green paste. Scrape down the sides of the bowl with a spatula.
3. On low speed, add the egg whites one at a time, being careful not to add the next egg white until the previous one is completely incorporated. Stop the mixer and scrape down the sides of the bowl with a spatula after every 2 to 3 egg whites. Once all of the egg whites have been incorporated, you will have a snotty green soup in your mixing bowl. Right on.
4. Add the confectioners’ sugar and almond flour and, on low speed, paddle them in for 2 to 3 minutes, until the mixture thickens. Stop the mixer and scrape down the sides of the bowl.
5. Stream in the pistachio oil and heavy cream and paddle on low speed for 1 minute. Stop the mixer and scrape down the sides of the bowl.
6. Add the flour, baking powder, and salt and paddle on low for 2 to 3 minutes, until the batter is super-smooth and slightly more viscous than your average American box cake batter.
7. Pam-spray a quarter sheet pan and line it with parchment, or just line the pan with a Silpat. Using a spatula, spread the cake batter in an even layer in the pan. Bake for 20 to 22 minutes. The cake will rise and puff, doubling in size. (This cake will become spongy, unlike any of our butter-based cakes, as it has so many egg whites in it.) At 20 minutes, gently poke the edge of the cake with your finger: the cake should bounce back (like said sponge), and it should be slightly golden brown on the sides and pulling away from the sides of the pan ever so slightly. Leave the cake in the oven for an extra 1 to 2 minutes if it doesn’t pass these tests.
8. Take the cake out of the oven and cool on a wire rack or, in a pinch, in the fridge or freezer (don’t worry, it’s not cheating). The cooled cake can be stored in the fridge, wrapped in plastic wrap, for up to 5 days.
MAKES ABOUT 460 G (2 CUPS)
3 lemons
100 g sugar
[½ cup]
4 eggs
1 gelatin sheet
115 g butter, very cold
[8 tablespoons (1 stick)]
2 g kosher salt
[½ teaspoon]
Powdered gelatin can be substituted for the sheet gelatin: use ½ teaspoon.
Elsewhere in this book: Lemon curd is used in the Lemon Mascarpone for the Thai Tea Parfait dessert and in the Lemon Meringue–Pistachio Pie.
1. Using a Microplane or the finest-toothed side of a box grater, zest the lemons. Do your best to grate only as far down as the yellow part of the skin; the white pith has less lemon flavor and can be bitter. Squeeze 80 g (⅓ cup) juice from the lemons.
2. Put the sugar, lemon zest, and lemon juice in a blender and blend until the sugar granules have dissolved. Add the eggs and blend on low until you have a bright-yellow mixture. Transfer the contents of the blender to a medium pot or saucepan. Clean the blender canister.
4. Heat the lemon mixture over low heat, whisking regularly. As it heats up, it will begin to thicken; keep a close eye on it. Once it boils, remove it from the stove and transfer it to the blender. Add the bloomed gelatin, butter, and salt and blend until the mixture is thick, shiny, and super-smooth.
5. Pour the mixture through a fine-mesh sieve into a heatproof container, and put in the fridge until the lemon curd has cooled completely, at least 30 minutes. The curd can be refrigerated for up to 1 week; do not freeze.
MAKES ABOUT 350 G (1¾ CUPS)
115 g butter, at room temperature
[8 tablespoons (1 stick)]
40 g confectioners’ sugar
[¼ cup]
230 g pistachio paste
[¾ cup]
2 g kosher salt
[½ teaspoon]
1. Combine the butter and confectioners’ sugar in the bowl of a stand mixer fitted with the paddle attachment and cream together on medium-high for 2 to 3 minutes, until fluffy and pale yellow.
2. Add the pistachio paste and salt and mix on low speed for half a minute, then kick up the speed to medium-high and let her rip for 2 minutes. Scrape down the sides of the bowl with a spatula. If the mixture is not all the same pale green color, give it another minute on high speed, and scrape down again.
3. Use the frosting immediately, or store it in an airtight container in the fridge for up to 1 week.

MAKES 10 TO 15 COOKIES
An ode to my favorite baked good of all time, the fudgy brownie, this cookie has a healthy salt content and, to me, is perfection. I freeze a few of these in the dense heat of a New York summer for my lunch or afternoon snack.
225 g butter, at room temperature
[16 tablespoons (2 sticks)]
300 g sugar
[1½ cups]
100 g glucose
[¼ cup]
1 egg
1 g vanilla extract
[¼ teaspoon]
60 g 55% chocolate, melted
[2 ounces]
200 g flour
[1¼ cups]
100 g cocoa powder, preferably Valrhona
[¾ cup]
3 g baking powder
[¾ teaspoon]
1.5 g baking soda
[¼ teaspoon]
7 g kosher salt
[1¾ teaspoons]
½ recipe Chocolate Crumb
In a pinch, substitute 35 g (2 tablespoons) corn syrup for the glucose.
1. Combine the butter, sugar, and glucose in the bowl of a stand mixer fitted with the paddle attachment and cream together on medium-high for 2 to 3 minutes. Scrape down the sides of the bowl, add the egg, vanilla, and melted chocolate, and beat for 7 to 8 minutes. (See notes on this process.)
2. Reduce the mixer speed to low and add the flour, cocoa powder, baking powder, baking soda, and salt. Mix just until the dough comes together, no longer than 1 minute. (Do not walk away from the machine during this step, or you will risk overmixing the dough.) Scrape down the sides of the bowl with a spatula.
3. Still on low speed, add the chocolate crumbs and mix just until incorporated, about 30 seconds.
4. Using a 2¾-ounce ice cream scoop (or a ⅓-cup measure), portion out the dough onto a parchment-lined sheet pan. Pat the tops of the cookie dough domes flat. Wrap the sheet pan tightly in plastic wrap and refrigerate for at least 1 hour, or up to 1 week. Do not bake your cookies from room temperature—they will not bake properly.
5. Heat the oven to 375°F.
6. Arrange the chilled dough a minimum of 4 inches apart on parchment- or Silpat-lined sheet pans. Bake for 18 minutes. The cookies will puff, crackle, and spread. It’s tough (kind of impossible) to gauge if a cookie that is this dark with chocolate is done. If after 18 minutes, the cookies still seem doughy in the center, give them another 1 minute in the oven, but not more.
7. Cool the cookies completely on the sheet pans before transferring to a plate or an airtight container for storage. At room temp, the cookies will keep fresh for 5 days; in the freezer, they will keep for 1 month.
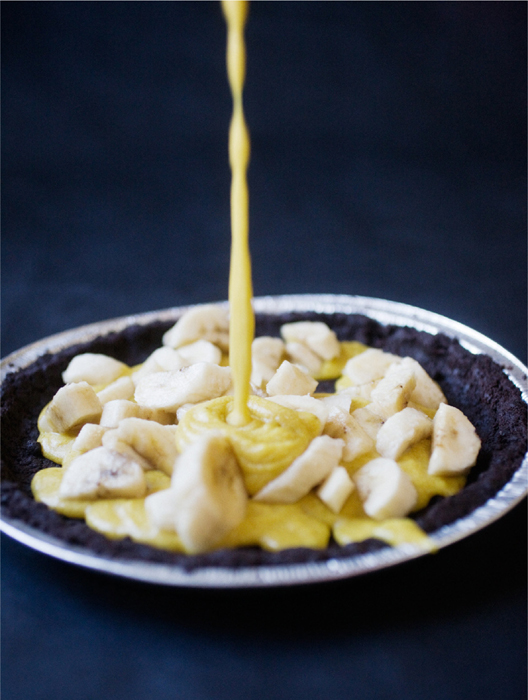
MAKES 1 (10-INCH) PIE; SERVES 8 TO 10
1 recipe Banana Cream
1 recipe Chocolate Crust
1 banana, just ripe, sliced
Pour half of the banana cream into the pie shell. Cover it with a layer of sliced bananas, then cover the bananas with the remaining banana cream. The pie should be stored in the fridge and eaten within a day of when you make it.
MAKES ABOUT 775 G (3 CUPS)
You have to plan ahead for this one. Buy bananas that are ripe and then let them get nearly black/brown before accepting them as the rrrrrripe bananas needed for this recipe. Another great option: at the bakery, we peel just ripe bananas, freeze them, and let them finish developing flavor in the freezer for 2 days or up to 2 weeks. Said rrrrrripe bananas are the difference between having your banana pie tasting like banana Laffy Taffy and the most delicious, deep banana cream pie ever.
225 g rrrrrripe bananas
[about 2]
75 g heavy cream
[⅓ cup]
55 g milk
[¼ cup]
100 g sugar
[½ cup]
25 g cornstarch
[2 tablespoons]
2 g kosher salt
[½ teaspoon]
3 egg yolks
2 gelatin sheets
40 g butter
[3 tablespoons]
25 drops yellow food coloring
[½ teaspoon]
160 g heavy cream
[¾ cup]
160 g confectioners’ sugar
[1 cup]
Powdered gelatin can be substituted for the sheet gelatin: use 1 teaspoon.
Elsewhere in this book: Banana cream is used in the Banana Layer Cake. The cream also tastes great when layered with Cereal Milk Panna Cotta.
1. Combine the bananas, cream, and milk in a blender and puree until totally smooth.
2. Add the sugar, cornstarch, salt, and yolks and continue to blend until homogenous. Pour the mixture into a medium saucepan. Clean the blender canister.
4. Whisk the contents of the pan and heat over medium-low heat. As the banana mixture heats up, it will thicken. Bring to a boil and then continue to whisk vigorously for 2 minutes to fully cook out the starch. The mixture will resemble thick glue, bordering on cement, with a color to match.
5. Dump the contents of the pan into the blender. Add the bloomed gelatin and the butter and blend until the mixture is smooth and even. Color the mixture with yellow food coloring until it is a bright cartoon-banana yellow. (It’s a ton of coloring, I know, but banana creams don’t get that brilliant yellow color on their own. Womp.)
6. Transfer the banana mixture to a heatsafe container, and put in the fridge for 30 to 60 minutes—as long as it takes to cool completely.
7. Using a whisk or a mixer with the whisk attachment, whip the cream and confectioners’ sugar to medium-soft peaks. (When you pull the whisk away from the whipped cream, the mounds of cream hold their shape softly.) Add the cold banana mixture to the whipped cream and slowly whisk until evenly colored and homogenous. Stored in an airtight container, banana cream keeps fresh for up to 5 days in the fridge.
MAKES 1 (10-INCH) PIE CRUST
Making this pie shell is the perfect opportunity to use some of those disposable kitchen gloves we recommend to keep your hands from looking like a mechanic’s that just changed someone’s oil.
¾ recipe Chocolate Crumb
[260 g (1¾ cups)]
8 g sugar
[2 teaspoons]
0.5 g kosher salt
[⅛ teaspoon]
14 g butter, melted, or as needed
[1 tablespoon]
Elsewhere in this book: The chocolate crust is used in Candy Bar Pie.
1. Pulse the chocolate crumbs in a food processor until they are sandy and no sizeable clusters remain.
2. Transfer the sand to a bowl and, with your hands, toss with the sugar and salt. Add the melted butter and knead it into the sand until it is moist enough to knead into a ball. If it is not moist enough to do so, melt an additional 14 g (1 tablespoon) butter and knead it in.
3. Transfer the mixture to a 10-inch pie tin. With your fingers and the palms of your hands, press the chocolate crust firmly into the tin, making sure the bottom and sides of the pie tin are evenly covered. Wrapped in plastic wrap, the crust can be stored at room temp for up to 5 days or in the fridge for 2 weeks.

MAKES 1 (6-INCH) LAYER CAKE, 5 TO 6 INCHES TALL; SERVES 6 TO 8
Passion fruit, chocolate, and coffee is one of my favorite flavor trios. Though the combo sounds a little out there, it’s actually beloved in lots of pastry kitchens. I wanted a way to feature it in a mainstream dessert. Turns out a deep vanilla chocolate chip layer cake is the perfect fit.
1 recipe Chocolate Chip Cake
60 g passion fruit puree
[⅓ cup]
1 recipe Passion Fruit Curd
½ recipe Chocolate Crumb
1 recipe Coffee Frosting
40 g mini chocolate chips
[¼ cup]
special equipment
1 (6-inch) cake ring
2 strips acetate, each 3 inches wide and 20 inches long
1. Put a piece of parchment or a Silpat on the counter. Invert the cake onto it and peel off the parchment or Silpat from the bottom of the cake. Use the cake ring to stamp out 2 circles from the cake. These are your top 2 cake layers. The remaining cake “scrap” will come together to make the bottom layer of the cake.

layer 1, the bottom
2. Clean the cake ring and place it in the center of a sheet pan lined with clean parchment or a Silpat. Use 1 strip of acetate to line the inside of the cake ring.
3. Put the cake scraps inside the ring and use the back of your hand to tamp the scraps together into a flat even layer.
4. Dunk a pastry brush in the passion fruit puree and give the layer of cake a good, healthy bath of half of the puree.

5. Use the back of a spoon to spread half of the passion fruit curd in an even layer over the cake.


6. Sprinkle half of the chocolate crumbs evenly over the passion fruit curd. Use the back of your hand to anchor them in place.
7. Use the back of a spoon to spread one-third of the coffee frosting as evenly as possible over the chocolate crumbs.
layer 2, the middle
8. With your index finger, gently tuck the second strip of acetate between the cake ring and the top ¼ inch of the first strip of acetate, so that you have a clear ring of acetate 5 to 6 inches tall—high enough to support the height of the finished cake. Set a cake round on top of the frosting, and repeat the process for layer 1 (if 1 of your 2 cake rounds is jankier than the other, use it here in the middle and save the prettier one for the top).
layer 3, the top
9. Nestle the remaining cake round into the frosting. Cover the top of the cake with the remaining frosting. Give it volume and swirls, or do as we do and opt for a perfectly flat top. Garnish the frosting with the mini chocolate chips.
10. Transfer the sheet pan to the freezer and freeze for a minimum of 12 hours to set the cake and filling. The cake will keep in the freezer for up to 2 weeks.
11. At least 3 hours before you are ready to serve the cake, pull the sheet pan out of the freezer and, using your fingers and thumbs, pop the cake out of the cake ring. Gently peel off the acetate, and transfer the cake to a platter or cake stand. Let it defrost in the fridge for a minimum of 3 hours (wrapped well in plastic, it can be refrigerated for up to 5 days).
12. Slice the cake into wedges and serve.
MAKES 1 QUARTER SHEET PAN CAKE
Happy birthday, Dave Chang! That’s what the kitchen screamed when we first made this cake. Marian was in charge of making boss man a birthday cake. She told me she channeled her innermost version of me, sprinkled chocolate chips into a vanilla cake batter we were going to use as a coconut cake, and layered it with liquid cheesecake and anything else she could find in the fridge; in other words, she followed to a tee our standard operating procedure for any birthday cake in our kitchen. Now even the Momofuku savory cooks know this cake by heart. It is a snack attack waiting to happen, so you may want to consider making a double batch of batter and baking the cake in a half sheet pan.
115 g butter, at room temperature
[8 tablespoons (1 stick)]
250 g granulated sugar
[1¼ cups]
60 g light brown sugar
[¼ cup tightly packed]
3 eggs
110 g buttermilk
[½ cup]
75 g grapeseed oil
[½ cup]
12 g vanilla extract
[1 tablespoon]
185 g cake flour
[1½ cups]
4 g baking powder
[1 teaspoon]
4 g kosher salt
[1 teaspoon]
Pam or other nonstick cooking spray (optional)
150 g mini chocolate chips
[¾ cup]
There is a ton of liquid and fat in this amazing cake! If you do not do your due diligence to make sure that the batter is homogenous at each step (no streaks, discolorations, or other signs of separation/unincorporation), you’ll be sorry when your cake bakes out of its pan and all over the bottom of your oven.
1. Heat the oven to 350°F.
2. Combine the butter and sugars in the bowl of a stand mixer fitted with the paddle attachment and cream together on medium-high for 2 to 3 minutes. Scrape down the sides of the bowl, add the eggs, and mix on medium-high again for 2 to 3 minutes. Scrape down the sides of the bowl once more.
3. On low speed, stream in the buttermilk, oil, and vanilla. Increase the mixer speed to medium-high and paddle for 4 to 6 minutes, until the mixture is practically white, twice the size of your original fluffy butter-and-sugar mixture, and completely homogenous. Don’t rush the process. You’re basically forcing too much liquid into an already fatty mixture that doesn’t want to make room for the liquid. Stop the mixer and scrape down the sides of the bowl.
4. On very low speed, add the cake flour, baking powder, and salt. Mix for 45 to 60 seconds, just until your batter comes together and any remnants of dry ingredients have been incorporated. Scrape down the sides of the bowl. If you see any lumps of cake flour in there while you’re scraping, mix for another 45 seconds.
5. Pam-spray a quarter sheet pan and line it with parchment, or just line the pan with a Silpat. Using a spatula, spread the cake batter in an even layer in the pan. Give the bottom of your sheet pan a tap on the countertop to even out the layer. Sprinkle the chocolate chips evenly over the cake batter.
6. Bake the cake for 30 to 35 minutes. The cake will rise and puff, doubling in size, but will remain slightly buttery and dense. At 30 minutes, gently poke the edge of the cake with your finger: the cake should bounce back slightly and the center should no longer be jiggly. Leave the cake in the oven for an extra 3 to 5 minutes if it doesn’t pass these tests.
7. Take the cake out of the oven and cool on a wire rack or, in a pinch, in the fridge or freezer (don’t worry, it’s not cheating). The cooled cake can be stored in the fridge, wrapped in plastic wrap, for up to 5 days.
MAKES ABOUT 360 G (1½ CUPS)
This recipe is similar to the grapefruit pie’s Grapefruit Passion Curd, but with slightly different ingredient proportions. It also makes a larger batch so there’s enough to fill the chocolate chip cake.
100 g passion fruit puree
[½ cup]
65 g sugar
[⅓ cup]
2 eggs
1 gelatin sheet
170 g butter, very cold
[12 tablespoons (1½ sticks)]
2 g kosher salt
[½ teaspoon]
Powdered gelatin can be substituted for the gelatin sheets: use ½ teaspoon.
1. Put the passion fruit puree and sugar in a blender and blend until the sugar granules have dissolved. Add the eggs and blend on low until you have a bright-orange-yellow mixture. Transfer the contents of the blender to a medium pot or saucepan. Clean the blender canister.
3. Heat the passion fruit mixture over low heat, whisking regularly. As it heats up, it will begin to thicken; keep a close eye on it. Once it boils, remove it from the stove and transfer it to the blender. Add the bloomed gelatin, butter, and salt and blend until the mixture is thick, shiny, and super-smooth.
4. Transfer the mixture to a heatproof container, and put in the fridge until the curd has cooled completely, at least 30 minutes. The curd can be refrigerated for up to 1 week; do not freeze.
MAKES ABOUT 200 G (1 CUP)
Do not make this recipe until you are ready to assemble the chocolate chip cake. Once it is cold, coffee frosting is hell to bring back up to room temp. It will separate on you, and you will spend the same amount of time trying to force the coffee milk back into the butter mixture.
115 g butter, at room temperature
[8 tablespoons (1 stick)]
40 g confectioners’ sugar
[¼ cup]
55 g milk
[¼ cup]
1.5 g instant coffee powder
[¾ teaspoon]
1 g kosher salt
[¼ teaspoon]
We use Nescafé instant coffee for this delicious frosting. The entire country of Greece makes an amazing frappe that puts Starbucks’ frappuccino to shame, and Nescafé is the secret ingredient.
1. Combine the butter and confectioners’ sugar in the bowl of a stand mixer fitted with the paddle attachment and cream together on medium-high for 2 to 3 minutes, until fluffy and pale yellow.
2. Meanwhile, make a quick coffee milk: whisk together the milk, instant coffee, and salt in a small bowl.
3. Scrape down the sides of the bowl with a spatula. On low speed, gradually stream in the coffee milk. You are essentially forcing liquid into fat, so be patient. The butter mixture will clump up and separate upon contact with the coffee milk. Do not stream more coffee milk into the butter mixture until the previous addition is fully incorporated; keep the mixer on and remain patient. The result will be a wildly fluffy coffee frosting, pale brown and super-shiny. Use immediately.


MAKES 15 TO 20 COOKIES
When we were in the Spanish Harlem rental kitchen for the summer of 2010, our cornflake-chocolate-chip-marshmallow cookie just wouldn’t bake up right in the busted convection ovens we were forced to use. So we stopped our crying, stopped making the cookie for a while, and took the opportunity to bring a new cookie into creation. The confetti cookie combines the technique of a snickerdoodle (cream of tartar makes all the difference in telling an average cookie apart from a snickerdoodle-inspired one) with the flavors of funfetti cake mix.
225 g butter, at room temperature
[16 tablespoons (2 sticks)]
300 g sugar
[1½ cups]
50 g glucose
[2 tablespoons]
2 eggs
8 g clear vanilla extract
[2 teaspoons]
400 g flour
[2½ cups]
50 g milk powder
[¼ cup]
9 g cream of tartar
[2 teaspoons]
6 g baking soda
[1 teaspoon]
5 g kosher salt
[1¼ teaspoons]
40 g rainbow sprinkles
[¼ cup]
½ recipe Birthday Cake Crumb
In a pinch, substitute 25 g (1 tablespoon) corn syrup for the glucose.
1. Combine the butter, sugar, and glucose in the bowl of a stand mixer fitted with the paddle attachment and cream together on medium-high for 2 to 3 minutes. Scrape down the sides of the bowl, add the eggs and vanilla, and beat for 7 to 8 minutes. (See notes on this process.)
2. Reduce the mixer speed to low and add the flour, milk powder, cream of tartar, baking soda, salt, and rainbow sprinkles. Mix just until the dough comes together, no longer than 1 minute. (Do not walk away from the machine during this step, or you will risk overmixing the dough.) Scrape down the sides of the bowl with a spatula.
3. Still on low speed, add the birthday cake crumbs and mix in for 30 seconds—just until they are incorporated.
4. Using a 2¾-ounce ice cream scoop (or a ⅓-cup measure), portion out the dough onto a parchment-lined sheet pan. Pat the tops of the cookie dough domes flat. Wrap the sheet pan tightly in plastic wrap and refrigerate for at least 1 hour, or up to 1 week. Do not bake your cookies from room temperature—they will not bake properly.
5. Heat the oven to 350°F.
6. Arrange the chilled dough a minimum of 4 inches apart on parchment- or Silpat-lined sheet pans. Bake for 18 minutes. The cookies will puff, crackle, and spread. After 18 minutes, they should be very lightly browned on the edges (golden brown on the bottom). The centers will show just the beginning signs of color. Leave the cookies in the oven for an additional minute or so if the colors don’t match and the cookies still seem pale and doughy on the surface.
7. Cool the cookies completely on the sheet pans before transferring to a plate or an airtight container for storage. At room temp, the cookies will keep fresh for 5 days; in the freezer, they will keep for 1 month.

MAKES 1 (6-INCH) LAYER CAKE, 5 TO 6 INCHES TALL; SERVES 6 TO 8
Once we got birthday cake crumbs down, we moved on to our larger quest of making a funfetti cake, canned frosting and all, from scratch. Turns out that looking on the side of the cake mix box at the monster ingredient list was really helpful in getting the “secret” stuff we couldn’t figure out by taste.
1 recipe Birthday Cake
1 recipe Birthday Cake Soak
1 recipe Birthday Cake Frosting
1 recipe Birthday Cake Crumb
special equipment
1 (6-inch) cake ring
2 strips acetate, each 3 inches wide and 20 inches long
1. Put a piece of parchment or a Silpat on the counter. Invert the cake onto it and peel off the parchment or Silpat from the bottom of the cake. Use the cake ring to stamp out 2 circles from the cake. These are your top 2 cake layers. The remaining cake “scrap” will come together to make the bottom layer of the cake.
layer 1, the bottom
2. Clean the cake ring and place it in the center of a sheet pan lined with clean parchment or a Silpat. Use 1 strip of acetate to line the inside of the cake ring.
3. Put the cake scraps in the ring and use the back of your hand to tamp the scraps together into a flat even layer.
4. Dunk a pastry brush in the birthday cake soak and give the layer of cake a good, healthy bath of half of the soak.
5. Use the back of a spoon to spread one-fifth of the frosting in an even layer over the cake.
6. Sprinkle one-third of the birthday crumbs evenly over the top of the frosting. Use the back of your hand to anchor them in place.
7. Use the back of a spoon to spread a second fifth of the frosting as evenly as possible over the crumbs.
layer 2, the middle
8. With your index finger, gently tuck the second strip of acetate between the cake ring and the top ¼ inch of the first strip of acetate, so that you have a clear ring of acetate 5 to 6 inches tall—high enough to support the height of the finished cake. Set a cake round on top of the frosting, and repeat the process for layer 1 (if 1 of your 2 cake rounds is jankier than the other, use it here in the middle and save the prettier one for the top).
layer 3, the top
9. Nestle the remaining cake round into the frosting. Cover the top of the cake with the last fifth of the frosting. Give it volume and swirls, or do as we do and opt for a perfectly flat top. Garnish the frosting with the remaining birthday crumbs.
10. Transfer the sheet pan to the freezer and freeze for a minimum of 12 hours to set the cake and filling. The cake will keep in the freezer for up to 2 weeks.
11. At least 3 hours before you are ready to serve the cake, pull the sheet pan out of the freezer and, using your fingers and thumbs, pop the cake out of the cake ring. Gently peel off the acetate and transfer the cake to a platter or cake stand. Let it defrost in the fridge for a minimum of 3 hours (wrapped well in plastic, it can be refrigerated for up to 5 days).
12. Slice the cake into wedges and serve.
MAKES 1 QUARTER SHEET PAN CAKE
55 g butter, at room temperature
[4 tablespoons (½ stick)]
60 g vegetable shortening
[⅓ cup]
250 g granulated sugar
[1¼ cups]
50 g light brown sugar
[3 tablespoons tightly packed]
3 eggs
245 g cake flour
[2 cups]
6 g baking powder
[1½ teaspoons]
3 g kosher salt
[¾ teaspoon]
50 g rainbow sprinkles
[¼ cup]
Pam or other nonstick cooking spray (optional)
25 g rainbow sprinkles
[2 tablespoons]
1. Heat the oven to 350°F.
2. Combine the butter, shortening, and sugars in the bowl of a stand mixer fitted with the paddle attachment and cream together on medium-high for 2 to 3 minutes. Scrape down the sides of the bowl, add the eggs, and mix on medium-high for 2 to 3 minutes. Scrape down the sides of the bowl once more.
3. On low speed, stream in the buttermilk, oil, and vanilla. Increase the mixer speed to medium-high and paddle for 4 to 6 minutes, until the mixture is practically white, twice the size of your original fluffy butter-and-sugar mixture, and completely homogenous. Don’t rush the process. You’re basically forcing too much liquid into an already fatty mixture that doesn’t want to make room for the liquid. There should be no streaks of fat or liquid. Stop the mixer and scrape down the sides of the bowl.
4. On very low speed, add the cake flour, baking powder, salt, and the 50 g (¼ cup) rainbow sprinkles. Mix for 45 to 60 seconds, just until your batter comes together. Scrape down the sides of the bowl.
5. Pam-spray a quarter sheet pan and line it with parchment, or just line the pan with a Silpat. Using a spatula, spread the cake batter in an even layer in the pan. Sprinkle the remaining 25 g (2 tablespoons) rainbow sprinkles evenly on top of the batter.
6. Bake the cake for 30 to 35 minutes. The cake will rise and puff, doubling in size, but will remain slightly buttery and dense. At 30 minutes, gently poke the edge of the cake with your finger: the cake should bounce back slightly and the center should no longer be jiggly. Leave the cake in the oven for an extra 3 to 5 minutes if it doesn’t pass these tests.
7. Take the cake out of the oven and cool on a wire rack or, in a pinch, in the fridge or freezer (don’t worry, it’s not cheating). The cooled cake can be stored in the fridge, wrapped in plastic wrap, for up to 5 days.
MAKES ABOUT 60 G (¼ CUP)
55 g milk
[¼ cup]
4 g clear vanilla extract
[1 teaspoon]
Whisk together the milk and vanilla in a small bowl.

MAKES ABOUT 430 G (2 CUPS)
115 g butter, at room temperature
[8 tablespoons (1 stick)]
50 g vegetable shortening
[¼ cup]
55 g cream cheese
[2 ounces]
200 g confectioners’ sugar
[1¼ cups]
2 g kosher salt
[½ teaspoon]
0.25 g baking powder
[pinch]
0.25 g citric acid
[pinch]
In a pinch, substitute 12 g (2 teaspoons) corn syrup for the glucose.
1. Combine the butter, shortening, and cream cheese in the bowl of a stand mixer fitted with the paddle attachment and cream together on medium-high for 2 to 3 minutes, until the mixture is smooth and fluffy. Scrape down the sides of the bowl.
2. With the mixer on its lowest speed, stream in the glucose, corn syrup, and vanilla. Crank the mixer up to medium-high and beat for 2 to 3 minutes, until the mixture is silky smooth and a glossy white. Scrape down the sides of the bowl.
3. Add the confectioners’ sugar, salt, baking powder, and citric acid and mix on low speed just to incorporate them into the batter. Crank the speed back up to medium-high and beat for 2 to 3 minutes, until you have a brilliant stark white, beautifully smooth frosting. It should look just like it came out of a plastic tub at the grocery store! Use the frosting immediately, or store it in an airtight container in the fridge for up to 1 week.