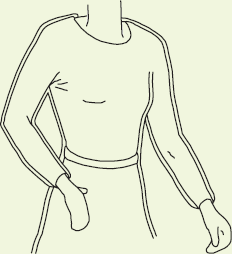
All of the projects in this book are based on a two-part Knitter Fitter System: the Fitter List and the Sweater Map. The Fitter List is a record of key sweater measurements and their translations into numbers of stitches and rows of knitting. The Sweater Map is an illustration of how the individual sweater pieces fit together. This system is infinitely versatile and variable—if you can read a tape measure, you can design your own sweater.
When I knitted my first sweater, I worked all the pieces from the bottom up. For a long time I thought that was the only way to knit a sweater. As my knitting skills improved, however, I realized I could knit from the top down just as easily or that I could orient my rows lengthwise and knit from side to side. It wasn’t long before I tried combining different knitting directions in a single sweater.
No matter which direction you want to knit your sweater, it’s an easy matter of taking a few body measurements (or measurements of a sweater that fits the way you like) to customize the fit. From there, it’s only a matter of adding or subtracting inches from that sweater to achieve any style you want—from form fitting to oversized, from cropped to coat length. From there, it’s a simple matter of knitting a generous swatch and taking accurate stitch- and row-gauge measurements, and using these measurements to design every aspect of a sweater, whether you want to knit that sweater from the bottom up (or from the top down) or from side to side.
The Fitter List
The Fitter List includes key measurements and the numbers of stitches and rows that correspond to these measurements (based on your gauge swatch). At first glance, this looks like an impossible amount of information. But don’t despair—you only need to determine the bodice width and length before you start knitting. All the other numbers will be added one at a time as you knit. This approach allows you to determine things such as armhole depth, neckline shape, and sleeve dimensions based on the hand, drape, and stretch of your particular knitted fabric. And when you’re done knitting, you’ll have a complete record of every decision you made along the way so you can knit another sweater just like it. Or, even better, use this information as a basis for making successful changes in fit or design for a completely different sweater.
The Fitter List
Measure your body and allow for the appropriate amount of ease (see page 14) or measure a sweater that fits the way you like and enter the numbers below. Refer to your gauge swatch for your stitch and row gauges, then translate each measurement into numbers of stitches and/or rows as you go along. Note that the direction you knit the sweater pieces (up and down or side to side) will determine whether you follow the stitch or row numbers (you only need to fill in the appropriate blank).
Download a blank Fitter List worksheet here.
Yarn
Yarn name:_______________
Fiber content:___________
Weight classification:_____WPI:_____Yards/pounds used:_____
Gauge
Stitches per inch:_____Rows per inch:_____Needle size:_____
Details
Cast-on method:_________________________
Bind-off method:_________________________
Selvedge treatment:_________________________
Sleeve increase/decrease method:_________________________
Seam technique:_________________________
Notes/Variations
Note any variations you make to the basic pattern here.


Cardigan (page 37) • Neck Variations (page 38) • Shoulder Variations (page 40) • Sleeve Variations (page 42) • Edgings (page 44)
The Sweater Map
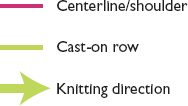
The Sweater Map is a bird’s-eye-view of all of the sweater pieces before they are sewn together. This at-a-glance overview lets you conceptualize the sweater before you begin knitting and provides a foundation for making additions and alterations along the way or for future sweaters. Annotate the map with arrows to indicate knitting direction, stitch and row counts to indicate where and how neck and sleeve shaping takes place, and notes about design details such as collar and edging choices, and you’ll have a complete picture of your sweater.
To draw your map in perfect proportion, plot your measurements on ordinary graph pager at a scale of one inch to one square. You can make custom printable PDF files of any size graph paper by visiting the Web (see page 142). You can also plot your measurements actual size on pellon yardage (see page 46).


Sweater Map for a basic drop-shoulder pullover worked up and down
Sweater Sizing
Deciding on the right size for a sweater is a relative thing. It is determined as much by style and fit as actual body measurements. Use your actual measurements as a foundation, then add (or subtract) inches to achieve the fit you want.
Close Fit or Fitted: The garment chest measurement is the same as your body chest measurement. If a fabric is very stretchy and is meant to fit very snugly, then measure the fabric while it is stretched the desired amount.

Add less than 2"–4" to your actual body measurement for a close fit.
Standard or Classic: The garment chest measurement is a bit larger than the body chest measurement. This larger measurement allows for more ease of movement and is appropriately called “ease.”

Add about 2–4" to your actual body measurement for a standard fit.
Loose or Oversized: The garment chest measurement is four or more inches larger than the actual chest measurement. Lots of ease!

Add 4" or more to your actual body measurement for a loose fit.


