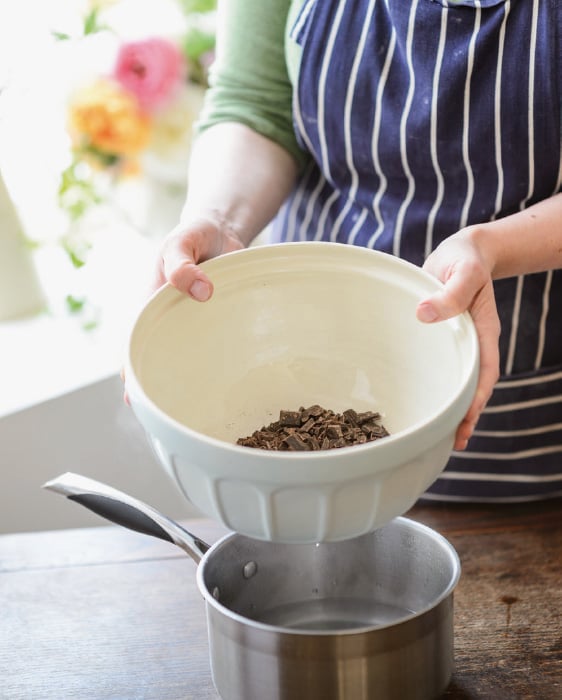
Melt chocolate in a bowl set over a saucepan of water, kept simmering on a low heat.
If I could give you only one baking tip, it would be that you need to be well prepared. Professional pastry chefs and bakers weigh out all their ingredients in advance, with everything in its own little bowl. I rarely have time to prepare for a bake that thoroughly and anyway that entails a lot of washing up. However it is always wise to make sure you have read the recipe thoroughly, and prepared those items that need a little more input than just weighing out – such as grating the vegetable ingredients – so that you can mix everything and get it in the oven as quickly as possible. All cakes rely on some form of raising agent, whether it is baking powder or the air in whisked eggs, and the longer the batter is standing around the less effective these ingredients will be.
Below I have given some general tips on the techniques used in this book. I have also explained in detail some basic procedures that are common to several recipes, such as how to make pastry.
Unfortunately there is often just no substitute for wheat flour or butter in a recipe, and so cakes have long been forbidden fruit to the intolerant or allergic. Although this book does not suggest alternative ingredients, I have included some cakes and other bakes that do not contain gluten, wheat or dairy (SEE here). There are also a number of good, gluten-free flour mixes available these days (Doves Farm does an excellent gluten-free baking range). These can be introduced instead of wheat flour without otherwise changing the recipe (you may need a little extra liquid though – try adding a tablespoon or two of milk if needed).
To beat a mix, use the paddle attachment on a stand mixer, electric beaters or a wooden spoon. Choose the whisk (attachments) only if the recipe specifically says to whisk.
It is always preferable to melt chocolate over a pan of simmering water, as it is easier to control and less likely to burn than if done in a microwave. Break up the chocolate into small pieces of roughly the same size and place in a heatproof (glass or ceramic) bowl that fits snugly over a saucepan of water. The bottom of the bowl should not touch the water – allow space for it to bubble up too. Put over a medium heat and bring the water to a simmer. Do not stir it (unless you are melting butter with the chocolate) until it has almost all melted. Take the bowl off the saucepan and stir the chocolate until it is smooth and glossy.
It is much easier to make chocolate shavings from a large bar than a few small squares. Turn the bar over so the flat side is uppermost. Hold a large knife firmly at both ends, and pull it at an angle across the surface of the chocolate. Thin shavings will roll up in front of the blade. Use the knife to transfer them to the cake – they will melt on your fingers.
The recipes here all specify double cream, because it gives a richer, tastier result. However you could use single cream if you wanted, to reduce the calorie count slightly or if it is all you have.
If a recipe needs whipped cream, always use double cream rather than ‘whipping cream’. It is smoother and creamier, and whips just as well. Stop a little before you think it is thick enough, because by scraping and spooning it, and especially piping it, you will continue to incorporate air. Whipped cream should be smooth, stiff enough to hold its own weight, but not bitty like the stuff in the whipped cream aerosol cans.
For a smooth finish to a cake that is iced all over, it is worth doing a crumb layer. Use a little of the buttercream/ganache to spread all over the top and sides of the cake, then leave it to set (put it in the refrigerator briefly if you are short of time). All the crumbs on the cake are now secured in this layer and you can spread over the rest of the buttercream/ganache without them appearing on the finished cake.
This technique is generally used for whisked-egg cakes and involves stirring cake batter with the lightest possible touch while combining all the ingredients and keeping as much air in the mixture as possible. Always use a large metal spoon, as it has a thinner edge than a wooden spoon or plastic spatula and will squash fewer air bubbles. Run the spoon round the bottom edge of the bowl and fold the mixture over the top of itself, with an occasional slice through the middle of the bowl as well. It is always worth an occasional scrape across the bottom of the bowl with a spatula though, to gather any unmixed ingredients.
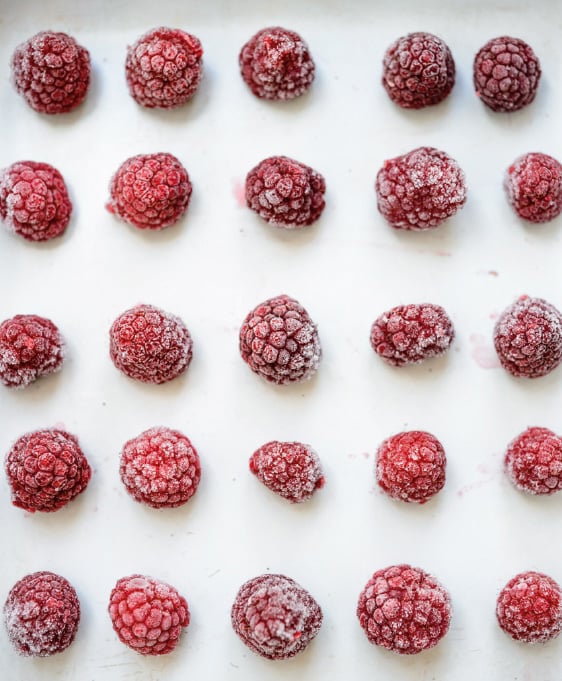
One option to preserve a glut of fruit or vegetables is to freeze them. Although they will lose their fresh texture and some of their juices once defrosted, this is ideal for berries and currants. Put the fresh, washed and dried fruit on a tray in the freezer, ensuring the individual fruits are not touching and there are no mouldy ones. Once frozen (after about 24 hours) they can be put into a box or bag for longer-term freezing.
When weighing out ingredients, use the metric or the imperial measures throughout a recipe; never mix the two systems.
Rule number one with ingredients is to buy the best you can afford, and the freshest. Always, always, have your ingredients at room temperature before you start baking. This obviously requires a bit of forward planning, so if you suddenly get the urge to bake and your eggs and butter are in the refrigerator, put the eggs in a glass of warm water and the butter (weighed out first) in the oven for a minute or two as it is warming up. Pastry however requires the butter to be cold.
Unless otherwise stated in the recipes in Grow Your Own Cake:
• |
butter is unsalted; |
• |
fruit and vegetables are washed/scrubbed, dried and topped and tailed as necessary; |
• |
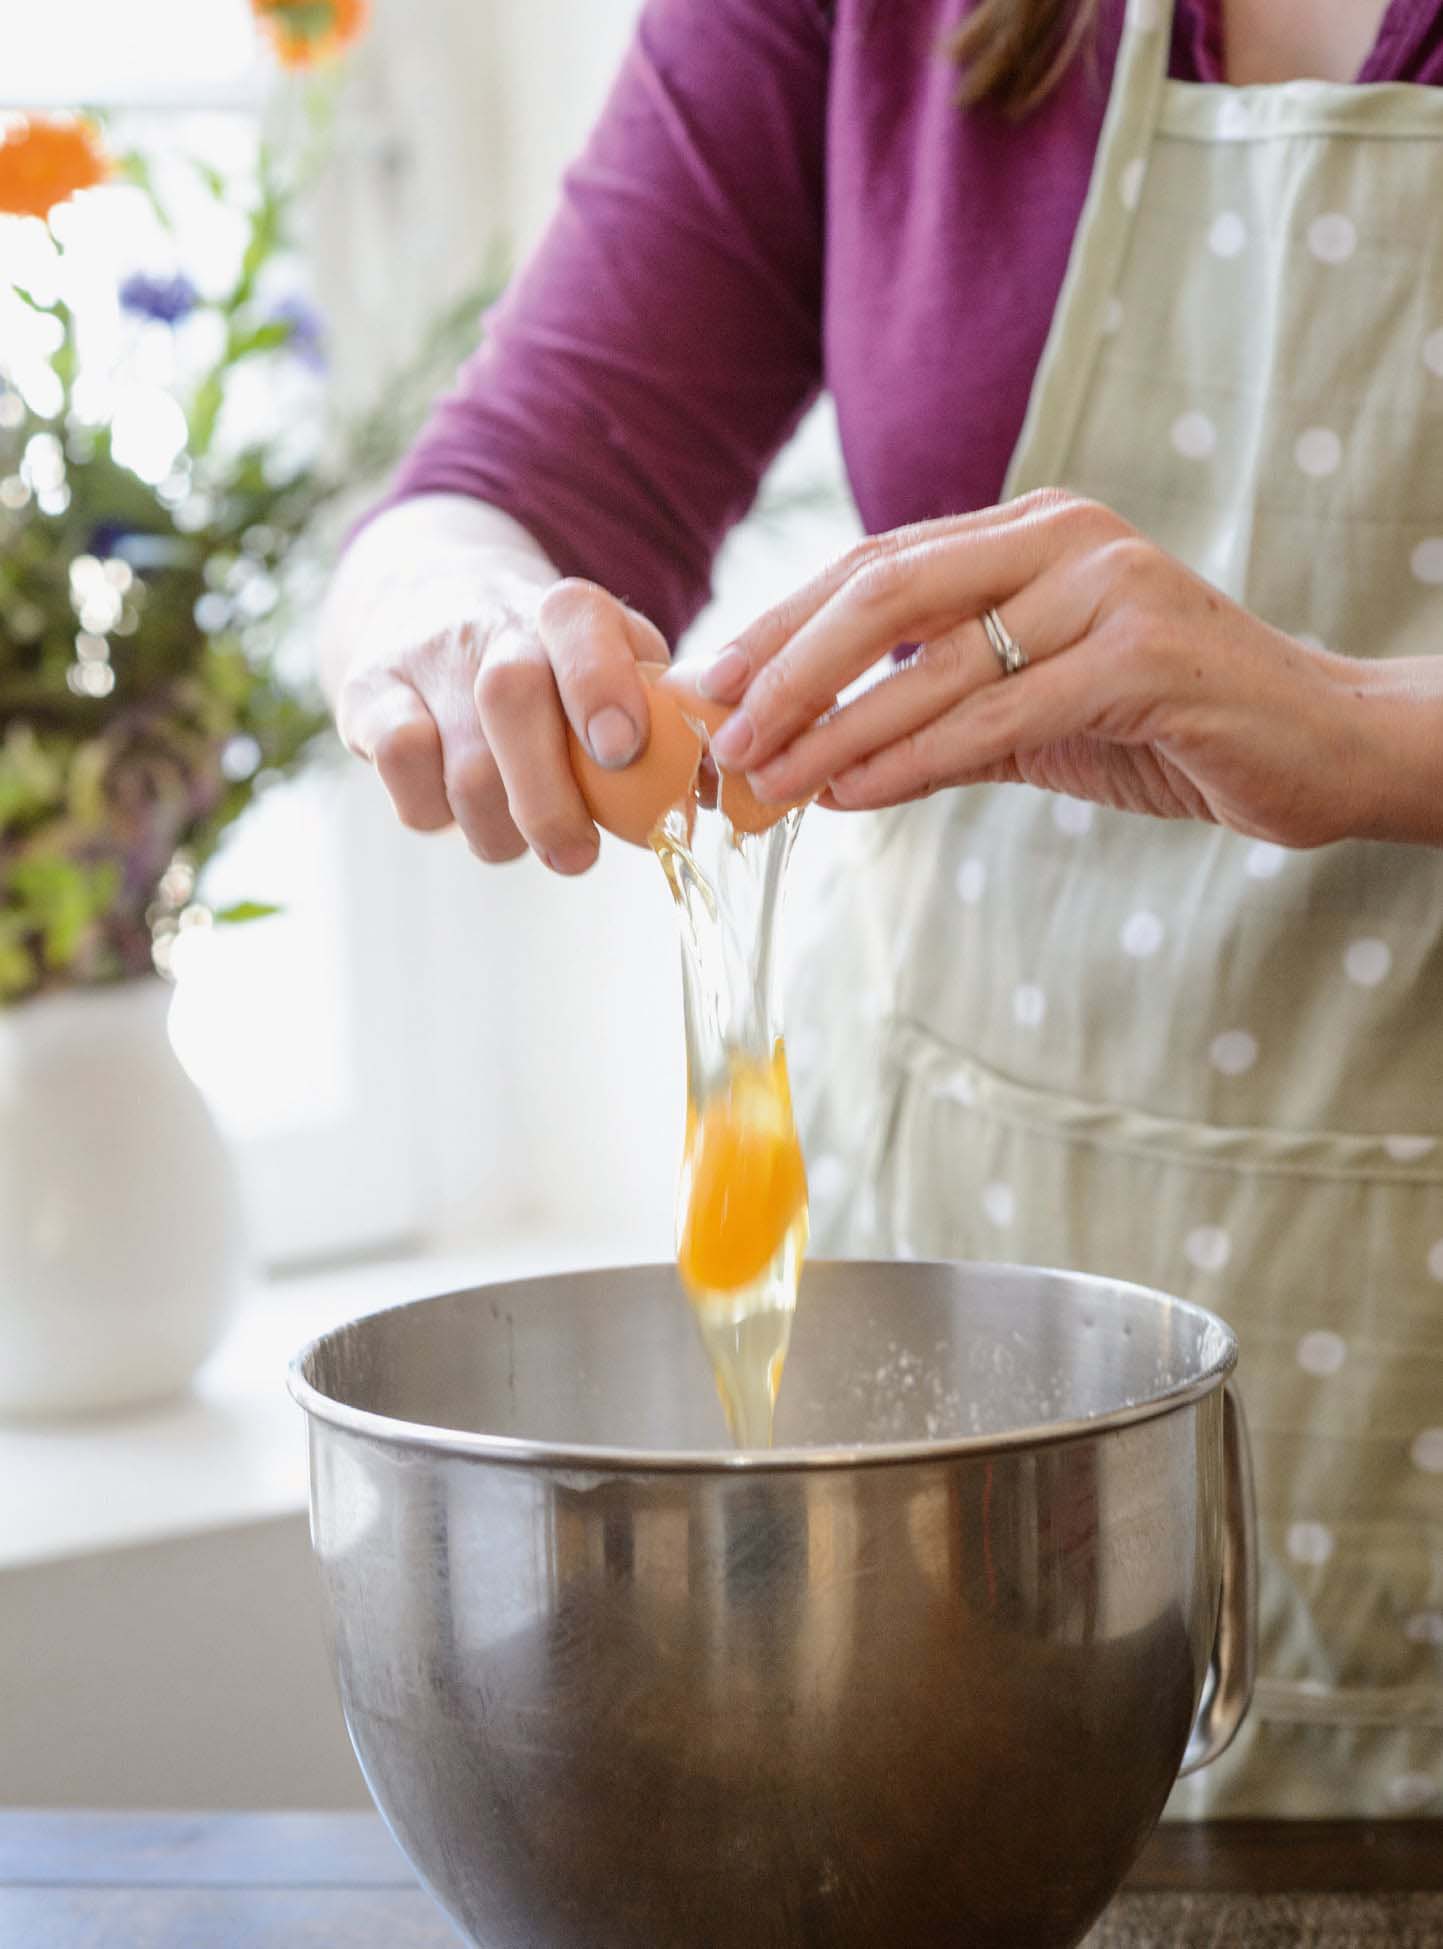
eggs are medium-sized; |
• |
milk is semi-skimmed; |
• |
salt is fine, not flaked. |
Oven temperatures are given in degrees Celsius and Fahrenheit for fan ovens, as well as in gas marks.
It is important to know whether the temperature dial on your oven is accurate, so buy an oven thermometer to find out – they are inexpensive and repay themselves tenfold in avoided baking disasters. My own oven is a massive 15°C hotter than the temperature on the dial.
With that in mind, and as the baking time will vary with the tin size and number of tins in the oven, treat the baking time given in this book as a guide rather than a prescription. Do not abandon your cake in the oven and go and do something else, or at least come back a good 10 minutes before the timer will ring.
SEE ALSO Testing cakes are cooked.
Gluten-free substitutes for plain flour are relatively easy to come by, in mainstream stores as well as specialist health food shops and of course online. To make the pastry recipes gluten-free, replace the plain flour with a gluten-free one (Doves Farm produce a suitable one, SEE Allergies & intolerances). You may need to add a little more liquid to bring the dough together – use milk or, if dairy is also off-limits, soya or almond milk. Trickle this in a few drops at a time so as not to over-dampen the dough.
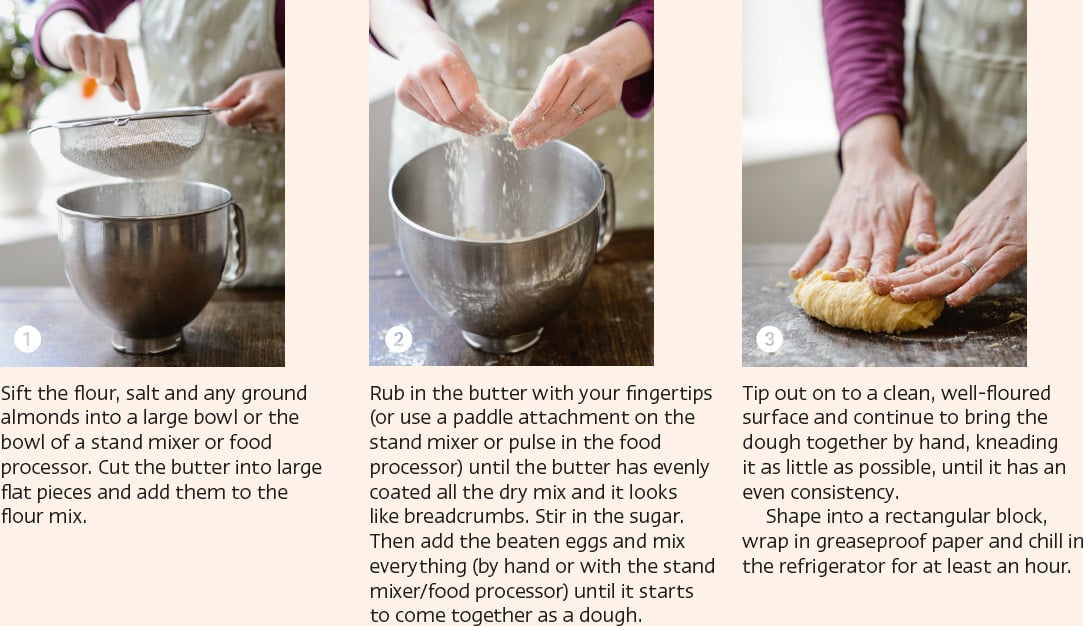
I prefer to make my pastry a little on the wet side, so that the flour that it picks up from the surface does not then make it too dry. You may therefore find the dough a little sticky to start with, but if you keep the surface, rolling pin and your hands well-floured the chilled dough will be easier to work.
Always roll out the pastry as thin as possible, which may mean you have some excess. Return a little to the refrigerator in case you need to patch up a blind-baked pastry case, while the rest is a bonus. Either bake a few extra little pastry cases (fill with fruit and whipped cream – cook’s perks), or freeze the dough wrapped in baking paper then sealed in a plastic bag. It will last three months in the freezer (label with the date), by which time you can collect enough scraps to combine them into a whole tart or flan.
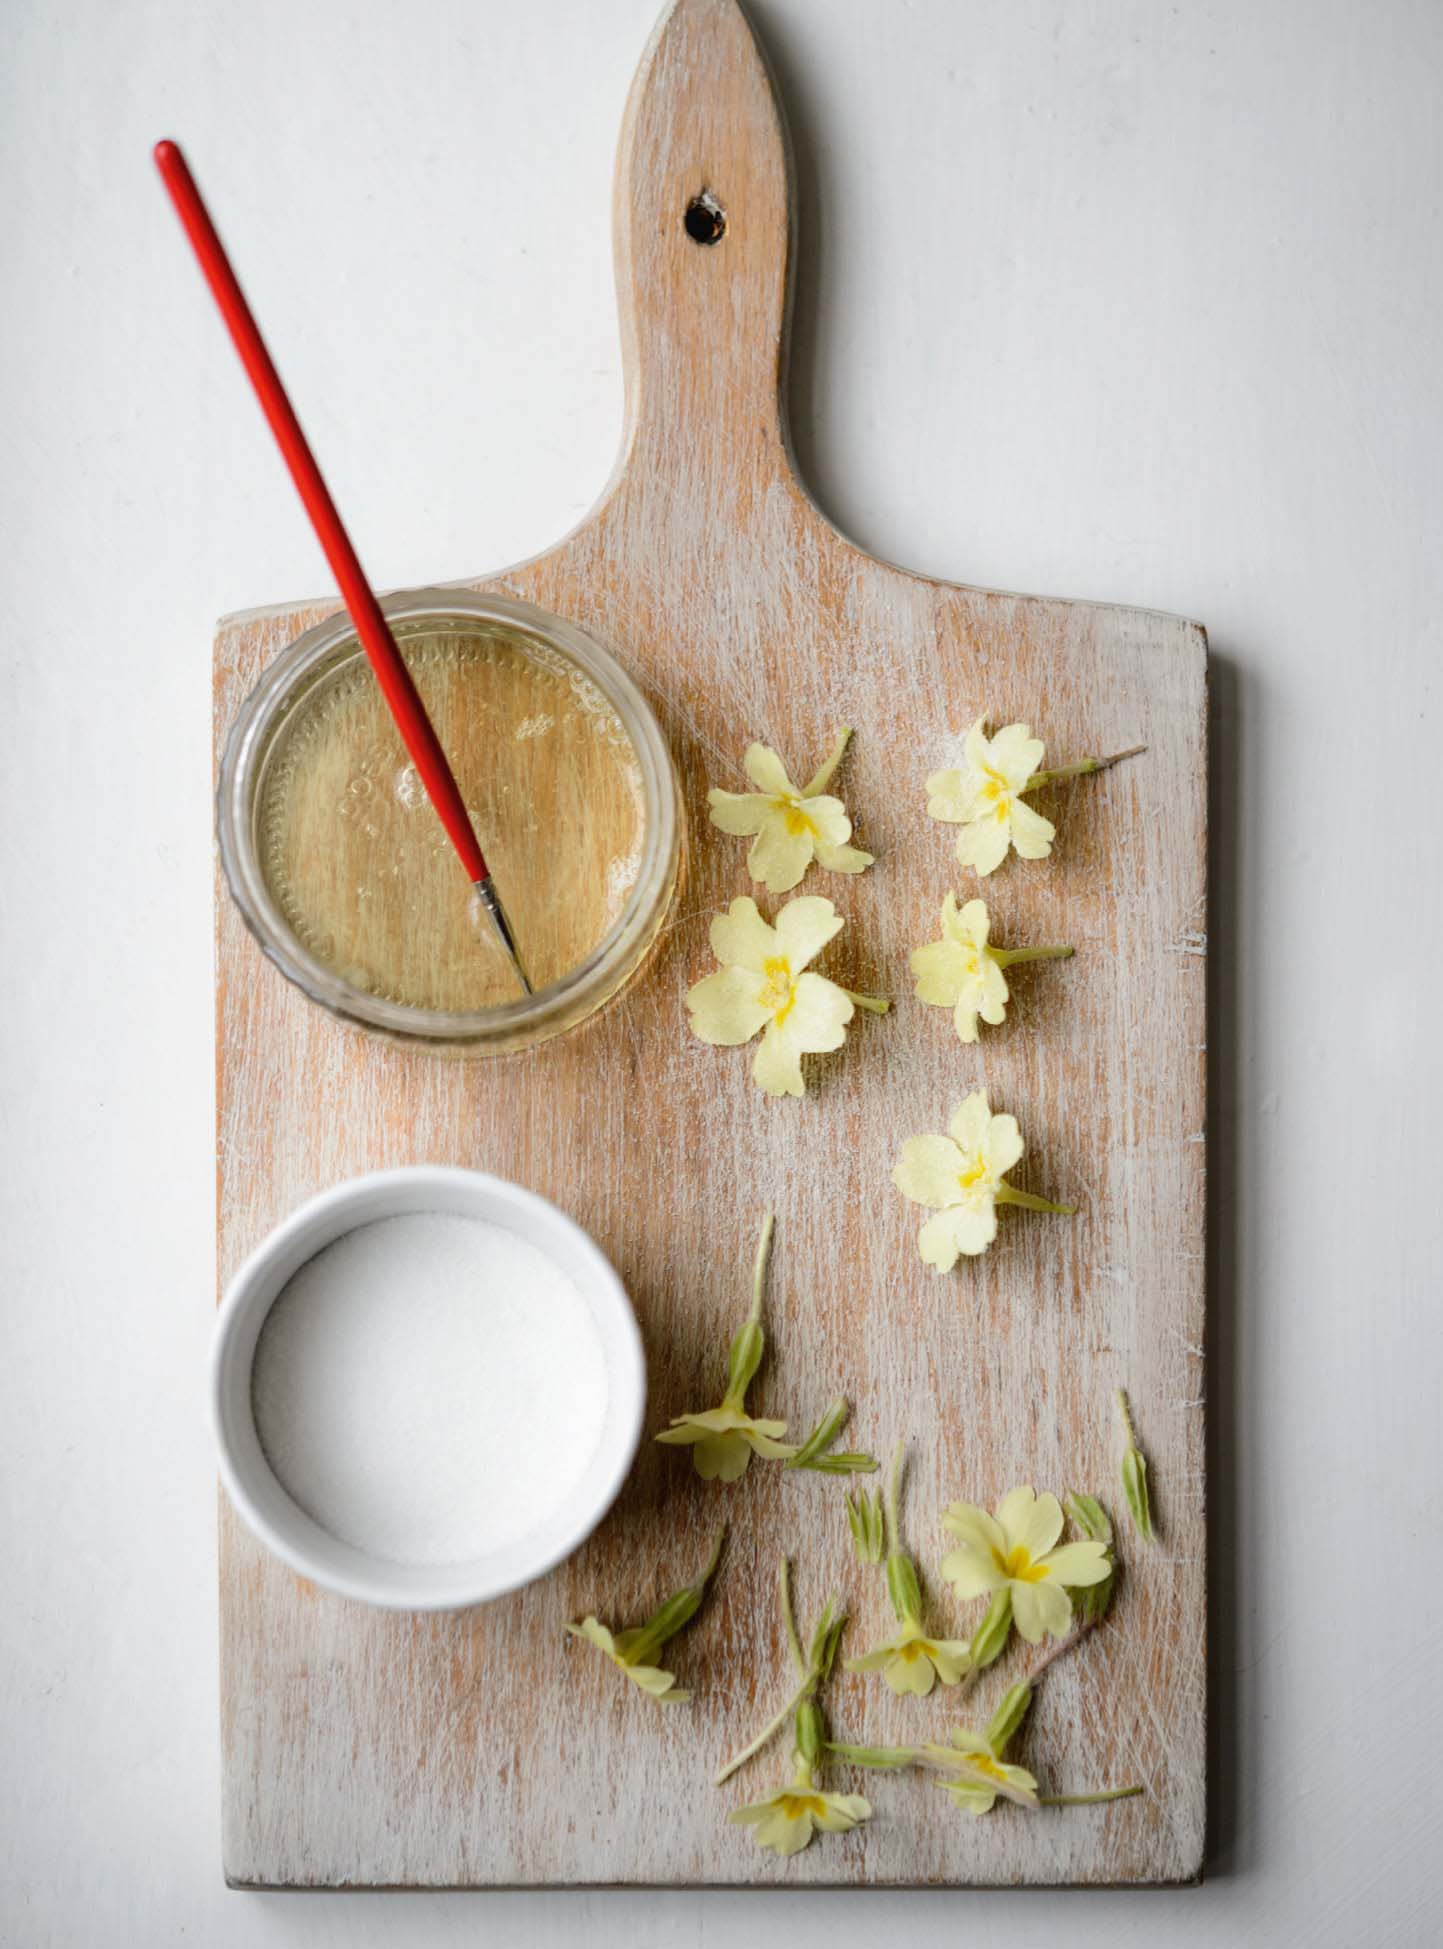
While it is perfectly possible to bake and decorate all the cakes in this book using only spoons and knives, piping gives a neater finish because you have more control over the process. Proper piping bags make life easier, but any plastic food bag will do. Before spooning the buttercream or meringue into the piping bag, it helps to stand the bag in a tall mug or jug so you have both hands free. There is no need for special nozzles – just cut the end off the bag, to create a hole of the desired width. Twist the bag closed at the top and, if necessary, swing it over your shoulder to move all the mixture down to the point of the bag – before you cut the end off!
To create neat, little blobs, such as the Flower meringues (SEE here), hold the point of the bag just above some baking paper. Squeeze out a little mixture – it will rise up around the bag point – then stop squeezing and push the point down into the blob before pulling it up and out. This should leave a small peak but not a trail of mixture across the paper. If you need to flatten any little peaks, such as on the Blackcurrant mini-pavlovas (SEE here), use a dampened finger to squash them down gently.
Two-layer cakes will support themselves, but if you go any higher than that the tiers will need securing to prevent them slipping. Specialist cake dowels are available for this purpose, but wooden skewers or plastic straws do just as good a job. Push each one into the cake before you ice or decorate, making sure you feel each hit the bottom. Three or four skewers/dowels will be enough, provided they are well-spaced around the cake. Pull the skewers/dowels out of the cake slightly before cutting them so that the tops sit flush with or just below the top of the cake.
The first indication that a cake is nearly ready is that a delicious smell will be coming from the oven, but to prevent it sinking make sure it has had at least 75 per cent of its recommended baking time before you open the door (unless it is a Genoese sponge, in which case never open the door before 25 minutes have elapsed). Other signs that a cake is cooked are that it should have risen, the surface should be lightly browned and firm to the touch, and it should have shrunk from the sides of the tin. The best test varies with the type of cake – see the specific recipes – but often it is to insert a wooden skewer into the middle of the cake. Only once the skewer comes out clean is it ready to remove from the oven. Always test each cake tin separately, with a clean skewer.
If for some reason your oven temperature was too high and the cake is not cooked in the middle but browning too fast on top, turn down the temperature to 20°C/50°F/2 gas marks below that stated in the recipe and cover the top of each tin with foil. Check every 5–10 minutes to see if it is ready.
Carefully remove the baking paper from the base of each sponge once it has been turned out of its tin.
Most people do not have the space to store a huge range of cake tins, and investing in good-quality ones can get expensive. All the bakes in this book therefore use only a small range:
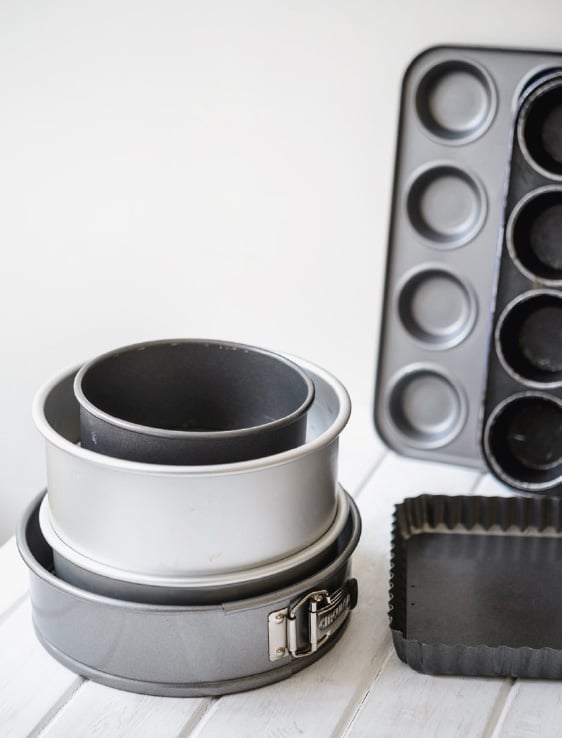
Most of the recipes in this book use only a small range of bakeware.
• |
2 × deep, round cake tins, 20cm/8in diameter (preferably loose-bottomed with a silicone seal); |
• |
1 × spring-form, round cake tin, 23–24cm/9–9½in diameter; |
• |
1 × 12-hole muffin or cupcake tin, with holes about 3cm/1¼in deep; |
• |
1 × loose-bottomed, metal flan tin, 23–25cm/9–10in diameter; |
• |
1 × deep pie dish, 25cm/10in diameter; |
• |
1 × Swiss roll tin, 30 × 20cm/12 × 8in; |
• |
1 × brownie or shallow roasting tin, 20 × 25 × 3cm/8 × 10 × 1¼in; |
• |
1–2 × baking sheets or roasting/oven trays; |
• |
2 × wire cooling racks. |
To this list you could also add the optional extras of:
• |
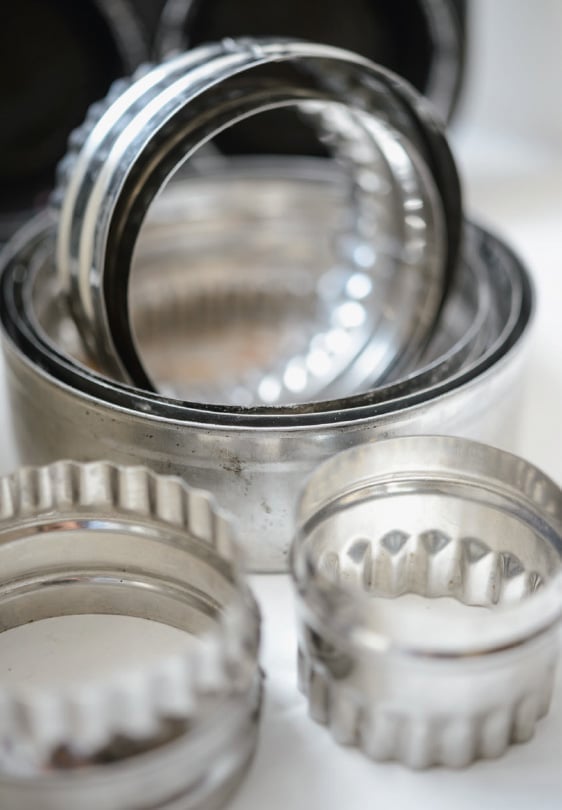
1 × set of cookie cutters (although an upturned glass works well as a substitute); |
• |
2 × deep, round cake tins, 15cm/6in diameter; |
• |
1 × 12-hole fairy cake tin, with holes about 2cm/¾in deep; |
• |
1 × mini-sponge tin, with holes of 4–5cm/1½–2in diameter, 12 holes minimum. |
When buying bakeware, always get the best you can afford. Plenty are advertised as nonstick, but this is not necessary as I would always grease and line these tins anyway. Loose-bottomed tins are worth the little extra money though. Few will leak batter these days, but a silicone seal will make sure that they do not.
Tin sizes are sadly not standardized. Use tins as close to the recommended size as you can, but do not run out and buy a new pie dish because yours is 23cm/9in diameter rather than 25cm/10in. Just be aware that if the tin is larger, the filling will be shallower within it and the baking time may need to be slightly shorter to compensate.
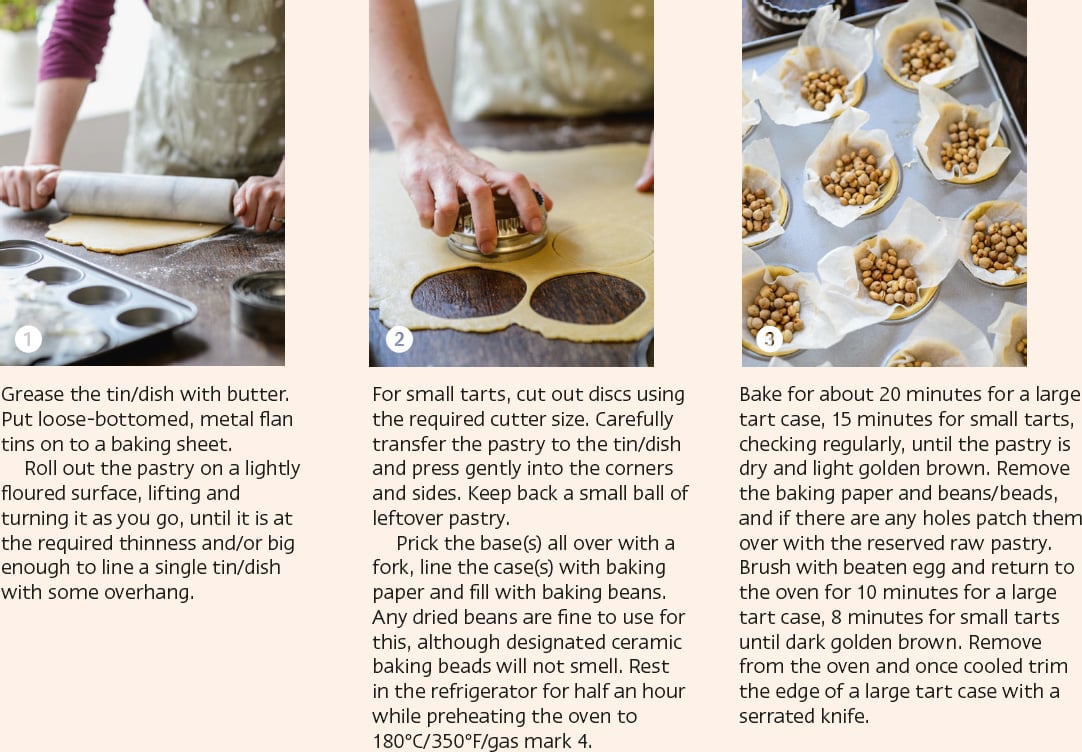
Cut out the baking paper lining before greasing the tin – remove the base and draw around it to ensure a snug fit. If you are really short of time it is possible to buy pre-cut liners, but they are vastly more expensive. Better, when you are baking, to cut out a few extra discs in case of cake emergencies in the future.
Grease tins with a thin layer of unsalted butter (or oil, if you need to be dairy-free), making sure that you have covered all of the base and sides. Keep old butter wrappers for this purpose. Take care that you do not add too much grease, as this will result in a crunchy, browned edge to your cakes.
Toasting the nuts is a step that it is very tempting to skip, but I would urge you not to, because the difference in flavour is enormous. Preheat the oven to 180°C/350°F/gas mark 4. Spread the nuts in a single layer on a baking sheet. Use your nose as a guide as to how long to cook them: when the aromas start to fill the kitchen they are done. Some approximate times are:
• |
walnuts and pecans – 7–8 minutes; |
• |
hazelnuts – 8–9 minutes. |
The most common things to go wrong in baking are the mix curdling or splitting. Fortunately both are easily remedied.
Curdling can occur when eggs are added to creamed butter and sugar, which then turns into a lumpy, watery mess. Usually this is because the eggs are too cold. To remedy the mix, take a couple of tablespoons of pre-weighed flour and add them to the curdled ingredients, then beat thoroughly and quickly. Add more flour until the mix combines into a smooth batter again, then pick up the recipe where you left off.
Chocolate when overheated can split – it will then look oily and behave like flubber. This may occur in recipes such as for brownies and ganaches. Using a shallow, wide bowl when melting the chocolate is a good preventative measure, as is cooling the mixture (for 10–15 minutes in the refrigerator) and beating, but they do not always remedy the problem.