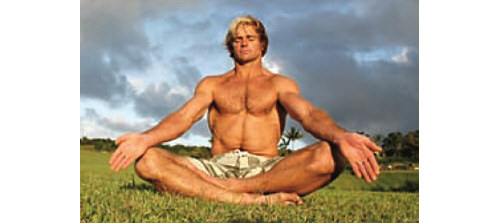
THE ANYWHERE WORKOUT
YOU DON’T NEED A GYM. AND ON A BEAUTIFUL
DAY, WHY WOULD YOU EVEN WANT ONE? THERE’S
A REASON IT’S CALLED WORKING OUT. WHETHER
YOU’RE AT THE BEACH, IN YOUR BACKYARD, OR IN
A HOTEL ROOM ON THE ROAD, HERE ARE SOME
MOVES THAT YOU CAN DO ANYWHERE, ANYTIME.

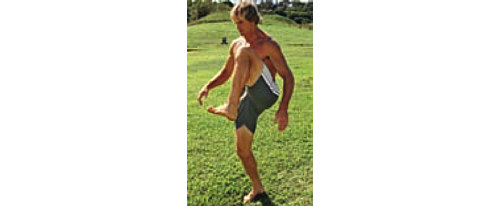
1. WALKING FORWARD LUNGE WITH HIGH STEP
The great thing about lunges is that you can do them in endless variations, combining different stances with different kinds of terrain: sand, uneven ground, uphill. When you’re lunging—wherever or however you do it—it’s important to keep everything 90-degrees square. Your back is straight, your shoulders are pulled back (no hunching or leaning forward), your head faces forward, your hips are square. Your front knee aligns directly over your ankle; letting it jut over your foot will cause pain around the kneecap.
Begin this exercise by taking a wide step out front with your right leg, bending your right knee at a 90-degree angle above your right ankle (so that your shin is perpendicular to your thigh). Your left knee bends to touch the ground (right). Next, press off of your bent right leg and straighten it, simultaneously lifting your left leg forward and up, as if to take a giant step forward. Your left knee lifts to your chest; your right leg is strong and grounded (and your back continues to be straight). Step down onto your left foot, bending your left leg forward into a lunge. On your next step, lift your right leg forward and up with a high knee to complete the cycle. It’s an exaggerated walking and lunging movement. Keep moving forward, alternating legs.
Try it: as an interval. Do 1 minute on; take 10 seconds off. Repeat 5 times.
Make it harder: Do the exercise in sand or going uphill.

2. WALKING LATERAL LUNGE
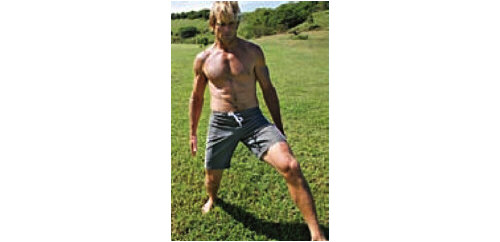
Instead of moving directly forward, lunge to a 45-degree angle on each leg. For these lateral lunges, skip the high step in between.
Try it: as an interval. Do 1 minute on; take 10 seconds off. Repeat 5 times.
Make it harder: Do the exercise going uphill.
3. HINDU SQUAT
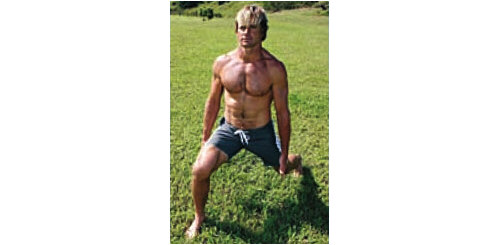
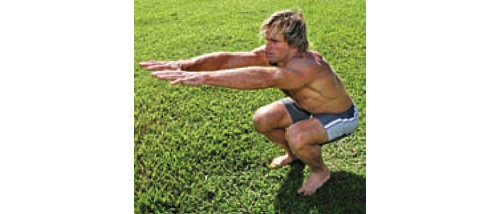
In a Hindu squat, you complete the full range of motion. Ultimately, you want to be able to put your butt on your heels. (If you have to lift your heels off the ground to go lower, that’s fine.)
Begin by standing with your arms at your sides, facing straight ahead. Your feet should be about 6 inches apart. Bend your knees and lower into a squat. At the same time, raise your arms forward so they’re parallel to the ground (right). Press back up to standing, using your arms to help with the momentum and ending in the same position in which you started. Make sure to breathe on every repetition.
Try it: Do 40 reps nonstop in a slow, fluid motion.
Make it harder: Do 3 sets of 40 reps, with 20 seconds of rest in between. Gradually work your way up to 3 sets of 100.
4. DECLINE PUSHUP
Find a way to elevate your legs 1 to 2 feet off the ground. You can use a rock, a piece of furniture, a stump, a hillside—whatever’s available. Working out in your environment is all about improvising and taking advantage of the surroundings.
Assume the pushup position, keeping your back straight and your core firm, making sure that your shoulders don’t round forward. Your hands are aligned beneath your shoulders.
Try it: Do 30 pushups in this position.
Make it harder: Do as many pushups as you can complete in 2 minutes.

5. CORE SERIES
My friend Flavio De Oliviera showed me this sequence of 9 core movements. They’re done in a progression, with no rest in between. You can adapt this routine in any way you’d like.

To begin: Lie on your back, using your hands to support your lower back. Lift your head slightly off the ground and look toward your toes. Keeping your stomach firm and your legs straight, raise your feet 6 to 12 inches off the ground. The closer your feet are to the ground, the harder these movements will be.

Movement #1: Lift your legs in a vertical scissoring motion. Keeping your legs straight, alternate raising your legs about 3 feet apart. Keep the motion fluid; when one leg comes down, the other goes up. Repeat 10 times on each leg (like an exaggerated flutter kick with straight legs).

Movement #2: Next, open your legs wide in a lateral scissoring motion. Keep your feet flexed and as close to the ground as possible. Make sure that your lower back doesn’t arch (pressing your stomach muscles toward the ground also helps to stabilize your lower back). Do this 10 times.

Movement #3: Lift your legs straight overhead. Using your lower abdominals, press the soles of your feet skyward. Your hips should lift off the ground about 4 to 6 inches with each movement. Do this 10 times.

Movement #4: Slowly lower your legs to the ground. Bend your knees and bring them toward your chest. Do 10 crunches. Cradle your head in your hands, taking care not to pull on your neck with your hands and keeping your elbows out to the sides so they’re aligned with your ears.

Movement #5: Extend your legs so that they’re hovering just above the ground. Hold for 30 seconds. Make it harder: Pulse your feet up and down 2 to 3 inches while you’re holding. Make sure that you’re not holding your breath. Ideally, you will use your breath to work through these movements, inhaling and exhaling on each repetition.

Movement #6: Slowly lift your legs straight overhead again, feet flexed. Reach up with your right hand and touch your left foot. Alternate with your left hand touching your right foot. This movement combines reaching and twisting. Do this 10 times on each side.

Movement #7: Keeping your legs raised, reach your left arm down as far as you can, bending your left side as you do so. This will engage your left obliques (the muscles that enable bending and twisting) in a lateral crunch. Alternate from side to side. Do this 10 times on each side.

Movement #8: Place the soles of your feet together and let your knees fall out to the sides. Pressing your palms together, reach your hands toward your feet, and hold the contraction for a second or two before lowering slightly. This isn’t a big movement—you don’t want to lift your lower back off the ground. The point is to keep your core in a tight contraction for the entire set. Do this 10 times.

Movement #9: Lie flat on your back with your hands clasped behind your head. Lift your left knee to your chest, simultaneously raising your right foot 2 to 3 inches off the ground. Twist your right elbow to touch your left knee. Alternate sides by extending your left leg while bending your right knee toward your chest and twisting your left elbow to touch your right knee. This is a twisting, bicycling motion. Do this 10 times on each side.
Make it harder: Double the reps so that you’re doing 20 of each movement.
6. HANDSTAND
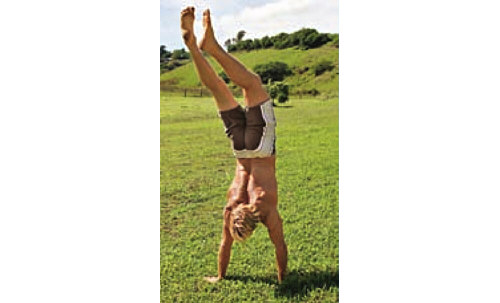
I like to walk on my hands, but if you’re uncomfortable with that, you can also do a handstand against a wall. Begin by facing the wall, kneeling. Place your hands flat on the ground about 3 inches from the wall, shoulder-width apart. Then straighten your arms and legs, and walk your feet toward your hands until your hips are approaching alignment above your shoulders. Keeping your arms straight and muscles firm, your shoulder blades pulled back and down, kick up with one leg to raise both legs above your head. Keep your head in a neutral position, looking down at your hands. Press through the soles of your feet, tighten your midsection, and press upward from your palms. This exercise builds back, shoulder, arm, and hand strength, and the inversion is good for circulation.
Try it: Hold for as long as you can, building to 2 minutes.
Make it harder: Do vertical pushups in this position, bending your arms and lowering your head toward the ground. Make sure you’re very comfortable in a handstand before trying this.
7. DIPS
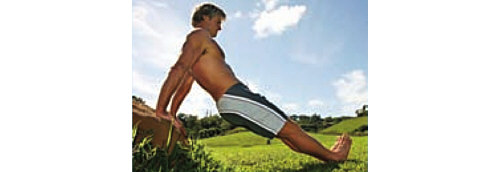
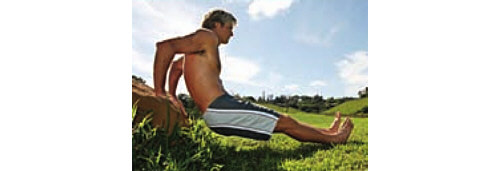
Find something that’s 1 to 2 feet off the ground—in this case, I’m using a rock. A chair would also work; so would a bench or a ledge of some kind. Place your hands behind you with your palms flat and your fingers facing forward. Stretch your legs in front of you so that only your heels are touching the ground. Next, bend your arms to a 90-degree angle, lowering your hips. Press to straighten your arms back up again.
Try it: Do 30 reps.
Make it harder: Do 3 sets of 30 reps.
8. THE STEEPS
Find a steep incline. A hill or a dune is ideal, but a long set of stairs will also work. The idea here is to get your heart pumping, to flush out some of the lactic acid you’ve generated with the anaerobic exercises that you’ve just done. I like to put on football cleats and do yard work on the hills around my house—it’s great for flexing your ankles and really working them. The most important thing to remember when you’re headed uphill is to use your whole foot, your ankles, and the backs of your calves. A lot of the time when people start climbing something steep, they move forward onto their toes. Don’t do that. Flex your ankles and dig in.
Try it: For 15 minutes, walk briskly up and down your incline.
Make it harder: Move faster, bending your upper body forward to make your glutes and lower back work harder.


THE POWER OF YOGA
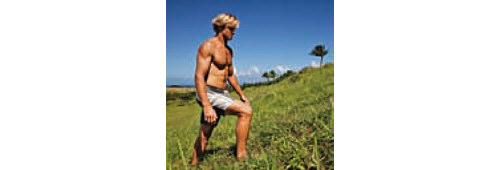
Growing up on Oahu’s North Shore, I watched Gerry Lopez and Dick Brewer do yoga, so I was exposed to it early. It’s an integral part of my fitness routine. I get peace of mind from yoga; it calms the brain. But it’s also a great workout. If you think yoga’s wimpy, you obviously haven’t done it much. Think of the pose names: Warrior I. Warrior II. Genghis Khan’s warriors did 1,000 sun salutations. That’s serious.
DROPPING IN
NADIA TORAMAN
On the parallels between yoga and surfing and why no one should be afraid of a little bit of nirvana

 It’s always great to teach yoga to athletes—it’s one of my favorite things to do. And Laird is good at it; he’s good at yoga in every way. One thing I appreciate about him is that if he’s into it, he’s really into it. In yoga, that helps because you have to be fully there. A lot of surfers like yoga—I think it’s because when you surf, you’re present; you’re with the wave. You actually become one with the wave. Yoga brings about the same state of mind. It awakens your awareness of the present moment. You’re not doing the poses and thinking, What’s going on over there? or What is she wearing?
 For a while Laird was doing two or even three classes a day. And it improved him, that kind of intensity. I think everyone should do that once in their lives; just dedicate themselves to the practice of yoga, whether it’s for a week or, preferably, a month. All of us should indulge ourselves in that place; really take that time for body, mind, and spirit because otherwise the demands in our lives never let us get there.
 One reason I got into yoga was that I could not be still. My mind was all over the place. And now my favorite thing is to be still! For people who aren’t doing yoga but want to start, my advice is not to be afraid of it, even if you feel like you’re stiff. Just try it with an open mind. I think you’ll find that yoga changes everything. It might only take one class to transform you. Literally, that single class—it’s like watering a plant that has been dry. Even a couple drops of water make a difference to that plant. Exactly like that. And if you do it longer, just imagine how much more you will blossom.
I met Nadia Toraman about 15 years ago when she dropped in on a wave I was surfing. We had mutual friends, and I started going to her yoga class, which combines principles from Iyengar, ashtanga, and vinyasa. Nadia’s an amazing teacher. Yoga is clearly her calling. In the pages that follow, she describes a series of postures that will help you build strength and flexibility (and don’t be surprised if you also get a giant endorphin high).
THE ESSENTIALS
YOGA
For all yoga practice, instructor Nadia Toraman recommends that you keep these foundations in mind.
BREATHING
In yoga, breathing is everything. The breath should be soft, smooth, and even, allowing the mind to be that way, too. Keep your inhalations and exhalations the same length, breathing mostly through the nose. When you breathe consciously (which we rarely do in life), you relax, and when you relax, you can stretch more fully.
ALIGNMENT
To properly hold a yoga posture, the body position is very precise. Think of the foundation of a building. If the ground floor is even a little bit off, then the walls will be off—everything will be off. You want to place your weight evenly on the four corners of both feet: mound of the big toe, mound of the small toe, and inner and outer heel. The feet are very important. From there, your leg muscles are firm. All four sides of your legs lift up. (A rule of thumb in yoga is that everything lifts up; nothing slumps down.)
Keep your pelvis in a neutral position. People tend to stand with their tailbones tucked too far under (in a slouch) or too far back (with an overly curved lower back). Imagine that you have a completely full bowl of water sitting at your hips and if you tilt in any direction, the water will spill. Your shoulders, hips, and heels are aligned. Your torso and shoulders are lifted (but make sure that your shoulders aren’t hunched). Your chest should be wide open, your sternum lifted, your collarbones broad. Look straight ahead with your face and neck relaxed and your chin level. At the same time, your feet are grounded deeply into the earth. The rest of you goes up, toward the universe, the sky, the heavens.
SURYA NAMASKAR
Sun Salutation
Sun salutations are a series of movements that get the blood going and the body warmed up for the postures that follow. On their own, these moves are a good workout—you might want to do 5 to 10 of them in the morning to get the day started. If I want the class to sweat, I’ll begin with a lot of these. If you want to move through the sun salutations more as a flow, hold each posture for 1 or 2 breaths. If you want to emphasize each posture, you can hold it for 10 breaths (or even 15 to 20 if you want to make it harder).
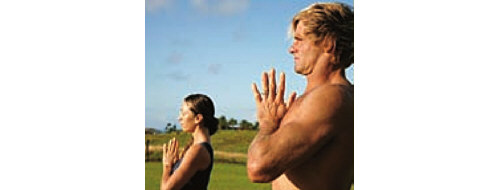
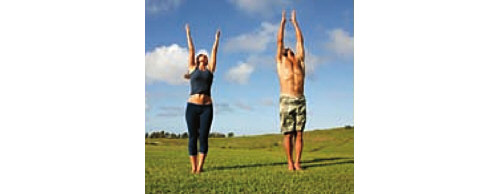
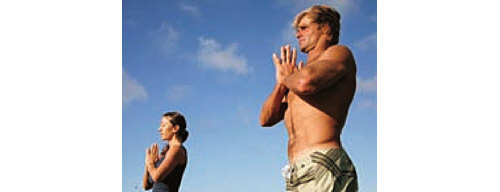
To begin, stand with your arms at your sides, your head relaxed and looking straight ahead, chin level. Feel the ground with your feet, and make sure that your weight is distributed evenly so your foundation is perfectly solid. Bring your hands to your heart in a prayer posture, and take 2 long smooth breaths. Then inhale and bring your arms overhead (right) as though you’re reaching for the sun. Bring your palms together.
UTTANASANA
Standing Forward Fold
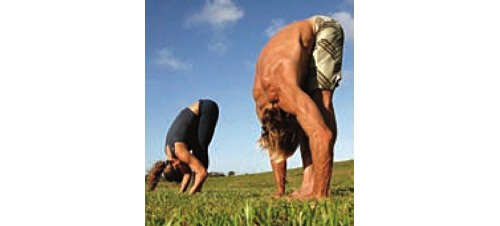
Next, fold your trunk over your legs. Your legs should be about 12 inches apart with your weight distributed evenly on both feet. Draw the top of your head down, keeping your shins, knees, and thighs in vertical alignment. Push your hips forward. As you bend, imagine drawing your thigh muscles upward while your shoulder blades move down your back toward your waist. Your torso, head, and neck should be relaxed. If you can’t get your hands to the ground, you can place them on your shins or ankles. This is a calming position, excellent for curing a headache.
Now look up, inhale, and, on the exhale, fold back into a forward bend (Uttanasana).
PLANK POSE
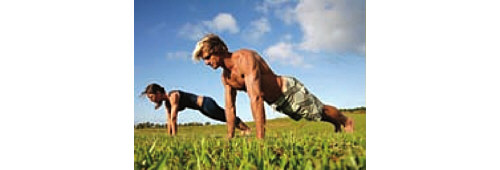
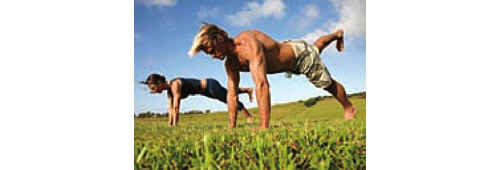
Inhale and step your feet back to plank position. Your hands are directly below your shoulders; your head is aligned with your spine. Lift one leg (below) for an optional variation. (If you do this, make sure you do it on both sides.)
CHATURANGA DANDASANA
Four-Limbed Staff Pose
In this pose, your body is held parallel to the ground by the strength of your legs and arms. Press the heels of your hands down, and pull your shoulder blades in toward your rib cage to keep your chest open and your back from hunching. Your elbows are tucked in toward your body. Keep your legs straight, and stretch them back slightly by pushing through your heels. Your body is an unbroken line. This is a strength-building pose, so if you want to challenge yourself, hold it as long as you can.

URDHVA MUKHA SVANASANA
Upward-Facing Dog Pose
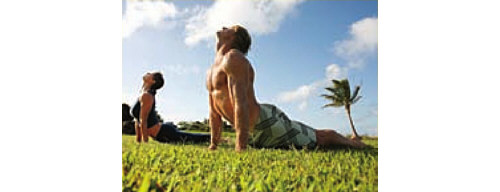
From Chaturanga, lower your body to the ground. Press up through your palms into Upward Dog. In this pose, you really want to open your chest. To do that, slide your shoulder blades back and down, and press your heart forward. Your hands and the tops of your feet are planted, but your legs and hips are slightly raised off the ground. Take your head back without straining your neck or throat. Look upward to intensify the stretch.
ADHO MUKHA SVANASANA
Downward-Facing Dog Pose
Press the heels of your hands down, stretching your fingers and keeping your middle finger pointing directly forward. Also press down through the balls of your feet, stretching your heels back (and touching the ground with your heels if you can). Your head is aligned with your upper arms. Press forward with your chest, sliding your shoulder blades back. Keep your head and neck relaxed.
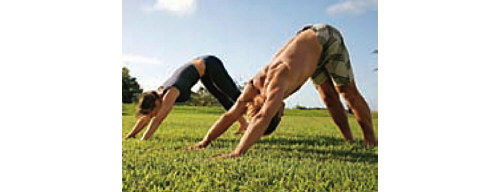
Now come back to standing. That’s the cycle for one Sun Salutation.
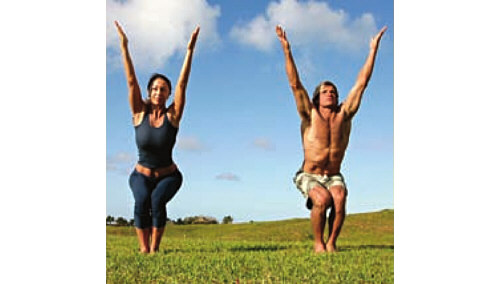
UTKATASANA
Chair Pose
This is another strength pose, this time for your legs. With your feet together, squat down as though to sit. Lift your rib cage and stretch from your armpits as you reach your arms in the opposite direction of your hips. Basically, your body forms a dynamic zigzag. Keep your elbows straight, and look directly ahead.
Hold for 10 to 20 breaths.
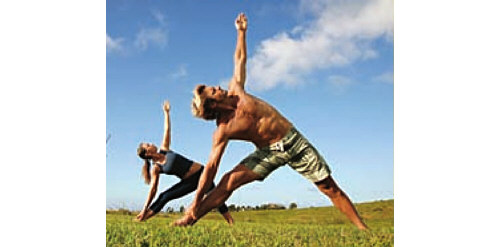
UTTHITA TRIKONASANA
Extended Triangle Pose
Take a wide stance with your right foot facing forward and your left foot turned perpendicular to it. Lean over your right leg, placing your right hand on your ankle (or, if you’re flexible enough, on the ground next to your right foot). Keeping your body on one plane—do not fall forward or backward with your upper body—stretch your left hand skyward. Look up at the thumb of your outstretched hand. Keep your shoulder blades pulled back and your chest wide open.
Hold for 5 to 10 breaths, and then switch sides.
UTTHITA PARSVAKONASANA
Extended Side Angle Pose
Take a wide stance with your right foot facing forward and your left foot turned perpendicular to it. With an exhalation, lower your right leg to a right angle and bend your torso over it. Place your right arm on your right leg (as shown) or on the ground next to your right foot. Stretch your left arm overhead with your palm facing down and your upper arm over your left ear. Feel the extension in one long line from your left ankle to the fingertips of your left hand. Turn your head and look up, making sure to keep your neck and face relaxed.
Hold for 10 to 15 breaths, and then switch sides.

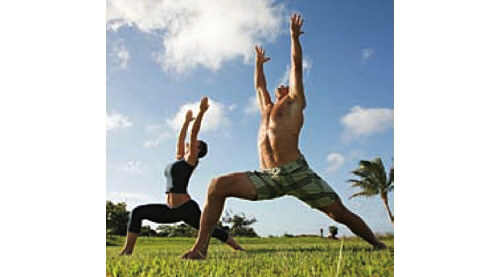
VIRABHADRASANA I
Warrior Pose I
Stand straight with your arms at your sides. Step your right leg forward and bend it to 90 degrees, making sure that your knee and ankle remain aligned (your knee should not jut out in front of your ankle). Your right foot faces forward; your left foot is turned perpendicular to it. Your left leg is straight. Face forward with an open chest and your shoulder blades pulled back toward your rib cage. Stretch your back and arms upward, extending your spine from your tailbone. Both armpits are parallel to each other. Look toward your middle fingers, keeping your head and neck relaxed.
Hold for 10 to 15 breaths, and then switch sides.
VIRABHADRASANA II
Warrior Pose II
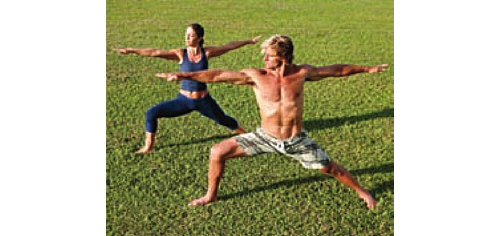
Stand straight with your arms at your sides. Step your right leg forward and bend it to 90 degrees, again making sure that your knee sits directly above your ankle. Your right foot faces forward, and your left foot is turned perpendicular to it. Your left leg is straight.
Extend your arms away from your torso at shoulder height, making sure that both arms are level. Keeping your back straight, stretch from your sternum through the tips of your fingers on both arms. Turn your head and look over your right fingertips.
Hold for 10 to 15 breaths, and then switch sides.
VIRABHADRASANA III
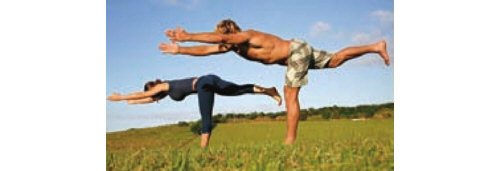
Warrior Pose III
This is the third and most difficult Warrior Pose. Begin by standing straight with your arms at your sides. Exhale and step forward with your left foot, simultaneously raising your right leg. Keep your left foot firm and your left leg strong and rooted. Reach forward, bringing your body weight onto your left leg and raising your right leg to hip level. Balance on your left leg, extending your right leg back, with your knee pointing down and your foot flexed. Stretch your arms and torso forward and parallel to the ground. Keep your head neutral or facing slightly forward.
Hold for 10 to 15 breaths, and then switch sides.
VASISTHASANA
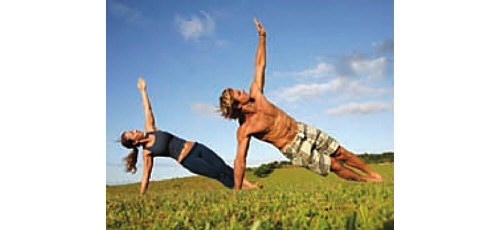
Side Plank Pose
Start in Plank Pose (see page 80), and then rotate your feet and torso 90 degrees to the left, keeping your feet together. Stack your left side over your right, keeping your head in line with your sternum. Stretch your left arm overhead, making sure not to let your hips sink. Look up at your left hand, balancing on the sides of your feet.
Hold for 10 to 15 breaths, and then switch sides.
BAKASANA
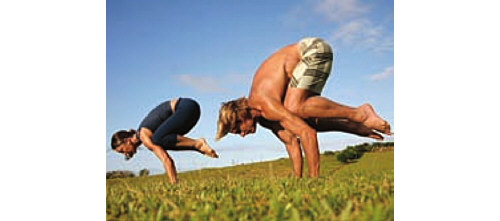
Crane Pose
Stand facing straight ahead. Squat down and place your hands flat on the ground in front of your feet. Bend your knees and elbows to your sides, resting the tops of your knees on the backs of your upper arms. Roll forward onto your palms, keeping your head and chest forward. Raise your feet, pressing your big toes together and pointing them backward. Straighten your arms and raise your torso and legs as high as possible.
Hold for 5 to 10 breaths.
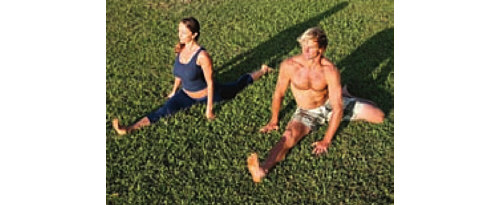
HANUMANASANA
Monkey Pose (Splits)
For full Hanumanasana: Stand facing straight ahead. Take a very wide step forward with your right leg so that you can place your hands flat on the ground, preferably right by your sides (as opposed to reaching forward). Work your heels apart, keeping your back erect and moving the base of your pelvis closer and closer to the ground.
For the version Laird is doing: Begin by kneeling, and then extend your right leg with your hands flat on the ground by your sides. Keeping your weight as evenly distributed above your hips as possible (try not to lean onto your right side), work your right leg forward with your left leg bent behind you. Face directly forward.
Hold for 10 to 15 breaths, and then switch sides.
SIRSASANA
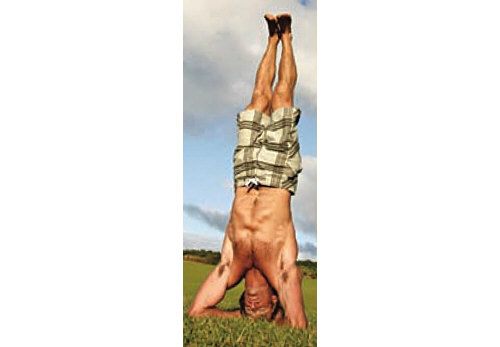
Headstand
If you’ve never done this before, it’s a good idea to practice against a wall. It’s also advisable to have a yoga instructor demonstrate the fine points. You want your technique to be perfect so that nothing happens to injure your neck. Inversion poses are advanced, but once you learn them, they deliver enormous benefits, as they increase the flow of blood to the brain.
For Headstand, begin by kneeling with your hands clasped in front of you, the outer edges of your hands pressing into the ground. Place the crown of your head on the ground so that your clasped hands cradle the top of your head. Keep your elbows symmetrical so your head sits directly between them. Lean forward onto the top of your head, rolling your body weight onto your head and your clasped hands. Walk your feet toward your head, raising your hips until they approach alignment with your shoulders. Then you can either bend your legs to raise them above your head or, if you’re strong enough, raise them in a pike position. Stretch upward from the soles of your feet.
Hold for as long as 20 minutes. If you feel any strain on your neck, stop immediately.
HALASANA
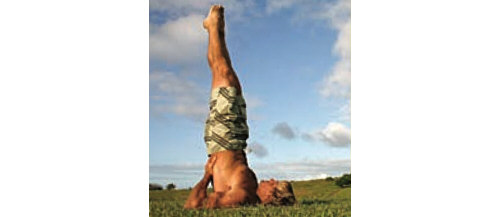
Plow Pose
Begin by lying flat on your back with your arms at your sides and palms to the ground. Inhale and bend your knees toward your chest. On the exhale, place your hands at the base of your lower back and straighten your legs. Slowly lower your legs to the floor behind you, keeping them straight. Breathe deeply, and on the exhale, work your legs backward to deepen the posture. If you feel any strain on your head or neck, stop. To come out of the pose, lift your legs above your head, bend your knees, and lower your legs to the ground. This is a great posture for stretching your back.
Hold for 10 to 15 breaths or longer.

SUKHASANA
Easy Pose
Begin by sitting with your legs outstretched. Fold your legs in toward your body, crossing them and placing each foot beneath the opposite knee so that the outer edges of your feet rest easily on the ground. Make sure that the base of your pelvis—your sit bones—is on the ground and you’re not leaning forward. Make sure that your spine is erect and your back is not rounded. Pull your shoulder blades back and down, and open your chest so that your heart faces directly forward. Feel energy through the crown of your head while relaxing your head, face, and neck. Place your hands on your knees, palms facing up to receive whatever the universe offers.
You can hold this pose for as long as you’d like, taking long, deep breaths.
