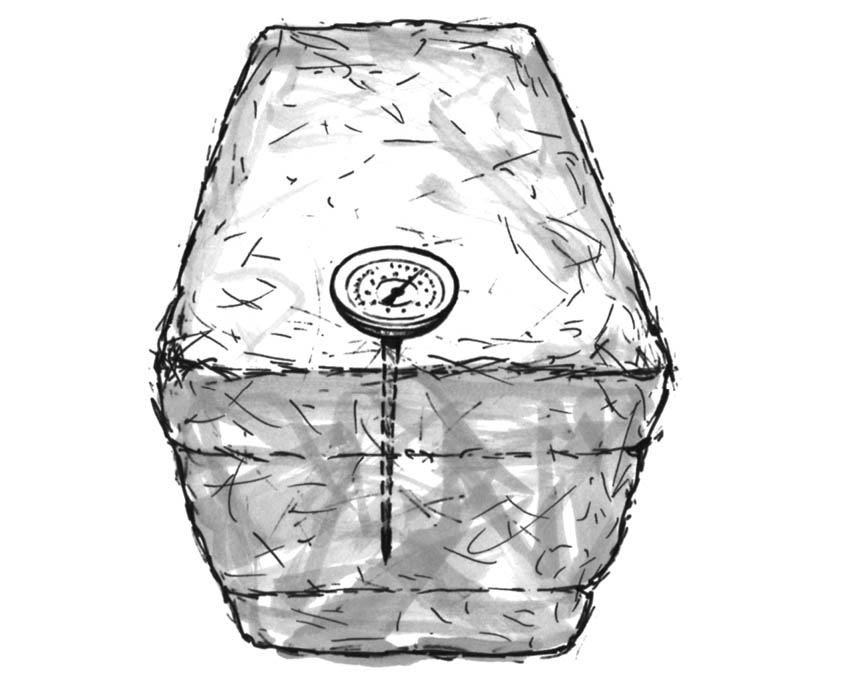
It is easy to check the internal temperature of the bales during the preparation process by inserting a thermometer into the interior of the bale.
Your straw bales are in place. You made all of the necessary decisions about placement, arrangement, surface protection (if needed), and orientation (strings on the top or strings on the side). You have decided what vegetables you want and have either started seeds indoors or planned to purchase seeds or seedlings for the bales. Now you will choose whether to use the standard bale treatment, adding either non-organic or organic nutrients (see below), or to allow the bales to get ready to plant on their own without any treatment (see Preparing Bales without Fertilizer). You are almost ready — let’s start your straw bale garden.
As noted in chapter 2, standard (chemical) fertilizers and organic fertilizers work equally well. The decision between them is up to your personal choice. Just remember that the nutrient content of chemical fertilizer tends to be higher by weight, so you can use smaller quantities of it compared with organic fertilizer.
For non-organic growers, a common option carried at most garden centers is high-nitrogen lawn starter with a nitrogen-phosphorous-potassium (NPK) ratio of 29-0-4. Organic growers should initially seek blood meal, which has an NPK ratio of 12-0-0.
In addition to the high-nitrogen fertilizer, non-organic gardeners should purchase a balanced granular product rated 10-10-10. Organic growers should seek out a balanced organic option, such as product rated 3-4-4.
Note that for both the high-nitrogen and balanced additives, there are numerous options, listed in High-Nitrogen Fertilizers. Whatever option you choose, I recommend using a notebook to record the nutrient addition schedule and temperature data.
Day 1: Check and record the internal temperature of the bale; it will likely be around 80°F. Add 1/2 cup of the 29-0-4 granular fertilizer, sprinkling it evenly over the top of the bale. Using a hose with no connector and a moderate water flow, add water evenly over the top of the bale for about one minute; you will see water emerging from the bottom of the bale. Note that the water will not visibly dissolve the granular material but will begin to push the material down into the structure of the bale.
Day 2: Check and record the internal temperature of the bale. Water the bale thoroughly from the top.
Day 3: Repeat the Day 1 activity. At this point, you should see the internal bale temperature begin to rise. The temperature should peak at approximately 120°F, which indicates the action of the nutrients on the bale components, breaking them down to provide a suitable environment for the plants. Over the course of treatment, the internal temperature will drift slowly downward. Once you are below 80°F, the environment is suitable for the plants’ roots.
Day 4: Repeat the Day 2 activity.
Day 5: Repeat the Day 1 activity.
Day 6: Repeat the Day 2 activity.
Days 7–9: Repeat the Day 1 activity, but use only 1/4 cup of the lawn fertilizer.
Day 10: Check and record the internal temperature of the bale. Sprinkle 1 cup of the balanced (10-10-10) granular plant food across the top of the bale. Thoroughly water, as you have been doing daily.
Days 11–12: Check and record the internal temperature of the bale. Water thoroughly. If, on Day 12, the temperature has fallen below 80°F, the bales are ready to plant.
It is easy to check the internal temperature of the bales during the preparation process by inserting a thermometer into the interior of the bale.
Day 1: Check and record the internal temperature of the bale; it will likely be around 80°F. Add 3 cups of the 12-0-0 granular blood meal, sprinkling it evenly over the top of the bale. Using a hose with no connector and a moderate water flow, add water evenly over the top of the bale for about one minute; you will see water emerging from the bottom of the bale. Note that the water will not visibly dissolve the granular material but will begin to push the material down into the structure of the bale.
Day 2: Check and record the internal temperature of the bale. Water the bale thoroughly from the top.
Day 3: Repeat the Day 1 activity. At this point, you should see the internal bale temperature begin to rise. The temperature should peak at approximately 120°F, which indicates the action of the nutrients on the bale components, breaking them down to provide a suitable environment for the plants. Over the course of treatment, the internal temperature will drift slowly downward, landing below 80°F, a safe temperature for the roots of your plants.
Day 4: Repeat the Day 2 activity.
Day 5: Repeat the Day 1 activity.
Day 6: Repeat the Day 2 activity.
Days 7–9: Repeat the Day 1 activity but use only 3/4 cup of the blood meal.
Day 10: Check and record the internal temperature of the bale. Sprinkle 2 cups of the balanced (3-4-4) granular plant food across the top of the bale. Thoroughly water, as you have been doing daily.
Days 11–14: Check and record the internal temperature of the bale. Water thoroughly. If, on Day 14, the temperature has fallen below 80°F, the bales are ready to plant.
Conditioned straw bales are constantly changing, and various things that you did not plant might emerge among the things that you did. Often, what you see in the morning is far different by midday, and gone completely by that evening.
Grasses. Though most of the seed tops are removed prior to baling, every bale I’ve planted sprouted grasses throughout the season. My experience is with germinating wheat, and I just leave it to add a little visual flair. If you wish, you can use scissors to cut the grass and use the clippings as mulch for bale tops.
Mushrooms. The real visual stars of the conditioned bales are the wild-looking mushrooms that pop out, often showing themselves the evening before, shooting spectacularly skyward overnight, then shriveling to nothingness in the sun the following day. The most common variety you’ll find are called Inky Caps, and these mushrooms are not harmful to the plants. Since the “ink” can be used to write with and is quite black, they can make a mess — they stained my plant tags a bit.
These are the fertilizers you can use for initial, standard bale treatment.
These fertilizers will sustain your plants throughout the growing season.
The simplest and least expensive way to prepare your bales is simply to place them where you’ll be gardening and water them daily. The watering alone will begin the internal breakdown process.
The main caveat for this method is that you’ll likely need to allow for quite a bit more time — at least a full month — between the initial watering and the readiness of the bale for planting.
In my own trials, I found that the internal temperature of the bale didn’t begin to rise significantly until Day 6. From that point until when I planted on Day 18, the temperature was about 10°F above ambient air temperature and remained steady. Contrast this with the 40°F temperature rise when using the pretreatment methods described above. The higher temperatures observed indicate faster structural breakdown of the interior of the bales. This explains the difference in preparation times: less than two weeks if you use fertilizer, a month or more when you use water alone.
Another caveat is that your plants may not thrive with this method. Whether it was because I didn’t give the untreated bales enough time to break down, or because the fertilizer in the quick-start bales gave the seedlings a good initial boost, my trials showed that plants in the untreated bales did not grow as well as those planted in prepared bales.