six
Socks
I’M KNITTING SOCKS for my husband. He’s the worst kind of man to knit socks for. He has enormous feet and he likes his socks plain — no colors, no fuss, no stripes. He can occasionally be persuaded to put on socks with cables and stuff, but mostly it’s round and round and round, forever and ever and ever.
When these socks are done, they’ll appear ordinary, except that they’re not. They are hours of my life, each one spent on him. He’ll pull them on like they’re run-of-the-mill footwear, they’ll walk with him as he goes through his day, every day, until they wear out, and then others will take their place, these others also knit by me. It’s this extraordinary ordinariness that makes socks special. That something as humdrum as socks could be elevated by love and then walked on … it speaks to a certain magnificence.
The truth about socks is that they’re humble and beautiful and noble, and in their lowness they’re the highest form of art.
FOR THE LOVE OF SOCKS
I like to think of myself as a person who is (at least in the eyes of the law and in my ability to be a parent) sane. I don’t talk to myself in public (except for counting stitches or patterns); I don’t rave or throw things (except when I fail to count stitches or patterns); and I hold down a job, buy groceries, and occasionally engage in normal activities like doing laundry. (I don’t enjoy these activities, which I think confirms my sanity.) But none of these indications that I’m a normal, sane person with really, very little odd behavior go far toward explaining my feelings about sock yarn and knitting socks.
I love sock yarn. All sock yarn. Heathered sock yarn, solid sock yarn, self-patterning sock yarn, stripy sock yarn, hand-painted sock yarn — I love it all. My heart beats a little faster when I see the sock-yarn display in a yarn shop, and even if I have sworn to buy nothing, a few tiny skeins somehow sneak home with me.
I have always believed that sock yarn is the appetizer of the stash, little bits of wondrousness that we can snap up in a yarn store without it counting as buying yarn. In fact, during the few times in my life when I’ve decided to stop buying yarn, for reasons of economy or space, I have never extended the yarn fast to sock yarn. It’s special. Don’t let anybody tell you different.
In this chapter you’ll find more math and technical mumbo jumbo than in the chapters on scarves, say, or hats. Don’t let it scare you off. Whether you’ve knit a thousand socks or have never knit one at all, all of this is here to make it easier. The truth about socks is that even though they are, from an engineering point of view, remarkably complex, once you break them down to their barest elements, they’re simple and straightforward, and don’t even take a tape measure. Slick.
A Good, Plain Sock (Knit from the Cuff Down)

Once you have a basic understanding of how socks work, it’s exceptionally easy to make them with no pattern at all.
Cheat Sheet
For anybody who would like to chicken out a bit, you’ll find a regular sock pattern in numbered steps beginning on page 144 for a good, plain sock of exactly the sort I’m explaining in the following recipe text. If you get stuck on a part of the recipe while knitting a sock of your own design, referring to the pattern may help.
Getting Started
You know what I’m going to say and I’d like you to forgive me right now. Here it is: It all starts with gauge. Get the yarn you’d like to use and the needles you’d like to use and knit a swatch to figure out how many stitches you have per inch. Measure the leg at the place where the calf muscle ends, multiply this by the gauge, and cast on.
I always stretch the swatch for socks a little bit before I measure it. I find that if I cast on the right number to go around my leg, my socks fall down. Using a few stitches less (maybe an inch worth) keeps me from having my regular fashion problems compounded by perpetually wearing slouch socks.
Don’t use the “knitted-on cast-on” for socks. The sturdy firm edge it produces is fine for many things, but it won’t stretch enough for most people to wear a sock comfortably. Try the long-tail cast-on (see glossary) or casting on over two needles so the stitches are bigger and you get a really stretchy top. That said, if you don’t care for the person you’re knitting for, or if you have always been curious, simply from a scientific perspective, about what it takes to cut off the circulation to a human foot, go right ahead.
Sock Leg
Once I work out how many stitches to cast on, I work in ribbing for a while. By “a while” I mean an inch or two or three, depending on my preference, and yours. Knitting goddess Elizabeth Zimmermann had it pegged when she suggested that you work on ribbing until you’re sick of it. You’d be surprised how often that works out to be the exact length you need.
For reasons I’ve never understood, knit 2, purl 2 ribbing seems to stay up the best, but knit 1, purl 1 looks the snappiest. Choose your priorities.
If you get tired of ribbing, change to stockinette stitch and carry on until the sock is a length that amuses you, fits your victim, or is the approximate length of your hand, palm base to fingertip.
If you knit sock tops that measure the same distance as the length of the leg from the bottom of the calf muscle to the top of the heel, you don’t need calf shaping, just a tube. For mathematically challenged types like me, this is a good idea.
FIVE WAYS TO MAKE SOCK KNITTING MORE EXCITING
There is very little I can tell you about hanging in there over the long, boring bits of socks. The following have helped me get past the monotony of knitting down to the heel.
 Self-patterning or otherwise amusing yarn. I’m apparently dim enough to be entertained by waiting for the discovery of what color will turn up next with variegated yarn.
 The reward system. Every 5 or 10 rows, give yourself a treat, like a square of chocolate. This is a temporary solution at best, though; if you adopt it for too long, you’ll gain so much weight that your socks won’t fit you anymore.
 Movies. Rent ’em.
 Take your socks everywhere. A round on the bus, a round on the phone, a quickie while you make dinner: It adds up. I churn out several pairs a year while waiting in line. Stick that sucker in your bag and look for opportunity.
 Books on tape. Since I started getting these, my whole knitting world has changed. I’m finally getting to all those classics I so want to discuss at parties and the socks are flying off the needles.
The Heel Flap
I like me a decent flap heel. I think they’re easy, durable, and without flaw. There are proponents I know of the short row, hourglass, or peasant heel, and to humor them I’ve made other heels. You should try a bunch of them and then decide for yourself, but know I prefer the flap, and I’ve thought a lot about it.
For a flap heel, you don’t need a tape measure. Simply make the flap on half the stitches and continue until it’s a square. Nifty, eh?
Put half the stitches onto one needle. Let the others be; we aren’t concerned with them for the next little bit. Choose one of the following methods and notice that each option for a heel flap has every row starting with a slipped stitch. You want that. It makes your life (well, your knitting life) easier later.
Method 1
Standard, no-screwing-around, straight-up heel. Work back and forth, always slipping the first stitch of every row, knitting the right-side rows, purling the wrong-side rows. Carry on bravely until the flap is a square.
Method 2
Sturdy heel. Right-side rows: Slip one, knit one all the way across, ending with a knit. Wrong-side rows: Slip one, purl the rest of the way. Continue until the flap is a square.
Method 3
Eye of partridge heel. Row 1 (RS): *Slip 1, knit 1; repeat from *to end of row. Row 2: Slip 1, purl to end of row. Row 3: Slip 1, *slip 1, knit 1; repeat from *to last stitch; knit 1. Row 4: Repeat Row 2. Repeat Rows 1–4 until the flap is a square.
Turning the Heel
When you have a flap that is a square, you’ll perform the actual turning of the heel. Turning the heel is a mythic act, one that sock knitters speak of with reverence. Turning the heel is when you, through an incredibly simple but clever series of short rows (see glossary), make the sock change direction and move from leg to foot. I’ve done a hundred socks and I feel smart every time.
With the right side of the work facing you, begin by counting your stitches — I’m not going to help you with that; it’s insulting — and make careful note of your center stitch. With that in mind, you’re going to knit to “a few” past the center stitch (see note below), then knit two together, knit one, and turn your work around. Now the wrong side is facing you and you need to count how many stitches were left when you turned around and give it a think. You want the same number left over this time. Slip one, purl until you are three stitches away from that number; purl two together, purl one, and turn your work.
If all has gone well, you’ll have a center group of stitches you just worked and an equal number of stitches on either side of that group, with a gap separating the just-worked and not-yet-worked stitches on either side. (Take note of that gap.) If you do, congratulations. You are home free. If not, take a deep breath, figure out if you need to knit more or fewer to make it equal, then eat a bonbon and try again.
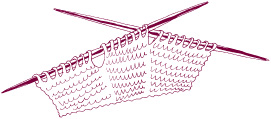
From here, all a knitter needs to do to have a brilliant heel is continue back and forth, slipping the first stitch, working to one stitch before the gap, working two stitches together over the gap, then working one stitch, and turning, until all of the heel stitches are used up.
The number of stitches in the middle of the group determines how deep or shallow the heel will be. If you are knitting for someone with a broad heel, add a few more to the middle. On the other side of the coin, if the recipient has narrow (or pointy) heels, make the center group smaller.
A Quick Game of Pickup
Take a deep breath, find yourself some good lighting, and get ready to pick up stitches along the sides of the heel flap. Remember how much I talked about slipping the first stitch of every row when you were doing the flap? Looking down the sides of the flap, you’ll see a chain of larger stitches, the result of the slipped stitches. These are your instep stitches waiting to be picked up.
Using your free needle, scoop up all of these stitches and then knit them. As unbelievable as it may sound, this will be the right number of stitches to pick up. Just go get each of those long stitches along the side and try not to look too smug: It makes the other knitters want to smack you. Knit across the regular stitches that are in your way and do the same thing on the other side.
After you have all the flap stitches picked up, knit half of the heel stitches onto the needle with the second set of picked-up stitches. If all has gone well (and what could have gone wrong?), you’ll be making a tube again. Number your needles 1, 2, and 3. On needle 1 there should be half of your heel stitches and the first set of newcomers. On needle 2 are all of your stitches for the top of the foot. On needle 3 are the other new stitches and the other half of the heel. Welcome to the foot. You’re going to love it here.
Making it to this point always seems like halfway to me. I suppose that whether or not it’s technically halfway depends on how long the leg and foot are, but spiritually I always give myself a little pat on the back at this juncture.
Gussets at the Instep
Remember numbering your needles 1, 2, and 3? If you admire your sock at this stage, which is something I do all through the process, you can see that the stitches for the bottom of the foot are on needles 1 and 3 and the stitches for the top of the foot are on needle 2.
After picking up the flap stitches, you will have way too many stitches. You need to decrease back down to the number you cast on in the first place. I feel bad pointing this out because you’re so clever, but I have to do it. If you decrease down to fewer stitches than you cast on, you’ll make a foot that is narrower than normal. If you don’t decrease that far and have more stitches than you cast on, the foot will be wider than normal. Take a look at your feet and think it through. Are your feet normal, wide, or narrow?
Since it would be weird-looking to run the decreases along the top and uncomfortable to put them along the bottom where you would walk on them, the decreases in socks run along the sides.
When decreasing the stitches for the gusset, you have to contemplate only the three stitches on each side of the bottom of the sock. There will be three at the end of needle 1, and three at the beginning of needle 3. The decreases are worked on these stitches every other row, like this (see box page 144 on ssk):
Needle 1 (bottom of the foot): Knit to last 3 stitches, K2tog, K1.
Needle 2 (top of the foot): Work, doing nothing.
Needle 3: K1, ssk, knit to the end.
Alternate this round with a plain round of knitting until you are back down to your original number of stitches.
Something is Afoot …
Really, all that remains at this point is more of the monotonous round and round that you did on the leg — and, of course, knowing when to stop. If you can try on the sock, that works best. Quit knitting and start working the toe when the sock fits down to the base of your toes, or 1¼ inches (3 cm) before you want to end the sock.
Make the Toe
Because human feet are not square (at least not usually — if yours are, I’m sorry I mentioned it; my condolences), when you get to the toe you’re going to want to taper off. This is where the business about having top-of-foot and bottom-of-foot stitches pays off again. You’re going to decrease at the sides of the feet again. Looking at all of your stitches, concern yourself with the six at each side of the foot. These will be: the last three stitches on needle 1, the first and last three stitches on needle 2, and the first three stitches on needle 3.
With this in mind, knit to the three stitches in the corner, knit two together, and knit one. Move to the top of the foot, knit one, ssk, knit to the last three stitches, knit two together, knit one.
Last needle, knit one, ssk, knit to the end of the needle.
Alternate this round of decreases with rounds of plain knitting.
Decrease until you have a toe that either looks right or is about one quarter the total width of the foot.
Cast off and sew together, work a three-needle bind-off, or — and this is really the right way to do it — Kitchener or graft the toe shut.
Kitchener stitch (or grafting, depending on where you live and who taught you) is a way of weaving together two pieces of knitting such that you have an absolutely seamless join. Look in any of your books, ask at the knitting shop, or, if you really want to know how to do it, try this. Stand in the presence of another knitter who you know is serious about sock knitting. Wait until there’s a lull in the conversation, then say loudly, “There has to be a better way to finish sock toes.” Someone will teach you instantly.
Grafting takes some heat for being sort of difficult. Try to let go of this and not believe what other knitters tell you before you try it for yourself. Remember how things were in high school and don’t give a technique a hard time because it has a reputation. (For a start, see the basic explanation in the glossary on page 214.)
STEP-BY-STEP CHEAT SHEET FOR SOCKS
This standard pair of socks will fit an average woman. They are knit out of sock yarn, using 2.5 mm needles at a gauge of 7.5 stitches to the inch in stockinette stitch.
 Cast on 64 stitches and join in a round without twisting. Knit for 2 inches in “knit 2, purl 2” ribbing. Then change to plain stockinette and work until the sock leg measures 7 inches or you simply can’t go on.
 Heel flap: Put half the stitches (32) on one needle and continue as follows. Right side: *Sl1, K1: repeat from *to the end; wrong side: slip 1, purl to the end.
Repeat these two rows 14 times until the heel flap is a square. End by working a wrong-side row and have the right side facing you.
 With right side facing, Sl1, K17, ssk (see box above), K1, turn. Sl1, P5, P2tog, P1, turn.
Sl1, K6, ssk, K1, turn. Sl1, P7, P2tog, P1, turn.
Continue in this fashion, slipping the first stitch, working to one stitch before the gap, working 2 sts together over the gap, then knit 1 (or purl 1) until you finish all the heel stitches. Eighteen stitches remain.
 Needle 1: Knit heel sts, pick up 16 sts up side of heel.
Needle 2: K32 for top of foot.
Needle 3: Pick up 16 sts down side of heel, knit first 9 heel sts (82 sts in all).
 Round 1:
Needle 1: Knit to 3 sts before the end of needle, K2tog, Knit to end.
Needle 2: Knit plain to end of needle.
Needle 3: K1, ssk, knit to end.
Round 2: Knit plain all the way around.
Repeat rounds 1 and 2 until you have 64 sts (divided 16, 32, 16).
 Continue knitting plain, around and around, until the sock measures 5 inches from the picked-up stitches.
 Round 1:
Needle 1: Knit to last 3 stitches, K2tog, K1.
Needle 2: K1, ssk, knit to last 3 stitches, K2tog, K1.
Needle 3: K1, ssk, knit to end of needle.
Round 2: Knit to end of round.
Repeat rounds 1 and 2 until 16 stitches remain.
Graft two sets of 8.
FIVE VARIATIONS ON THE BASIC SOCK
Variation 1
Stripes. Alternate two, five, eight colors. You decide.
Variation 2
Texture. There’s no end to the entertaining ways that you can toss cables and textured stitches into socks. I try to keep in mind two things before I go nuts. First, cables make a sock narrower, so I have to remember to add a few extra stitches or I’m making that four-year-old down the street another pair by accident. Second, I try to remember not to put the texture on the bottom of the foot. It takes only 10 minutes of walking around on bobbles to learn that one.
Variation 3
Choose a Fair Isle pattern and toss it in there. Fudge the stitch count to make it work. Remember, Fair Isle isn’t as stretchy, so don’t scale the stitch count downward unless you don’t especially care for the recipient and would like to pox him with absolutely beautiful warm socks that he can’t get on.
Variation 4
Lace. Choose a lace pattern from the stitch dictionary and get going. Lace is usually elastic, so if you’re changing your number to cast on by a few stitches to make the lace work, you can go downward. If you’re going to do lace socks, think about working the lace only on the top of the foot. Sock bottoms work best in plain, sturdy stitches.
Variation 5
Try one of the other million (okay, maybe not a million) ways to make socks. Knit them toe up, flat, on circulars, with the “magic loop”; with a handkerchief heel, an hourglass heel, a short row heel. Try self-patterning yarns or solid yarns; fingering or chunky weight; mohair or cashmere or good old sheepy wool. Do a zillion things, keep your eyes open, and ask other knitters what they do.
WHY ISN’T THIS WORKING?
My socks start out the right size and then grow bigger as I wear them. What’s going wrong?
The gauge is too loose. Go down a couple of needle sizes and try again. In the meantime, you can felt the ones you made, or mail them to my husband. He has huge feet.
My socks are doing this stupid loose thing at the ankle.
If socks bag and droop at the ankles, you need shaping. Much like bagging and drooping in humans, this can be avoided by doing a little decreasing. Knit a leg as you would normally, then, about an inch from the anklebone and the start of the heel, decrease by a few stitches. Knit the heel as you would normally, then when decreasing over the instep, work back to your original cast-on number. If this sounds like too much bother, do as I do and cop out and knit ribbing all the way down. It’s a quick fix, but it works better than math some days.
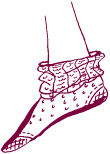
In the spots where I change needles, there’s a loose line of stitches. What is that and how do I make it go away?
If you want to look slick in a sock-knitting circle then you call those ladders. There’s a bunch of ways to make them go away, all of which are hotly contested.
• Tug firmly on the first stitch of every needle to tighten up that little gap.
• Work on circulars so you don’t have needles to gap between.
• Try knitting with a set of five needles instead of four (two for the top stitches, two for the bottom). This sets the stitches in a square instead of a triangle and there’s a greater angle between stitches, which seems to help some knitters avoid ladders.
• Wind the yarn in the opposite direction when knitting the first stitch on the needle (that is, clockwise instead of counterclockwise). This makes a knit stitch that sits sort of twisted on the needle, but like all twisted stitches, it’s tighter than its buddies. When you come back to this stitch on the next round, insert your needle into the front of the stitch to untwist it, then wrap the yarn around clockwise to twist the one you’re making. With practice, you’ll do this automatically, though for the first several months it can drive you batty.
• Work a lace pattern, so you can’t see the stupid ladders.
SOCKS FOR YOUR SOUL
Recently, a friend was going through a difficult time. It was an ugly divorce, he missed his children, and nothing seemed to lighten him. In desperation, I mailed him a pattern for kilt hose, old-fashioned steel needles and some good sock-weight wool. He was stunned. He didn’t know how to knit, and here I was suggesting that he go from absolute non-knitter status to full-blown, fine-gauge, men’s socks. He thought I was nuts, but agreed to try.
The stuff arrived at his house in the morning and that entire afternoon went down the drain as he sat down and taught himself to cast on. By dinnertime, he was knitting. I don’t think I could say he was knitting well, and I don’t think he liked me very much that day, but he was knitting. Probably the sanity of both of us was in doubt.
Meanwhile, I was sure knitting would help him. I really thought having small successes every day, things he was in charge of — even though they were only stitches — could help. I thought his ego could use an opportunity to be productive in a way he could see, and that he needed a chance to make mistakes without dire consequences. I believed, and he must have believed too or he wouldn’t have spent umpteen hours humoring the crazy knitting lady, that this could help him feel better.
It’s way too soon to tell if knitting kilt hose was a good idea or just a stupid missionary move on my part. I tell you this, though; I bet you’re wondering right now if it worked, and that means something. That means you think sock knitting could change someone’s path and make him feel better. That means you think knitting socks matters … despite how dumb it seems to try it.
 They don’t use much yarn. If you’re broke, knitting socks lets you come up with a finished project without having to save up like you do for a sweater’s worth of yarn.
 They’re portable. You can tuck a ball of sock yarn in a purse or pocket and turn out knitwear wherever you go. You simply can’t say the same for a sweater project or an afghan.
 Socks are not forever. They’re one of the only knitting projects that, if used properly, will wear out. This means, unlike with hats and scarves, you can never knit too many.
 Hand-knit socks are 100 percent better than store-bought. They feel so fabulous on your feet that there’s almost nobody who doesn’t want to only wear hand-knit socks from the first time he slips them on.
 There are so many ways to make socks that you can do it no matter how you like to knit; toe up, top down, on DPNs, flat, on two circulars, on one big one. If you like to knit, you’ll like to knit socks.
 Having to do the second one is good for the soul and reinforces determination and stick-to-itiveness. (Naturally, if you don’t possess these qualities to begin with, this could be a downer …)
 Socks have parts. This is a big help to those of us who bore easily. There’s the charm of the top, the thrill of the heel, the intrigue of the instep, and the joy of shaping the toe. Helps keep interest high.
 Once you know the rules about knitting socks, you’ll never need a pattern.
 Human feet come in a huge variety of sizes: 3½ inches for a tiny newborn, up to 12 inches for a large man. This means that no matter how badly you choke on gauge, you’re going to have socks that fit someone. You might have to mail them to a basketball player, but they’ll fit someone out there.
 Socks are a miracle of engineering. When you knit a sock, you’re doing it the same way it has always been done. You’re connected with knitters over the last 700 years, all making socks and watching them wear out.

 Self-patterning or otherwise amusing yarn. I’m apparently dim enough to be entertained by waiting for the discovery of what color will turn up next with variegated yarn.
 The reward system. Every 5 or 10 rows, give yourself a treat, like a square of chocolate. This is a temporary solution at best, though; if you adopt it for too long, you’ll gain so much weight that your socks won’t fit you anymore.
 Movies. Rent ’em.
 Take your socks everywhere. A round on the bus, a round on the phone, a quickie while you make dinner: It adds up. I churn out several pairs a year while waiting in line. Stick that sucker in your bag and look for opportunity.
 Books on tape. Since I started getting these, my whole knitting world has changed. I’m finally getting to all those classics I so want to discuss at parties and the socks are flying off the needles.

 Continue knitting plain, around and around, until the sock measures 5 inches from the picked-up stitches.
 Round 1: