Starters
Baba Ganouj

Whether you spell it with “j” or “sh” or some other way, there are just as many versions of the ingredients necessary to make a great Baba Ganouj as there are spellings of this classic Middle Eastern starter. We like it with yogurt and lots of garlic.
1 large eggplant
4 cloves garlic
1 teaspoon plus 2 tablespoons olive oil
1 teaspoon salt
½ cup plain yogurt
 cup tahini
juice of 1 to 2 lemons
½ teaspoon fresh ground black pepper
½ teaspoon ground cumin
pita points
sprouts
- Preheat the oven to 400°F. Prepare a baking tray, jelly roll pan, or shallow roasting pan by oiling it with about ½ teaspoon olive oil.
- Place the eggplant on the baking tray and prick with a fork numerous times to create vent holes for steam. Drizzle ½ teaspoon of olive oil on the garlic cloves and add to tray.
- Put the baking tray into the oven, and roast for about 8 minutes, then remove the garlic and set aside to cool. Continue roasting the eggplant for an additional 45 minutes or so until the eggplant has “deflated.”
- Remove from the oven and let it cool. Once the eggplant is cool enough to handle, scoop the pulp out into a bowl.
- Peel and mash the roasted garlic cloves with the salt and add to the eggplant. Mix in the remaining ingredients, including 2 tablespoons of olive oil, adding enough lemon juice to maintain a smooth consistency.
- Chill covered for about 30 minutes.
- Serve with toasted pita bread triangles and sprouts.
SERVES 6 TO 8
Hummus
Black Dog cooks love tahini, so it makes sense that hummus would also appear on our menu. We make our version of this classic Middle Eastern dip with lots of garlic (surprised?) and a dash of cayenne, although you may substitute cumin if you prefer. Just take some chickpeas, or garbanzos as the California kids call them, and mix it all up. Easy and very tasty.
2 cups cooked chickpeas (either canned or cook ½ pound dry to yield 2 cups)
3 garlic cloves, minced
½ cup tahini
juice of 1 lemon
½ cup olive oil
1 teaspoon salt
½ teaspoon black pepper dash of cayenne
toasted pita points
- To prepare dried chickpeas, clean and soak ½ pound overnight. The next day, rinse them and put in a large pot covered with water. Bring to a boil, add about 1 teaspoon of salt and cook at a simmer for around 2 hours, until they are soft. Drain, reserving a little of the cooking liquid. The easy way is to buy cooked canned chickpeas, drain, reserve the can liquid, and rinse.
- Place cooked chickpeas in a food processor and pulse briefly.
- Add the garlic, tahini (remember to mix it up first, since it often separates), lemon juice, olive oil, and seasonings. Continue to process until the mixture achieves a smooth consistency. If it’s too thick, add a little of the reserved cooking liquid or can liquid. Place in a bowl and chill.
- To serve, drizzle with a little olive oil and surround it with your favorite raw veggies and toasted pita points.
SERVES 8 TO 10
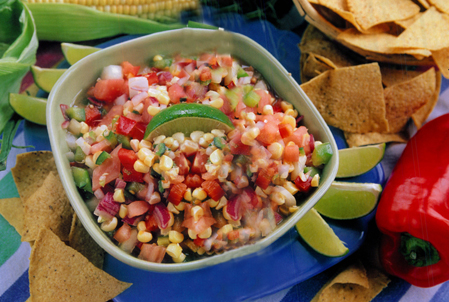
Sweet Corn Pepper Salsa
Just-picked corn truly is sweet, but it doesn’t take long for the sugars to turn to starch. If only older ears are available, we recommend “roasting” them first for added flavor. This salsa is great with grilled fish and chicken or just grab the chips.
4 ears freshly picked corn
1 red pepper, diced
1 green jalapeño pepper, minced
1 small bunch of cilantro, chopped
1 small red onion, chopped
½ cup fresh lime juice
¼ cup sherry vinegar
¼ cup olive oil
3 cloves of garlic, minced salt and pepper to taste
- Cut the kernels from the fresh corn ears. (Grill older ears for 3 to 5 minutes, or put them under the broiler for 10 to 15 minutes.)
- Mix all the ingredients together in a medium-size bowl. Cover and refrigerate for at least an hour to let the flavors develop.
YIELDS: 3 CUPS

Steamers
THE FUNDAMENTALS
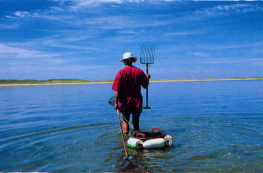
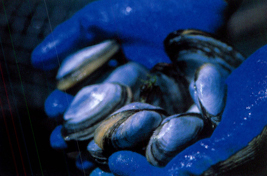
Steamers, or steamed clams, are also known as soft-shell clams. That’s because their shells can be cracked easily, unlike their hard-shell relatives known as quahogs. Steamers have elongated bodies and a protruding neck with a skin you should remove before eating. Digging them, “clamming,” can be a test of will ~ yours. You can’t believe how fast a clam can bury itself to elude its fate. If you know how to dig for clams, you surely know how to prepare them. These ten steps are for those of you who just bought some or had them gifted (lucky you!).
- Figure on one pound of clams per person.
- Soak clams (unopened) for a few hours in a bucket of salted water ~ enough to completely cover them. This should purge them of sand. You can add 1 tablespoon of cornmeal to the water. That often helps the clams give up their sand.
- Discard any clams that float to the surface.
- Bring one inch of water to a boil in a pot large enough to hold all of your clams. Season the water with a squeeze of fresh lemon juice, about 1 tablespoon.
- Place the clams in this pot and cover.
- Melt butter.
- Keep the clams on the heat until the pot froths, and clams open, then IMMEDIATELY remove the pot from the burner. This should take about 5 minutes for a pound of clams, longer for larger quantities.
- Drain the clams, reserving the cooking liquid. This is your broth.
- For each serving offer a bowl of steamers, a mug of the reserved broth, and a container of melted butter.
- To eat, remove the clam from its shell (this should be easy), discard the skin around the neck. Dunk the rest first in the broth and then the melted butter. Enjoy!
Note: Some drink the broth after finishing the clams. It’s salty but tasty ~ just don’t drain your mug to the last drop or you’ll be chewing a bit of sand.
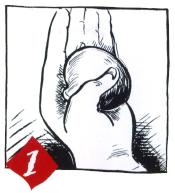
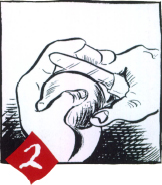
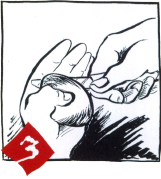
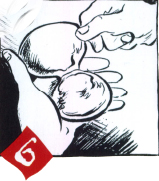
How to Open a Clam
- 1 Place the clam in your left hand with the hinge facing down and the lips facing your fingers.
- 2 Press the knife into the clam using pressure from the fingers of your left hand.
- 3 Once inside, cut one-third of the way into the clam.
- 4 Twist the knife. That should cut and separate the first muscle.
- 5 Retract the knife and run the knife along the inside of the top shell.
- 6 Pull back the top shell. Cut under the clam in the bottom shell to remove the clam.


Black Dog Stuffed Quahogs
This traditional and substantial appetizer served in its own shell makes a tasty start to any meal ~ especially one featuring seafood. You can vary the flavor by using sausage (we use Andouille) instead of bacon. For extra zing, add a diced jalapeño to the veggie sauté.
8 slices bread
8 slices of bacon, chopped into ½-inch pieces
½ teaspoon crushed red pepper flakes
2 chopped garlic cloves
1 medium white onion, diced
1 medium green bell pepper, diced
6 large quahogs, opened and chopped with juice and shells (see “How to Open a Clam,” page 118)
1 tablespoon fresh parsley, chopped
1 teaspoon ground black pepper garnish: lime and lemon wedges
- Dice the bread slices into ½-inch cubes and dry overnight or in an oven at 300°F for about 10 minutes.
- In a large heavy-bottomed skillet, cook the chopped bacon. When the bacon is just browned, add the crushed red pepper and garlic. Sauté for 1 minute.
- Add the diced veggies and continue to Sauté for 3 to 4 minutes until the onion and pepper are just soft.
- Add the chopped clam meat and reserved clam juice and cook for 3 to 4 minutes. The mixture should boil.
- Remove from heat and stir in the dried bread cubes, parsley, and black pepper. Allow the mixture to cool a bit before stuffing into shells. Preheat the oven to 400°F.
- Make sure the clamshells are clean. Mound the mixture into each half shell and place the filled shells on a baking tray.
- Baked stuffed quahogs for 20 to 25 minutes or until nicely browned on top.
- Serve with lemon and lime wedges.
YIELDS: 12