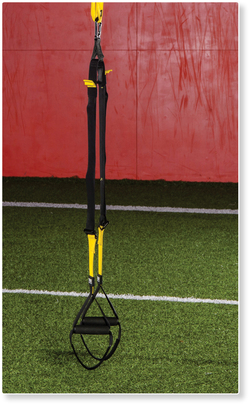
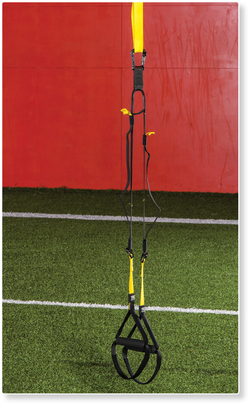
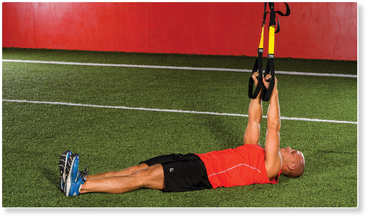
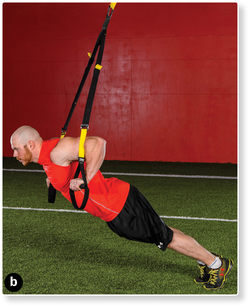
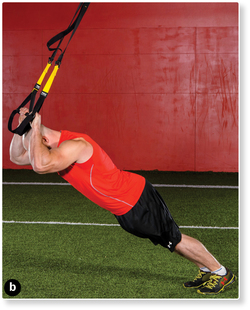
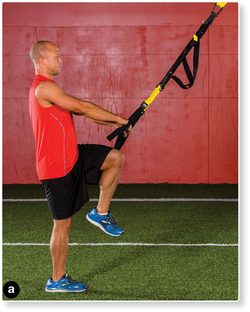
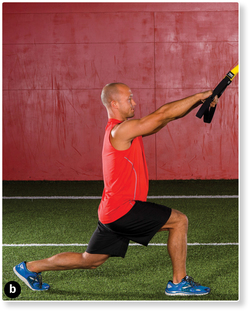
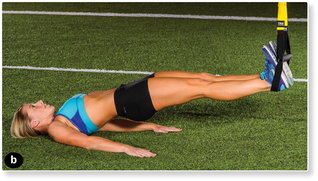
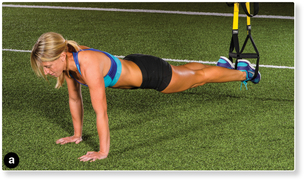
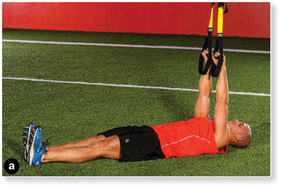
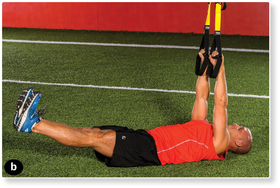
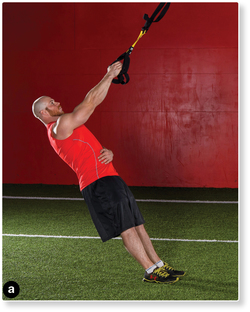
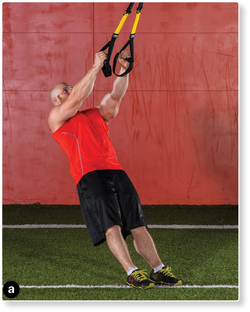
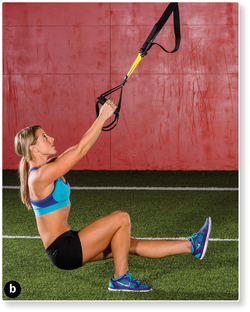
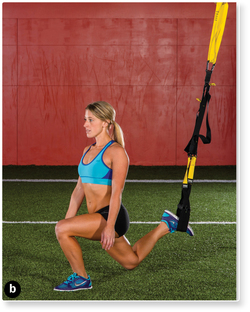
The use of the suspension trainer has exploded in the fitness industry over the last 10 years. For the most part, suspension-training exercises are variations of bodyweight exercises (bodyweight push-up, squat, lunge, and so forth) with part of the body suspended in the air by the trainer. The suspension trainer is not fixed; all of its parts move in space while the exercise is being performed. For that reason, you must recruit more muscles to perform the movement and stabilize yourself. Using a suspension trainer increases the involvement of the muscles of the core, shoulders, and glutes to perform this stabilizing movement. A tremendous variety of exercises can be performed with the suspension trainer, which helps to keep workouts interesting. The suspension trainer is easily portable, so it’s ideal for workouts for those who are on vacation or deployed to remote areas.
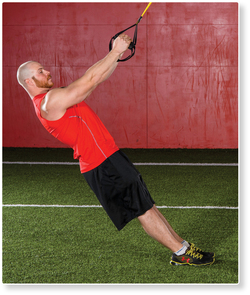
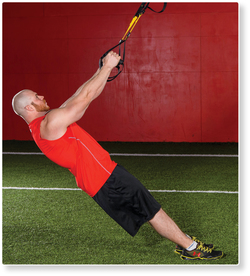
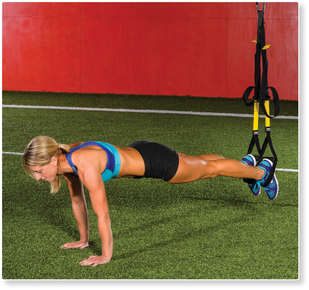
Suspension training does have drawbacks. First, these exercises are difficult to learn. They require so much balance and stabilization that even simple exercises like a push-up take time to master. Second, because all the parts of the suspension trainer move in space, safety is a concern. For example, if you are performing a push-up and your hands are in the trainer, allowing one of the hands to move suddenly could be a recipe for a shoulder injury. Third, suspension-training units tend to be expensive, costing upward of $200 each. Finally, suspension training has built-in overload challenges. After you have finished learning and have developed your fitness base, making the exercises more challenging is difficult. You can always perform the exercises for longer periods, but in the case of athletics, you may be training the wrong energy systems and qualities. Because of that, suspension training is frequently integrated with other modes of exercise for an advanced person’s program (see table 7.1).
Suspension training involves a little more in terms of setup, adjustment, and basic positions than the other exercise modes covered in this book. Recognizing this requirement helps ensure a safe, successful experience. With that in mind, this part of the chapter covers how to secure and adjust the suspension trainer, the basic grips that are used, and the basic positions used in the exercises.
The suspension trainer needs to be secured to an object. The object that it is secured to should be able to handle your body’s weight without moving or breaking. For example, a tree limb may be tall enough, but if the limb isn’t big enough it will break when you try to perform a chest press or push-up. A pull-up bar or a set of monkey bars is ideal for securing a suspension trainer, but a door or small tree limb is not because it may not be able to handle the weight of your body.
Suspension trainers generally have a strap with some sort of carabiner. The carabiner is on one end of the strap, and the rest of the suspension trainer is attached to the other end. The carabiner and strap are looped around the object that the trainer is to be attached to, and the carabiner is then attached to the strap (figure 7.1).
If you want the suspension trainer to be farther off the ground, the strap can be looped around the object it is being attached to multiple times to draw up the suspension trainer. If you want the suspension trainer to be closer to the ground, the strap can be looped around the object that it is being attached to fewer times, which will result in the trainer being lower to the ground. Some exercises should have the trainer higher, some are better if the trainer is lower, and several are best when the trainer is in between. The positioning depends on the exercise and the desired difficulty level.
The handles on most suspension trainers also adjust up or down. Generally, this is done with a buckle that unlocks the strap attached to the handle. After the buckle is released, the handle can be adjusted upward or downward (figure 7.2). This mechanism provides another way to make the trainer closer to the ground or farther from it.
Four basic grip types are used for suspension trainer exercises. For each grip, the thumb and fingers should be wrapped around the handles. The first grip type is the prone grip, sometimes referred to as an overhand grip (figure 7.3). For the prone grip, the palm faces away from the body or down. So a push-up or a chest press is an example of a prone grip. The second grip type is the supine grip, sometimes called an underhand grip (figure 7.4). For the supine grip, the palms face up or toward the body. An example of this is a biceps curl. The third grip type is the neutral grip (figure 7.5), in which the palms face in toward the body (and toward each other).
The fourth grip type is used for one-handed exercises. A one-handed exercise may use a supine, prone, or neutral grip. The big difference here is that the suspension trainer has to be set up to perform a one-handed exercise. To perform a one-handed exercise, one of the handles is drawn through the other handle (see figure 7.6). After the handle is drawn through, it is used to perform the exercises.
This book shows five basic body positions for suspension-training exercises. A huge number of exercises and variations are possible using these five positions. The five are supine standing position, supine lying position, prone standing position, prone lying position, and standing position.
This position is used for upper back, shoulder, and biceps exercises. For the supine standing position, the handles are adjusted so that they are at shoulder height (figure 7.7). Any grip may be used for exercises performed from this position. If you are a beginner, place your feet close together and under the handles. Grip the handles. Keeping your feet in place, lean backward until your arms are fully extended. If you do this properly, your body should be straight from your ankles all the way to your shoulders.
As you become skilled with these exercises, an easy way to make them more difficult is to change the placement of your feet. You can make supine standing exercises more difficult by moving your feet forward so that part of your body, rather than your feet, is directly under the handles. Moving your feet forward puts you closer to the ground. If you move your feet forward far enough, you will need to adjust the handles so that they hang lower than shoulder height. Even in these positions, you should maintain good posture for the exercises (i.e., maintain a straight line from the ankles to the shoulders).
This position is used in hamstring and core exercises. For the supine lying position, adjust the handles so that they are off the ground. Generally, they will not be higher than knee height (figure 7.8). Next, lie on the ground on your back. Depending on the exercise, you may reach up and grab the handles (so that your shoulders are positioned below the handles) or you may place your feet in the handles.
This position is used in chest and triceps exercises. Adjust the handles so that they are at shoulder height. Depending on the exercise, the prone or neutral grips are most commonly used in conjunction with this position. Grip the handles. Begin with your feet positioned under the handles. Keeping the feet in place, extend your arms and lean forward. Remember that a straight line should run from your ankles to your shoulders (figure 7.9).
To make exercises using this position more difficult, move the feet backward so that they begin farther from the handles. This position forces you to lean forward more, requiring you to support more of your body weight. Even in these advanced positions, you should maintain good posture for the exercises.
This variation is used for push-ups, advanced shoulder exercises, and core exercises. For this variation, the handles are adjusted so that they are hanging just above the ground. You assume the push-up position for this exercise, keeping a straight line from your heels to your shoulders (figure 7.10). Depending on the exercise to be performed, either your hands will grip the handles (for a push-up) or you will place your feet in the handles (for a core exercise).
A number of lower-body exercises are performed from a standing position. Adjust the handles so that they are at chest height or shoulder height. Grip the handles and step back until the trainer is tight (figure 7.11). From this position, perform the desired exercise.
Every exercise listed in this section should be a mainstay of a maximum interval-training program using the suspension trainer, regardless of your fitness level and experience. Besides their value in enhancing fitness, these exercises have a number of purposes. First, they teach positions, grips, and fundamental movement patterns. Second, they develop your balance and knowledge of your body in space. Finally, they develop many of the stabilizing muscles that support exercise with suspension trainers.
The chest press develops the muscles of the chest, shoulders, and triceps. The core helps to stabilize the body during this exercise, so it is trained as well. This exercise is rhythmic in nature and can be used for conditioning.
This exercise develops the muscles of the upper back, shoulders, and biceps. The core helps to stabilize the body during this exercise, so it is trained as well. This exercise is rhythmic in nature and can be used for conditioning.
This exercise develops the biceps muscles. The core must stabilize the body throughout, so the exercise has some benefit to this region as well. It is a rhythmic exercise and lends itself to conditioning.
This exercise develops the triceps muscles. The core must stabilize the body throughout, so the exercise has some benefit to that region as well. It is a rhythmic exercise and lends itself to conditioning.
This exercise develops the muscles of the lower body, particularly the quadriceps, hamstrings, and glutes. The exercise requires the core to stability the body. This exercise is also appropriate for a conditioning workout.
This exercise allows you to focus on one leg at a time. It is an excellent exercise for developing the quadriceps, hamstrings, and glutes. In addition, it allows you to work on balance and mobility.
The hip up exercise trains the muscles of the core, glutes, and hamstrings.
Leg curls with a suspension trainer develop the glutes and hamstrings. Your core muscles will help to get you into position and hold you there, so they will get some benefit as well. Like most suspension-training exercises, this one is great for conditioning workouts.
The knees to chest exercise trains the core muscles and all the abdominal muscles. It primarily uses the upper and lower abdominal muscles to perform the exercise, and the obliques have a stabilizing role. In addition, by forcing you to support yourself using your upper body, those muscles receive some benefit as well.
The lying leg raise is another core exercise. This one also uses the upper and lower abdominal muscles to perform the exercise. The obliques have a stabilizing role.
For the person using the suspension trainer, the advanced exercises are fun and challenging. They require greater levels of fitness, strength, balance, and proprioception. Some of them have the potential to be dangerous. For these reasons, you should perform them only after you have thoroughly mastered the foundational exercises.
Push-ups develop the muscles of the chest, shoulders, and triceps. When performing this exercise with a stability trainer, the core and the upper back are involved in a stabilizing role.
As with dumbbells, the suspension trainer fly isolates the muscles of the chest. It also trains the muscles of the core, which must stabilize the body during performance of the exercise. This is another good exercise for a conditioning workout.
The one-arm row develops the muscles of the upper back, shoulder, and biceps. It is a more difficult version than the foundational rowing exercise because only one arm is exercising at a time. This variation adds difficulty as well as new balance and stabilization requirements.
The reverse fly develops the shoulders and the muscles of the upper back. The muscles of the core work to stabilize the body during this exercise.
Like the squat exercise, this exercise develops the quadriceps, hamstrings, and glutes. Unlike the squat, this variation develops one-legged strength. The one-legged nature of the exercise requires good balance as well as strength in the ankle, foot, and shin to stabilize the body.
Like the one-legged squat exercise, this exercise develops the quadriceps, hamstrings, and glutes. This variation also develops one-legged strength. This extremely advanced exercise requires a great deal of balance and coordination.
The one-legged hip bridge primarily trains the glutes and hamstrings. The muscles of the core perform a stabilizing role during this exercise. The one-legged nature makes this a challenging exercise for the lower body.
The one-legged leg curl primarily trains the glutes and hamstrings. The muscles of the core perform a stabilizing role during this exercise. The one-legged nature makes this a challenging exercise for the lower body.
The pike is an advanced exercise for training the muscles of the core. The upper and lower parts of the rectus abdominis perform the exercise, and the obliques stabilize the pelvis. This exercise is challenging from a balance and stability standpoint.
This advanced exercise primarily trains the oblique muscles. People with lower back injuries should not perform this exercise.
The introductory program is designed to get you familiar with using the suspension trainer. It will require you to learn how to adjust the trainer, learn the fundamental positions, and learn the grips that are used with it. In addition, it will prepare your body for the more advanced exercises that can be performed with the suspension trainer. This program is meant to be done two times per week. The program should be performed as a circuit. You perform each exercise for a specific time and take as little rest as possible before you perform the next exercise. After you perform the entire list of exercises, start the entire circuit over again. Table 7.2 outlines the introductory program.