
•1 Jelly Roll of solid green fabric
•1 polystyrene wreath, 12″ in diameter × 2½″ wide × 2″ high (preferably with a flat back)
•3 polystyrene cones: approximately 6″high × 3″ in diameter, 9″high × 4″ in diameter, and 12″high × 4″ in diameter
•1 yard of 2″-wide ribbon for hanging wreath
•Hot glue gun
•Rotary cutter with pinking blade
1. With the rotary cutter pinking blade, cut 20 Jelly Roll strips into 5″-long pieces. Each piece will form a leaf on the wreath.
TIP:If any of the leaf pieces come up short, save them to cover the tops of the trees.
2. Place 3 small dabs of hot glue on a narrow end of a leaf piece (Figure 1). Fold the strip in half with short ends together to measure 2½″, and press down to set the glue (Figure 2). Be careful not to burn your fingers!
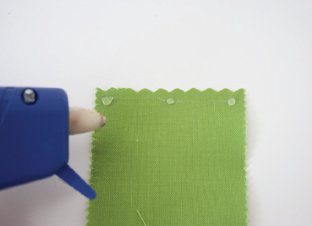
Figure 1
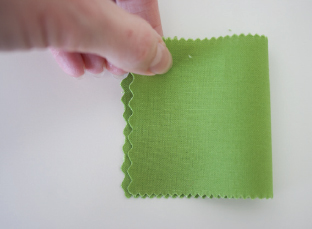
Figure 2
3.Place a dab of hot glue on a corner of the raw edge of the folded strip. Squeeze the corners together to set the glue (Figure 3).
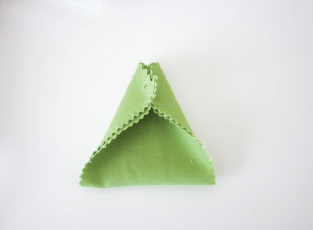
Figure 3
4. Now place a medium-sized glob of glue on top of the point you just glued (Figure 4).
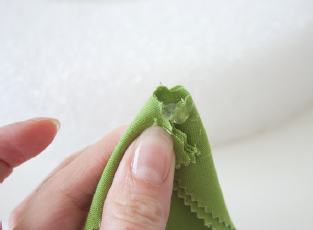
Figure 4
5. Place the glued piece toward the inside edge on the front of the wreath, glue side down, and press to adhere.
6. Repeat Steps 2-4, placing the second piece toward the outer edge of the wreath, in line with the first piece.
7. Glue a third piece between the first 2, slightly overlapping them (Figure 5).
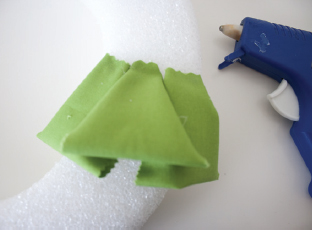
Figure 5
8. Glue another piece on the side edge toward the back. Place the next piece on the side next to it, slightly overlapping. Do the same to the inner edge of the wreath on the same row. The first row is now complete (Figure 6).
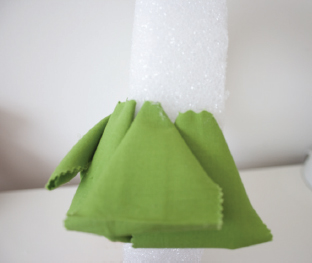
Figure 6
9.Continue on to the second row, this time starting on the outside of the wreath, leaving 1½″ to 2″ of the first row visible (Figure 7).
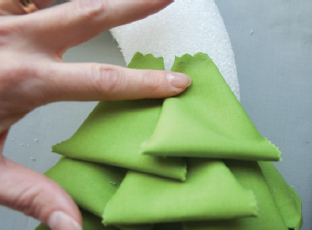
Figure 7
10. For the third row, start on the inside of the wreath as you did for the first row (Figure 8).
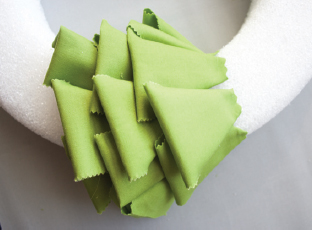
Figure 8
11. Continue adding rows, alternating the starting point of each row, until the entire front of the wreath is covered.
Hang the wreath from a length of ribbon as shown in the photo (page 74).
1. From the 20 Jelly Roll strips left after making the wreath, cut 10 in half lengthwise with the pinking blade of a rotary cutter to yield 20 pieces 1¼″ × 45″. Subcut these strips into 2″ long pieces.
2. Place a leftover piece from the wreath on top of each cone (Figure 9). Place a dab of hot glue on each of the 4 corners, and press down on the cone to secure the fabric (Figure 10). Use additional glue as needed.
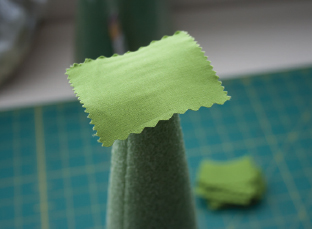
Figure 9
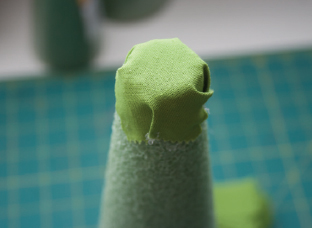
Figure 10
3.Glue a 1¼″ × 2″ piece in half with short ends together as you did to cover the wreath (Step 2, page 75).
4. Dab glue on the top back of the piece, and place it glue side down on the base of the cone, with the folded edge just flush with the bottom of the cone (Figure 11).
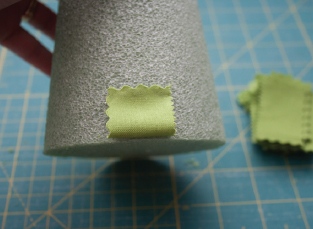
Figure 11
5. Repeat Steps 3 and 4 to continue gluing pieces all around the base of the cone until you return to the starting point (Figure 12). This completes the first row.
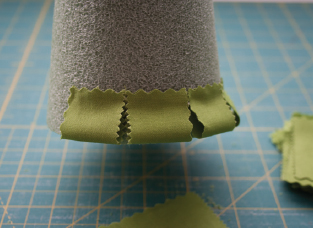
Figure 12
6. Glue the next row of pieces around the cone, centering the pieces over the gaps in the first row and overlapping the first row, leaving at least ¼″ to ½″ visible (Figure 13).
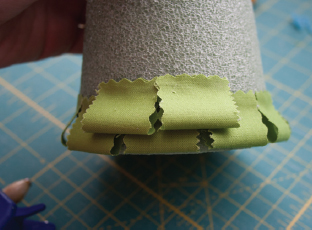
Figure 13
7. Repeat Step 6 for the third row (Figure 14), overlapping the preceding row and centering the pieces over the gaps. Continue adding rows up the tree until the top of a row of strips is flush with the level top of the cone.
8. Repeat Steps 3–7 to cover all 3 trees.
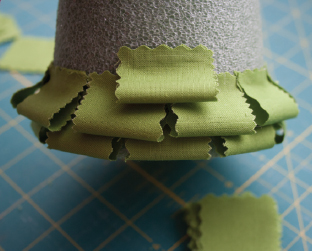
Figure 14