Prosciutto & Polenta
Stuffed Mushrooms
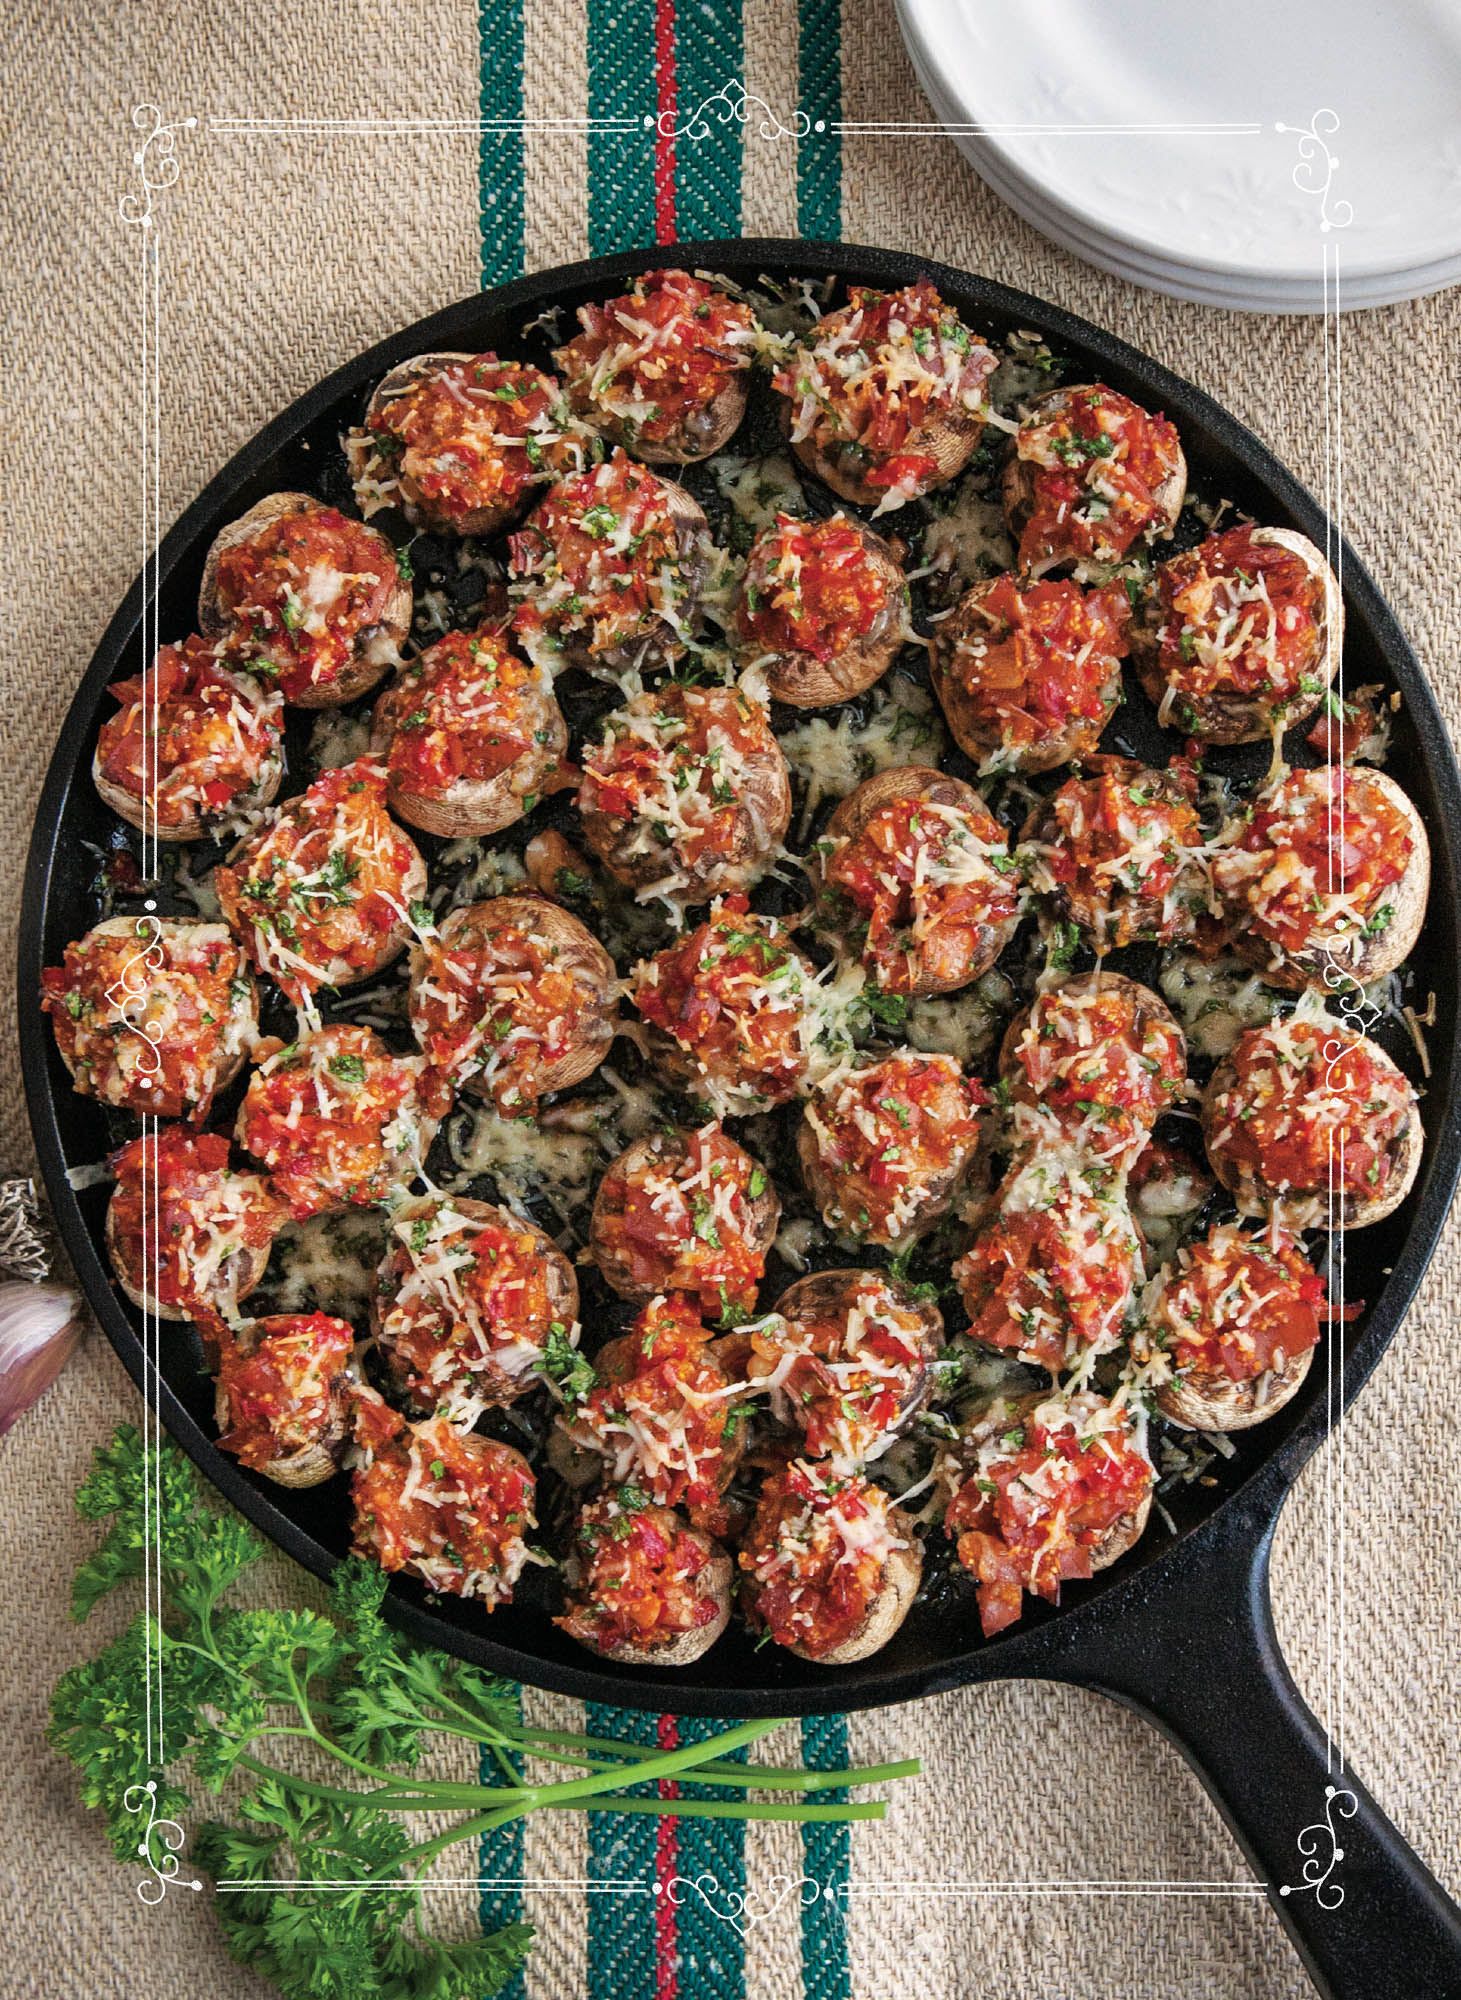
I’m always excited about stuffed mushrooms, but I especially love a
batch of perfectly cooked mushrooms with a simple, yet beautiful, presentation. My
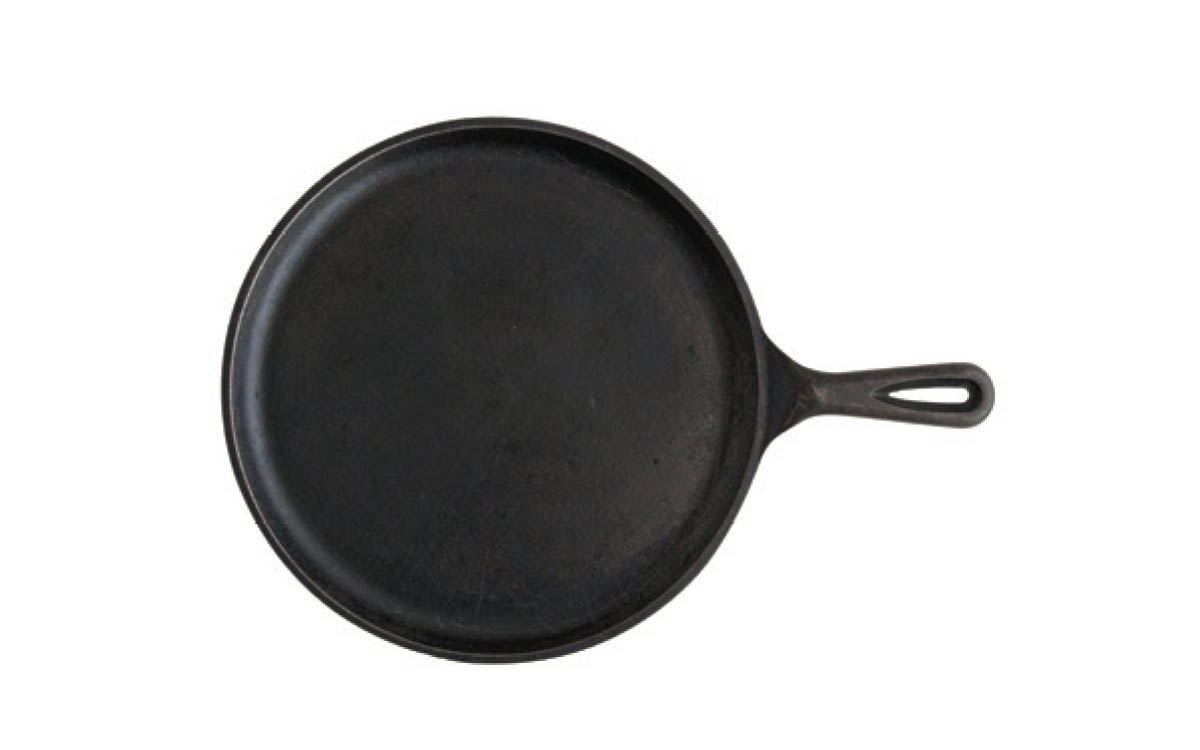
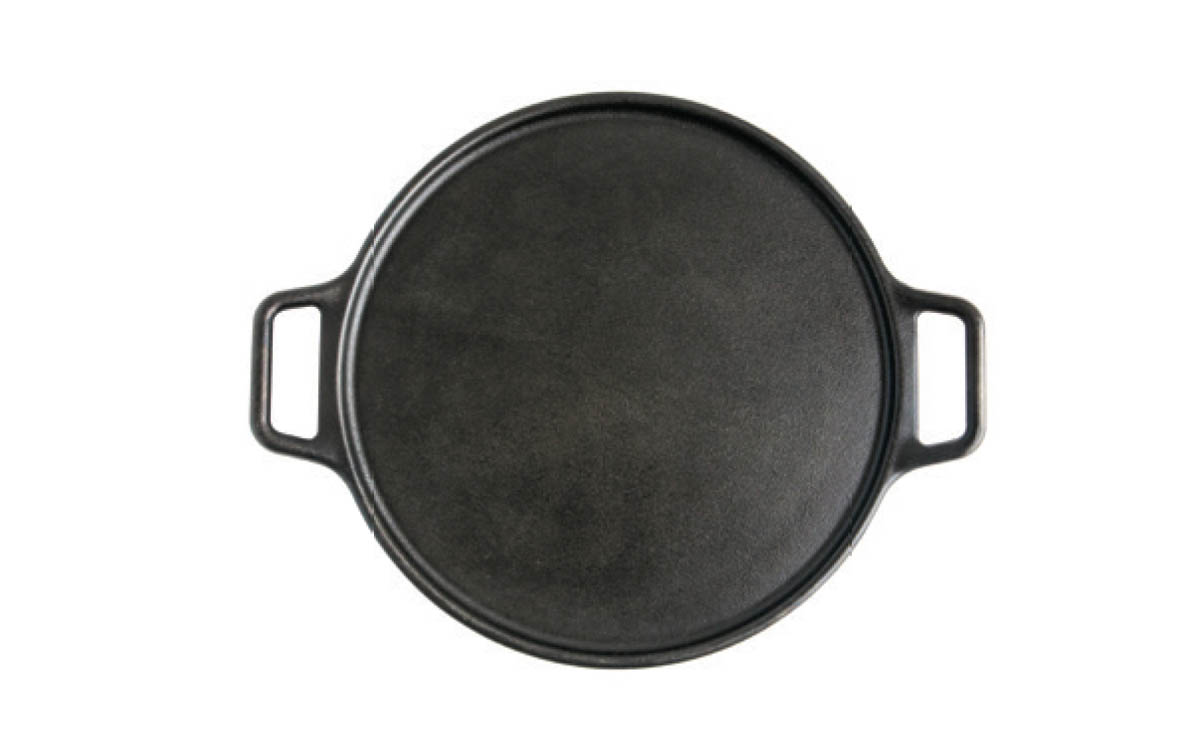
round cast-iron griddle does a fantastic job of cooking the mushrooms to perfection,
and you can serve the mushrooms right from the pan.
MAKES: 36 MUSHROOMS
36 button mushrooms (about 1-1/4 lbs)
4 ozs prosciutto, diced
1 red bell pepper, seeded and diced (about 1-1/4 cups)
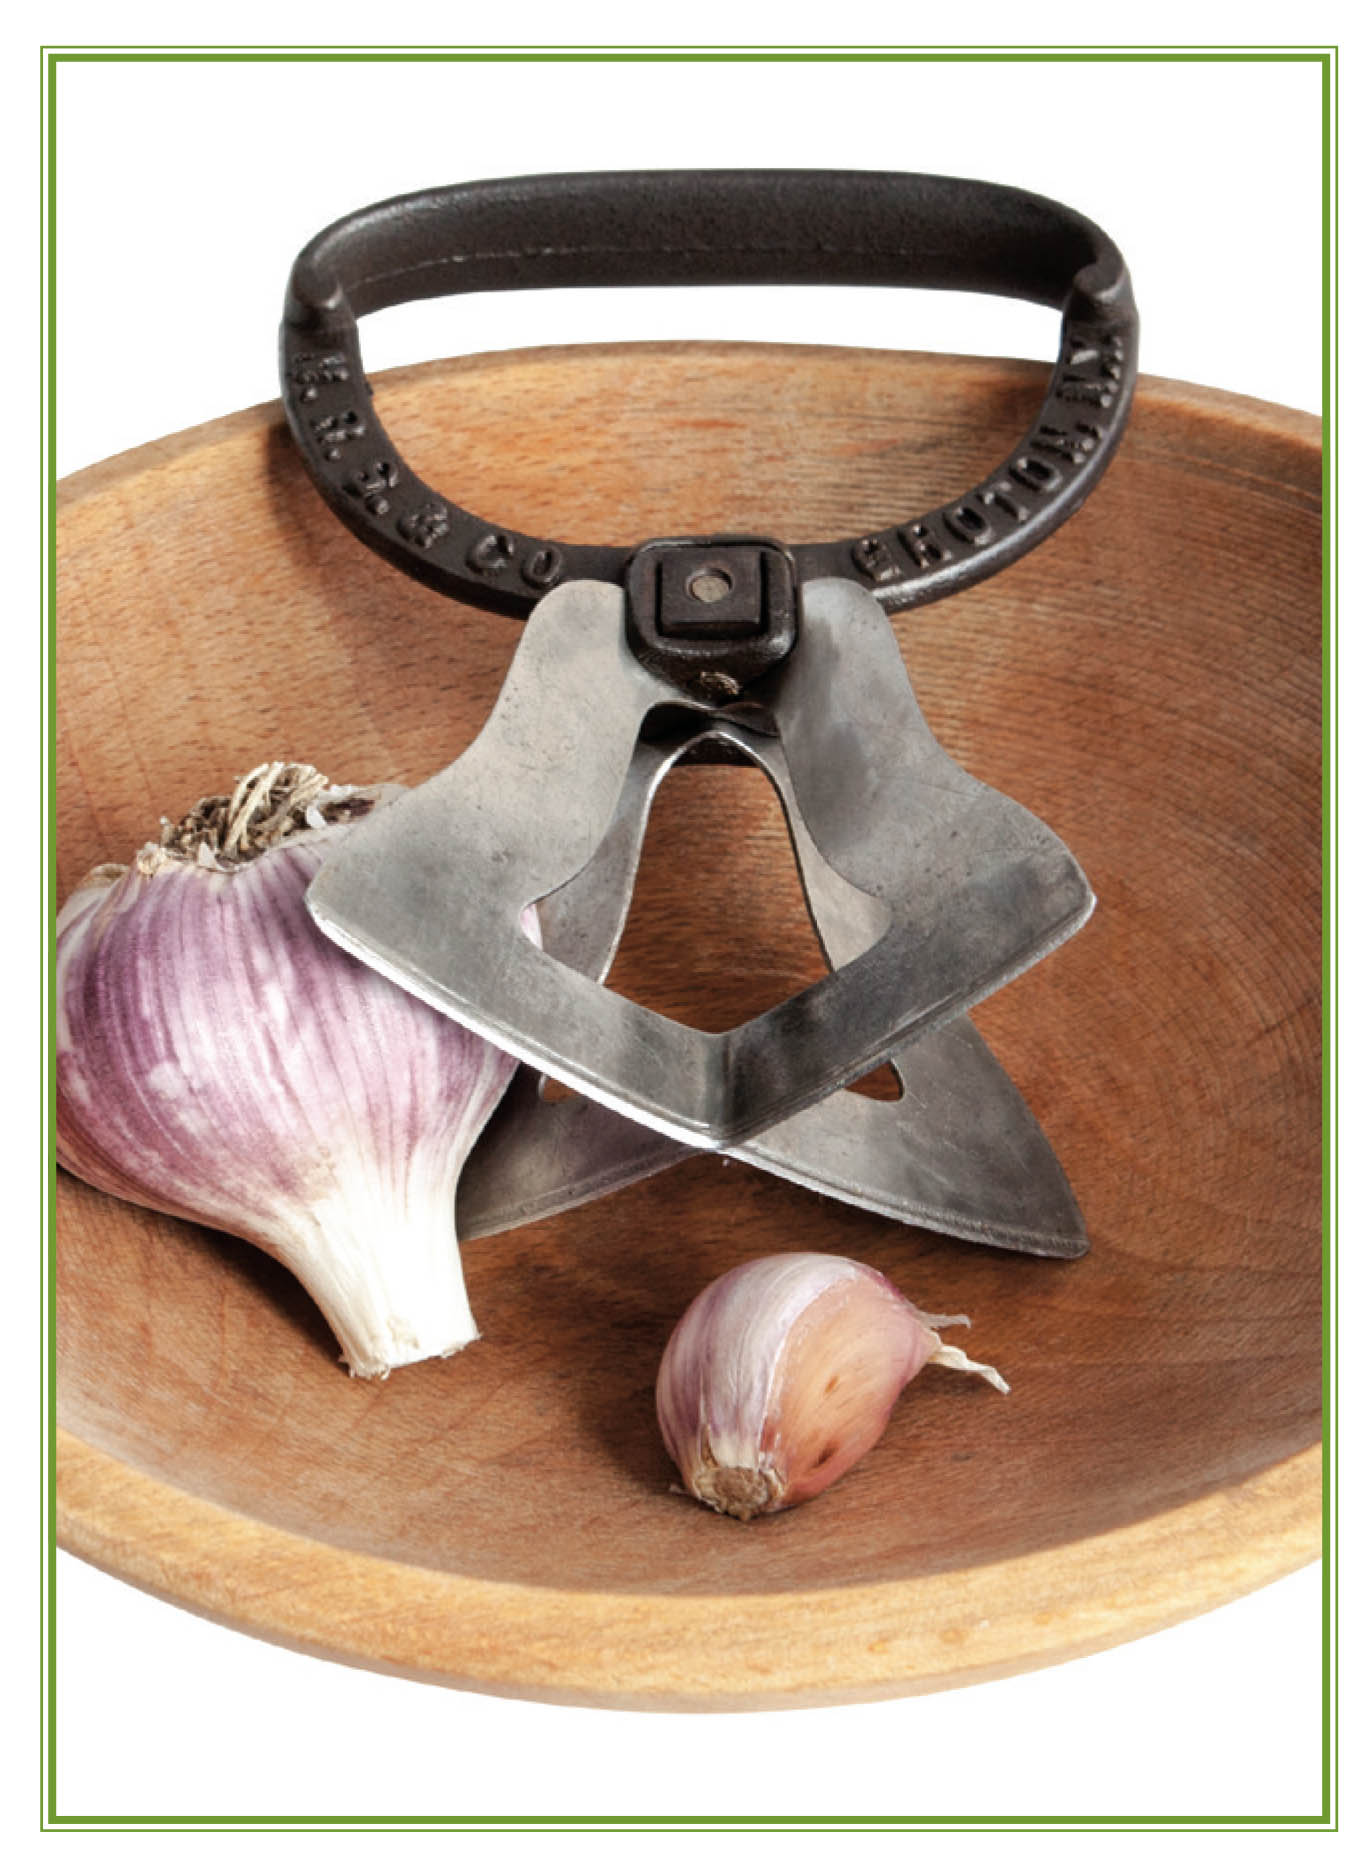
2 garlic cloves, peeled and minced (about 2 t)
3/4 cup chicken broth
1/4 t salt
2 T dry polenta
1-1/2 ozs shredded Parmesan cheese (about 1/3 cup)
1 oz shredded Asiago cheese (about 1/4 cup)
1/4 cup fresh parsley, minced, plus more for garnish
-
Preheat oven to 350°F.
-
Remove stems from mushrooms and place the tops gill side up on a 10-1/2”
cast-iron griddle (if desired, reserve the stems for use in other
dishes); set aside.
-
In a large skillet over medium heat, cook prosciutto for 5 minutes,
stirring frequently. Add bell pepper and garlic. Cook an additional 3–5
minutes, stirring frequently, until pepper is tender-crisp.
-
Add chicken broth and salt to skillet; bring to a simmer. Add polenta,
mix well, reduce heat to low and cover. Continue to simmer for 5–8
minutes, until polenta is cooked; remove from heat.
-
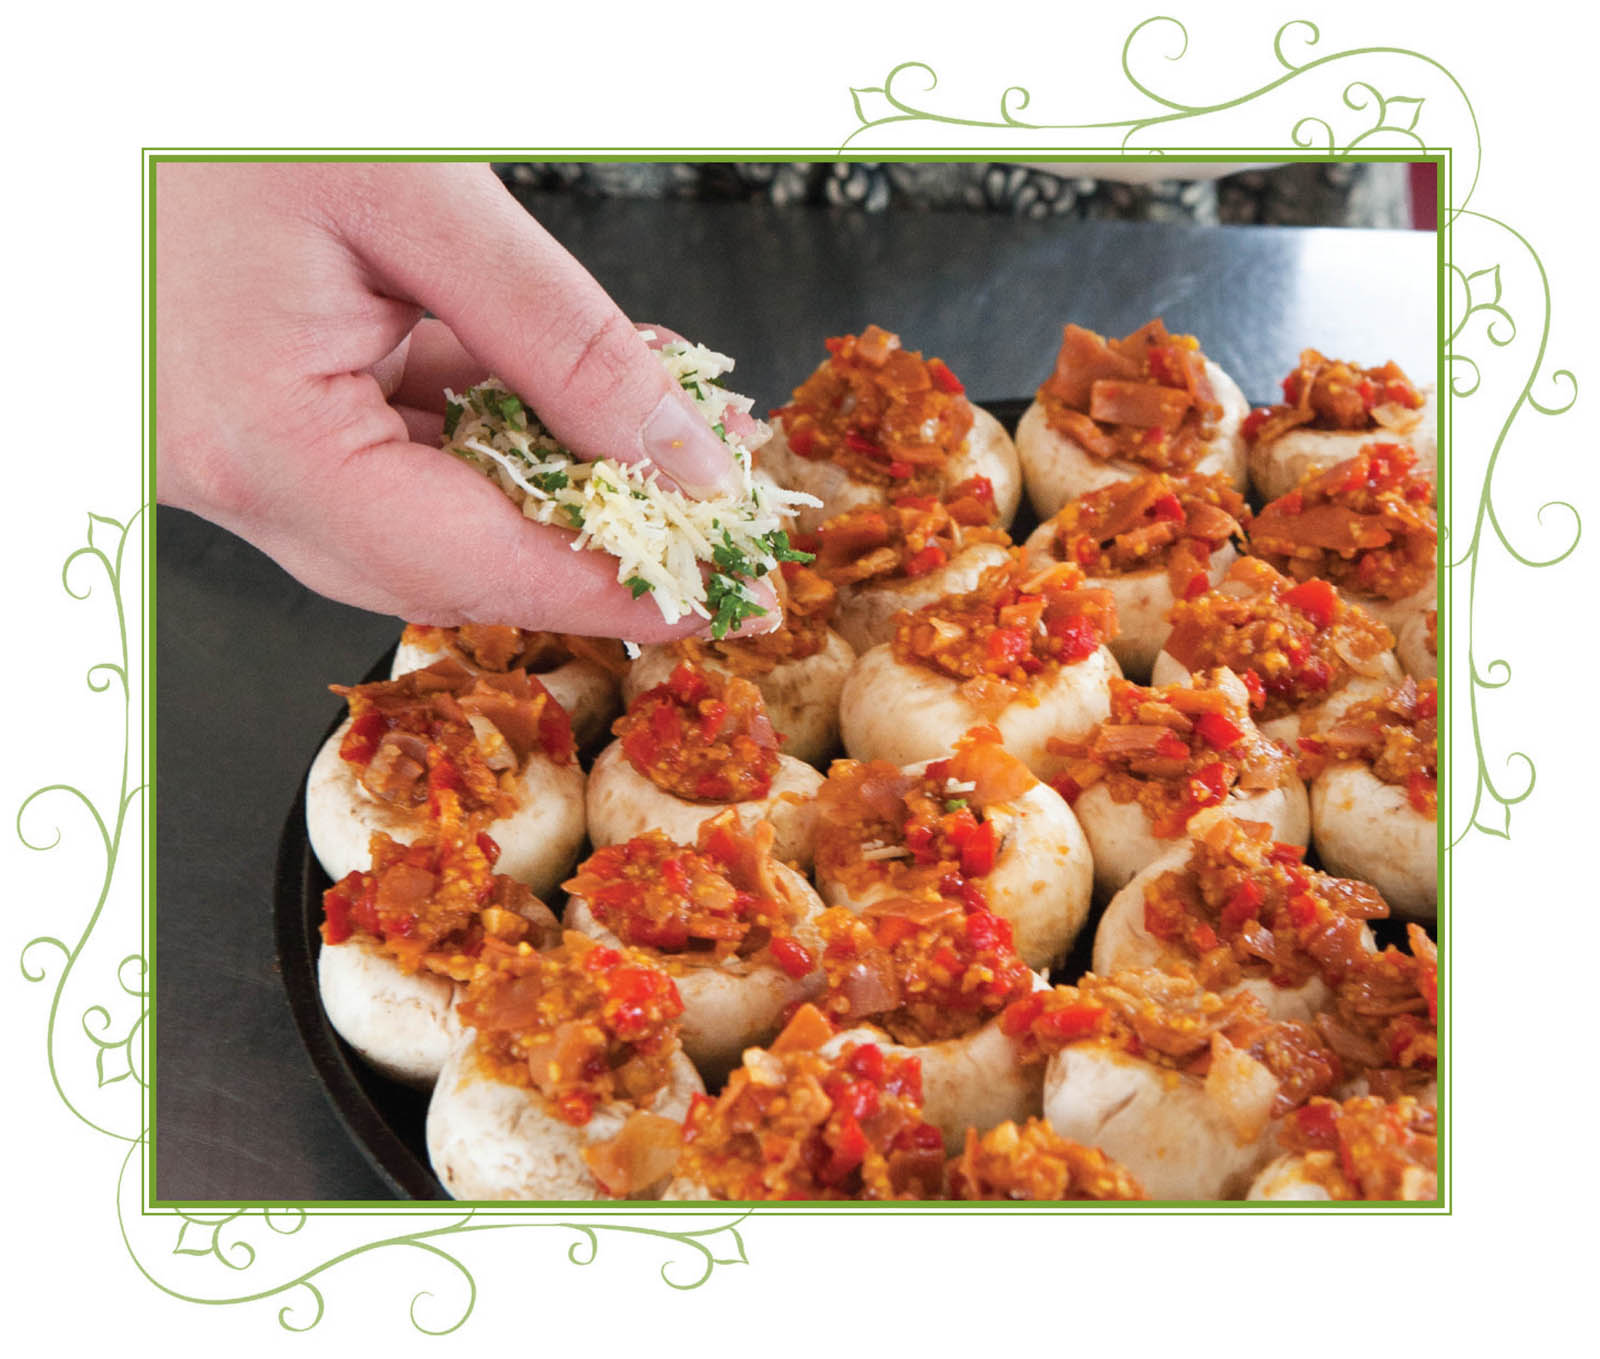
Divide mixture among mushroom caps.
-
In a small bowl, combine cheeses and parsley. Sprinkle over the tops of
the mushrooms and bake for 18–20 minutes, or until mushrooms are tender.
Garnish with parsley.
Sausage & Cheddar
Meatballs
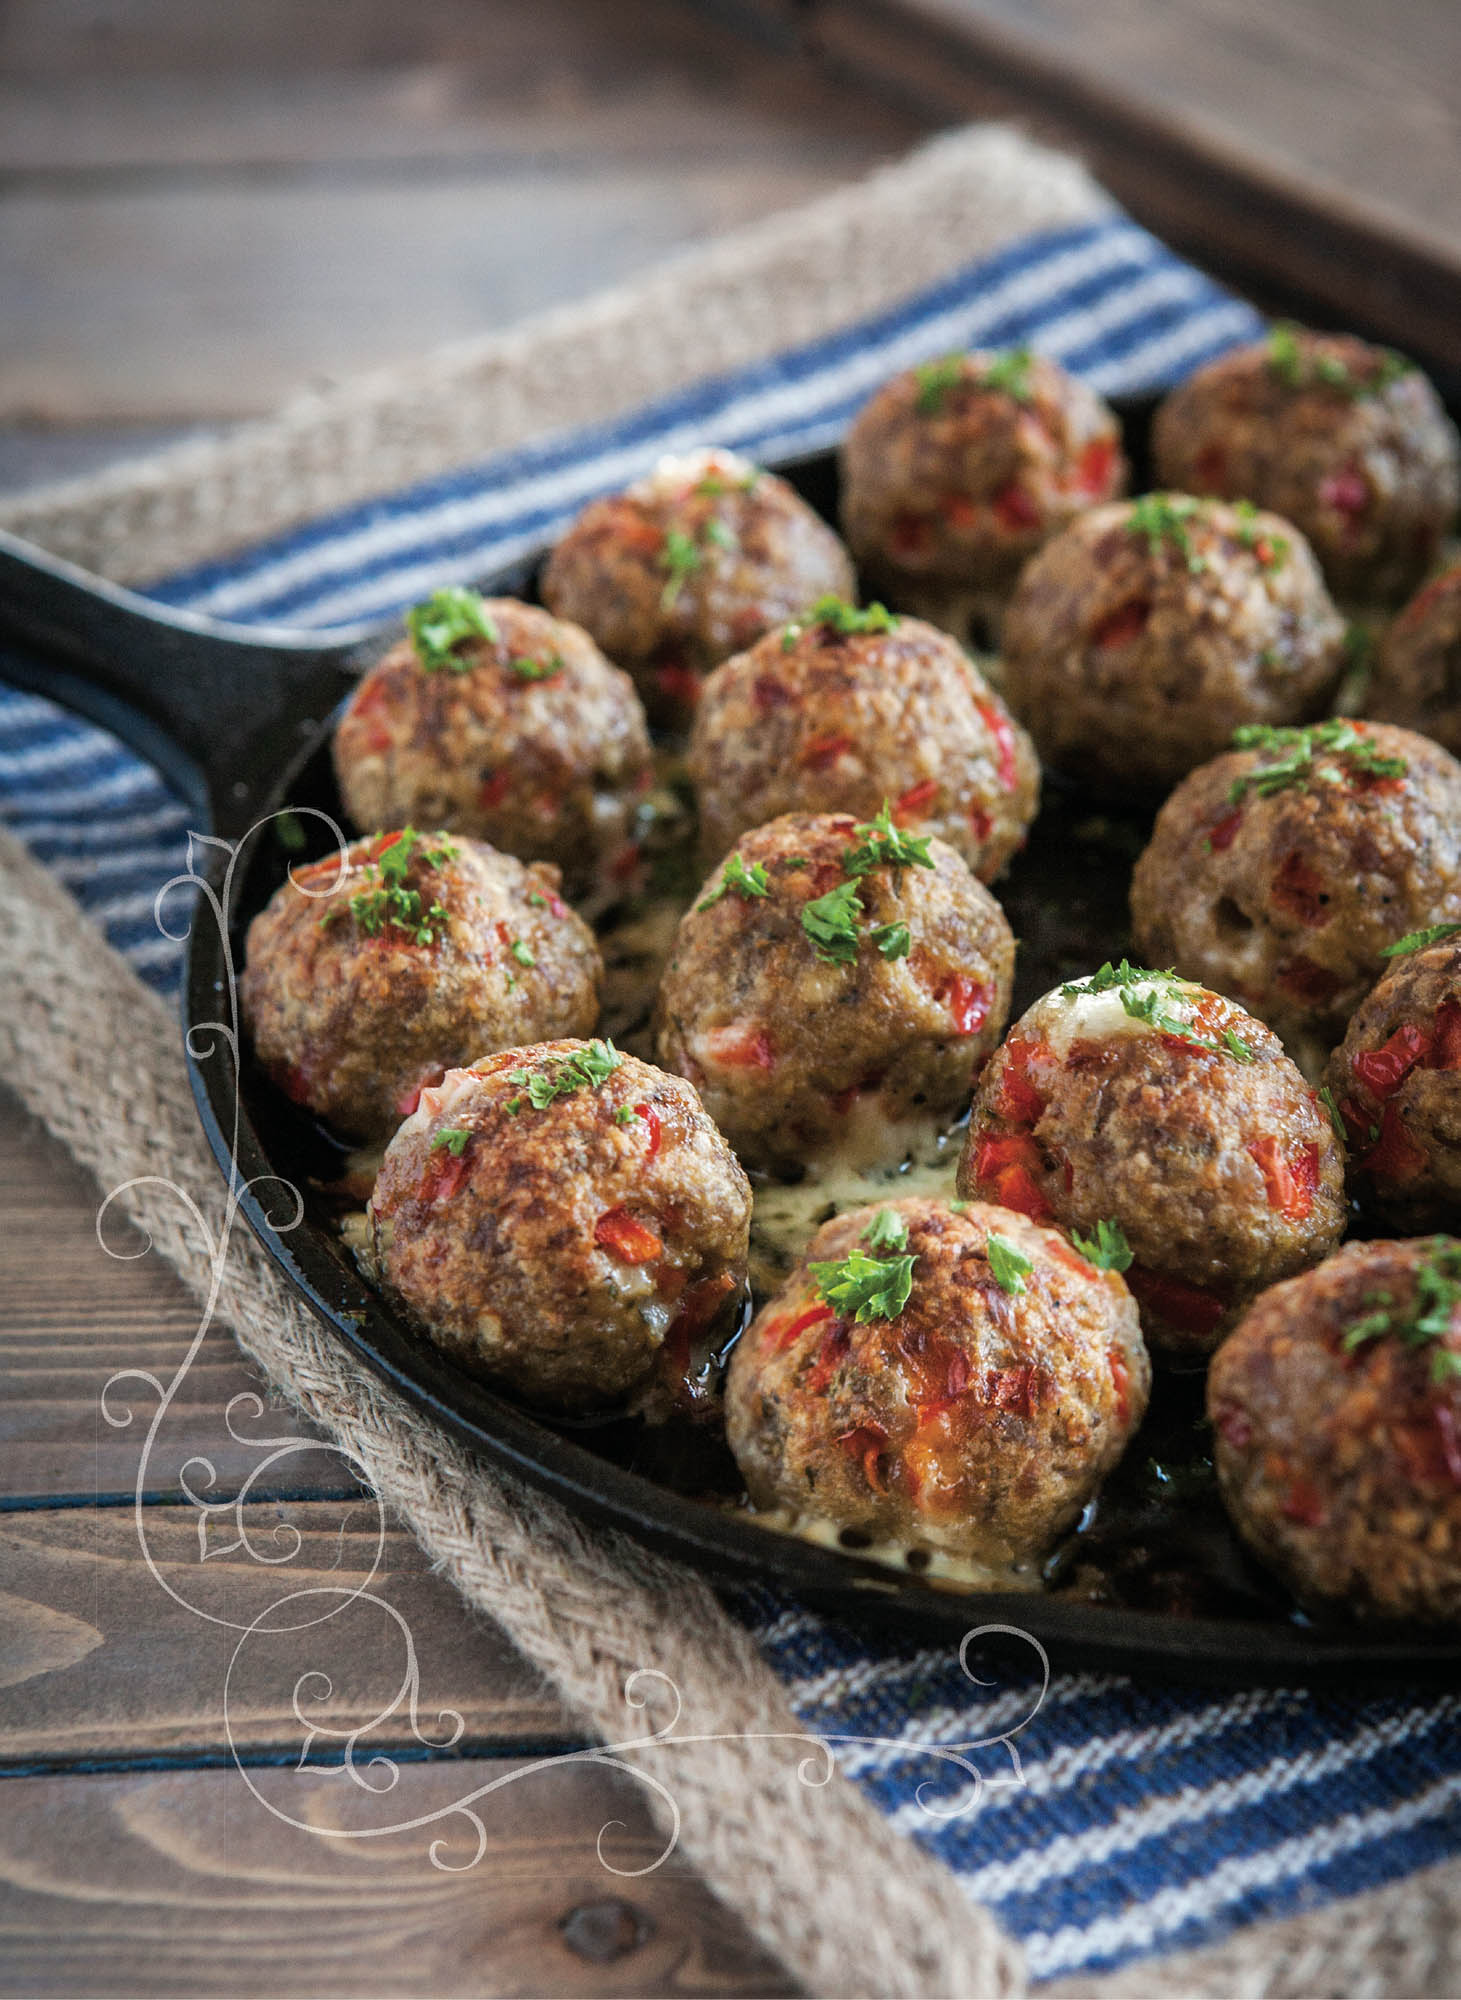
These meatballs have a little surprise—as you shape them, you place
a square of Cheddar cheese in the center of each. The little pocket of cheese on the
inside is wonderful, and all that melted, slightly crisp cheese on the pan just begs
to be devoured.
MAKES: 20 MEATBALLS
1 lb breakfast sausage
1 cup breadcrumbs
2 eggs
1 red bell pepper, seeded and finely diced (about 1-1/4 cups)
2 garlic cloves, peeled and minced (about 2 t)
2 T fresh parsley, minced (about 1 T), plus more for garnish
1/2 t pepper
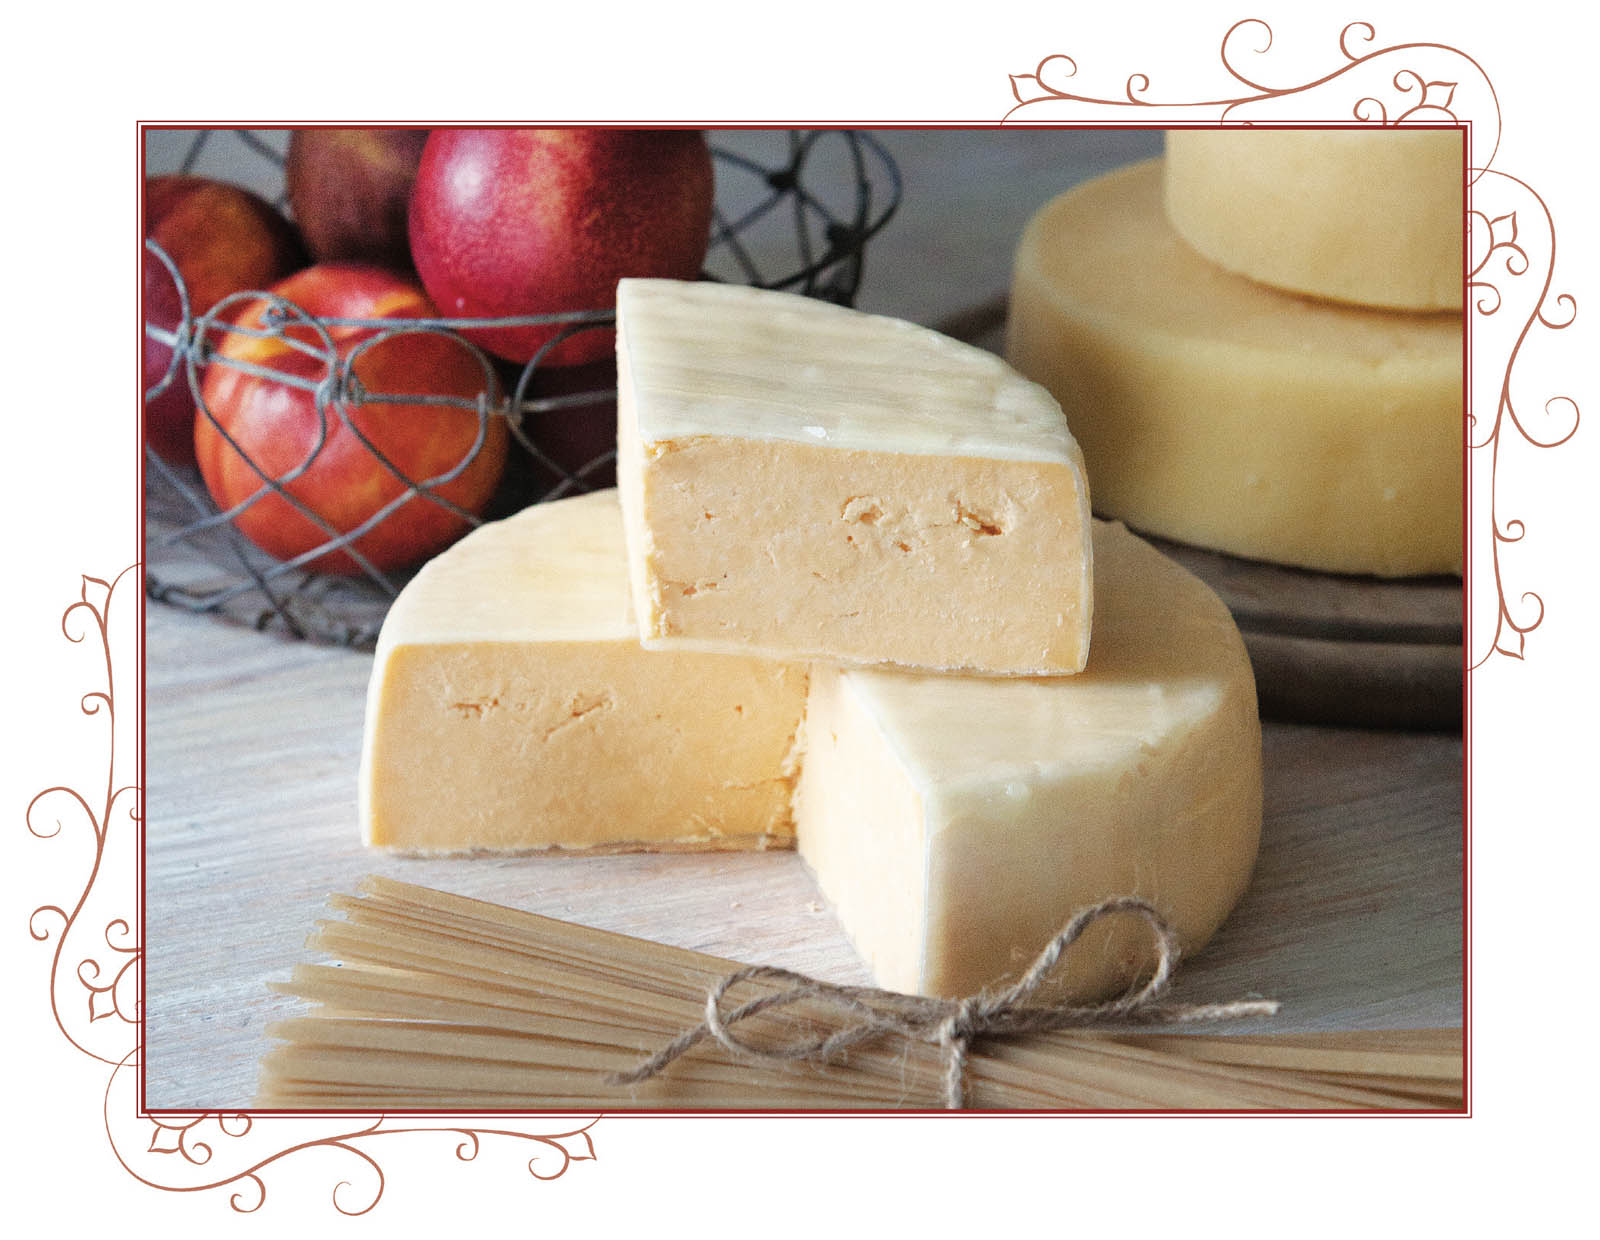
5 ozs Cheddar cheese, cut into 20 cubes
-
Preheat oven to 400°F.
-
In a medium bowl, combine sausage, breadcrumbs, eggs, bell pepper,
garlic, parsley, and pepper.
-
Divide mixture into 20 equal portions. Place a cube of cheese in the
center of each portion and roll into balls.
-
Place meatballs on a 10-1/2” round cast-iron griddle and bake for 25
minutes, or until cooked through. Garnish with minced parsley and serve.
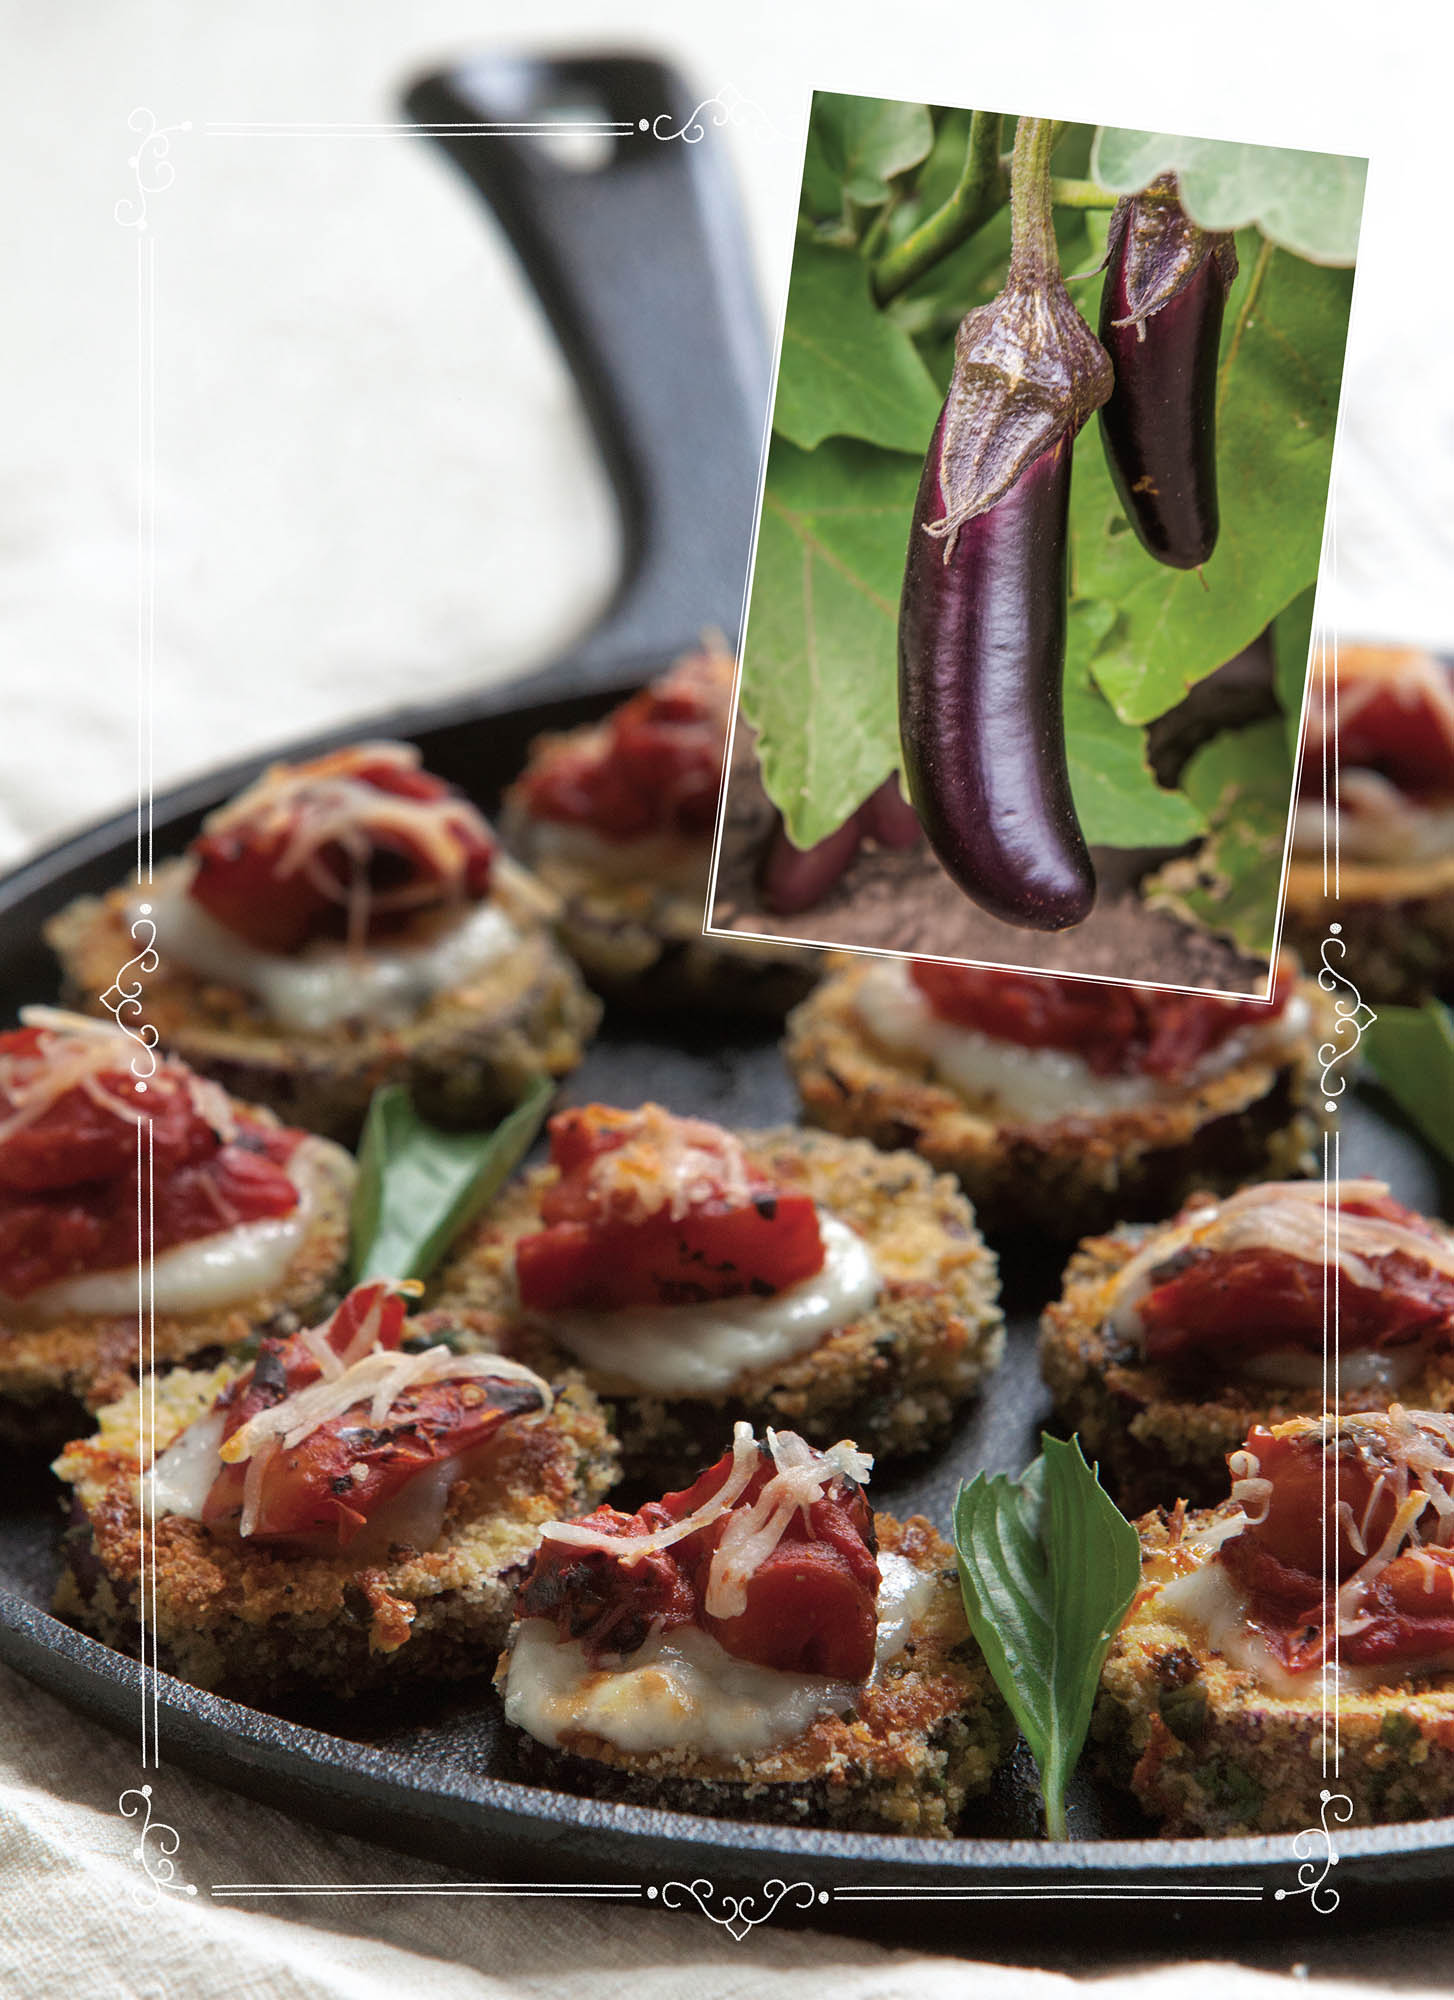
Eggplant Parmesan Rounds
Of all the plants I grow in my garden, eggplant is one that always
catches my eye. I love the look of the lush, green plants with the glossy,
deep-purple eggplants poking out from behind the leaves. I love this dish because
the ingredients meld together to create a flavor that just screams summer. Each time
I make it, I gain an even deeper appreciation for my cast-iron griddle that
transitions seamlessly between stovetop, oven, and table.
MAKES: ABOUT 36 ROUNDS
Topping:
2 14.5-oz cans diced tomatoes, drained
1/2 cup red wine
6 garlic cloves, peeled and minced (about 2 T)
1/2 t salt
1/4 t pepper
1/2 t Italian seasoning
1 t brown sugar
8 ozs mozzarella cheese, sliced
1 oz Parmesan cheese, shredded (about 1/4 cup)
Fried Eggplant:
2 Japanese eggplants
2 T fresh lemon juice (about 1 lemon)
3/4 t salt, divided
1 cup breadcrumbs
1 oz Parmesan cheese, shredded (about 1/4 cup)
1/4 cup fresh basil leaves, minced
4 garlic cloves, peeled and minced (about 4 t)
1/4 t pepper
2 eggs
6 T safflower oil, divided
-
Make topping: Combine diced tomatoes, wine, garlic, salt, pepper, Italian
seasoning, and brown sugar in a medium saucepan. Cook over medium-low
heat until wine is reduced, about 15 minutes. Remove from heat and set
aside.
-
Meanwhile, make fried eggplant: Cut eggplant into 1/4”-thick rounds and
arrange in a single layer on a baking sheet. Brush with 1 T lemon juice,
sprinkle with 1/4 t salt, flip over, brush with 1 T lemon juice, and
sprinkle with 1/4 t salt. Set aside.
-
Combine breadcrumbs, Parmesan, basil, garlic, pepper, and remaining 1/4 t
salt in a medium bowl. Whisk eggs together in a small bowl.
-
Pat the eggplant dry with paper towels, flip over, and pat the other side
dry. Dip eggplant rounds in egg, then coat in breadcrumb mixture.
-
Heat 3 T oil on a 101/2” cast-iron griddle over medium-high heat. Fry
breaded eggplant rounds for 3–4 minutes on each side, or until golden
brown, adding remaining oil as needed.
-
Divide sliced mozzarella between eggplant rounds, then divide the tomato
mixture evenly among the rounds; top with Parmesan. Broil until
mozzarella is melted.
“… two steps farther, and I could look down into the
vegetable garden enclosed within its tall pale of
reeds—rich chocolate earth studded emerald green,
frothed with the whites of cauliflower, jeweled with the purple globes of eggplant and the scarlet wealth of tomatoes.”
– Doris Lessing
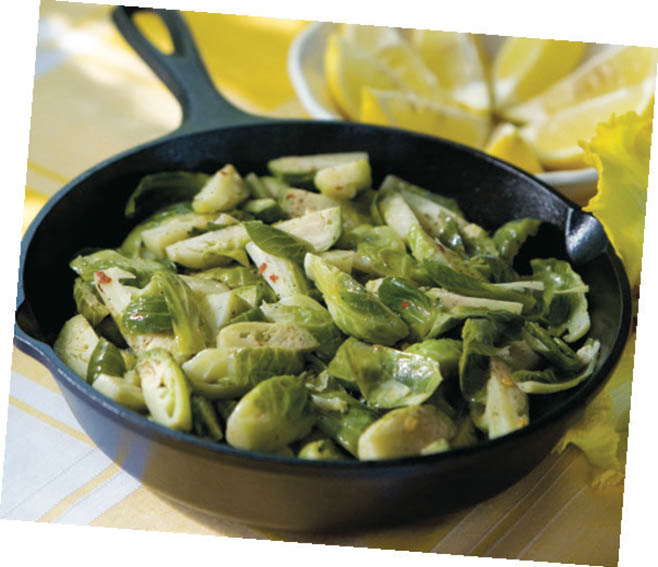
Steamed Brussels Sprouts
MAKES: 4 SERVINGS
12 ozs Brussels sprouts, quartered (about 4 cups)
1/4 cup olive oil
2 t lemon juice
1/2 t salt
1/2 t pepper
1 T Dijon mustard
1/4 t red pepper flakes
-
Fill a large pot with 2” of water; bring to a boil. Place steamer basket
with Brussels sprouts in the pot; cover and steam for 12–15 minutes.
-
In an 8” cast-iron skillet, heat olive oil until warm; add lemon juice,
salt, pepper, mustard, and red pepper flakes; mix well. Add Brussels
sprouts; toss to coat.
Roasted Chicken & Squash
With Herbed Honey Mustard
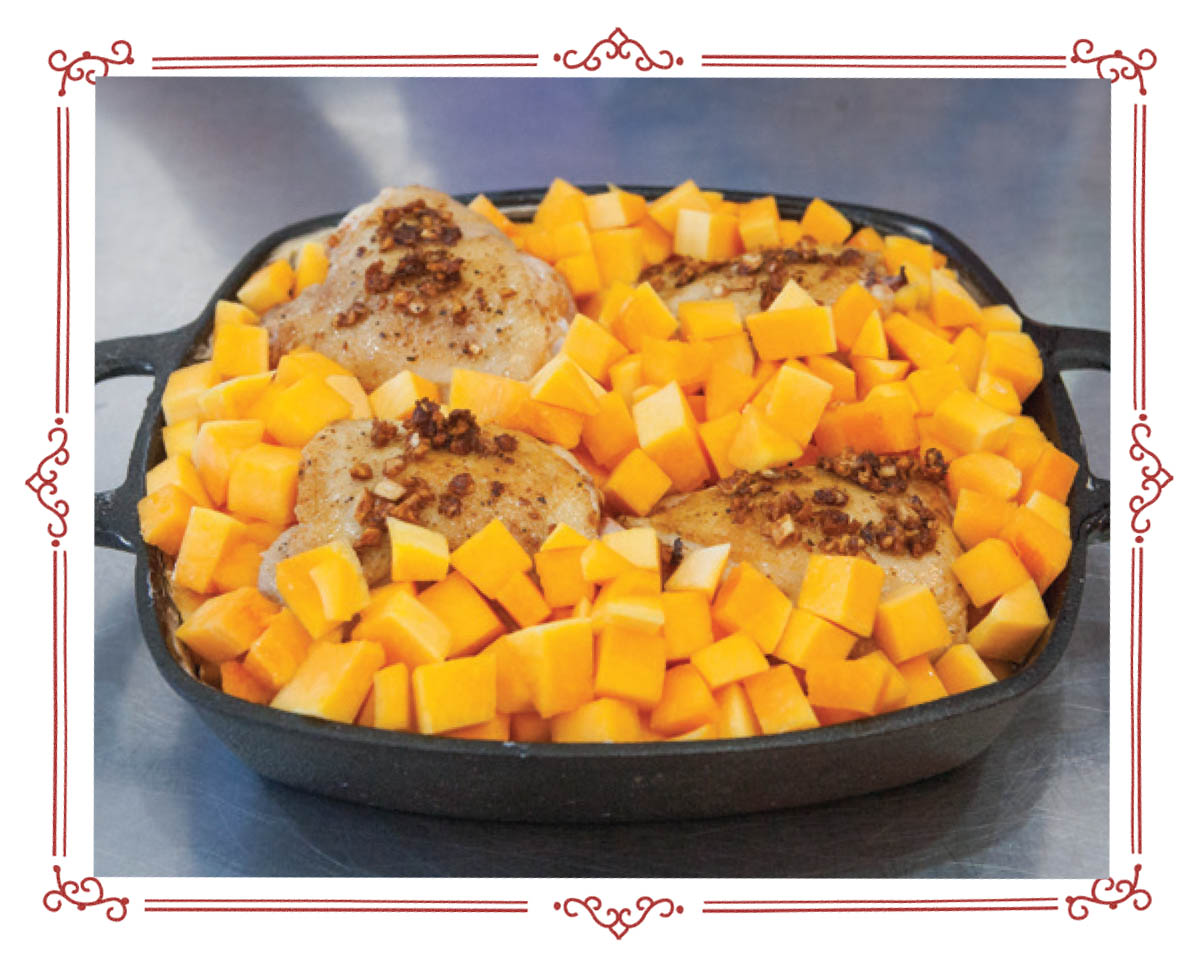
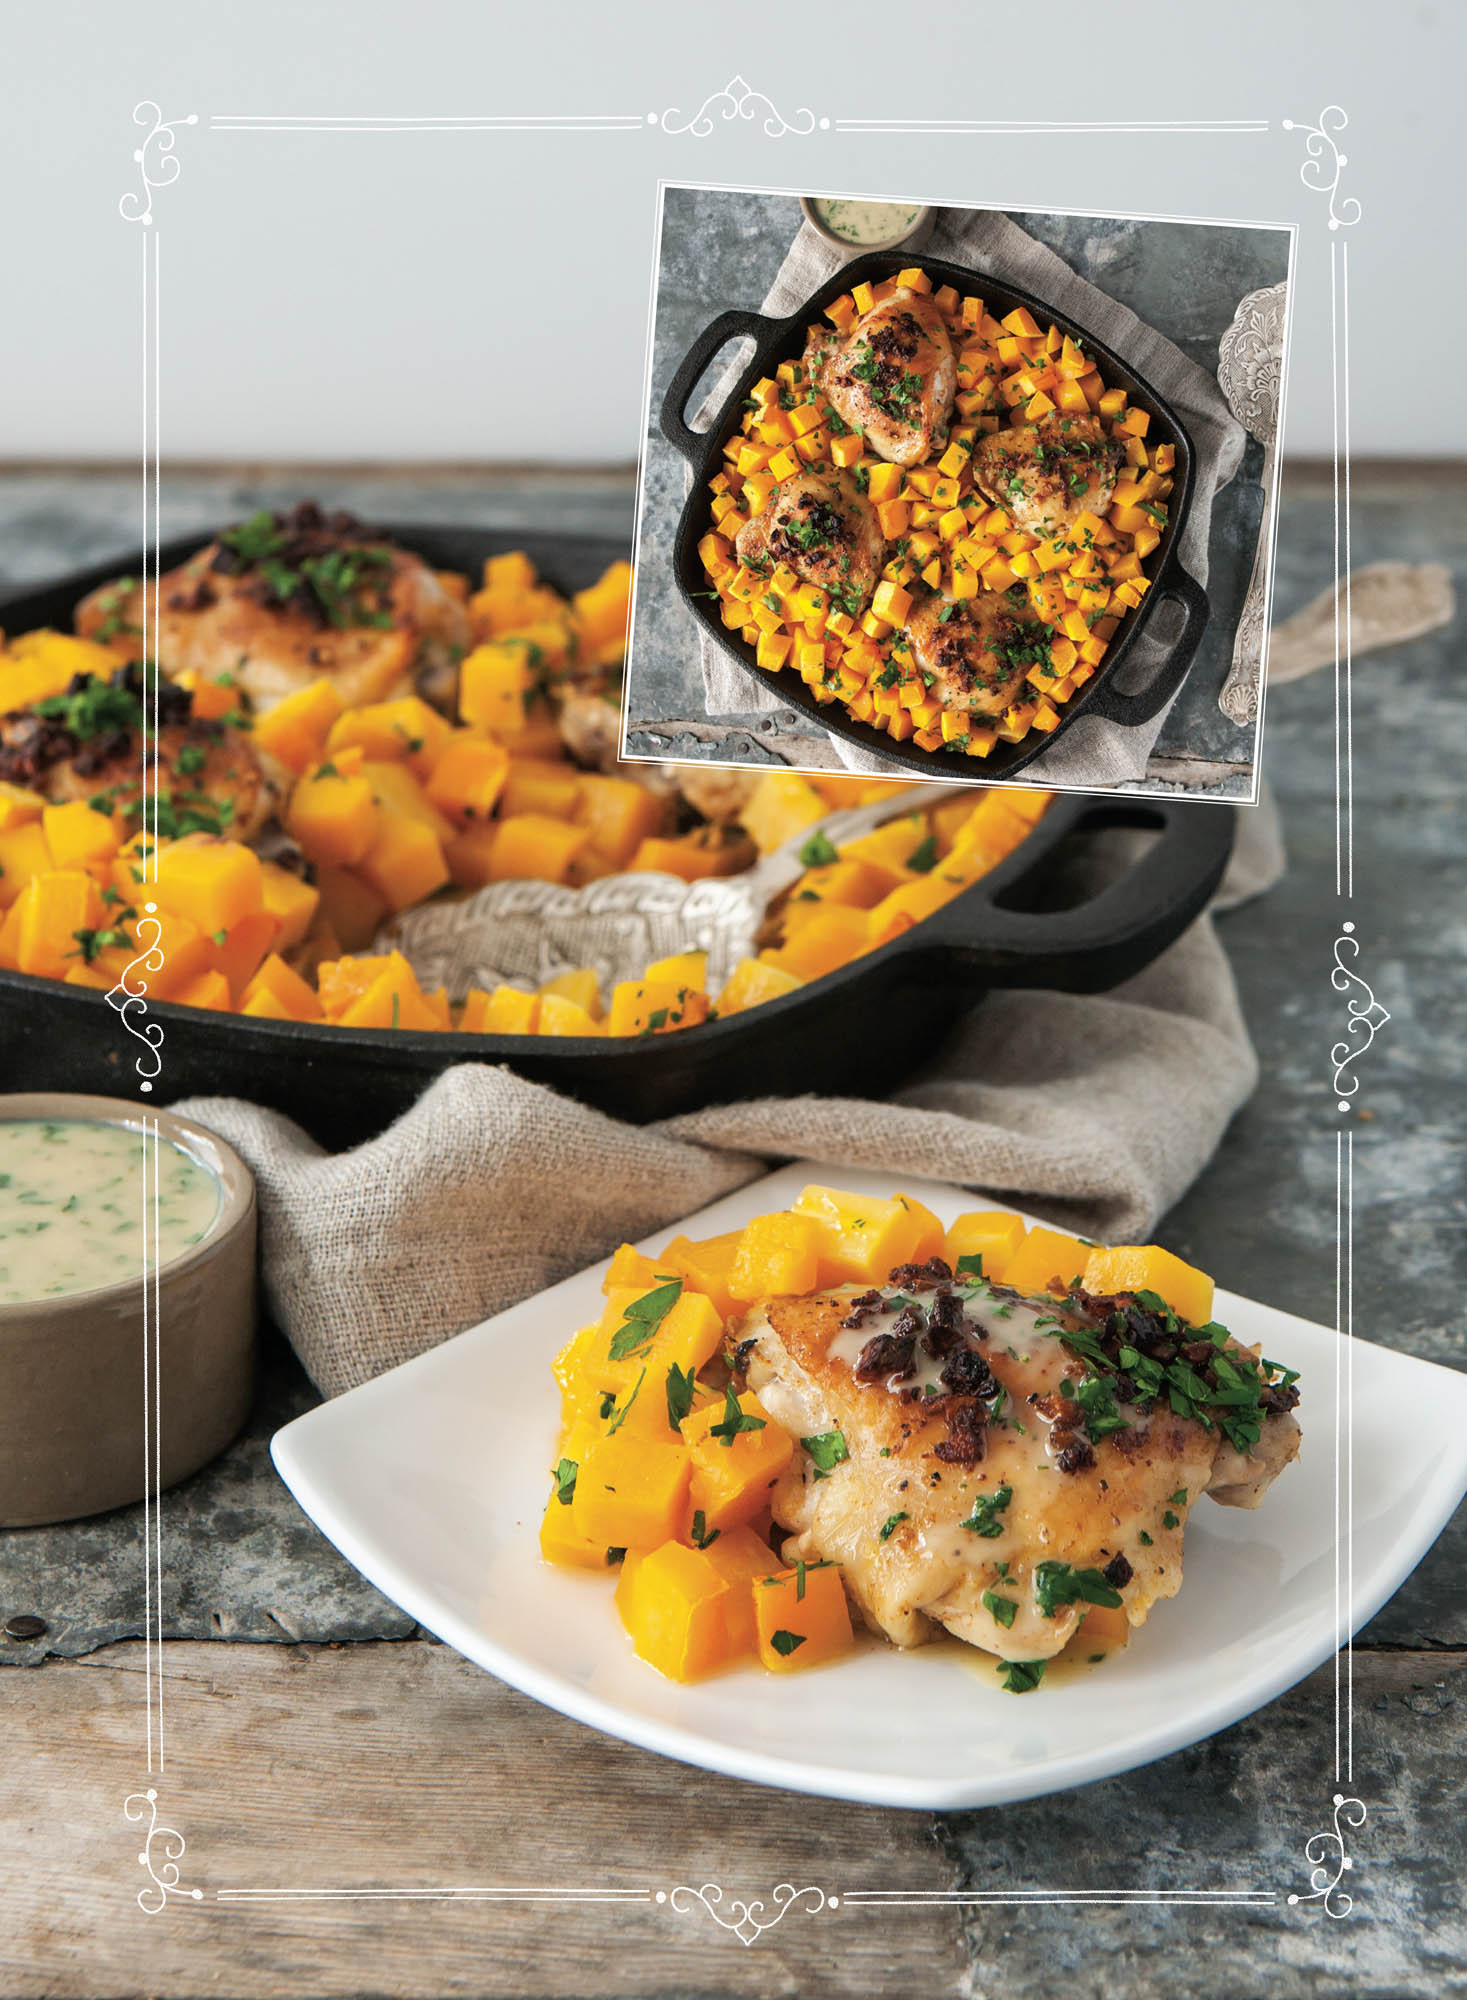
This dish makes a wonderfully simple, yet delicious, weeknight meal.
The chicken thighs are lightly seared, placed on a bed of squash, and baked. As the
chicken cooks, the drippings flavor the squash. The honey-mustard sauce adds a
tangy-sweet twist.
MAKES: 4 SERVINGS
Roasted Chicken &
Squash:
4 bone-in chicken thighs (about 1-1/2–2 lbs)
3 garlic cloves, peeled and minced (about 1 T)
1 t salt
1/2 t paprika
1/4 t pepper
1 T olive oil
3-1/2 lbs buttercup or butternut squash, peeled, seeded and cut
into 1/2” cubes (about 7 cups)
Herbed Honey Mustard:
1/4 cup buttermilk
2 T Dijon mustard
2 T honey
1 T parsley, minced, plus more for garnish.
1 rosemary sprig, de-stemmed and minced (about 1/2 t)
-
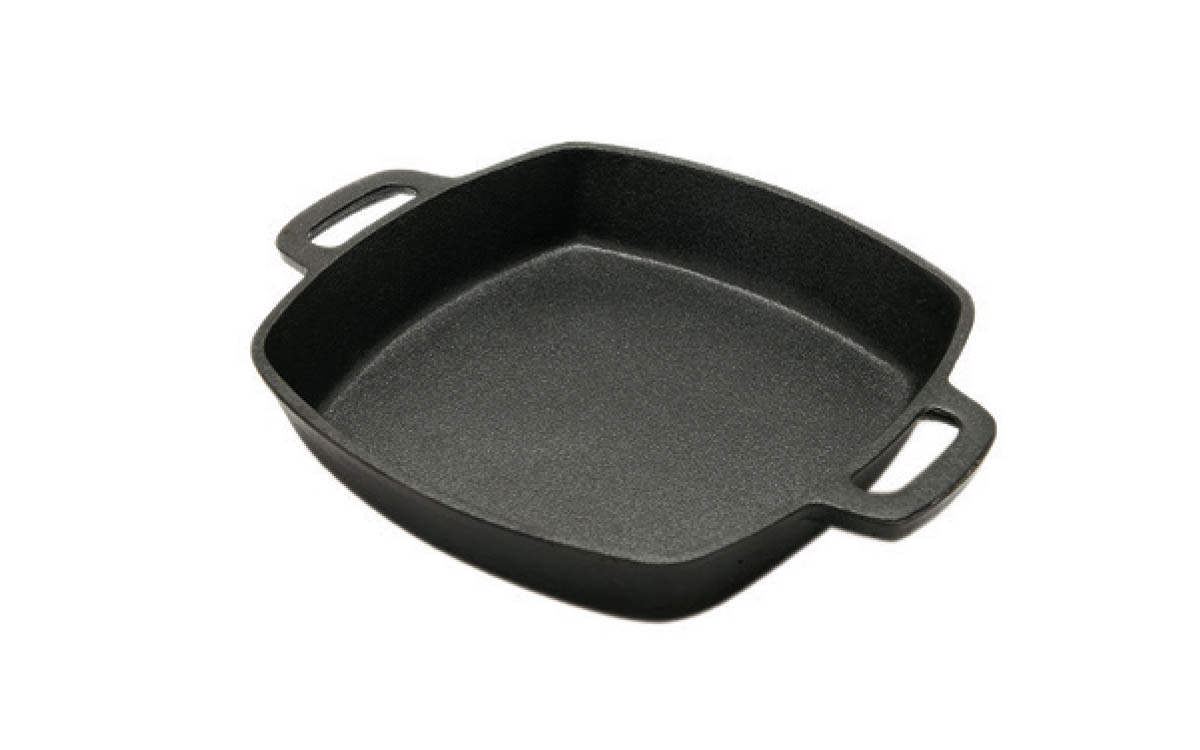
Preheat oven to 400°F. Generously butter a 10” square cast-iron baking
pan.
-
Make roasted chicken and squash: Place chicken thighs on a plate.
-
In a small bowl, combine garlic, salt, paprika, and pepper. Sprinkle over
chicken and rub all over surface of thighs.
-
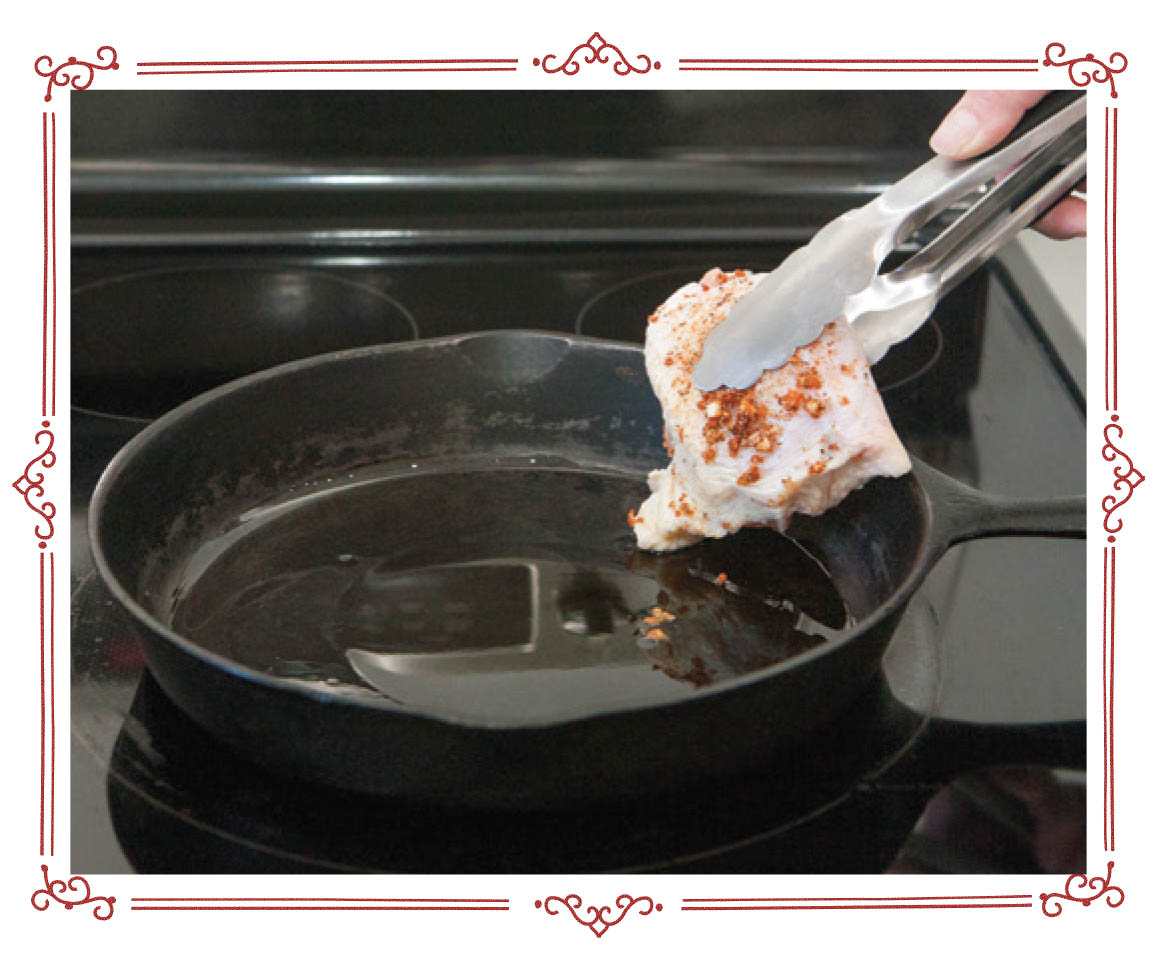
In a medium skillet over medium heat, heat olive oil. Once oil is hot,
add chicken thighs, skin side down. Cook for 5 minutes, flip over, and
cook an additional 5 minutes; remove from heat.
-
Add about 3/4 of the squash to prepared baking pan and place chicken
thighs over squash. Add remaining squash, cover with aluminum foil, and
bake for 30 minutes. Remove foil and bake an additional 20 minutes, or
until internal temperature of the thighs reaches 165°F.
-
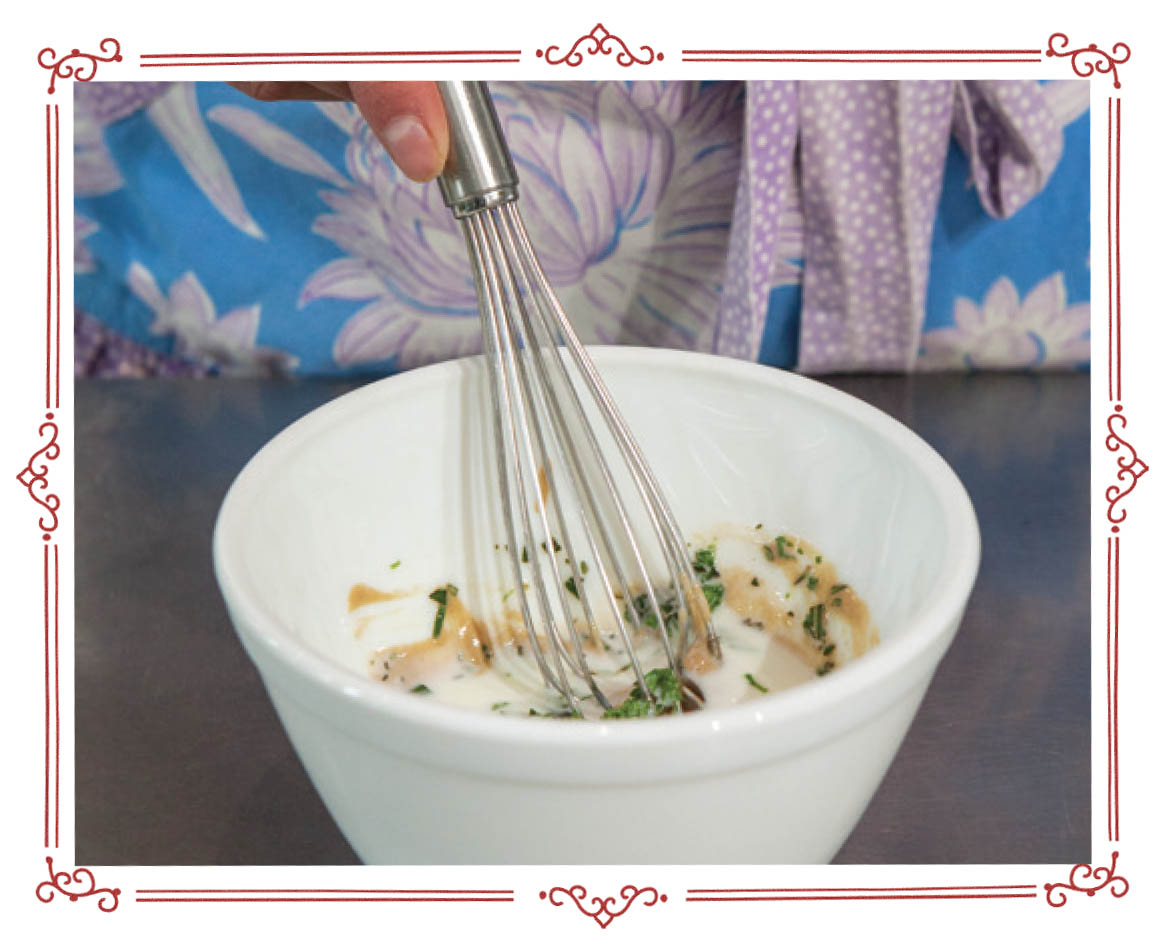
Make honey mustard: In a small bowl, combine buttermilk, mustard, honey,
parsley, and rosemary. Mix well. Cover and refrigerate until ready to
use.
-
Once chicken is ready, sprinkle with fresh minced parsley for garnish and
serve with Herbed Honey Mustard.
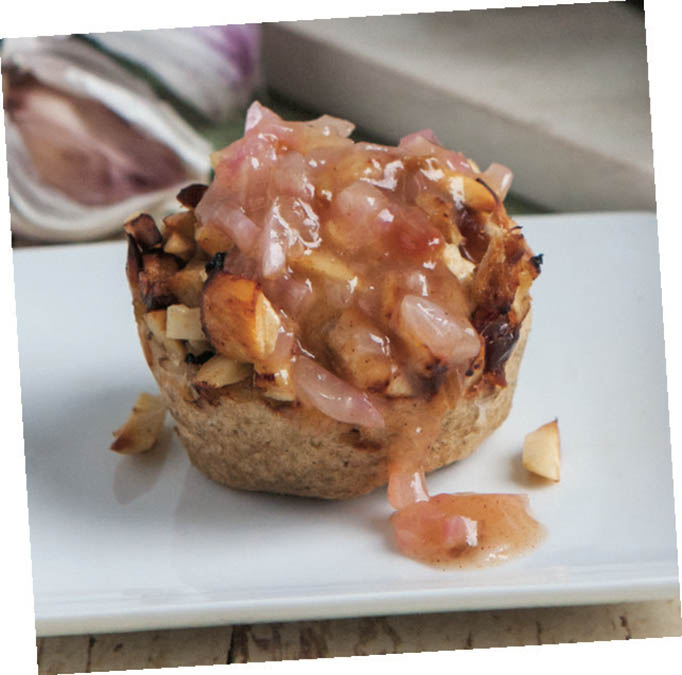
Chicken Puffs With Onion Sauce
The base of each puff is reminiscent of a popover with subtle
cinnamon-nutmeg notes. The topping is a delectable combination of chicken, almonds,
and dates, all dressed up with a tangy onion sauce. This combination of flavors is a
great way to add some interest to your midday meal.
MAKES: 6 PUFFS
Chicken Puffs:
1 T coconut oil
4 ozs boneless, skinless chicken breasts
3 cloves garlic, peeled and minced (about 1 T)
1/2 t red pepper flakes
1/2 t salt, divided
1/3 cup slivered almonds
4 dates, pitted and finely minced (about 1/3 cup)
4 t lemon juice, divided
1/2 cup flour
1/4 t nutmeg
1/4 t cinnamon
1/2 cup coconut milk
2 eggs
Onion Sauce:
1 T coconut oil
1/2 medium red onion, diced
1 T cornstarch
1 cup chicken broth
3 dates, pitted and finely minced (about 1/4 cup)
1 T lemon juice
1-1/2 t distilled white vinegar
1 t brown sugar
1/4 t nutmeg
1/4 t cinnamon
-
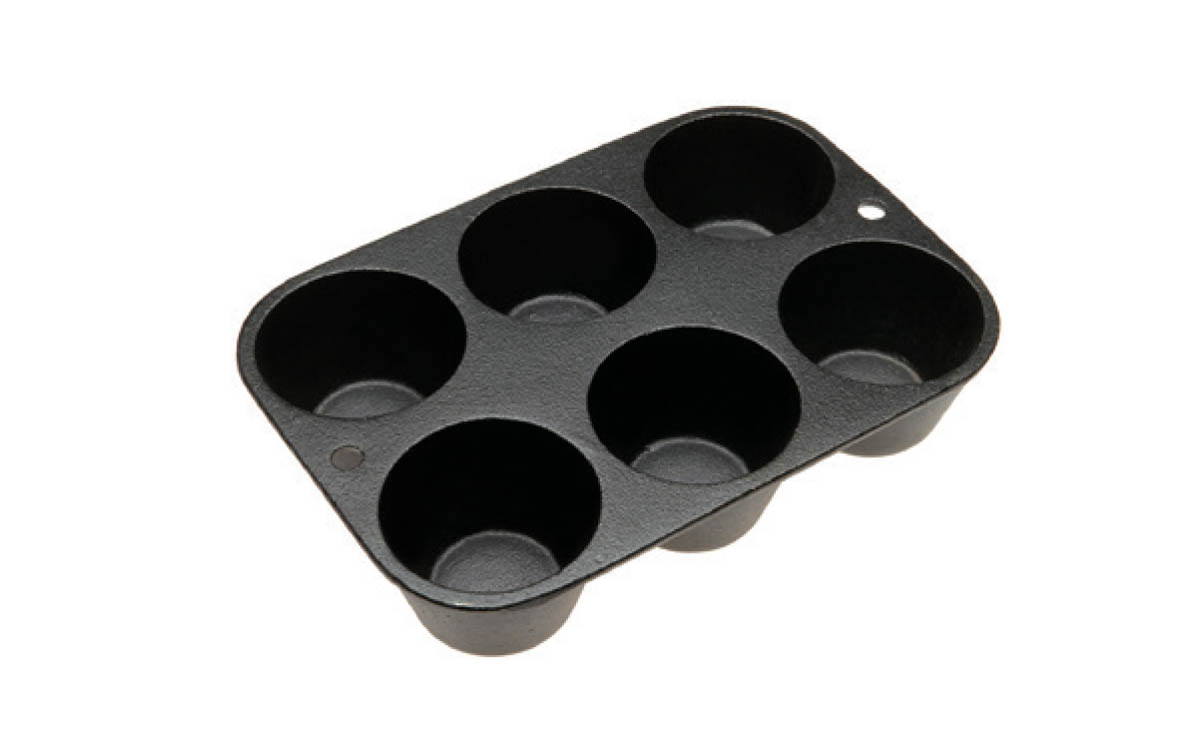
Preheat oven to 425°F. Lightly butter cups of a 6-cavity cast-iron muffin
pan.
-
Prepare chicken puffs: In a small skillet over medium heat, heat coconut
oil. Once oil is hot, add chicken breasts and cook on each side for 6
minutes. Add garlic, red pepper flakes, and 1/4 t salt; cover and cook
an additional 6–8 minutes, or until internal temperature reaches 165°F.
-
Remove chicken from skillet and set aside to cool. Add almonds to skillet
and sauté until golden brown, stirring frequently; remove from skillet
and set aside to cool.
-
Finely dice chicken and add to a medium bowl. Mix in almonds, dates, and
2 t lemon juice.
-
In another medium bowl, combine flour, nutmeg, cinnamon, and remaining
1/4 t salt.
-
In a small bowl, combine coconut milk, eggs, and remaining 2 t lemon
juice; add to flour mixture and combine until mixed thoroughly (batter
will be slightly lumpy).
-
Divide batter evenly between cups in prepared muffin pan. Evenly divide
chicken mixture between cups. Place muffin pan on a large baking sheet
to catch drips, cover with aluminum foil, and bake for 10 minutes.
Remove foil and bake an additional 5 minutes, or until edges are golden
brown and batter is cooked through.
-
Prepare onion sauce: In a small saucepan over medium heat, heat coconut
oil. Add onion and sauté until translucent, about 5 minutes; add
cornstarch and mix well. Add remaining ingredients and continue to cook
over medium heat, stirring occasionally until thickened, about 5
minutes. Serve over puffs.
Swiss-Chard Gratin
I can’t get enough of the earthy, almost musky flavor of chard. I
frequently sauté it with some garlic, olive oil, apple-cider vinegar, and a generous
sprinkle of black pepper and call it dinner. But sometimes, we all need a little
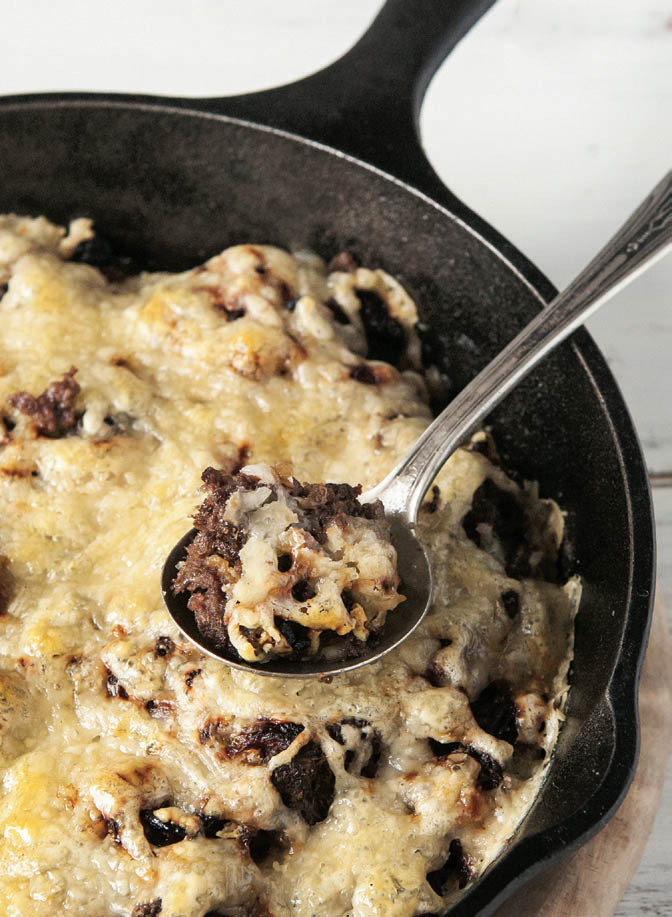
decadence, and that’s what this dish is. When baked in cast iron, the edges of the
gratin turn a perfect golden-brown and are, in my opinion, the best part of the
dish.
MAKES: 8 SERVINGS
4 lbs Swiss chard
3 T butter
1/2 onion, peeled and diced (about 1 cup)
3 garlic cloves, peeled and minced (about 1 T)
1 t salt
1/2 t pepper
1/4 t nutmeg
2 T flour
2-1/4 cups milk
5 ozs Gruyère cheese, shredded and divided (about 1-1/4 cups)
-
Fill a large stockpot with water, leaving about 5” of room at the top.
Bring water to a boil. Wash chard and remove stems, reserving about a
third of the stems and discarding the rest.
-
When water begins to boil, prepare an ice-water bath in a large bowl. Add
chard to the boiling water and cook for 2–3 minutes. (The color of the
chard will brighten, but it should still have a little crispness to it.)
Transfer chard immediately to the ice-water bath.
-
Line a colander with a thin dishtowel and pour chard into colander. Let
water drain off, and then gather the edges of the cloth and wring out as
much water as you can from the chard. You should end up with a firm
ball. Transfer to a cutting board and slice the ball lengthwise into 1”
sections, and then crosswise into 1” sections. Set aside.
-
Preheat oven to 400°F. Lightly butter a 36-oz cast-iron serving dish.
-
Dice the reserved stems and add to a large skillet, along with butter,
onion, garlic, salt, pepper, and nutmeg.
-
Sauté over medium heat for about 5 minutes. Stir in flour and cook for
about 1 minute. Reduce heat to medium low and slowly add milk, mixing
well. Cook until milk has thickened and begins to bubble, stirring
frequently. Add about 3/4 cup of Gruyère, reserving the other 1/2 cup
for the top. Stir mixture until the cheese has melted, then turn off the
heat and mix in the prepared chard. Pour into prepared serving dish, and
top with remaining cheese.
-
Bake for 15–20 minutes, or until sides are bubbling and cheese has
browned.
Chicken, Bacon & Swiss
Hand Pies
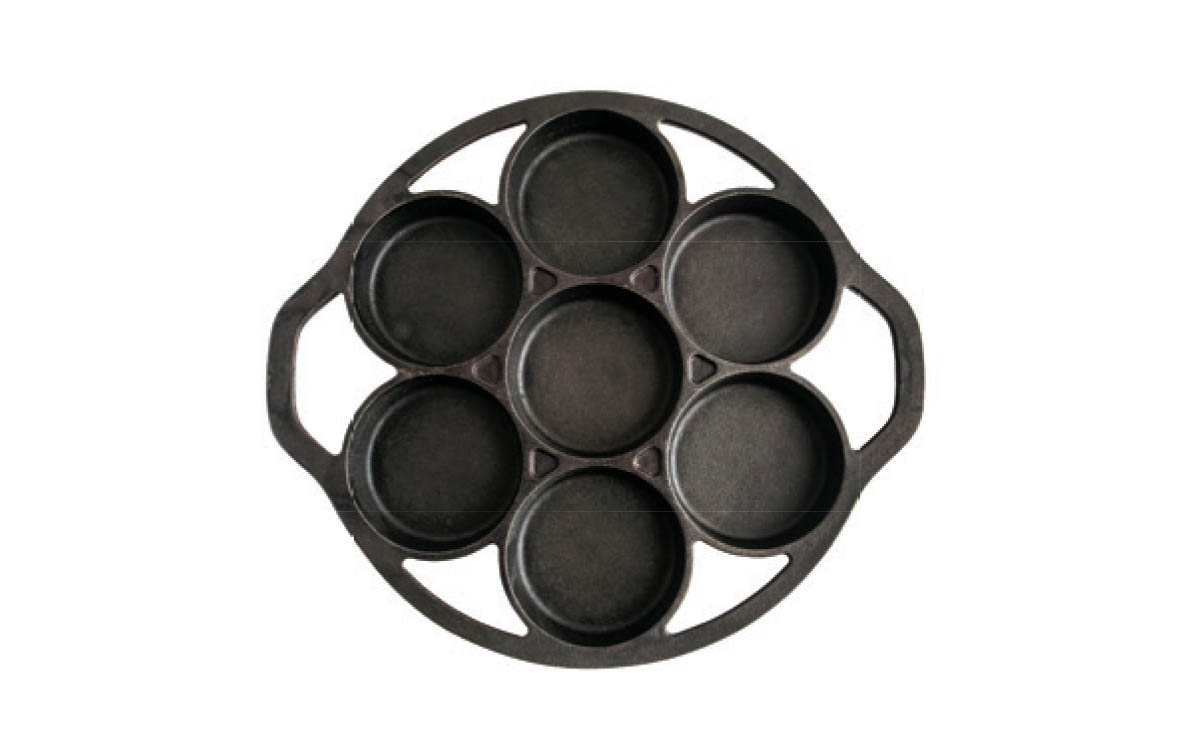
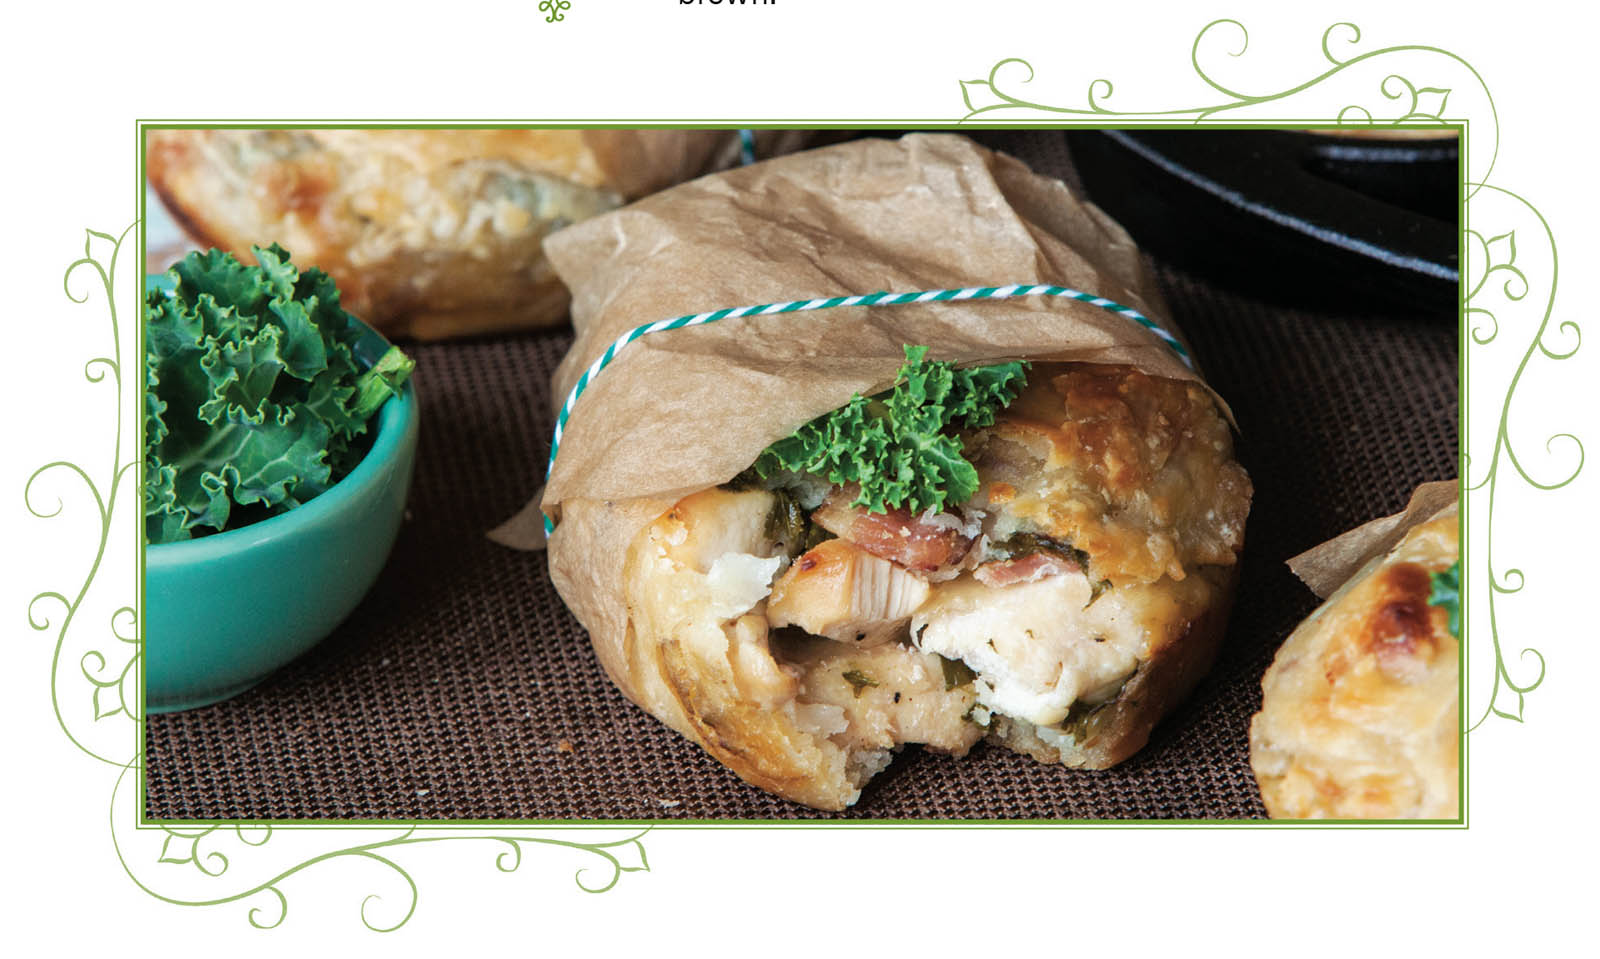
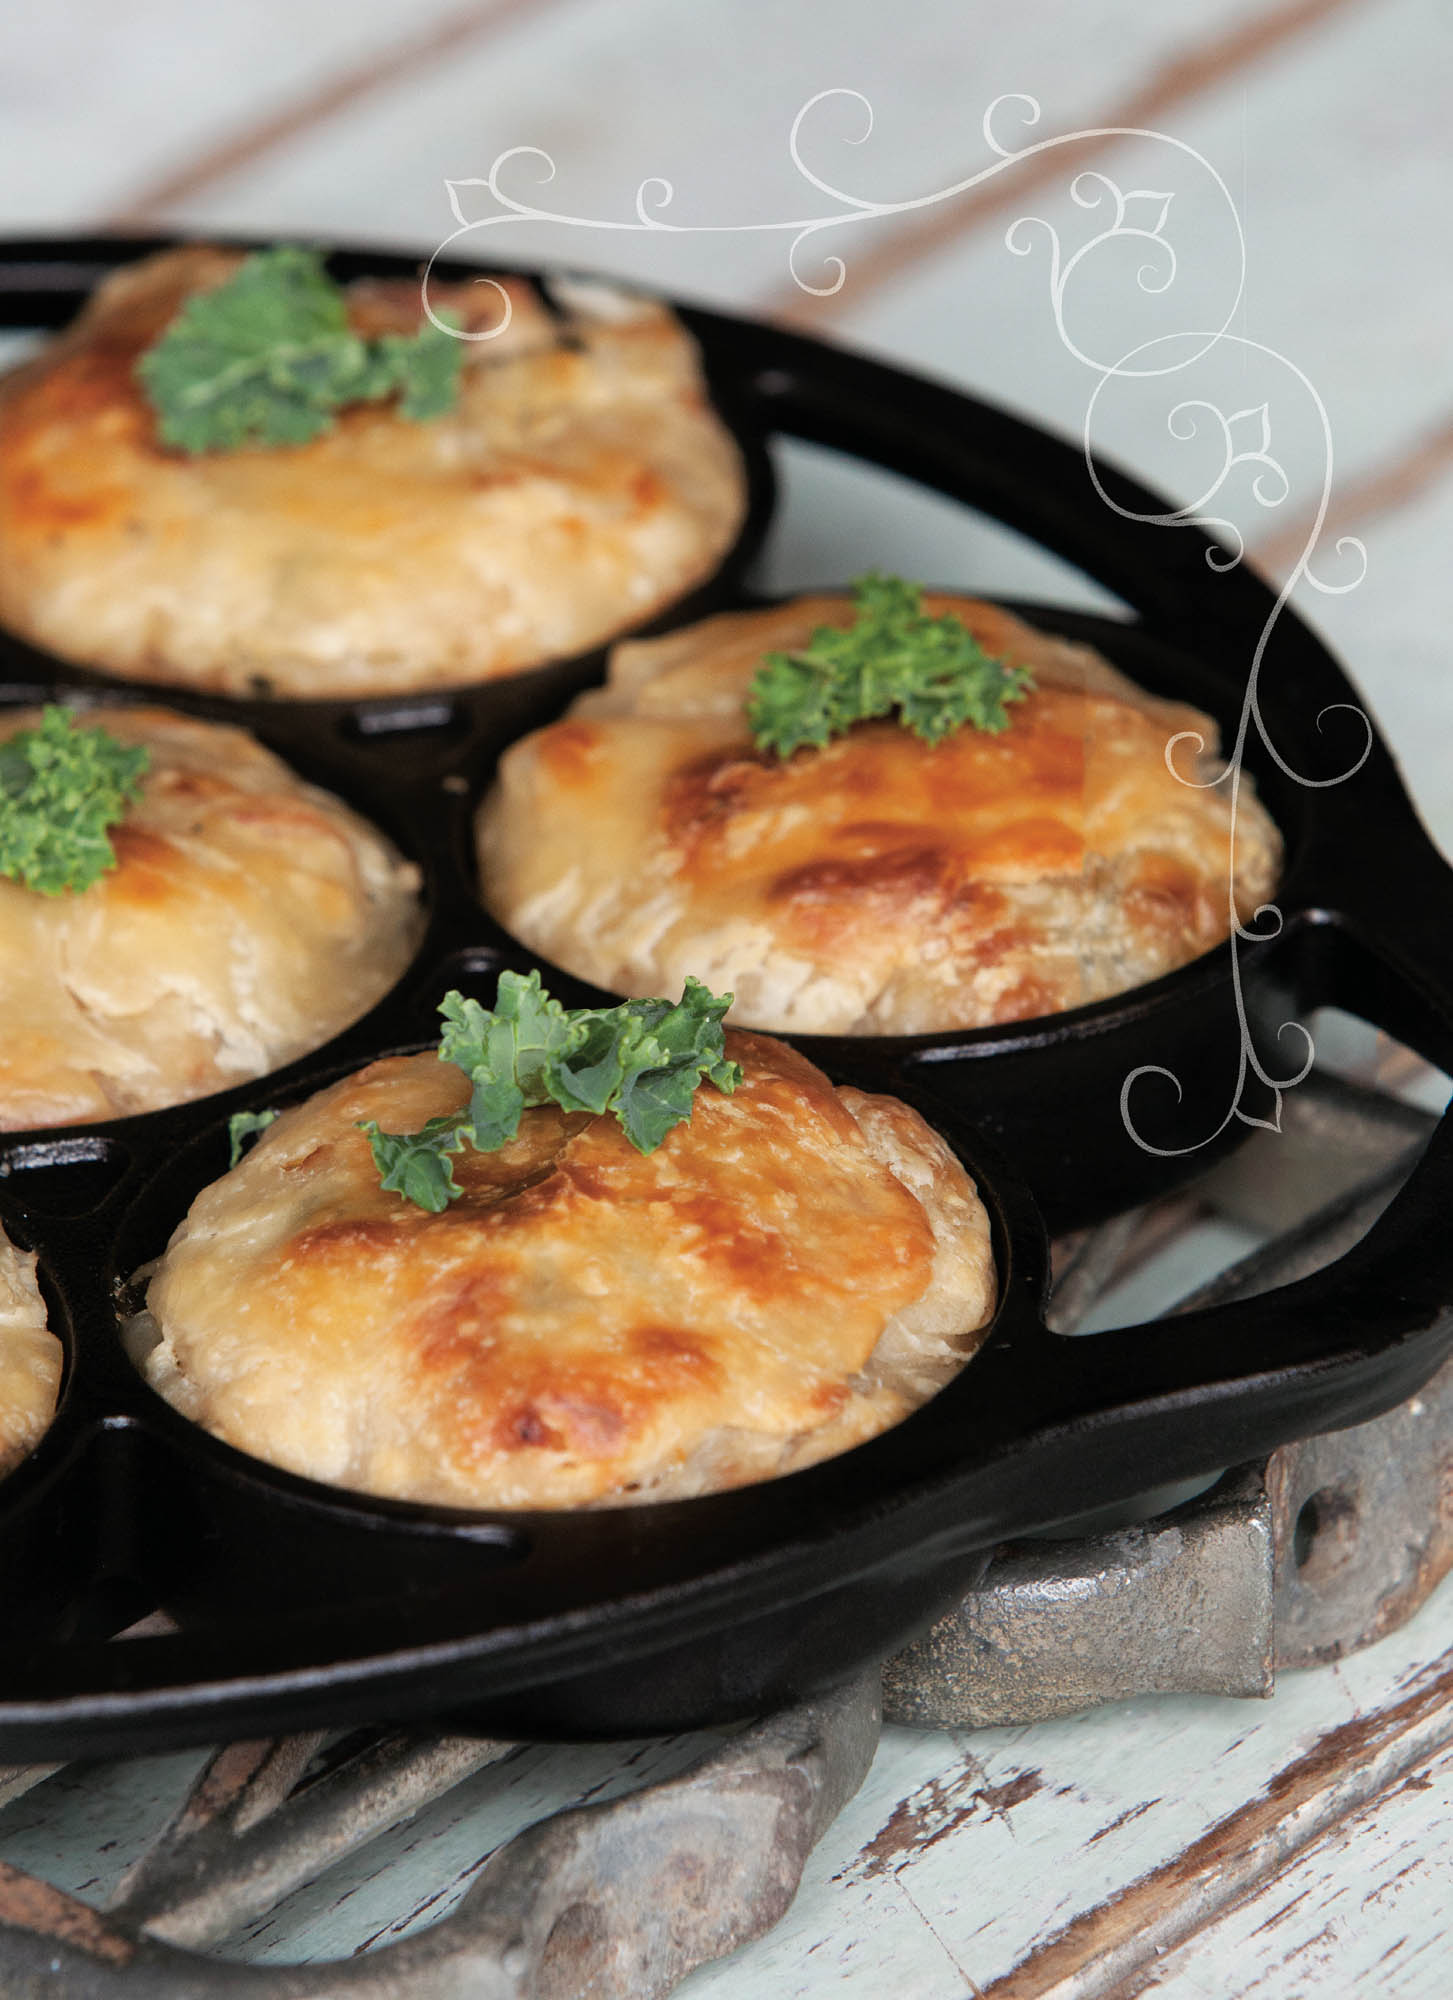
With its great versatility, this mini-cake pan is another of my
favorite cast-iron pans. For this particular dish, I would be hardpressed to find a
pan that makes perfectly sized hand pies with such a wonderfully browned crust.
These hand pies are great as a make-ahead meal that you can grab-and-go.
MAKES: 7 PIES
Crust:
1-3/4 cups flour, plus more for dusting
1 t baking powder
3/4 t baking soda
1/4 t salt
4 T cold butter
1 cup buttermilk
Filling:
4 ozs bacon (about 4 slices), diced
1-1/2 lbs boneless, skinless chicken breasts, diced
1/4 t salt
1/4 t pepper
8 ozs Swiss cheese, shredded (about 1 cup)
2 ozs kale, coarsely diced (about 2 cups)
-
Preheat oven to 400°F. Lightly butter a cast-iron mini-cake pan.
-
Make crust: In a medium bowl, combine flour, baking powder, baking soda,
and salt. Cut in butter until mixture resembles coarse crumbs. Add
buttermilk and stir until dough forms.
-
Dust work surface with flour and roll dough to 1/8 “ thickness. Cut dough
into seven 6” squares and line each cup of prepared mini-cake pan with a
square.
-
Make filling: In a medium skillet, cook bacon over medium heat for about
5 minutes. Add chicken, salt, and pepper. Continue to cook over medium
heat until bacon is crispy and chicken is cooked.
-
Transfer chicken mixture to a medium bowl, draining off any fat. Add
Swiss cheese and kale; stir to combine.
-
Divide mixture evenly between mini-cake pan cups and wrap dough over top.
Bake for 30 minutes, or until crust is golden brown.
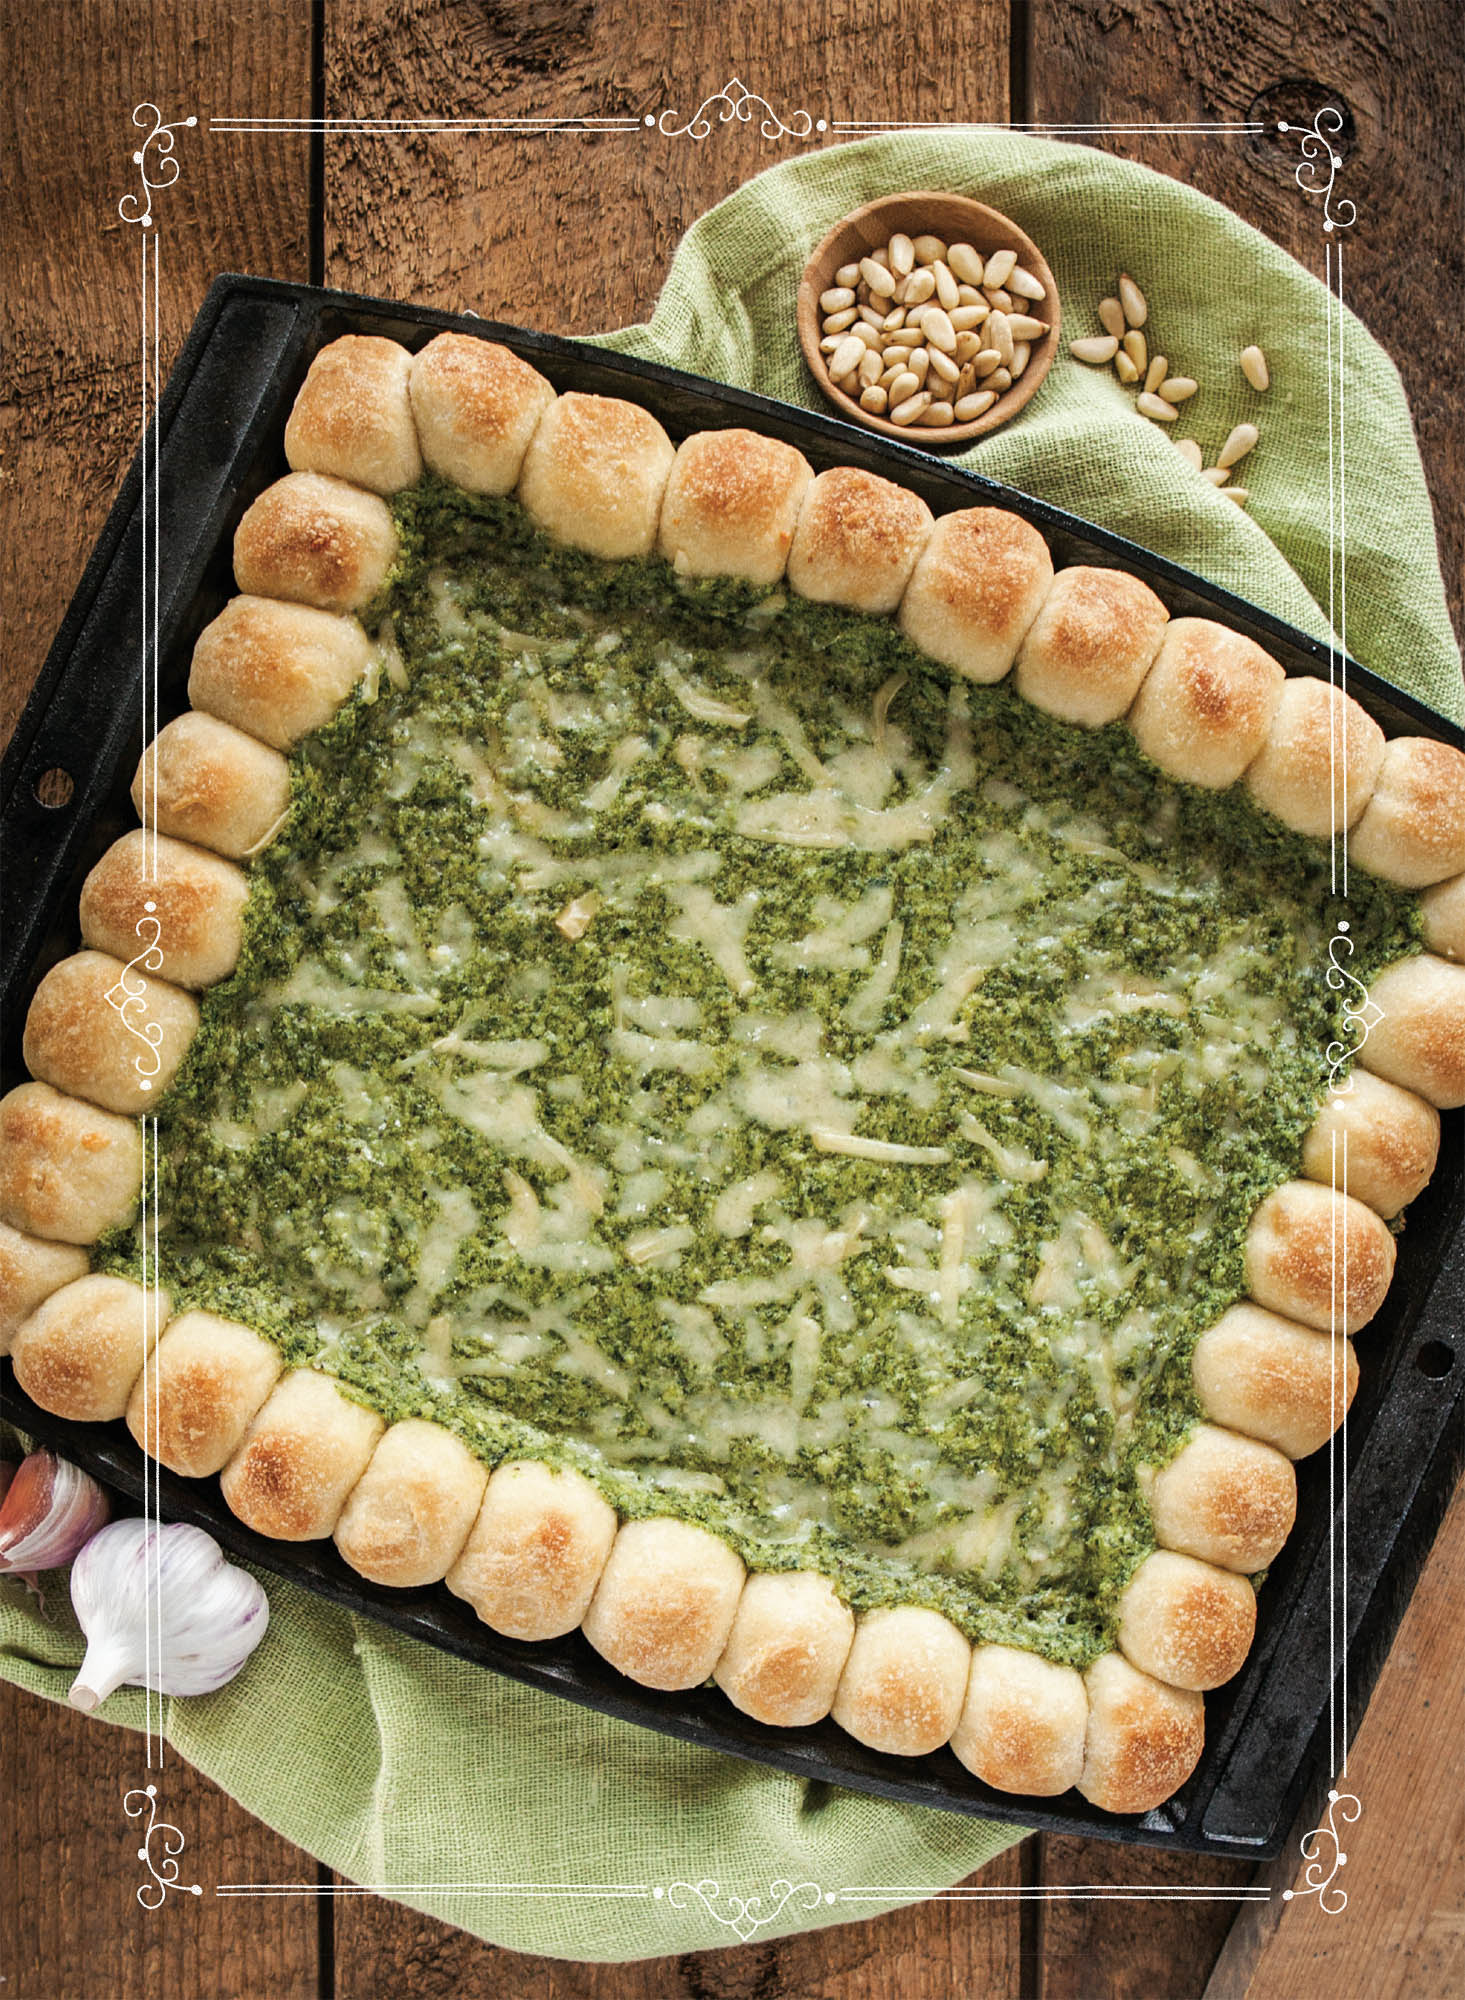
Spinach Dip With Panbread Bites
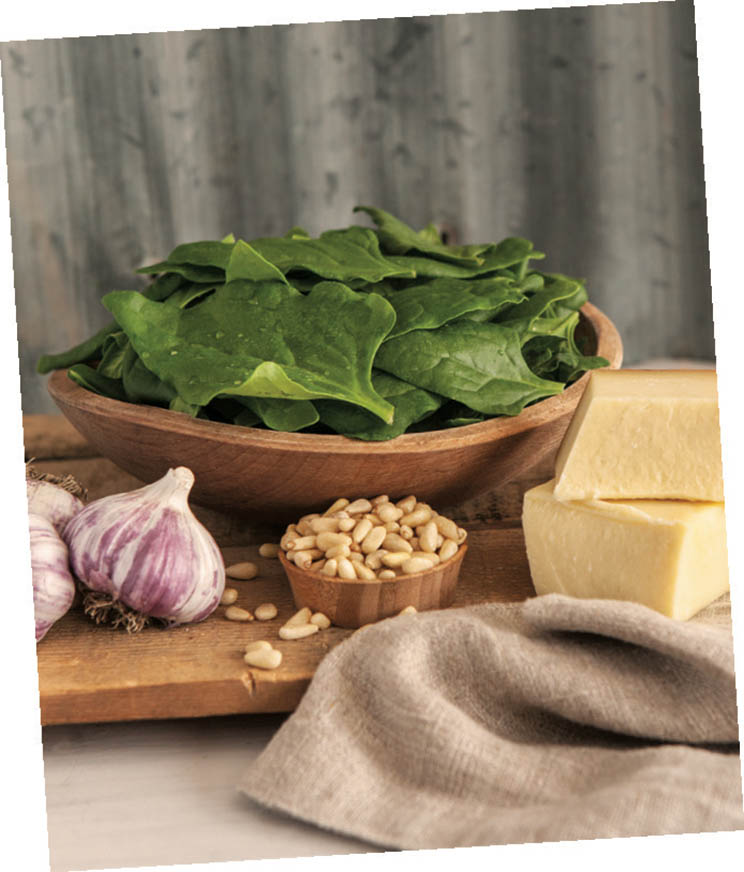
With its eye-catching presentation and fuss-free serving, this dish
begs to be made for your next get-together. Did I mention that it’s delicious?
MAKES: 10–12 SERVINGS
Spinach Dip:
2 T butter
1/2 medium sweet white onion, peeled and finely diced (about 1
cup)
3 garlic cloves, peeled and minced (about 1 T)
10 ozs frozen spinach, thawed and squeezed dry
6 ozs shredded Gruyère cheese (about 1-1/2 cups), divided
8 ozs cream cheese (about 1 cup), softened
2/3 cup sour cream
1/3 cup pine nuts
3/4 t salt
1/2 t pepper
Panbread:
2-1/4 cups flour, plus more for dusting
1-1/2 t baking powder
3/4 t baking soda
3/4 t salt
1-1/2 T olive oil
1-1/2 T honey
3/4 cup warm water
1 t butter, melted
-
Make spinach dip: In a medium skillet over medium heat, cook butter,
onion, and garlic until onion is soft; remove from heat.
-
Add spinach, 1 cup Gruyère, cream cheese, sour cream, pine nuts, salt,
pepper, and onion mixture to a food processor; pulse until smooth.
-
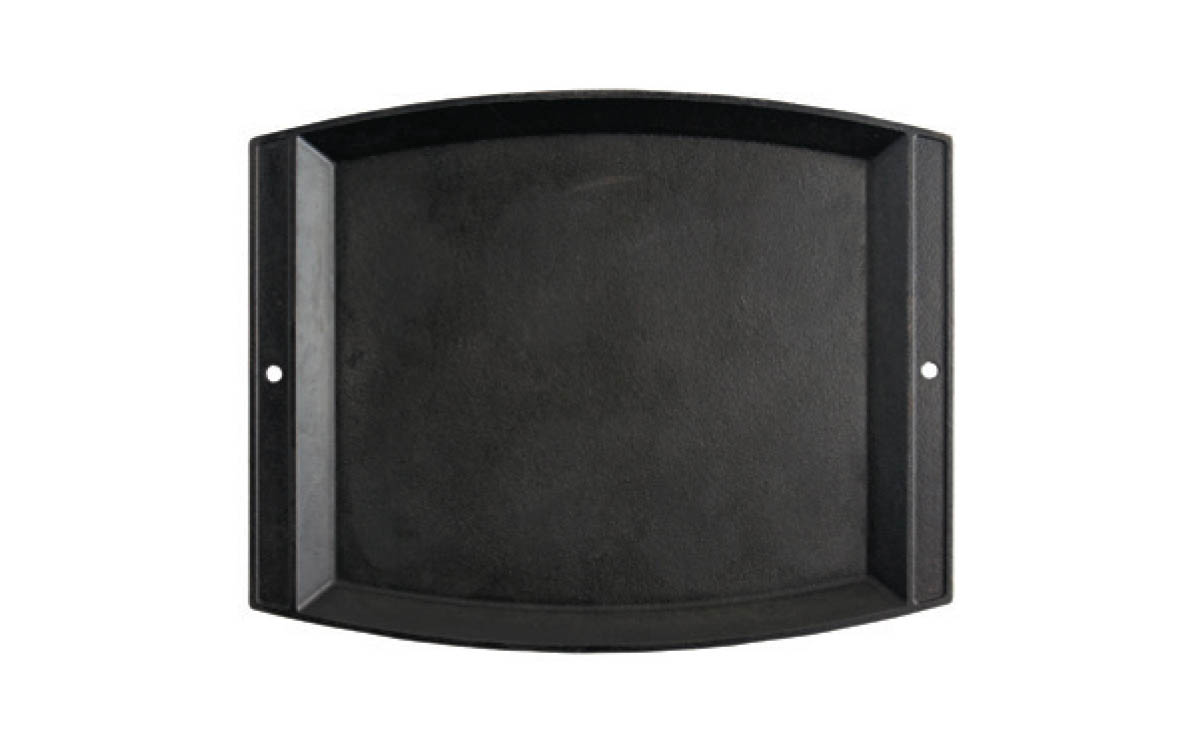
Lightly butter a 15” x 12.” cast-iron griddle. Preheat oven to 425°F.
-
Spread spinach dip in a smooth layer onto cast-iron griddle; set aside.
-
Make panbread: In a medium bowl, combine flour, baking powder, baking
soda, and salt; make a well in the center.
-
In a small bowl, combine oil, honey, and water. Pour water into flour
mixture and stir until blended (add more flour or water, if needed, to
make the dough tacky, but not sticky).
-
Divide dough into 34 small pieces and shape each piece into an oval,
dusting with flour as needed. Line sides of pan with shaped bread. Brush
with melted butter.
-
Sprinkle remaining 1/2 cup Gruyère over spinach dip and bake for 15–18
minutes, or until spinach dip is bubbling and bread is golden brown.
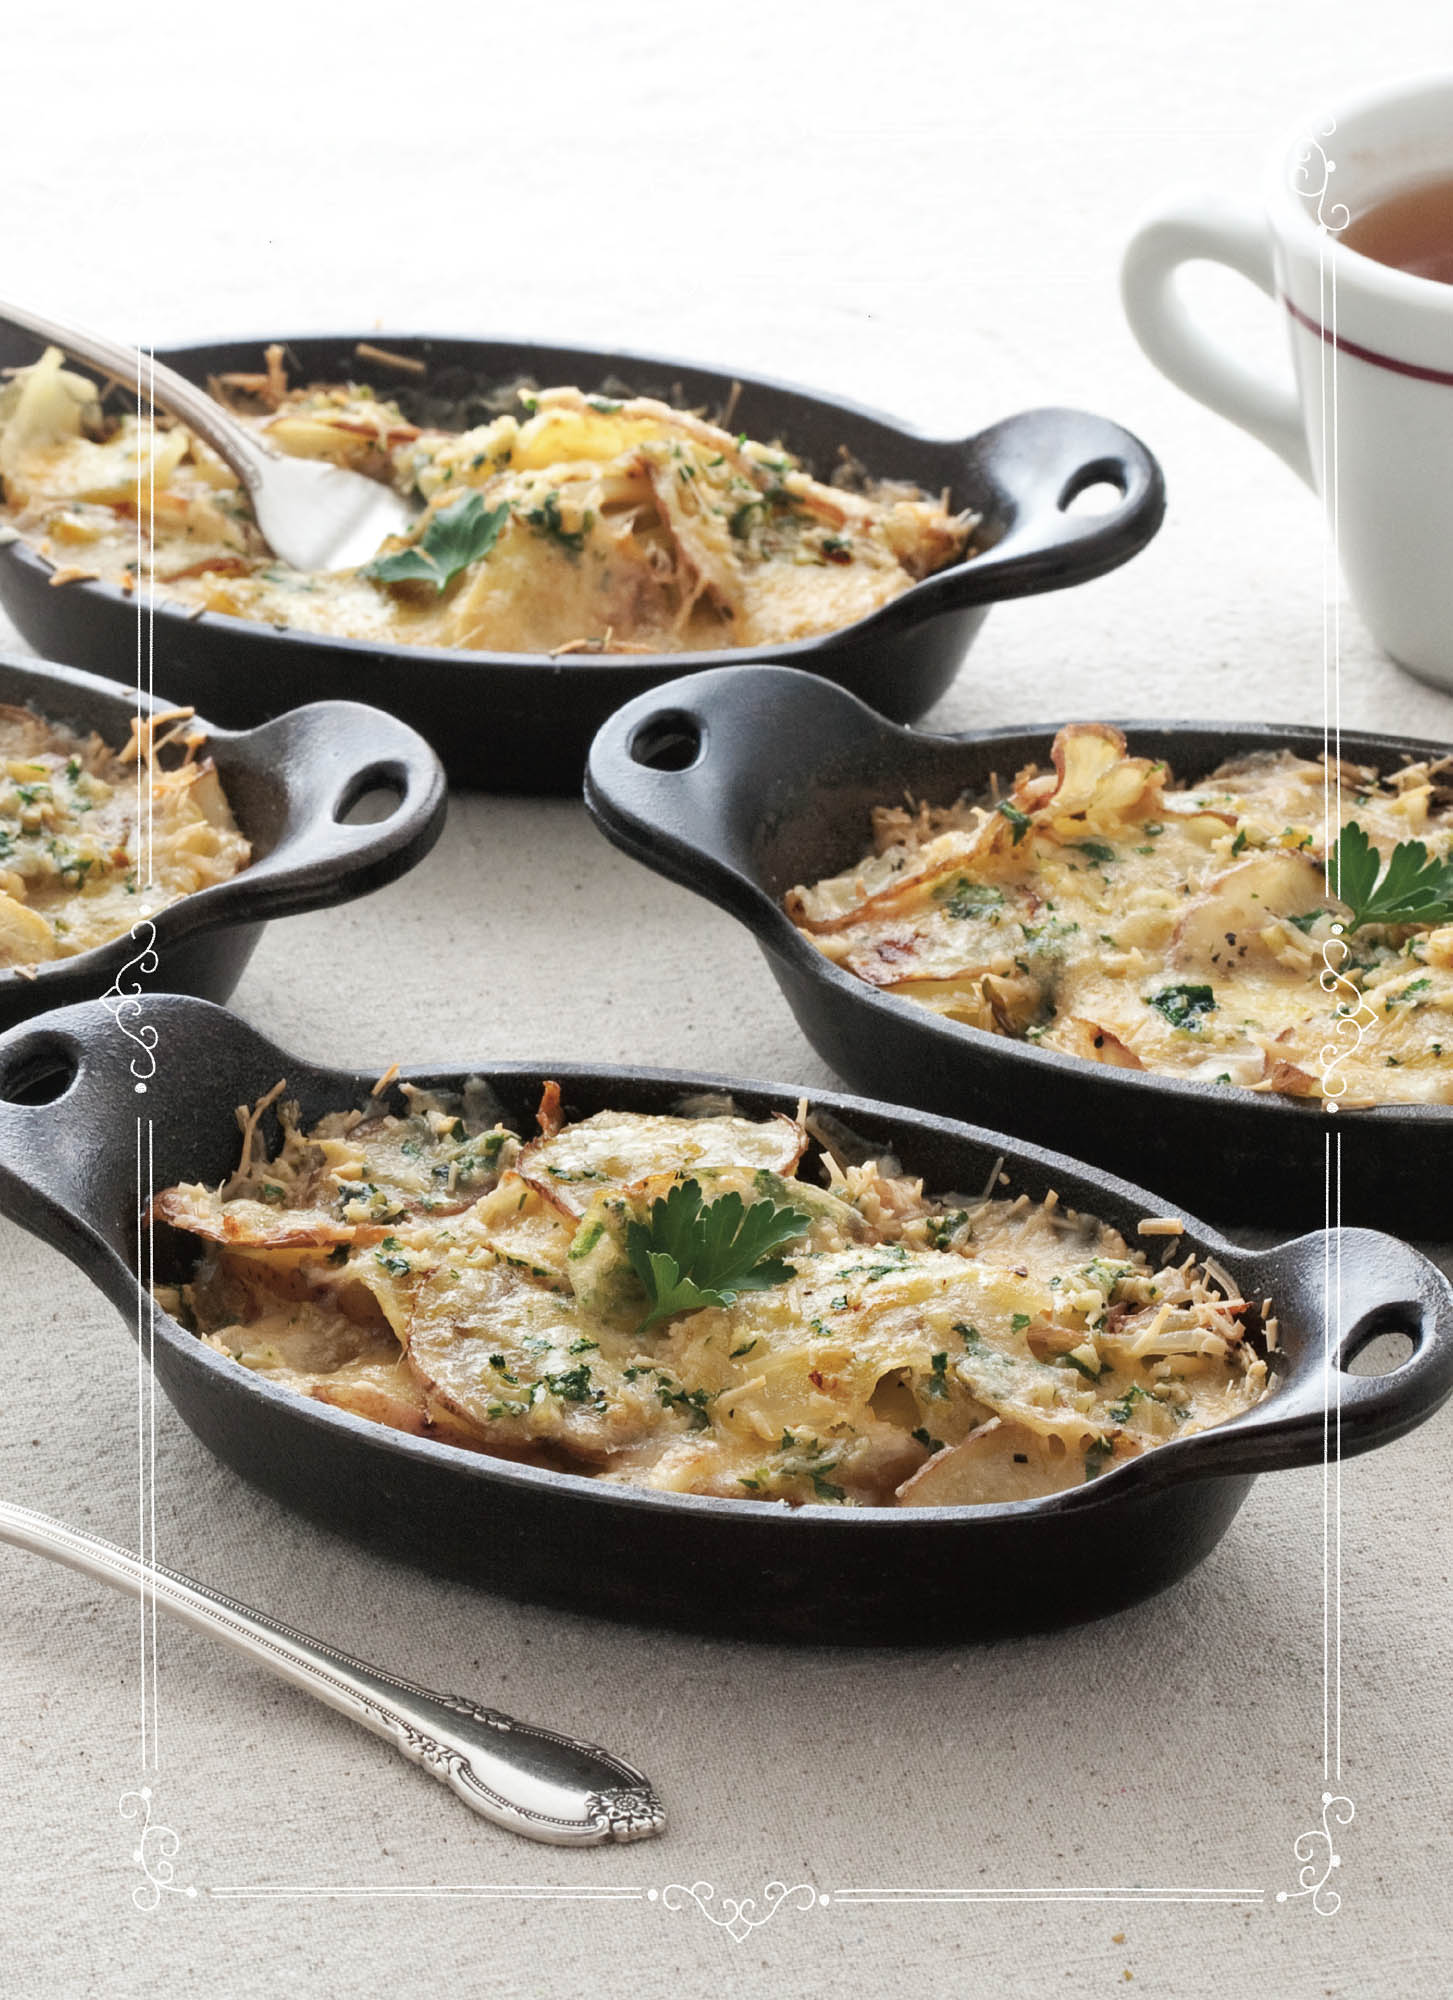
Parmesan & Garlic
Single-Serve Brunch Potatoes
I was trying to come up with a way to turn a “mess of taters” into
an elegant presentation for my B&B guests, so of course, I turned to cast
iron. Cast iron and a late morning campfire go together like a cup and coffee.
MAKES: 4 TRAYS
2 lbs potatoes, halved and sliced into 1/4”-thick slices
4 T butter, divided
1/8 t salt
1/8 t pepper
4 garlic cloves, peeled and minced (about 4 t)
4 T fresh parsley, minced
1 oz sharp Cheddar cheese, shredded (about 1/4 cup)
2 ozs Parmesan cheese, shredded (about 1/2 cup)
1 oz Gruyère cheese, shredded (about 1/4 cup)
1/2 cup heavy cream
-
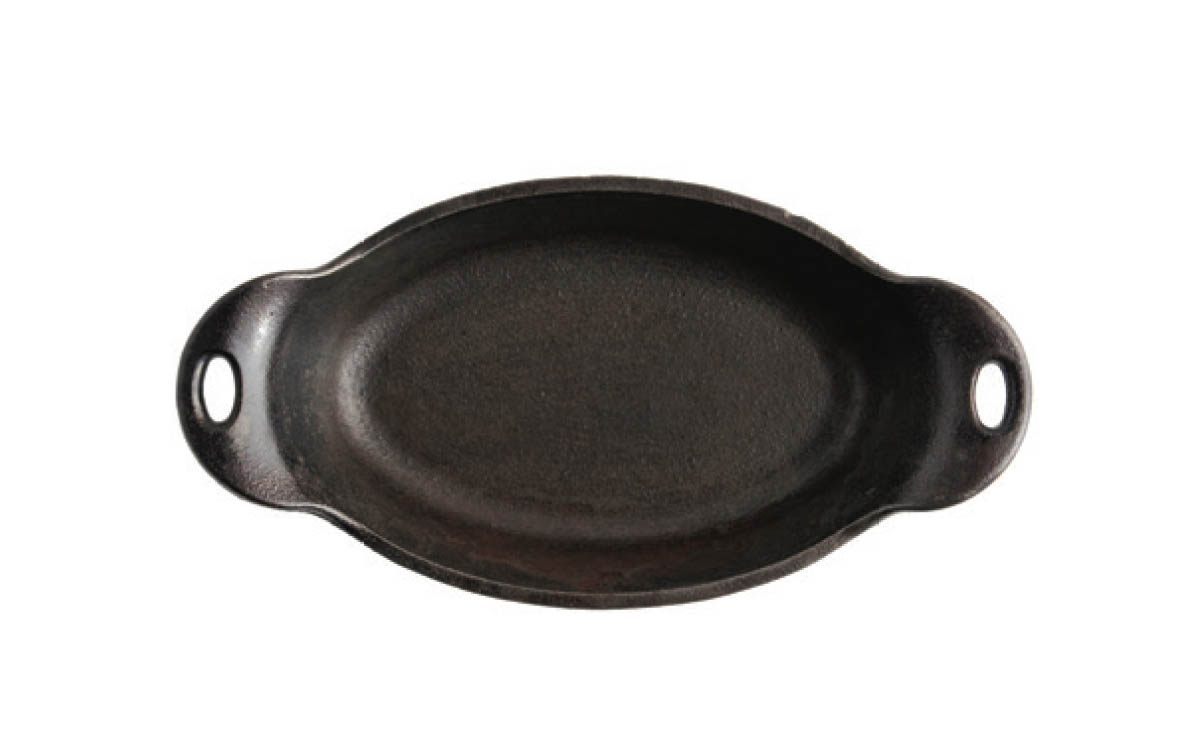
Preheat oven to 450°F. Lightly butter eight 9-oz cast-iron oval
mini-servers.
-
Add potatoes to a large bowl. Melt 2 T butter and add to potatoes. Add
salt and pepper and toss to coat. Evenly divide potatoes between two
large baking sheets and spread in a single layer. Bake, turning
frequently, until potatoes are golden brown and slightly crisp (about 35
minutes). Remove from oven and cool slightly.
-
Reduce oven temperature to 350°F.
-
In a small skillet, sauté garlic in remaining 4 T butter until golden
brown. Remove from heat; stir in parsley. Set aside.
-
Arrange a layer of potatoes in the bottom of prepared oval mini-servers.
Evenly divide Cheddar among trays and top each tray with 1 T Parmesan.
Evenly divide remaining potatoes, Gruyère, and remaining Parmesan among
trays. Evenly divide garlic/parsley mixture among trays; pour 2 T cream
over each tray.
-
Place trays on a large baking sheet and bake for 25 minutes, or until
cheese is golden brown.
“Any chance I can get your recipe for the cast-iron potatoes you
served to me and my husband when we stayed at your B&B this past
summer? I can’t get them off my mind. They were
that good.”
– Mildred “Milly” Ross
Sour Cream & Chive
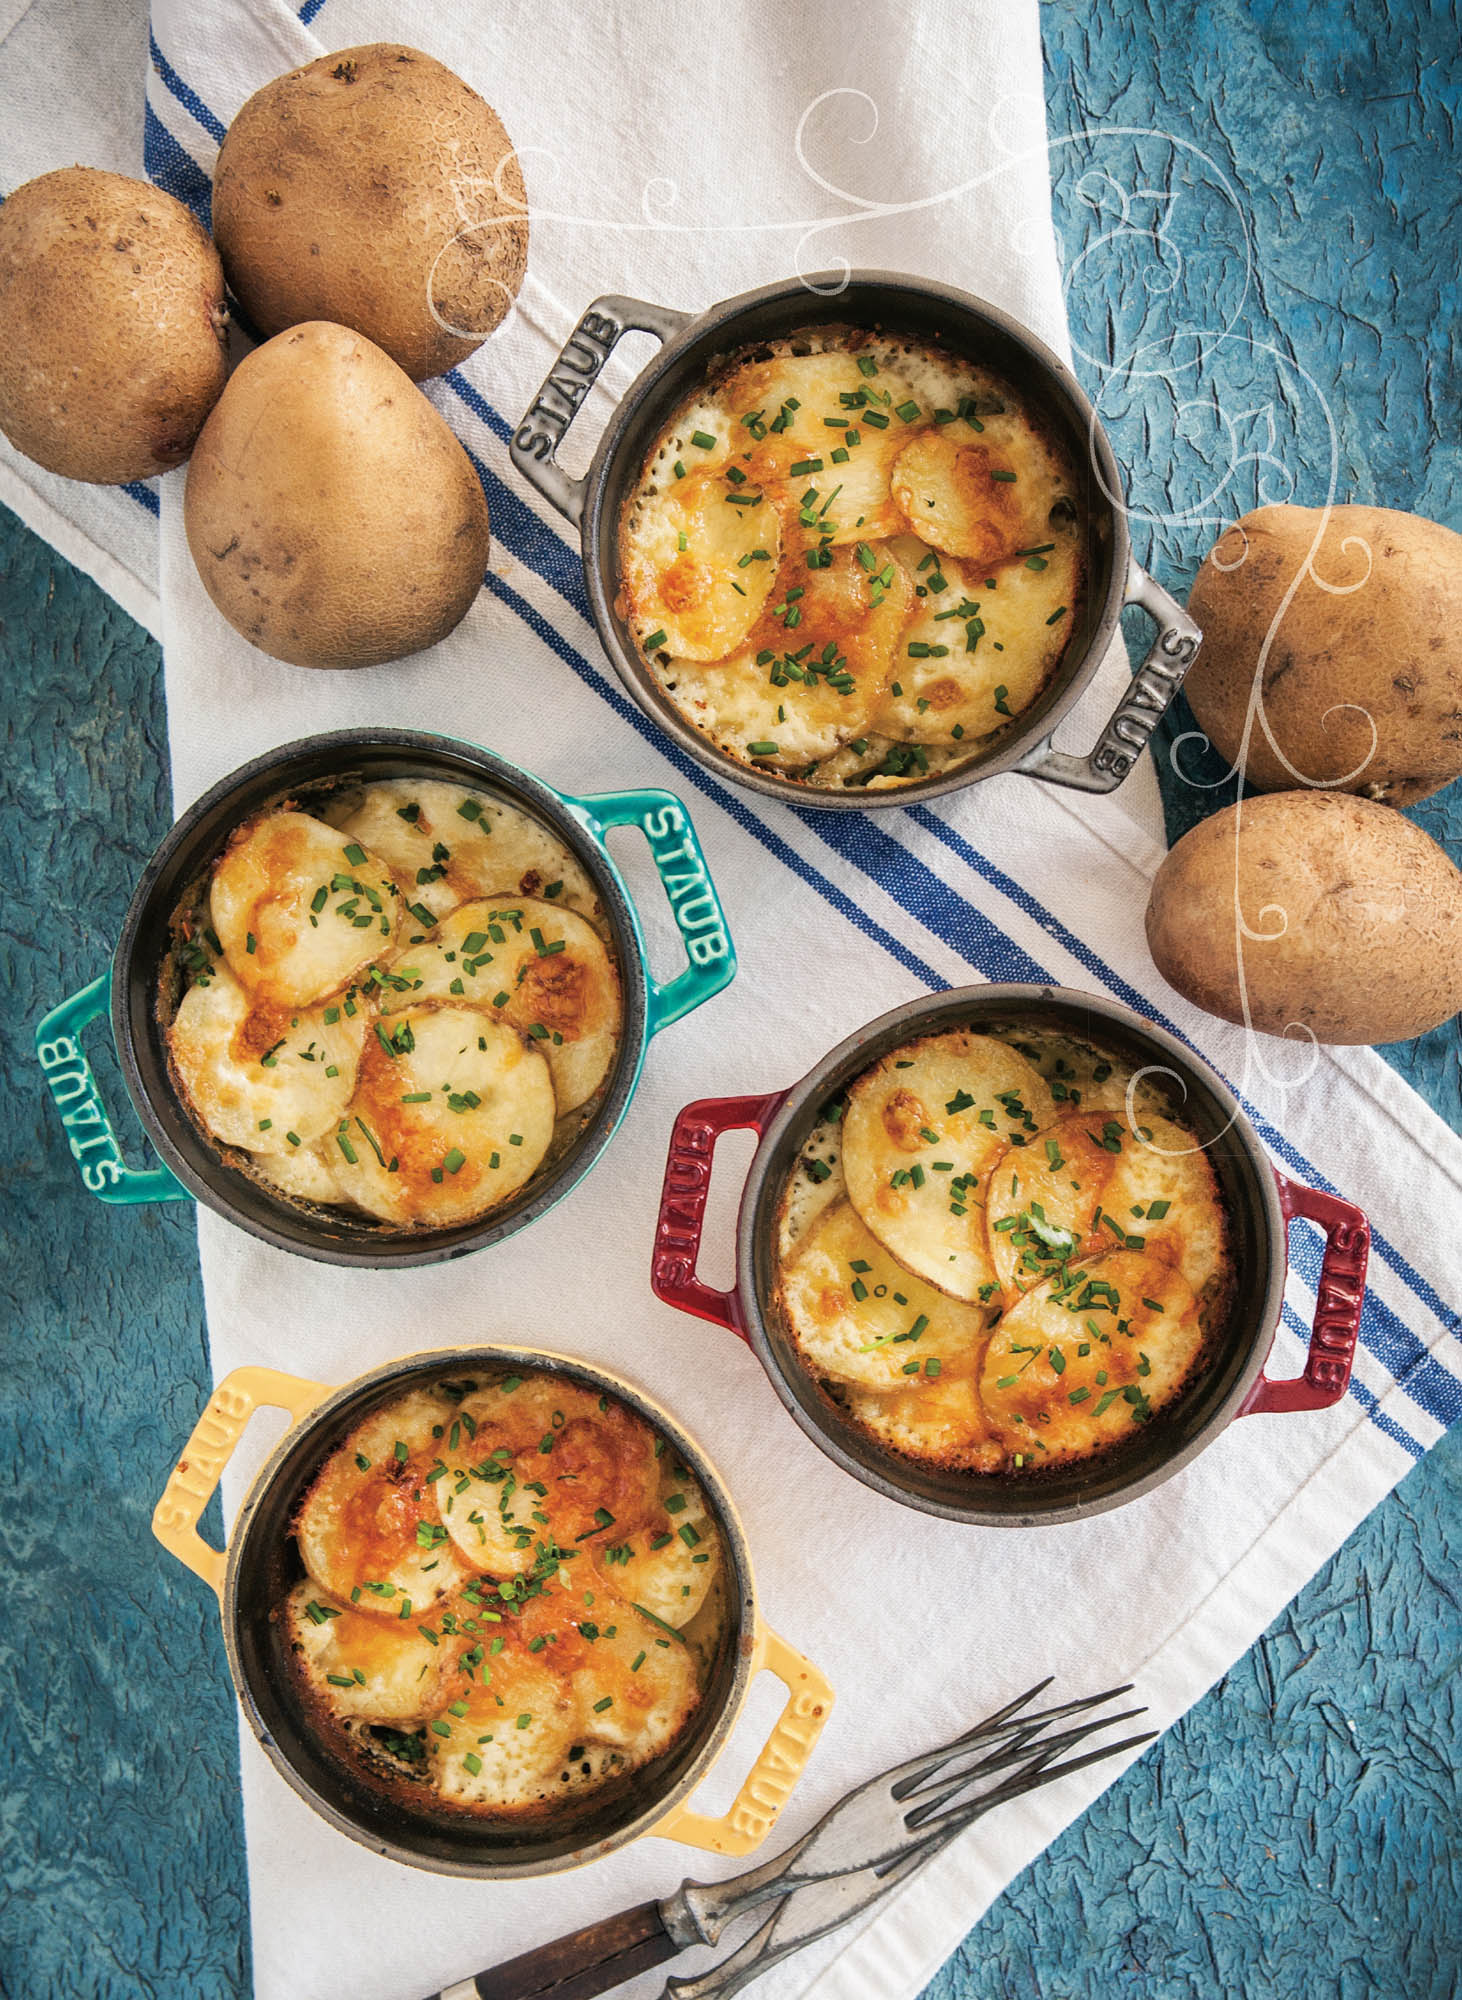
Single-Serve Scalloped Potatoes
Scalloped potatoes are always a favorite at the farm, so it’s no
surprise that we’re always dreaming up new flavor combinations and serving methods.
The straightforward prep of this recipe makes it a great choice when you’re short on
time but don’t want to sacrifice flavor or flair.
MAKES: 6 SERVINGS
2/3 cup sour cream
1/2 cup milk
1/4 cup heavy cream
1/2 t salt
3/4 lb yellow potatoes, sliced into 1/8”-thick slices
6 ozs sharp Cheddar cheese, shredded (about 1-1/2 cups)
1 T minced chives
-
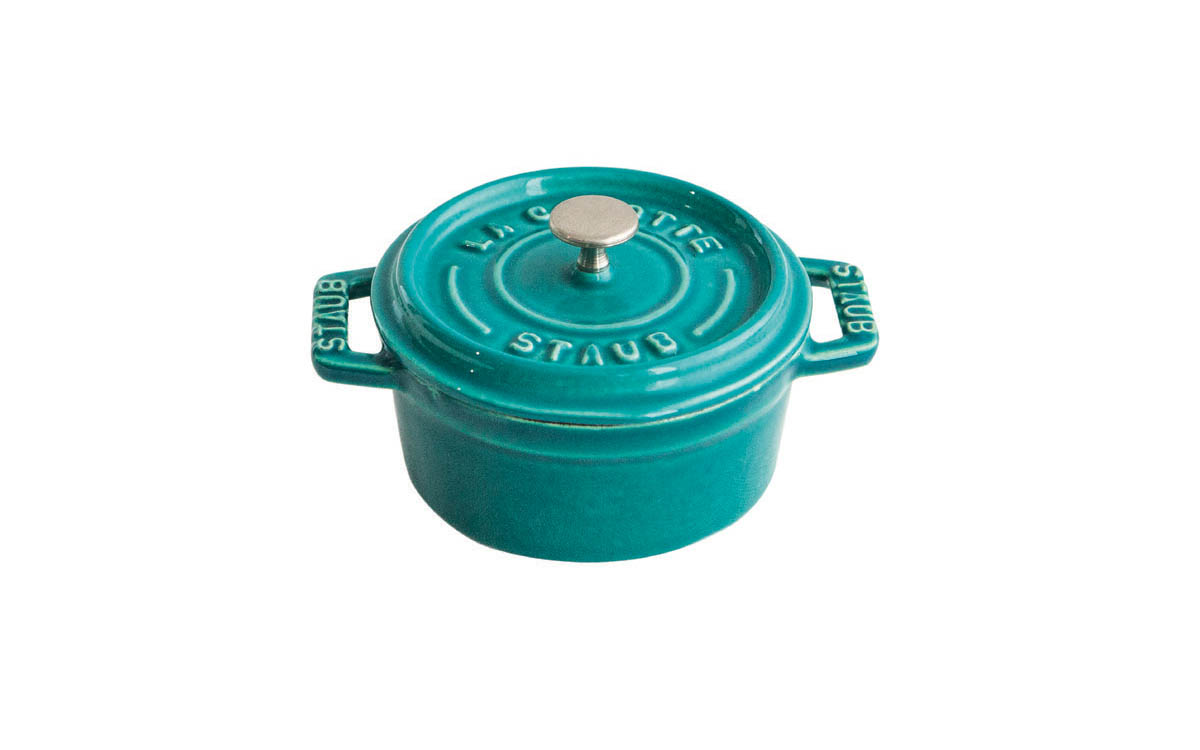
Preheat oven to 400°F. Lightly butter six enameled cast-iron mini round
cocottes and place on a large baking sheet.
-
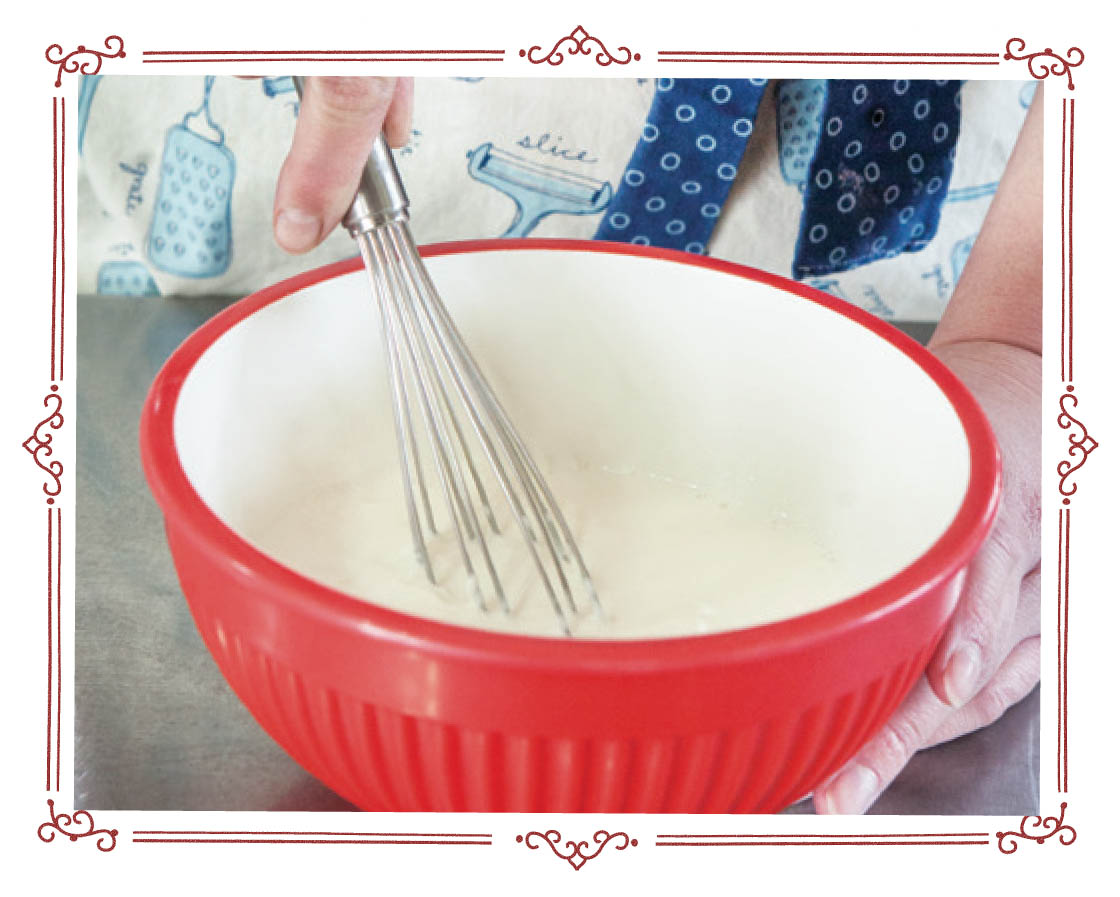
In a small bowl, whisk sour cream, milk, cream, and salt together.
-
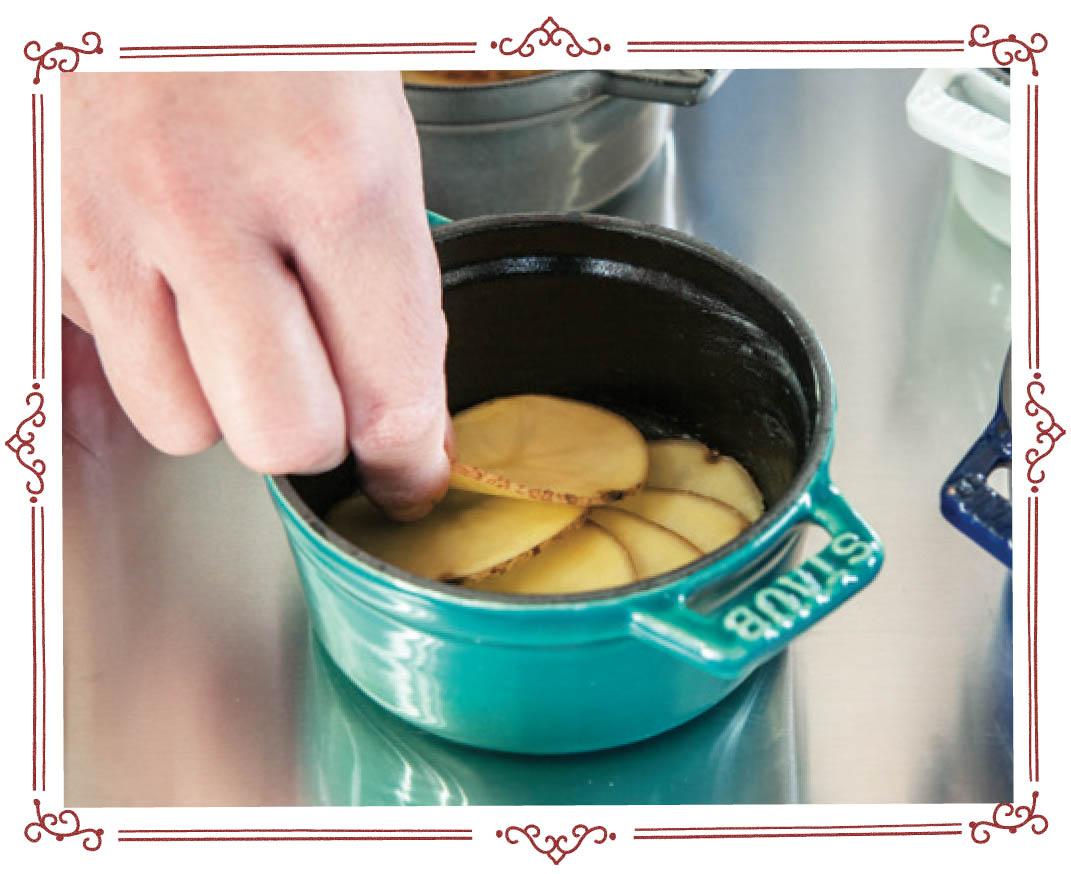
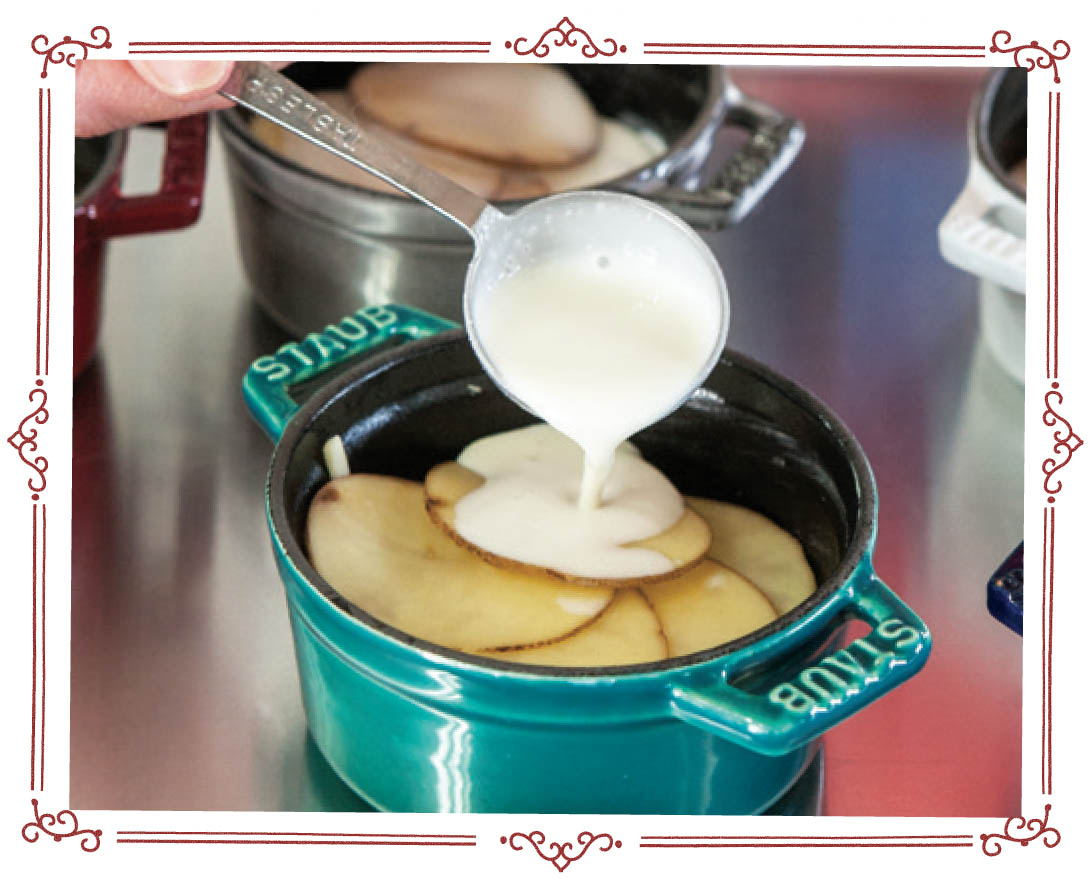
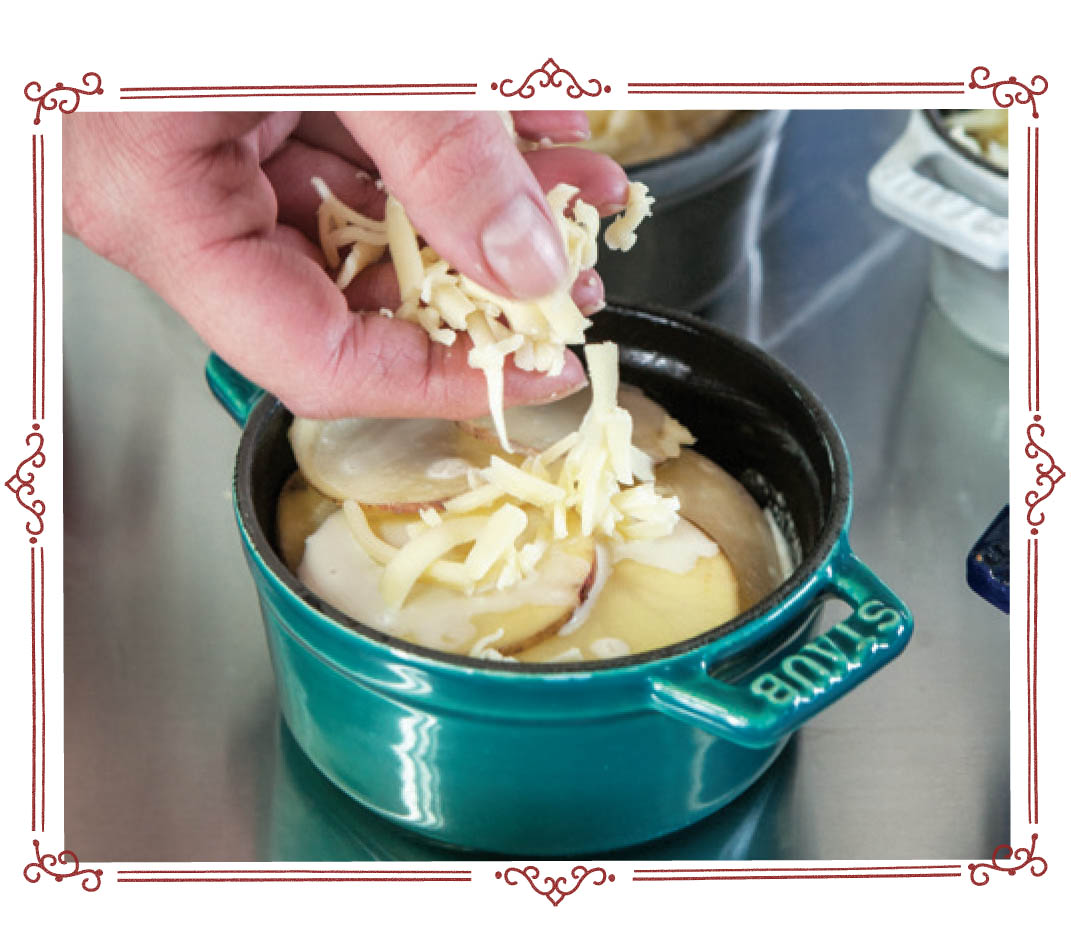
In the bottom of each mini round cocotte, arrange layer of potatoes,
overlapping each slice. Add about 1 T sour-cream mixture to each, and
then add about 1 T cheese. Repeat once more.
-
For the top layer, evenly divide remaining potatoes, cheese, and sour
cream mixture between cocottes. Bake for 45 minutes, or until potatoes
are tender. Top with chives and serve.
Dutch-Oven Scalloped Potatoes
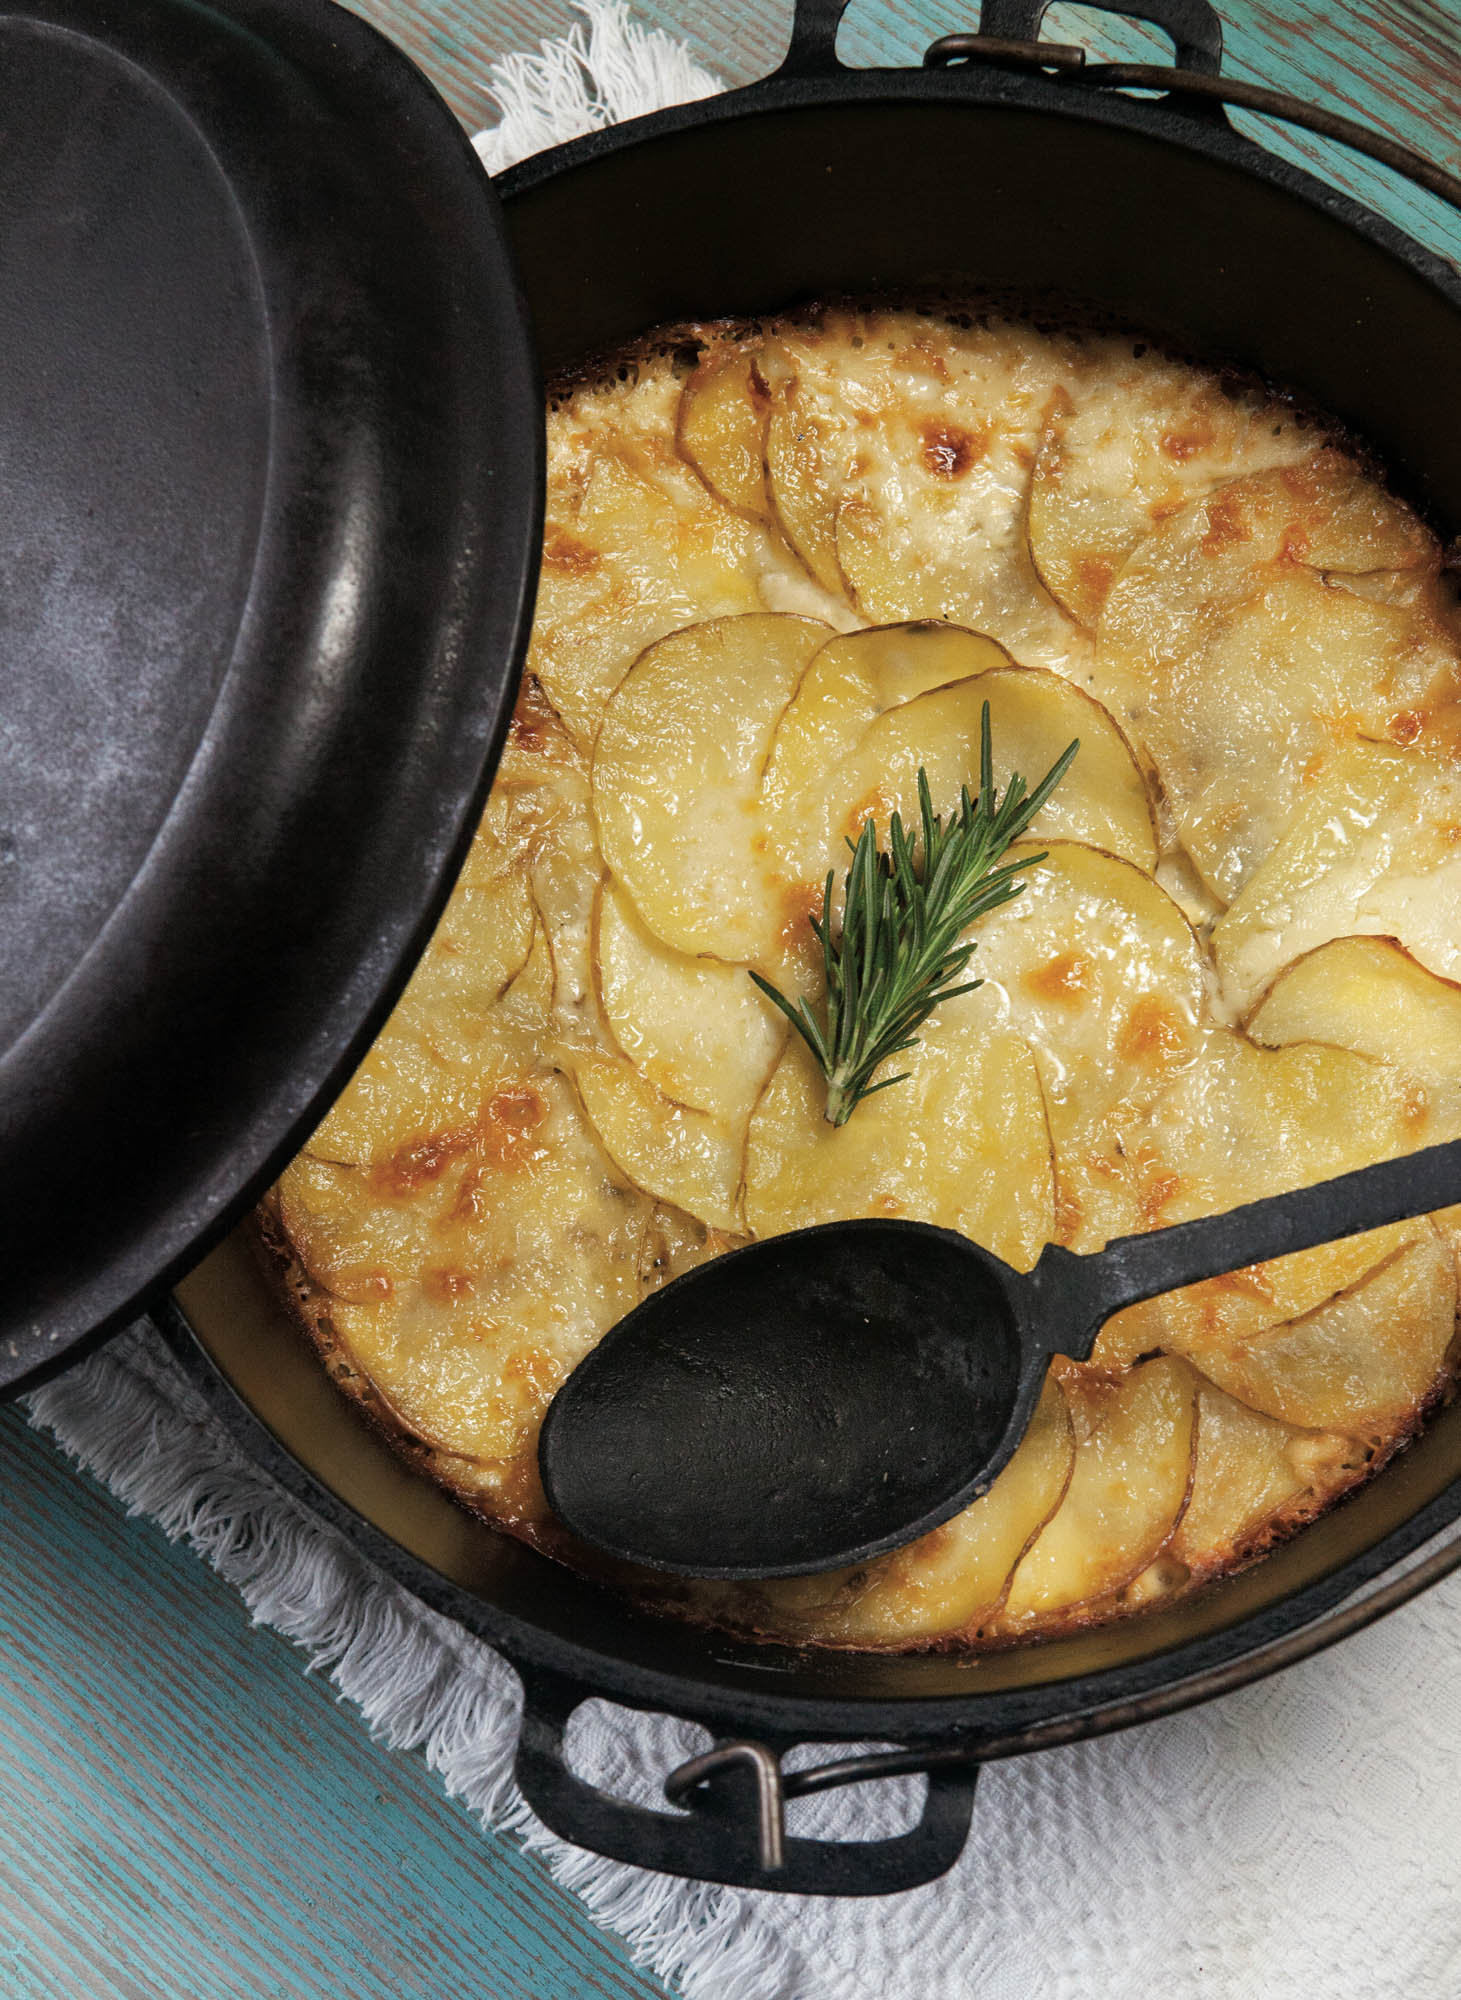
Who doesn’t love a big mess of scalloped potatoes? With the help of
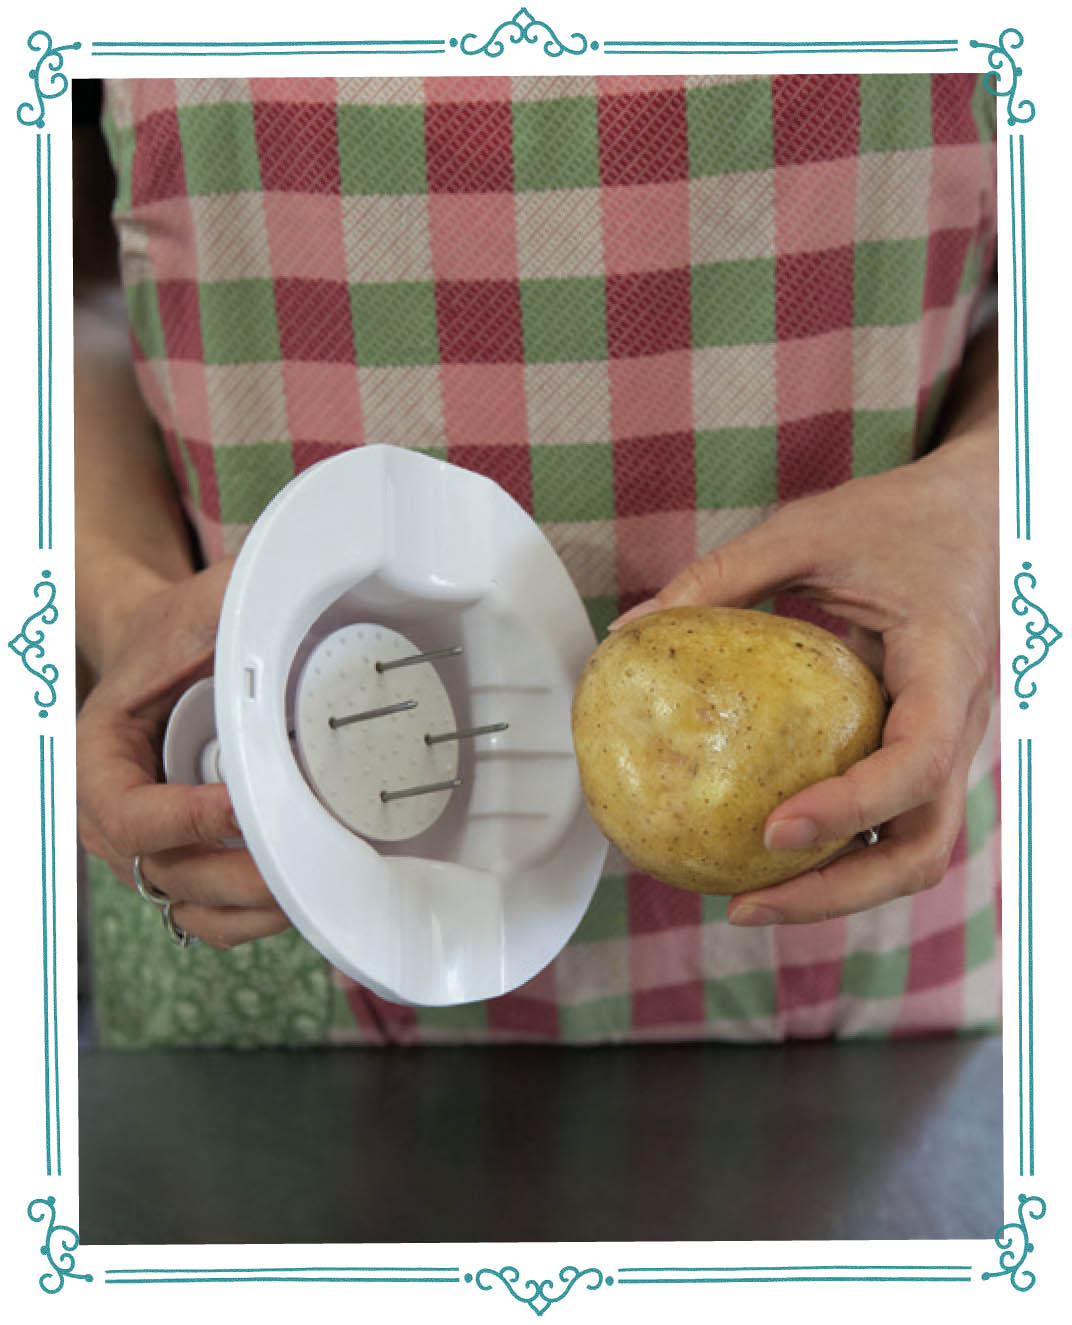
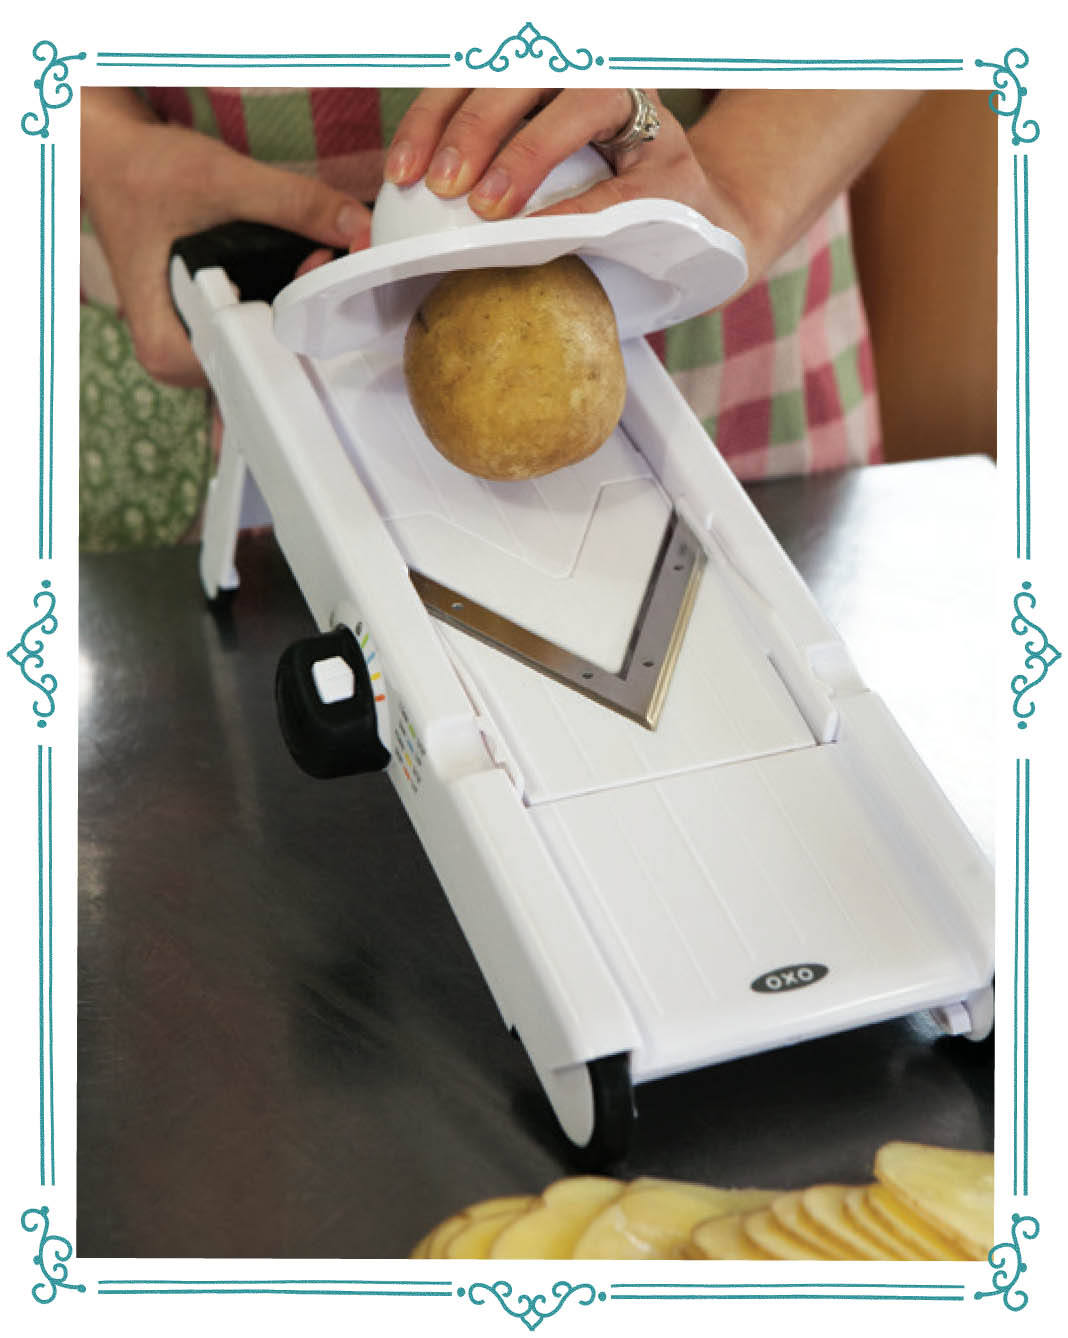
a mandoline slicer, this recipe is a snap to prepare. I find the process of layering
potatoes in tidy little rings around my Dutch oven cathartic. I love creating
something that looks tidy and orderly and tastes good to boot.
MAKES: 8 SERVINGS
2-1/2 lb yellow potatoes, sliced into 1/8 “-thick slices
1 t salt, divided
1 t pepper, divided
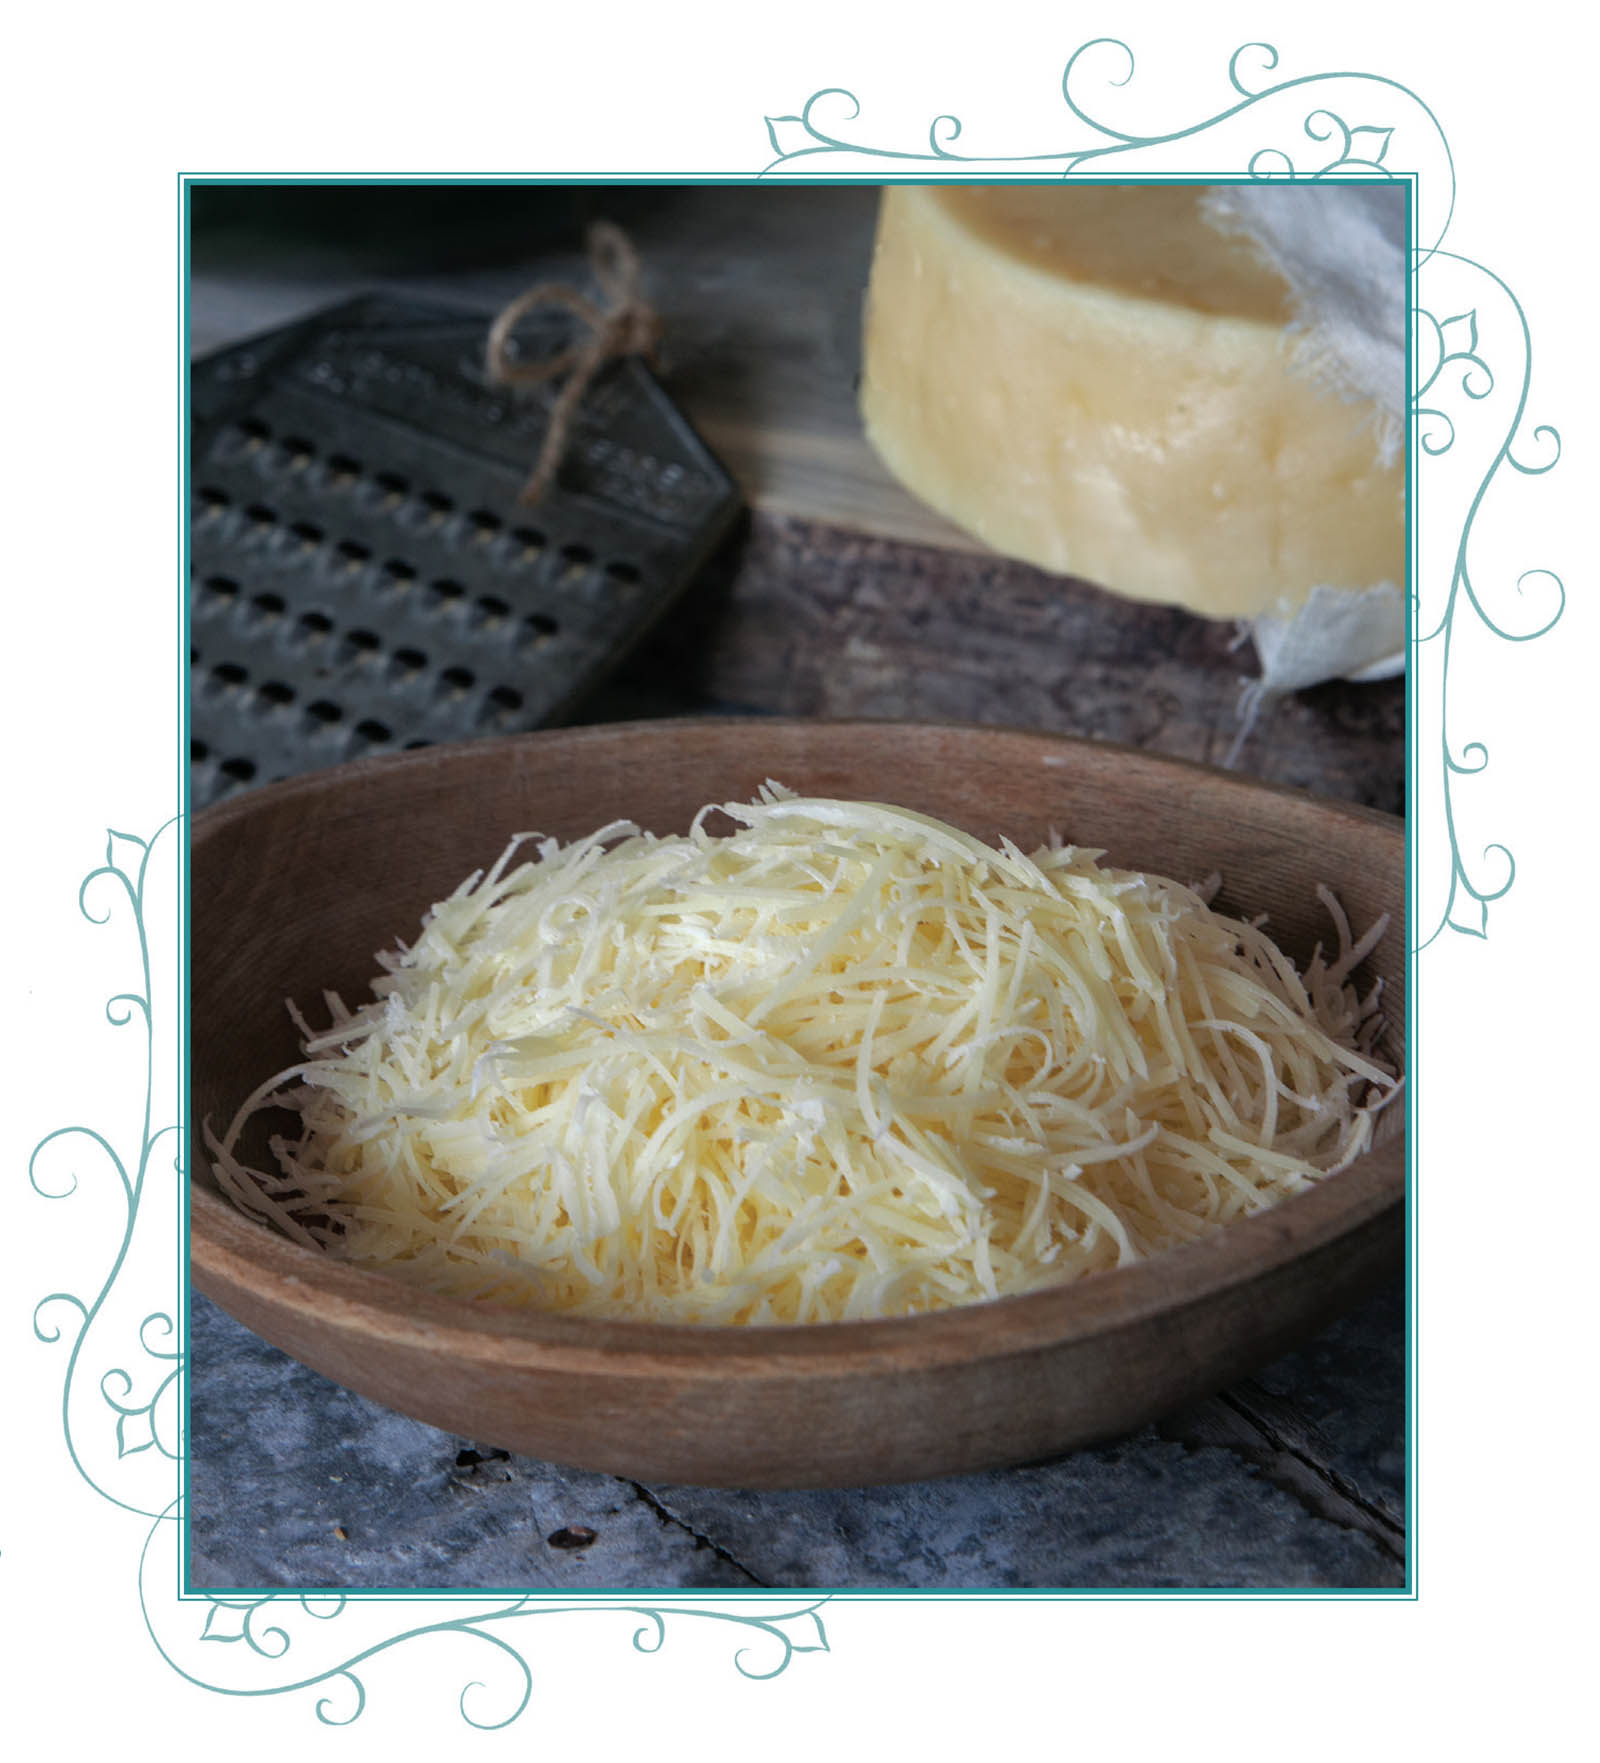
4 ozs Parmesan cheese, shredded (about 1 cup), divided
2 cups heavy cream
2 ozs Cheddar cheese, shredded (about 1/2 cup)
-
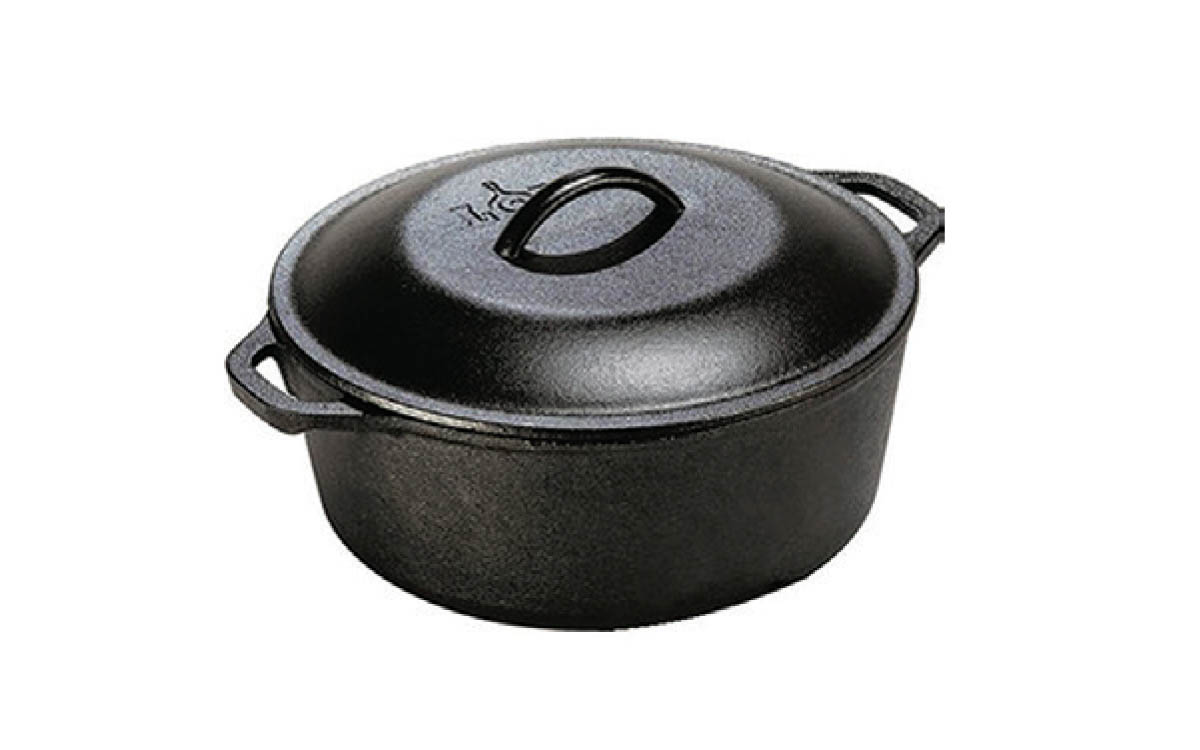
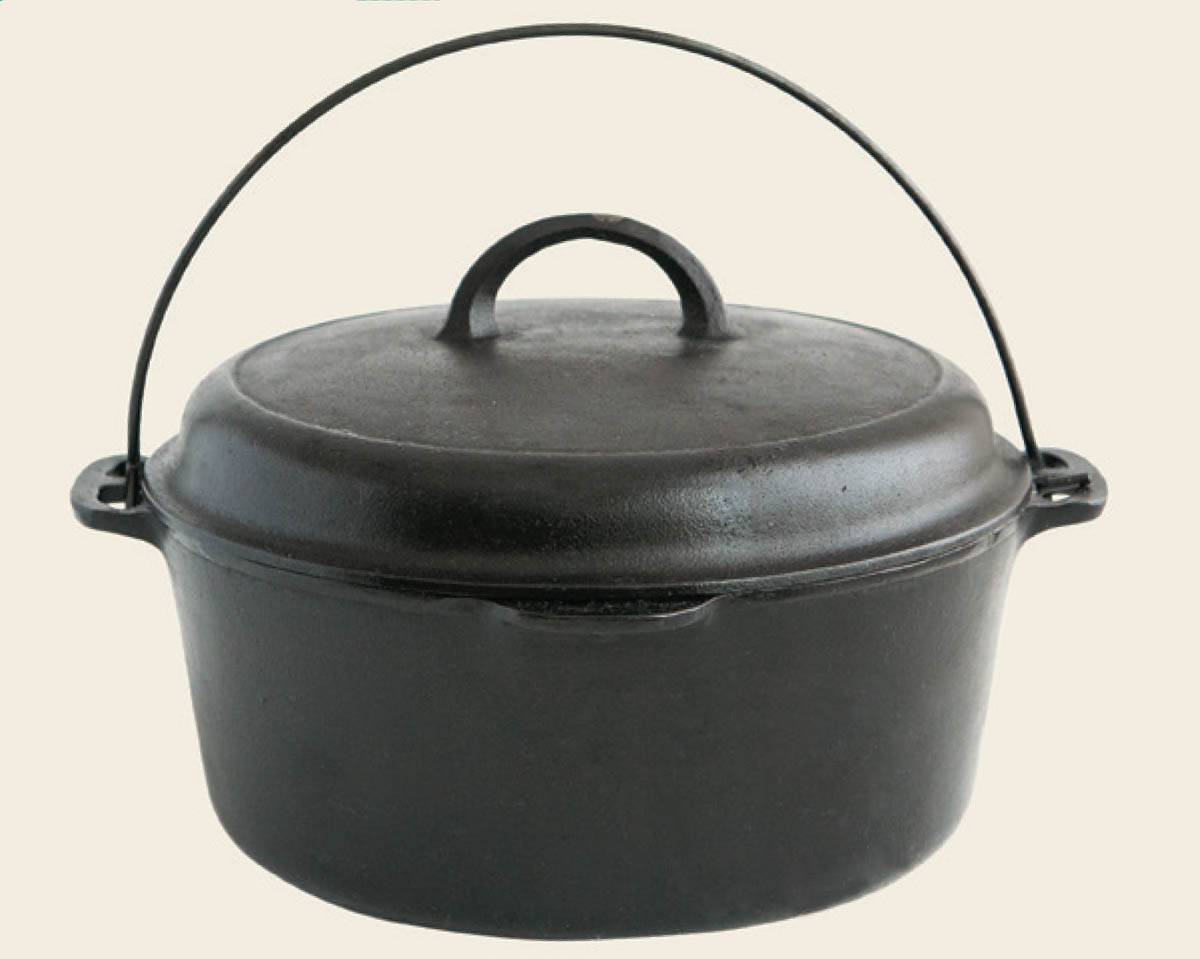
Preheat oven to 375°F. Lightly butter a 5-qt cast-iron Dutch oven.
-
Arrange potato slices in a single layer in the bottom of the Dutch oven.
Sprinkle with about 1/4 t salt and 1/4 t pepper, then add 1/4 cup grated
Parmesan. Continue layering, ending with potatoes.
-
Pour cream over all and top with Cheddar.
-
Cover and bake for 45 minutes. Remove lid and bake an additional 15–20
minutes until top is golden and potatoes are tender.
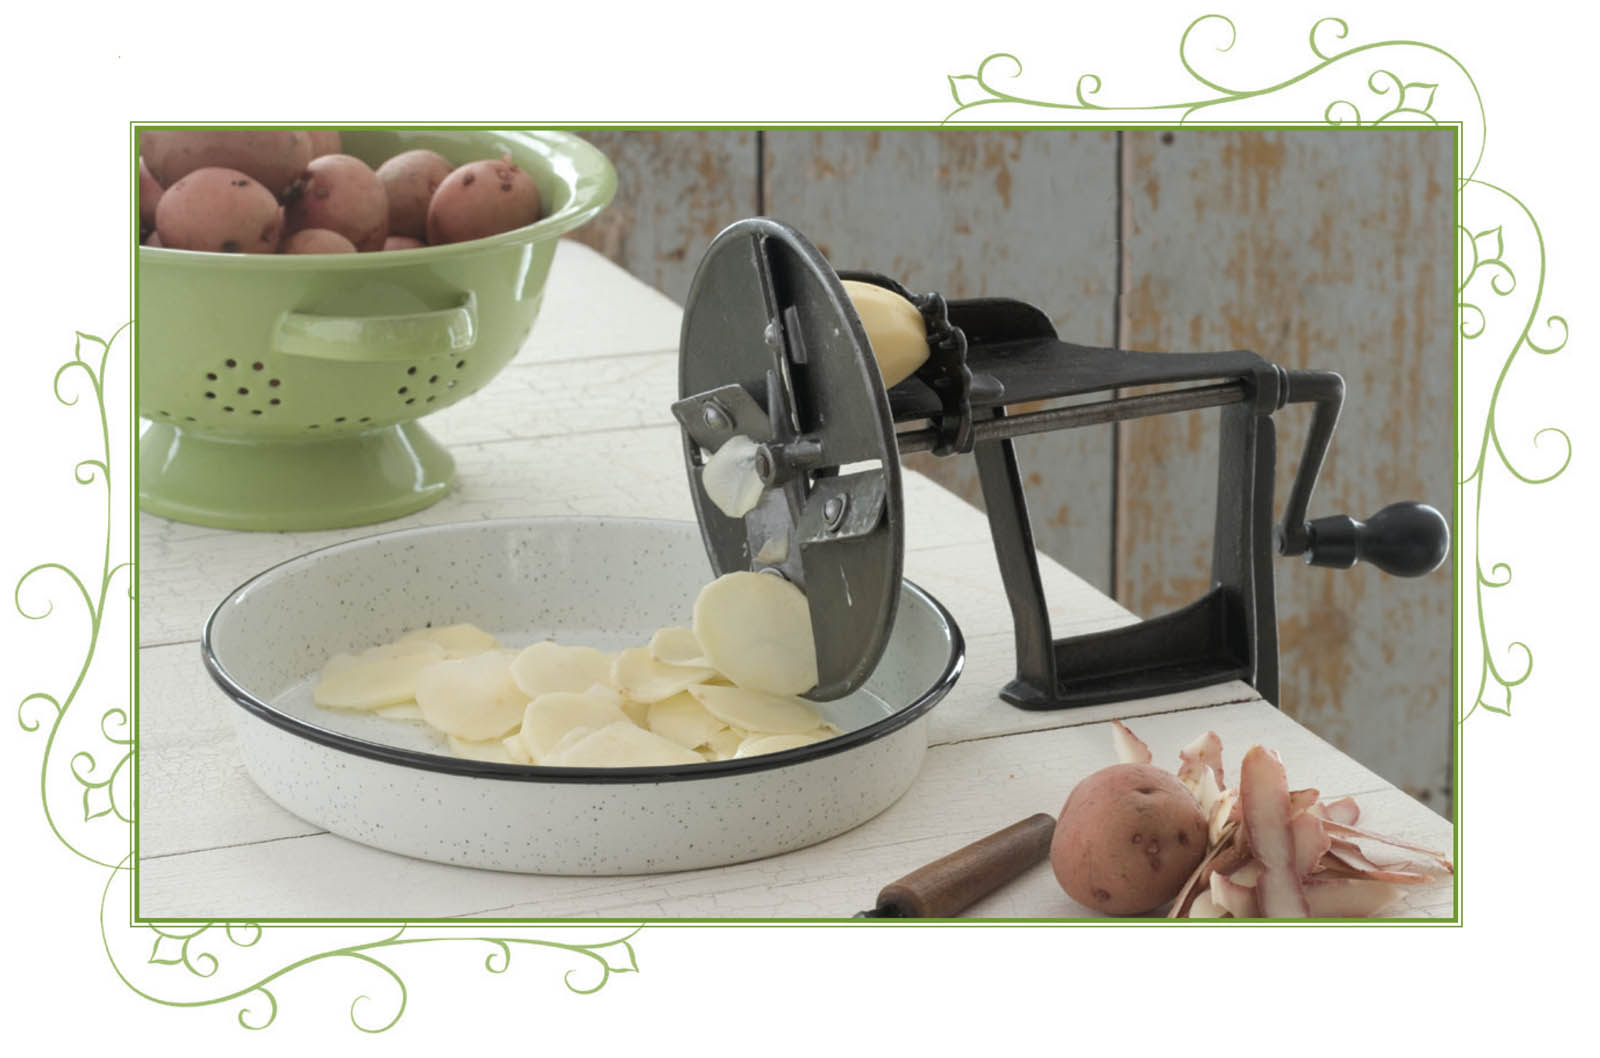
Tip: a mandoline slicer makes quick work of slicing potatoes to a
uniform thickness.
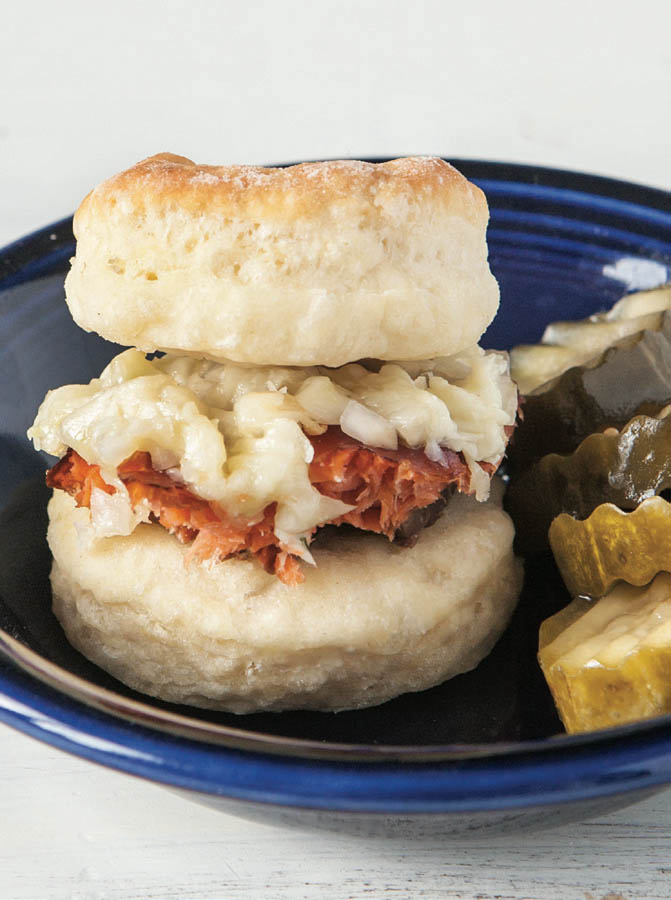
Sliders
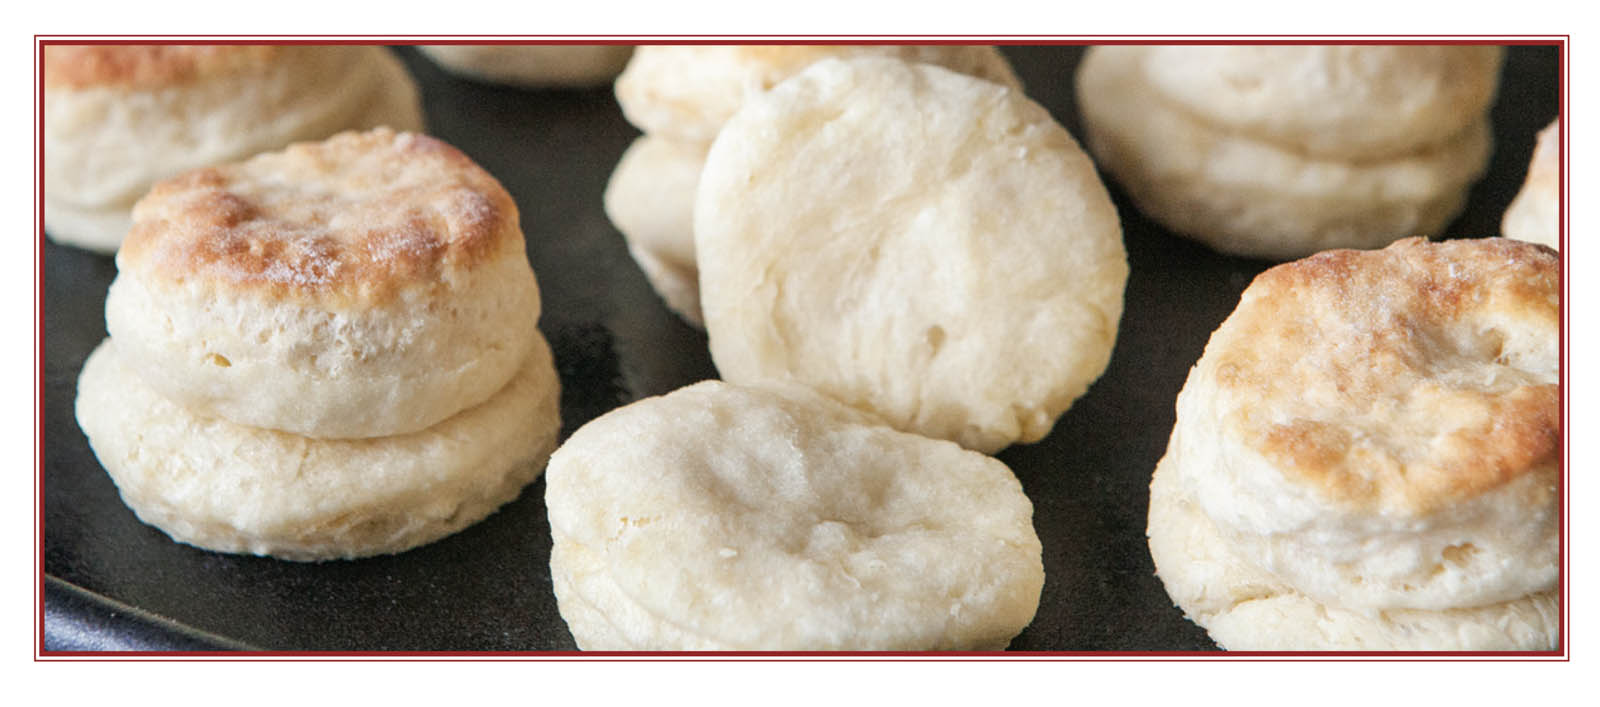
What do you get when you have a plateful of “biscuit buns” and a
skillet full of yummy, cheesy, spiced-up burger? DINNER FOR
4.
What do you get when you bake up a whole lotta “biscuit buns” and
then make all eight of my slider recipes? BUFFET FOR 32!
For six of the recipes, you simply combine the ingredients and
“burger binder” in a bowl, mix, and then bake. For busy families without time to
fuss and flip burgers, this menu is perfect. For entertaining guests, these sliders
make serving a variety of delicious foods a snap.
Biscuit Buns & Burger
Binder
MAKES: 16 BISCUIT BUNS (4 SERVINGS)
2-1/2 cups flour, plus more for dusting
2-1/2 t cream of tartar
1-1/2 t baking soda
1-1/2 t salt
5 T cold butter
1-1/4 cups buttermilk
-
Preheat oven to 450°F.
-
In a large bowl, combine flour, cream of tartar, baking soda, and salt.
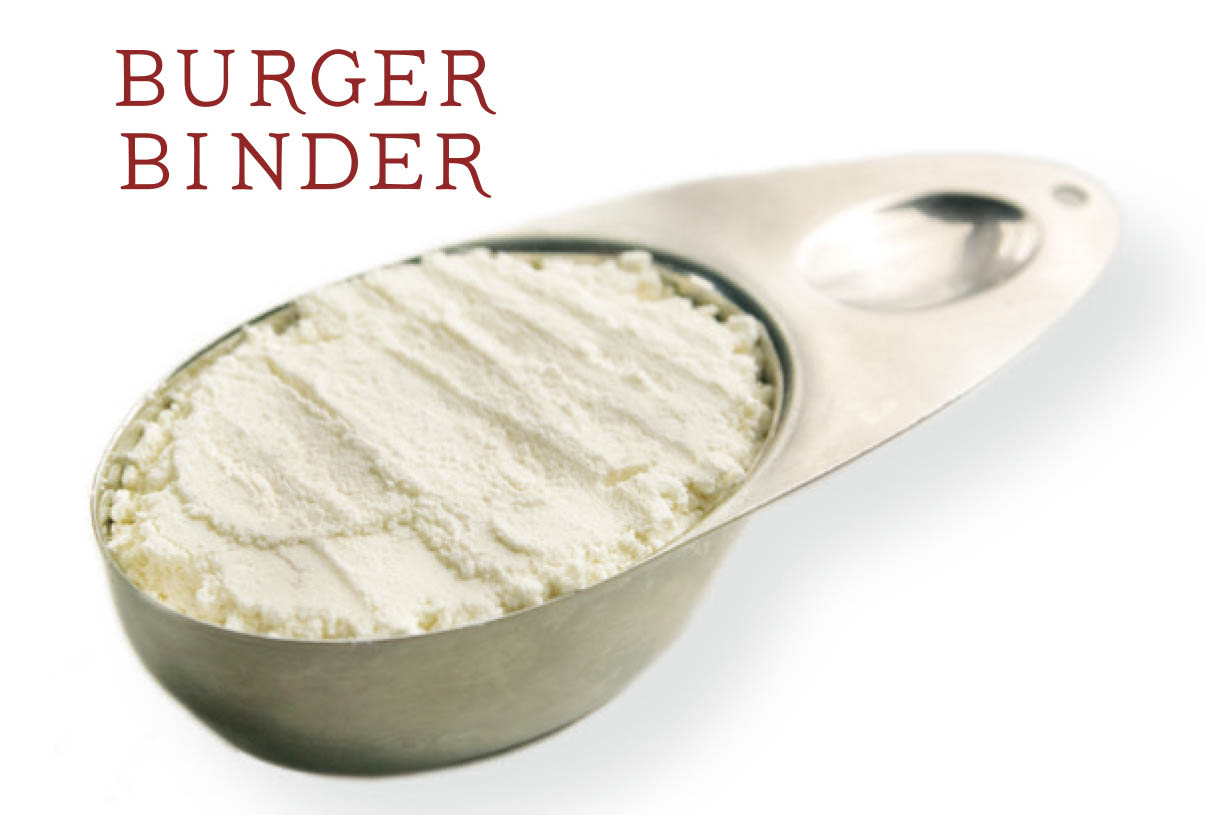
Pull out 1/2 cup of the dry ingredients for the “burger binder” used in
our slider recipes.
-
Using a pastry blender or fork, cut butter into dry ingredients until
mixture resembles coarse crumbs with some pea-size chunks throughout.
-
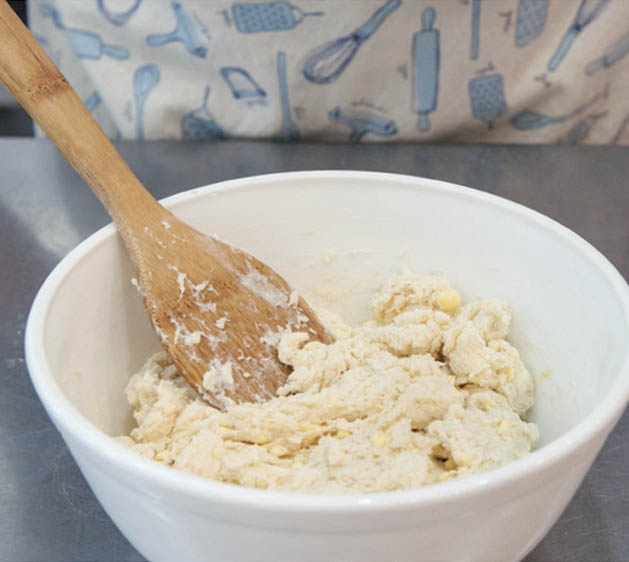
Make a depression in the center of the mix to receive the liquid. Add
buttermilk all at once and mix just enough to form a sticky dough (do
not overmix).
-
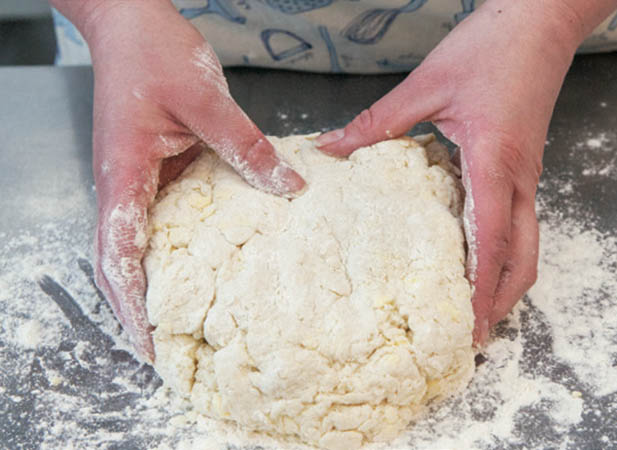
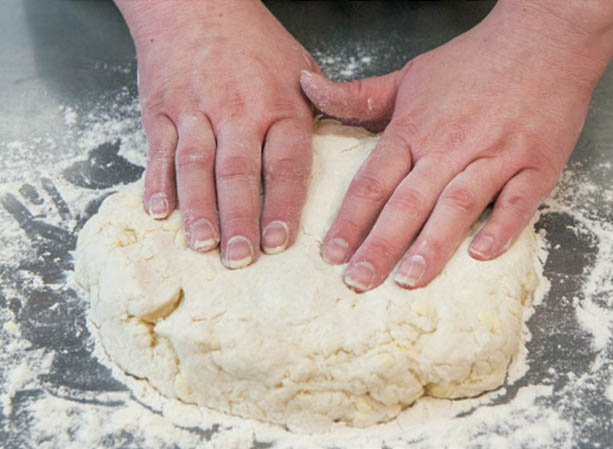
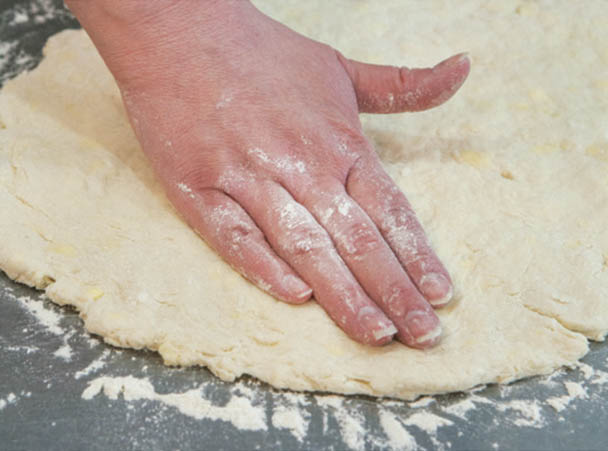
Turn the dough out onto a generously floured work surface and press out
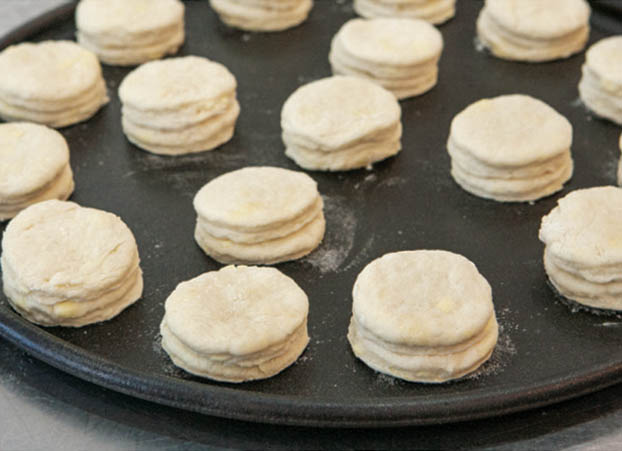
to about 1/4”-3 /8 “ thickness. Dip a 2” cookie cutter in flour and cut
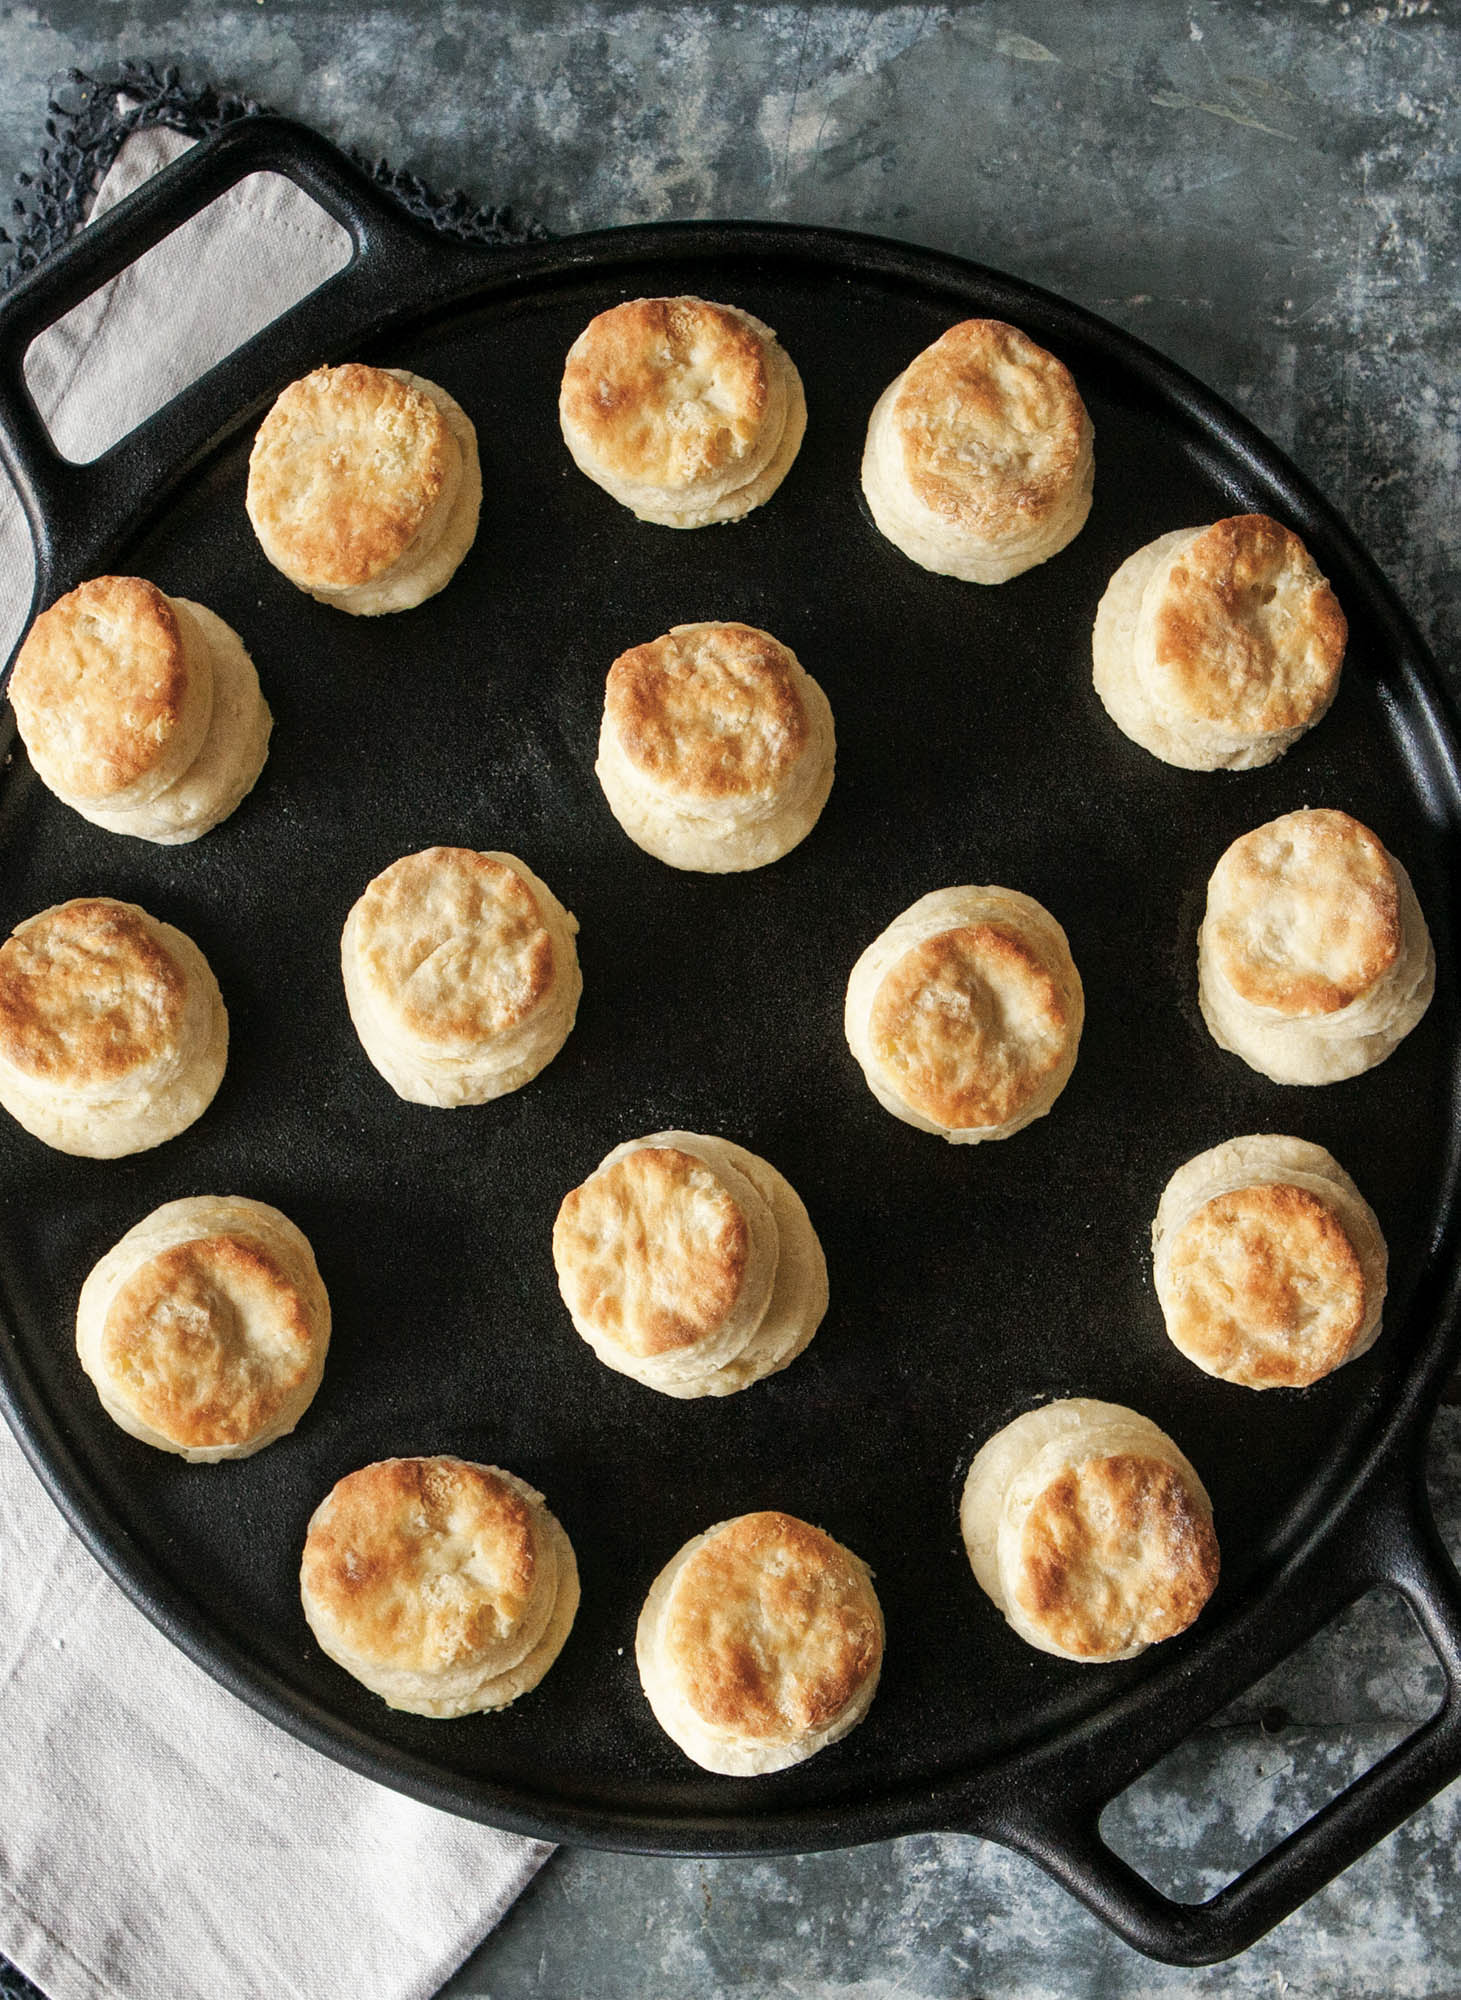
out 32 biscuits. On a 14” cast-iron baking pan, stack two biscuits, one
on top of the other, to create “biscuit buns” so that you have 16 double
buns.
-
Bake for 8–10 minutes, or until tops are light golden brown.
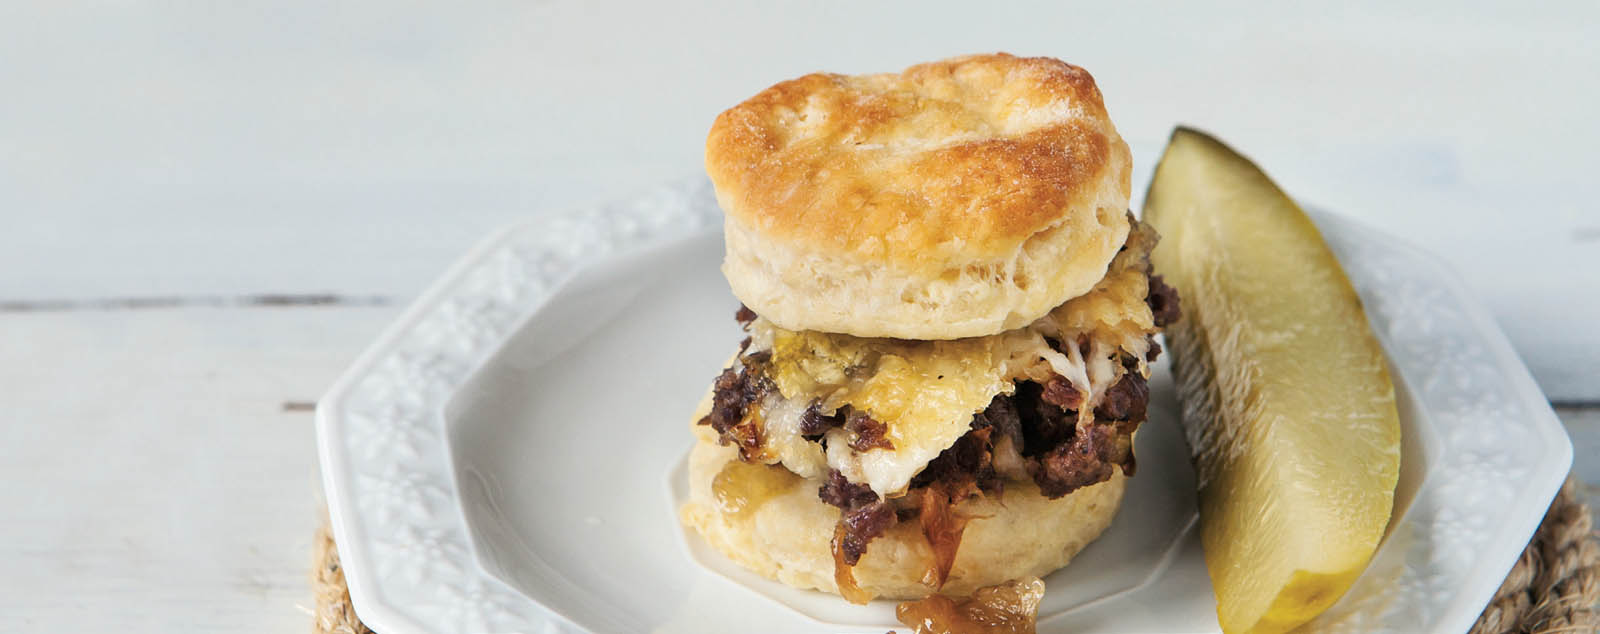
Caramelized Onion &
Swiss Sliders
MAKES: 16 SLIDERS
3 T olive oil
1 yellow onion, peeled and sliced into half-rings
1 lb lean ground beef
1/2 t salt
1/2 t pepper
Burger Binder
8 ozs Swiss cheese, shredded (about 1 cup)
-
Preheat oven to 375°F.
-
Preheat oil in a large skillet over medium-low heat; add onion slices,
stirring to coat evenly. Cover and cook 15 minutes, stirring
occasionally. Remove cover; reduce heat to low. Continue cooking,
stirring occasionally, until onion slices release their sugar and begin
to caramelize and turn golden brown (about 30 minutes).
-
In a large bowl, combine beef, salt, pepper, onion slices, and binder;
mix well.
-
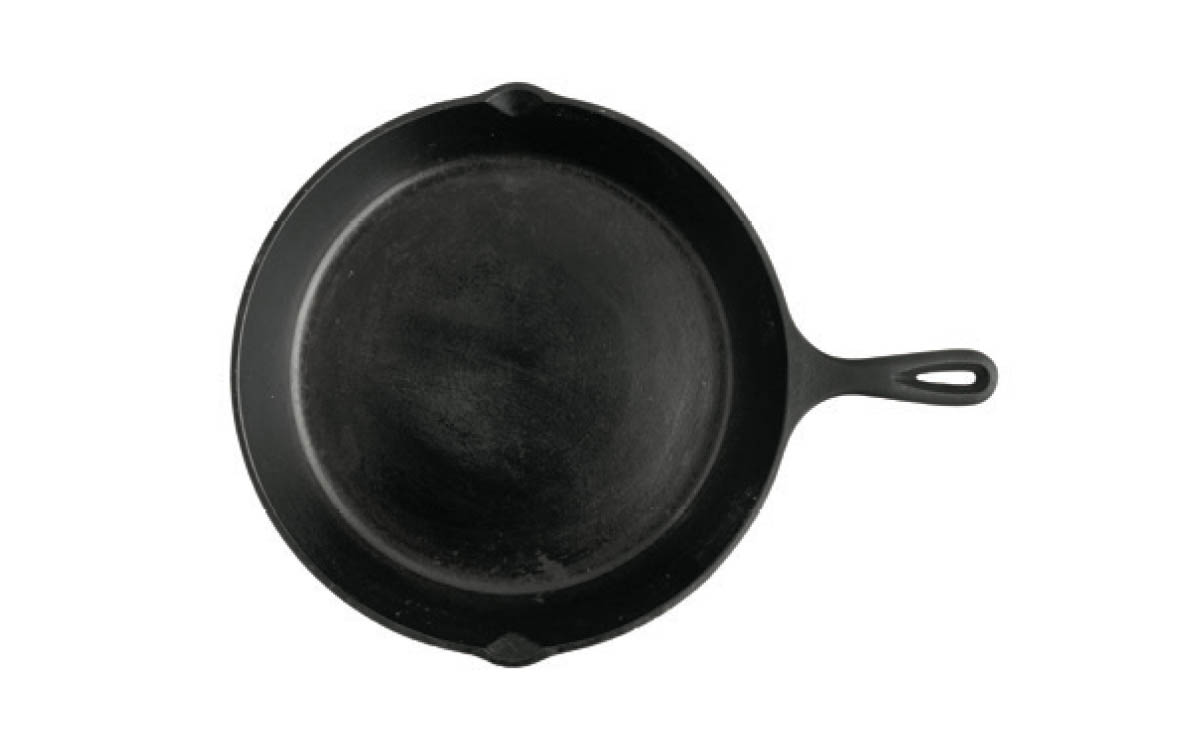
Spoon mixture into a 9” cast-iron skillet. Bake for 25 minutes, sprinkle
cheese evenly on top, and continue baking for 20 minutes.
Taco Sliders
MAKES: 16 SLIDERS
1 lb lean ground beef
1/2 medium onion, peeled and diced (about 1 cup)
1 garlic clove, peeled and minced (about 1 t)
1/2 t crushed red pepper flakes
1/2 t salt
1/2 t pepper
Burger Binder
1 cup refried beans
8 ozs Cheddar cheese, shredded (about 1 cup)
1 tomato, finely diced (about 3/4 cup)
1 avocado, finely diced (about 1/2 cup)
1/2 cup sour cream
-
Preheat oven to 375°F.
-
In a large bowl, combine beef, onion, garlic, pepper flakes, salt,
pepper, and binder; mix well.
-
Spoon mixture into a 9” cast-iron skillet. Spread beans evenly over the
top. Bake for 25 minutes, sprinkle cheese evenly on top, and continue
baking for 20 minutes. Serve with tomato, avocado, and sour cream.
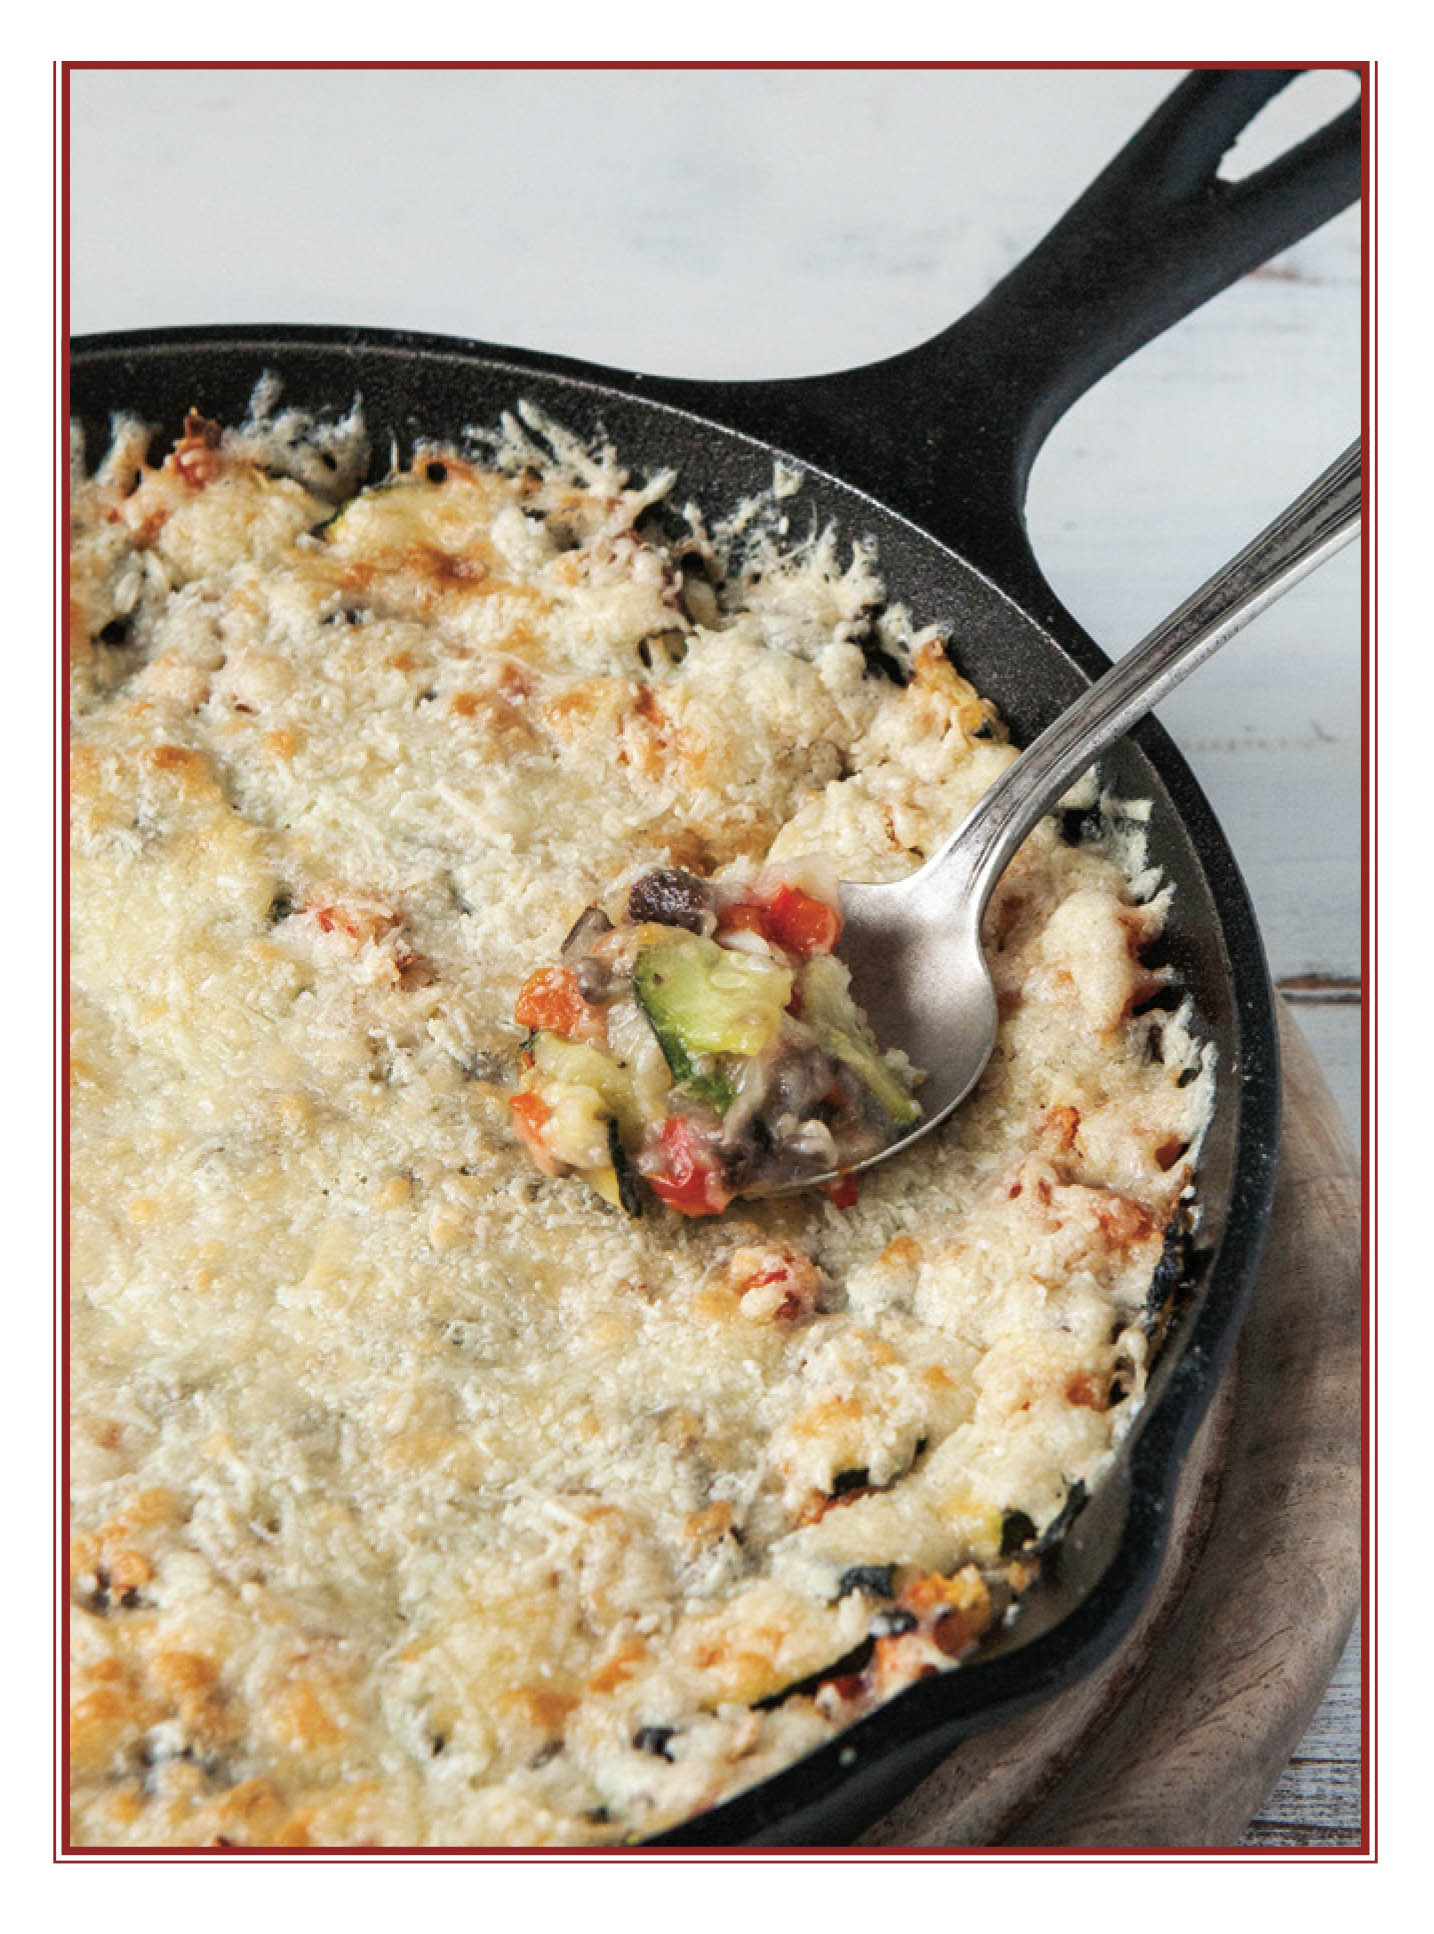
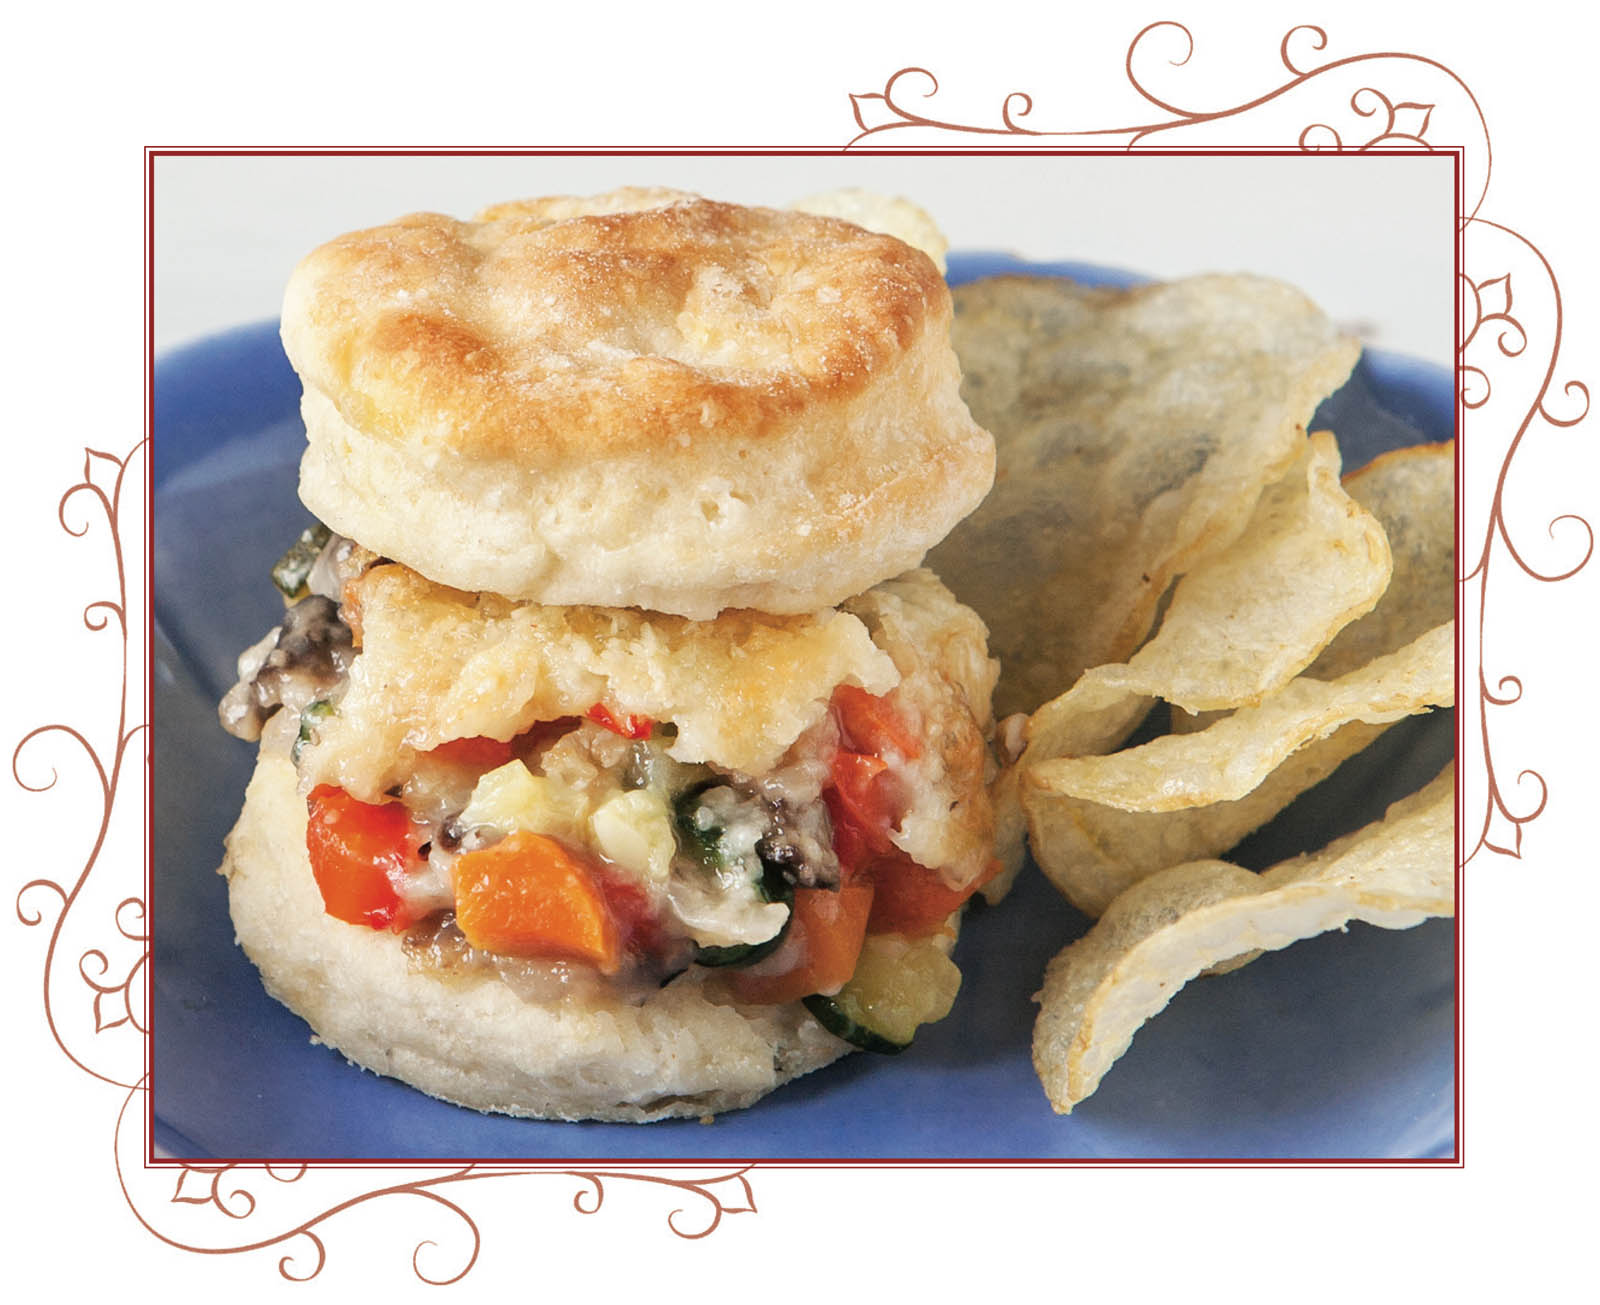
Veggie Sliders
MAKES: 16 SLIDERS
1 zucchini, diced (about 1-1/2 cups)
1 carrot, diced (about 1 cup)
1/2 medium onion, peeled and diced (about 1 cup)
4 ozs mushrooms, diced (about 1 cup)
1 red bell pepper, seeded and finely diced (about 1-1/4 cups)
1 garlic clove, peeled and minced (about 1 t)
1/2 t salt
1/4 t pepper
Burger Binder
8 ozs manchego cheese, shredded (about 1 cup)
-
Preheat oven to 375°F.
-
In a large bowl, combine veggies, garlic, salt, pepper, and binder; mix
well.
-
Spoon mixture into a 9” cast-iron skillet. Bake for 25 minutes, sprinkle
cheese evenly on top, and continue baking for 20 minutes.
Sloppy-Joe Sliders
MAKES: 16 SLIDERS
1-1/2 t chili powder
1 t salt
1/2 t pepper
1/4 t cumin
1 t brown sugar
1/4 cup water
1 6-oz can tomato paste
1 lb lean ground beef
1/2 onion, peeled and diced (about 1 cup)
1 green bell pepper, seeded and finely diced (about 1-1/4 cups)
2 garlic cloves, peeled and minced (about 2 t)
Burger Binder
-
Preheat oven to 375°F.
-
In a medium bowl, combine first five ingredients. Add water and tomato
paste, mix well.
-
In a large bowl, combine beef, onion, bell pepper, garlic, and binder;
add tomato-spice mixture and mix well.
-
Spoon mixture into a 9” cast-iron skillet. Bake for 45 minutes.
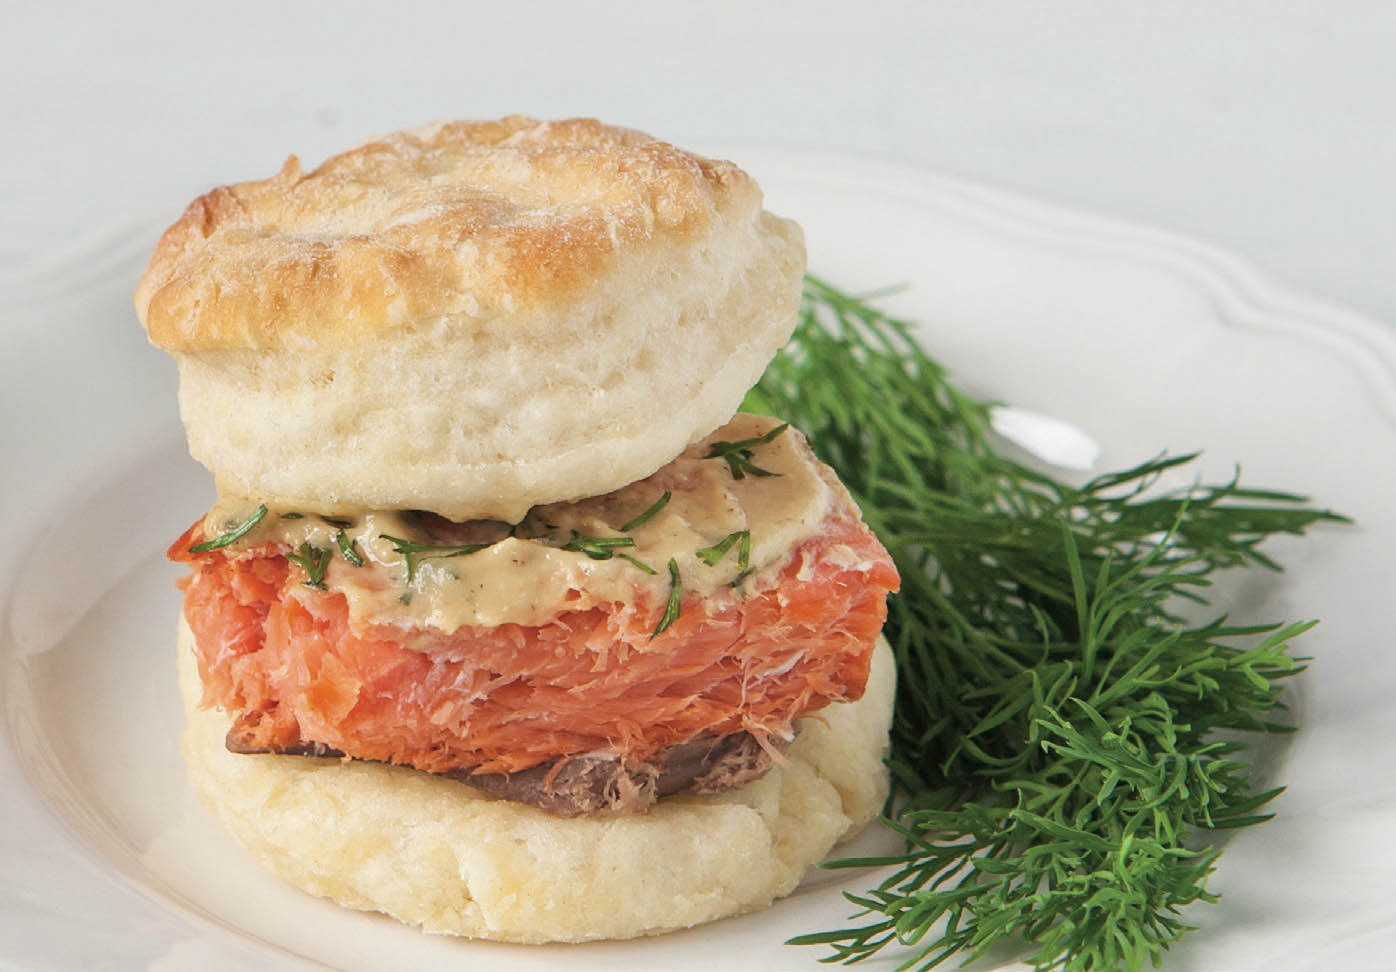
Smoked-Salmon Sliders
MAKES: 16 SLIDERS
Note: Each fillet has a different topping.
2 8-oz smoked salmon fillets, skinned
1/4 fennel bulb, trimmed and finely minced (about 1/4 cup)
1 oz Gruyère cheese, shredded (about 1/4 cup)
2 t Dijon mustard
1 t fresh dill, minced
-
Preheat oven to 375°F.
-
Place salmon fillets in a 14” cast-iron baking pan.
-
Cover one fillet with fennel and cheese. Cover second fillet with mustard
and dill.
-
Bake for 15 minutes.
Spicy Sausage & Gravy
Sliders
MAKES: 16 SLIDERS
2 T butter
4 ozs mushrooms, sliced (about 1 cup)
3/4 cup white wine
1 cup heavy cream
1/2 t salt
1/2 t pepper
1 lb spicy sausage
Burger Binder
8 ozs smoked Gouda cheese, shredded (about 1 cup)
-
Preheat oven to 375°F.
-
Melt butter in large skillet over medium heat; sauté mushrooms for 5
minutes, stirring occasionally. Reduce heat to mediumlow, add wine, and
simmer for 15 minutes. Reduce heat to low, add cream, and continue
cooking for 10 minutes. Stir in salt and pepper; remove from heat. Add
sausage and binder; mix well, breaking up sausage into small, 1/2”
chunks.
-
Spoon mixture into a 9” cast-iron skillet. Bake for 25 minutes, sprinkle
cheese evenly on top, and continue baking for 20 minutes.
Garlic & Cheddar Sliders
MAKES: 16 SLIDERS
1 lb lean ground beef
4 garlic cloves, peeled and minced (about 4 t)
1/2 t salt
1/2 t pepper
Burger Binder
8 ozs Cheddar cheese, shredded (about 1 cup)
-
Preheat oven to 375°F.
-
In a large bowl, combine beef, garlic, salt, pepper, and binder; mix
well.
-
Spoon mixture into a 9” cast-iron skillet. Bake for 25 minutes, sprinkle
cheese evenly on top, and continue baking for 20 minutes.
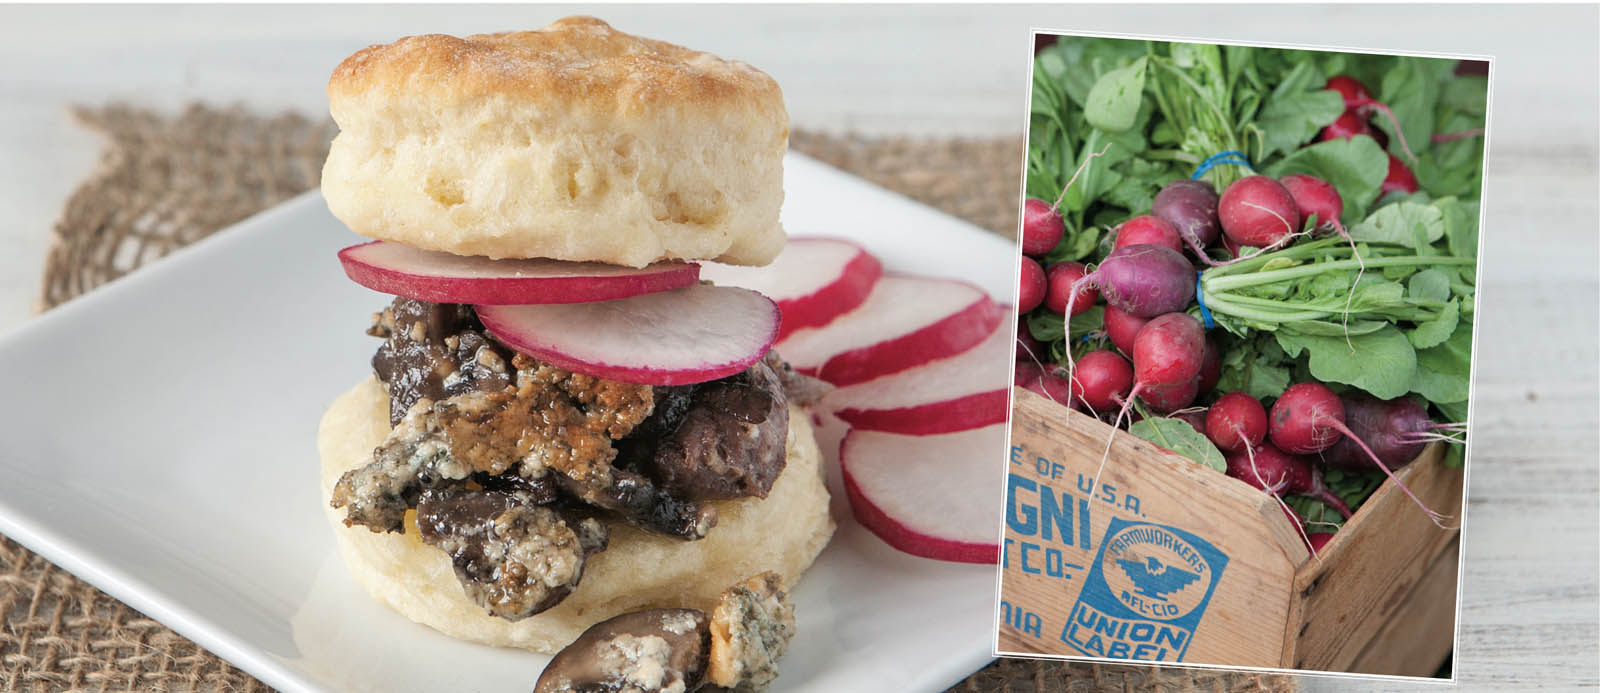
Steak & Blue-Cheese
Sliders
MAKES: 16 SLIDERS
2-1/2 T butter
8 ozs mushrooms, sliced (about 2 cups)
2 8-oz New York strip steaks, trimmed and thinly sliced
Burger Binder
1/4 t pepper
9 ozs blue cheese, crumbled (about 1 cup)
-
Preheat oven to 375°F.
-
Melt butter in a large skillet over medium heat; sauté mushrooms for 10
minutes, stirring occasionally.
-
In a medium bowl, combine beef, binder, and pepper.
-
Place beef mixture in a 9” cast-iron skillet; cover evenly with mushrooms
and cheese. Bake for 45 minutes.
Tortillas
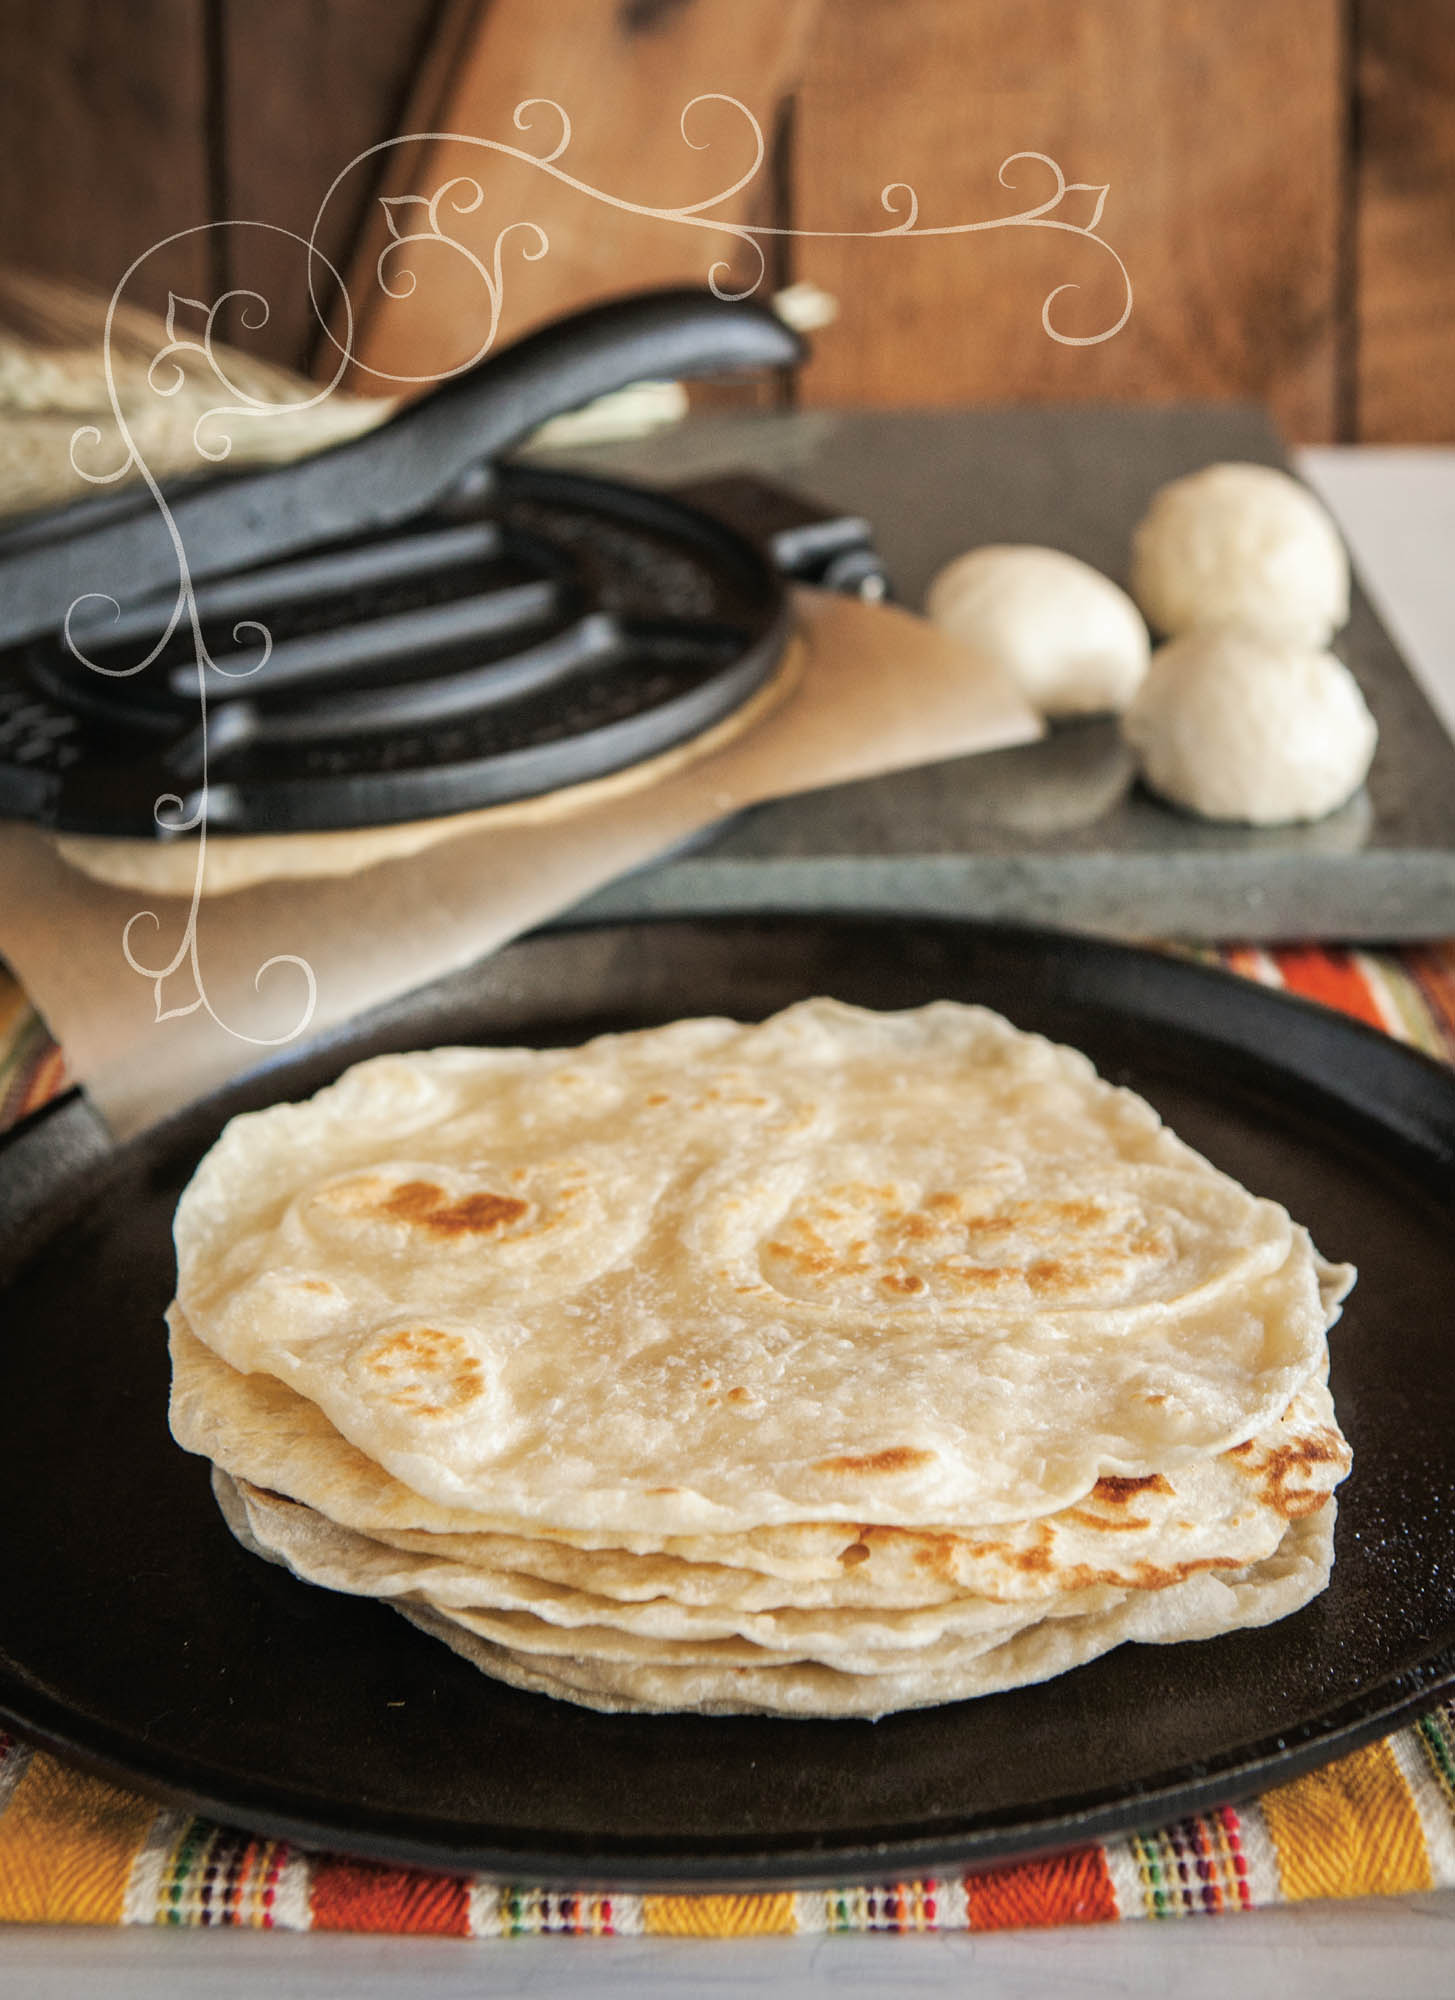
When my DIL, Ashley, and I set out to create this tortilla recipe,
we had a few goals in mind. We wanted to create flavorful tortillas without
hydrogenated oils or other strange ingredients. The texture was important as well.
We didn’t want a gummy tortilla, but rather one that you can feel your teeth sink
into without it being tough or chewy. These tortillas are amazingly pliable, and the
texture is just right—substantial and not too soft. Lastly, the coconut oil gives
the tortillas a subtle coconut flavor that is out-of-this-world delicious.
MAKES: TWELVE 6-1/2” TORTILLAS
2 cups flour
3/4 t salt
3/4 t baking powder
1/2 cup coconut oil (in solid form)
3/4 cup warm water
-
In a medium bowl, combine flour, salt, and baking powder. Cut in coconut
oil until mixture resembles coarse crumbs. Make a well in the center of
the flour mixture and add warm water. Mix until a wet dough forms. Cover
bowl and let dough rest for 10 minutes.
-
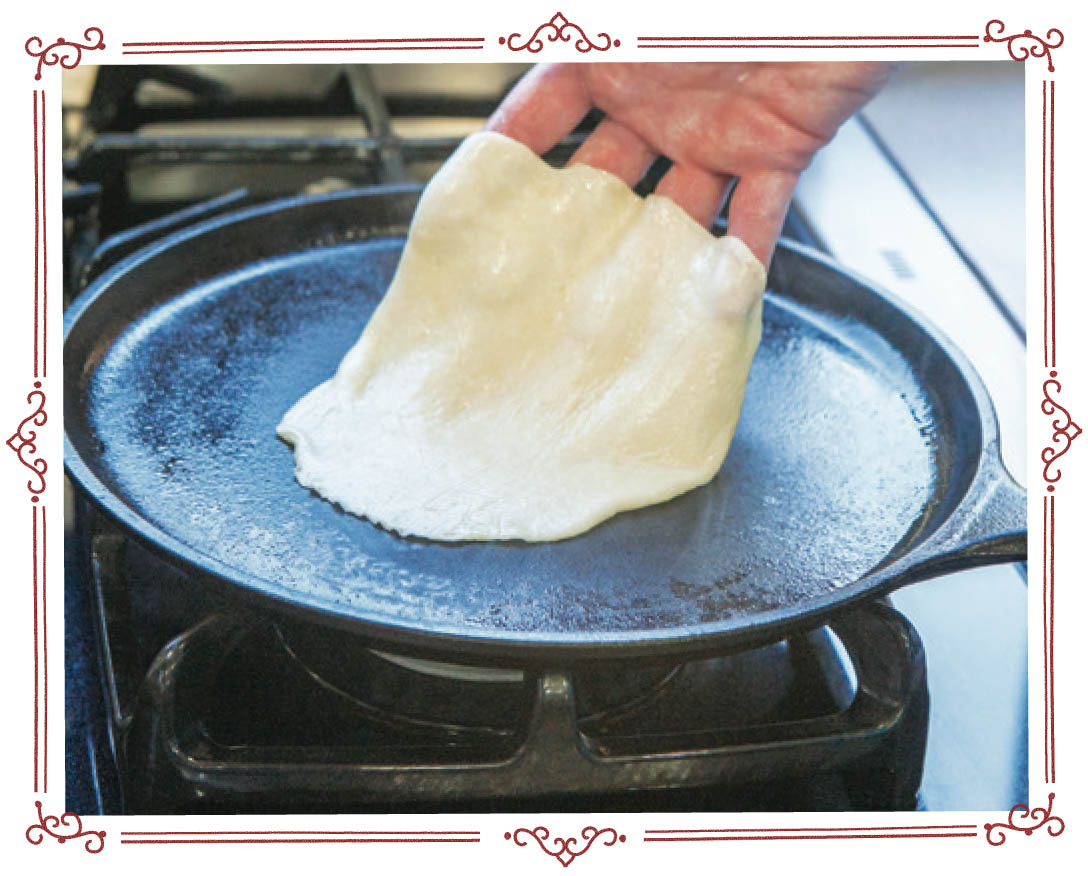
Over medium-low heat, preheat a 10-1/2” cast-iron griddle.
-
Cut two 8-1/2” squares of wax paper.
-
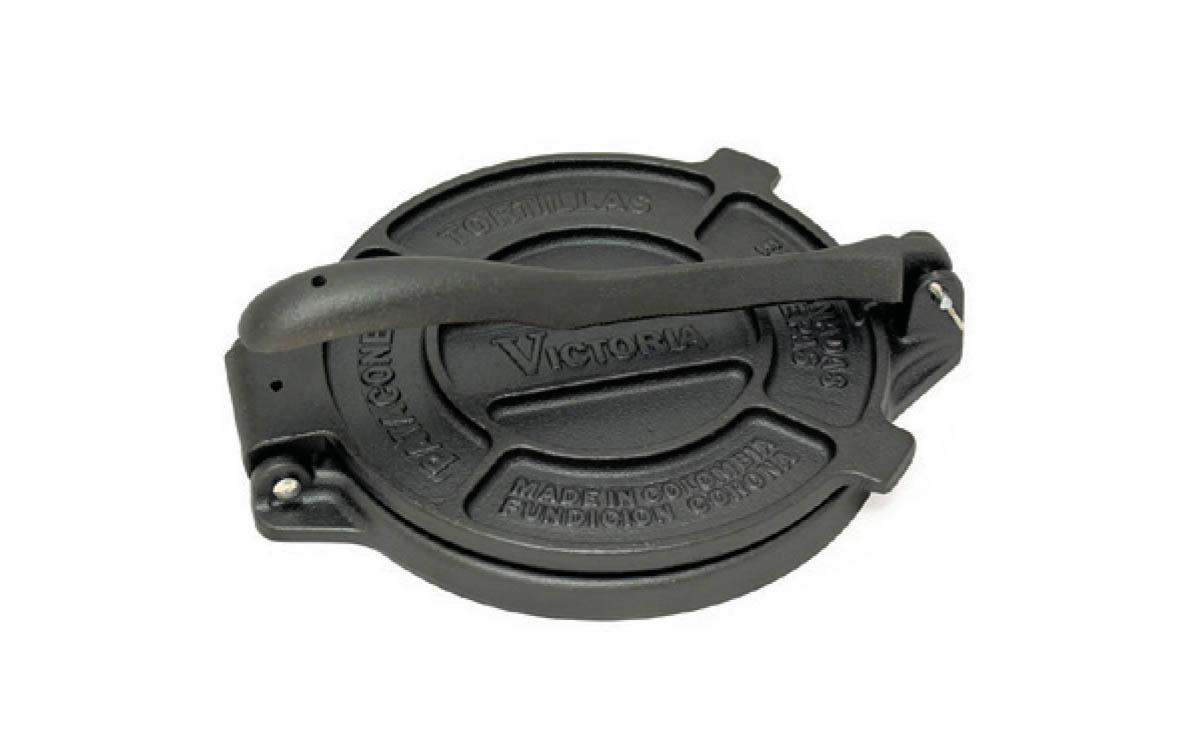
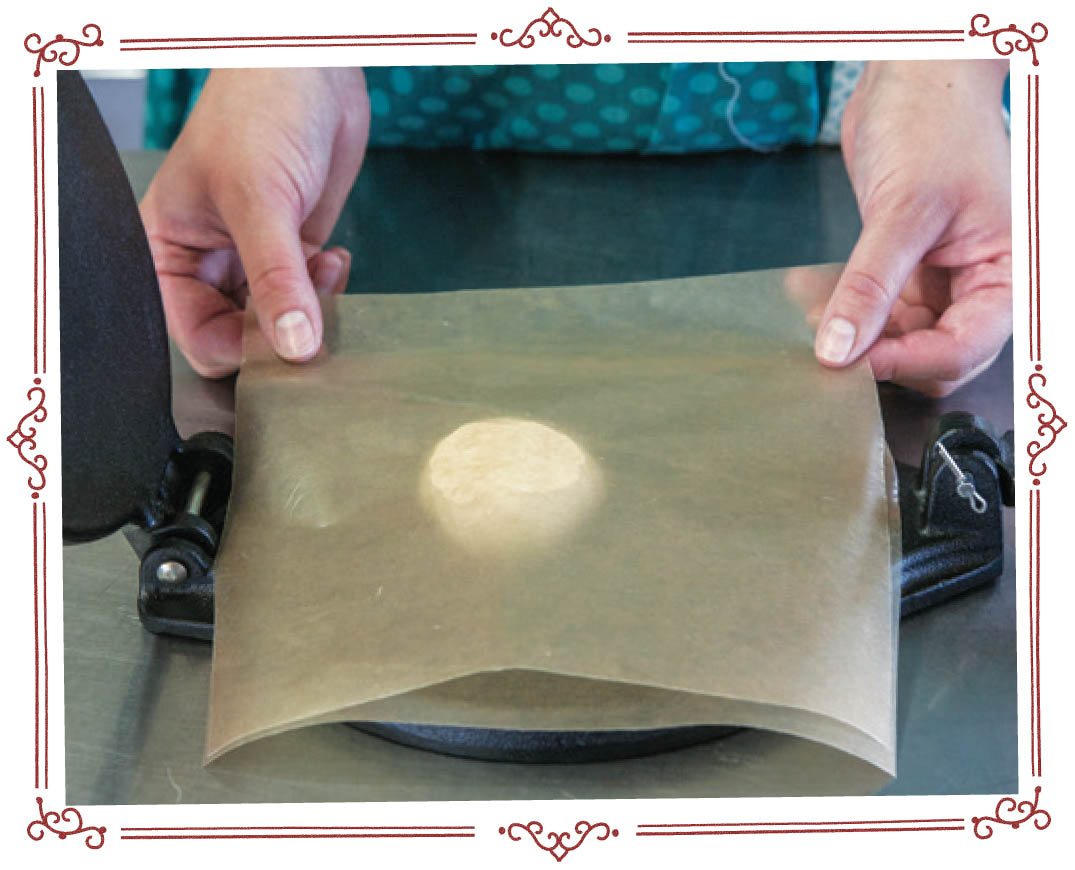
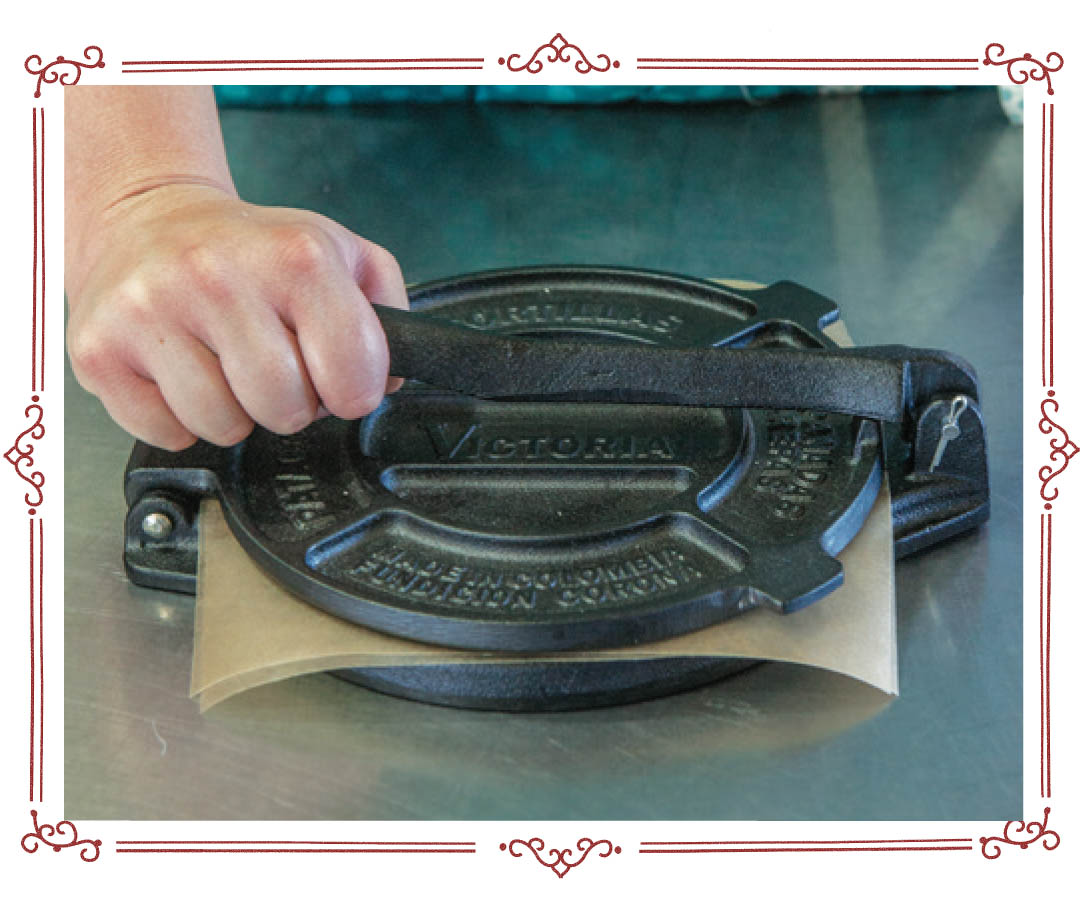
Divide dough into 12 equal portions. Form one portion into a ball. Press
dough in 8” cast-iron tortilla press between squares of wax paper. Flip
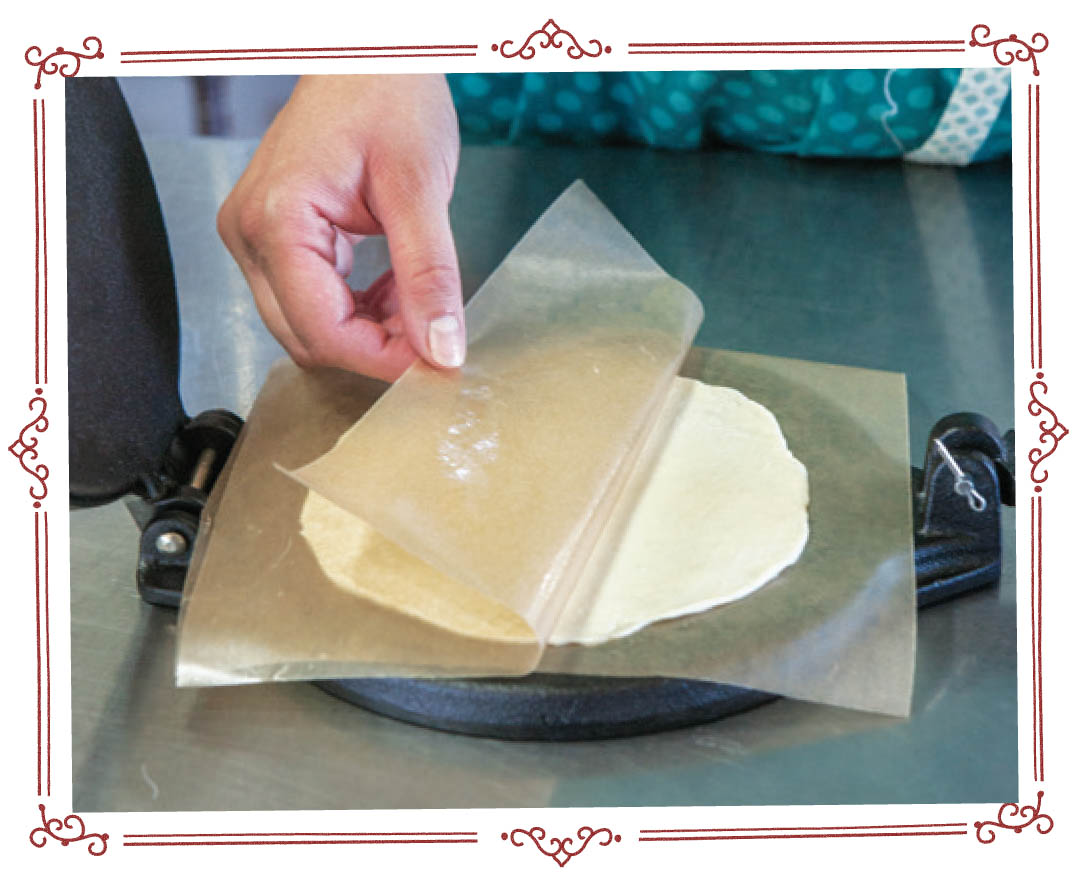
flattened dough over (in wax paper), and press again. Lift wax paper
from dough, replace, and continue to press until dough holds its shape
(it will want to shrink during the first few presses).
-
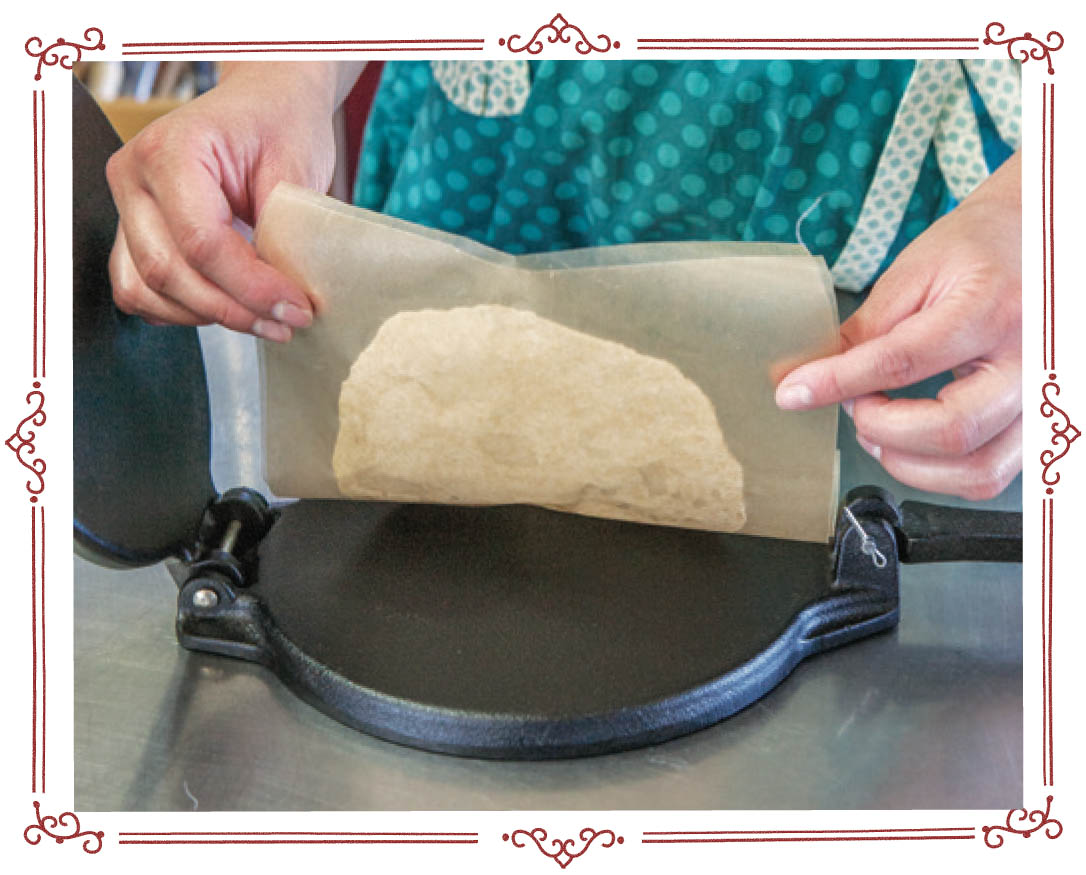
After pressing, carefully lift the wax paper, replace, and flip over.
Continue doing this until the wax paper readily lifts from the tortilla.
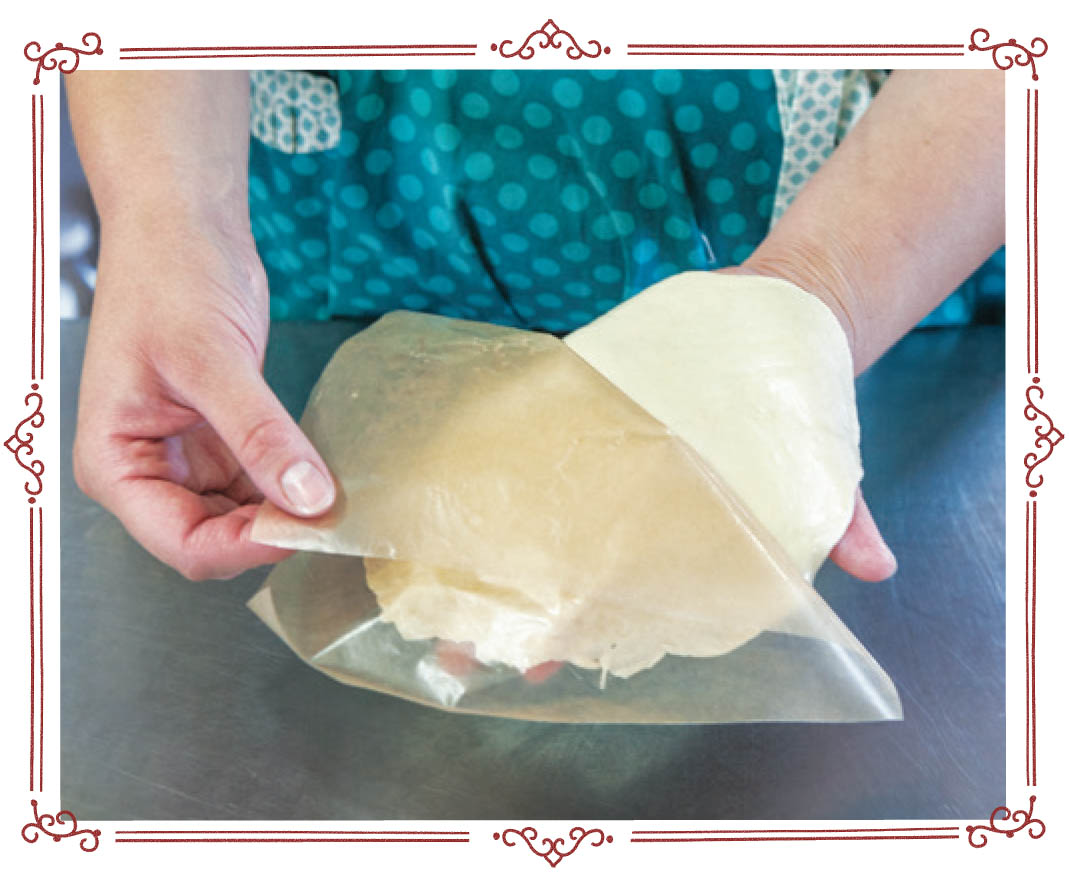
Remove one side of the wax paper and place tortilla on your hand.
Carefully remove the other piece of wax paper. Transfer tortilla to
preheated griddle.
-
Cook tortilla for 30–45 seconds, or until top of tortilla has lost its
sheen. Flip over and cook for an additional 30–45 seconds. Transfer
cooked tortilla to a cooling rack and repeat process with remaining
dough (if griddle gets too hot during cooking and pressing, reduce heat
or turn off intermittently).
-
Cool tortillas completely and transfer to an airtight container or Ziploc
bag. Reheat just before serving.
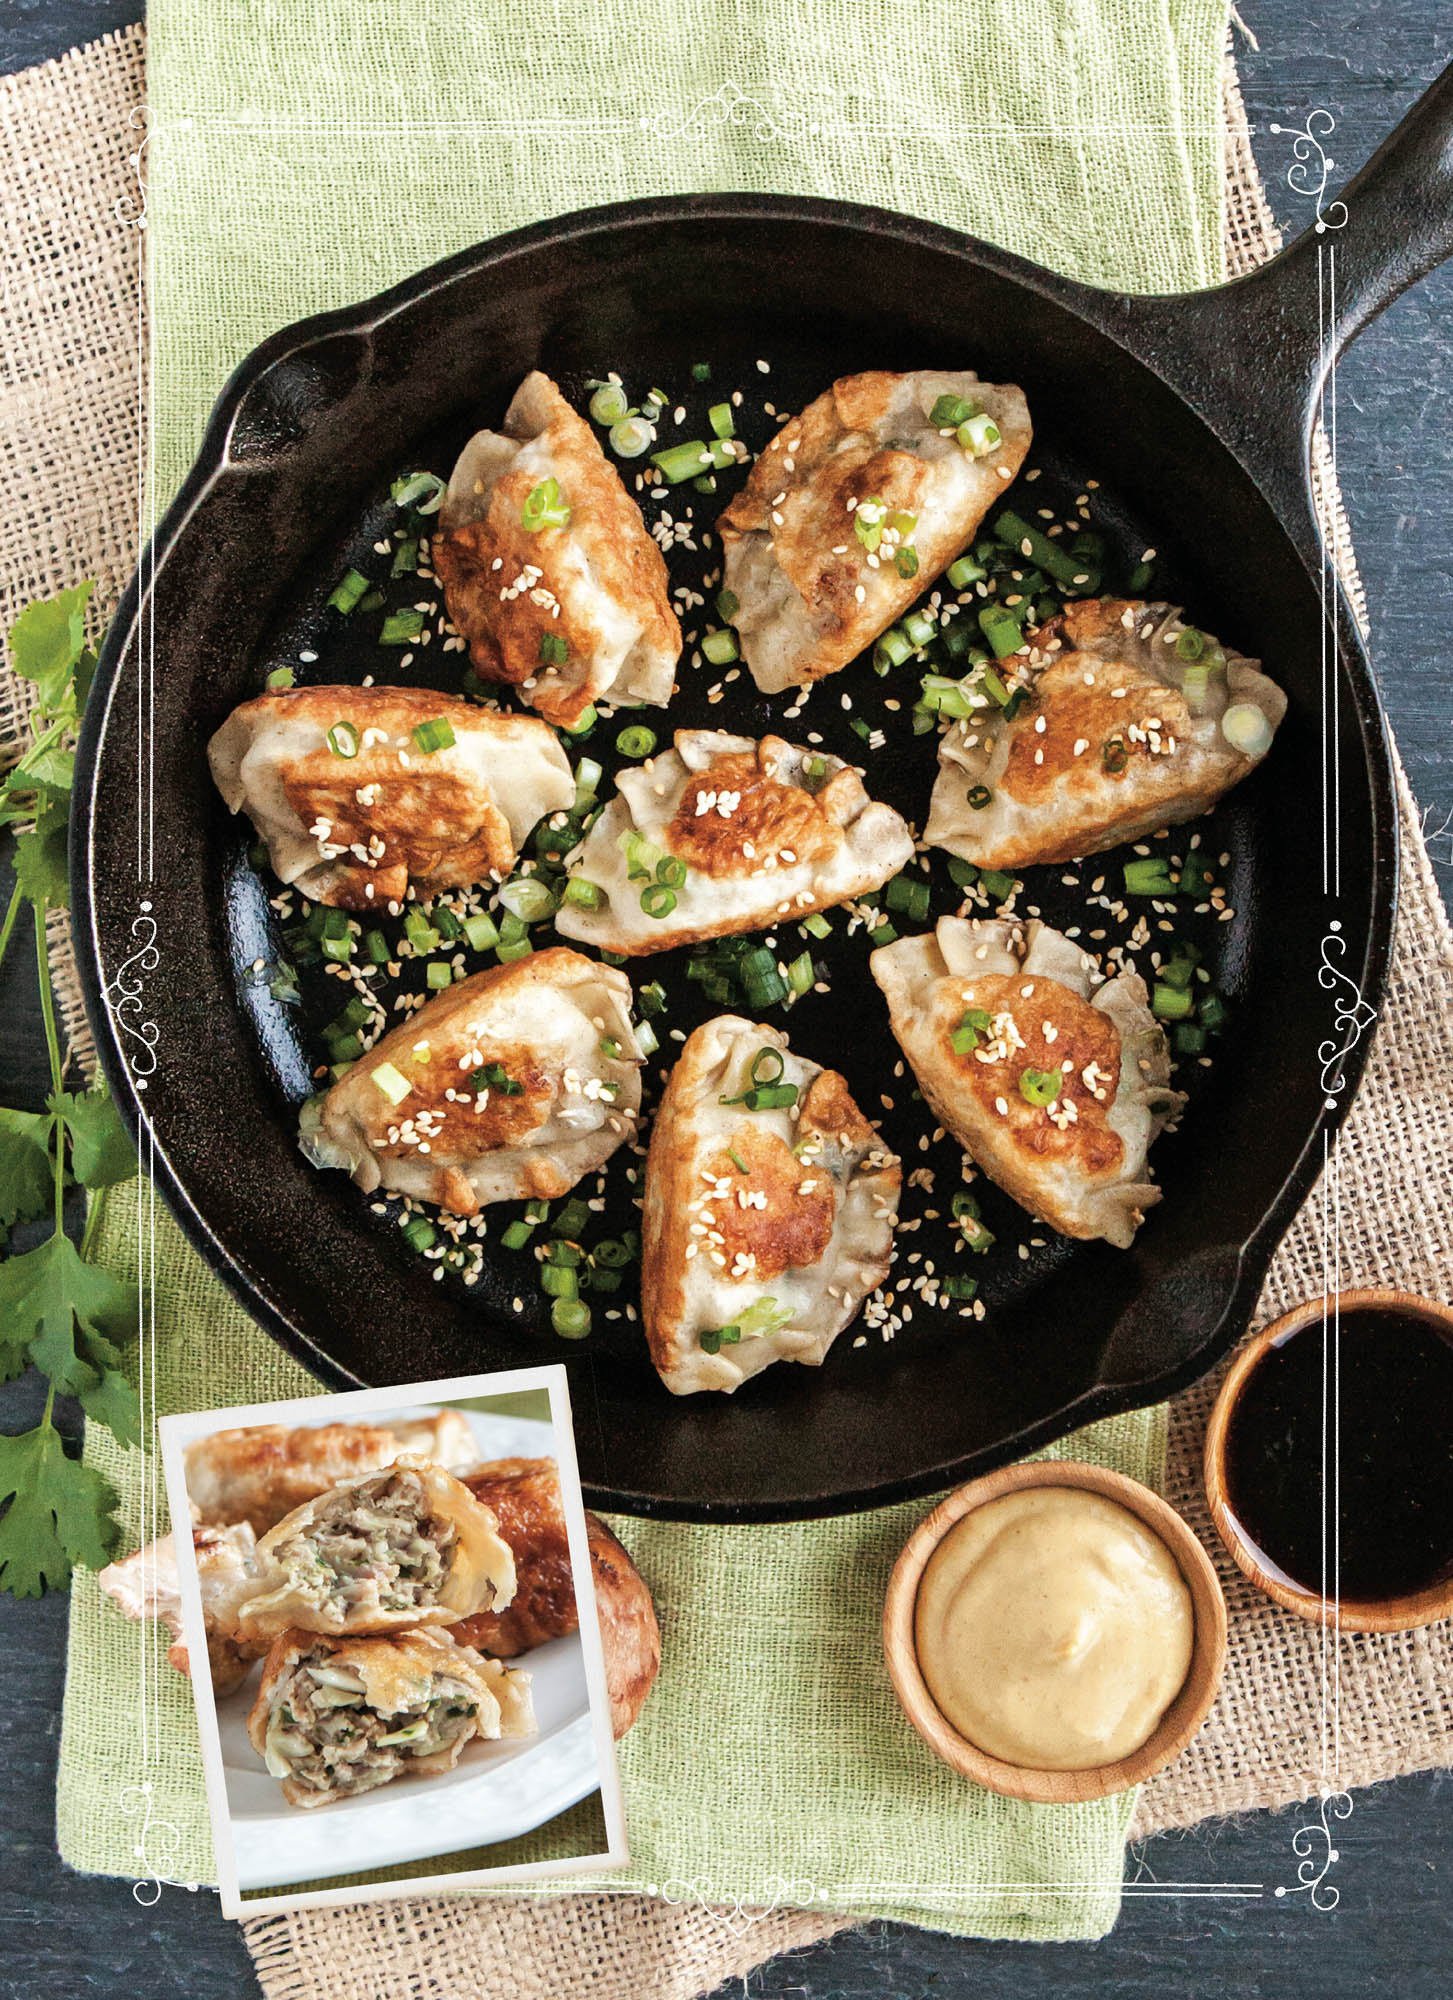
Fried Pot Stickers
Don’t be intimidated by the appearance of these pot stickers—they’re
really quite simple to make. All it takes is mixing up a little meat and spices, and
making the wrappers. After that, you’re well on your way to shaping these cute
little pouches and frying them up in your trusty cast-iron skillet.
MAKES: 32 POTSTICKERS
Filling:
1 lb ground pork
4 ozs cabbage, finely shredded (about 1 cup)
6 shiitake mushrooms, finely diced (about 2/3 cup)
1/4 oz chives, minced (about 1/4 cup)
1/4 cup fresh cilantro leaves, minced
2 garlic cloves, peeled and minced (about 2 t)
1/4 t fresh grated ginger
1/2 t salt
1/4 t white pepper
Wrappers:
1-1/4 cups flour
1/4 t salt
2 egg whites
1/4 cup water
3 T cornstarch
1/4 cup safflower oil, divided
Dipping Sauce:
2 T soy sauce
1 T brown sugar
1 T mirin
1 t toasted sesame oil
1/8 t fresh grated ginger
mustard for serving
-
Make filling: In a medium bowl, combine ground pork, cabbage, mushrooms,
chives, cilantro, garlic, ginger, salt, and pepper. Mix well, cover, and
keep refrigerated while making wrappers.
-
Make wrappers: In a small bowl, combine flour and salt. In another small
bowl, whisk egg whites and water together.
-
Make a depression in the center of the flour and pour in the egg-white
mixture. Stir until a dough forms. Let dough rest for 10 minutes.
-
While dough is resting, prepare dipping sauce: In a small bowl, combine
all ingredients and mix well. Cover and refrigerate.
-
Line two large baking sheets with wax paper.
-
Assemble pot stickers: Dust a clean work surface with cornstarch and roll
dough out to an 18” square, dusting with cornstarch as needed. Using a
3”-round cookie cutter, cut dough into 32 circles.
-
Arrange circles on prepared cookie sheets. Spoon 1 T filling onto each
circle. Fold each circle in half around the filling and crimp the edges
to seal. Flatten bottom so pot stickers can stand up.
-
Add 2 T safflower oil to an 8” cast-iron skillet and heat over medium-low
heat. Once oil is shimmering, begin frying pot stickers in batches,
adding remaining oil as needed. First, fry on the bottom for 1-1/2–2
minutes, and then on each side for 1-1/2–2 minutes or until golden
brown.
-
Serve with dipping sauce and mustard.
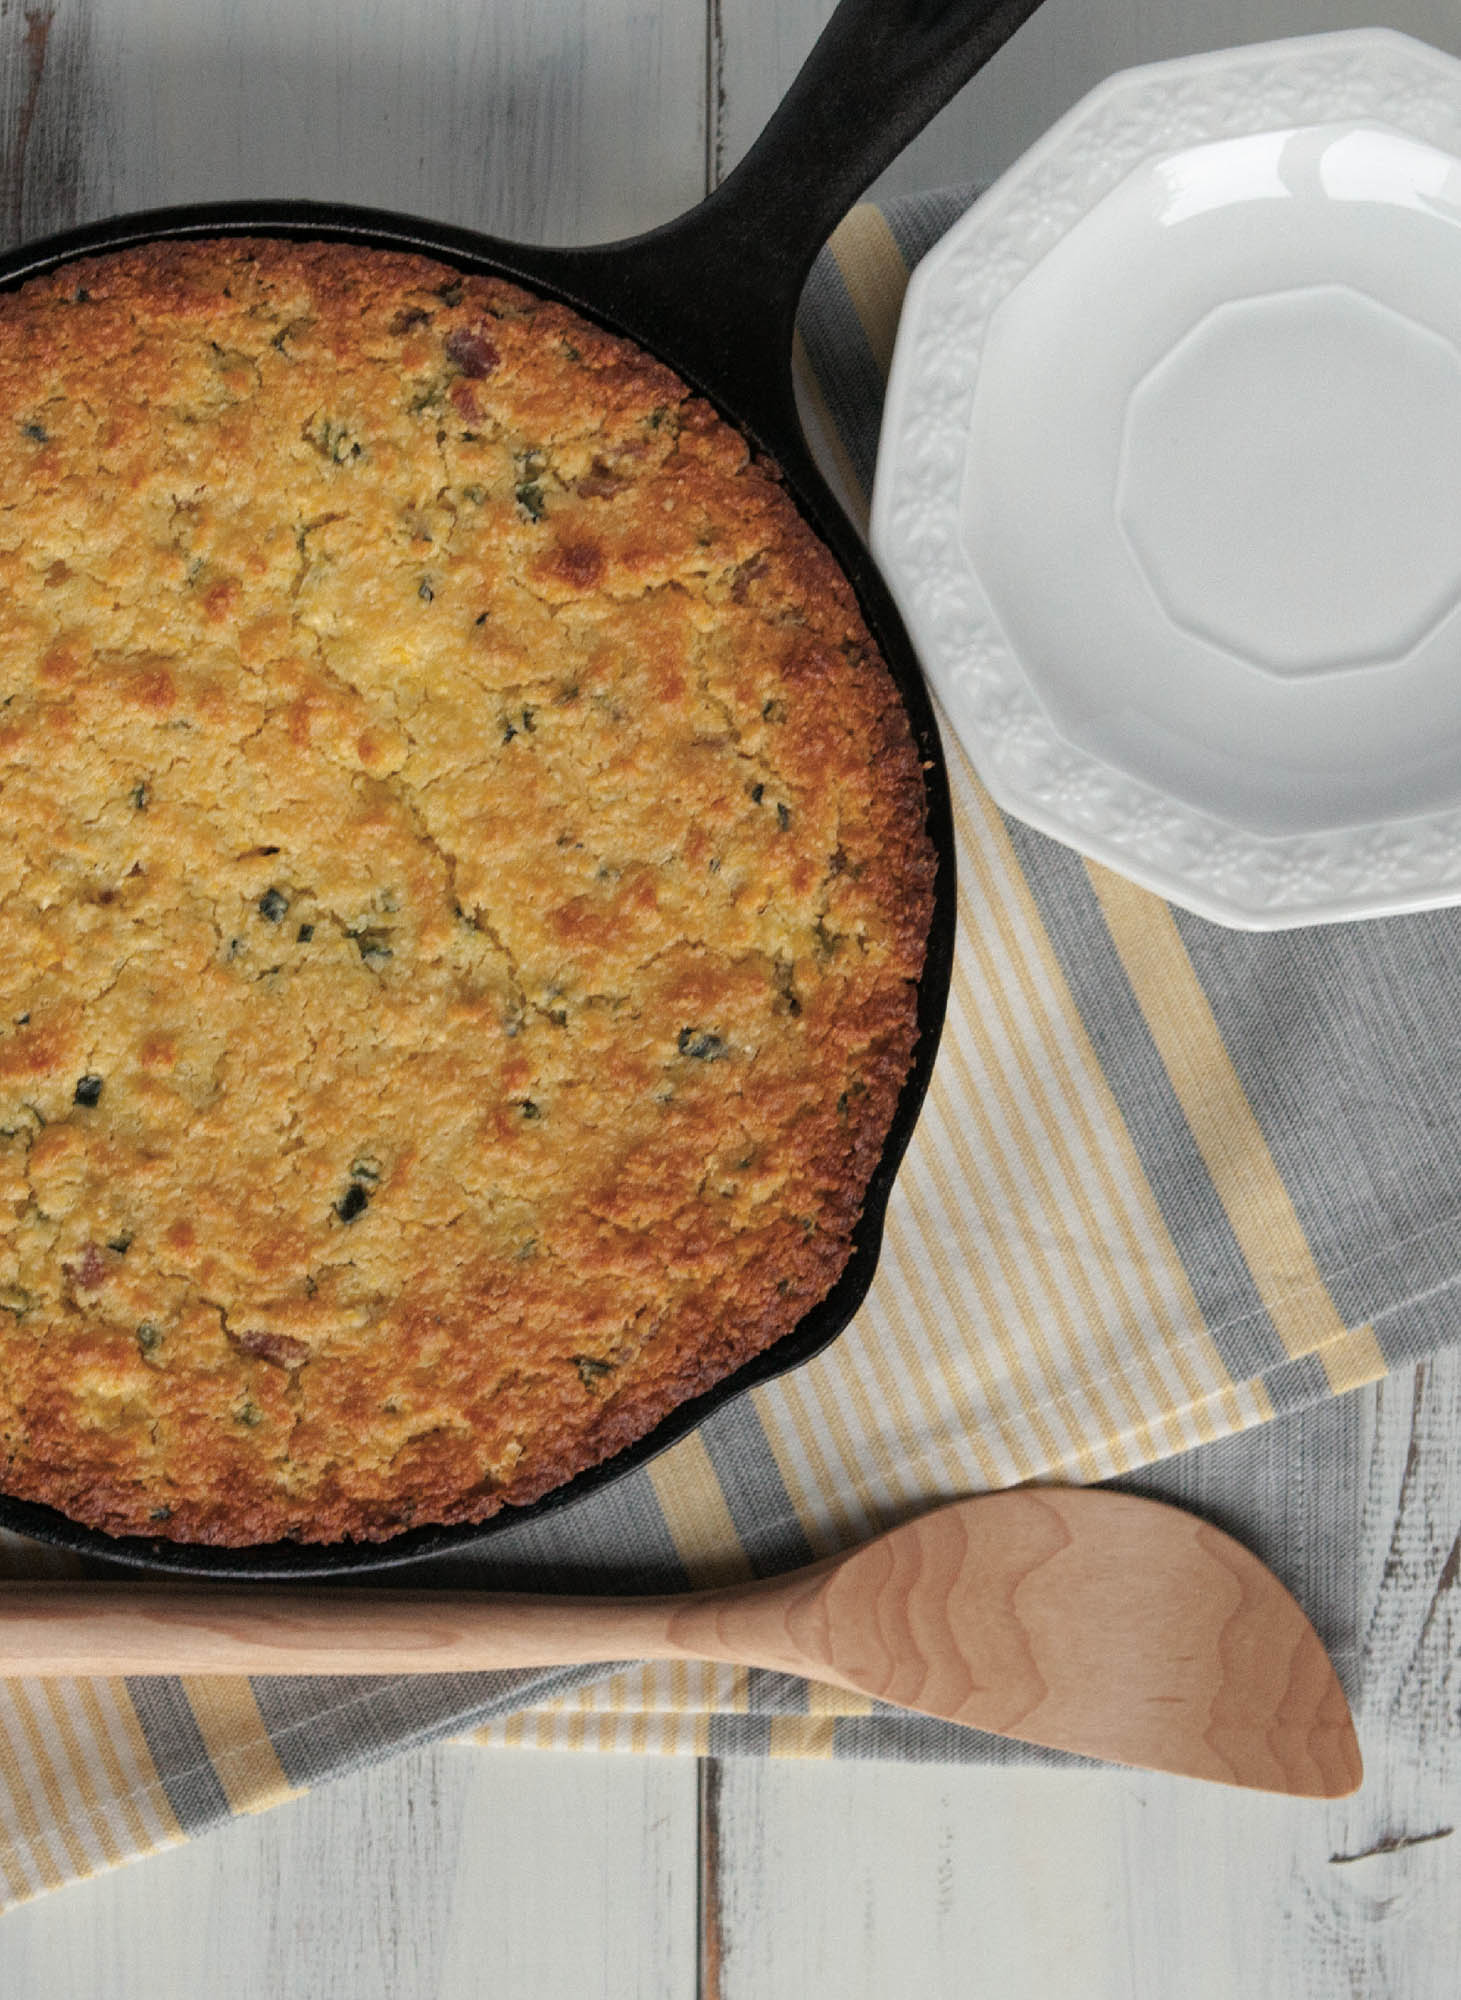
Sweet-Corn Casserole
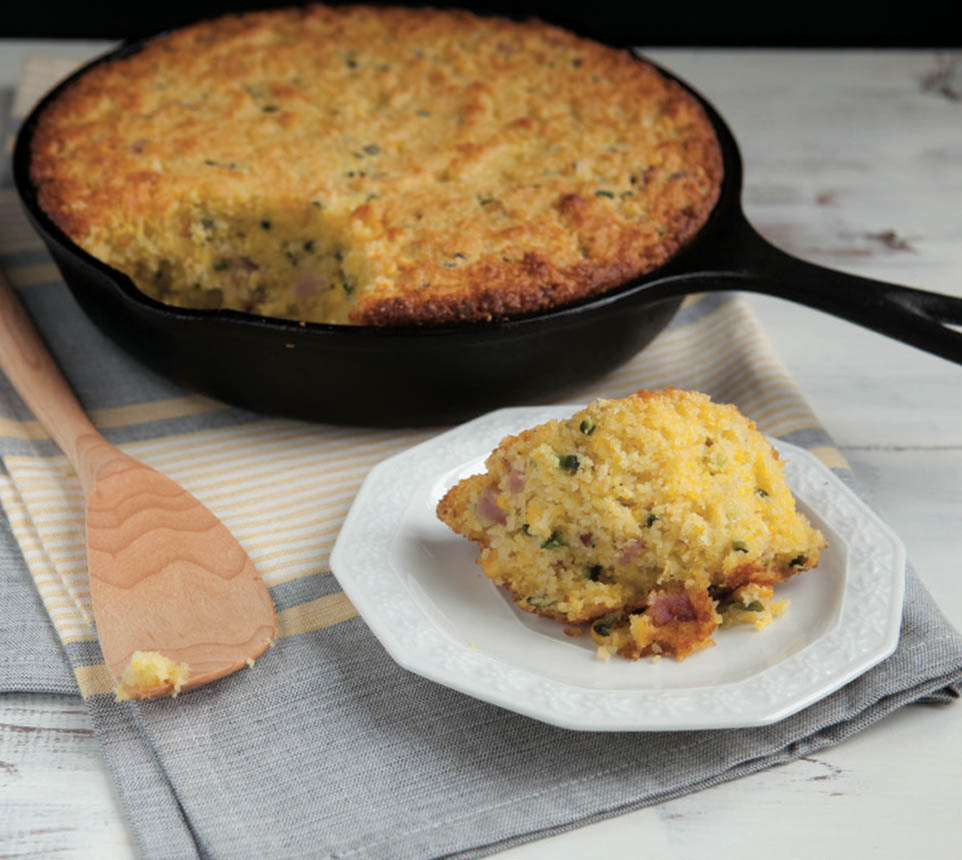
This casserole is a definite crowd pleaser. It lands somewhere on
the texture spectrum between spoon bread and corn bread—still sliceable, but
incredibly tender and soft. It’s so deceptively glutenfree that when you whip up a
batch, you’ll have people exclaiming, “I can’t believe this is gluten-free!”
MAKES: 6 SERVINGS
1-1/2 cups fresh or thawed frozen corn, divided
2 eggs
1/2 cup butter, melted
3/4 cup sour cream
1/2 cup sugar
1 t salt
1 4-oz can diced green chiles (can substitute 1/2 cup fresh
poblano chile, finely diced)
3 ozs cooked ham, cut into 1/4” cubes (about 1/2 cup)
1 cup cornmeal
2/3 cup white rice flour
1 T baking powder
-
Preheat oven to 350°F. Generously butter a 10-1/4” cast-iron skillet.
-
Combine 1 cup corn and eggs in a food processor; blend. Transfer to a
large bowl. Add butter, sour cream, sugar, and salt; mix thoroughly. Add
remaining 1/2 cup corn, green chiles, and ham; mix.
-
In another bowl, combine cornmeal, rice flour, and baking powder.
-
Combine wet and dry ingredients; stir until just blended.
-
Transfer mixture to prepared skillet. Bake for 50 minutes, or until
casserole is puffed in center, golden brown around edges, and a
toothpick inserted in the center comes out clean.
Skillet Corn Bread
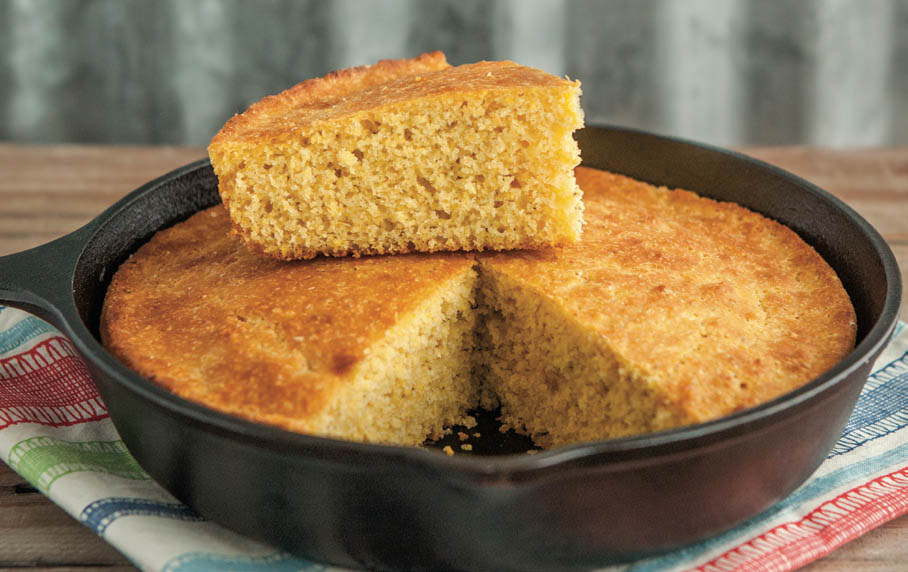
You can’t have a cast-iron book without a skillet corn-bread recipe.
Hot and buttered, it’s quintessential cast iron.
MAKES: 4 SERVINGS
1 cup flour
1 cup finely ground cornmeal
1/2 t baking powder
1/2 t baking soda
1/2 t salt
1 cup buttermilk
1 egg
2 T honey
4 T butter, melted
-
Preheat oven to 400ºF. Generously butter an 8” cast-iron skillet.
-
In a medium bowl, combine flour, cornmeal, baking powder, baking soda,
and salt.
-
In another medium bowl, combine buttermilk, egg, and honey. Whisk in
melted butter (butter will chill and make the mixture slightly lumpy).
-
Add buttermilk mixture to flour mixture and mix well. Spoon batter into
prepared skillet.
-
Bake for 22–25 minutes, or until a toothpick inserted into the center
comes out clean.
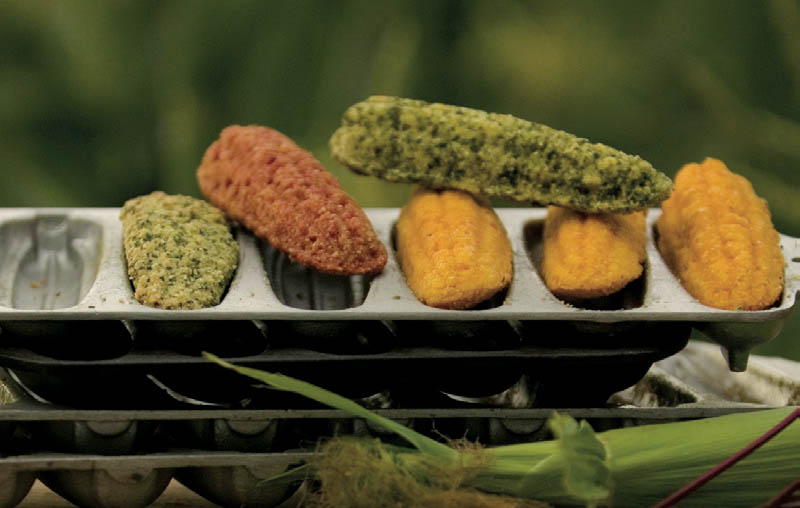
Healthy Corn Doggies
MAKES: 14 CORN DOGGIES
1 cup flour
3/4 cup cornmeal
1/3 cup sugar
2 t baking powder
3/4 t salt
5 T cold butter
1 cup vegetables, steamed and puréed (we used beets for one
batch, carrots for another, and kale for the third)
1/2 cup water (or cooking liquid from vegetables)
1 egg
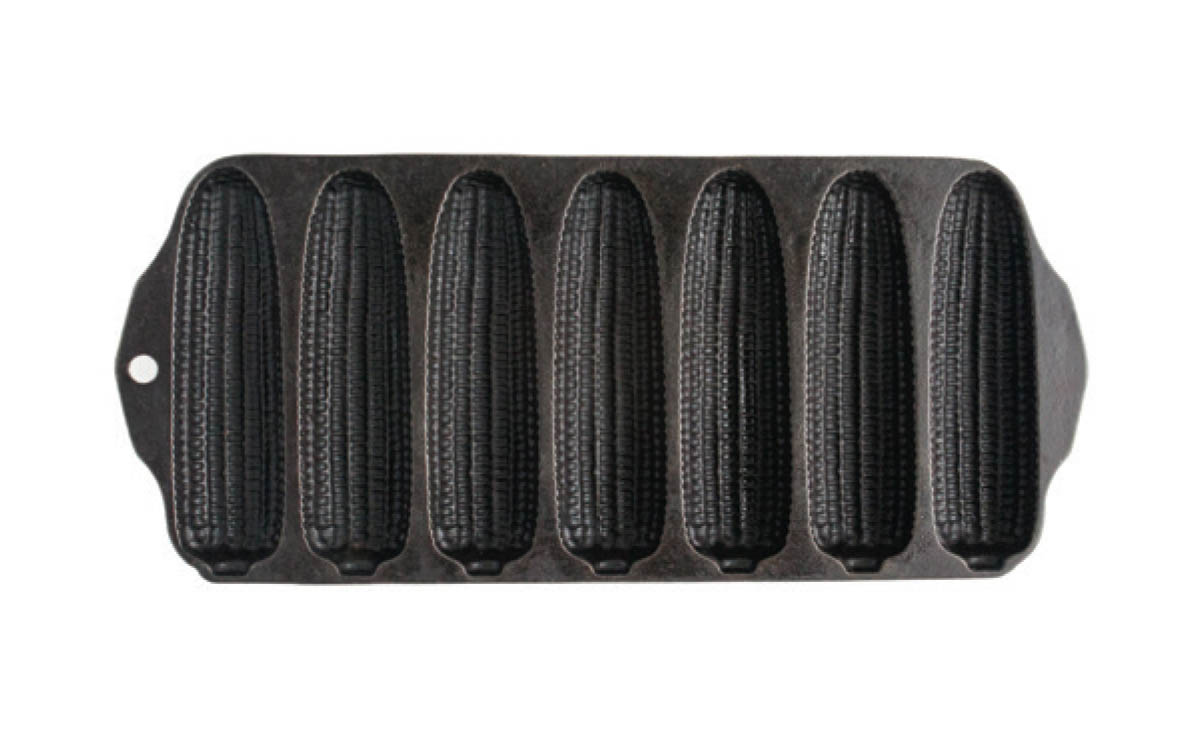
Preheat oven to 425°F. Lightly butter a cast-iron cornstick pan.
-
In a medium bowl, combine flour, cornmeal, sugar, baking powder, and
salt. Using a pastry blender or fork, cut butter into dry ingredients
until mixture resembles coarse crumbs with some pea-sized pieces
throughout.
-
In a small bowl, combine vegetables, water or cooking liquid, and egg;
stir into dry ingredients and mix just until combined.
-
Spoon batter into prepared pan, filling each cornstick cavity to the top.
Bake for 25 minutes, until tops begin to brown. Repeat with remaining
batter.
