
Any manipulation of metal is considered forming. Forming creates interesting three-dimensional pieces. As you move into heavier gauges you will need to anneal the metal (see Annealing) before working with it, and perhaps afterward if you plan to continue working with the design.
Chain-nose pliers: The workhorse of wire tools, chain-nose pliers are used for grasping wire and sheet, opening and closing jump rings, and making sharp angled bends. Because you may need to manipulate the wire or sheet using both hands, it’s a good idea to have at least two pairs in your workshop. Bent-nose pliers are similar to chain-nose pliers but have a bend at the tip that allows access to tight places for tasks such as tightening coils and tucking in ends.
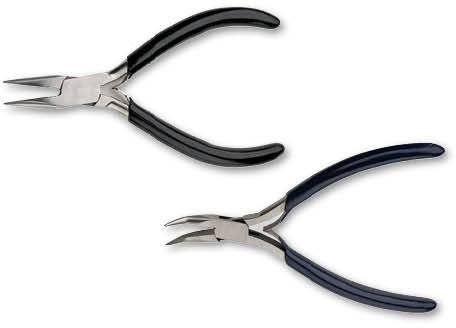
Chain-nose pliers (top), bent-nose pliers (bottom)
Flat-nose pliers: Flat-nose pliers have broad flat jaws and are good for making sharp bends, grasping spirals, and holding components.

Flat-nose pliers
Round-nose pliers: Another wireworker’s necessity, round-nose pliers have pointed, graduated round jaws. They are used for making jump rings, simple loops, and curved bends in wire or sheet. They are also available in short and long nose. Longer jaws give you a longer reach but less leverage at the tips. Shorter jaws offer more strength at their tips but less of a reach. You can ruin long-nose pliers trying to bend heavy-gauge wire or sheet.

Short round-nose pliers (top), long round-nose pliers (bottom)
Bail-forming pliers: Bail-forming pliers have long untapered jaws that enable you to make consistent loops. Each jaw has a slightly different diameter, so one set of pliers enables you to make two sizes of loops.

Bail-forming pliers
Stepped forming pliers: Stepped forming pliers come in different sizes and shapes. They can have one flat jaw or one concave jaw and one jaw of various-sized round barrels. They’re perfect for wrapping loops of a consistent size. They may also be called wrap-and-tap pliers.
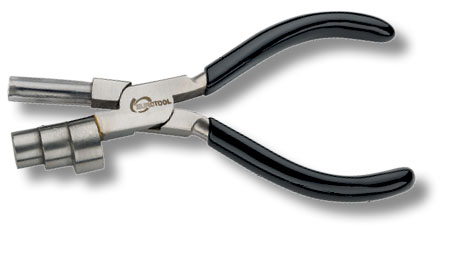
Stepped forming pliers
Nylon-jaw pliers/wire-straightening pliers: The jaws of these pliers are made of hard nylon. Pulling wire through the clamped jaws will straighten any bends or kinks. They can also be used to hold, bend, or shape wire and sheet without marring it. Keep in mind that every time you pull wire through straightening pliers, you’re work-hardening it more, making it more brittle and harder to manipulate.

Nylon-jaw pliers
Manipulation with pliers is considered forming whether it is using the pliers as a mandrel or using them as a gripping tool to pull the sheet around a mandrel. They are really the most basic tool there is for forming.
Anneal the metal if necessary (see Annealing). Grasp the edge of the sheet between the jaws of the pliers and bend the metal to form an angle or tube (Figure 1).
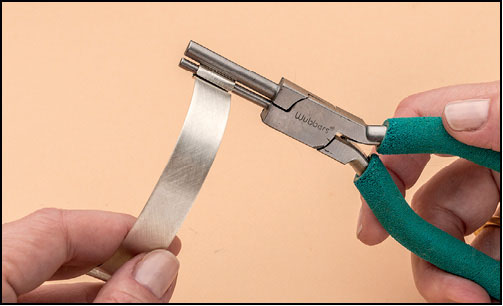
Figure 1
A mandrel is a spindle, rod, or bar around which you can bend metal or wire. Depending upon the hardness and gauge of the metal, you can form the metal around mandrels using your hands or tools. Mandrels come in a variety of shapes and sizes. Some are made specifically for bracelets, rings, and making bezels. Almost anything can be used as a mandrel to shape wire, including wooden dowels, ballpoint pens, chopsticks, knitting needles, carpenter’s pencils, and other pieces of wire. A Sharpie-brand permanent marker is the perfect shape for making French ear wires.
Anneal the metal if necessary (see Annealing). Place the sheet against the mandrel and begin hammering with a rawhide mallet to shape the metal to the form of the mandrel (Figure 2). Continue moving the sheet around the mandrel as you hammer.
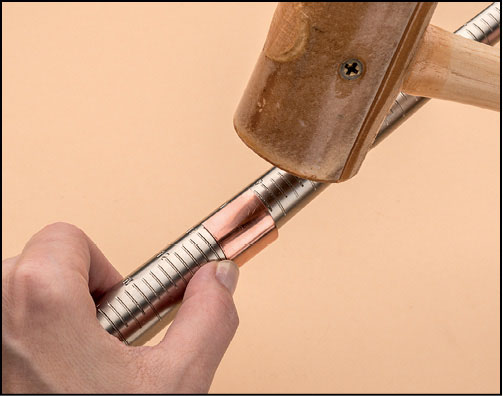
Figure 2
These are simple tools that do a gargantuan job. They come in steel and wood, and the block has various-sized depressions on each side for shaping and doming metal, most often discs. The block is used with punches, also in wood or steel. Gently hammering the punches against metal, in the depressions, shapes the metal.
Dapping and doming in a forming block is a quick and easy way to make concave and convex shapes in your metal.
1. Place a metal disc in a depression in the forming block that is bigger than the disc (Figure 1).
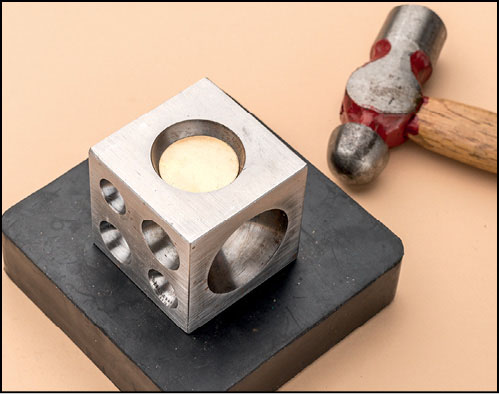
Figure 1
2. Using a brass or utility hammer and corresponding punch, hammer the punch to form the disc into a dome. If you are doming a textured piece, place a Pro-Polish pad between the texture and the tool (Figure 2).
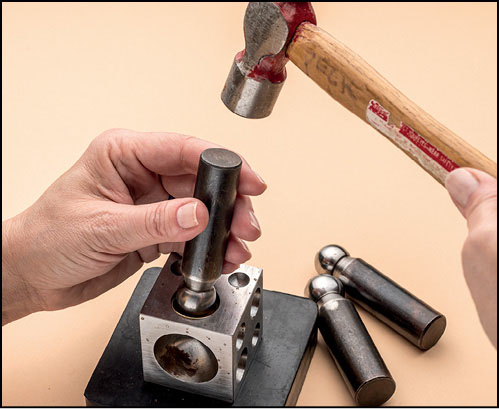
Figure 2
3. To make the dome higher, gradually move the disc to smaller depressions and hammer with corresponding punches (Figure 3).
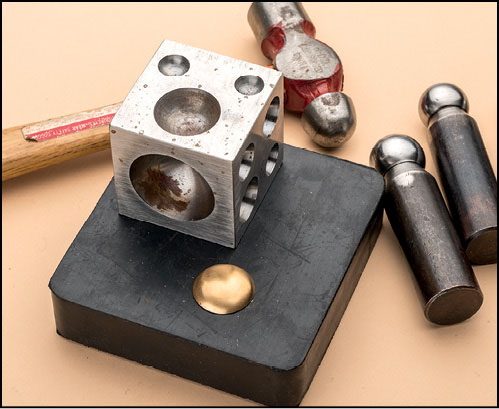
Figure 3
Rawhide and nylon mallets are used for shaping metal around mandrels and for work-hardening or flattening it without marring it.
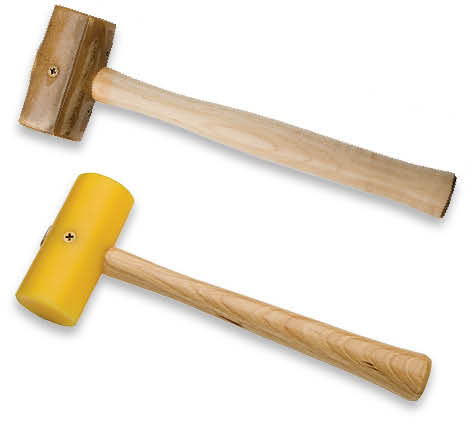
Rawhide mallet (top), nylon mallet (bottom)
This handy bench tool, used for shaping and forming wire and metal, comes in a selection of sizes. Made of hardened tool steel, it offers a flat surface and often one flat horn and one rounded horn.
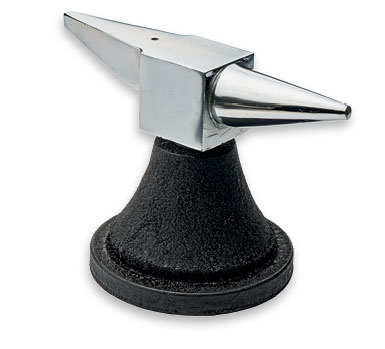
Anvil
Steel bench blocks are used most frequently as a hard and portable surface on which to hammer metal. Nylon and rubber bench blocks are also useful because they provide a softer surface on which to hammer, preventing the metal from being marred.
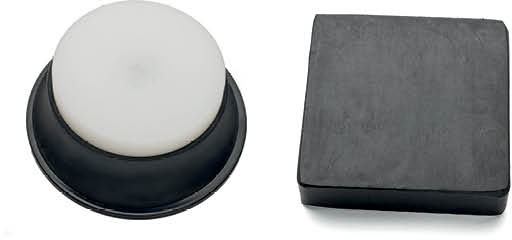
Bench blocks
Almost all jewelry pieces include wire in some form. These are some of the most basic and frequently used techniques. The secret to fine-wire jewelry is neatness. Ends should be neat and smooth or tucked out of sight, and wrapped loops should have the same number of wraps on each neck. Try working from the spool of wire, instead of cutting a separate length to start each piece. It eliminates waste and is much more cost-effective.
1. Working from the spool, flush cut the end of the wire. Grasp the end of the wire in round-nose pliers so you can just see the tip of the wire (Figure 1).

Figure 1
2. Rotate the pliers fully until you’ve made a complete loop (Figure 2).
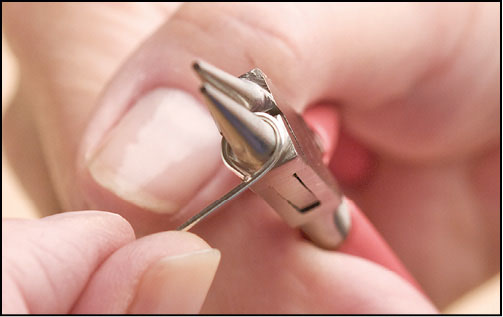
Figure 2
3. Remove the pliers. Reinsert the tip of the pliers to grasp the wire directly across from the opening of the loop. Make a sharp 45° bend across from the opening (Figure 3).
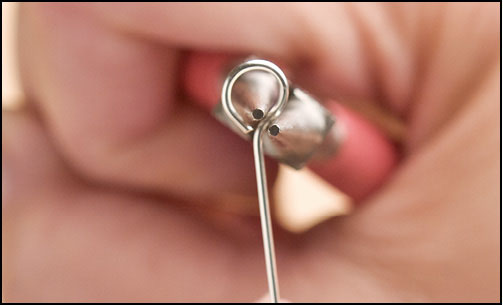
Figure 3
4. Center the loop over the length of the wire like a lollipop (Figure 4).
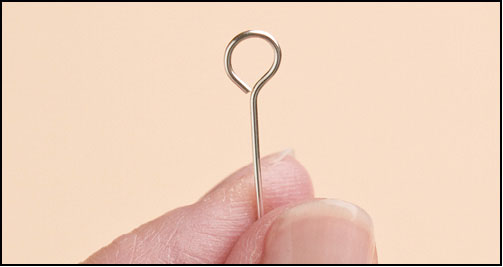
Figure 4
1. Working from the spool, flush cut the end of the wire. Grasp the wire about 2" (5 cm) from the end with chain-nose pliers. Use your fingers to bend the wire flat against the pliers to 90° (Figure 1).
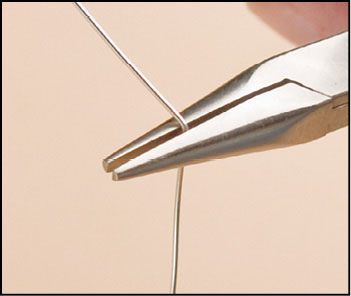
Figure 1
2. Use round-nose pliers to grasp the wire right at the bend you just made, holding the pliers perpendicular to the tabletop. Pull the wire up and over the top of the round-nose pliers (Figure 2).
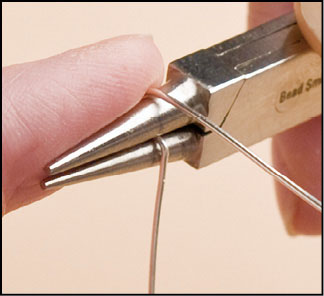
Figure 2
3. Pull the pliers out and put the lower jaw back into the loop you just made (Figure 3).

Figure 3
4. Continue pulling the wire around the bottom jaw of the pliers into a full round loop (Figure 4).
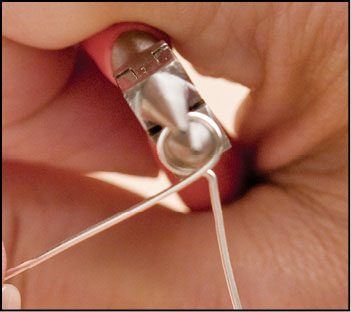
Figure 4
5. With your fingers or chain-nose pliers, wrap the wire around the neck of the lower wire two or three times (Figures 5 and 6).

Figure 5

Figure 6
6. Trim the wire and pinch the end snugly with chain-nose pliers.
1. Coils can be made on any round mandrel, including another piece of wire. Hold one end of the wire tightly against the mandrel with your thumb and coil the length up the mandrel. Be sure to wrap snugly and keep the coils right next to one another (Figure 1).
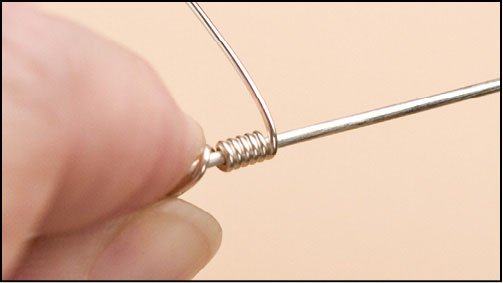
Figure 1
2. Flush cut both ends (Figure 2).
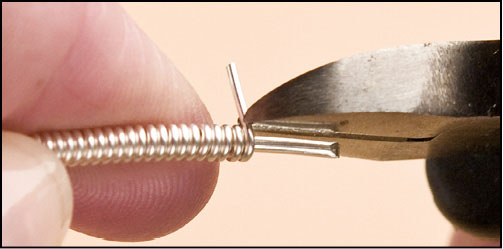
Figure 2
1. Anchor the frame to the desk using a C-clamp or hold it in your nondominant hand. Working from the spool of wire, wrap the end of the wire a couple of times around the back of the mandrel to anchor it (Figure 1).
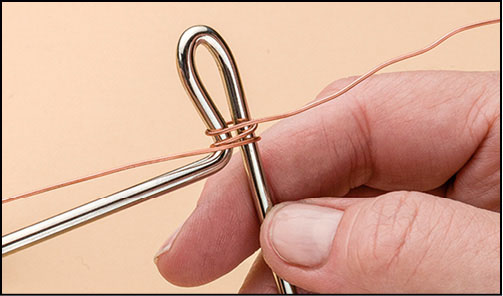
Figure 1
2. Insert the mandrel into the frame and begin turning the mandrel to start the coil, near the handle. Keep the wire taut while you feed it onto the mandrel (Figure 2).
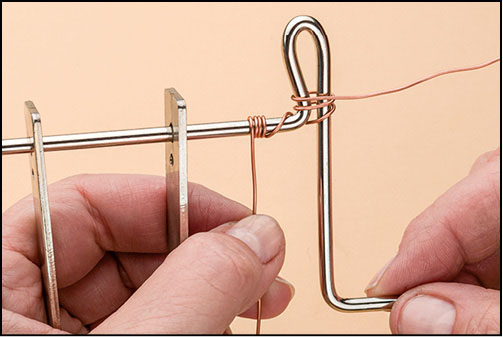
Figure 2
3. Gently push the coil against the frame to keep the wraps tightly against one another. Keep turning the mandrel and pushing the coil against the frame until the coil is the length you want (Figure 3).

Figure 3
4. Trim the wire from the spool, unwrap the anchor wire, and remove the coil from the mandrel. You may need to break the tension of the coil in order to remove it. To do this, grasp both ends of the coil on the mandrel and twist them slightly in opposite directions. Flush cut both ends of the coil.
1. Coil the wire snugly around a mandrel (Figure 1). Each single coil will make one jump ring.

Figure 1
2. Remove the mandrel. Use flush cutters to cut through all the rings at the same spot along the length of the coil, snipping one or two at a time (Figure 2). They will fall away and each ring will be slightly open. One side of the ring will be flush-cut, and the other side will have a beveled edge. Flush-cut the beveled side so the ring will close properly.
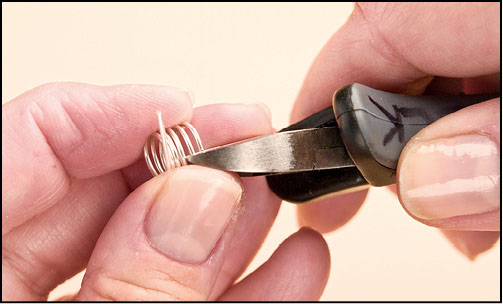
Figure 2
3. Tumble to work-harden or hammer with the rawhide hammer and bench block. The jump rings you make will have the inner diameter (ID) of the mandrel you used to make them.
4. Always use two chain- or bent-nose pliers to open and close jump rings. Grasp the ring on each side of the opening with pliers (Figure 3).

Figure 3
5. Gently push one side away from you while pulling the other side toward you, so the ring opens from side to side (Figure 4). To close, reverse the directions of your hands.
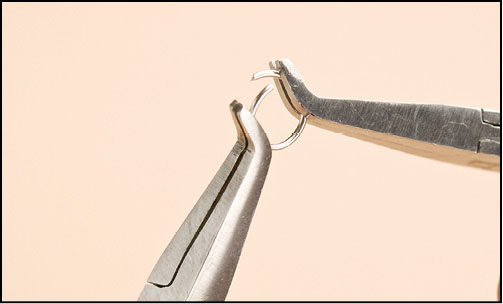
Figure 4
1. Make a small loop on the end of 11⁄2" (3.8 cm) of wire (Figure 1).

Figure 1
2. Hold the loop against a Sharpie marker and bend the wire over the marker away from the loop (Figure 2).
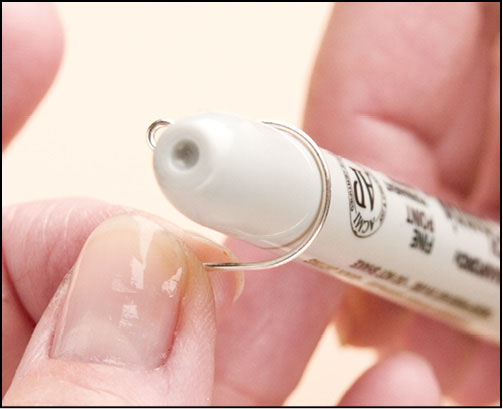
Figure 2
3. Use round-nose pliers to make a small bend up at the end of the wire (Figure 3). Use a cup bur or file to smooth the end of the wire. Repeat for the other ear wire.
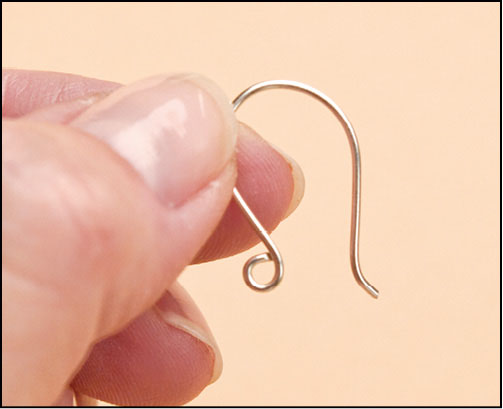
Figure 3