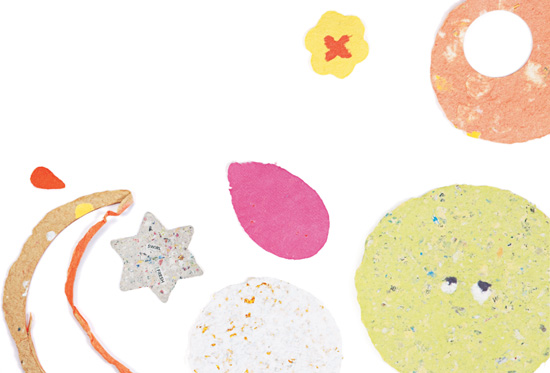

Once you’ve mastered the basics of papermaking, then the fun really begins! This chapter covers a variety of ways you can work with pulp, including ways to add color and glitter, and how to layer it and paint with it. As you practice these techniques, you will walk through the worldwide wonderland of waste paper!
You will find amazing colors — pastels and hues of a thousand shades residing in dyed fibers. On these papers, you will find expensive and exotic inks. The entire world of waste paper is as mixable as the colors on an artist’s palette. You can find gleam and glisten in paper/foil combinations and in the heavy metallic inks that shatter into a thousand points of light in the blender. Take the walk.
People often ask me how to dye paper, and my initial reaction is, “If you want to make decorative and artistic papers, why spend your time on dyeing?” All the colors, hues, and pastels of dyed fibers you can ever imagine are in your wastebasket, for free. And remember: Wastepaper does not mean waste fiber. These fibers have been professionally dyed with high technology and expert supervision at pulp or paper mills. You are not likely to match their quality at home for some time, if ever.
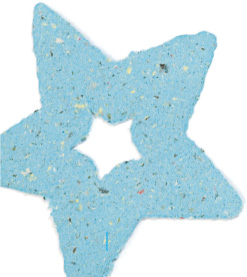
Also, color for handmade paper is readily available by recycling papers printed with colored ink. Take time to notice subdued or brilliant inks on papers. Then put those colors to use by adding them to your handmade papers.
However, if you want to try your hand at dyeing, or if you absolutely must have what some natural dye offers, just keep in mind that the in depth world of dyeing is complex, made up of pots, pans, multi-hour soaks, hot and cold water, acidity and alkalinity, plant and berry squishing and squashing, straining, lots of time, some expense, and more.
If all of this interests you, check other papermaking books for specific recipes (see Resources, page 196). Other sources of information are arboretums, botanical gardens, and paper mills. Watch for any area papermaking dye workshops.

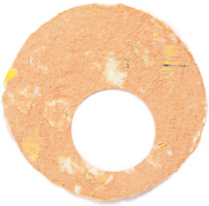
Many people respond to glitter in paper. Soft or brilliant reflections from a paper surface, as it is turned at different angles to the light, can surprise, please, and delight. You don’t need to buy glitter, although you can if you like. Glittery effects can be achieved by using a number of recycled materials. Simply stated, foil is where you find it, attached to or separate from paper. If you see it, try it.
A problem can arise when using foils: The shiny bits can be pounded into small, dense wads by the blender. Sometimes, this doesn’t matter, especially if drying is done without heat and under considerable pressure. When foil wads do become a problem, it can help to reduce the amount of time the foil part of the paper is in the blender. Total flatness of foil pieces can best be achieved by cutting the foil to desired sizes with scissors and adding them to the pulp in the deckle, after the pulp has been blended (see Surface Embedment, page 64).
Glitter also comes in near-powder form in bottles, available at your local craft store or online. This small-size flake or near-powder glitter can be added in either the blender or the deckle. The blender affects some types, but not others.
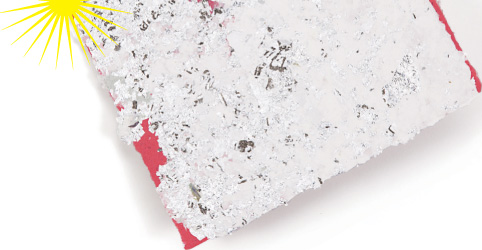

Fine glitter, available at craft stores and online, is retained when mixed in with liquid pulp (above).
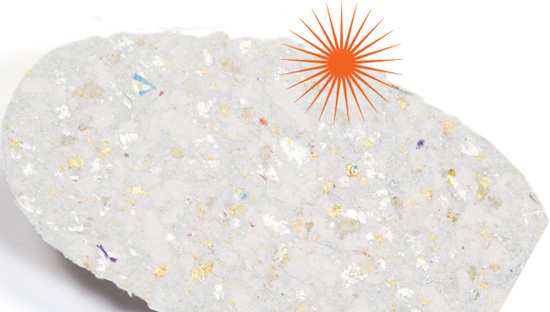
Glitter from foil in a recycled envelope stays put in the finished sheet (right).

Frequently Asked Questions
Q: Why doesn’t glitter stay in my paper?
A: It is just resting on the surface rather than actually a part of the sheet. In the pulp in the deckle, glitter tends to float. To tie glitter down, there must be fibers over at least part of each glitter particle. Putting glitter in the blender can help, as does vigorously rocking the mold in all directions as the water drains. Try putting very few fibers in the deckle with glitter and literally forming a very thin sheet of fibers and glitter. Then pulp layer (see page 78) the thin sheet onto the surface of your regular sheet. Tying glitter securely into a sheet takes attention. Tying down 100 percent of the glitter may never happen.

Just as single fibers bond to single fibers in the presence of water, batches of fibers bond to other batches of fiber if enough water is present. This means you can make a sheet, remove no water from it, make a second sheet of a different color, shape, or size, remove no water from it either, and put it down as a layer on the surface of the first sheet. If the two layers are then handled as a single sheet for dewatering, pressing, and drying, the layers will in fact become a single sheet by the end of the process.
There can be as many layers as the papermaker can handle, but water must always be present. Remove no water until all layers are in place. Pulp layering opens broad horizons of art and decorative expression, especially in association with recycling, which provides endless types and colors of pulp, free and instantly.
For this technique, you will make two separate sheets. One will be regular-sized, and the second will be smaller, which requires a second, smaller mold. This can be a small tin can, cookie cutters with high sides, or any number of found items. You also can custom-cut a template (see Handmade Molds and Templates, page 80). You will be making the second sheet before the first sheet is taken off the papermaking screen, so have an appropriate size square of window screen ready for the second sheet.
Step 1. Make a sheet of paper with your technique of choice, using a single pulp color.
Step 2. Lift the new sheet and the papermaking screen straight up off the support screen and place them down on a surface that will catch any draining water. Do not press any water from the new sheet. Set up a second papermaking screen for the second sheet.
Step 3. Blend pulp of a different color in your blender. Because the second sheet is much smaller, you will need much less pulp.
Step 4. Make the second sheet of paper in the smaller mold (see Second Sheet Option, on the next page).
Step 5. Begin to “layer” this second new sheet onto the surface of the first new sheet by lifting the papermaking screen and new sheet off the support screen.
Step 6. Hold the second new sheet on its screen in mid-air and turn them over (so the papermaking screen is on top and the new sheet is on the bottom). The new sheet will not fall off unless it is very thick. Lower the smaller new sheet carefully down onto the surface of the first, larger sheet. (You can place the smaller sheet wherever you wish on the larger sheet’s surface.)
Step 7. Press a sponge down firmly on the top papermaking screen. Wring water from the sponge and repeat, pressing over the entire surface.
Step 8. Lift the top papermaking screen carefully. The smaller sheet should separate from the papermaking screen and stay bonded to the surface of the larger sheet.
Note: If the smaller sheet tends to rise with the screen, lay the screen back down and apply pressure again with the sponge. Some pulps tend to stick to the papermaking screen. If separation still fails to occur after more pressure has been applied, either try to peel the new sheet off, or simply wash the sheet off the screen and make a new sheet with new pulp from a different type of paper.
Step 9. Continue with the regular papermaking process (see page 55) just as though the two-layer sheet were a single sheet.
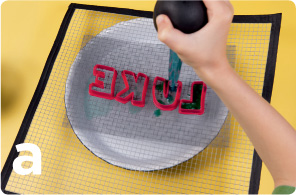
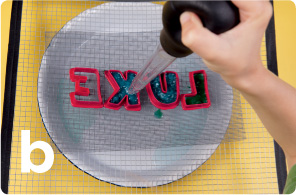
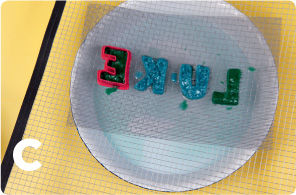
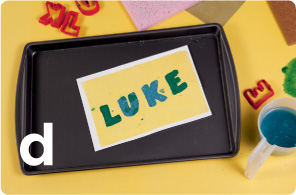
Any time you make a separate layer of pulp, remember that the layer will be flipped over and reversed on the paper background. This is especially important when making letters. Plastic letter templates (see Resources) can make the job even easier. These letters are from a Jello-cutting alphabet found in a second-hand store.
Second Sheet Option
You might want to set up a second screen for your second pulp layer. Lay a support screen or a piece of fine hardware cloth over a bucket, large bowl, or cookie sheet with sides. This provides an open surface on which to work with one or more mold shapes, allowing plenty of room for a flat template (see page 80) or other options. You can use the same arrangement for pulp painting.
Molds. As noted previously, the size and shape of your paper depends on the size and shape of the mold you use — and the possibilities are endless! In addition to tin cans and other recycled containers, you can use cookie cutters and aspic cutters for creative shaping of both papers and pulp layers. To fully customize your own unique shapes, see the instructions on the next page.
Templates. Templates are an efficient way to make paper in a shape you want. A template has the same outer measurement as the deckle, and it slides between the deckle and papermaking screen (see page 59). Templates for standard size envelopes are available for purchase, but you can make your own from foam core, wood, or other materials with sufficient rigidity and thickness. My favorite recycled approach is to trace a shape onto food board (the Styrofoam-like material under meats and pastries from the grocery store) and cut it out with a battery-operated hot wire foam cutter, readily available at craft stores. You can use a utility knife instead, but hot wire makes a cleaner cut. See Resources for a few template options.
To make paper with a template, slide the template into place and form a sheet in the usual way. Carefully lift the template off the papermaking screen before the first step of water removal. Nudge any fibers clinging to the template onto the newly formed paper with a finger or toothpick. Press and dry in the usual way.
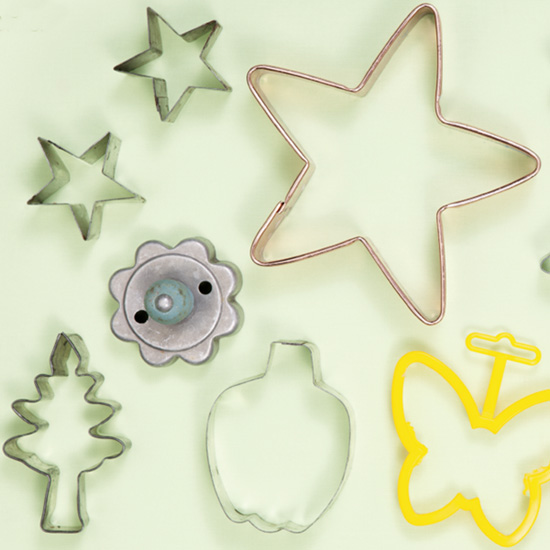
Sometimes, it’s impossible to find just the right cookie cutter shape for an inspired project. You can make your own metal form with brass strips from the hardware store. Brass strips are bendable and corrosion-resistant. And, they’re recyclable!
Instructions
1. Draw or trace a shape on a piece of paper.
2. Place the vertical edge of the brass strip along the outline. Work the strips into shape, using your hands where possible. Tight angles and curves require the use of the pliers. Note: Do not begin at a corner. Start on a gentle curve or straight area of the design where it is easier to glue strips together. Plan for a 1″ overlap at the ends, or any time you need to attach two strips together to make a larger mold.
3. Mix epoxy and spread it on overlapping ends of the strips. Hold glued section together with a small clamp, as advised by epoxy package directions. If the area is too small to clamp, wrap masking tape around the glued section to secure it. You can continue making bends once the glue has set.
Materials
 Paper and pencil
 Shape template (optional)
 Brass strips: several 12″ long, ½″ wide, 0.016 thickness
 Large needle nose or flat nose pliers
 Epoxy
Epoxy
 Small clamp
 Masking tape
An Option to Brass
You can also cut strips from a disposable aluminum pie tin and shape them as desired. These pie tin strips make good molds because they are very sturdy, but still flexible enough to bend into interesting shapes.
Wall Art
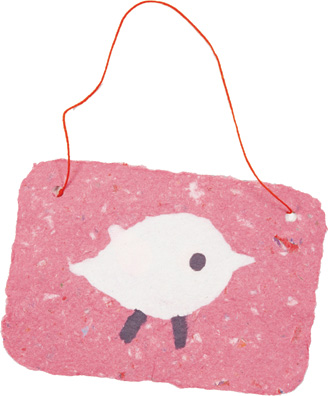
When it comes to pulp layering (see page 78), anything goes, from simple to complex. The white bird was made with handmade pie-tin molds and dabs of black pulp. Once the two layers were pressed together and dried, holes were punched on both sides of the top, with yarn added for hanging.
You can make these coasters one at a time, as instructed, or use a larger piece of mesh screen and make them side-by-side, two, four, or more at a time.
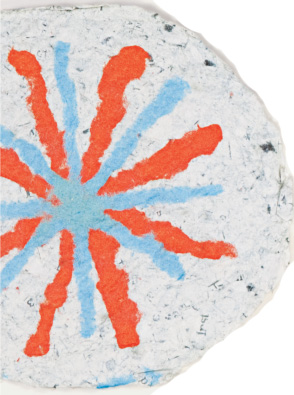
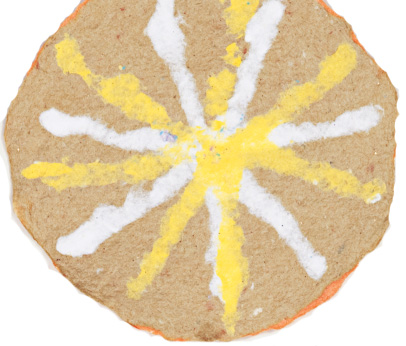
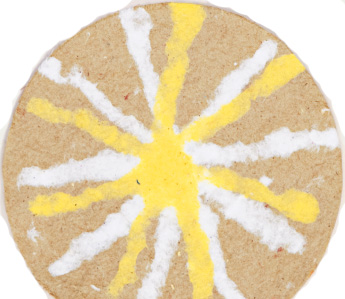
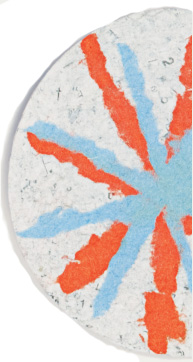
Here’s a great introductory project for pulp layering and painting. These coasters have one solid color on the back side or bottom, another solid color on the top, and multicolor rays on top of that. For instance, the color on the bottom of the brown-and-yellow coasters is orange. Endless possibilities!
Materials
 Pulp in assorted colors, separated into different containers
 4"-diameter circle mold (large-sized tin can works well)
 Papermaking screen
 Sponge
 Pulp gun (see page 27)
 Couching sheets
 Paper towels
 Boards or books (for weights)
 3"- or 4"-diameter circle template (optional)
 Utility knife (optional)
Instructions
1. Pour the pulp color you want on the bottom into a circle shape. For a nice, thick coaster, pour the pulp generously; it should be approximately ¼″ deep in the mold before draining the water.
2. Move the circle and screen to the side to drain. Do not press or iron dry.
3. Pour the pulp color you want on top into a circle shape. Once the pulp has drained a bit, carefully turn the screen upside down and line it up on top of the previous circle. Press lightly on the screen with a sponge to release the top circle.
4. Use the pulp gun and fresh colors to make patterns on the top circle, as desired.
5. Couch the coaster(s) to remove some of the water (see page 55) and leave them to dry overnight pressed between paper towels and a couple of boards or books (see page 56). They will take considerably longer to dry than usual, due to their thickness.
6. Finish dried coasters by using the circle template and utility knife to trim into clean-edged circles or simply leave them with a natural edge.
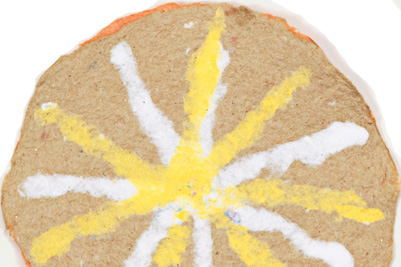
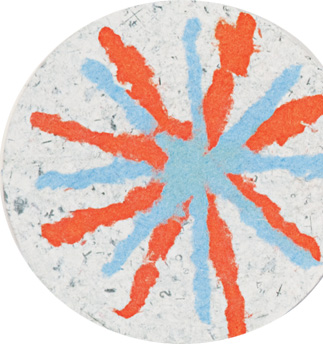
It’s easy to make a pulp “gun.” With it, you can “shoot” pulp onto a screen in a variety of shapes or abstract patterns. You can shoot one color and then reload and shoot another color. With good aim, you can form single or multicolor images, such as numbers, letters, scenes, or abstract patterns. Combined with the pulp layering technique, you can place your numbers, letters, scenes, or patterns on the surface of a regular sheet, making beautiful decorated paper or works of art. Pulp guns can be made with any plastic squeeze bottle that has a lid with a nozzle, such as some containers for mustard and ketchup (see page 27).
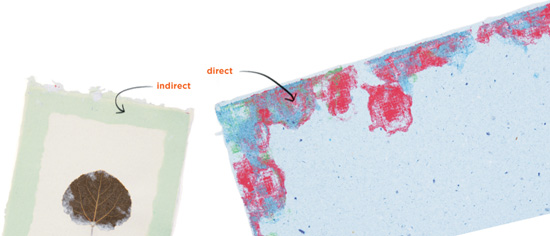
What follows are two different ways to paint with pulp, either directly on the first wet sheet or indirectly, painting freehand layers on a second screen and transferring them to the first sheet. Experiment with thicker or thinner pulp in the pulp gun.
Direct Pulp Painting
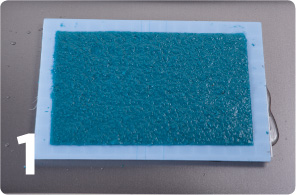
Step 1. Set up a papermaking screen on top of a drain rack and place them in a drain pan. Make a background sheet, leaving it as wet as possible on the papermaking screen. If necessary, spray it to rewet.
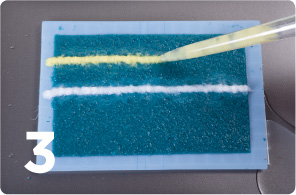
Step 2. Recycle a different color of paper in the blender, running it until there are no chunks left. Pour the pulp into a plastic squeeze bottle or turkey baster. Fill the bottle half full and put the lid on. Be sure the nozzle is open.
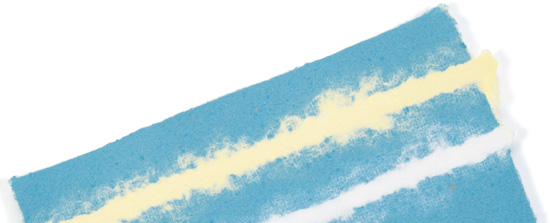
Step 3. Paint directly on the wet background sheet.
Step 4. Press and dry the sheet.
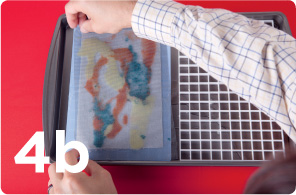
Indirect Pulp Painting
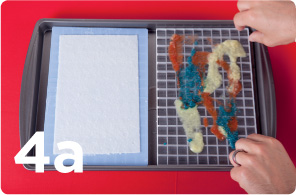
Step 1. Make a sheet and leave it wet on the papermaking screen. Set up a second papermaking screen on a support screen, as with pulp layering (see page 79).
Step 2. Recycle a different color of paper in the blender, running it until there are no chunks left. Pour the pulp into a plastic mustard or ketchup squeeze bottle. Fill the bottle half full and put the lid on. Be sure the nozzle is open. Another option is to mix several different colors in paper cups and dip into them one at a time with a turkey baster.
Step 3. Aim the pulp gun nozzle down at the screen, within 2″ of the surface. Give the pulp gun a short, gentle squeeze and shoot little patches of pulp onto the screen as desired. Experiment with harder, longer squeezes as well, and feel free to try different colors and thicker or thinner pulp slurries in the pulp gun.
Step 4. Pick up the secondary screen and layer it onto the sheet you made earlier by turning it upside down onto the first sheet. The fibers will bond and transfer. Multiple layers can be painted and transferred as desired. Press and dry the sheet.

For different batches, try some of the following options:
 Use thick and thinner pulps in the bottle.
 Use different types of plastic bottles with larger or smaller nozzle openings.
 Hold the bottle at different angles to the screen. At the same time, try squeezing harder and softer.
 Try writing with the gun. Squirt pulp out into the form of your initials. Make sure to write the letters backward when doing pulp painting, so they will transfer and read the right way around when placed on another paper sheet.
 Try simple drawings, such as a tree, using two or more colors.
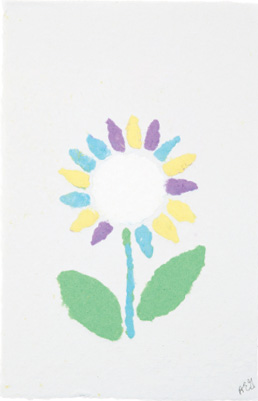
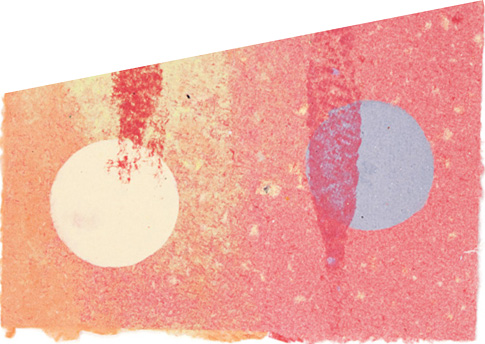
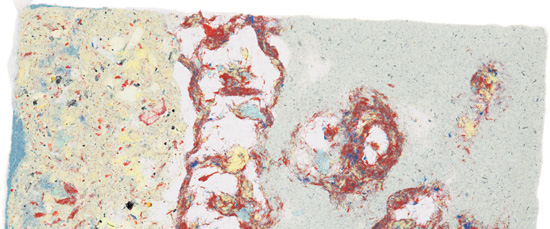
Avoid piling up pulp in high ridges or mounds. Put down thin little patches, patterns, and lines. Adding water to the pulp in the bottle will help keep pulp from getting too thick on the screen. Once you’ve gotten a feel for the process, you can experiment with thicker and thinner pulp in the bottle.

After a sheet’s worth of pulp has been poured into the deckle of a pour hand mold, you can throw in many other interesting components. These can include other colored pulps, botanicals, glitter, strips of fabric, and so on. It’s a whole world unto itself. Adding color at this point is easy and leads to all kinds of unique results. The following instructions work best for a pour mold that is strapped together, so you have your hands free to apply other colors while the mold rests in the vat.
Step 1. Prepare a sheet’s worth of pulp. White is probably the best to show off the colors you want to add. Pour the pulp into a container and put it aside.
Step 2. Prepare several colors of pulp by recycling colored papers in a blender. Put each in a separate cup and set aside.
Step 3. Use the pulp from step 1 to begin making a sheet of paper, but pause with the mold still in the vat.
Step 4. Draw colored pulp into a turkey baster. Using just a bit of gentle pressure on the baster’s bulb, shoot some of the colored pulp into the white pulp at a corner of the deckle.
Step 5. Repeat the action with each of the other colored pulps in separate corners of the deckle.
Step 6. Complete by making your paper as usual.
Variations
This technique offers great room for exploration, experimentation, and a wide range of unique and wonderful papers:
 In step 4, try holding the baster at different levels; use different amounts of pressure on the baster bulb; use different thicknesses of colored pulp slurries in the baster; or put the baster end down into the pulp and shoot.
 Try different pulp guns (syrup dispenser, mustard container, and so on). Try anything your imagination can uncover as a way to enter colored pulps into the pulp already in the deckle.
 These sheets will likely be two-sided. Dispersion on one side of the sheet will be different than on the other because the colored pulp tends to sink. Close observation can lead to further manipulation of this phenomenon and how it works.
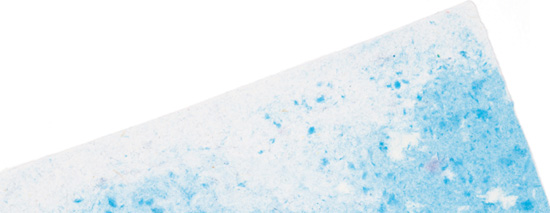
Color(s) can be added to the pulp in the deckle, gently or with force.
Frequently Asked Questions
Q: Can I put recycled paper through my home printer?
A: I am not an expert on printers, but I do print often on my handmade paper. My inkjet printer has suffered no discernable ill effects. I do not know about laser or any other type of home printer. Common sense and some experimentation indicate that sheets that are too thick or thin will present problems. The more pressure you apply during drying, the better the final paper will be for printing. Check your owner's manual for more tips.

Here is another way to add color in the deckle, after the water has drained from the first sheet. Use this technique to put a border on one edge or entirely around a sheet. You can even achieve a self-framing effect by forming a mat that becomes part of the paper sheet.
Direct Bordering
Step 1. Prepare enough pulp for one sheet. Prepare several colors of pulp for adding as the border or frame.
Step 2. Follow the basic papermaking procedure through step 4 (see page 53). Once the paper is drained, set the mold down in a drain pan.
Step 3. Draw colored pulp into a pulp gun. Drop and dribble the colored pulp along the edge of the sheet next to the deckle, on one or more edges. Repeat with as many colored pulps as you wish.
Step 4. Loosen the mold straps and continue with papermaking as usual.
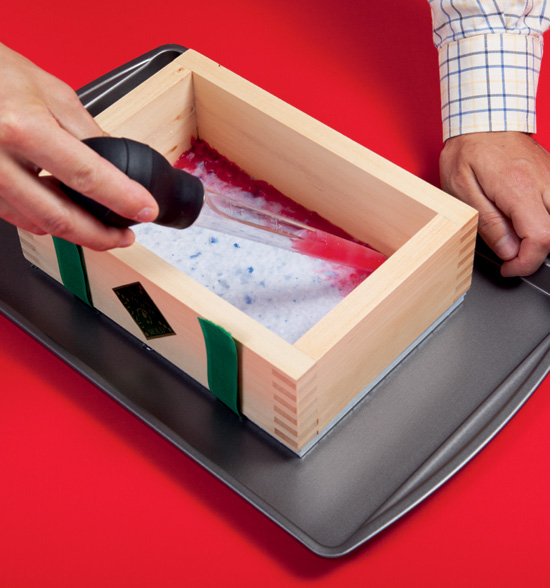
Keep the point of the baster near the deckle wall and release pulp very gently.
Step 1. Prepare enough pulp for one sheet. Prepare several colors of pulp for adding as the border or frame.
Step 2. Make a full-sized sheet of paper, following the basic papermaking procedure through step 5 (see page 54). Once you’ve removed the deckle, set the wet sheet in a drain pan.
Step 3. Set up a separate papermaking screen over a drain pan or bucket and set the deckle on top. Draw colored pulp into a pulp gun and dribble the colored pulp onto the window screen, inside the deckle and along the edges. Leave the center of the screen open.
Step 4. Remove the deckle and lift the window screen. Carefully turn it over so the pulp is on the bottom.
Step 5. Match the outside edges of the pulp carefully to the outside edges of the new sheet and lower the edged screen onto the new sheet. Apply a sponge to the window screen to remove water. After removing as much water as possible, carefully lift the window screen. The colored pulps will remain on the edge(s) of the new sheet.
Step 6. Finish making the paper as usual.
Crafty Tip
The amount of pulp you apply as a border or self-frame depends on your taste. Applying pulp sparingly will keep sheet edges more uniformly thick with the sheet’s center. If you want more of a distinct frame, more pulp might be in order.
