Figure 60: CommonsWare
Our EmPubLite project has some initial resources. However, the defaults are not what
we want for the long term. So, in addition to adding new resources in future
tutorials, we will fix the ones we already have in this tutorial.
This is a continuation of the work we did in the previous tutorial.
You can find the results of the previous tutorial and the results of this tutorial in the book’s GitHub repository:
Our application shows up everywhere as “EmPubLite”:
We should change that to be “EmPub Lite”, adding a space for easier reading,
and to illustrate that this is a “lite” version of the full EmPub application.
Double-click on the res/values/strings.xml file in your project explorer.
In the XML editor for the string resources, you will find an element that looks like:
<string name="app_name">EmPubLite</string>
Change the text node in this element to EmPub Lite.
Then save your changes, giving you something like:
<resources>
  <string name="app_name">EmPub Lite</string>
</resources>
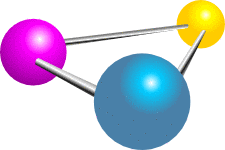
The build tools provide us with a stock icon to use for the launcher — the actual image used varies by Android tools release. However, we can change it to something else. For example, we could use the icon portion of the CommonsWare logo:
Figure 60: CommonsWare
Download the molecule PNG file from the CommonsWare Web site and save it somewhere on your development machine.
Then, right-click over the res/ directory in your main sourceset
in the project explorer, and choose New > Image Asset from the context
menu. That will bring up the Asset Studio wizard:
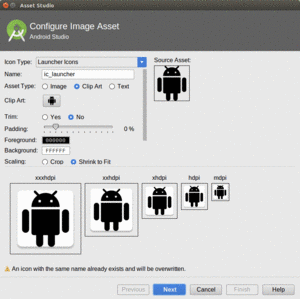
Figure 61: Asset Studio Wizard, First Page
Click the “Image” radio button in the “Asset Type” row.
Then, click the “…” to the right of the “Path” field and choose
the molecule.png file that you downloaded. Also, ensure that “Scaling”
is set to
“Shrink to Fit”,
and choose “None” from the “Shape” drop-down.
This
should give you a preview of what the icons will look like:
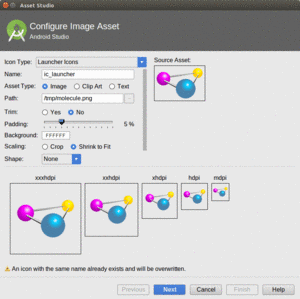
Figure 62: Asset Studio Wizard, First Page, After Loading Image
Leave the rest of the wizard alone, then click Next to proceed to the next page:
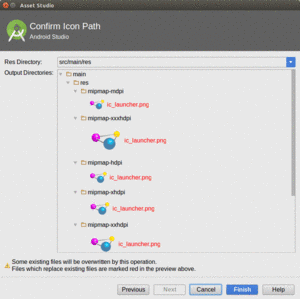
Figure 63: Asset Studio Wizard, Second Page
You should get a red warning towards the bottom, indicating that
if you finish the wizard, you will overwrite existing files. This
is expected, as we are trying to replace the old ic_launcher.png
files with new ones. So, go ahead and click Finish.
If you run the resulting app, you will see that it shows up with the new name and icon, such as in the launcher:
Figure 64: EmPubLite with New Icons
… we will add a progress indicator to the UI of our tutorial project.