
Figure 876: The WebBeam UI
NFC, courtesy of high-profile boosters like Google Wallet, is poised to be a significant new capability in Android devices. While at the time of this writing, only a handful of Android devices have NFC built in, other handsets are slated to be NFC-capable in the coming months. Google is hoping that developers will write NFC-aware applications to help further drive adoption of this technology by device manufacturers.
This, of course, raises the question: what is NFC? Besides being where the Green Bay Packers play, that is?
(For those of you from outside of the United States, that was an American football joke. We now return you to your regularly-scheduled chapter.)
Understanding this chapter requires that you have read the core chapters,
particularly the chapters on broadcast Intents and
services.
NFC stands for Near-Field Communications. It is a wireless standard for data exchange, aimed at very short range transmissions — on the order of a couple of centimeters. NFC is in wide use today, for everything from credit cards to passports. Typically, the NFC data exchange is for simple data — contact information, URLs, and the like.
In particular, NFC tends to be widely used where one side of the communications channel is “passive”, or unpowered. The other side (the “initiator”) broadcasts a signal, which the passive side converts into power enough to send back its response. As such, NFC “tags” containing such passive targets can be made fairly small and can be embedded in a wide range of containers, from stickers to cards to hats.
The objective is “low friction” interaction — no pairing like with Bluetooth, no IP address shenanigans as with WiFi. The user just taps and goes.
NFC is often confused with or compared to RFID. It is simplest to think of RFID as being an umbrella term, under which NFC falls. Not every RFID technology is NFC, but many things that you hear of being “RFID” may actually be NFC-compliant devices or tags.
In many places, NFC will be used in ways you might consider using QR codes. For example, a restaurant could use either technology, or both, on a sign to lead patrons to the restaurant’s Yelp page, as a way of soliciting reviews. Somebody with a capable device could either tap the NFC tag on the sign to bring up Yelp or take a picture of the QR code and use that to bring up Yelp.
NFC’s primary advantage over QR codes is that it requires no user intervention beyond physically moving their device in close proximity to the tag. QR codes, on the other hand, require the user to launch a barcode scanning application, center the barcode in the viewfinder, and then get the results. The net effect is that NFC will be faster.
QR’s advantages include:
RFID is a concept, not a standard. As such, different vendors created their own ways of structuring data on these tags or chips, making one vendor’s tags incompatible with another vendor’s readers or writers. While various standards bodies, like ISO, have gotten involved, it’s still a bit of a rat’s nest of conflicting formats and approaches.
The NFC offshoot of RFID has had somewhat greater success in establishing standards. NFC itself is an ISO and ECMA standard, covering things like transport protocols and transfer speeds. And a consortium called the NFC Forum created NDEF — the NFC Data Exchange Format — for specifying the content of tags.
However, not all NFC tags necessarily support NDEF. NDEF is much newer than NFC, and so lots of NFC tags are out in the wild that were distributed before NDEF even existed.
You can roughly divide NFC tags into three buckets:
Android has some support for non-NDEF tags, such as the MIFARE Classic. However, the hope and expectation going forward is that NFC tags will coalesce around NDEF.
NDEF, as it turns out, maps neatly to Android’s Intent system, as
you will see as we proceed through this chapter.
Most developers interested in NFC will be interested in reading NFC
tags and retrieving the NDEF data off of them. In Android, tapping an
NDEF tag with an NFC-capable device will trigger an activity to be
started, based on a certain IntentFilter.
Some developers will be interested in writing to NFC tags, putting URLs, vCards, or other information on them. This may or may not be possible for any given tag.
And while the “traditional” thinking around NFC has been that one side of the communication is a passive tag, Android will help promote the “peer-to-peer” approach — having two Android devices exchange data via NFC and NDEF. Basically, putting the two devices back-to-back will cause each to detect the other device’s “tag”, and each can read and write to the other via this means. This is referred to as “Android Beam” and will be discussed later in this chapter.
Of course, all of these are only available on hardware. At the present time, there is no emulator for NFC, nor any means of accessing a USB NFC reader or writer from the emulator.
NDEF is made up of messages, themselves made up of a series of records. From Android’s standpoint, each tag consists of one such message.
Each record consists of a binary (byte array) payload plus metadata to
describe the nature of the payload. The metadata primarily consists
of a type and a subtype. There are quite a few combinations of these,
but the big three for new Android NFC uses are:
TNF_WELL_KNOWN and a subtype of RTD_TEXT, indicating
that the payload is simply plain textTNF_WELL_KNOWN and a subtype of RTD_URI, indicating
that the payload is a URI, such as a URL to a Web pageTNF_MIME_MEDIA, where the subtype is a standard MIME
type, indicating that the payload is of that MIME typeWhen Android scans an NDEF tag, it will use this information to
construct a suitable Intent to use with startActivity(). The
action will be android.nfc.action.NDEF_DISCOVERED, to distinguish
the scanned-tag case from, say, something simply asking to view some
content. The MIME type in the Intent will be text/plain for the
first scenario above or the supplied MIME type for the third scenario
above. The data (Uri) in the Intent will be the supplied URI for
the second scenario above. Once constructed, Android will invoke
startActivity() on that Intent, bringing up an activity or an
activity chooser, as appropriate.
NFC-capable Android devices have a Tags application pre-installed that will handle any NFC tag not handled by some other app. So, for example, an NDEF tag with an HTTP URL will fire up the Tags application, which in turn will allow the user to open up a Web browser on that URL.
The enthusiasm that some have with regards to Android and NFC technology needs to be tempered by the reality of NDEF, NFC tags in general, and Android’s support for NFC. It is easy to imagine all sorts of possibilities that may or may not be practical when current limitations are reached.
Some tags come “from the factory” read-only. Either you arrange for the distributor to write data onto them (e.g., blast a certain URL onto a bunch of NFC stickers to paste onto signs), or they come with some other pre-established data. Touchatag, for example, distributes NFC tags that have Touchatag URLs on them — they then help you set up redirects from their supplied URL to ones you supply.
While these tags will be of interest to consumers and businesses, they are unlikely to be of interest to Android developers, since their use cases are already established and typically do not need custom Android application support. Android developers seeking customizable tags will want ones that are read-write, or at least write-once.
Conversely, some tags lack any sort of read-only flag. An ideal tag for developers is one that is write-once: putting an NDEF message on the tag and flagging it read-only in one operation. Some tags do not support this, or making the tag read-only at any later point. The MIFARE Classic 1K tag is an example — while technically it can be made read-only, it requires a key known only to the tag manufacturer.
The MIFARE Classic 1K NFC tag is NDEF-capable, but must be “formatted” first, supplying the initial NDEF message contents. You have the option of formatting it read-write or read-only (turning the Classic 1K a write-once tag).
This is not a problem — in fact, the write-once option may be compelling. However, it is something to keep in mind.
Also, note that the MIFARE Classic 1K, while it can be formatted as NDEF, uses a proprietary protocol “under the covers”. Not all Android devices will support the Classic 1K, as the device manufacturers elect not to pay the licensing fee. Where possible, try to stick to tags that are natively NDEF-compliant (so-called “NFC Forum Tag Types 1-4”).
The “1K” in the name “MIFARE Classic 1K” refers to the amount of storage on the tag: 1 kilobyte of information.
And that’s far larger than other tags, such as the MIFARE Ultralight C, some of which have ~64 bytes of storage.
Clearly, you will not be writing an MP3 file or JPEG photo to these tags. Rather, the tags will tend to either be a “launcher” into something with richer communications (e.g., URL to a Web site) or will use the sorts of data you may be used to from QR codes, such as a vCard or iCalendar for contact and event data, respectively.
The Android developer documentation is focused on the
Android
classes
related to NFC and on
the Intent mechanism used for scanned tags.
It does not focus on the actual structure of the payloads.
For TNF_MIME_MEDIA and RTD_TEXT, the payload is whatever you
want. For RTD_URI, however, the byte array has a bit more structure
to it, as the NDEF specification calls for a single byte to represent
the URI prefix (e.g., http://www. versus http:// versus
https://www.). The objective, presumably, is to support
incrementally longer URLs on tags with minuscule storage. Hence, you
will need to convert your URLs into this sort of byte array if you
are writing them out to a tag.
Generally speaking, the rules surrounding the structure of NDEF messages and records is found at the NFC Forum site.
Different devices will have different NFC chipsets. Not all NFC chipsets can read and write all tags. The expectation is that NDEF-formatted tags will work on all devices, but if you wander away from that, things get dicier. For example, NXP’s Mifare Classic tag can only be read and written by NXP’s NFC chip.
This is increasingly a challenge for Android developers, as a Broadcom NFC chip is becoming significantly more popular. Many new major Android devices, such as the Samsung Galaxy S4, the Nexus 4, the Nexus 10, and the 2013/2nd generation version of the Nexus 7, all use the Broadcom chip. Those devices are incompatible with the Mifare tags, such as the popular Mifare Classic 1K.
That is because NXP is the maker of the Mifare Classic series, and those tags broke the NFC Forum’s standards to create a tag that was NXP-specific.
Right now, NTAG203 and Topaz tags (like the Topaz 512), are likely candidate tags that will work across all NFC-capable Android devices, due to their adherence to NFC standard protocols.
NFC tags are not the sort of thing you will find on your grocer’s shelves. In fact, few, if any, mainstream firms sell them today.
Here are some online sites from which you can order rewritable NFC tags, listed here in alphabetical order:
Note that not all may ship to your locale.
So, let’s see what it takes to write an NDEF message to a tag,
formatting it if needed. The code samples shown in this chapter are
from the
NFC/URLTagger
sample application. This application will
set up an activity to respond to ACTION_SEND activity Intents,
with an eye towards receiving a URL from a browser, then waiting for
a tag and writing the URL to that tag. The idea is that this sort of
application could be used by non-technical people to populate tags
containing URLs to their company’s Web site, etc.
First, we need to get a URL from the browser. As we saw in the
chapter on integration, the standard Android browser uses
ACTION_SEND of text/plain contents when the user chooses the
“Share Page” menu. So, we have one activity, URLTagger, that will
respond to such an Intent:
    <activity
      android:name="URLTagger"
      android:label="@string/app_name">
      <intent-filter android:label="@string/app_name">
        <action android:name="android.intent.action.SEND"/>

        <data android:mimeType="text/plain"/>

        <category android:name="android.intent.category.DEFAULT"/>
      </intent-filter>
    </activity>
Of course, lots of other applications support ACTION_SEND of
text/plain contents that are not URLs. A production-grade version
of this application would want to validate the EXTRA_TEXT Intent
extra to confirm that, indeed, this is a URL, before putting in an
NDEF message claiming that it is a URL.
When the user shares a URL with our application, our activity is launched. At that point, we need to go into “detect a tag” mode – the user should then tap their device to a tag, so we can write out the URL.
First, in onCreate(), we get access to the NfcAdapter, which is
our gateway to much of the NFC functionality in Android:
  @Override
  public void onCreate(Bundle savedInstanceState) {
    super.onCreate(savedInstanceState);
    setContentView(R.layout.main);

    nfc=NfcAdapter.getDefaultAdapter(this);
  }
We use a boolean data member — inWriteMode — to keep
track of whether or not we are set up to write to a tag. Initially,
of course, that is set to be false. Hence, when we are first
launched, by the time we get to onResume(), we can go ahead and
register our interest in future tags:
  @Override
  public void onResume() {
    super.onResume();

    if (!inWriteMode) {
      IntentFilter discovery=new IntentFilter(NfcAdapter.ACTION_TAG_DISCOVERED);
      IntentFilter[] tagFilters=new IntentFilter[] { discovery };
      Intent i=new Intent(this, getClass())
                .addFlags(Intent.FLAG_ACTIVITY_SINGLE_TOP|
                          Intent.FLAG_ACTIVITY_CLEAR_TOP);
      PendingIntent pi=PendingIntent.getActivity(this, 0, i, 0);

      inWriteMode=true;
      nfc.enableForegroundDispatch(this, pi, tagFilters, null);
    }
  }
When an NDEF-capable tag is within signal range of the device,
Android will invoke startActivity() for the
NfcAdapter.ACTION_TAG_DISCOVERED Intent action. However, it can
do this in one of two ways:
Intent.createChooser()) to
allow the user to pick from any activities that claim to support this
action.enableForegroundDispatch() for it to handle all tag events while it
is in the foreground, superseding the normal startActivity() flow.
In this case, while Android still will invoke an activity, it will be
our activity, not any other one.We want the second approach right now, so the next tag brought in range is the one we will try writing to.
To do that, we need to create an array of IntentFilter objects,
identifying the NFC-related actions that we want to capture in the
foreground. In this case, we only care about ACTION_TAG_DISCOVERED
– if we were supporting non-NDEF NFC tags, we might also need
to watch for ACTION_TECH_DISCOVERED.
We also need a PendingIntent identifying the activity that should
be invoked when such a tag is encountered while we are in the
foreground. Typically, this will be the current activity. By adding
FLAG_ACTIVITY_SINGLE_TOP and FLAG_ACTIVITY_CLEAR_TOP to the
Intent as flags, we ensure that our current specific instance of
the activity will be given control again via onNewIntent().
Armed with those two values, we can call enableForegroundDispatch()
on the NfcAdapter to register our request to process tags via the
current activity instance.
In onPause(), if the activity is finishing, we call
disableForegroundDispatch() to undo the work done in onResume():
  @Override
  public void onPause() {
    if (isFinishing()) {
      nfc.disableForegroundDispatch(this);
      inWriteMode=false;
    }

    super.onPause();
  }
We have to see if we are finishing, because even though our activity
never leaves the screen, Android still calls onPause() and
onResume() as part of delivering the Intent to onNewIntent().
Our approach, though, has flaws — if the user presses HOME, for
example, we never disable the NFC dispatch logic. A production-grade
application would need to handle this better.
For any of this code to work, we need to hold the NFC permission via an appropriate line in the manifest:
<uses-permission android:name="android.permission.NFC"/>
Also note that if you have several activities that the user can reach
while you are trying to also capture NFC tag events, you will need to
call enableForegroundDispatch() in each activity — it’s a
per-activity request, not a per-application request.
Once the user brings a tag in range, onNewIntent() will be invoked
with the ACTION_TAG_DISCOVERED Intent action:
  @Override
  protected void onNewIntent(Intent intent) {
    if (inWriteMode &&
        NfcAdapter.ACTION_TAG_DISCOVERED.equals(intent.getAction())) {
      Tag tag=intent.getParcelableExtra(NfcAdapter.EXTRA_TAG);
      byte[] url=buildUrlBytes(getIntent().getStringExtra(Intent.EXTRA_TEXT));
      NdefRecord record=new NdefRecord(NdefRecord.TNF_WELL_KNOWN,
                                        NdefRecord.RTD_URI,
                                        new byte[] {}, url);
      NdefMessage msg=new NdefMessage(new NdefRecord[] {record});

      new WriteTask(this, msg, tag).execute();
    }
  }
If we are in write mode and the delivered Intent is indeed an
ACTION_TAG_DISCOVERED one, we can get at the Tag object
associated with the user’s NFC tag via the NfcAdapter.EXTRA_TAG
Parcelable extra on the Intent.
Writing an NDEF message to the tag, therefore, is a matter of crafting the message and actually writing it. An NDEF message consists of one or more records (though, typically, only one record is used), with each record wrapping around a byte array of payload data.
We did not do anything to get the URL out of the Intent back in
onCreate(), when our activity was first started up. Now, of course,
we need that URL. You might think it is too late to get it, since our
activity was effectively started again due to the tag and
onNewIntent().
However, getIntent() on an Activity always returns the Intent
used to create the activity in the first place. The getIntent()
value is not replaced when onNewIntent() is called.
Hence, as part of the buildUrlBytes() method to create the binary
payload, we can go and call
getIntent().getStringExtra(Intent.EXTRA_TEXT) to retrieve the URL.
Given the URL, we need to convert it into a byte array suitable for
use in a TNF_WELL_KNOWN, RTD_URI NDEF record. Ordinarily, you
would just call toByteArray() on the String and be done with it.
However, the byte array we need uses a single byte to indicate the
URL prefix, with the rest of the byte array for the characters after
this prefix.
This is efficient. This is understandable. This is annoying.
First, we need the roster of prefixes, defined in URLTagger as a
static data member cunningly named PREFIXES:
  static private final String[] PREFIXES={"http://www.", "https://www.",
                                          "http://", "https://",
                                          "tel:", "mailto:",
                                          "ftp://anonymous:anonymous@",
                                          "ftp://ftp.", "ftps://",
                                          "sftp://", "smb://",
                                          "nfs://", "ftp://",
                                          "dav://", "news:",
                                          "telnet://", "imap:",
                                          "rtsp://", "urn:",
                                          "pop:", "sip:", "sips:",
                                          "tftp:", "btspp://",
                                          "btl2cap://", "btgoep://",
                                          "tcpobex://",
                                          "irdaobex://",
                                          "file://", "urn:epc:id:",
                                          "urn:epc:tag:",
                                          "urn:epc:pat:",
                                          "urn:epc:raw:",
                                          "urn:epc:", "urn:nfc:"};
Then, in buildUrlBytes(), we need to find the prefix (if any) and
use it:
  private byte[] buildUrlBytes(String url) {
    byte prefixByte=0;
    String subset=url;
    int bestPrefixLength=0;

    for (int i=0;i<PREFIXES.length;i++) {
      String prefix = PREFIXES[i];

      if (url.startsWith(prefix) && prefix.length() > bestPrefixLength) {
        prefixByte=(byte)(i+1);
        bestPrefixLength=prefix.length();
        subset=url.substring(bestPrefixLength);
      }
    }

    final byte[] subsetBytes = subset.getBytes();
    final byte[] result = new byte[subsetBytes.length+1];

    result[0]=prefixByte;
    System.arraycopy(subsetBytes, 0, result, 1, subsetBytes.length);

    return(result);
  }
We iterate over the PREFIXES array and find a match, if any,
and the best possible match if there is more than one. If
there is a match, we record the NDEF value for the first byte (our
PREFIXES index plus one) and create a subset string containing the
characters after the prefix. If there is no matching prefix, the
prefix byte is 0 and we will include the full URL.
Given that, we construct a byte array containing our prefix byte in the first slot, and the rest taken up by the byte array of the subset of our URL.
Given the result of buildUrlBytes(), our onNewIntent()
implementation creates a TNF_WELL_KNOWN, RTD_URI NdefRecord
object, and pours that into an NdefMessage object.
The third parameter to the NdefRecord constructor is a byte array
representing the optional “ID” of this record, which is not necessary
here.
Finally, we delegate the actual writing to a WriteTask subclass of
AsyncTask, as writing the NdefMessage to the Tag is…
interesting.
Here is the aforementioned WriteTask static inner class:
  static class WriteTask extends AsyncTask<Void, Void, Void> {
    Activity host=null;
    NdefMessage msg=null;
    Tag tag=null;
    String text=null;

    WriteTask(Activity host, NdefMessage msg, Tag tag) {
      this.host=host;
      this.msg=msg;
      this.tag=tag;
    }

    @Override
    protected Void doInBackground(Void... arg0) {
      int size=msg.toByteArray().length;

      try {
        Ndef ndef=Ndef.get(tag);

        if (ndef==null) {
          NdefFormatable formatable=NdefFormatable.get(tag);

          if (formatable!=null) {
            try {
              formatable.connect();

              try {
                formatable.format(msg);
              }
              catch (Exception e) {
                text="Tag refused to format";
              }
            }
            catch (Exception e) {
              text="Tag refused to connect";
            }
            finally {
              formatable.close();
            }
          }
          else {
            text="Tag does not support NDEF";
          }
        }
        else {
          ndef.connect();

          try {
            if (!ndef.isWritable()) {
              text="Tag is read-only";
            }
            else if (ndef.getMaxSize()<size) {
              text="Message is too big for tag";
            }
            else {
              ndef.writeNdefMessage(msg);
            }
          }
          catch (Exception e) {
            text="Tag refused to connect";
          }
          finally {
            ndef.close();
          }
        }
      }
      catch (Exception e) {
        Log.e("URLTagger", "Exception when writing tag", e);
        text="General exception: "+e.getMessage();
      }

      return(null);
    }

    @Override
    protected void onPostExecute(Void unused) {
      if (text!=null) {
        Toast.makeText(host, text, Toast.LENGTH_SHORT).show();
      }

      host.finish();
    }
  }
In doInBackground(), after making note of how big the message is in
bytes, we first try to get the Ndef aspect of the Tag object, by
calling the static get() method on the Ndef class. If the tag is
an NDEF tag, this should return an Ndef instance. If it does not,
we try to get an NdefFormatable aspect by calling get() on the
NdefFormatable class. If the tag is not NDEF now but can be
formatted as NDEF, this should give us an NdefFormatable object. If
both aspect attempts fail, we bail out, displaying a Toast to let
the user know that while the tag they used is NFC, it is not
NDEF-compliant.
If the tag turned out to be NdefFormatable, to put the
NdefMessage on it, we first connect() to the tag, then format()
it, supplying the message. NdefFormatable also supports
formatReadOnly() for tags that support that mode — this will
write the message on the tag, then block it from further updates.
When we are done, we close() the connection.
If the tag turned out to be Ndef already, we connect() to it,
then see if it is writable and has enough room. If it meets both of
those criteria, we can emit the message via writeNdefMessage(),
which overwrites the NDEF message that had already existed on the tag
(if any). If the tag supported it, a call to makeReadOnly() would
block further updates to the tag. Again, when we are done, we
close() the connection.
All of the actual NFC I/O is performed in doInBackground(), because
this I/O may take some time, and we do not want to block the main
application thread while doing it.
Writing to a tag is a bit complicated. Responding to an NDEF message on a tag is significantly easier.
If the foreground activity is not consuming NFC events — as
URLTagger does in write mode — then Android will use normal
Intent resolution with startActivity() to handle the tag. To
respond to the tag, all you need to do is have an activity set up to
watch for an android.nfc.action.NDEF_DISCOVERED Intent. To get
control ahead of the built-in Tags application, also have a <data>
element that describes the sort of content or URL you are expecting
to find on the tag.
For example, suppose you used the Android browser to visit
some page on the CommonsWare Web site, and
you wrote that to a tag using URLTagger. The URLTagger application
has another activity, URLHandler, that will respond when you tap
the newly-written tag from the home screen or anywhere else. It
accomplishes this via a suitable <intent-filter>:
    <activity
      android:name="URLHandler"
      android:label="@string/app_name">
      <intent-filter android:label="@string/app_name">
        <action android:name="android.nfc.action.NDEF_DISCOVERED"/>

        <data
          android:host="commonsware.com"
          android:scheme="http"/>

        <category android:name="android.intent.category.DEFAULT"/>
      </intent-filter>
    </activity>
The URLHandler activity can then use getIntent() to retrieve the
key pieces of data from the tag itself, if needed. In particular, the
EXTRA_NDEF_MESSAGES Parcelable array extra will return an array
of NdefMessage objects. Typically, there will only be one of these.
You can call getRecords() on the NdefMessage to get at the array
of NdefRecord objects (again, typically only one). Methods like
getPayload() will allow you to get at the individual portions of
the record.
The nice thing is that the URL still works, even if URLTagger is not on the device. In that case, the Tags application would react to the tag, and the user could tap on it to bring up a browser on this URL. A production application might create a Web page that tells the user about this great and wonderful app she can install, and provide links to the Play Store (or elsewhere) to go get the app.
Tags tend to have limited capacity. Even in peer-to-peer settings, the effective bandwidth of NFC is paltry compared to anything outside of dial-up Internet access.
As a result, NFC will be used infrequently as the complete communications solution between a publisher and a device. Sometimes it will, when the content is specifically small, such as a contact (vCard) or event (iCalendar). But, for anything bigger than that, NFC will serve more as a convenient bootstrap for more conventional communications options:
Reading and writing NFC tags is a relatively slow process, mostly due to low bandwidth. It may take a second or two to actually complete the operation.
Users, however, are not known for their patience.
If a user moves their device out of range of the tag while Android is
attempting to read it, Android simply will skip the dispatch. If,
however, the tag leaves the signal area of the device while you are
writing to it, you will get an IOException. At this point, the
state of the tag is unknown.
You may wish to incorporate something into your UI to let the user know that you are working with the tag, encouraging them to leave the phone in place until you are done.
There are two separate system settings that control NFC behavior:
isEnabled() on your NfcAdapter
isNdefPushEnabled() on your NfcAdapter
As with most enabled/disabled settings, you cannot change these values yourself.
On newer Android SDK versions, though, you can try to bring up the relevant
Settings screens for the user to enable these features, by using the following
activity action strings from the android.provider.Settings class:
ACTION_NFC_SETTINGS for the main NFC settings screen (added in API Level 16)ACTION_NFCSHARING_SETTINGS for the Android Beam settings screen (added in
API Level 14)Android Beam is Google’s moniker for peer-to-peer NFC messaging, with an emphasis — obviously — on Android apps. Rather than you tapping your NFC-capable Android device on a smart tag, you put it back-to-back with another NFC-capable Android device, and romance ensues.
Partially, this is simply one side of the exchange “pushing” an NDEF record, in a fashion that makes the other side of the exchange think that it is picking up a smart tag.
Partially, this is the concept of the “Android Application Record” (AAR), another NDEF record you can place in the NDEF message being pushed. This will identify the app you are trying to push the message to. If nothing on the device can handle the rest of the NDEF message, the AAR will lead Android to start up an app, or even lead the user to the Play Store to go download said app.
As the basis for explaining further how this all works, let’s take a look
at the
NFC/WebBeam
sample application. The UI consists of a WebViewFragment, in which we
can browse to some Web page. Then, running this app on two NFC-capable
devices, one app can “push” the URL of the currently-viewed Web page
to the other app, which will respond by displaying that page. In this
fashion, we are “sharing” a URL, without one side having to type it in
by hand. And, while we are using this to share a URL, you could use
Android Beam to share any sort of bootstrapping data, such as the user IDs
of each person, for use in connecting to some common game server.
The fragment that implements our UI, BeamFragment, extends from
WebViewFragment. In onActivityCreated(), we
configure the WebView, load up Google’s home page, and indicate that would
like to participate in the action bar (via a call to setHasOptionsMenu()):
  @SuppressLint("SetJavaScriptEnabled")
  @Override
  public void onActivityCreated(Bundle savedInstanceState) {
    super.onActivityCreated(savedInstanceState);

    getWebView().setWebViewClient(new BeamClient());
    getWebView().getSettings().setJavaScriptEnabled(true);
    loadUrl("http://google.com");
    setHasOptionsMenu(true);
  }
To keep all links within the WebView, we attached a WebViewClient
implementation, named BeamClient, that just loads all requested URLs
back into the WebView:
  class BeamClient extends WebViewClient {
    @Override
    public boolean shouldOverrideUrlLoading(WebView wv, String url) {
      wv.loadUrl(url);

      return(true);
    }
  }
We add one item to the action bar: a toolbar button (R.id.beam)
that will be used to
indicate we wish to beam the URL in our WebView to another copy of this
application running on another NFC-capable Android device:
  @Override
  public void onCreateOptionsMenu(Menu menu, MenuInflater inflater) {
    if (getContract().hasNFC()) {
      inflater.inflate(R.menu.actions, menu);
    }

    super.onCreateOptionsMenu(menu, inflater);
  }

  @Override
  public boolean onOptionsItemSelected(MenuItem item) {
    if (item.getItemId() == R.id.beam) {
      getContract().enablePush();

      return(true);
    }

    return(super.onOptionsItemSelected(item));
  }
So, when the app is initially launched, it will look something like this:
Figure 876: The WebBeam UI
The user can use Google to find a Web page worth beaming.
Our hosting activity, WebBeamActivity, gets access to our NfcAdapter,
as we did in the previous example:
adapter=NfcAdapter.getDefaultAdapter(this);
When the user taps on our action bar item, the fragment calls enablePush()
on the activity. WebBeamActivity, in turn, calls setNdefPushMessageCallback()
on the NfcAdapter, supplying two parameters:
NfcAdapter.CreateNdefMessageCallback interface,
used to let us know when another device is in range for us to beam to
(in our case, WebBeamActivity implements this interface)If something else comes to the foreground, onStop() will call a corresponding
disablePush(), which also calls setNdefPushMessageCallback(), specifying
a null first parameter, to turn off our request to beam:
  void enablePush() {
    adapter.setNdefPushMessageCallback(this, this);
  }

  void disablePush() {
    adapter.setNdefPushMessageCallback(null, this);
  }
In between the calls to enablePush() and disablePush(), if another
NFC device comes in range that supports the NDEF push protocols, we’re beamin’.
When our beam-enabled device encounters another beam-capable device,
our NfcAdapter.CreateNdefMessageCallback is called with createNdefMessage(),
where we need to prepare the NfcMessage to beam to the other party:
  @Override
  public NdefMessage createNdefMessage(NfcEvent arg0) {
    NdefRecord uriRecord=
        new NdefRecord(NdefRecord.TNF_MIME_MEDIA,
                       MIME_TYPE.getBytes(Charset.forName("US-ASCII")),
                       new byte[0],
                       beamFragment.getUrl()
                           .getBytes(Charset.forName("US-ASCII")));
    NdefMessage msg=
        new NdefMessage(
                        new NdefRecord[] {
                            uriRecord,
                            NdefRecord.createApplicationRecord("com.commonsware.android.webbeam") });

    return(msg);
  }
We first create a typical NfcRecord, in this case of TNF_MIME_MEDIA,
with a MIME type defined in a static data member and payload consisting
of the URL from our WebView:
  private static final String MIME_TYPE=
      "application/vnd.commonsware.sample.webbeam";
You might wonder why we are using TNF_MIME_MEDIA, instead of
TNF_WELL_KNOWN and a subtype of RTD_URI, since our payload is a URL.
The reason is that we need to have a unique MIME type for our message for
the whole beam process to work properly, and TNF_WELL_KNOWN does not
support MIME types. This is also why the MIME type is something distinctive,
and not just text/plain — it has to be something only we will pick up.
Our NfcMessage then consists of two NfcRecord objects: the one we
just created, and one created via the static createApplicationRecord()
method on NfcRecord. This helper method creates an AAR record, identifying
our application by its Android package name. This record must go last –
Android will try to find an app to work with based on the other records
first, before “failing over” to use the AAR.
To receive our beam, our WebBeamActivity must be configured in the manifest
to respond to NDEF_DISCOVERED actions with our unique MIME type:
<?xml version="1.0" encoding="utf-8"?>
<manifest xmlns:android="http://schemas.android.com/apk/res/android"
  package="com.commonsware.android.webbeam"
  android:versionCode="1"
  android:versionName="1.0">

  <uses-sdk
    android:minSdkVersion="14"
    android:targetSdkVersion="14"/>

  <uses-permission android:name="android.permission.INTERNET"/>
  <uses-permission android:name="android.permission.NFC"/>

  <application
    android:icon="@drawable/ic_launcher"
    android:label="@string/app_name"
    android:theme="@android:style/Theme.Holo.Light.DarkActionBar">
    <activity
      android:name=".WebBeamActivity"
      android:label="@string/app_name"
      android:launchMode="singleTask"
      android:screenOrientation="landscape">
      <intent-filter>
        <action android:name="android.intent.action.MAIN"/>

        <category android:name="android.intent.category.LAUNCHER"/>
      </intent-filter>
      <intent-filter>
        <action android:name="android.nfc.action.NDEF_DISCOVERED"/>

        <category android:name="android.intent.category.DEFAULT"/>

        <data android:mimeType="application/vnd.commonsware.sample.webbeam"/>
      </intent-filter>
    </activity>
  </application>

</manifest>
You will also notice that we set android:launchMode="singleTask" on this
activity. That is so we will only have one instance of this activity,
regardless of whether it is in the foreground or not. Otherwise, if we
already have an instance of this activity, and we receive a beam, Android
will create a second instance of this activity — when the user later
presses BACK, they return to our first instance, and wonder why our app
is broken.
If we receive the beam, we will get the Intent for the NDEF_DISCOVERED
action either in onCreate() (if we were not already running) or
onNewIntent() (if we were). In either case, we want to handle it the
same way: pass the URL from the first record’s payload to our BeamFragment.
However, we cannot do that from onCreate() — the fragment will not
have created the WebView yet. So, we use a trick: calling post() with
a Runnable puts that Runnable on the end of the work queue for
the main application thread. We can delay our processing of the Intent
by this mechanism, so we can safely assume the WebView exists.
  @Override
  public void onCreate(Bundle savedInstanceState) {
    super.onCreate(savedInstanceState);

    beamFragment=
        (BeamFragment)getFragmentManager().findFragmentById(android.R.id.content);

    if (beamFragment == null) {
      beamFragment=new BeamFragment();

      getFragmentManager().beginTransaction()
                                 .add(android.R.id.content, beamFragment)
                                 .commit();
    }

    adapter=NfcAdapter.getDefaultAdapter(this);

    findViewById(android.R.id.content).post(new Runnable() {
      public void run() {
        handleIntent(getIntent());
      }
    });
  }

  @Override
  public void onNewIntent(Intent i) {
    handleIntent(i);
  }
  private void handleIntent(Intent i) {
    if (NfcAdapter.ACTION_NDEF_DISCOVERED.equals(i.getAction())) {
      Parcelable[] rawMsgs=
          i.getParcelableArrayExtra(NfcAdapter.EXTRA_NDEF_MESSAGES);
      NdefMessage msg=(NdefMessage)rawMsgs[0];
      String url=new String(msg.getRecords()[0].getPayload());

      beamFragment.loadUrl(url);
    }
  }
There are three possible scenarios, when we try beaming from one device to another:
Intent is delivered
to it, courtesy of our NDEF_DISCOVERED <intent-filter> with our unique
MIME type.Intent system handles this in the same general fashion as the
first scenario, though it starts up a process for us and creates our
activity instance anew in this case.WebBeam is not in the Play Store).Android 4.1 (a.k.a., Jelly Bean) added in a far simpler facility for an app to beam
a file to another device using the Android Beam system. You can use setBeamPushUris()
or setBeamPushUrisCallback() on an NfcAdapter to hand Android one or more Uri
objects representing files to be transferred. While the initial connection will be
made via NFC and Android Beam, the actual data transfer will be via Bluetooth or
WiFi, much more suitable than NFC for bulk data.
The difference between the two approaches is mostly when you provide the array of
Uri objects. With setBeamPushUris(), you initiate the beam operation and supply
the Uri values immediately. With setBeamPushUrisCallback(), you initiate the beam
but do not supply the Uri values until the beam connection is established with the
peer app.
The
NFC/FileBeam
sample application shows file-based beaming in action.
In our activity (MainActivity), in onCreate(), we check to make sure that Android
Beam is enabled, via a call to isNdefPushEnabled() on our NfcAdapter. If it is,
then we use ACTION_GET_CONTENT to retrieve some file from the user (MIME type
wildcard of */*):
  @Override
  public void onCreate(Bundle savedInstanceState) {
    super.onCreate(savedInstanceState);
    adapter=NfcAdapter.getDefaultAdapter(this);

    if (!adapter.isNdefPushEnabled()) {
      Toast.makeText(this, R.string.sorry, Toast.LENGTH_LONG).show();
      finish();
    }
    else {
      Intent i=new Intent(Intent.ACTION_GET_CONTENT);

      i.setType("*/*").addCategory(Intent.CATEGORY_OPENABLE);
      startActivityForResult(i, 0);
    }
  }
In onActivityResult(), if we actually got a file (e.g., the result is ACTION_OK),
we turn around and call setBeamPushUris() to pass that file to some peer device.
We also set up a Button as our UI — clicking the Button will finish() the
activity:
  @Override
  protected void onActivityResult(int requestCode, int resultCode,
                                  Intent data) {
    if (requestCode==0 && resultCode==RESULT_OK) {
      adapter.setBeamPushUris(new Uri[] {data.getData()}, this);

      Button btn=new Button(this);

      btn.setText(R.string.over);
      btn.setOnClickListener(this);
      setContentView(btn);
    }
  }
That is all there is to it. If you run this app and pick a file, then hold the device up to another Android 4.1+ device, you will be prompted to “Touch to Beam” — doing so will kick off the transfer. Once the transfer is shown on the receiving device, you can pull the devices apart a bit, as the transfer will be proceeding over Bluetooth or WiFi. However, while Bluetooth ranges are much longer than NFC, you still need to keep the devices within a handful of meters of one another.
Note that the receiving device is not running our app. The OS handles the receipt of
the transferred file, not our code. Similarly, the OS on the sending device is
really the one responsible for the file transfer, so our app does not need the INTERNET
or BLUETOOTH permissions. The downside is that we have no control over anything
on the receiving side — the file is stored wherever the OS elects to put it, and the
Notification it displays when complete will simply launch ACTION_VIEW on the
pushed file.
To provide another take on using these features of NfcAdapter, let’s examine the
NFC/SecretAgentMan
sample application, originally written for a presentation at the 2012 droidcon UK
conference. This combines writing to tags, directly beaming text to another device,
and using Uri-based beaming, all in one app.
The UI of the app is a large EditText widget with an action bar:
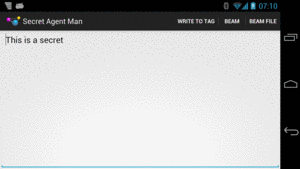
Figure 877: The SecretAgentMan UI
There are three action bar items, one each for the three operations: writing to a tag,
directly beaming to another device, and beaming a file (represented via a Uri).
Our app is comprised of a single activity, named MainActivity. As part of our manifest
setup, we request the NFC permission. And, since the app needs NFC to be useful, we
also have a <uses-feature> element, stipulating that the device needs to have NFC,
otherwise the app should not be shown in the Play Store:
  <uses-permission android:name="android.permission.NFC"/>

  <uses-feature
    android:name="android.hardware.nfc"
    android:required="true"/>
In onCreate() of MainActivity, we can then safely get access to an NfcAdapter,
since the NFC hardware should exist and we have rights to use NFC:
  @Override
  public void onCreate(Bundle savedInstanceState) {
    super.onCreate(savedInstanceState);
    setContentView(R.layout.activity_main);

    nfc=NfcAdapter.getDefaultAdapter(this);
    secretMessage=(EditText)findViewById(R.id.secretMessage);

    nfc.setOnNdefPushCompleteCallback(this, this);

    if (NfcAdapter.ACTION_NDEF_DISCOVERED.equals(getIntent().getAction())) {
      readFromTag(getIntent());
    }
  }
We also get our hands on the EditText widget, storing a reference to it in a data member
named secretMessage. We will cover the rest of the initialization work in onCreate()
later in this section, as we cover the code that needs that initialization.
If the user chooses the “Write to Tag” action bar item, we call a setUpWriteMode() method
from onOptionsItemSelected() of MainActivity. We maintain an inWriteMode boolean data member to track
whether or not we are already trying to write to an NFC tag. If inWriteMode is false, we
go ahead and take control over the NFC hardware to attempt to write to the next tag we see:
  void setUpWriteMode() {
    if (!inWriteMode) {
      IntentFilter discovery=
          new IntentFilter(NfcAdapter.ACTION_TAG_DISCOVERED);
      IntentFilter[] tagFilters=new IntentFilter[] { discovery };
      Intent i=
          new Intent(this, getClass()).addFlags(Intent.FLAG_ACTIVITY_SINGLE_TOP
              | Intent.FLAG_ACTIVITY_CLEAR_TOP);
      PendingIntent pi=PendingIntent.getActivity(this, 0, i, 0);

      inWriteMode=true;
      nfc.enableForegroundDispatch(this, pi, tagFilters, null);
    }
  }
To do that, we:
IntentFilter for ACTION_TAG_DISCOVERED
PendingIntent for an Intent pointing back to this same activity instance
(using getClass() to identify the instance, plus FLAG_ACTIVITY_SINGLE_TOP and
FLAG_ACTIVITY_CLEAR_TOP to route control back to our running instance)enableForegroundDispatch() on our NfcAdapter, to route newly-discovered
tags to us, with the IntentFilter identifying the tag-related events we are interested
in, and the PendingIntent identifying what to do when such a tag is encounteredOnce our activity is finishing (e.g., the user presses BACK), we need to clean up
our write-to-tag logic. This is kicked off in onPause() of MainActivity:
  @Override
  public void onPause() {
    if (isFinishing()) {
      cleanUpWritingToTag();
    }

    super.onPause();
All we do in cleanUpWritingToTag() is discontinue our foreground control over the NFC
hardware:
  void cleanUpWritingToTag() {
    nfc.disableForegroundDispatch(this);
    inWriteMode=false;
  }
If, before that occurs, the device is tapped on a tag, our activity should regain
control in onNewIntent() as a result of our PendingIntent having been executed:
  @Override
  protected void onNewIntent(Intent i) {
    if (inWriteMode
        && NfcAdapter.ACTION_TAG_DISCOVERED.equals(i.getAction())) {
      writeToTag(i);
    }
    else if (NfcAdapter.ACTION_NDEF_DISCOVERED.equals(i.getAction())) {
      readFromTag(i);
    }
  }
If we are in write mode, and if the Intent that was just used with startActivity()
was ACTION_TAG_DISCOVERED, we call our writeToTag() method to actually start writing
information to the tag:
  void writeToTag(Intent i) {
    Tag tag=i.getParcelableExtra(NfcAdapter.EXTRA_TAG);
    NdefMessage msg=
        new NdefMessage(new NdefRecord[] { buildNdefRecord() });

    new WriteTagTask(this, msg, tag).execute();
  }
To write to the tag, we get our Tag out of its Intent extra (keyed by EXTRA_TAG). Then,
we build an NfcMessage to write to the tag, getting its NfcRecord from buildNdefRecord():
  NdefRecord buildNdefRecord() {
    return(new NdefRecord(NdefRecord.TNF_MIME_MEDIA,
                          MIME_TYPE.getBytes(), new byte[] {},
                          secretMessage.getText().toString().getBytes()));
  }
Our NDEF record will be of a specific MIME type, represented by a static data member named
MIME_TYPE:
private static final String MIME_TYPE="vnd.secret/agent.man";
The payload of the NDEF record is our “secret message” from the secretMessage EditText
widget.
The writeToTag() method then kicks off the same WriteTagTask that we used earlier in this
chapter:
package com.commonsware.android.jimmyb;

import android.nfc.NdefMessage;
import android.nfc.Tag;
import android.nfc.tech.Ndef;
import android.nfc.tech.NdefFormatable;
import android.os.AsyncTask;
import android.util.Log;
import android.widget.Toast;

class WriteTagTask extends AsyncTask<Void, Void, Void> {
  MainActivity host=null;
  NdefMessage msg=null;
  Tag tag=null;
  String text=null;

  WriteTagTask(MainActivity host, NdefMessage msg, Tag tag) {
    this.host=host;
    this.msg=msg;
    this.tag=tag;
  }

  @Override
  protected Void doInBackground(Void... arg0) {
    int size=msg.toByteArray().length;

    try {
      Ndef ndef=Ndef.get(tag);

      if (ndef == null) {
        NdefFormatable formatable=NdefFormatable.get(tag);

        if (formatable != null) {
          try {
            formatable.connect();

            try {
              formatable.format(msg);
            }
            catch (Exception e) {
              text=host.getString(R.string.tag_refused_to_format);
            }
          }
          catch (Exception e) {
            text=host.getString(R.string.tag_refused_to_connect);
          }
          finally {
            formatable.close();
          }
        }
        else {
          text=host.getString(R.string.tag_does_not_support_ndef);
        }
      }
      else {
        ndef.connect();

        try {
          if (!ndef.isWritable()) {
            text=host.getString(R.string.tag_is_read_only);
          }
          else if (ndef.getMaxSize() < size) {
            text=host.getString(R.string.message_is_too_big_for_tag);
          }
          else {
            ndef.writeNdefMessage(msg);
            text=host.getString(R.string.success);
          }
        }
        catch (Exception e) {
          text=host.getString(R.string.tag_refused_to_connect);
        }
        finally {
          ndef.close();
        }
      }
    }
    catch (Exception e) {
      Log.e("URLTagger", "Exception when writing tag", e);
      text=host.getString(R.string.general_exception) + e.getMessage();
    }

    return(null);
  }

  @Override
  protected void onPostExecute(Void unused) {
    host.cleanUpWritingToTag();

    if (text != null) {
      Toast.makeText(host, text, Toast.LENGTH_SHORT).show();
    }
  }
}
The net result is that if the user taps the “Write to Tag” action bar item, then taps and holds
the device to a tag, we will write a message to the tag and display a Toast when we are done.
And, yes, this is a surprising amount of code for what really should be a simple operation…
We can set up MainActivity to respond to tags similar to the one we wrote — ones that have
the desired MIME Type — via an android.nfc.action.NDEF_DISCOVERED <intent-filter>:
      <intent-filter android:label="@string/app_name">
        <action android:name="android.nfc.action.NDEF_DISCOVERED"/>

        <data android:mimeType="vnd.secret/agent.man"/>

        <category android:name="android.intent.category.DEFAULT"/>
      </intent-filter>
In both onCreate() and onNewIntent(), if the Intent that started our activity is
an NDEF_DISCOVERED Intent, we route control to a readFromTag() method:
  void readFromTag(Intent i) {
    Parcelable[] msgs=
        (Parcelable[])i.getParcelableArrayExtra(NfcAdapter.EXTRA_NDEF_MESSAGES);

    if (msgs.length > 0) {
      NdefMessage msg=(NdefMessage)msgs[0];

      if (msg.getRecords().length > 0) {
        NdefRecord rec=msg.getRecords()[0];

        secretMessage.setText(new String(rec.getPayload(), US_ASCII));
      }
    }
  }
In principle, there could be several NDEF messages on the tag, but we only pay attention to the
first element, if any, of the EXTRA_NDEF_MESSAGES array of Parcelable objects on the Intent.
Similarly, in principle, there could be several NDEF records in the first message, but we only
examine the first element out of the array of NdefRecord objects contained in the NdefMessage.
From there, we extract our secret message and display it by means of putting it in the EditText
widget.
This sample only supports beaming — whether of NDEF messages directly or of a file — if we are
on API Level 16 or higher. Hence, in onCreateOptionsMenu(), we check our version and only enable
our default-disabled beam action bar items if:
isNdefPushEnabled() on our NfcAdapter:
  @TargetApi(16)
  @Override
  public boolean onCreateOptionsMenu(Menu menu) {
    getMenuInflater().inflate(R.menu.activity_main, menu);

    if (Build.VERSION.SDK_INT >= Build.VERSION_CODES.JELLY_BEAN) {
      menu.findItem(R.id.simple_beam)
          .setEnabled(nfc.isNdefPushEnabled());
      menu.findItem(R.id.file_beam).setEnabled(nfc.isNdefPushEnabled());
    }

    return(super.onCreateOptionsMenu(menu));
  }
If the user taps on the “Beam” action bar item, we call an enablePush() method from onOptionsItemSelected(),
which simply enables push mode:
  void enablePush() {
    nfc.setNdefPushMessageCallback(this, this);
  }
We arrange for the activity itself to be the CreateNdefMessageCallback necessary for push mode. That
requires us to implement createNdefMessage(), which will be called if we are in push mode and a
push-compliant device comes within range:
  @Override
  public NdefMessage createNdefMessage(NfcEvent event) {
    return(new NdefMessage(
                           new NdefRecord[] {
                               buildNdefRecord(),
                               NdefRecord.createApplicationRecord("com.commonsware.android.jimmyb") }));
  }
Here, we create an NdefMessage similar to the one we wrote to the tag earlier in this sample.
However, we also attach an Android Application Record (AAR), by means of the static
createApplicationRecord() method on NdefRecord. This, in theory, will help route the push to our
app on the other device, including downloading it from the Play Store if needed (and, of course,
if it actually existed on the Play Store, which it does not).
Back up in onCreate(), we call setOnNdefPushCompleteCallback(), to be notified of when a push
operation is completed. Once again, we set up MainActivity to be the callback, this time by implementing the
OnNdefPushCompleteCallback interface. That, in turn, requires us to implement onNdefPushComplete(),
where we disable push mode via a call to setNdefPushMessageCallback() with a null listener:
  @Override
  public void onNdefPushComplete(NfcEvent event) {
    nfc.setNdefPushMessageCallback(null, this);
  }
To receive the beam, we only need our existing logic to read from the tag, as on the receiving side, a push is indistinguishable from reading a tag, and we are using the same MIME type for both the message written to the tag and the message we are pushing.
If the user taps the “Beam File” action bar item, we find some file to beam, by means of an
ACTION_GET_CONTENT request and startActivityForResult():
      case R.id.file_beam:
        Intent i=new Intent(Intent.ACTION_GET_CONTENT);

        i.setType("*/*").addCategory(Intent.CATEGORY_OPENABLE);
        startActivityForResult(i, 0);
        return(true);
In onActivityResult(), if the request succeeded, we use setBeamPushUris() to tell Android to beam
the selected file to another device. Nothing more is needed on our side, and the receipt of the file is
handled entirely by the OS, not our application code, so there is nothing to be written for that.
This code assumes the NFC adapter is enabled. We could check that via a call to isEnabled()
on our NfcAdapter. If it is not enabled, we could — on user request — bring up the Settings
activity for configuring NFC, via startActivity(new Intent(Settings.ACTION_NFC_SETTINGS)).
However, oddly, this Intent action is only available on Android 4.1 (API Level 16) and
higher, despite NFC having been available for some time previously.
This code ignores the possibility of doing the simple beam (not the file-based beam) on
Android 4.0.x devices. That is because the isNdefPushEnabled() method was not added until
Android 4.1, and therefore we do not know whether or not we can actually do a beam.
If isNdefPushEnabled() returns false, we simply disable some action bar items. Alternatively,
we could use startActivity(new Intent(Settings.ACTION_NFCSHARING_SETTINGS)), on API Level
14 and higher, to bring up the beam screen in Settings, to allow the user to toggle beam
support on.
To help make sense of the tags that you are trying to use with your
app, you may wish to grab the
NFC TagInfo
application off of the Google Play Store. This application
simply scans a tag and allows you to peruse all the details of that
tag, including the supported technologies (e.g., does it support
NDEF? is it NdefFormatable?), the NDEF records, and so on.
To learn more about NFC on Android — beyond this chapter or the Android developer documentation – this Google I|O 2011 presentation is recommended.