Figure 288: EmPubLite Project, Showing assets/ in main/ of app/
Now that we have seen how to work with assets, we can start putting them to use, by defining some “help” and “about” HTML files and displaying them in their respective activities.
This is a continuation of the work we did in the previous tutorial.
You can find the results of the previous tutorial and the results of this tutorial in the book’s GitHub repository.
Your project may already have an assets/ folder. If not, create one.
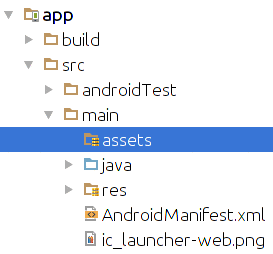
In Android Studio, right-click over the main sourceset directory,
choose New > Directory from the context menu, fill in the name assets in the dialog,
and click OK. This should give you an app/ module that looks like:
Figure 288: EmPubLite Project, Showing assets/ in main/ of app/
In assets/, create a misc/ sub-folder, by right-clicking over
the assets/ folder and choosing to add a new directory named misc
(e.g., New > Directory from the Android Studio context menu), giving
you something like:
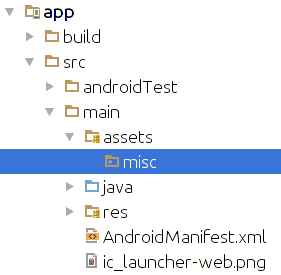
Figure 289: EmPubLite Project, Showing assets/misc/ in main/ of app/
In assets/misc/, create two files, about.html and help.html.
In Android Studio, right-click over the assets/misc/ folder in the project
explorer, choose New > File from the context menu, fill in the desired filename in the dialog,
and click OK.
The
actual HTML content of these two files does not matter, so long as you can
tell them apart when looking at them. If you prefer, you can download
sample about.html
and help.html
files from the application’s GitHub repository, via the links.
Now, open up SimpleContentActivity and replace the stub implementation that
we have now with the following Java:
package com.commonsware.empublite;

import android.app.Activity;
import android.app.Fragment;
import android.os.Bundle;

public class SimpleContentActivity extends Activity {
  public static final String EXTRA_FILE = "file";

  @Override
  public void onCreate(Bundle savedInstanceState) {
    super.onCreate(savedInstanceState);

    if (getFragmentManager().findFragmentById(android.R.id.content)==null) {
      String file=getIntent().getStringExtra(EXTRA_FILE);
      Fragment f=SimpleContentFragment.newInstance(file);

      getFragmentManager().beginTransaction()
        .add(android.R.id.content, f).commit();
    }
  }
}
If you prefer, you can view this file’s contents in your Web browser via this GitHub link.
In onCreate(), we follow the standard recipe for defining our fragment if
(and only if) we were started new, rather than restarted after a configuration
change, by seeing if the fragment already exists. If
we do need to add the fragment, we retrieve a string extra from the Intent
used to launch us (identified as EXTRA_FILE), create an instance of
SimpleContentFragment using that value from the extra, and execute a
FragmentTransaction to add the SimpleContentFragment to our UI.
Now, what remains is to actually supply that EXTRA_FILE value, which we are
not doing presently when we start up SimpleContentActivity from
EmPubLiteActivity.
Modify onOptionsItemSelected() of EmPubLiteActivity to look like this:
  @Override
  public boolean onOptionsItemSelected(MenuItem item) {
    switch (item.getItemId()) {
      case R.id.about:
        Intent i = new Intent(this, SimpleContentActivity.class)
          .putExtra(SimpleContentActivity.EXTRA_FILE,
            "file:///android_asset/misc/about.html");
        startActivity(i);

        return(true);

      case R.id.help:
        i = new Intent(this, SimpleContentActivity.class)
          .putExtra(SimpleContentActivity.EXTRA_FILE,
            "file:///android_asset/misc/help.html");
        startActivity(i);

        return(true);
    }

    return(super.onOptionsItemSelected(item));
  }
You are adding the two putExtra() calls in the R.id.about and R.id.help
branches of the switch statement. In both cases, we are using a quasi-URL
with the prefix file:///android_asset/. This points to the root of our project’s
assets/ folder. WebView knows how to interpret these URLs, to load files
out of our assets directly.
Right now, our action bar on Android 5.0 devices is the one defined
by Theme.Holo.Light.DarkActionBar. This certainly works. However, it
looks a bit out of place, as most of the built-in apps will be using
a material theme. So, let’s make some minor adjustments to make our app
blend in a bit better.
First, we need to add a res/values-v21/ directory, representing resources
that will be used solely on API Level 21+ devices. In Android Studio,
right-click over the res/ directory in your main/ sourceset and choose
New > “Android resource directory” from the context menu. Choose “values”
as the “Resource type”. Then, in the list of available qualifiers on
the left, click on “Version”, then click the “>>” button to the right
of that list. This may give you a fairly messed-up dialog, at least
in the current version of Android Studio:
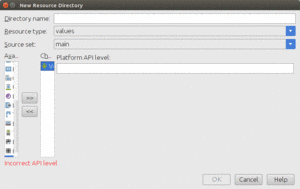
Figure 290: Android Studio New Resource Directory Dialog
Fill in 21 in the “Platform API level” field, then click OK. This should
give you an empty res/values-v21/ directory, as desired.
Then, copy the styles.xml file from res/values/ into res/values-v21/.
Windows/Linux users can drag styles.xml from res/values/ while holding
down the Control key to make a copy. OS X users probably have a similar
convention.
Open res/values-v21/styles.xml and change the parent
attribute of our one style element to be
android:Theme.Material.Light.DarkActionBar.
Also, add three child elements
to the <style> element:
<resources>

  <!-- Base application theme. -->
  <style name="AppTheme" parent="android:Theme.Material.Light.DarkActionBar">
    <item name="android:colorPrimary">@color/colorPrimary</item>
    <item name="android:colorPrimaryDark">@color/colorPrimaryDark</item>
    <item name="android:colorAccent">@color/colorAccent</item>
  </style>

</resources>
These tell Theme.Material (and its descendants) to apply our
existing color scheme to the theme.
Now, if you run the application and choose “Help” from the action bar overflow, you will see your help content on-screen:
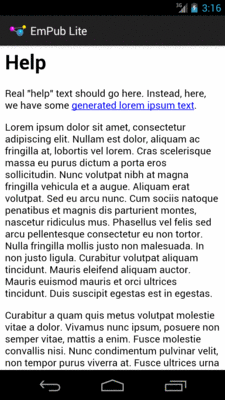
Figure 291: EmPubLite Help Screen
Pressing BACK and choosing “About” from the action bar overflow will bring up your about content:
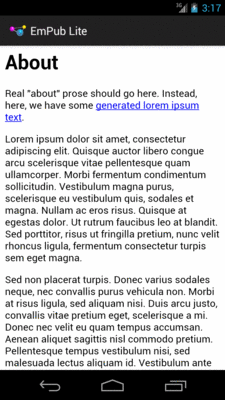
Figure 292: EmPubLite About Screen
However, on an Android 5.0 or higher device or emulator, our action bar will now sport our designated color scheme:
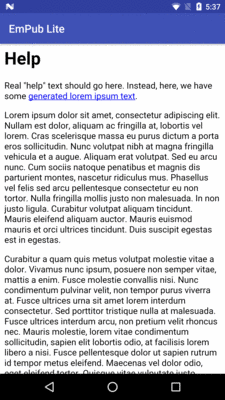
Figure 293: EmPubLite Help Screen on Android 5.1
… we will display the actual content of our book in our tutorial project.