CHAPTER 4
Fruits and Vegetables
Is there anything more satisfying than preparing dinner using vegetables from your garden that you started from seed? It’s a fabulous feeling to know that you started plants, nurtured them, harvested their fruit, and saved seed from those plants for next year’s garden. You’ve become a fully self-sufficient gardener!
The first three chapters of this book provided the information you need to get started on your seed-starting and -saving journey. Now, let’s dive into the specific plants and their needs so you’ll grow an amazing, productive garden. The plants here are organized alphabetically by their Latin names.

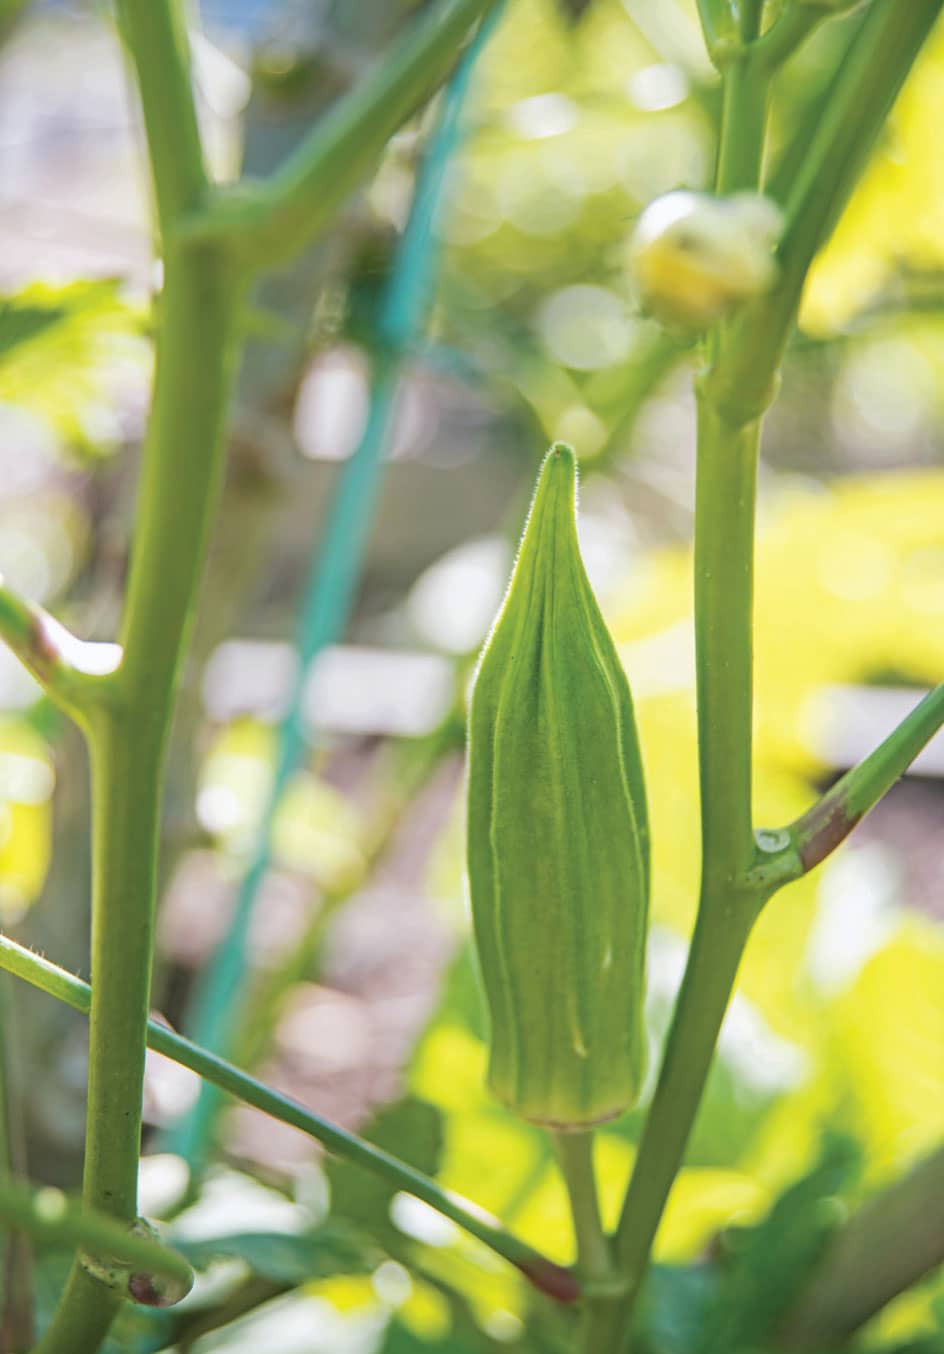
Okra
Abelmoschus esculentus
It’s a love/hate relationship with okra. My Southern friends consider it a necessary garden staple, adding it to gumbo or frying it, while other people can’t abide its somewhat slimy nature. Still, with its beautiful blooms, okra deserves a place in your garden. Most okra varieties are daylight sensitive, flowering early with shorter days. Okra produces perfect flowers that are self-pollinating. However, pollinators adore their large, showy flowers, so cross-pollination is possible. Bag the blooms to avoid cross-pollination. Edible pods form 5 to 7 days after the blossom appears. Harvest the pods to eat while they’re young, as they become woody as they age.
·TRAITS AND TIPS·
OKRA
COMMON NAME: Okra
SCIENTIFIC NAME: Abelmoschus esculentus
FAMILY: Malvaceae, same family as cotton and mallow
LIFE CYCLE: Annual
FRUIT TYPE: Capsule
SEED-STARTING DEPTH: 1/2″ (1.3 cm)
SPECIAL NEEDS: Scarification or soak seeds for 12 hours in warm water prior to planting.
SEED-STARTING SOIL TEMPERATURE: 70–95°F (21–35°C)
SEED START TIMING: Direct sow after frost is preferred. Can be started indoors using biodegradable containers 4–5 weeks before last frost. Bottom heat speeds germination.
LIGHT REQUIREMENTS: As soon as seedlings emerge
TRANSPLANT: After danger of frost. Do not disturb roots. Plant in deep beds, as okra grows a long taproot. Space 18″ (46 cm) apart for smaller varieties, 36″ (91 cm) apart for tall varieties.
DIRECT SOWING: After danger of frost and when temperatures reach 55°F (13°C)
GERMINATION: 3–12 days
DAYS TO MATURITY: 50–60
POLLINATION: Self
CROSS-POLLINATION: Can cross-pollinate with other okra varieties. Cage plants or bag blossoms to prevent cross-pollination.
ISOLATION DISTANCE: 1/2 mile (0.8 km)
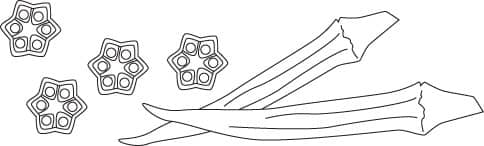
SEED MATURITY: Dry pods on the plants or harvest prior to frost and allow pods to continue to dry fully. Wear gloves to harvest pods.
SEED PROCESSING: Thresh to remove seeds from pods.
SEED VIABILITY: 2–3 years
Leek
Allium ampeloprasum
I’ll admit my Swiss husband introduced me to leeks, because it seems they’re more popular in Europe than in the United States. Now, not only do I use them at least twice weekly, I grow them too. After all, leeks can be a bit pricey at the supermarket, and they’re incredibly easy to grow. Plus, as an allium, leeks produce beautiful blooms, which the pollinators adore.
Leeks require patience, with a long growing season of approximately 120 days. They prefer deep, humus-rich beds with steady moisture. The good news is that leeks tolerate mild winters well. In fact, you can plant a fall crop in Southern climates to harvest leeks in the winter. However, in cold climates, leeks need to be dug and stored to protect them, then replanted in the spring. Although leeks are classified as biennials, they may produce flower stalks the first year, after 4 to 6 weeks of cold temperatures. However, the plant needs to grow to maturity the second year before harvesting seed, as the seed will not be viable.
·TRAITS AND TIPS·
LEEK
COMMON NAME: Leek
SCIENTIFIC NAME: Allium ampeloprasum
FAMILY: Amaryllidaceae
LIFE CYCLE: Biennial
FRUIT TYPE: Capsule
SEED-STARTING DEPTH: 1/4″ (0.6 cm)
SPECIAL NEEDS: Requires vernalization period, with temperatures below 55°F (13°C) for 4–6 weeks to induce flowering and seed setting.
SEED-STARTING SOIL TEMPERATURE: 50–75°F (10–24°C)
SEED START TIMING: Direct sowing after frost is preferred. Can be started indoors using biodegradable containers 4–5 weeks before last frost. Can also be planted in fall in mild climates.
LIGHT REQUIREMENTS: As soon as seedlings emerge
TRANSPLANT: Plant after danger of frost. Plant in a 6″ (15 cm) deep trench, 2″ (5 cm) apart. Fill in sides with soil as plants grow.
DIRECT SOWING: Sow after danger of frost has passed and when temperatures reach 55°F (13°C).
GERMINATION: 5–7 days
DAYS TO MATURITY: 80–120
POLLINATION: Self
CROSS-POLLINATION: Can cross-pollinate with other varieties. Cage plants or bag blossoms to prevent cross-pollination.
ISOLATION DISTANCE: 1/2 mile (0.8 km)
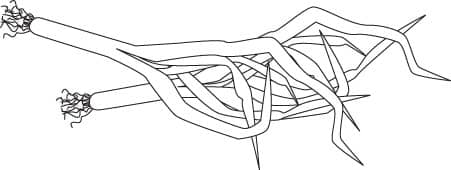
SEED MATURITY: Allow flower heads (capsules) to dry on plants. Harvest when capsules fade or begin to split, showing dark seeds within.
SEED PROCESSING: Thresh
SEED VIABILITY: 2–3 years
Celery and Celeriac
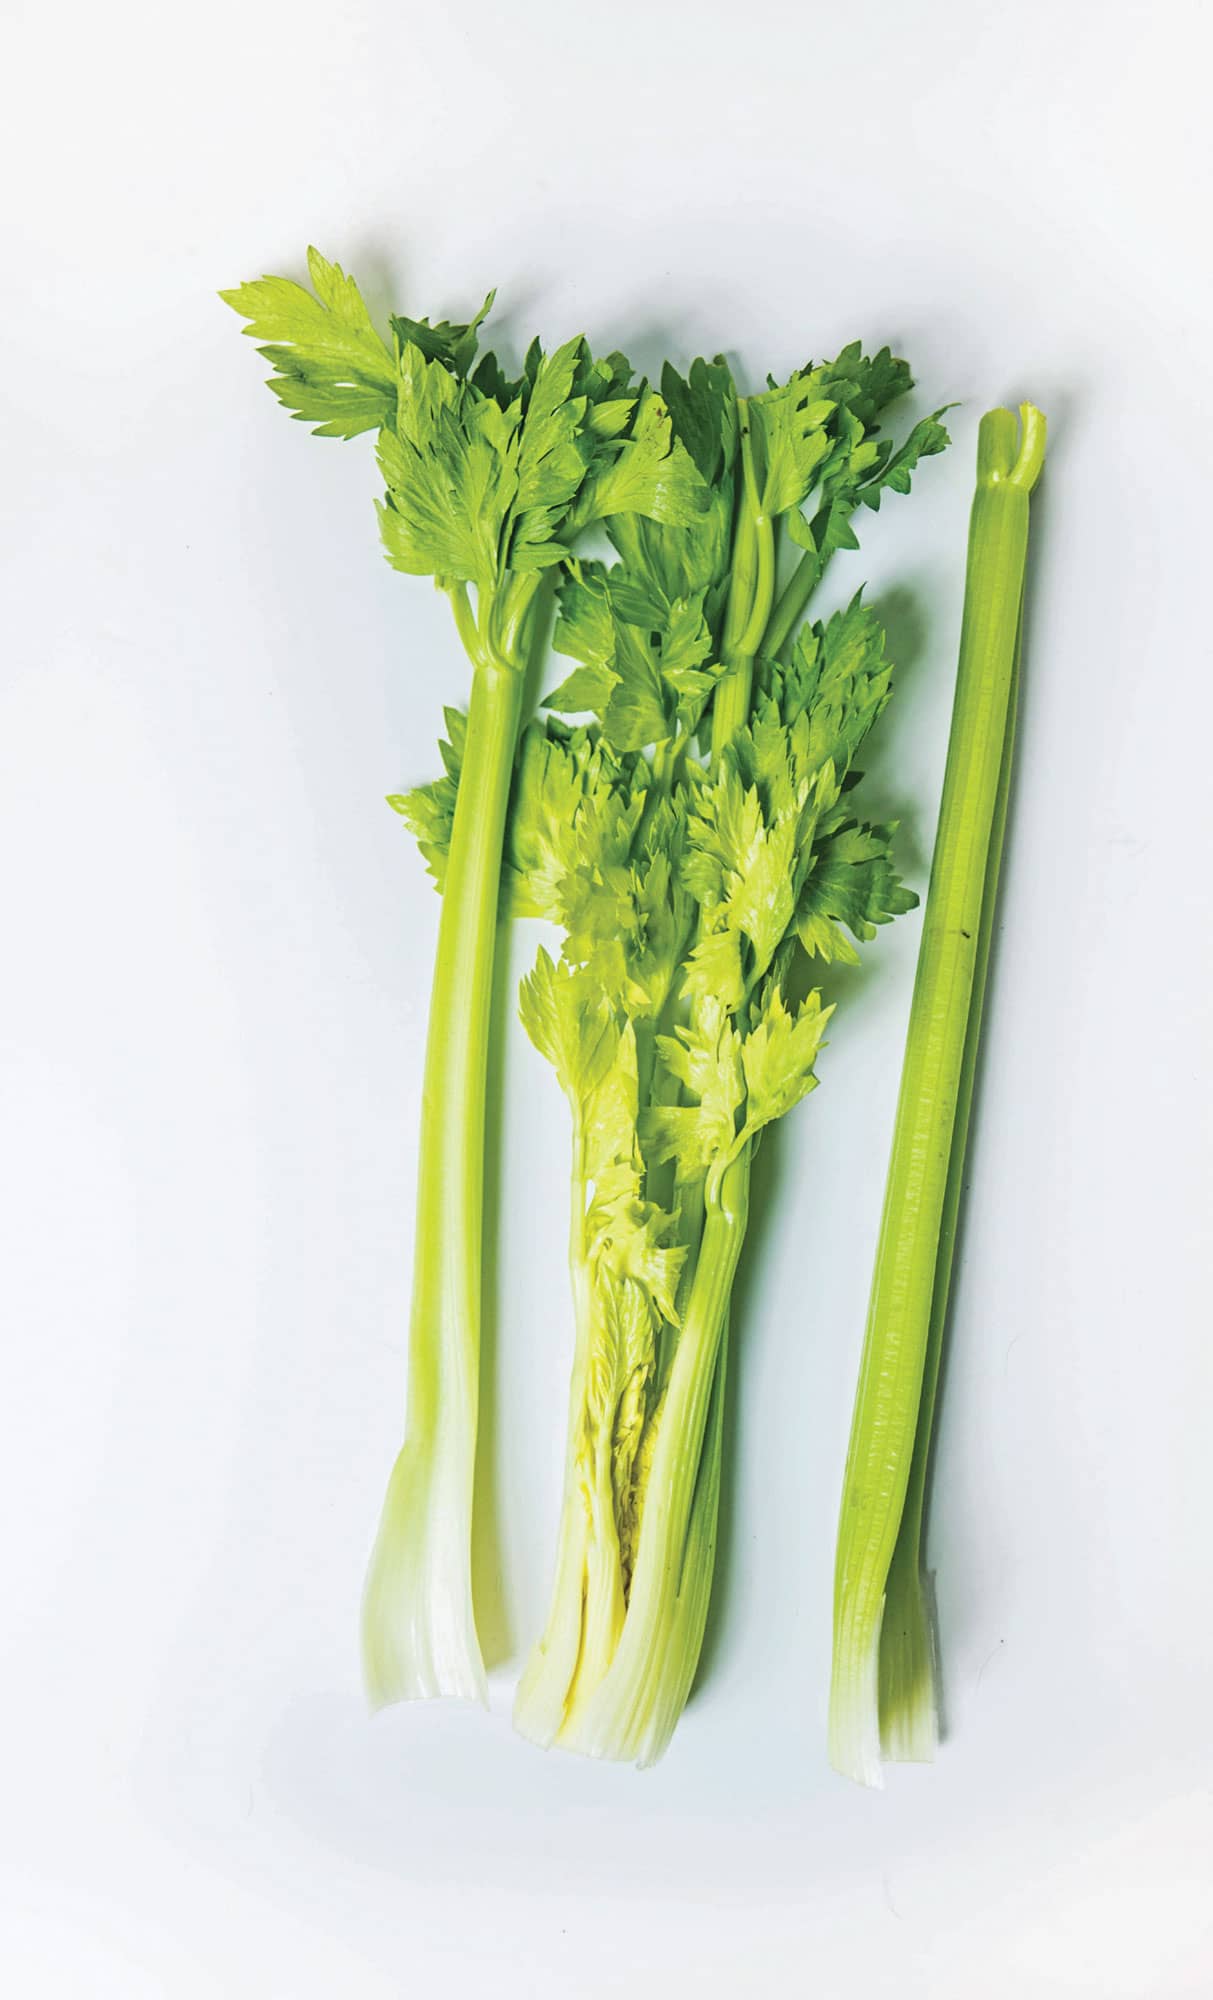
Apium graveolens var. dulce (celery), Apium graveolens var. rapaceum (celeriac)
Although they share a similar flavor, celery and celeriac grow differently and serve different culinary functions. Celery, with its tall stems and flat leaves, is 94 percent water, adding crunch and texture to dishes. Celeriac, with its dense, bulbous, yellowish root, provides a great addition to soups, stews, and gratins. Both celery and celeriac are biennial plants requiring pollination from insects, and both require a chilling period to flower and produce seed. In mild climates, overwinter the plants in the ground and insulate with a layer of mulch, but in cold zones, dig up the roots and store in a root cellar. Trim celery stalks severely and place the roots in damp earth or sand with crowns exposed. For celeriac, carefully dig the bulbous root, trim the roots and top, and store in a container filled with damp sand at 33–40°F (0.5–4°C). When weather warms, remove any dead vegetation and replant the celery and celeriac in the garden.
·TRAITS AND TIPS·
CELERY AND CELERIAC
COMMON NAMES: Celery, celeriac
SCIENTIFIC NAMES: Apium graveolens var. dulce, Apium graveolens var. rapaceum
FAMILY: Apiaceae
LIFE CYCLE: Biennial
FRUIT TYPE: Umbel
SEED-STARTING DEPTH: 1/4″ (0.6 cm)
SPECIAL NEEDS: Soak seeds overnight to speed germination. It needs light to germinate.
SEED-STARTING SOIL TEMPERATURE: 55–75°F (13–24°C). Seeds sown in temperatures exceeding 85°F (29°C) remain dormant.
SEED START TIMING: Direct sow when soil temperature reaches 50°F (10°C). Start seeds for transplants 10–12 weeks before last expected frost date. Can also be grown in mild climates for a fall crop.
LIGHT REQUIREMENTS: It needs light to germinate. As seedlings emerge, continue 12–16 hours of light per day.
TRANSPLANT: Plant after danger of frost. Space plants 10–12″ (25–30 cm) for celery, 6–8″ (15–20 cm) for celeriac. Both like compost-rich, moist soil. Celery prefers a pH of 5.8–6.8. Celeriac is a heavy feeder. Water weekly with compost tea.
DIRECT SOWING: After danger of frost
GERMINATION: 14–21 days
DAYS TO MATURITY: 100–130 celery; 90–120 celeriac
POLLINATION: Insect
CROSS-POLLINATION: Can cross-pollinate with other varieties. Cage plants or bag blossoms to prevent cross-pollination. Hand-pollinate or introduce pollinators into cage.
ISOLATION DISTANCE: 1 mile (1.6 km)
SEED MATURITY: Seeds mature the second year. If seeds are produced the first year, they will not be viable. Harvest seeds when color turns from green to brown.
SEED PROCESSING: Screen
SEED VIABILITY: 3–6 years
Asparagus
Asparagus officinalis
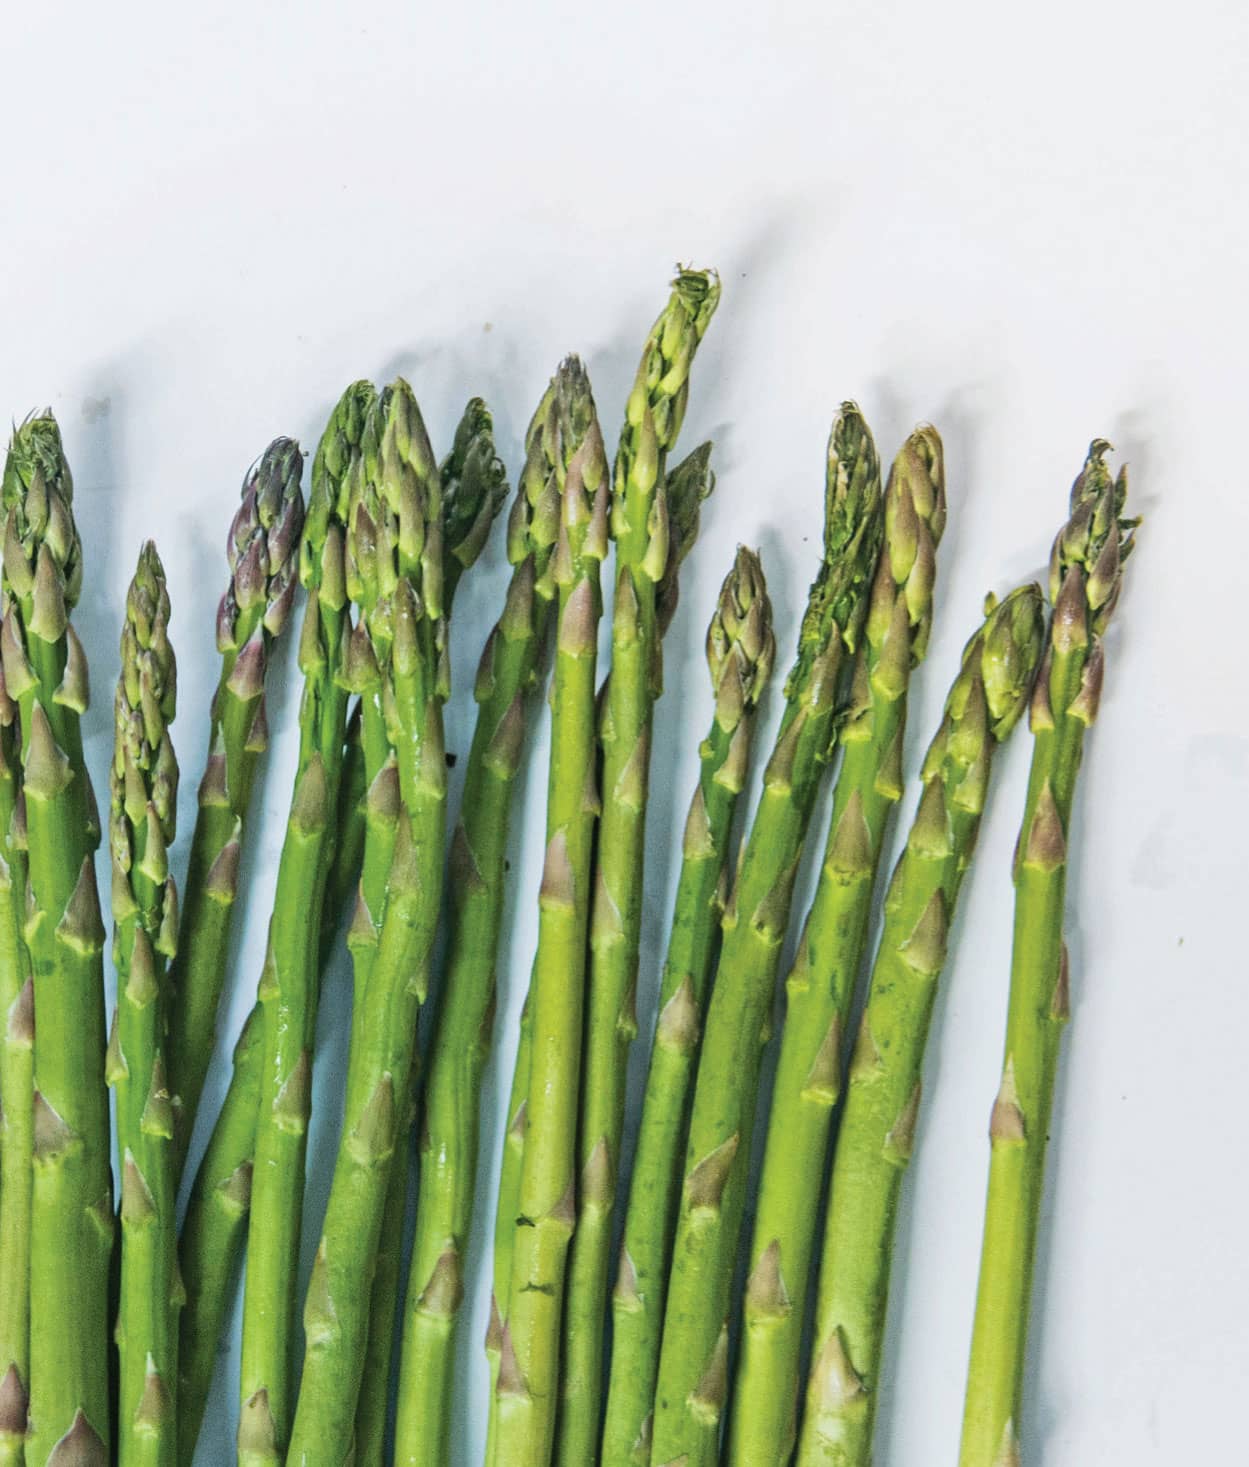
Growing asparagus is an exercise in patience, which is not my forté. It’s hard to resist those delicious shoots peeking out of the soil in the spring. But eating the first spear straight from the garden makes the wait worthwhile. And you will wait—three years, to be exact—before harvesting your first, precious asparagus. While growing asparagus from seed is easy, it takes several years to establish a strong, productive plant.
Before you transplant seedlings into the garden, remember: Asparagus is a perennial. Select your location carefully as the bed will become its permanent home. Choose a site that drains well and amend it with compost. Asparagus prefers a soil pH between 6.5 and 7.0. Based on the results of a soil test, determine if you need to add lime to the bed to raise the pH. If the pH is too high, amend the soil with sulfur. (Test your soil early, as it can take several months to establish the correct soil pH.) Allow the plants to grow for two years, with the spears becoming ferns and then dying back each season. Finally, in year three, you may begin harvesting a few spears in the spring.
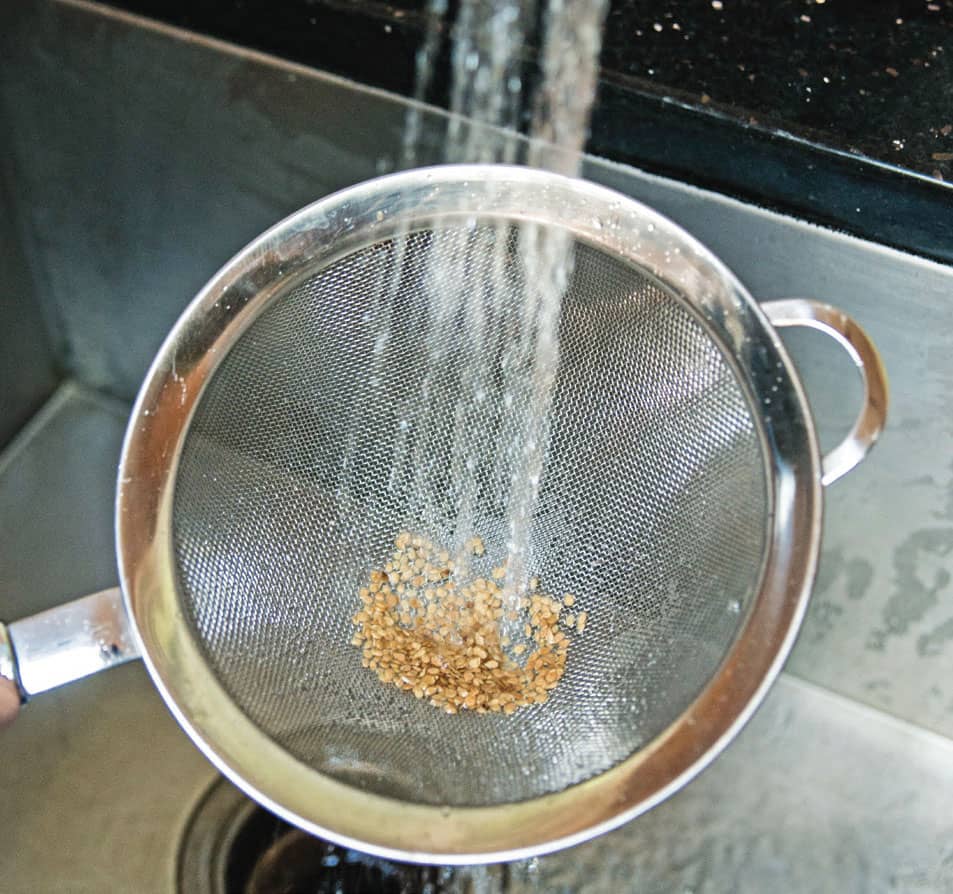
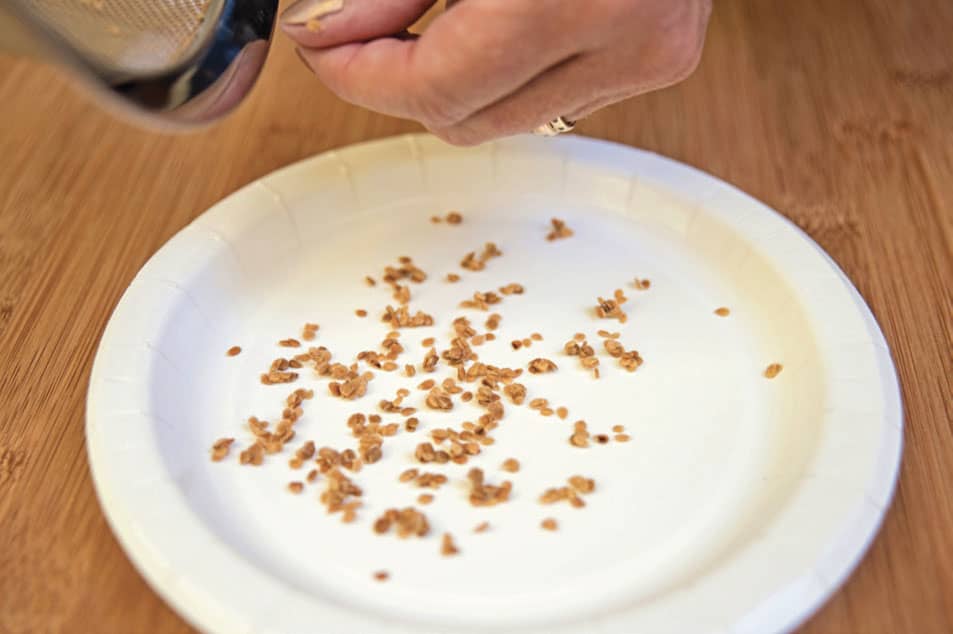
The trick to saving seeds is to know the difference between male and female asparagus plants. Male varieties, while typically providing larger spears, don’t produce fruit, which means that only female asparagus plants produce seeds. To clean the seeds, crush the berries in a bag, then soak them in a bowl of water. Debris and nonviable seeds will rise to the top. Remove the debris, then pour the remaining water and seeds through a fine sieve. Dry the seeds on a plate for a week. NOTE: The bright red asparagus berries are toxic. Do not eat them.
·TRAITS AND TIPS·
ASPARAGUS
COMMON NAME: Asparagus
SCIENTIFIC NAME: Asparagus officinalis
FAMILY: Liliaceae
LIFE CYCLE: Perennial
FRUIT TYPE: Berry
SEED-STARTING DEPTH: 1/2″ (1.3 cm)
SPECIAL NEEDS: Soak seeds overnight prior to planting.
SEED-STARTING SOIL TEMPERATURE: 70–80°F (21–27°C)
SEED START TIMING: Indoors 8–10 weeks before first frost
LIGHT REQUIREMENTS: As soon as seedlings emerge
TRANSPLANT: Plant after danger of frost. Do not disturb roots. Plant in deep beds, as asparagus grows large roots. Space plants 15″ (38 cm) apart, with 36″ (91 cm) between rows. Avoid transplanting after the second year.
DIRECT SOWING: Sow after danger of frost has passed and when soil temperatures reach 70°F (21°C).
GERMINATION: 7–21 days
DAYS TO MATURITY: 3 years until the first harvest
POLLINATION: Insect
CROSS-POLLINATION: Can cross-pollinate with wild asparagus. Cage plants or bag blossoms to prevent cross-pollination.
ISOLATION DISTANCE: 1/4 mile (0.4 km)
SEED MATURITY: Let berries dry on plants, or harvest prior to frost and dry.
SEED PROCESSING: Wet processing
SEED VIABILITY: 3 years
Beets and Swiss Chard
Beta vulgaris (Crassa group), Beta vulgaris (Cicla group)
Beet seeds are finicky, as their seed coat contains a chemical that inhibits germination. Luckily an overnight soaking in water remedies the problem. Did you know that the seed is actually a cluster of multiple seeds? So don’t fret over careful spacing when sowing seeds, as you’ll still need to thin plants. (Benefit: baby beet and swiss chard seedlings make a tasty addition to salads.)
Both beets and swiss chard require a chill period before producing seeds the second year. In mild climates, cut the tops, dig the roots to inspect them for quality, and replant the healthiest, largest, disease-free beets, adding a layer of mulch to protect the plant. For swiss chard, harvest the leaves, cutting them to an inch above the roots, and leave in the ground. Cover with mulch.
However, in cold climates, both crops must be dug and stored away from freezing temperatures. Store in a root cellar or basement at 40°F (4°C). Replant in the spring when danger of freezing temperatures has passed.
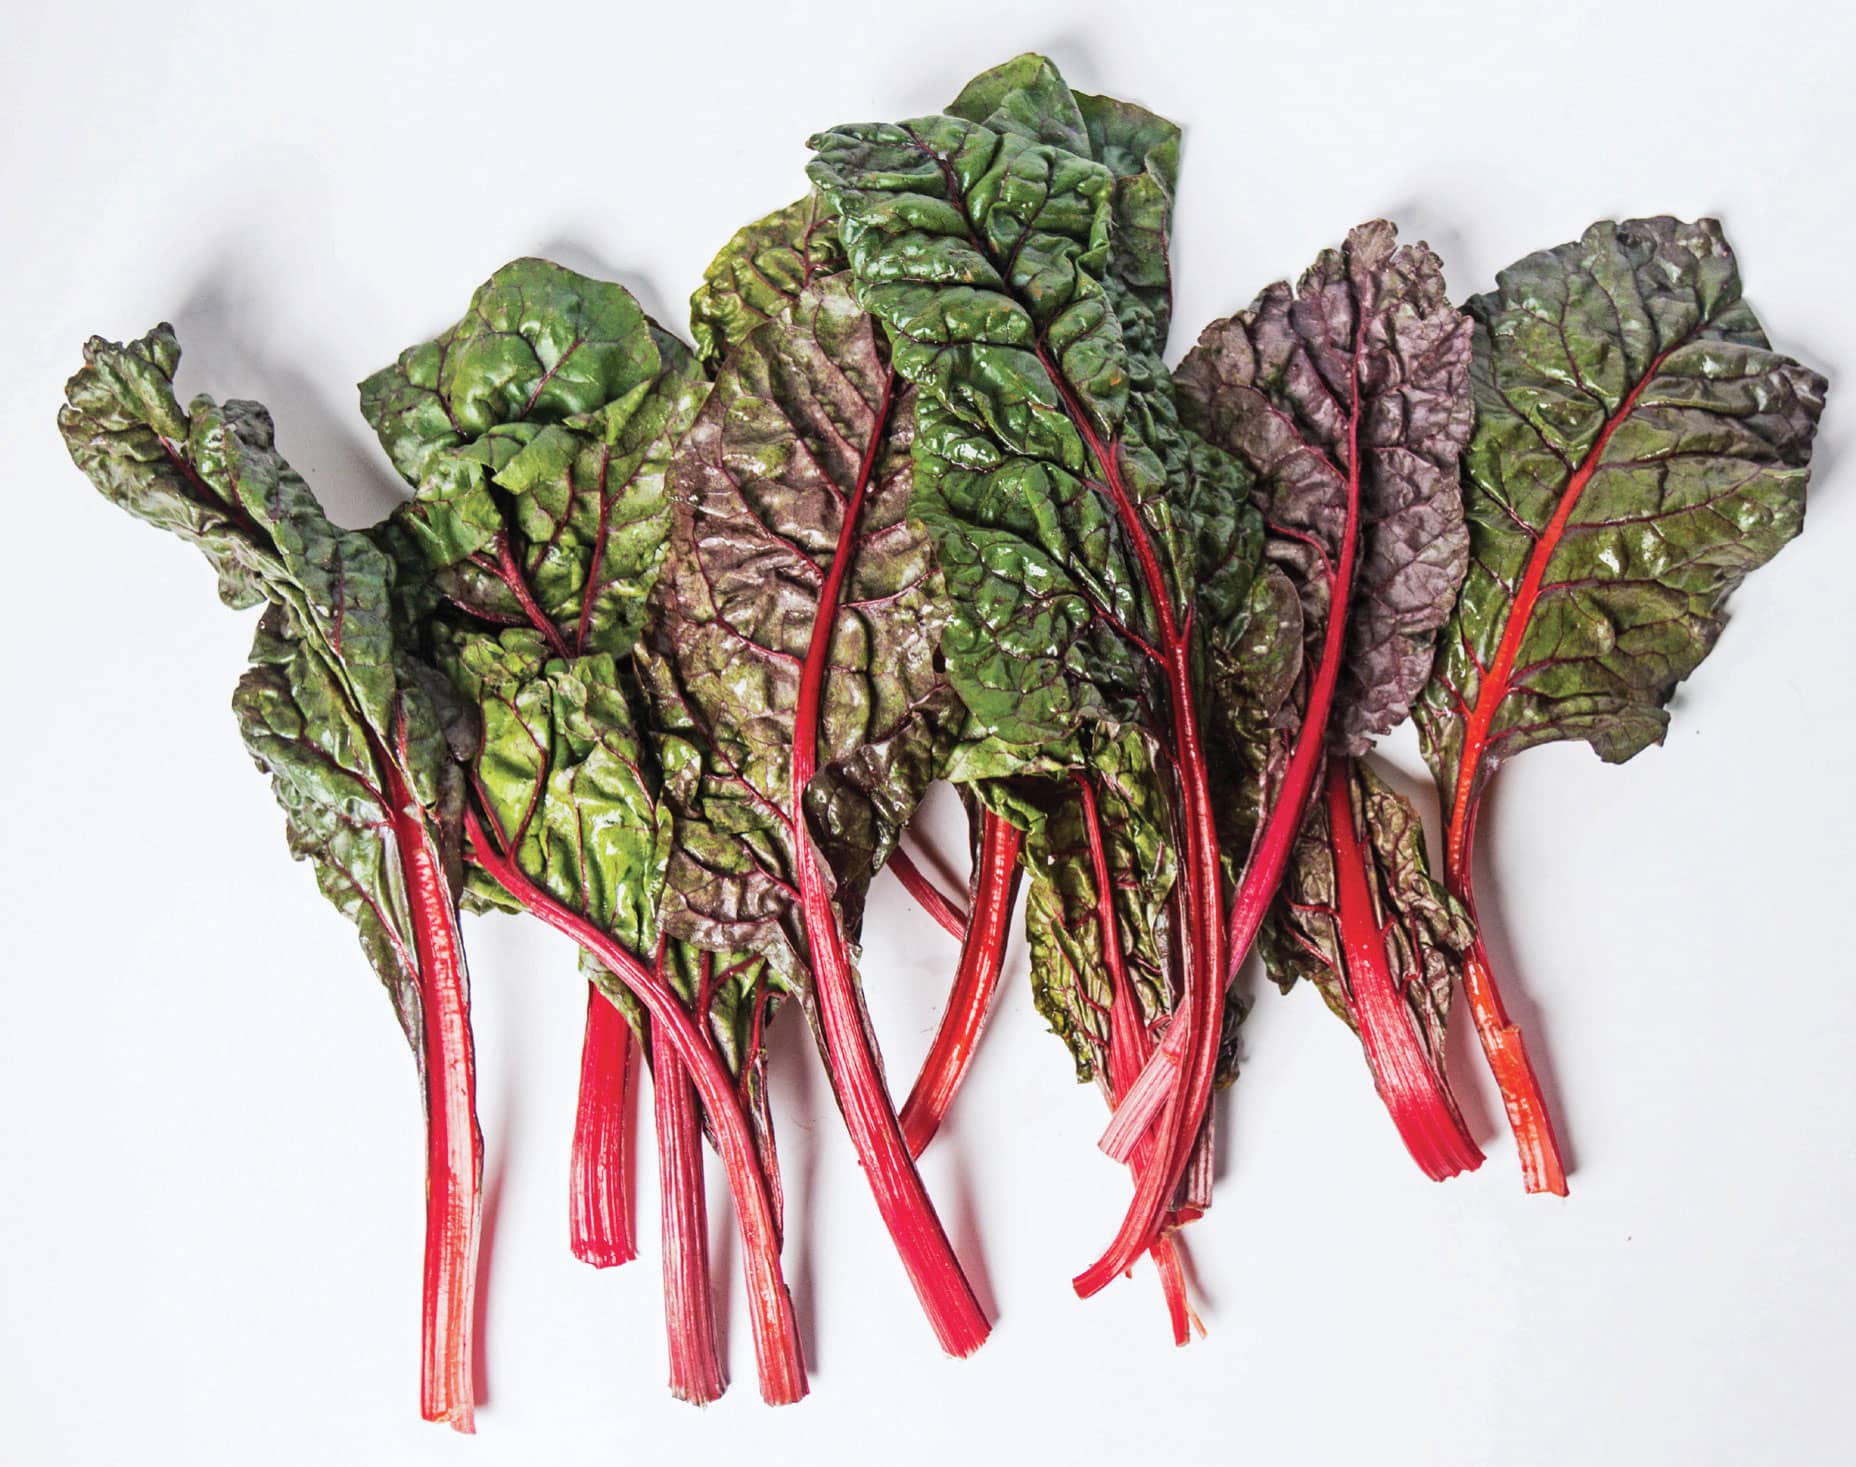
Swiss chard
·TRAITS AND TIPS·
BEETS AND SWISS CHARD
COMMON NAMES: Beet, swiss chard
SCIENTIFIC NAMES: Beta vulgaris (beet: Crassa group); Beta vulgaris (swiss chard: Cicla group)
FAMILY: Amaranthacea (formerly Chenopodiaceae)
LIFE CYCLE: Biennial
FRUIT TYPE: Dry, indehiscent fruit, multigerm (seedball)
SEED-STARTING DEPTH: 1/2″ (1.3 cm)
SPECIAL NEEDS: Soak seeds overnight prior to planting.
SEED-STARTING SOIL TEMPERATURE: Optimal is 85°F (29°C); can germinate at 45°F (7°C)
SEED START TIMING: Direct sowing is preferred. Can be started indoors and planted in the garden 1–2 weeks before last frost.
LIGHT REQUIREMENTS: As soon as seedlings emerge
TRANSPLANT: Plant 1–2 weeks prior to last frost. Space 8–10″ (20–25 cm) in rows 12–24″ (30–61 cm) apart.
DIRECT SOWING: Sow when temperatures reach 45°F (7°C) minimum. Protect young plants from freezing.
GERMINATION: 5–16 days
DAYS TO MATURITY: 55–80 beet; 50–60 swiss chard
POLLINATION: Wind. Plants, with perfect, self-incompatible flowers, require outward pollination. Self-incompatible plants, while producing functional pollen, fail to set seeds when self-pollinated and need pollen from another plant to reproduce.
CROSS-POLLINATION: Swiss chard and beets may cross. Cage the same types of plants in groups with extremely fine covering to avoid cross-pollination by wind.
ISOLATION DISTANCE: 800′–1 mile (0.24–1.6 km)
SEED MATURITY: Requires vernalization. Seeds ripen first at the base of side shoots, then progress to terminal points. Color changes from green to brown, but harvest time is challenging to identify; cut open a sample seed to gauge maturity. Unripe seed is milky; ripe is mealy.
SEED PROCESSING: Thresh
SEED VIABILITY: 5 years
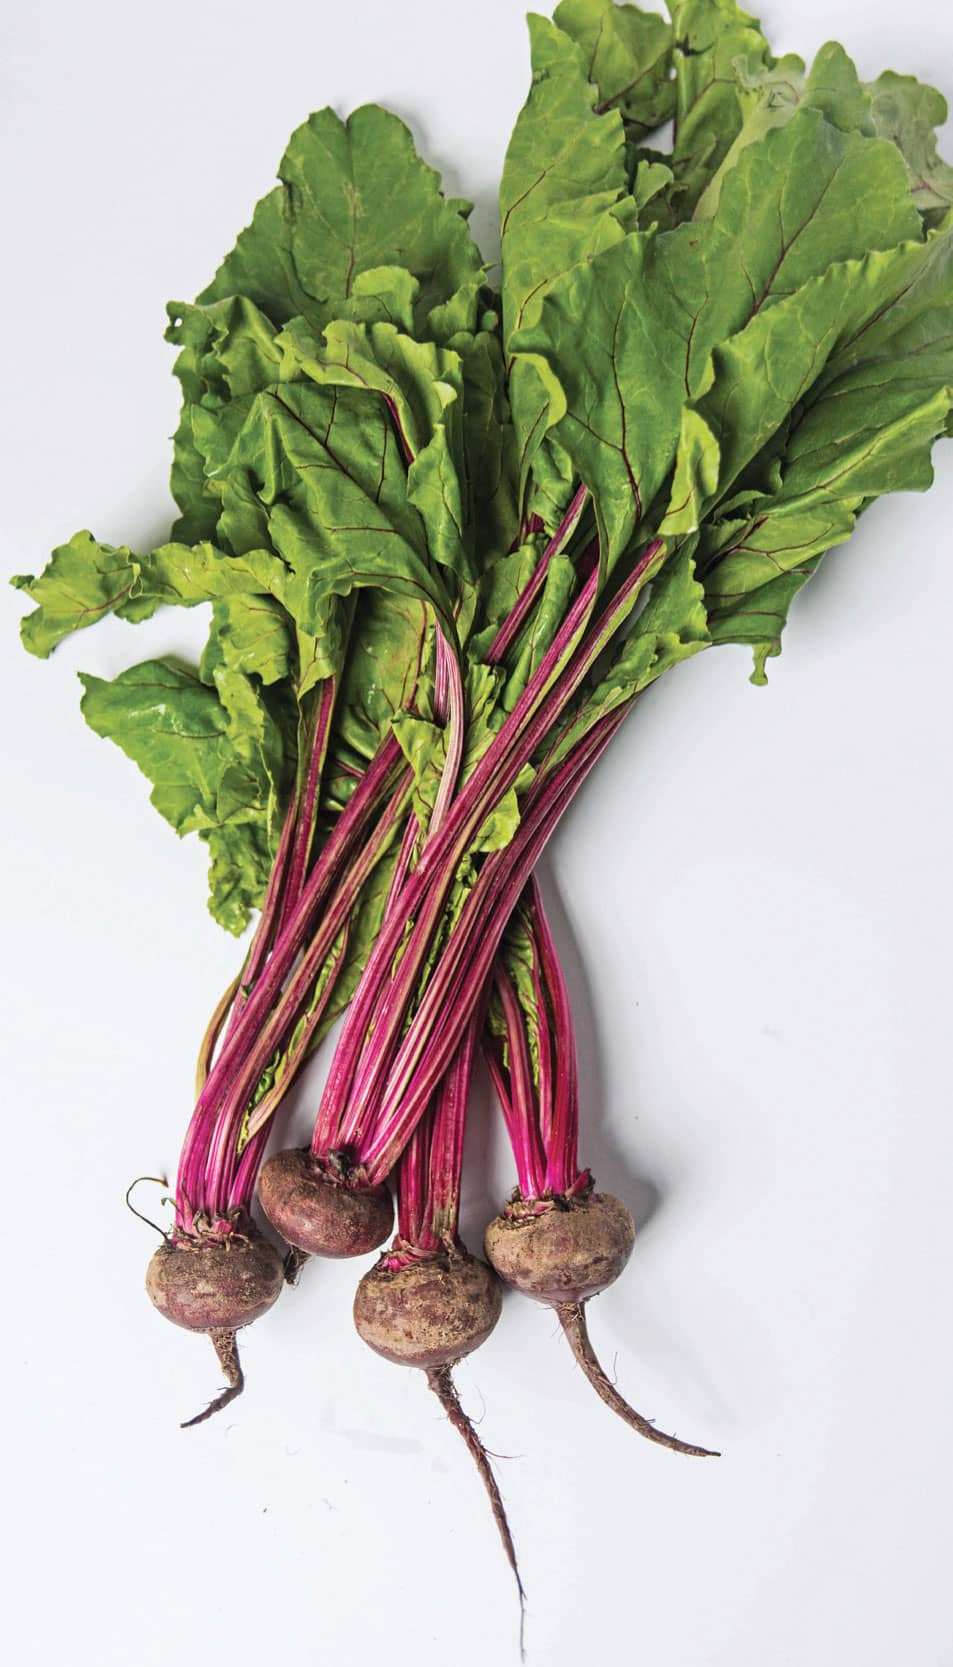
Beets
Brassicas
Brassica juncea (mustards)
Brassica napus (rutabaga, Siberian Kale, Swede)
Brassica oleracae (brussels sprouts, broccoli, cabbage, cauliflower, Chinese broccoli, collards, kale, kohlrabi, sprouting broccoli)
Brassica rapa (broccoli raab, Chinese cabbage, Napa cabbage, turnip)
Ah, brassicas . . . the stars of the cool-season garden. While it might seem odd to group all brassicas together, there is a method to my madness. Most brassicas share common seed-starting traits, and many grow under the same garden conditions. However, when varieties deviate from the pack, you’ll find those specific needs defined.
Most brassicas thrive under full sun or partial shade (but need at least 4–5 hours of sun). Brassicas prefer a soil pH between 6–7, and they appreciate well-drained, compost-rich soil. While brassicas that grow quickly often taste the best, those that require a longer growing season benefit from additional fertilizer. Compost tea or diluted fish emulsion will boost plant growth. The biggest challenge is timing: brassicas grow best in cool weather and bolt in summer’s heat. In fact, most brassicas taste sweeter after they’ve been kissed by frost.
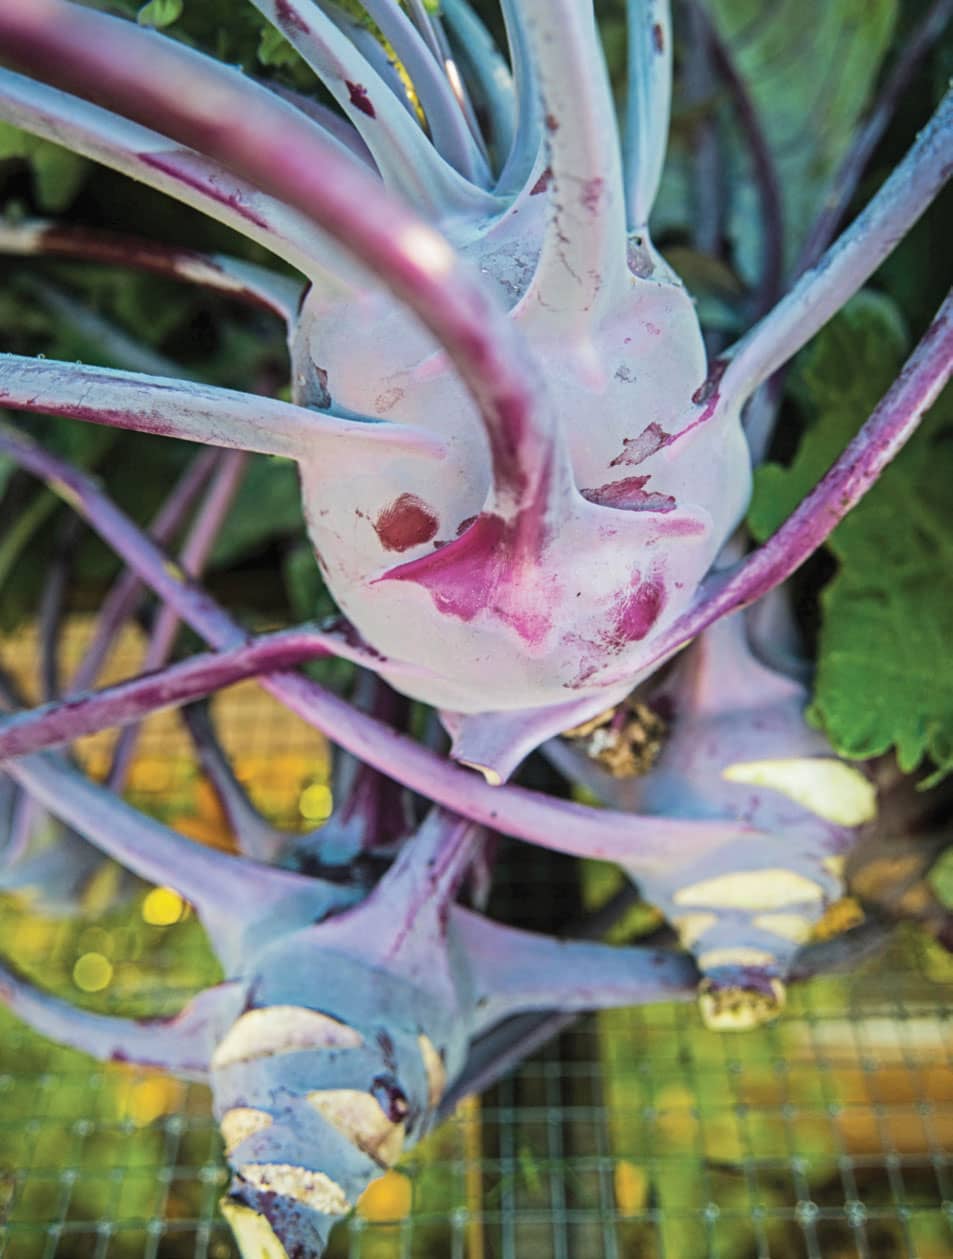
Kohlrabi
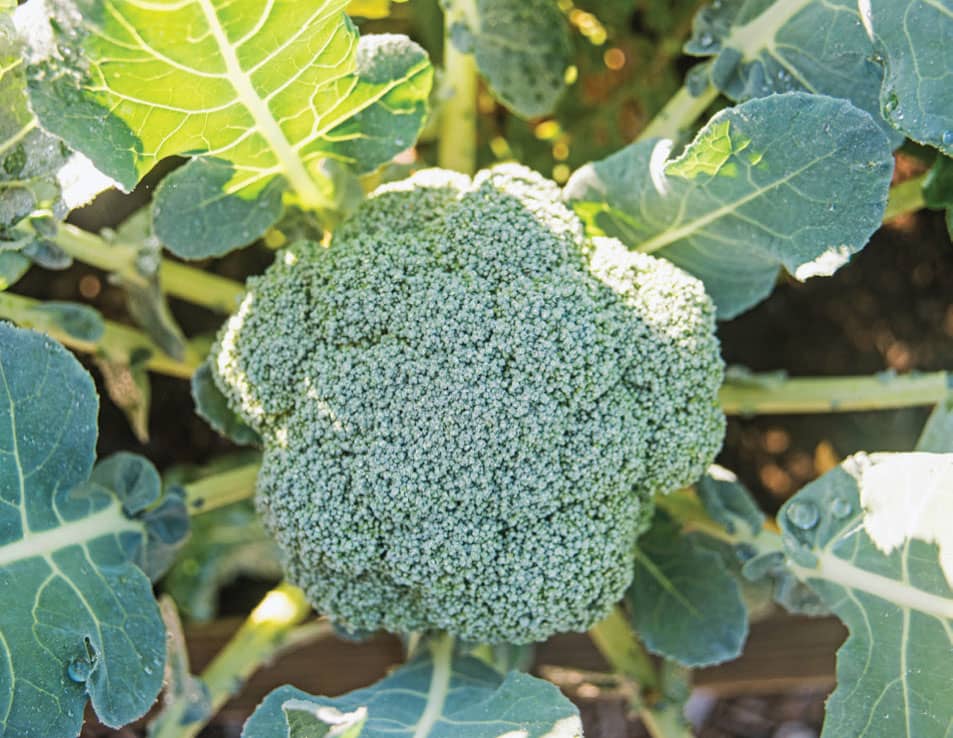
Broccoli
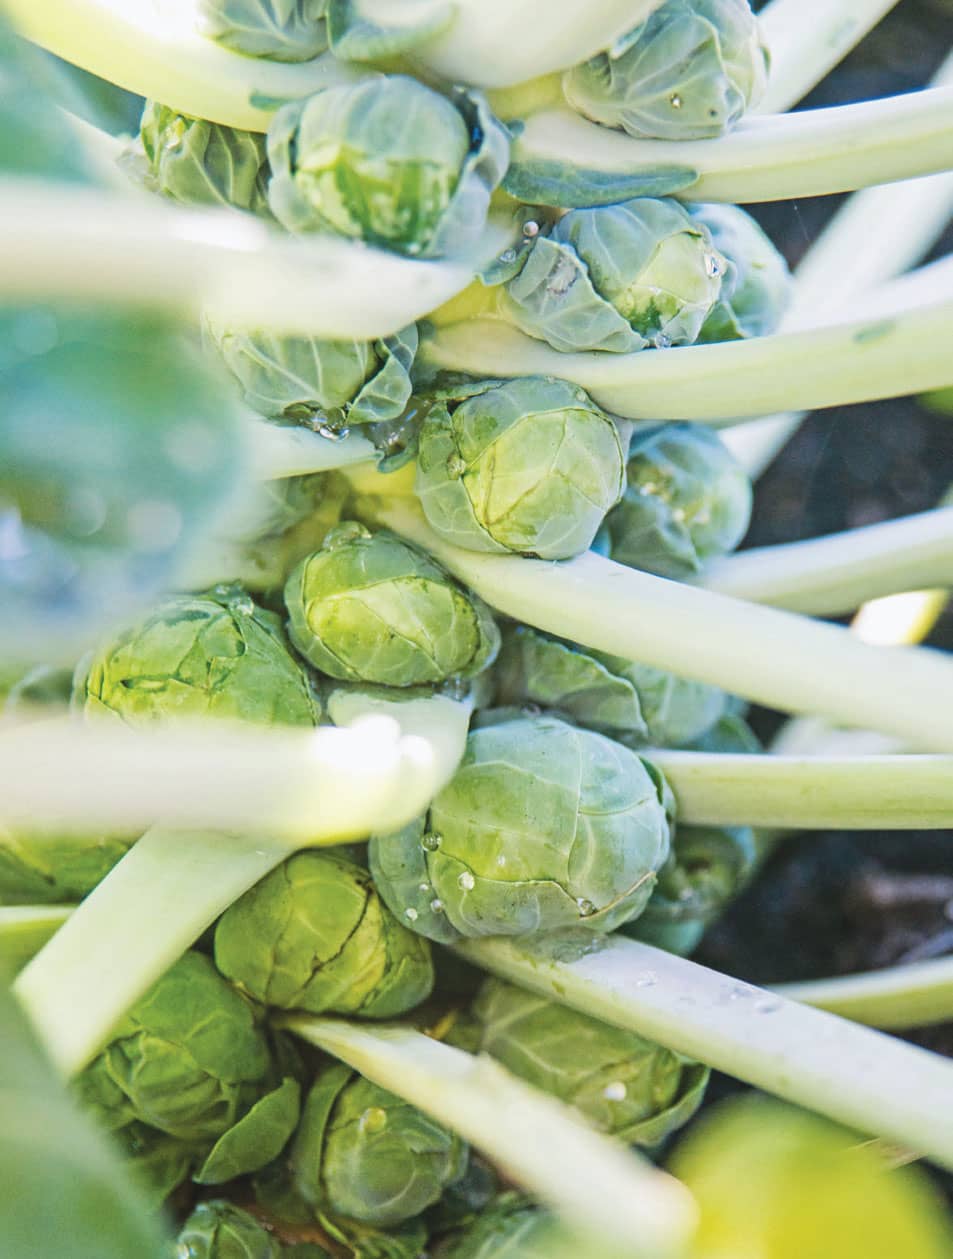
Brussels sprouts
Watch for pests, particularly cabbage worms and loopers. I remove them by hand (they become chicken treats) but look carefully for eggs on the undersides of leaves, which you can simply squish. One of the best methods to prevent pest damage is to place a floating row cover over brassica crops after planting seedlings. The lightweight cover protects them from cabbage moths, which lay the eggs, plus it’s easily removed to weed or water the plants.
Brassicas require that pesky vernalization period before you can harvest seed. In my Southern garden, I leave fall-planted brassicas in the ground, mulching well around the plants, and let nature take its course. In cold climates, it’s still best to select fall-planted brassicas to overwinter indoors, as the plants are smaller and require less storage space than brassicas that grew all summer. For root crops, dig the root, remove foliage, and store in damp growing medium in a cool, dark place, like a basement or root cellar. For crops like cabbage or kale, harvest exterior leaves, keep the growing point intact (the flower stalk will form here), check carefully for pests, and pot up into containers. Store in a basement or root cellar. As spring approaches, inspect the plants for signs of rot or root damage, remove dead foliage, and replant in the garden a month prior to the last expected frost date. Space plants approximately 18–24 inches (46–61 cm) in rows spaced 36 inches (91 cm) apart.
Allow the plants to continue to grow and form flower stalks. Brassicas are insect-pollinated. Cage plants and introduce pollinators as needed.
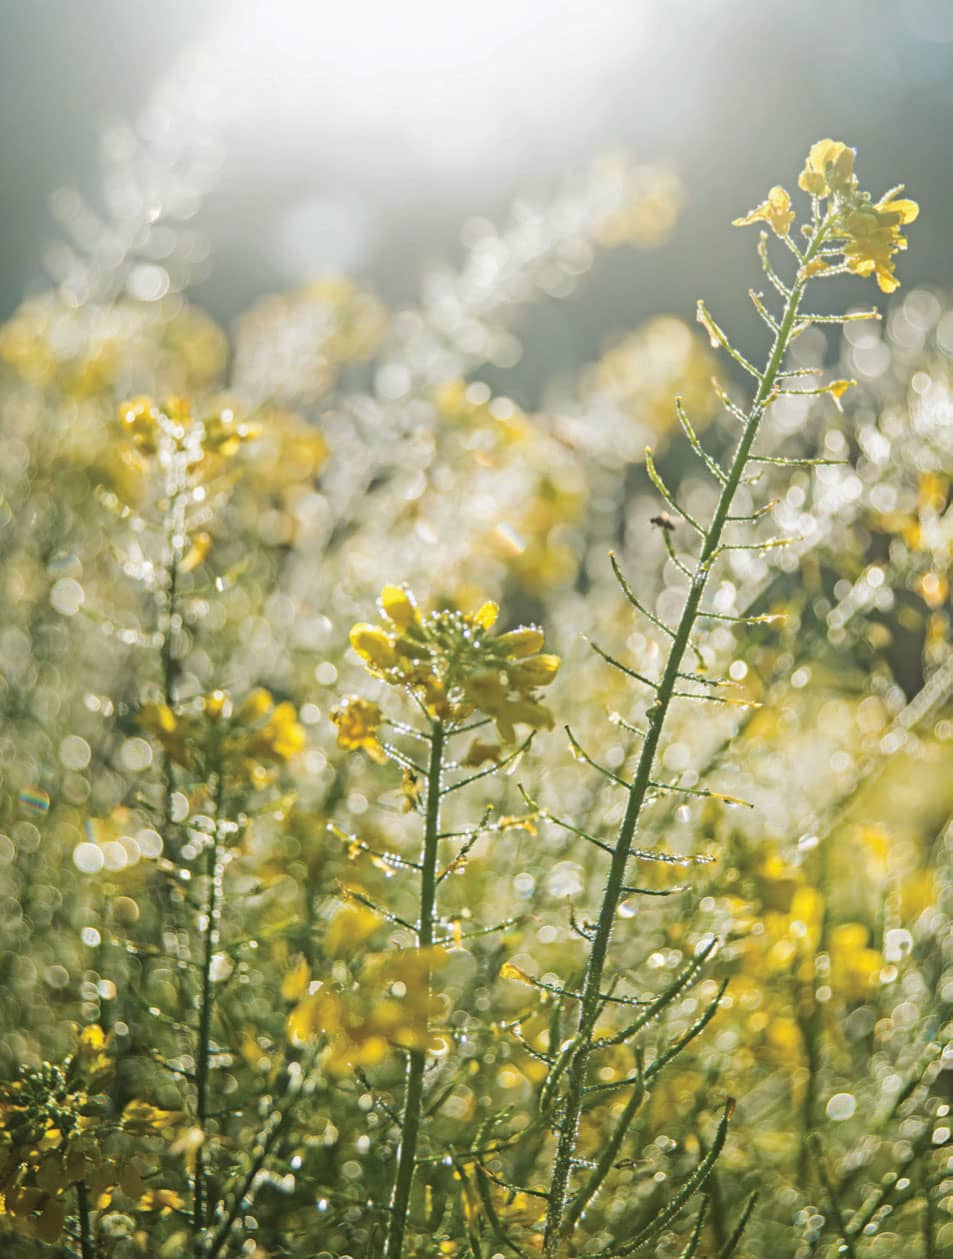
Brassica blooms need pollination for seed production, but bag the flowers to avoid cross-pollination.
·TRAITS AND TIPS·
BRASSICAS
COMMON NAMES/SCIENTIFIC NAMES:
• Mustard/Brassica juncea
• Rutabaga, Siberian kale, Swede/Brassica napus
• Brussels sprouts, broccoli, cabbage, cauliflower, Chinese broccoli, collards, kale, kohlrabi, sprouting broccoli/Brassica oleracae
• Broccoli raab, Chinese cabbage, Napa cabbage, turnip/Brassica rapa
FAMILY: Brassicaceae
LIFE CYCLE: Biennial
FRUIT TYPE: Solique
SEED-STARTING DEPTH: 1/4″ (0.6 cm)
SPECIAL NEEDS: If seedborne disease is an issue in your garden, soak seeds in 122°F (50°C) water for 25 minutes prior to sowing.
SEED-STARTING SOIL TEMPERATURE: Optimal is 65–75°F (18–24°C) but seeds will germinate at 50°F (10°C).
SEED START TIMING: Start indoors 6–8 weeks before planting to allow seedlings time to harden off. Can plant in the garden a month prior to last frost date.
LIGHT REQUIREMENTS: As soon as seedlings emerge
TRANSPLANT: Plant one month prior to last frost.
DIRECT SOWING: Sow when soil temperatures reach 50°F (10°C).
GERMINATION: 7–15 days
DAYS TO MATURITY: Broccoli 55–98; brussels sprouts 92–120; cabbage 60–110; Chinese cabbage 45–70; cauliflower 50–85; collards 60–75; kale 30–65; kohlrabi 75–80; sprouting broccoli 80–130; rutabaga 80–90; Siberian kale
POLLINATION: Insect
CROSS-POLLINATION: Can cross-pollinate with other varieties. Cage plants and introduce pollinators to prevent cross-pollination.
ISOLATION DISTANCE: 1 mile (1.6 km)
SEED MATURITY: Seeds mature the second year when siliques turn from green to brown. Dry on the plant.
SEED PROCESSING: Thresh
SEED VIABILITY: 5–7 years
Peppers
Capsicum spp.
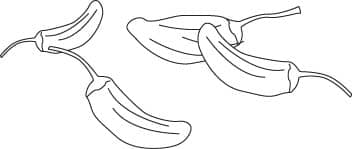
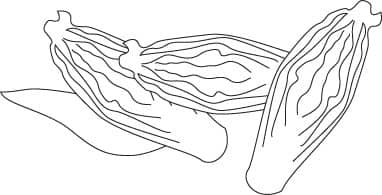
Spicy or mild, lovely bells or scary ghosts, peppers belong in your garden. Not only are they delicious, they add a gorgeous pop of color to vegetable gardens. When starting pepper seeds, consider using a heat mat. Because peppers prefer warmth to germinate, start the seeds indoors about 8 weeks prior to last frost rather than direct sowing. Be patient. Peppers take their own sweet time before making an appearance. Transplant to a larger container when the first true leaves appear.
Peppers prefer rich, well-draining soil. Good calcium and phosphorus levels in the soil lead to higher yields. Although most peppers are self-fertile, wind or insects can cause cross-pollination. Bag or cage the plants to maintain pure seed. Also, stake pepper plants, as their heavy fruit can break a plant’s fragile stem.
When saving seeds, the color of the pepper indicates maturity, as well as seed harvest time. Many peppers turn red when fully ripe, but different varieties achieve different coloration at maturity. While peppers generally may be harvested at any stage for culinary use, you need fully mature fruit for seed saving.
NOTE: Don’t wait until the end of the season to save pepper seeds. When temperatures drop below 53°F (12°C), peppers will not set fruit. Additionally, evening temperatures between 55–60°F (13–16°C) lead to small fruits that don’t contain viable seeds. Be certain to harvest mature peppers earlier in the season to save seeds.
Saving pepper seeds is simple: Slice open a fruit vertically and separate the seeds from the core. Spread the seeds on a paper plate and allow seeds to dry for two weeks. One important note when harvesting hot peppers: protect yourself! Wear gloves when processing and a mask if you’re dehydrating peppers in the oven, as the fumes affect breathing. Do not touch your eyes when processing peppers!
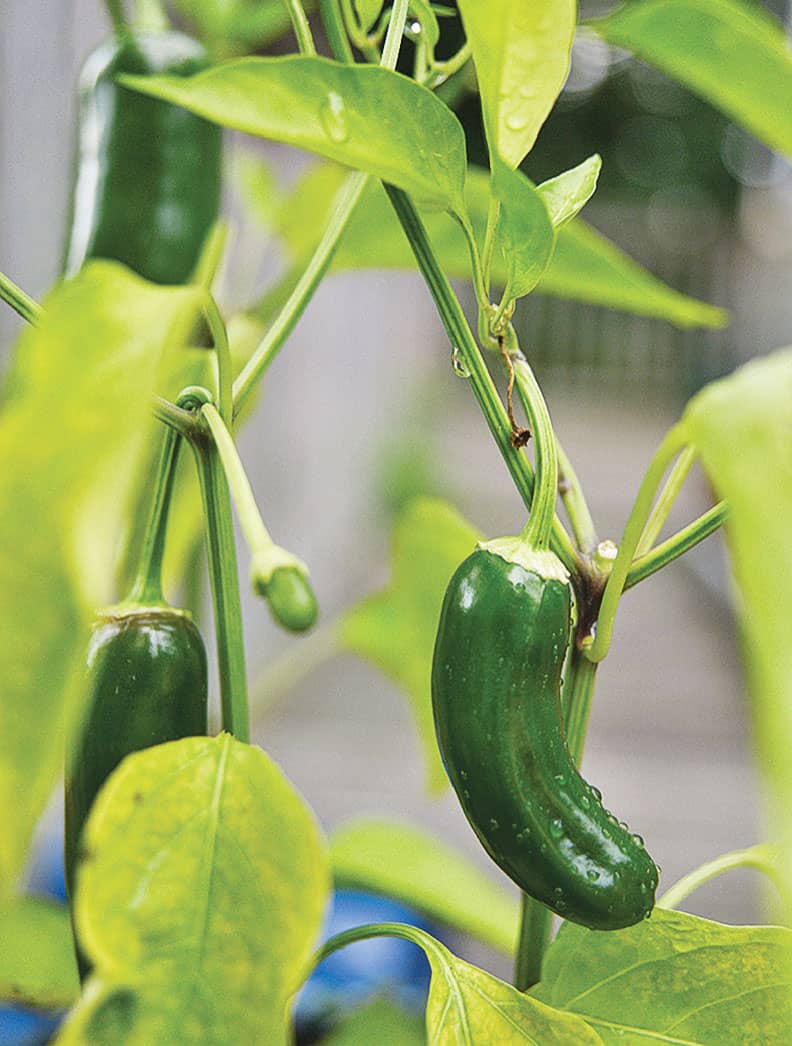
Sweet or spicy, peppers deserve a place in the garden.
·TRAITS AND TIPS·
PEPPERS
COMMON NAME: Pepper
SCIENTIFIC NAME: Capsicum spp.
FAMILY: Solanaceae
LIFE CYCLE: Tender perennial treated as annual
FRUIT TYPE: Berry
SEED-STARTING DEPTH: 1/4″ (0.6 cm)
SPECIAL NEEDS: Use bottom heat.
SEED-STARTING SOIL TEMPERATURE: 70–85°F (21–29°C)
SEED START TIMING: 8 weeks prior to last frost
LIGHT REQUIREMENTS: As soon as seedlings emerge
TRANSPLANT: Plant after danger of frost. Space plants 18–24″ (46–61 cm) apart and stake.
DIRECT SOWING: Not recommended
GERMINATION: 7–21 days
DAYS TO MATURITY: Sweet peppers 60–90; hot peppers up to 150.
POLLINATION: Self
CROSS-POLLINATION: Can cross-pollinate with other varieties. Cage plants or bag blossoms to prevent cross-pollination.
ISOLATION DISTANCE: 300–1,600′ (91–488 m)
SEED MATURITY: Allow fruit to ripen fully to final color before harvesting seeds.
SEED PROCESSING: Remove from fruit and dry
SEED VIABILITY: 2–4 years
TOP 10 PRETTIEST, TASTIEST SWEET PEPPERS
‘Purple Beauty’
‘White Cloud’
‘Violet Sparkle’
‘Quadrato d’Asti Rosso’
‘Tequila Sunrise’
‘Orange Bell’
‘Corno di Toro Giallo’
‘Bullnose’
‘Golden Marconi’
‘Jimmy Nardello’ Italian
TOP 10 MOST GORGEOUS, DEVILISHLY HOT PEPPERS
‘Chinese 5-Color’
‘Fish’
‘Craig’s Grande’ Jalapeno
Thai Red Chili
Serrano Tampequino
‘Trinidad Scorpion’ (Yellow)
‘Sante Fe Grande’
‘Scotch Bonnet’ (Yellow)
‘Goat Horn’
‘Carolina Reaper’
Endive, Escarole/Belgian Endive, Chicory, Italian Dandelion and Radicchio
Cichorium endivia, Cichorium intybus
It may seem tricky to navigate the world of Cichorium endivia versus C. intybus. However, these plants possess similar growing conditions. Both species prefer cool temperatures. Both require caging to avoid cross-pollination. Both may overwinter in gardens in mild climates, which will induce flowering and seed setting the second year. And both are much tastier and less expensive when grown at home than those found in a grocery store’s produce section.
·TRAITS AND TIPS·
ENDIVE, ESCAROLE/BELGIAN ENDIVE, CHICORY, ITALIAN DANDELION, AND RADICCHIO
COMMON NAMES: Endive, escarole/Belgian endive, chicory, Italian dandelion, radicchio
SCIENTIFIC NAMES: Cichorium endivia, Cichorium intybus
FAMILY: Asteraceae
LIFE CYCLE: C. endivia annual; C. intybus biennial
FRUIT TYPE: Achene
SEED-STARTING DEPTH: 1/4″ (0.6 cm)
SPECIAL NEEDS: Belgian endive is unique. Grow it normally outdoors during its first season. Remove the outer leaves of the rosette and harvest the roots. Plant the roots in pots, placing in a dark location to grow inside. By not exposing the leaves to sunlight as the plant grows, the vegetable turns a creamy yellowish white, providing a mild, non-bitter flavor. The blanched leaves that form are what’s harvested and eaten.
SEED-STARTING SOIL TEMPERATURE: 60–70°F (16–21°C)
SEED START TIMING: Direct sowing after frost is preferred. Can be started indoors 4–5 weeks before last frost.
LIGHT REQUIREMENTS: As soon as seedlings emerge
TRANSPLANT: Plants tolerate cool temperatures, dislike heat. In mild climates, plant in fall and overwinter in the garden for seed production its second season. Dig roots in cold climates, trim leaves to 2″ (5 cm) above crown; overwinter in potting soil in 32–40°F (0–4°C).
DIRECT SOWING: Sow after danger of frost has passed and when temperatures reach 55°F (13°C).
GERMINATION: 5–7 days
DAYS TO MATURITY: 85–100
POLLINATION: Self (Cichorium endivia); insect (Cichorium intybus)
CROSS-POLLINATION: Can cross-pollinate with other varieties. Cage plants or bag blossoms to prevent cross-pollination. Introduce insects or hand-pollinate Cichorium intybus.
ISOLATION DISTANCE: 10–20′ (3–6 m) Cichorium endivia; 800′ (0.24 km) Cichorium intybus
SEED MATURITY: Seeds mature after market maturity, Cichorium endivia; second season after cold period, Cichorium intybus. Seeds are enclosed in dry flower bracts that may shatter.
SEED PROCESSING: Thresh
SEED VIABILITY: 6 years
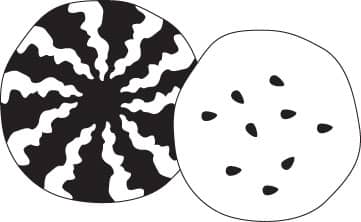
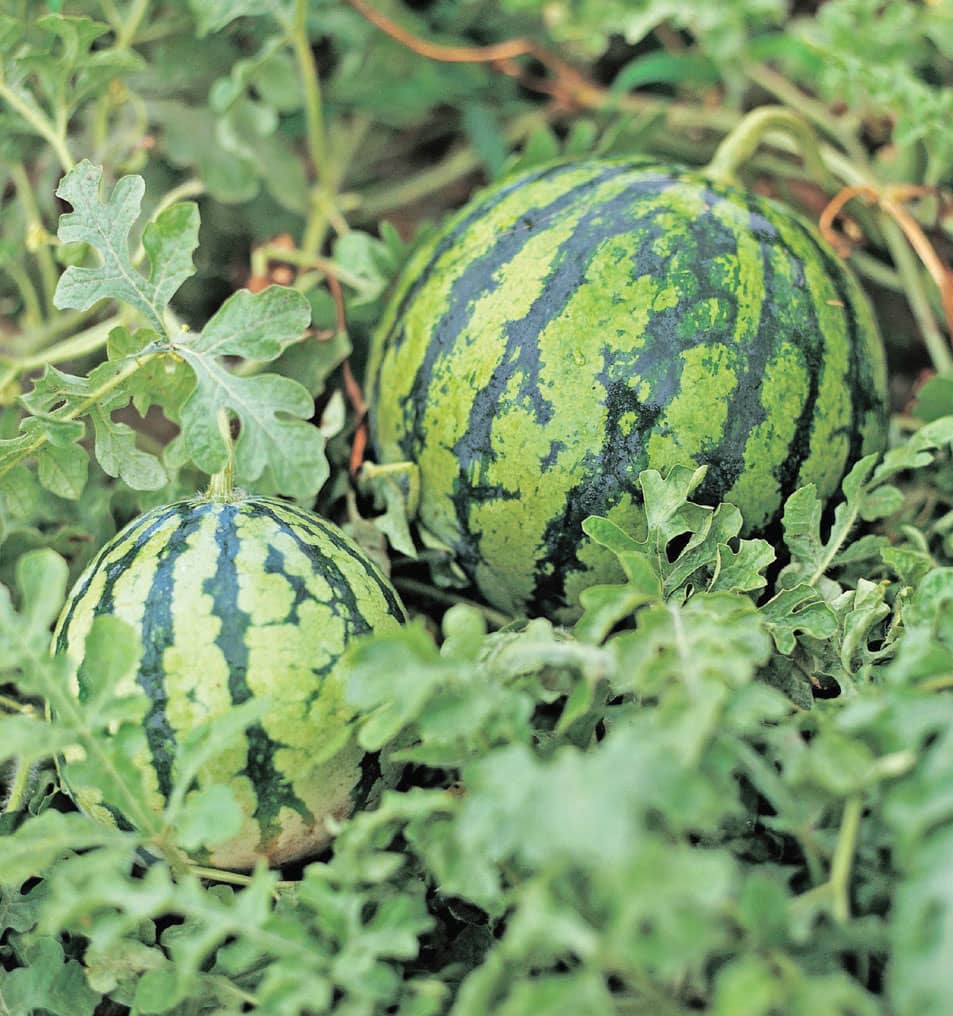
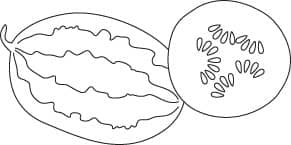
Watermelon and Citron
Citrullus lanatus
Heirloom watermelons offer more options than the standard red flesh. White, yellow, orange, pink . . . so many options to grow in your garden! However, watermelon vines demand plenty of space. Also, for delicious, large melons, you need to cull the growing fruits so that only one or two remain on the vine. Citron melons look similar to watermelons, but the flesh is hard and the fruit is most often pickled.
To determine when to harvest the fruit, look at the color of the fruit’s rind where it touches the ground. When it turns yellow, it’s time to harvest. Also, another indicator is the tendril closest to the fruit. When it’s dried and black, the fruit is ready to harvest.
·TRAITS AND TIPS·
WATERMELON AND CITRON
COMMON NAMES: Watermelon, citron
SCIENTIFIC NAME: Citrullus lanatus
FAMILY: Cucurbitaceae
LIFE CYCLE: Annual
FRUIT TYPE: Berry
SEED-STARTING DEPTH: 1″ (3 cm)
SPECIAL NEEDS: Sow seeds in individual biodegradable pots when starting indoors. Avoid disturbing roots when planting in garden.
SEED-STARTING SOIL TEMPERATURE: 80–90°F (27–32°C)
SEED START TIMING: Start indoors 4 weeks prior to last frost. Bottom heat speeds germination.
LIGHT REQUIREMENTS: As soon as seedlings emerge
TRANSPLANT: Plant after danger of frost. Do not disturb roots. Plant in hills, one or two plants per hill, spaced 6–8′ (2–2.5 m) apart.
DIRECT SOWING: Sow after danger of frost has passed and when temperatures reach 70–85°F (21–29°C).
GERMINATION: 3–10 days
DAYS TO MATURITY: 70–110 days from planting
POLLINATION: Insect
CROSS-POLLINATION: Can cross-pollinate with other varieties. Cage plants or bag blossoms to prevent cross-pollination. Hand-pollinate or introduce insects.
ISOLATION DISTANCE: 800′–1/2 mile (0.24–0.8 km)
SEED MATURITY: Same as fruit maturity. Save seeds from fruit with the best flavors, preferred shapes, and colors.
SEED PROCESSING: Rinse. Dry for 1 week.
SEED VIABILITY: 5 years
Cucumber and Melon
Cucumis sativus, Cucumis melo
Although heirloom cucumbers and melons take up a lot of garden real estate, they’re worth the space investment. Unless you’re growing a bush variety of cucumbers, grow up—create a trellis and train the vines around it. Even small melons grow well on a trellis as long as you support the heavy fruit with old nylons tied around them and secured to the trellis. Trellising not only saves space, it keeps the plants off the ground so you can more easily spot pests or diseases, and eases back pain when harvesting.
Both melons and cucumbers prefer warm temperatures, good air circulation, and consistent water. After all, these crops are 90 or 95 percent water, respectively. Don’t skimp on the water. Feed cucumbers diluted fish emulsion each week. Melons prefer humus-rich soil.
The main difference in seed saving involves timing. Melon seeds reach maturity at the same time the fruit is ready to eat. Simply harvest the seeds before eating, separate from the pulp, rinse well, and dry. Cucumber seeds, though, require longer ripening time. Allow fruits to continue to ripen past their prime for at least 5 weeks, either on the vine or harvested and stored in a cool, dry place. Remove seeds from pulp, rinse well, and dry. Seeds can also be fermented.
Growing heirlooms gives you the chance to try interesting varieties, like this Indian melon ‘Kajari’.
·TRAITS AND TIPS·
CUCUMBER AND MELON
COMMON NAMES: Cucumber, melon
SCIENTIFIC NAMES: Cucumis sativus, Cucumis melo
FAMILY: Cucurbitaceae
LIFE CYCLE: Annual
FRUIT TYPE: Fleshy
SEED-STARTING DEPTH: 1/2″ (1.3 cm)
SPECIAL NEEDS: None
SEED-STARTING SOIL TEMPERATURE: 80–90°F (27–32°C)
SEED START TIMING: Start indoors using biodegradable containers 3–4 weeks before last frost. Bottom heat speeds germination.
LIGHT REQUIREMENTS: As soon as seedlings emerge
TRANSPLANT: Plant after danger of frost. Do not disturb roots. Prefers soils temperature 65–75°F (18–24°C). Space plants 8″ (20 cm) apart if trellising, 4–5′ (1–1.5 m) apart if letting plants sprawl.
DIRECT SOWING: Sow after danger of frost has passed and when temperatures reach 65°F (18°C).
GERMINATION: 3–10 days
DAYS TO MATURITY: 48–80 cucumbers; 70–100 melons
POLLINATION: Insect
CROSS-POLLINATION: Can cross-pollinate with other varieties but not between cucumbers and melons. Bag blossoms to prevent cross-pollination. Hand-pollinate. (First flowers are most commonly male; wait until female flowers appear.)
ISOLATION DISTANCE: 800′–1/2 mile (0.24–0.8 km)
SEED MATURITY: Harvest cucumber seed 5 weeks after fruit’s edible maturity, when it changes color to yellow, white, orange, or brown. Harvest melon seed when fruit is ripe for eating.
SEED PROCESSING: Rinse or ferment (cucumber); rinse (melon)
SEED VIABILITY: 5 years
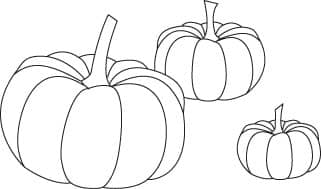
Pumpkin, Winter and Summer Squash, and Gourd
Cucurbita spp.
Ah, pumpkins and squashes, the bullies of the garden. They’re terrible space hogs and will run over any pretty companion plants you add to their beds. But no matter what their bullying habits are, I always invite them to the garden party because they’re pretty and delicious. They can also be prima donnas, demanding constant attention to prevent damage by pests and disease. Why do we persist? Because there’s nothing more fun than growing your own jack o’lanterns, that’s why! When your autumn decorations include a tableful of gourds and miniature pumpkins, and you’ve carved silly faces into those large, orange fruit, all the Cucurbita angst is forgotten.
However, a few years ago, I read about a companion planting technique that involves icicle radishes. Plant three to five icicle radishes in close proximity to each squash plant. Don’t harvest the radish. Instead, allow it to mature and flower. The radish blooms repel the moths, encouraging them to lay eggs elsewhere. As an organic gardener, I like to try every alternative before using chemicals of any kind. Diatomaceous earth is also safe to use to prevent squash vine borers. Most important, check the plants daily for eggs on the leaves (check undersides as well). Removal of eggs is crucial to preventing plant death by squash vine borer.
Summer squash tastes best when it’s harvested young and tender. Baseball bat-sized zucchini found late in the season, hidden under foliage, are not delicious. However, they may be good for seed saving, as squash needs to be past its preferred harvest time for seed maturity. (When the rind is hard to pierce with a fingernail, the seeds should be mature.)
·TRAITS AND TIPS·
PUMPKIN, WINTER AND SUMMER SQUASH, AND GOURD
COMMON NAMES: Pumpkin, winter squash, summer squash, gourd
SCIENTIFIC NAMES: Cucurbita pepo, Cucurbita moschata, Cucurbita maxima, and Cucurbita mixta
FAMILY: Cucurbitaceae
LIFE CYCLE: Annual
FRUIT TYPE: Fleshy (pepo)
SEED-STARTING DEPTH: 1″ (3 cm)
SPECIAL NEEDS: Beware squash vine borer. Companion plant icicle radishes among squash vines to deter this pest.
SEED-STARTING SOIL TEMPERATURE: 70–95°F (21–35°C)
SEED START TIMING: Start indoors using biodegradable containers 4–5 weeks before last frost.
LIGHT REQUIREMENTS: As soon as seedlings emerge
TRANSPLANT: Plant after danger of frost. Do not disturb roots. Plant 8″ (20 cm) apart if trellising, 4′ (1.2 m) apart if sprawling.
DIRECT SOWING: Sow after danger of frost has passed and when soil temperature reaches 60°F (16°C).
GERMINATION: 5–10 days
DAYS TO MATURITY: 43–75 summer squash; 85–110 winter squash; 100–115 pumpkin; 95–125 gourd
POLLINATION: Insect
CROSS-POLLINATION: Can cross-pollinate with other varieties. Bag blossoms to prevent cross-pollination. Hand-pollinate.
ISOLATION DISTANCE: 800′–1/2 mile (0.24–0.8 km)
SEED MATURITY: Harvest seeds approximately 4 weeks after fruit maturity.
SEED PROCESSING: Rinse
SEED VIABILITY: 4 years
Artichoke and Cardoon
Cynara cardunculus
While artichokes are grown for their edible immature inflorescences and bracts, cardoons’ edible portion is the leaf petiole or stalk, which is peeled and blanched before eating. Both plants produce stunning flowers but require vernalization for blooms and seed setting. They will cross-pollinate with each other, so bag blooms and hand-pollinate using a brush. (Gather pollen from the base of the flower on the brush, transfer to the stigmas, and replace the bag. Repeat over the next several days to ensure pollination. Keep the bag in place until flowering is finished.)
Cardoons are grown as an annual for culinary use, but to save seeds, it must be grown as a perennial or, at least, a biennial. Sacrifice a few plants for seed production rather than culinary use. Artichokes continue to produce flowers and seeds for 3 to 6 years, depending on the variety. Both plants are large—give them adequate space in the garden, at least 3′ (91 cm).
·TRAITS AND TIPS·
ARTICHOKE AND CARDOON

COMMON NAMES: Artichoke, cardoon
SCIENTIFIC NAME: Cynara cardunculus var. scolymus; Cynara cardunculus var. altilis
FAMILY: Asteraceae
LIFE CYCLE: Perennial in mild climates; annual in cold climates
FRUIT TYPE: Dry, indehiscent, single-seeded
SEED-STARTING DEPTH: 1/2″ (1.3 cm)
SPECIAL NEEDS: Soak seeds overnight to boost germination.
SEED-STARTING SOIL TEMPERATURE: 70–75°F (21–24°C)
SEED START TIMING: Start indoors using biodegradable containers 8–10 weeks before last frost.
LIGHT REQUIREMENTS: As soon as seedlings emerge
TRANSPLANT: Plant after danger of frost when air temperatures reach at least 60°F (16°C). Space 4′ (1.2 m) apart.
DIRECT SOWING: Not recommended
GERMINATION: 10–21 days
DAYS TO MATURITY: 110–150
POLLINATION: Insect
CROSS-POLLINATION: Can cross-pollinate with other varieties. Cage plants or bag blossoms to prevent cross-pollination. Hand-pollinate.
ISOLATION DISTANCE: 800′–1/2 mile (0.24–0.8 km)
SEED MATURITY: Seeds mature 60 days after fertilization. Seeds mature when bracts turn from green to brown and light gray pappuses emerge from seedheads.
SEED PROCESSING: Thresh; winnow to remove seeds from chaff.
SEED VIABILITY: 6 years
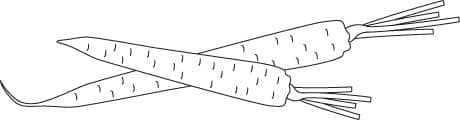
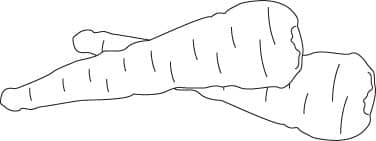
Carrot
Daucus carota
Carrots seem like they should be an easy garden crop, don’t they? Unfortunately, they’re finicky about their soil and placement. Carrots require vernalization to flower and produce seeds. In warm climates, overwinter the crop in the garden, mulching well. In cold areas, dig the roots in autumn before the ground freezes and store in cool, humid location at 35°F (2°C). Place roots in damp sand. Replant in spring 6–18″ (15–46 cm) apart for seed production. (For food production, carrots can grow with 1–2″ (3–5 cm) spacing between them.)
·TRAITS AND TIPS·
CARROT
COMMON NAME: Carrot
SCIENTIFIC NAME: Daucus carota
FAMILY: Apiaceae
LIFE CYCLE: Biennial
FRUIT TYPE: Schizocarps split at maturity into two single-seeded, indehiscent mericaps.
SEED-STARTING DEPTH: 1/4–1/2″ (0.6–1.3 cm)
SPECIAL NEEDS: Seeds are slow to germinate.
SEED-STARTING SOIL TEMPERATURE: 50–85°F (10–29°C)
SEED START TIMING: Direct sowing after frost is preferred.
LIGHT REQUIREMENTS: As soon as seedlings emerge
TRANSPLANT: Sow seeds after danger of frost in shallow rows. Replant vernalized roots in spring, 6–18″ (15–46 cm) apart.
DIRECT SOWING: Sow after danger of frost has passed and when temperatures reach 55°F (13°C).
GERMINATION: 7–21 days
DAYS TO MATURITY: 70–80
POLLINATION: Insect
CROSS-POLLINATION: Can cross-pollinate with other varieties, as well as Queen Anne’s Lace, which is considered a wild carrot. Cage plants or bag blossoms to prevent cross-pollination. Introduce pollinators or hand-pollinate.
ISOLATION DISTANCE: 800′–1/2 mile (0.24–0.8 km)
SEED MATURITY: 4–6 weeks post pollination. Umbellets turn brown, indicating mature seeds. Primary umbellets mature first, then secondary. (Typically, primary umbellets contain the best seeds.) Harvest a whole umbel and hang it upside down to dry or bag an umbel on plants in the garden to avoid seed loss due to shattering. Continue drying 1–3 weeks. Cure seeds 4–5 days in hot, dry conditions or 2 weeks in humid areas.
SEED PROCESSING: Hang or place in a bag and flail. Winnow to remove debris.
SEED VIABILITY: 6 years
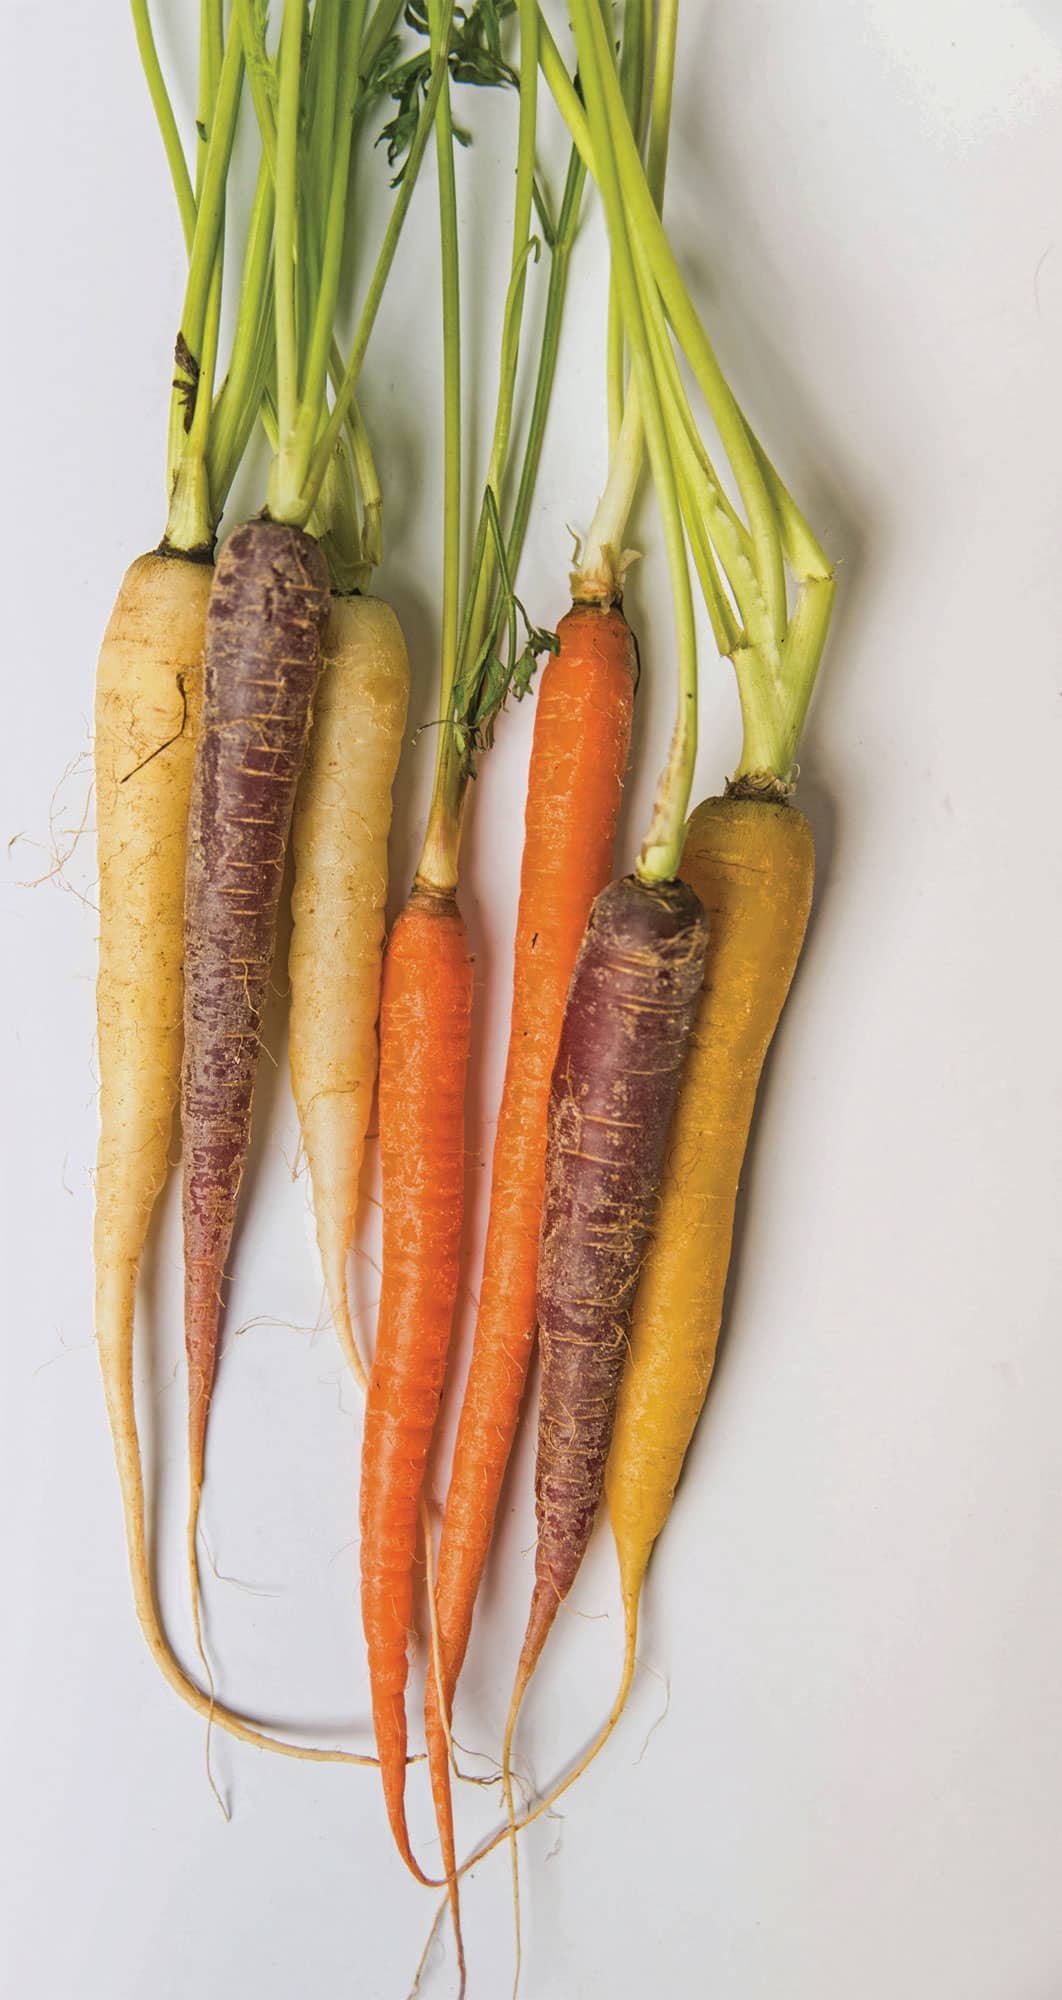
A rainbow of carrots
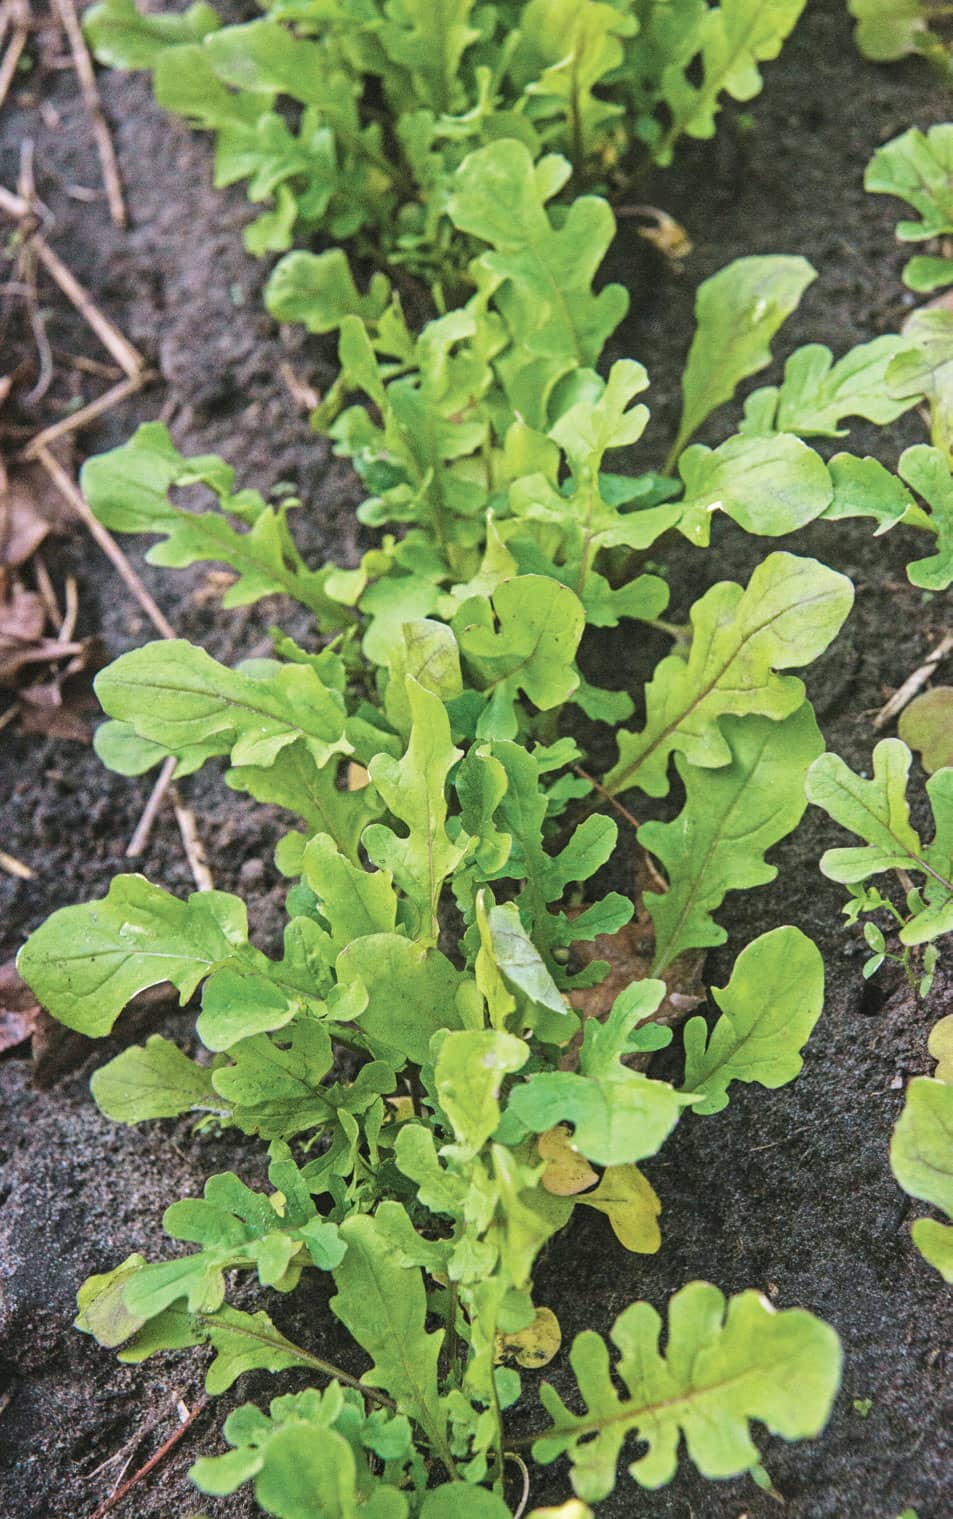
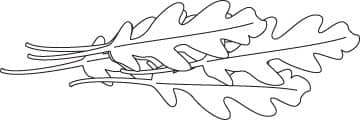
Arugula (Rocket, Roquette)
Eruca sativa
Arugula is an easy crop to grow, although it does get quite spicy if exposed to high temperatures. To save arugula seeds, allow the plant to bolt in the heat of summer. You can also harvest a few edible flowers to enhance your fancy culinary game but allow the rest of the blooms to set seed.
·TRAITS AND TIPS·
ARUGULA
COMMON NAMES: Arugula, rocket, roquette
SCIENTIFIC NAME: Eruca sativa
FAMILY: Brassicaceae
LIFE CYCLE: Annual
FRUIT TYPE: Silique
SEED-STARTING DEPTH: 1/4″ (0.6 cm)
SPECIAL NEEDS: It doesn’t transplant well. If started indoors, use biodegradable pots.
SEED-STARTING SOIL TEMPERATURE: 60–77°F (16–25°C)
SEED START TIMING: Direct sowing after frost is preferred. Can be started indoors using biodegradable containers 4 weeks before last frost.
LIGHT REQUIREMENTS: As soon as seedlings emerge
TRANSPLANT: Plant after danger of frost. Do not disturb roots. If growing for seed, increase spacing to 6″ (15 cm) between plants.
DIRECT SOWING: Sow after danger of frost has passed and when temperatures reach 60°F (16°C).
GERMINATION: 5–7 days
DAYS TO MATURITY: 45–60
POLLINATION: Insect
CROSS-POLLINATION: Can cross-pollinate with other varieties. Cage plants or bag blossoms to prevent cross-pollination. Introduce pollinators into cages or hand-pollinate.
ISOLATION DISTANCE: 800′–1/2 mile (0.24–0.8 km)
SEED MATURITY: Dry silique on the plant or harvest entire plants and hang them upside down to dry.
SEED PROCESSING: Thresh. Do not damage seed coat.
SEED VIABILITY: 6 years
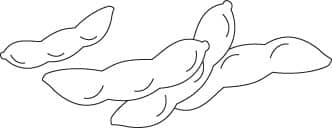
Edamame and Soybean
Glycine max
Popular for its snack appeal, edamame is also an easy crop to grow for new seed savers. Edamame is self-pollinating, the seeds are large and easy to clean, and flowers are typically pollinated before they open, reducing the risk of cross-pollination. Edamame tolerates light frost. Allow pods to dry on the plant for seed harvest. Wear gloves when harvesting, as pods are sharp.
·TRAITS AND TIPS·
EDAMAME AND SOYBEAN
COMMON NAMES: Edamame, soybean
SCIENTIFIC NAME: Glycine max
FAMILY: Fabaceae
LIFE CYCLE: Annual
FRUIT TYPE: Dry, dehiscent (legume)
SEED-STARTING DEPTH: 1″ (3 cm)
SPECIAL NEEDS: It prefers compost-rich soil.
SEED-STARTING SOIL TEMPERATURE: 60–75°F (16–24°C)
SEED START TIMING: Direct sowing after frost is preferred.
LIGHT REQUIREMENTS: As soon as seedlings emerge
TRANSPLANT: Not recommended
DIRECT SOWING: Sow after danger of frost has passed and when temperatures reach 60°F (16°C).
GERMINATION: 5–7 days
DAYS TO MATURITY: 75–110. Harvest immature plants for eating.
POLLINATION: Self
CROSS-POLLINATION: None
ISOLATION DISTANCE: 10–20′ (3–6 m)
SEED MATURITY: Dry pods on plants. Harvest when a pod turns from green to tan.
SEED PROCESSING: Thresh gently to avoid damaging seeds. Winnow to remove chaff.
SEED VIABILITY: 3–4 years
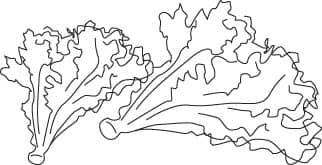
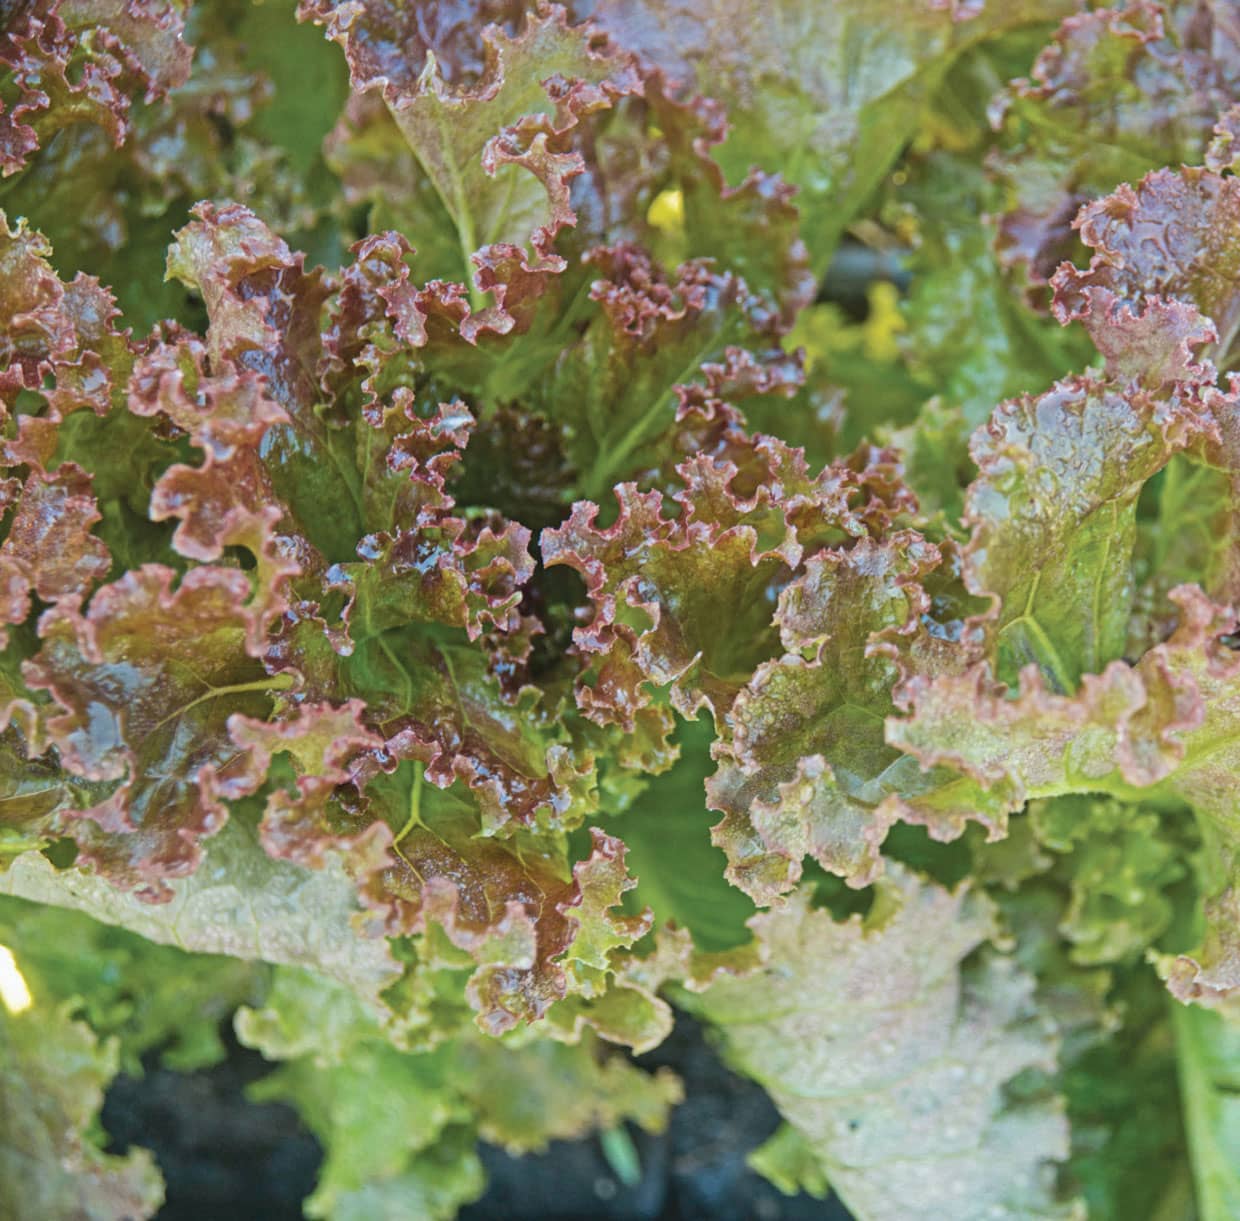
Lettuce
Lactuca sativa
Speckled, freckled, ruffled, red, green with red edging . . . heirloom lettuces look different than the round, pale, crunchy iceberg lettuce I grew up eating. Lettuce prefers cool temperatures, otherwise it will bolt and become bitter. Be careful when harvesting seed from early flowers, as you’re inadvertently selecting seeds from a parent plant with the tendency to bolt early, which is not ideal.
Newly harvested seeds undergo a period of dormancy. Wait at least two months prior to planting for germination success. Additionally, if seeds are exposed to temperatures greater than 77°F (25°C), seeds become dormant and require a cold treatment period before germinating. Hold the seeds in a cool basement or cellar with temperatures ranging from 50 to 59°F (10 to 15°C). As if those issues aren’t enough to challenge a gardener, some lettuce varieties need exposure to light to germinate. Still, while there are a few challenges to consider when growing lettuce, homegrown heirloom lettuce is worth the extra effort. (Keep plants well watered and plant early to avoid heat. For leaf lettuce, you can harvest outer leaves while allowing the plant to continue to grow, extending your harvest time.)
·TRAITS AND TIPS·
LETTUCE
COMMON NAME: Lettuce
SCIENTIFIC NAME: Lactuca sativa
FAMILY: Asteraceae
LIFE CYCLE: Annual
FRUIT TYPE: Achene
SEED-STARTING DEPTH: 1/4″ (0.6 cm)
SPECIAL NEEDS: Requires light for germination. Do not plant freshly harvested seeds as they will not germinate; hold for 2-plus months.
SEED-STARTING SOIL TEMPERATURE: 70–75°F (21–24°C)
SEED START TIMING: Direct sowing after frost is preferred. Can be started indoors using biodegradable containers 4–5 weeks before last frost. Can succession plant by sowing seeds indoors every few weeks to replace harvested lettuce.
LIGHT REQUIREMENTS: It needs light to germinate. As seedlings emerge, continue 12–16 hours of light per day.
TRANSPLANT: Plant after danger of frost. Space 12″ (30 cm) apart for larger heading varieties, 6″ (15 cm) apart for smaller leaf lettuces. Increase spacing to 15″ (38 cm) for seed saving as plants will grow large.
DIRECT SOWING: Sow after danger of frost has passed and when temperatures reach 55°F (13°C).
GERMINATION: 2–12 days
DAYS TO MATURITY: Depends on variety: 45–55 for looseleaf; 75–100 for heading lettuce
POLLINATION: Self
CROSS-POLLINATION: Can cross-pollinate with wild varieties but not a big concern as it self-pollinates.
ISOLATION DISTANCE: 10–20′ (3–6 m)
SEED MATURITY: After edible harvest maturity. Allow plants to bolt. Seeds are mature when the pappuses appear. Collect seeds before they’re dispersed by wind by handpicking or bagging plants and shaking seeds into a bag.
SEED PROCESSING: Screen to remove chaff
SEED VIABILITY: 6 years
Parsnip
Pastinaca sativa
Parsnips provide a great benefit: They can withstand cold temperatures better than almost every vegetable in the garden. However, they also cause a bit of pain, as the leaves and stems produce a sap that can cause a nasty rash. So, handle parsnips with care; wear gloves to avoid the sap.
Grown much like carrots but with a longer tolerance for cold, parsnips produce sweeter flavors when they’re kissed by cold weather. In fact, you can leave the roots in the ground all winter without damage. (Harvesting parsnips as needed in the winter can be challenging, though, chiseling through frozen soil.) The ability to withstand the cold benefits seed savers, as there’s no need to dig the roots to induce vernalization. Add a layer of mulch to the crop and leave it in the garden to overwinter. After its exposure to cold, the plants will be ready to flower and produce seeds in the spring. Bag the blossoms, as parsnips cross-pollinate. Parsnip seeds don’t last. Use fresh seed each season.
·TRAITS AND TIPS·
PARSNIP
COMMON NAME: Parsnip
SCIENTIFIC NAME: Pastinaca sativa
FAMILY: Apiaceae
LIFE CYCLE: Biennial
FRUIT TYPE: Schizocarps split at maturity into two indehiscent mericarps.
SEED-STARTING DEPTH: 1/2″ (1.3 cm)
SPECIAL NEEDS: Plants require vernalization of 10 weeks below 50°F (10 C) to produce seeds. Use only fresh seeds each season.
SEED-STARTING SOIL TEMPERATURE: 50–54°F (10–12°C)
SEED START TIMING: Direct sowing after frost is preferred.
LIGHT REQUIREMENTS: As soon as seedlings emerge
TRANSPLANT: Not recommended; direct sow in the garden.
DIRECT SOWING: Sow after danger of frost has passed and temperatures reach 55°F (13°C).
GERMINATION: 14–21 days
DAYS TO MATURITY: 120
POLLINATION: Insect
CROSS-POLLINATION: Can cross-pollinate with wild parsnip. Cage plants or bag blossoms to prevent cross-pollination.
ISOLATION DISTANCE: 800′–1/2 mile (0.24–0.8 km)
SEED MATURITY: Seeds change from green to tan as they mature. Gather seedheads when approximately two-thirds of an umbel has turned brown, and continue to dry.
SEED PROCESSING: Thresh
SEED VIABILITY: 1 year
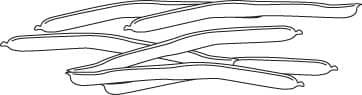
Bean
Phaseolus vulgaris (common), Phaseolus coccineus (runner), Vicia faba (fava), Phaseolus lunatus (lima), Cicer arietinum (chickpea), Vigna unguiculata (cowpea)
Purple, yellow, speckled, foot-long, bush, green, pole . . . the varieties seem endless. And whether you prefer beans fresh in the pod or dried, you’ve never met a more versatile vegetable. Now, here’s the thing: there are many bean varieties and classifications. However, they grow from seed similarly, and seed harvesting is similar as well, which is why I’ve grouped all the beans into one section.
Like tomatoes, bean varieties range from determinate (bush), indeterminate (pole or runner), and semi-determinate (half-runner). Your garden space might dictate the type you grow. I love runner beans because I trellis the vines in the garden, which saves space—and my back when harvesting. However, if your space is limited or you prefer container gardening, bush beans may be a better option. Determinate beans flower, produce fruit, and reach maturity in a short amount of time, while indeterminate beans flower and continue to produce fruit throughout the life of the plant. If you plan to process beans for canning or freezing, bush varieties are a good choice for efficiency.
Grow beans in a sunny location in well-drained soil that’s rich in organic matter. Bean plants add nitrogen to the soil, which is beneficial to crops that require nitrogen to produce well, like corn. Consider companion planting with crops that can benefit from a nitrogen boost. As beans grow throughout the season, add compost as a sidedressing or fertilize with kelp to keep the plants well fed. Water well, particularly as plants become established and blooms begin to appear.
Pest alert: Beans attract all kinds of undesirables, like Japanese beetles, aphids, striped cucumber beetles, and Mexican bean beetles. Row covers help prevent infestations, but vigilant handpicking and squishing is always a good remedy. Check your plants often before a pest population gets out of control.
Continuous harvest of indeterminate beans for fresh eating helps the plant to produce well all season. Harvest beans for fresh eating when they are young and tender. To save seeds or to harvest dry beans, however, allow the pods to dry on the vine until they turn yellowish tan, approximately 6 weeks after the beans are ready for fresh eating.
·TRAITS AND TIPS·
BEAN
COMMON NAMES: Common bean, French bean, green bean, haricot, snap bean, string bean
SCIENTIFIC NAME: Phaseolus vulgaris
FAMILY: Fabaceae
LIFE CYCLE: Annual
DAYS TO MATURITY: 70–80 pole; 65–75 bush
COMMON NAME: Runner bean
SCIENTIFIC NAME: Phaseolus coccineus
FAMILY: Fabaceae
LIFE CYCLE: Perennial grown as an annual
DAYS TO MATURITY: 45–55
COMMON NAMES: Fava bean, broad bean, English bean, European bean, field bean
SCIENTIFIC NAME: Vicia faba
FAMILY: Fabaceae
LIFE CYCLE: Annual
DAYS TO MATURITY: 80–100
COMMON NAMES: Lima bean, butter bean, civet, Carolina, sewee
SCIENTIFIC NAME: Phaseolus lunatus
FAMILY: Fabaceae
LIFE CYCLE: Annual
DAYS TO MATURITY: 60–80 bush; 85–90 pole
COMMON NAMES: Chickpea, garbanzo, Egyptian pea
SCIENTIFIC NAME: Cicer arietinum
FAMILY: Fabaceae
LIFE CYCLE: Annual
DAYS TO MATURITY: 100
COMMON NAME: Tepary bean
SCIENTIFIC NAME: Phaseolus acutifolius
FAMILY: Fabaceae
LIFE CYCLE: Annual
DAYS TO MATURITY: 75–85
ALL
FRUIT TYPE: Dehiscent legume or pod
SEED-STARTING DEPTH: 1″ (3 cm)
SPECIAL NEEDS: None
SEED-STARTING SOIL TEMPERATURE: 60–85°F (16–29°C)
SEED START TIMING: Direct sowing 1–2 weeks after frost is preferred. Can be started indoors using biodegradable containers 4 weeks before last frost.
LIGHT REQUIREMENTS: As soon as seedlings emerge
TRANSPLANT: Plant after danger of frost. Space bush varieties 24″ (61 cm) apart, runner/pole varieties 10″ (25 cm) apart, and trellis.
DIRECT SOWING: Sow after danger of frost has passed and when soil temperatures reach 60°F (16°C).
GERMINATION: 8–10 days
POLLINATION: Self except for runner beans, which are insect-pollinated. There’s small chance of cross-pollination among other beans.
CROSS-POLLINATION: Small chance of cross-pollinating with other varieties. Cage plants or bag blossoms to prevent cross-pollination.
ISOLATION DISTANCE: 10–20′ (3–6 m) common, tepary; 160–500′ (49–152 m) lima, runner
SEED MATURITY: Dry pods on plants or harvest prior to frost and allow pods to continue to dry fully.
SEED PROCESSING: Hand process or flail gently.
SEED VIABILITY: 3–4 years
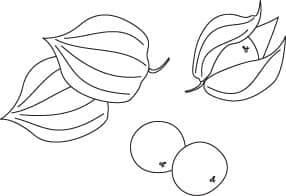
Tomatillo and Ground Cherry
Physalis philadelphica, Physalis grisea
Tomatillos and ground cherries are the perfect little garden presents. Wrapped neatly in their husks, growing prettily until ripe, when the wrapping bursts open and provides us with a tasty gift. Like tomatoes, the seeds of both tomatillos and ground cherries ripen at the same time as the fruit, which makes harvesting easy. When the husk splits is the perfect time to harvest tomatillos. Ground cherries live up to their name—they literally drop to the ground when they’re ripe.
·TRAITS AND TIPS·
TOMATILLO AND GROUND CHERRY
COMMON NAMES: Tomatillo, ground cherry
SCIENTIFIC NAMES: Physalis philadelphica, Physalis grisea
FAMILY: Solanaceae
LIFE CYCLE: Annual
FRUIT TYPE: Berry
SEED-STARTING DEPTH: 1/4″ (0.6 cm)
SPECIAL NEEDS: They prefer bottom heat for germination.
SEED-STARTING SOIL TEMPERATURE: 75–90°F (24–32°C)
SEED START TIMING: Start indoors 4–6 weeks before last frost. Bottom heat speeds germination.
LIGHT REQUIREMENTS: As soon as seedlings emerge
TRANSPLANT: Plant after danger of frost. Space 36″ (91 cm) apart and support with stakes or cages.
DIRECT SOWING: In long, warm-season climates, sow after danger of frost has passed and when temperatures reach 60°F (16°C).
GERMINATION: 7–14 days
DAYS TO MATURITY: 65–80
POLLINATION: Self
CROSS-POLLINATION: Can cross-pollinate with other varieties. Cage plants or bag blossoms to prevent cross-pollination.
ISOLATION DISTANCE: 800′–1/2 mile (0.24–0.8 km) tomatillo; 300–1,600′ (91–488 m) ground cherry
SEED MATURITY: Mature at edible stage when husks split.
SEED PROCESSING: Wet process; blend or mash and wash.
SEED VIABILITY: 4–6 years
Pea
Pisum sativum
Not only are peas delicious when eaten fresh, but pea blooms add a beautiful burst of delicate color to the garden. Peas are divided into two categories: garden and field. Garden peas are eaten fresh and include snap and snow peas, which have an edible, low-fiber pod, as well as shelling peas, which have a high-fiber pod that’s traditionally not eaten. Saving seeds from garden peas requires the fruit continues to ripen past the edible green stage, allowing the pods to dry on the plant. Field peas, however, reach full maturity before they’re harvested, with its peas typically used in soups. Field peas saved for seeds are harvested at the same time as for food.
Peas provide a perfect introduction for beginning seed starters and savers, as they’re simple to grow, self-pollinate, and harvest and clean easily. The biggest trick with peas is to start them early, before summer’s heat shuts down production. While direct sowing is optimal, I also start peas in biodegradable pots. Peas don’t like their roots disturbed, so plant the entire pot in the garden. Most peas require trellising.
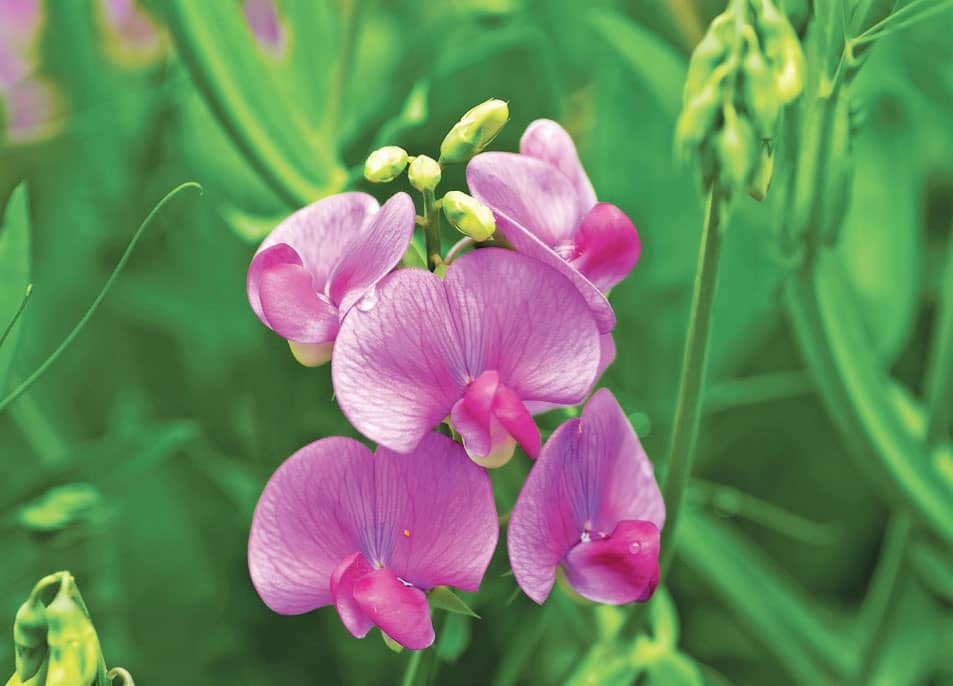
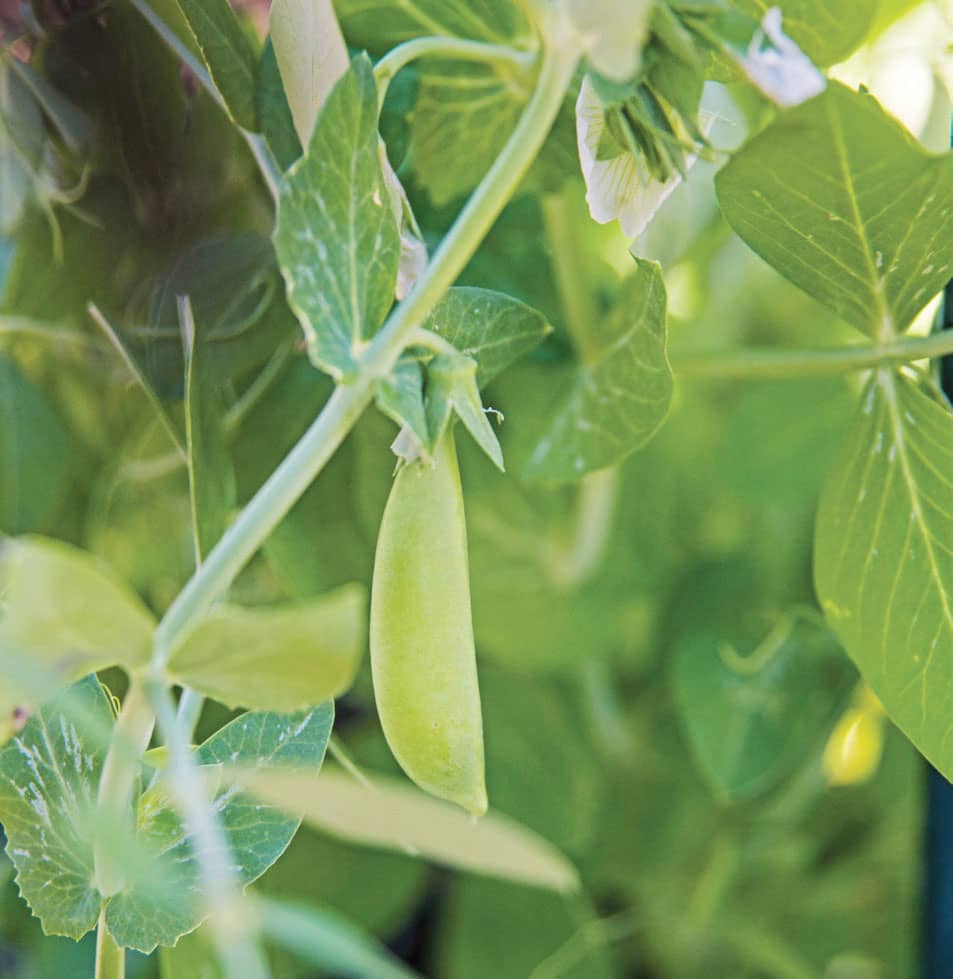
With edible pods, tendrils, and flowers, there’s much to love about peas.
·TRAITS AND TIPS·
PEA
COMMON NAMES: Pea, garden pea, snap pea, snow pea, shelling pea, field pea
SCIENTIFIC NAME: Pisum sativum
FAMILY: Fabaceae
LIFE CYCLE: Annual
FRUIT TYPE: Dry, dehiscent legume
SEED-STARTING DEPTH: 1″ (3 cm)
SPECIAL NEEDS: Soak seeds overnight prior to planting.
SEED-STARTING SOIL TEMPERATURE: 40–75°F (4–24°C)
SEED START TIMING: Direct sow 2–3 weeks before last frost or when the soil is workable. Can be started indoors using biodegradable containers 4–5 weeks before last frost.
LIGHT REQUIREMENTS: As soon as seedlings emerge
TRANSPLANT: Plant two weeks prior to last frost. Do not disturb roots. Plant biodegradable containers in the garden. Space 4″ (10 cm) apart, and trellis plants.
DIRECT SOWING: Sow 2–3 weeks prior to last frost and when soil temperatures reach 40°F (4°C).
GERMINATION: 7–14 days
DAYS TO MATURITY: 60–70 garden; 90–100 field
POLLINATION: Self
CROSS-POLLINATION: Self-pollinated. May rarely cross through insect pollination. Cage plants or bag blossoms to prevent cross-pollination.
ISOLATION DISTANCE: 10–20′ (3–6 m)
SEED MATURITY: Dry pods on the plants.
SEED PROCESSING: Hand-shell or thresh
SEED VIABILITY: 3–4 years
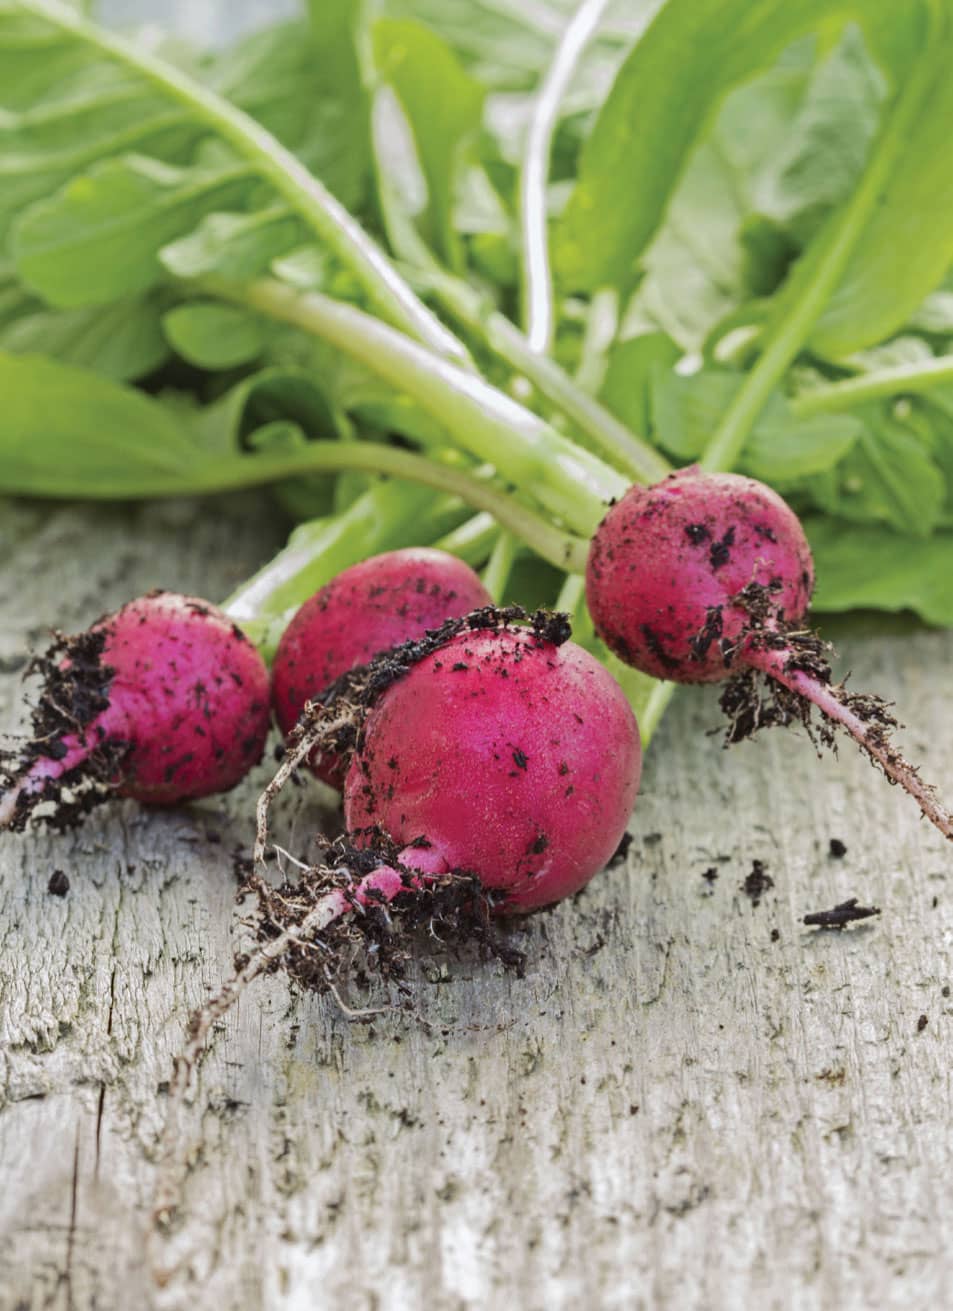
Radish
Raphanus sativus
Growing radishes is easy—they prefer cool weather and need little space, about 4–6″ (10–15 cm) between plants. However, growing radishes for seed is a bit trickier, as they do love to cross-pollinate, and they require a larger space to mature as the flower stalks can reach 4′ (1 m) high. Additionally, biennial winter radishes, like daikon varieties, require vernalization before flowering and setting seed. However, most daikon radishes tolerate temperatures down to 25°F (-4°C) and can overwinter in the garden if mulched well. In colder climates, dig the roots and store in a cool root cellar, basement, or refrigerator. Replant the roots in the spring, spaced 12–18″ (30–46 cm) apart.
·TRAITS AND TIPS·
RADISH
COMMON NAMES: Radish, daikon, winter radish
SCIENTIFIC NAME: Raphanus sativus
FAMILY: Brassicaceae
LIFE CYCLE: Annual or biennial
FRUIT TYPE: Dry, dehiscent (silique)
SEED-STARTING DEPTH: 1/4″ (0.6 cm)
SPECIAL NEEDS: None
SEED-STARTING SOIL TEMPERATURE: 50–65°F (10–18°C)
SEED START TIMING: Direct sow 2–3 weeks prior to last frost.
LIGHT REQUIREMENTS: As soon as seedlings emerge
TRANSPLANT: Not recommended
DIRECT SOWING: Sow 2–3 weeks before last frost and when temperatures reach 50°F (10°C).
GERMINATION: 4–12 days
DAYS TO MATURITY: 22–70, depending on variety
POLLINATION: Insect
CROSS-POLLINATION: Can cross-pollinate with other varieties. Cage plants or bag blossoms to prevent cross-pollination. Introduce pollinators into cages.
ISOLATION DISTANCE: 800′–1/2 mile (0.24–0.8 km)
SEED MATURITY: After edible maturity. Dry pods on plants or harvest prior to frost and allow pods to continue to dry fully.
SEED PROCESSING: Thresh
SEED VIABILITY: 6 years
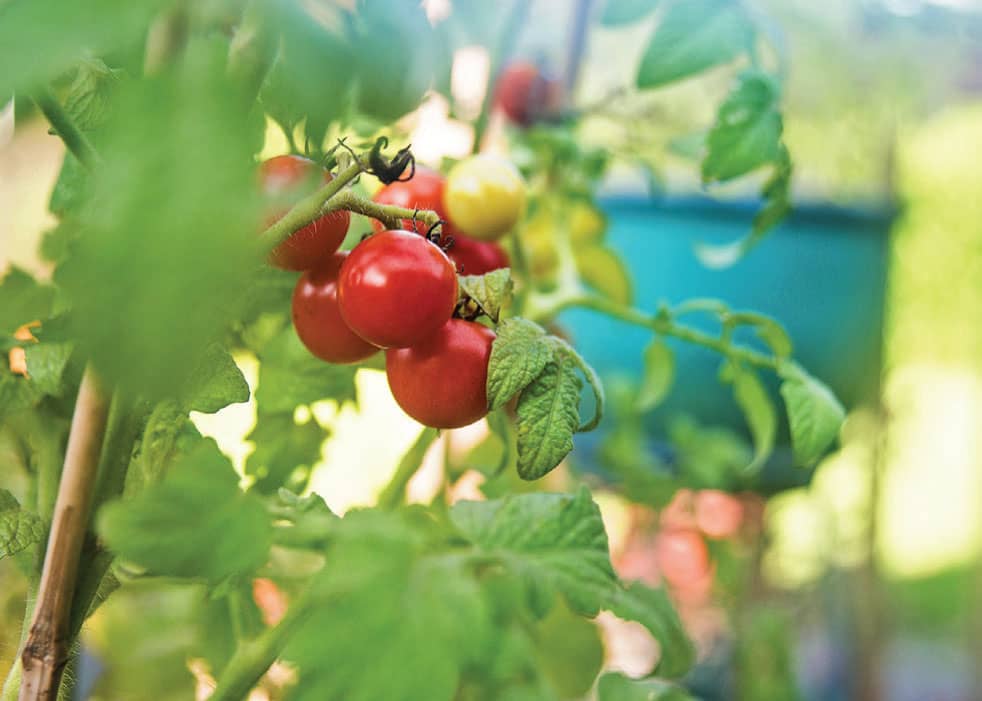
Tomato
Solanum lycopersicum
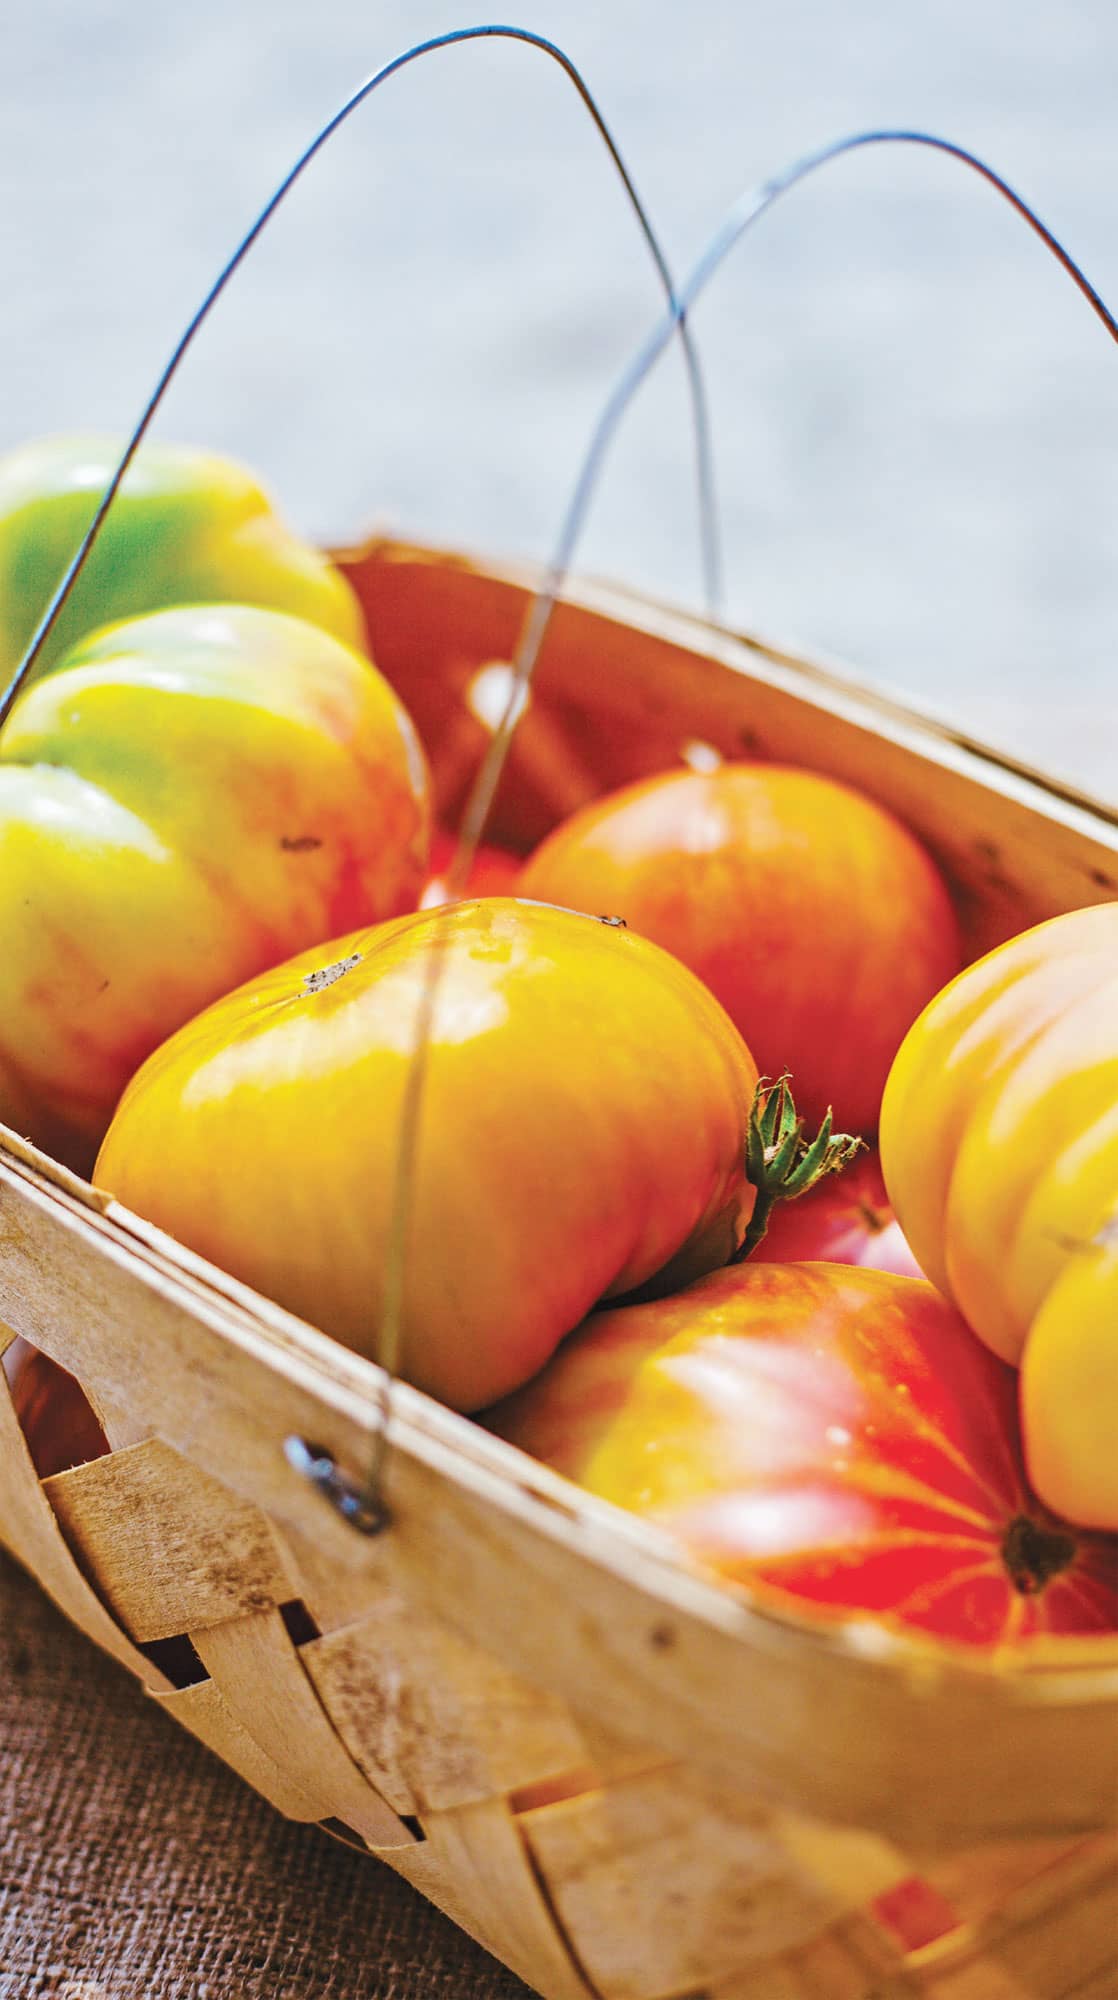
Red, pink, orange, purple, striped, ribbed, miniscule, mammoth . . . tomatoes provide an abundance of color and texture on a dinner plate and add beauty to the garden. Many a gardener has been born thanks to the tomato: It starts with the craving for a taste of just-picked, sun-warmed tomato, and the next thing you know, you’ve got a garden full of them! For most gardeners, tomatoes are also the gateway to the seed-starting and -saving club. Saving the seeds of just one tomato can provide you with plants for many years to come.
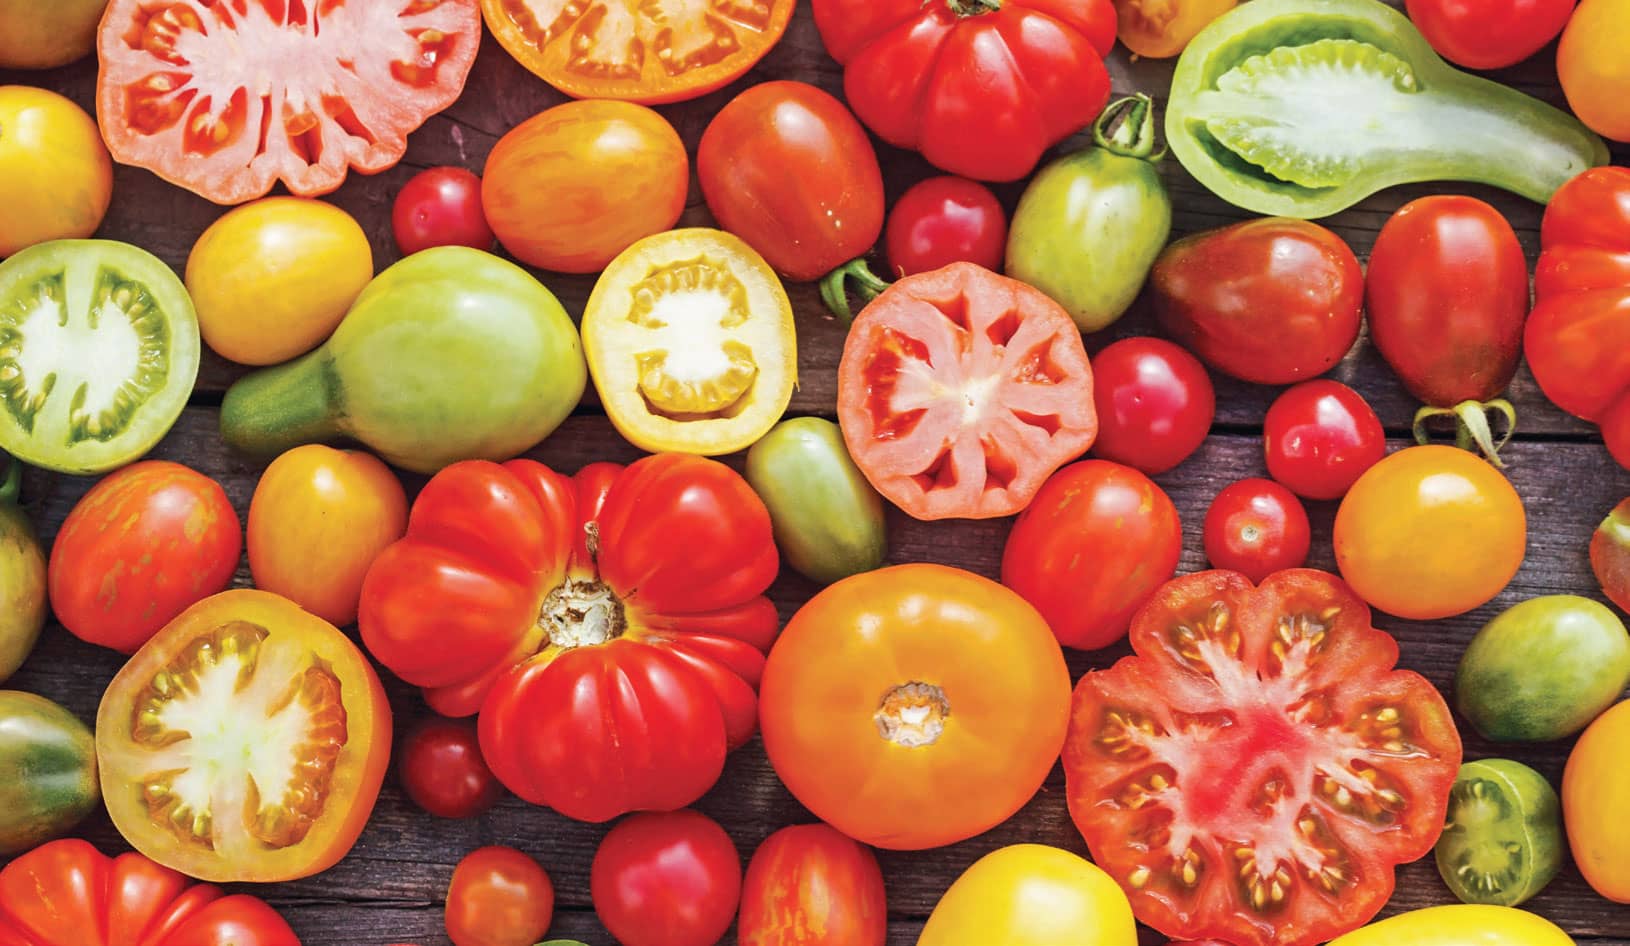
A rainbow of options are available for tomatoes—no need to settle for simple red varieties.
Before You Begin
Start by evaluating your garden space. Each tomato plant needs approximately a 24-inch (61cm) circumference if you plan to stake/support the vine, which I highly recommend. Staking prevents diseases and saves your back when harvesting. If you plan to use containers for your tomatoes, you’ll need space for 5-gallon (19 L) pots. However, you can also find several heirloom dwarf varieties that produce well in smaller spaces. Before you buy seeds, assess your garden and determine your available space.
Also note the amount of sun in various areas of your garden. Most large, beefsteak-type tomatoes need 6 to 8 hours of sunlight to produce healthy fruit. However, if your garden doesn’t bask in full sun, don’t worry—some smaller, cherry-type tomatoes will produce with less sun, particularly the yellow and white varieties.
Next, consider how you want to use your tomatoes. Do you desire a summer-long daily serving of bruschetta, or do you plan to preserve jars of sauce for winter? For a long season of tomato treats, indeterminate tomato plants provide continuous fruit throughout the growing season until frost or disease kills the vines. Indeterminate tomato plants need space and support, as the vines can grow as tall as 10 feet (3 m). For a crop that produces all at once in a big flush of fruit, determinate tomatoes provide a nice crop for canning and preserving. Plus, the vine is more manageable in containers, with the plant growing approximately 3 feet (1 m). For smaller spaces, dwarf tomato varieties offer short vines with decent production, perfect for containers on patios or balcony gardens.
Starting Tomato Seeds
Once you’ve assessed your garden, it’s time for the fun to begin: selecting your seeds. With so many options, it’s challenging to choose. Try chatting with tomato growers at a farmers’ market to learn what varieties grow well in your area. The market is also a good resource to taste-test varieties. Not only can you buy a few heirloom tomatoes from your local farmer to taste and determine your preferences, you can save seeds from these heirloom tomatoes for next season’s garden. (Be certain to ask the variety names so that you can properly label the seeds.)
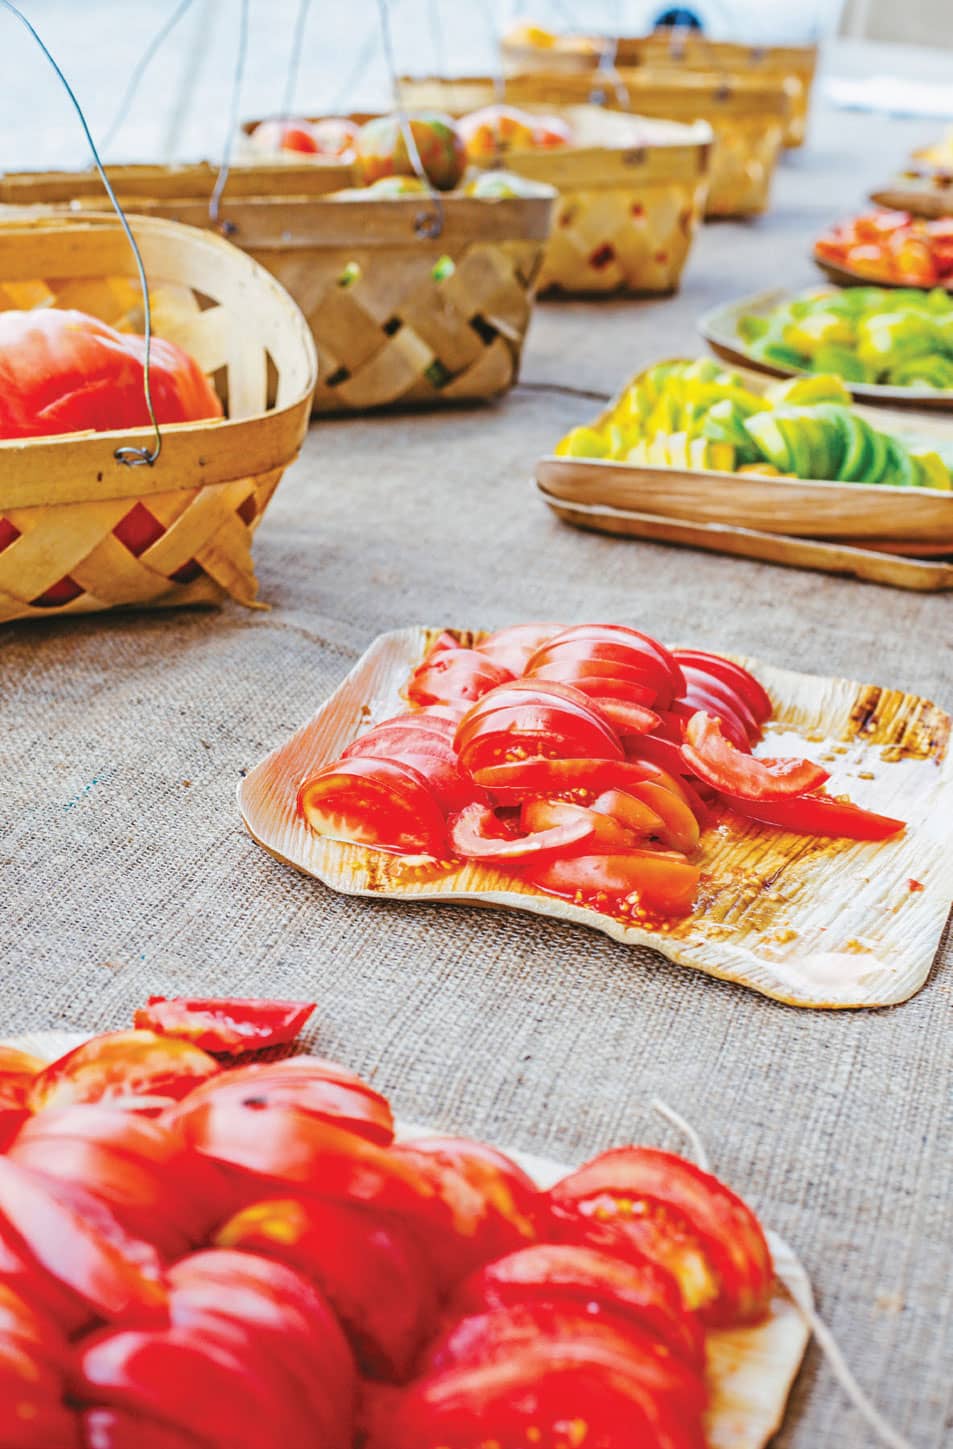
Share a few homegrown beauties, and soon neighbors will think you’re a master gardener.
I grow a lot of tomatoes, so I use a 128-cell seed-starting flat filled with moistened soilless seed-starting mix. Some growers crowd dozens of seeds per cell, but I find it weakens the seedlings and makes transplanting difficult. Instead, place two or three tomato seeds per cell on top of the mix, then cover lightly with more mix—about 1/4 inch (0.6 cm). Using a spray bottle, water the flat carefully to settle the seeds. Cover with a plastic dome.
To heat or not to heat: Tomato seeds germinate more quickly with the addition of bottom heat. A heat mat intended for seed starting provides a perfect addition to your gardening toolkit, as it offers consistent bottom heat to maintain an 80°F (27°C) soil temperature beneficial to tomato seed germination.
Light is right: While light isn’t necessary to spur germination of tomato seeds, it is important once the cotyledon appear. Place the tray under a direct light source. (See here for instructions on how to build an inexpensive seed-starting station.) Raise the lights as the plants grow.
Ideally, the lights should remain just an inch or two above the seedlings to avoid the plants becoming leggy—where a seedling stretches toward a light source, weakening its stem. Placing direct light immediately above the seedlings keep the plants compact and sturdy.
Offer a drink, but don’t drown: Ensure the soilless mix stays moist but not soggy. I add a bit of water to the bottom tray, allowing the plants to absorb water from below as needed. I also spritz the flat using a spray bottle. Be certain the flats don’t dry out, because you can lose your seedlings. Set a daily reminder on your phone if you’re afraid you’ll forget to water.
Bully the babies: To create vigorous tomato seedlings, give them a shake. It seems counterintuitive to mistreat your sweet little seedlings, but a twice-daily brushing or agitation of the plants with your hand helps strengthen seedlings’ stems. (If you’ve handled any diseased plants, don’t touch your seedlings until your hands are clean!)
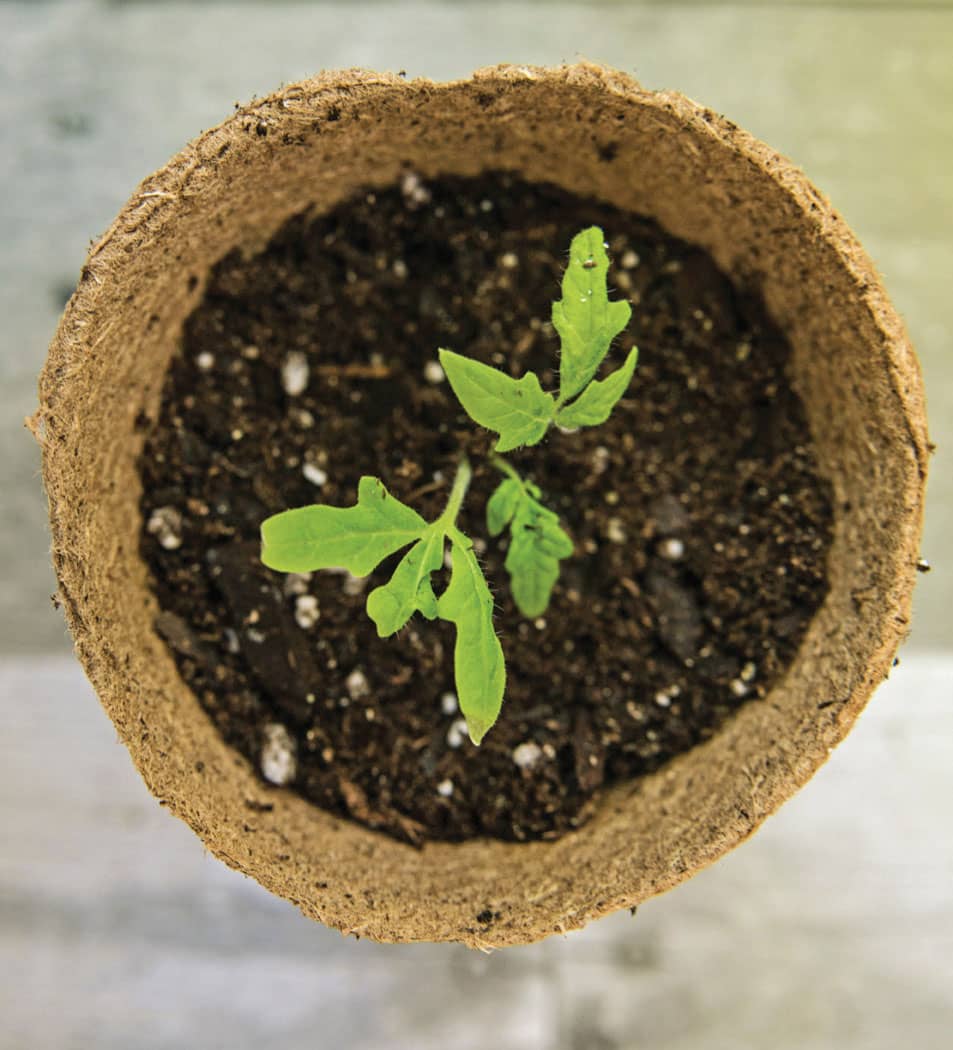
Biodegradable pots can be planted directly in the garden.
Move up: Once the tomato seedlings’ true leaves appear, it’s time for the babies to move into a new home. Any clean, sterilized, repurposed container will do but select one that gives the seedling room to stretch its roots. The biodegradable pots I use are 3 inches (8 cm) in diameter, don’t require sterilizing, and can be planted directly into the garden without disturbing the plant’s roots.
After the seedlings are out of their seed-starting cell, it’s easy to gently tease the roots apart with your fingers, separating the plants. Prefill containers with a good organic potting mix, adding it to each container until it’s about three-fourths full. Using your index finger, create a hole in the soil in the center of the container. It speeds the process to prefill several flats of containers so that the seedlings can be quickly transplanted without drying out. Insert a tomato seedling’s roots into the hole and bury a portion of the stem. Add more potting soil until the soil line is about an inch under a plant’s first set of leaves. Firm the soil in the container, and water well to settle the plant. Place the plants back under the grow lights.

Be gentle but don’t worry; tomato seedlings are tougher than they look.
Feed them right: Now’s the time to give your tomato seedlings a bit of nutrition, particularly if yellow leaves appear or the stems look unnaturally purple, which can indicate a phosphorous deficiency. I water with a manure compost tea once a week until it’s time to plant the tomatoes in the garden. Composted manure tea is gentle, adds nutrients to the soil, and doesn’t damage young plants. Too much fertilizer can cause quick, lanky growth or even damage leaves due to the uptake of excessive nitrogen salts, causing more harm than good for the plant. If you choose to use biodegradable pots, you’ll eventually see the tomato’s roots growing through the pot. The pots will decompose naturally in the soil.
Hardening off: As your tomatoes grow and the danger of frost passes, it’s time to prepare the plants for their permanent home. (See here for details about hardening off seedlings.)
By the end of the 2-week hardening off period, the plants should be exposed to the same conditions as they will experience in the garden—full sun for 6–8 hours or more per day. By gradually introducing tomato plants to direct sunlight, you’ll avoid sunscald (burning the plants’ leaves). Young plants are similar to people in a way: after we’ve lounged around inside all winter, we need to protect our skin before heading to the beach.
Growing Conditions
Tomatoes require 6–8 hours of full sun for the best production. Good soil drainage is essential, as is a nearby water source. Avoid planting tomatoes near walnut trees, as tomatoes are sensitive to the juglone toxin exuded by the tree’s roots.
Space plants 24 inches (61 cm) apart. Plant your tomatoes deep. Dig a hole and bury most of the stem, leaving about an inch of stem exposed between the soil line and the first set of leaves. If a plant became leggy while awaiting the last frost date, dig a trench and plant the tomato horizontally, laying the stem in the trench and gently guiding the leafy portion of the stem to curve upwards. Roots will grow along the buried stem, stabilizing the plant, while the leafy portion will begin growing vertically toward the light. Add a layer of mulch to preserve soil moisture and prevent soil from splashing on plants when watering. When the plant reaches 18 inches (46 cm), begin staking. Continue tying up the plant as it grows.
Tomatoes are heavy feeders. Avoid adding too much nitrogen in the soil, as it will promote foliage growth rather than fruit. If you worry about lack of nutrients in your soil, a soil test can show what may be lacking. Harvest fruits continually as they ripen.
Saving Tomato Seeds
The beauty of saving tomato seeds resides in the timing. When your ripe tomatoes are ready to harvest, the seeds are ready for preserving too.
Tomato seeds are enclosed in a gelatinous sack, which contains chemicals that inhibit germination inside the tomato. In nature, a tomato falls off the vine, decomposes, and natural fermentation destroys the gel sac, allowing the seed to germinate in ideal conditions. To save tomato seeds, we simply mimic nature, fermenting the tomato seeds to remove the gel sac. It’s a simple, if smelly, process, but fermentation also kills many seedborne tomato diseases. Here’s how to do it.
Tomato seeds are ready to harvest when the fruit is ripe for eating.
1 Wash the tomato, then slice it through the middle horizontally (not through the blossom end and core). This will expose the seed cavities.
2 Squeeze the seeds and surrounding gel into a bowl or canning jar. Label each container with the name of the tomato variety.
3 Add 1/2 cup (.12L) of water to the jar and stir it into the seed mixture. Let the mixture stand for 1–3 days, uncovered, at a temperature between 70–85°F.

Cut the tomato in slices horizontally to expose the seeds.
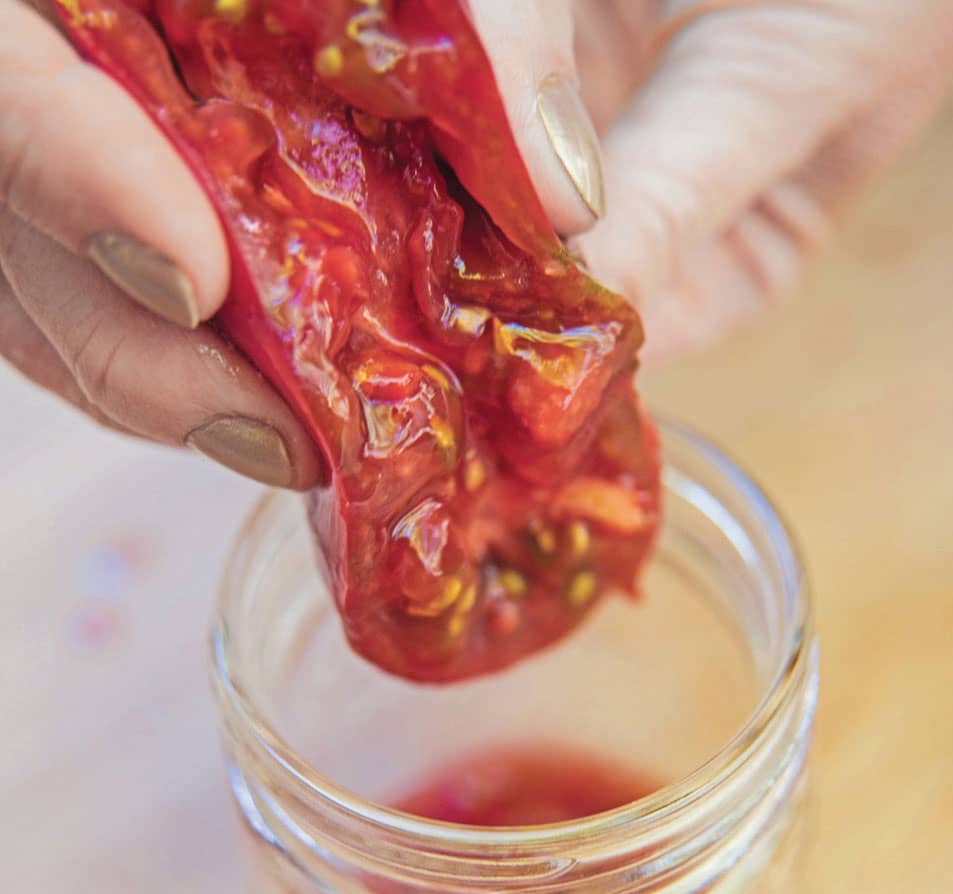
Removing the seeds is easy—just squeeze.
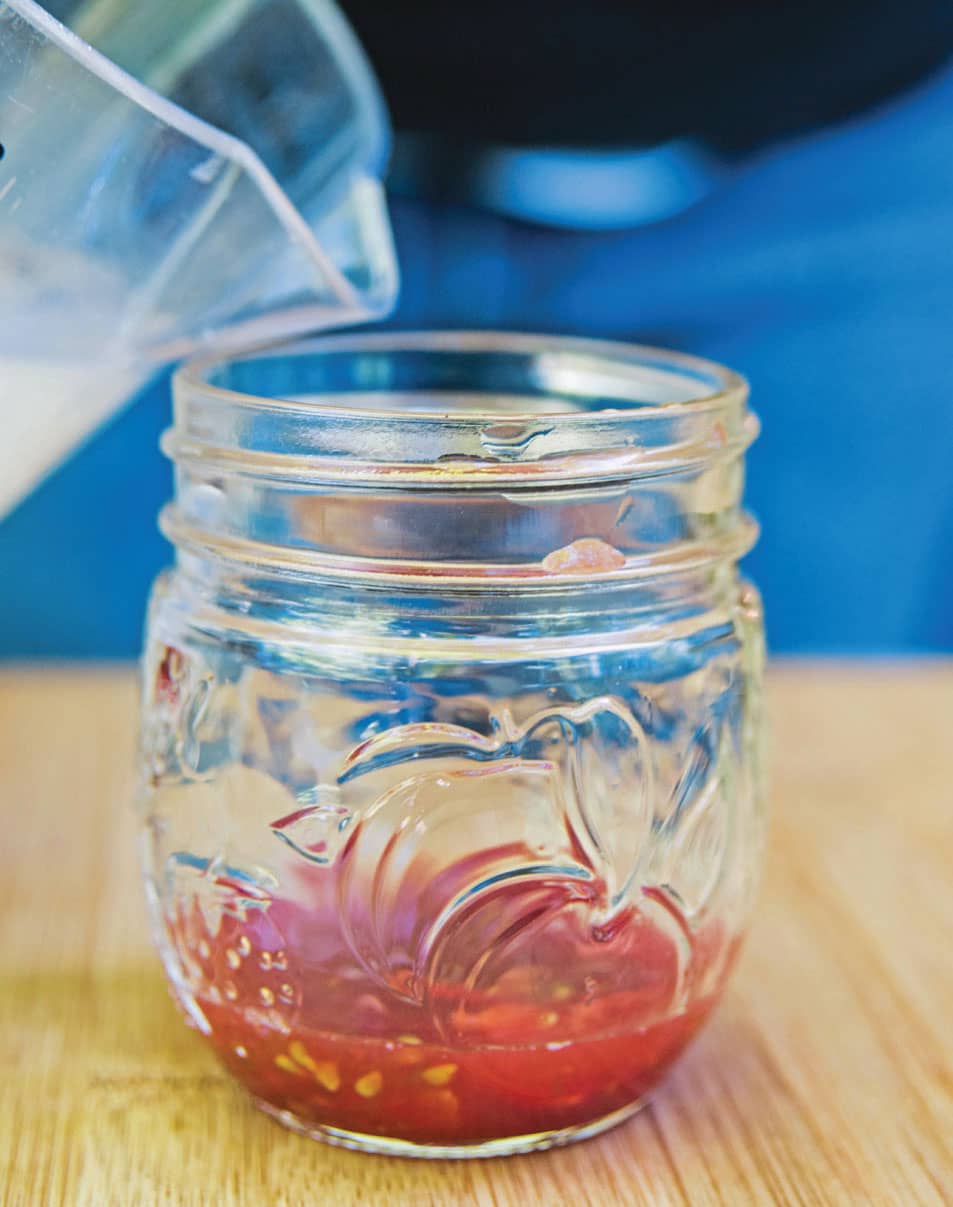
Add water to the seeds and pulp. Stir well.
4 As the mixture ferments, white or grayish mold will appear on the surface. (Don’t overferment, as seeds may begin to germinate.)
5 Add 1 cup (.24L) of water and stir the mix. Beware—it smells terrible. Let the mix rest. Viable seeds will settle to the bottom, while hollow seeds float to the top. Remove the floaters with a spoon.
6 Pour the mix through a fine-mesh strainer, rinsing with water until the seeds are clean from debris. Blot the excess water from the bottom of the strainer with a paper towel.
7 Pour the clean seeds from the strainer onto a plate. Spread the seeds into a single layer to dry. If you’re working with more than one tomato variety at a time, label each plate with its variety.
8 Stir the seeds several times per day as they dry to ensure complete, even drying. Separate any clumps that form.
9 When seeds are completely dry (approximately one week), store them in an air-tight container in a cool, dry area, or freeze for long-term storage. Be certain to label your seeds carefully.
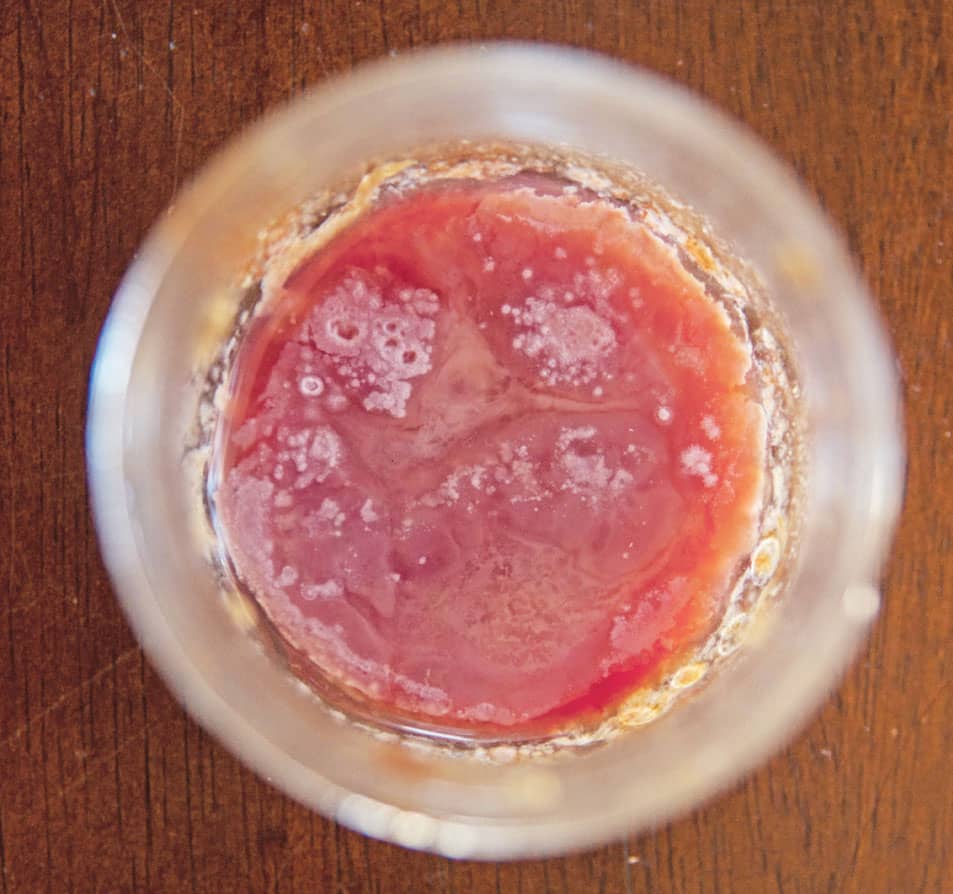
Fermenting is the worst part of the process—but it’s necessary.
Pour the mix through a fine-mesh strainer, and rinse thoroughly.
Let the seeds dry well before storing.
Top 10 Heirloom Tomatoes for Cool, Short-Season Climates
• ‘Alpha’
• ‘Anna Russian’
• ‘Buckbee’s New 50-Day’
• ‘Earliana’
• ‘Galina’
• ‘Glacier’
• ‘Legend’
• ‘Oregon Spring’
• ‘Siberian’
• ‘Stupice’
Top 10 Heirloom Tomatoes for Hot, Humid Climates
• ‘Arkansas Traveler’
• ‘Bali’
• ‘Brandywine’
• ‘Cherokee Purple’
• ‘Costoluto Genovese’
• ‘Floradade’
• ‘Green Zebra’
• ‘Homestead’
• ‘Marglobe Supreme’
• ‘Sioux’
Make sure to note your favorite tomato varieties to grow again next year.
·TRAITS AND TIPS·
TOMATO
COMMON NAME: Tomato
SCIENTIFIC NAME: Solanum lycopersicum
FAMILY: Solanaceae
LIFE CYCLE: Short-lived perennial typically grown as an annual due to frost sensitivity.
FRUIT TYPE: Berry
SEED-STARTING DEPTH: 1/4″ (0.6 cm)
SEED-STARTING SOIL TEMPERATURE: 80°F (27°C). Bottom heat speeds germination.
SEED START TIMING: Start indoors 6–8 weeks prior to last frost.
LIGHT REQUIREMENTS: Not needed for germination. Direct light after germination, 1″ (3 cm) above seedlings.
TRANSPLANT: Plant when two sets of true leaves appear. Transplant at least once to a larger container prior to planting out in garden.
DIRECT SOWING: Sow after danger of frost has passed.
GERMINATION: 4–8 days
DAYS TO MATURITY: 45–87. Fruit typically ripens 45–55 days after blossoming.
POLLINATION: Self
CROSS-POLLINATION: Solanum lycopersicum may cross pollinate with Solanum pimpinellifolium (currant tomato). Potato-leaf varieties may also cross-pollinate.
ISOLATION DISTANCE: 10–50′ (3–15 m)
SEED MATURITY: Same as fruit ripeness/harvest maturity
SEED PROCESSING: Fermentation 1–3 days
SEED VIABILITY: 4–8 years
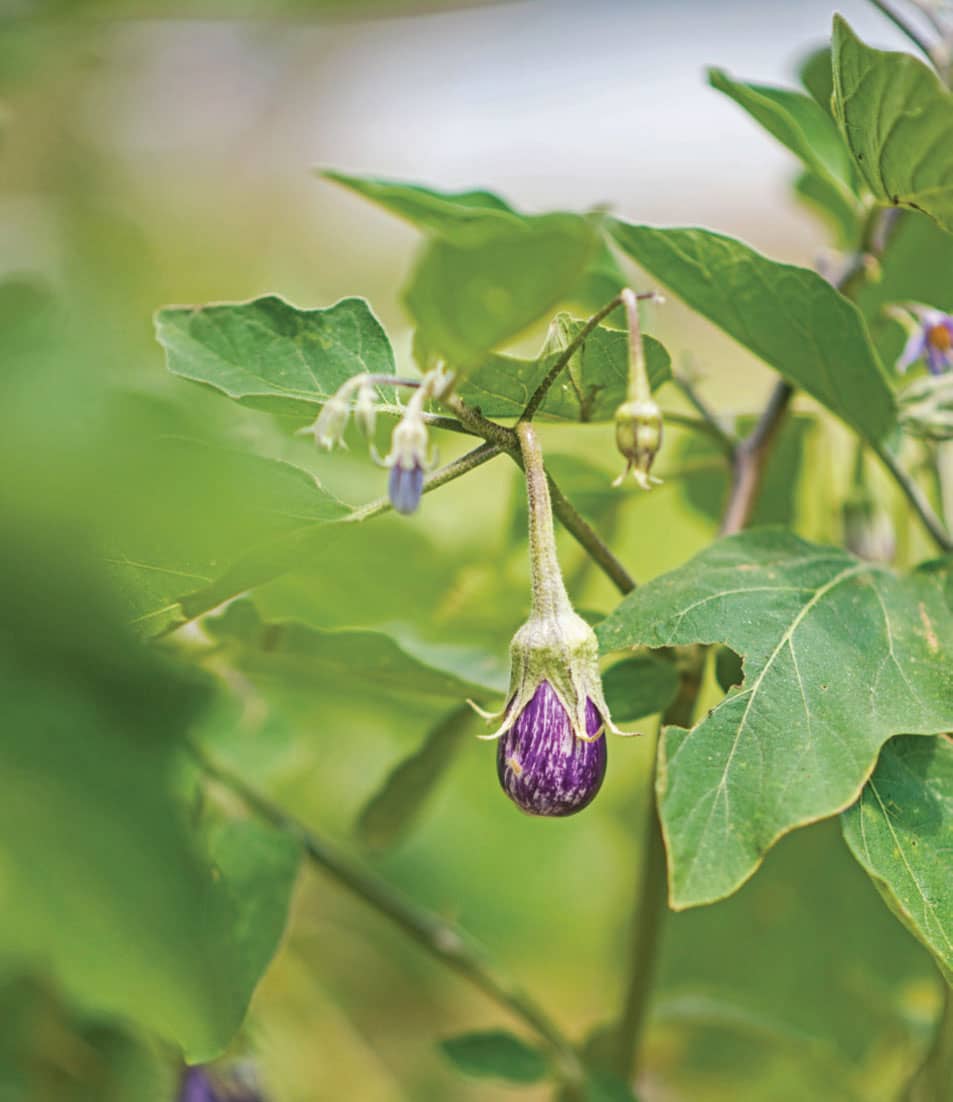
Eggplant
Solanum melongena, Solanum aethiopicum (Turkish Eggplant)
From the shiny, deep purple-black of ‘Black Beauty’ to the charming lavender-and-white striped ‘Listada de Gandia’ to the bright orange-and-green striped ‘Turkish Orange’, eggplants offer a rainbow of colors for the garden and dinner plate. Eggplants grow much like tomatoes. I recommend staking the plants because as the fruits grow and become heavy, they can topple the plant, causing breakage. Watch for pests that attack tomatoes, like hornworms, because they will also enjoy snacking on your eggplants.
I prefer harvesting eggplants while they’re young and tender, before they become pithy. Use garden snips to harvest, as eggplants want to stay firmly attached to the plant. However, if you’re saving seed, allow the eggplants to continue growing on the plant past market maturity. When they turn a yellowish brown and lose their shiny glow, it’s time to harvest for seed. (They typically remove easily from the stem at this point as well.)
Eggplant seeds are firmly embedded in the fruit’s flesh. It looks intimidating, but extracting the seeds is actually easy, if a tad messy. Cut the eggplant in half to make it easier to handle and use a hand grater to shred the flesh into a bowl. Fill the bowl with water until it covers the pulp and seeds by about 2 inches; agitate the water to separate the seeds from the pulp. The viable seeds will sink to the bottom of the bowl. Using a small strainer, scoop the floating debris from the top of the water, add more water, and repeat until the seeds look free of debris. Pour the water and seeds through a fine-mesh strainer, pat the bottom of the strainer with a paper towel to remove excess water, and pour seeds onto a paper plate to dry. Allow seeds to dry for about 2 weeks, stirring daily to ensure even drying. (Remember: process only one eggplant variety at a time to retain seed purity.)
·TRAITS AND TIPS·
EGGPLANT
COMMON NAMES: Eggplant, Aubergine/Turkish eggplant, Ethiopian eggplant
SCIENTIFIC NAMES: Solanum melongena, Solanum aethiopicum
FAMILY: Solanaceae
LIFE CYCLE: Tender perennial
FRUIT TYPE: Berry
SEED-STARTING DEPTH: 1/4″ (0.6 cm)
SPECIAL NEEDS: Bottom heat speeds germination.
SEED STARTING SOIL TEMPERATURE: 75–90°F (24–32°C)
SEED START TIMING: Start indoors using biodegradable containers 6–8 weeks before last frost. Bottom heat speeds germination.
LIGHT REQUIREMENTS: As soon as seedlings emerge
TRANSPLANT: Plant after danger of frost. Plant 18–24″ (46–61 cm) apart. Stake taller varieties.
DIRECT SOWING: Not recommended
GERMINATION: 7–14 days
DAYS TO MATURITY: 100–150. Harvest eggplants young before their flesh becomes pithy.
POLLINATION: Self, insect
CROSS-POLLINATION: Can cross-pollinate with other varieties. Cage plants or bag blossoms to prevent cross-pollination. However, Turkish eggplant does not cross with garden eggplant varieties.
ISOLATION DISTANCE: 300–1,600′ (91–488 m)
SEED MATURITY: After edible harvest. Fruit turns yellowish and dull when seeds ripen.
SEED PROCESSING: Wet process, rinse
SEED VIABILITY: 4–6 years
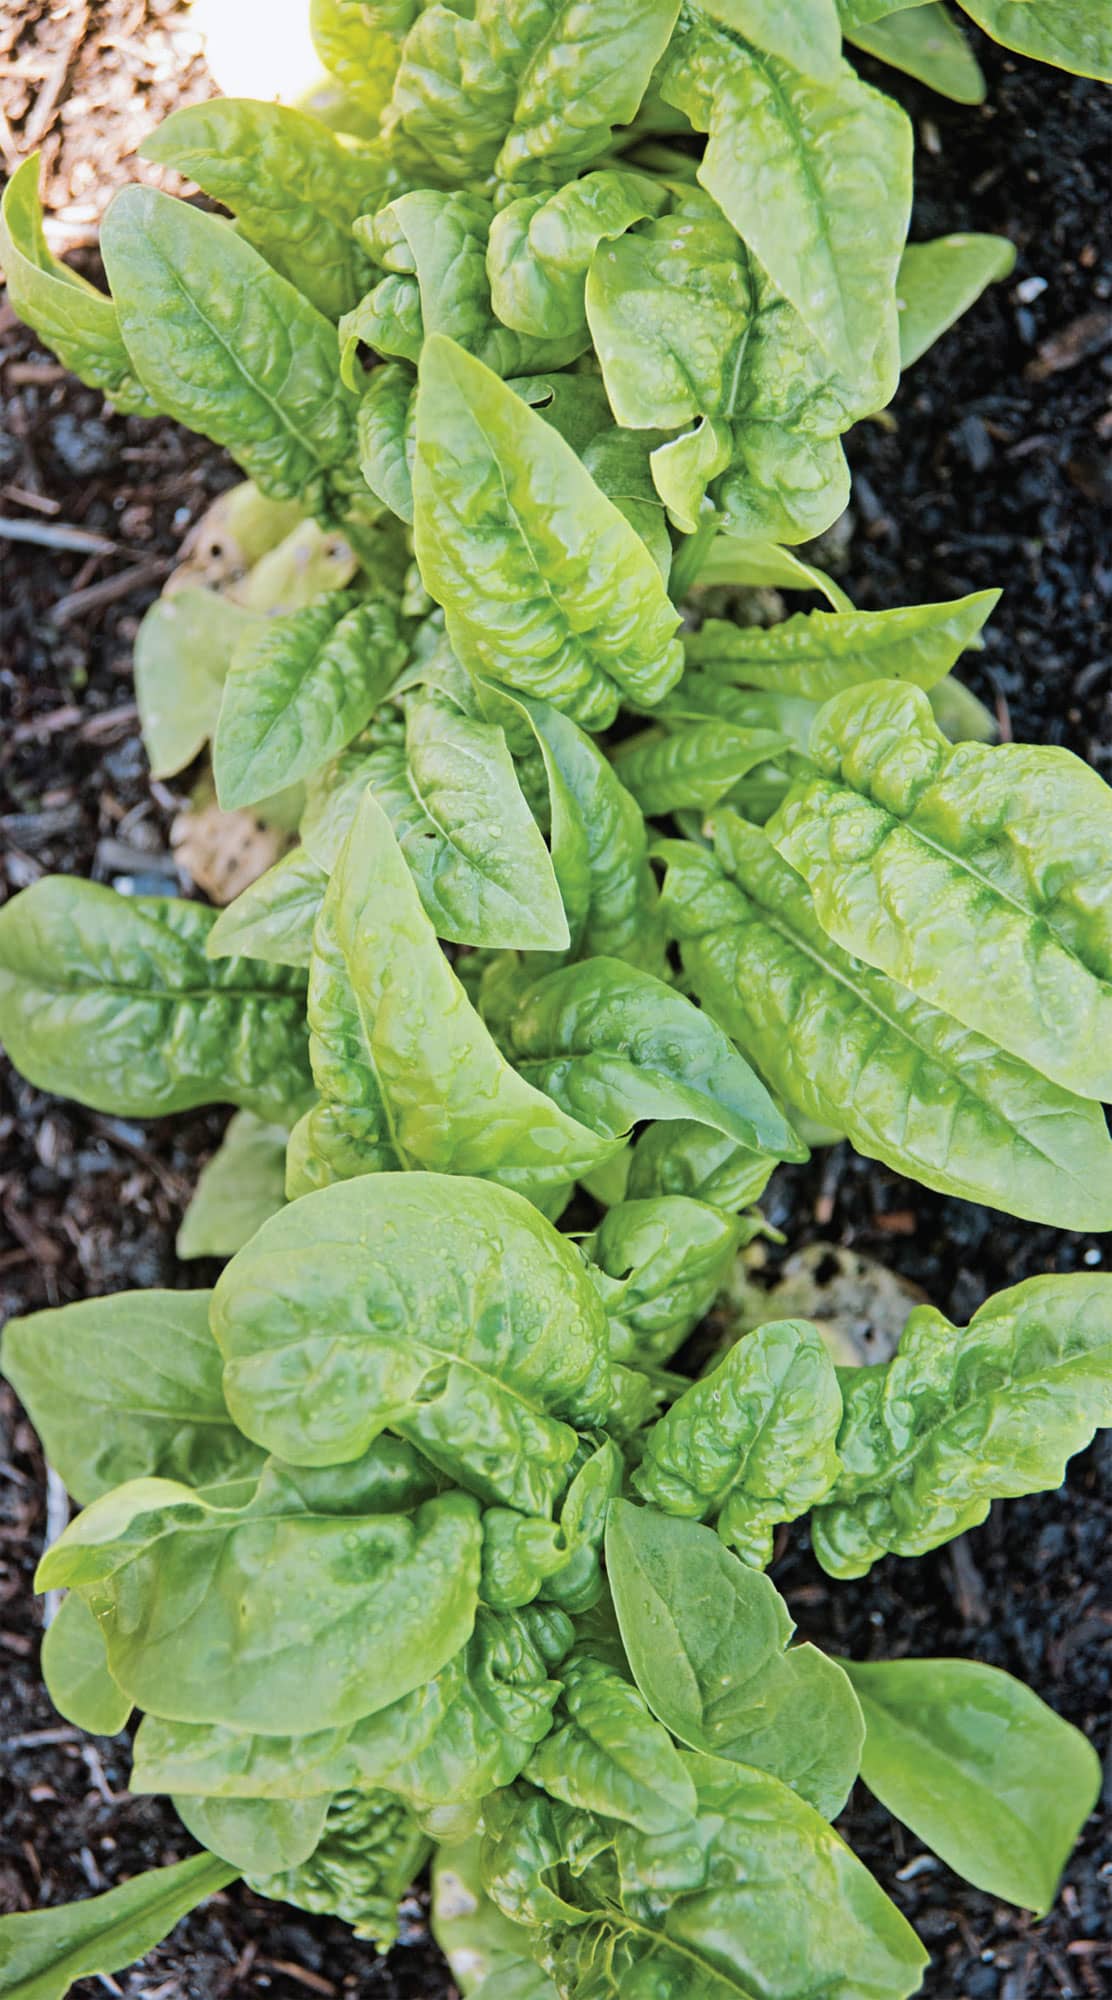
Spinach
Spinacia oleracea
Spinach is one of my favorite vegetables, particularly when it’s harvested young and sweet from the garden. It’s a crop that’s a little tricky though. Not only is it heat- and day-length sensitive, causing it to bolt and become bitter when its preferred cool growing days turn toasty and long, it’s also a trickster when planning seed saving. Spinach is one of the few dioecious plants, which means that some plants are male, while others are female—and you won’t know which it is until the plant flowers. Females are typically larger with slightly more pronounced flowers than the blooms on male plants. Make sure to cage plants in groups, using a cover of fine-spun polyester, to ensure adequate pollination (and to avoid cross-pollination from other varieties).
Spinach prefers nitrogen-rich soil and cool weather. This is a plant you can direct sow, even when the soil temperature is still chilly. In fact, spinach crops tolerate frost and freezes, still going strong when temperatures plunge to 15°F (-9°C). However, spinach is intolerant of heat and long days, causing it to bolt when day length reaches 13–15 hours. Additionally, for the best seed production, try to time the plants’ flowers when temperatures are below 75°F (24°C). The good news? You can harvest some of the outer leaves of spinach plants, even if you intend to save seeds from the crop.
·TRAITS AND TIPS·
SPINACH
COMMON NAME: Spinach
SCIENTIFIC NAME: Spinacia oleracea
FAMILY: Chenopodiaceae
LIFE CYCLE: Annual
FRUIT TYPE: Dry indehiscent, single-seeded fruit (utricle)
SEED-STARTING DEPTH: 1/2″ (1.3 cm)
SPECIAL NEEDS: Spinach requires cool temperatures to thrive.
SEED-STARTING SOIL TEMPERATURE: 40–75°F (4–24°C)
SEED START TIMING: Direct sow 3 weeks before last frost. Can be started indoors using biodegradable containers 4–5 weeks before last frost but does not transplant well, so plant containers directly in garden.
LIGHT REQUIREMENTS: As soon as seedlings emerge
TRANSPLANT: Plant 3 weeks prior to last frost. Do not disturb roots. Can tolerate temperatures to 15°F (-9°C).
DIRECT SOWING: Sow 3 weeks prior to last frost. Seeds can germinate in temperatures as low as 35°F (2°C). Seeds do not germinate well in soil temperatures above 75°F (24°C).
GERMINATION: 5–9 days
DAYS TO MATURITY: 40–52
POLLINATION: Wind. Plants are dioecious; some produce only male flowers, some only female. Spinach requires a 1:2 ratio male-to-female plants for best pollination. Cage several plants together for pollination.
CROSS-POLLINATION: Can cross-pollinate with other varieties. Cage plants using row cover fabric to prevent cross-pollination. Pollen is very fine, and isolation is the best method to ensure pure seed.
ISOLATION DISTANCE: 800′–1 mile (0.24–1.6 km)
SEED MATURITY: When plants turn yellow
SEED PROCESSING: Strip seeds by hand, winnow
SEED VIABILITY: 3 years
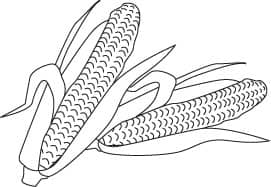
Corn
Zea mays
Growing up on a dairy farm after the Great Depression, my dad never glamorized farm life. In fact, he was quick to leave the manure spreader behind and head off to college. While my dad may have left the farm, he never lost his farm-boy love of sweet corn. Every summer Saturday, we drove around the Indiana countryside, looking for fresh-from-the-field sweet corn. And I mean fresh. If the corn was harvested more than an hour or two before we arrived at the farm stand, forget it—my dad considered it old.
Today I’m the keeper of that sweet corn tradition. Growing sweet corn is an homage to my dad, plus it guarantees that we only eat the sweetest, freshest ears. Growing corn—whether it’s sweet, flint, flour, dent, or popcorn—can be a challenge for the home gardener, particularly if you want to save seeds. Corn is a real-estate intensive crop; you need a fairly large garden to grow enough corn to ensure genetic diversity. Corn is a crop that suffers from inbreeding depression, which if not addressed, will lead to disappointing future harvests from saved seeds.
For the best pollination and seed set, plant corn in blocks six rows wide, with plants spaced 6–12 inches (15–30 cm) apart and 24–36 inches (61–91 cm) between rows. Corn is monecious, meaning that separate male and female flowers are produced on each plant. Male flowers, the tassels on top of the corn stalk, pollinate the female flowers, the tiny hairs on the silks, by wind. The corncob is the ovary receptacle, and the ovaries eventually become the kernels of the corn. Tasseling occurs about 3 weeks after pollination. Hand-pollination is recommended to improve pollination.
·TRAITS AND TIPS·
CORN
COMMON NAMES: Corn, sweet corn, flint corn, popcorn, dent corn, maize
SCIENTIFIC NAME: Zea mays
FAMILY: Poacea
LIFE CYCLE: Annual
FRUIT TYPE: Dry indehiscent, single-seeded (caryopses)
SEED-STARTING DEPTH: 11/2″ (3.8 cm)
SPECIAL NEEDS: Plant in blocks of six rows for best pollination.
SEED-STARTING SOIL TEMPERATURE: 60–95°F (16–35°C)
SEED START TIMING: Direct sowing after frost is preferred. Can be started indoors using biodegradable containers 4 weeks before last frost. Bottom heat speeds germination.
LIGHT REQUIREMENTS: As soon as seedlings emerge
TRANSPLANT: Plant after danger of frost. Do not disturb roots. Plant in blocks of six rows for best pollination and kernel set. Space plants 6–12″ (15–30 cm) apart, 24–36″ (61–91 cm) between rows.
DIRECT SOWING: Sow after danger of frost has passed and when temperatures reach 50°F (10°C).
GERMINATION: 5–14 days
DAYS TO MATURITY: 60–100, depending on variety
POLLINATION: Wind
CROSS-POLLINATION: Can cross-pollinate with other varieties. Bag shoots and tassels and hand-pollinate. (See sidebar.)
ISOLATION DISTANCE: 800′–1/2 mile (0.24–0.8 km)
SEED MATURITY: Dry on plant. Seeds reach maturity when husks are dry and brown and kernels are hard.
SEED PROCESSING: Hand; twist ears to remove kernels.
SEED VIABILITY: 2–3 years