CHAPTER 3
From Seedlings to Plants to Saving Seeds
You’ve successfully started your seeds, and your trays are filled with beautiful green seedlings. Congratulations! Now what? Much like anticipating the birth of a child, the more you prepare ahead of its arrival, the easier it will be to raise your little green babies.
Like any anxious new parent, you want only the best for your young. How can you make certain they’re happy and healthy? How do you ensure they’ll become productive members of society—wait, I mean, productive additions to your garden? In this chapter, we’ll examine how to help your seedlings flourish into strong plants that will fill your garden with food and flowers. Then we’ll continue the journey, harvesting, processing, and storing their seeds for next year’s garden.
Care and Feeding of Seedlings
Your tiny seeds are now lovely little plants, crowding the trays with their first set of true leaves. How can you keep seedlings healthy until it’s time to transplant? Just like newly germinated seeds, your seedlings still need:
Water: Check daily to ensure seed-starting mix is moist but not soggy. Don’t allow seedlings to dry out. Fill the bottom of the tray with water and allow the plants’ roots to wick it up to avoid disturbing seedlings. However, refrain from allowing plants to stand in water. If water remains in the tray after 12 hours, empty the excess.
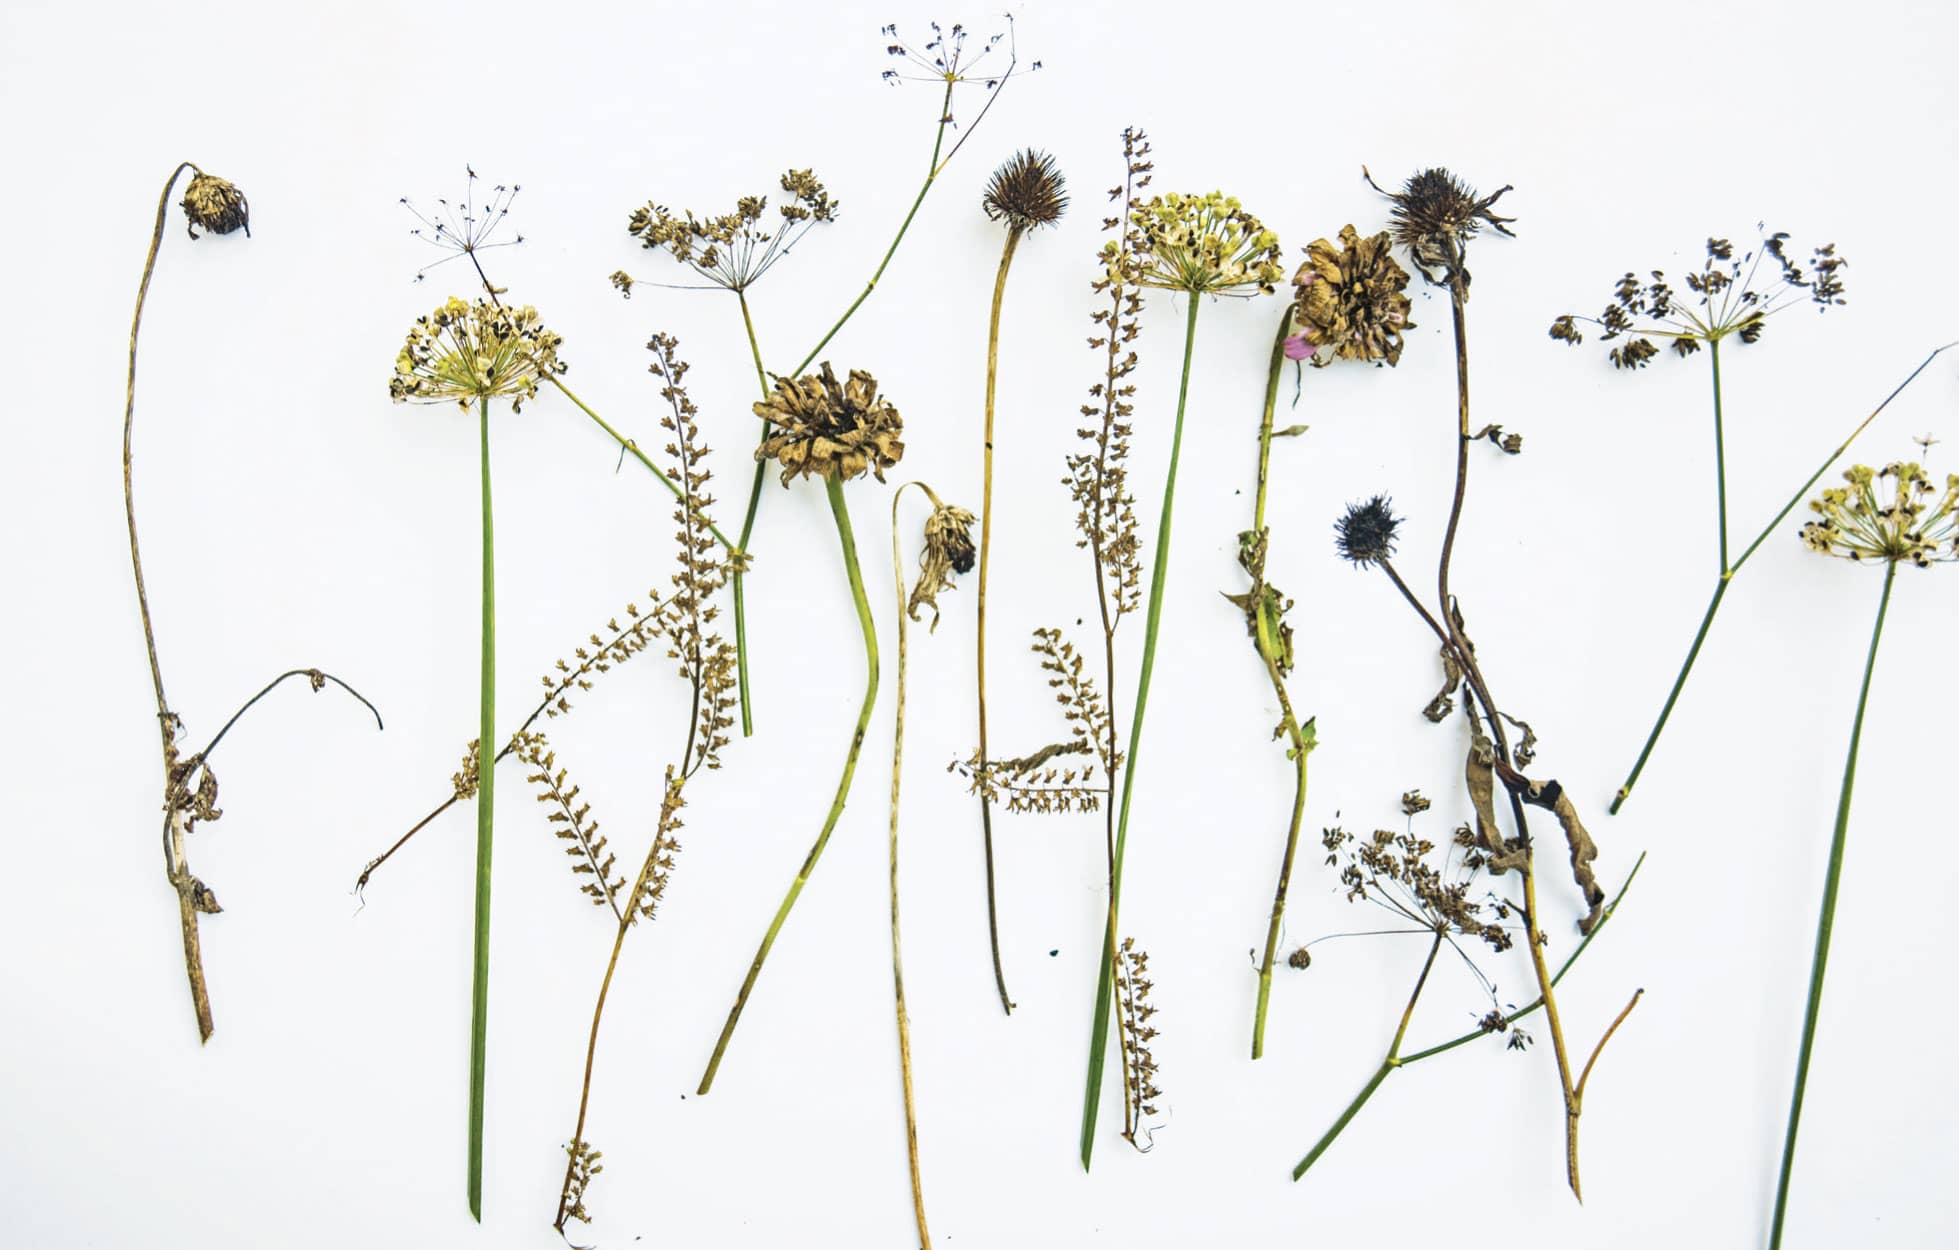
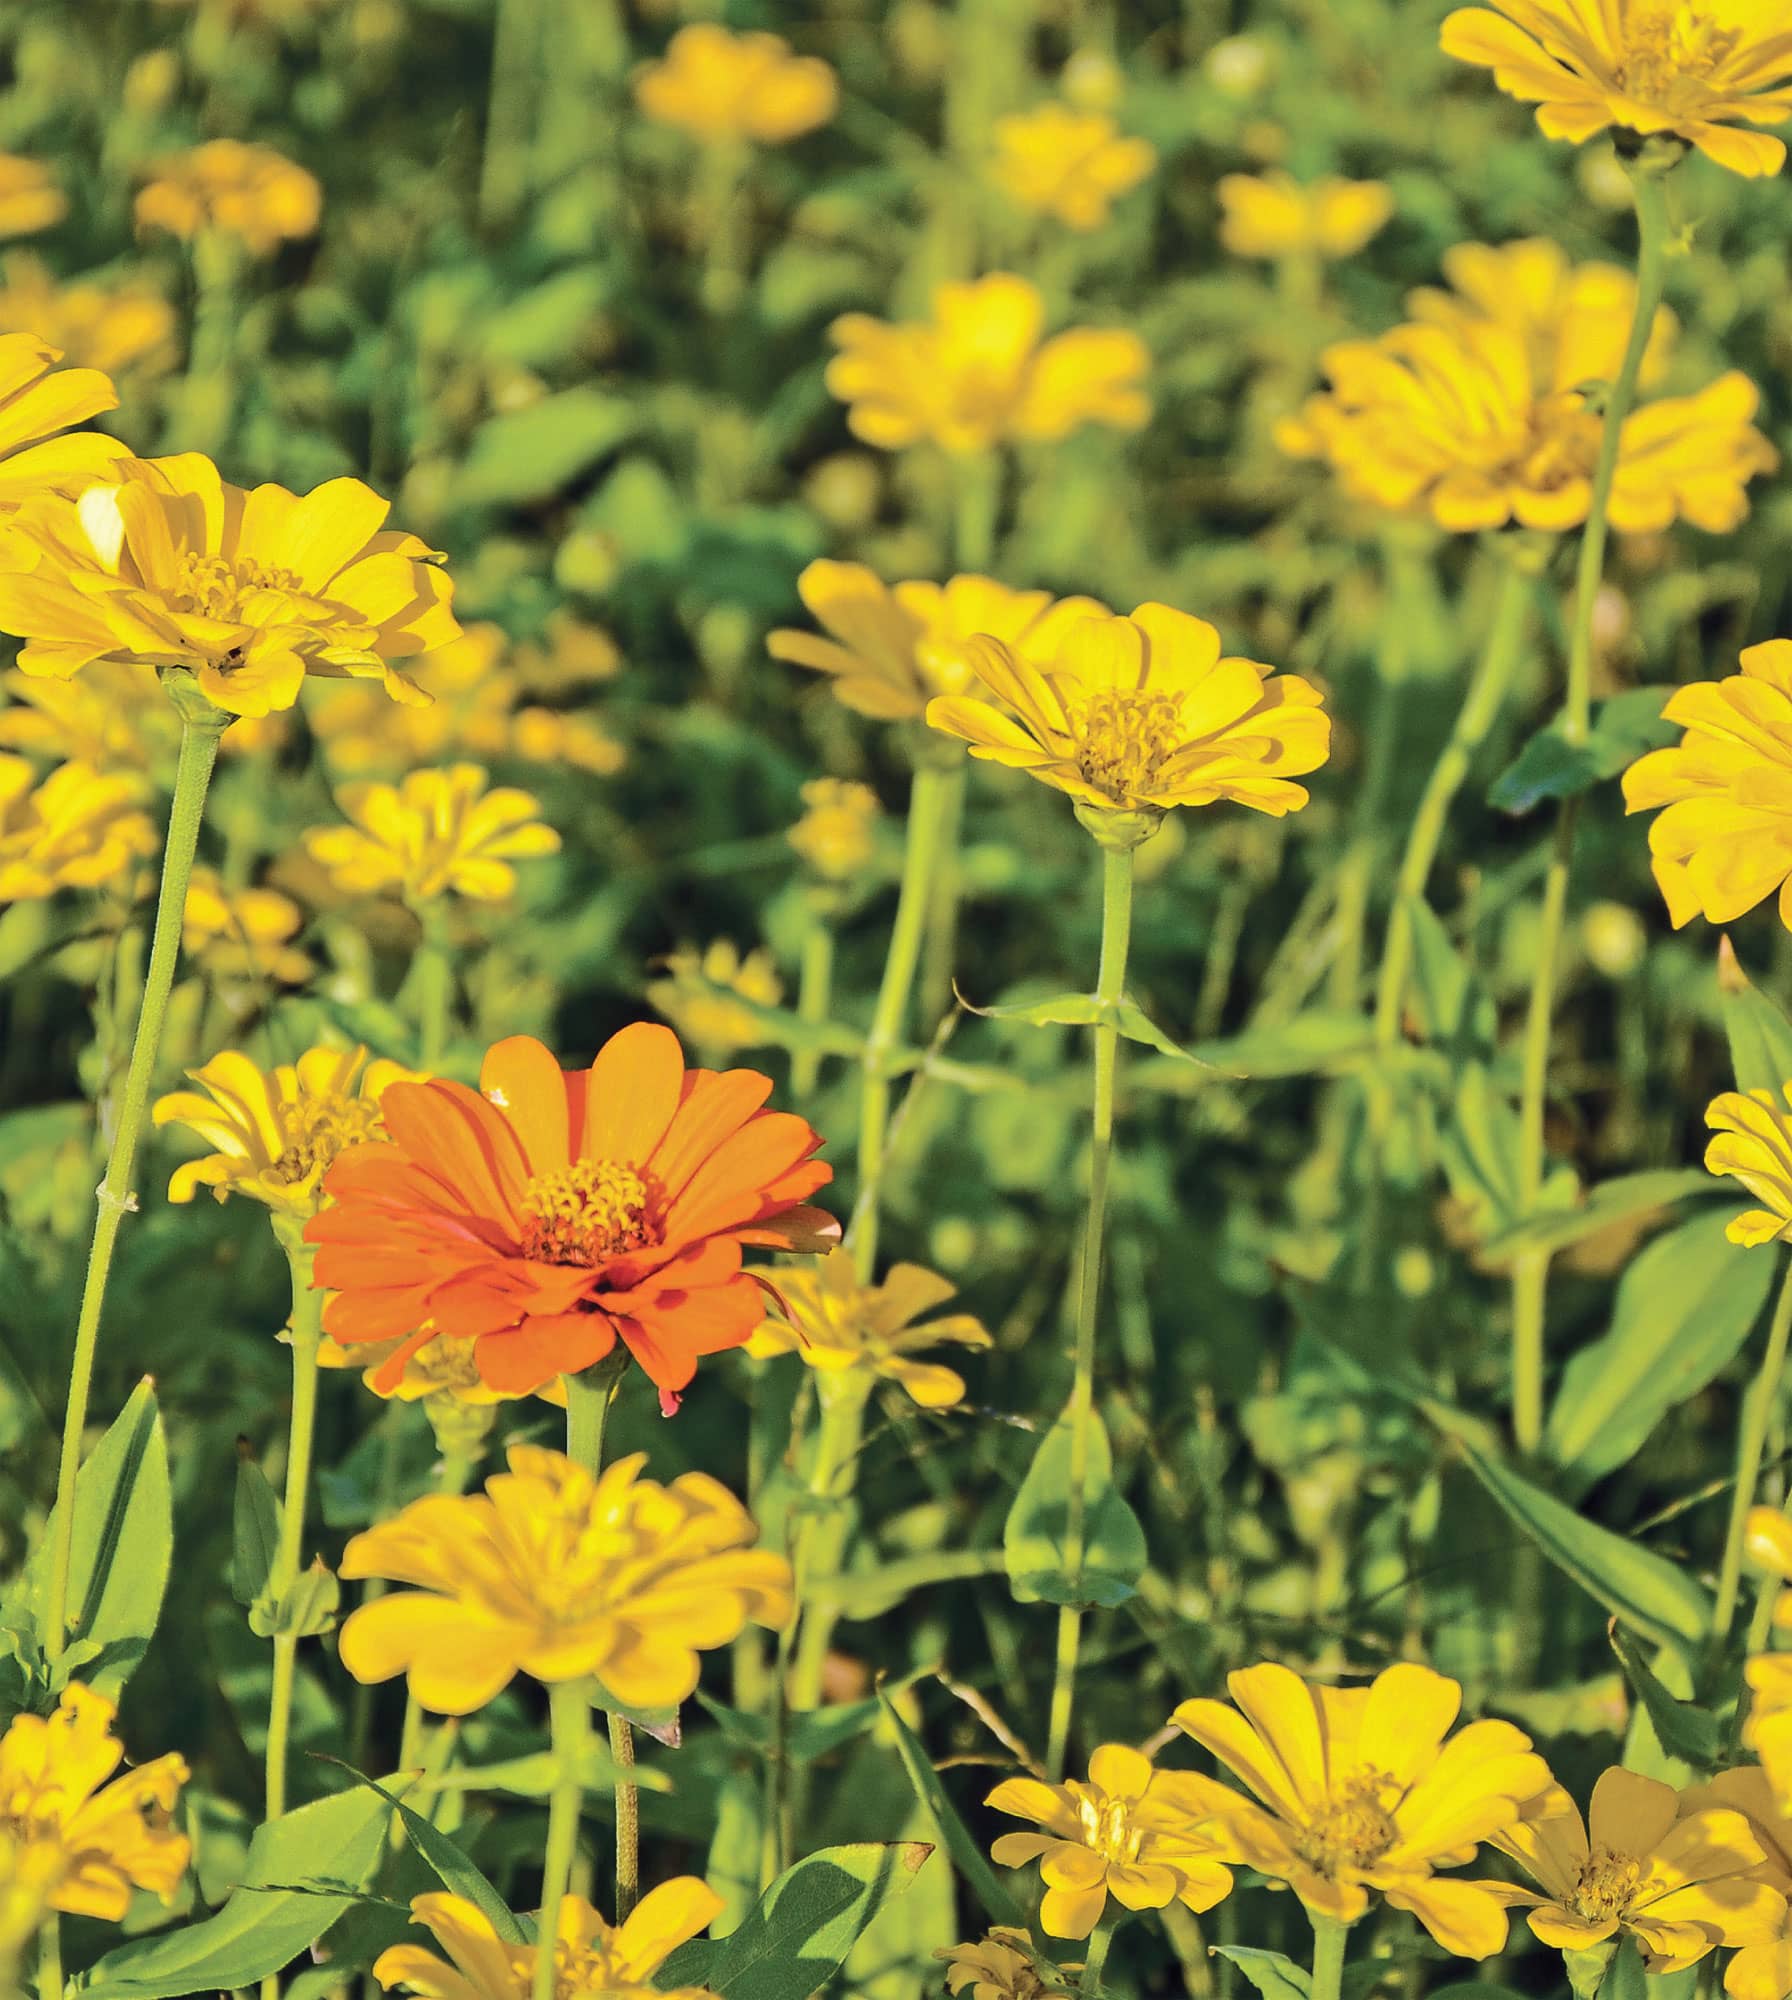
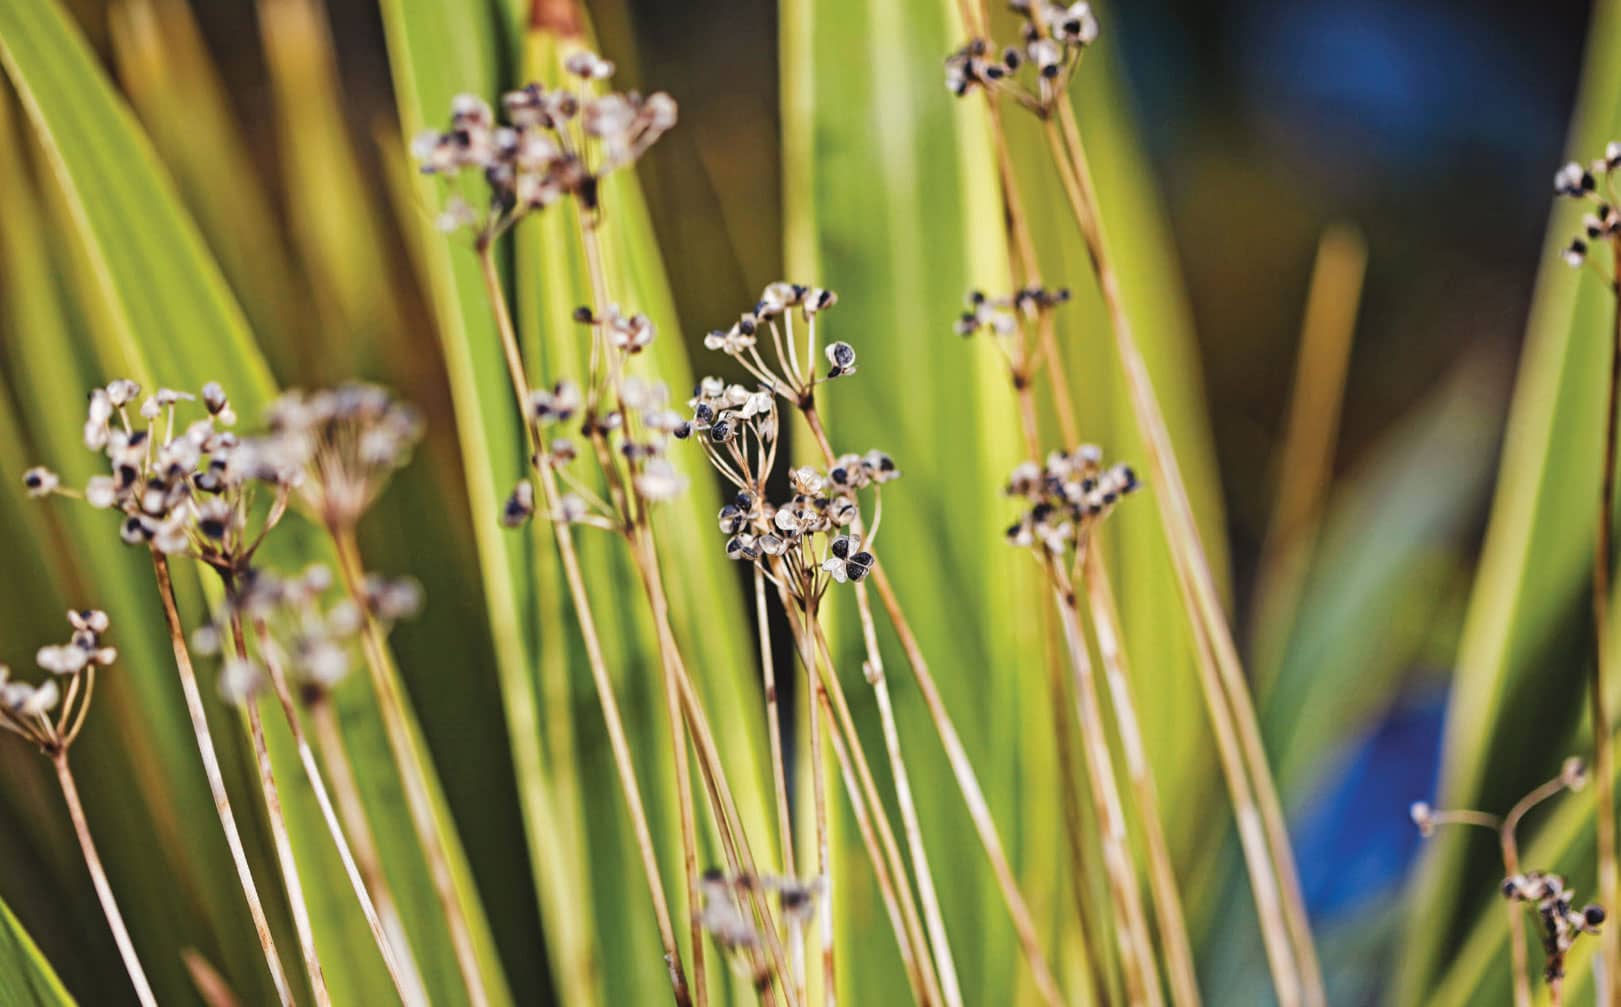
As seedheads dry in the garden, they add architectural interest to your landscape. Just make sure to harvest before the birds eat all your seeds.
Light: Continue to provide 12–16 hours of light for the seedlings. Make sure to raise the light fixture as the plants grow, keeping the light approximately 1 inch (3 cm) above the plants.
Airflow: Remove the humidity dome or plastic wrap after the seedlings emerge to promote good circulation.
Consistent temperature: Once the seedlings emerge, continue to monitor temperatures. Too cold, and you risk stunted plant growth. Too hot, and your seedlings might wilt and die.
Bully the Babies
It seems counterintuitive, but “roughing up” your seedlings will turn them into stronger plants. Now, I don’t mean to mistreat them. After all, they are still fragile. However, brushing your hands over them several times a day will strengthen the stems, preparing them to withstand wind when they’re planted in the garden. Some sources recommend an oscillating fan aimed at the seedlings. However, I find that trays dry out more quickly with a fan pointed at them, so I prefer the brushing technique.
Failure to germinate: If you’re not seeing any action, make sure your next planting starts with fresh, vigorous seeds. Test germination by placing a few seeds into a moistened, folded paper towel and enclose it in a plastic bag. Check every few days to see if the seeds sprout. If the seeds do not germinate, consider using new seeds. Also, follow the recommendations for seed starting in chapters 4 and 5, paying careful attention to challenging seeds that require stratification, scarification, or soaking. Use bottom heat for seeds that prefer it for germination.
Damping off: Nothing is more disheartening than watching your seeds germinate and begin to grow, only to find sudden seedling death. The culprit is most likely damping off, a fungal condition that kills plants at the base of the stem. Once damping off occurs, there’s nothing you can do to save the seedlings. However, you can avoid damping off by practicing good sanitization. Prior to planting, sterilize recycled containers in a solution of one-part bleach to nine-parts water, soaking the trays or containers to kill contaminants. Rinse containers with water after soaking. Use fresh seed-starting mix, not garden soil, which can harbor the fungus. Provide plenty of air circulation and avoid overwatering.
Discolored leaves or stems: Pale leaves or oddly colored seedling stems may indicate nutrient deficiency in a seedling. Use a good seed-starting mix that will support your plants until you transplant them. If you’re delayed in potting up your seedlings and they’re beginning to show stress, fertilize them with diluted fish emulsion or weak compost tea to provide a boost of nutrients. However, whitish leaves may indicate sunscald. Move the plants out of direct sunlight and back under grow lights until they’re properly acclimated to full, intense sunlight.
Leggy, weak seedlings: When seedlings stretch toward light, the plants suffer, forming weak stems. Place lights 1 inch above the plants, raising the lights as the plants grow. Make certain the seedlings receive 12–16 hours of light per day.
Mold: Too much watering is as bad as not enough. If the soil remains constantly wet, mold may develop on it. Water plants from the bottom and always check soil for moisture prior to watering.
Insects: Soil gnats don’t cause damage but they are a nuisance in seedling trays—and they typically occur when soil is too wet. Other pests, like aphids, weaken plants and may spread diseases among your seedlings. Check seedlings for any sign of pests, particularly investigating the undersides of leaves. A yellow sticky trap inserted in trays can help reduce pest infestation. If the problem is severe, diluted Neem oil is a good organic solution to control pests on seedlings.
Into the Garden
Once the true leaves appear, it’s time to kick your seedlings out of their current home and give them room to grow. What does that mean, exactly? Well, for seeds that you’ve grown indoors, it’s time to pot up.
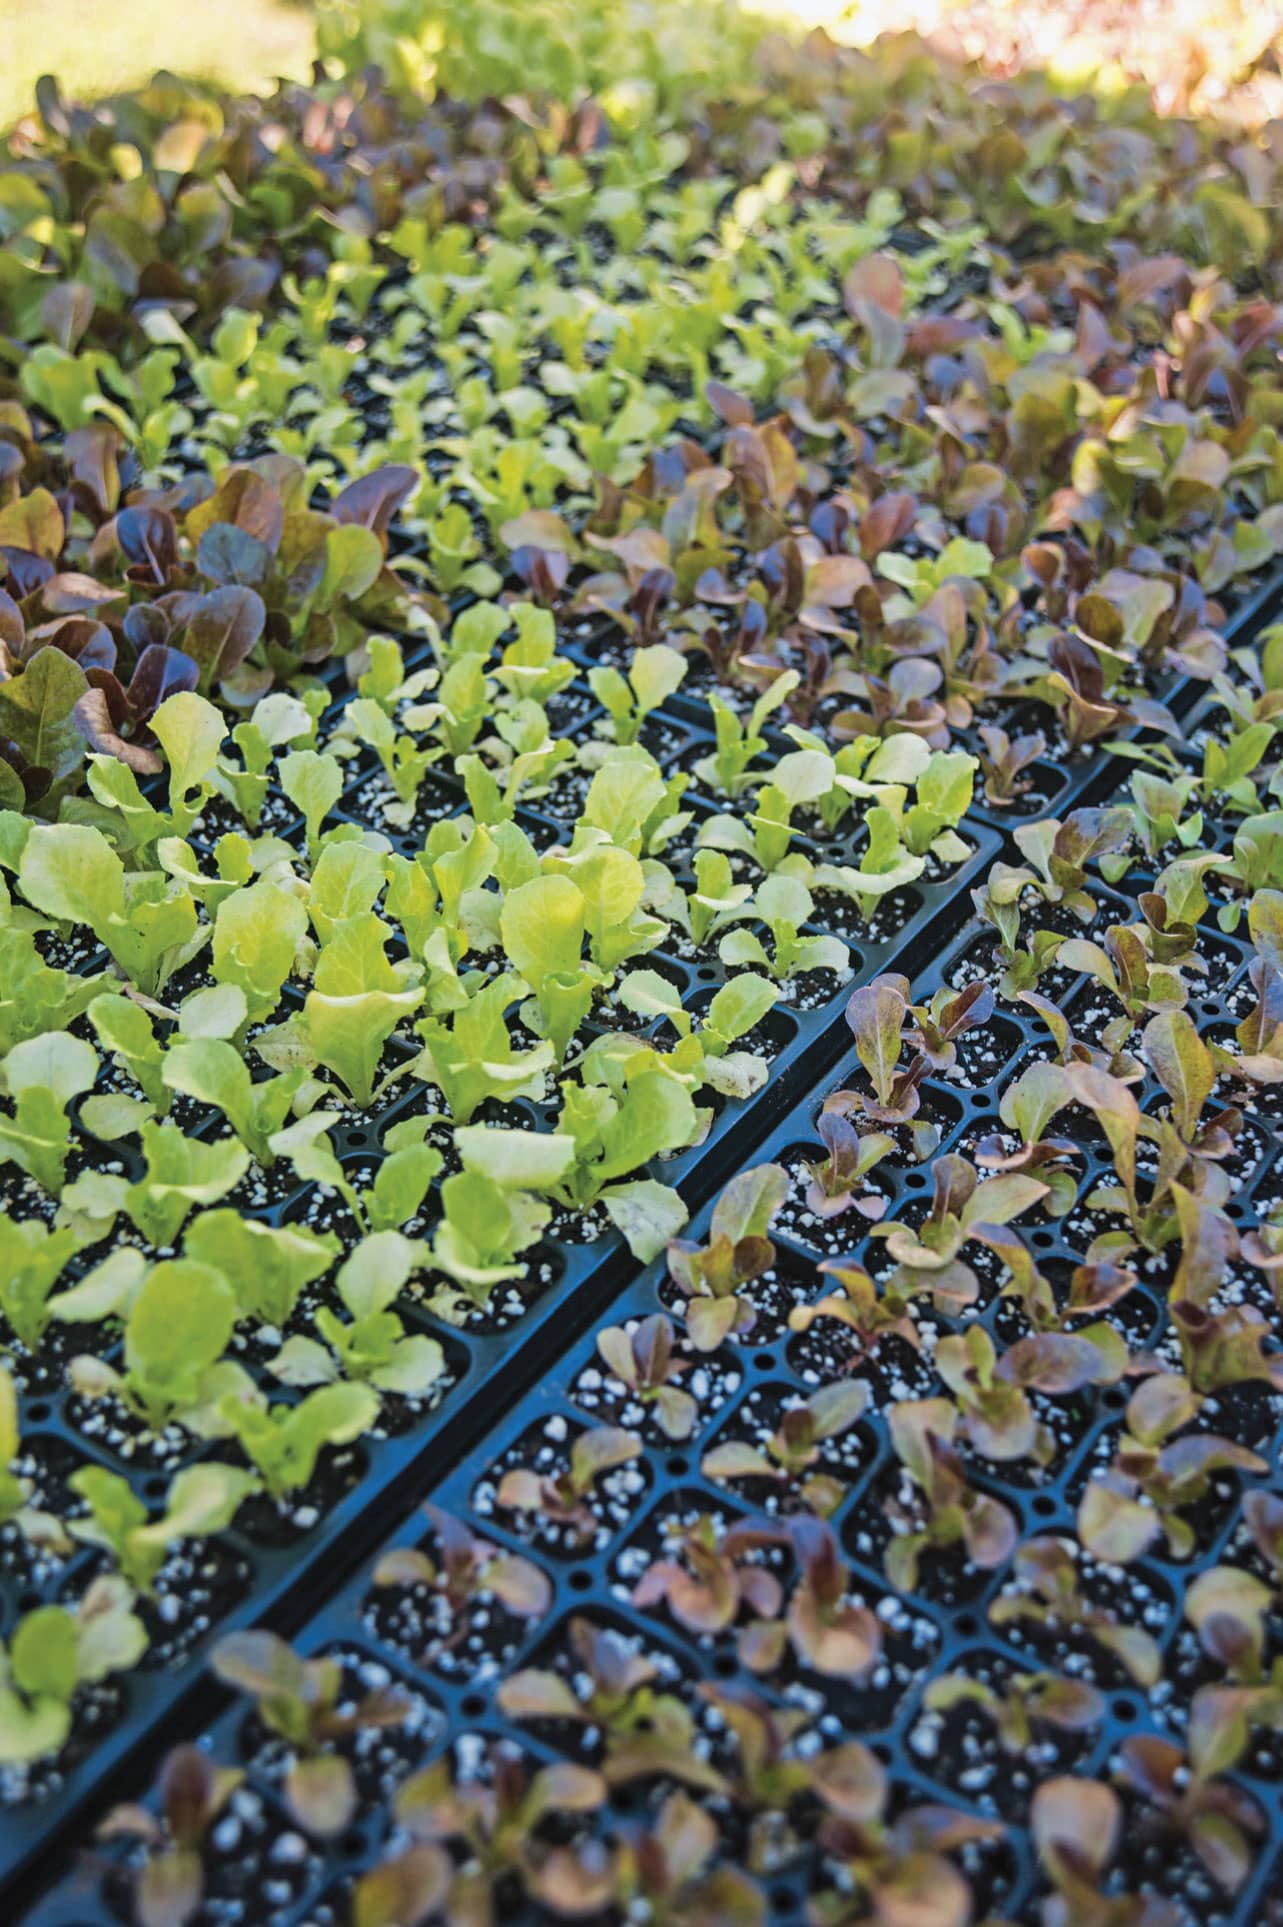
Keep seedlings under lights and well watered so they grow into healthy transplants.
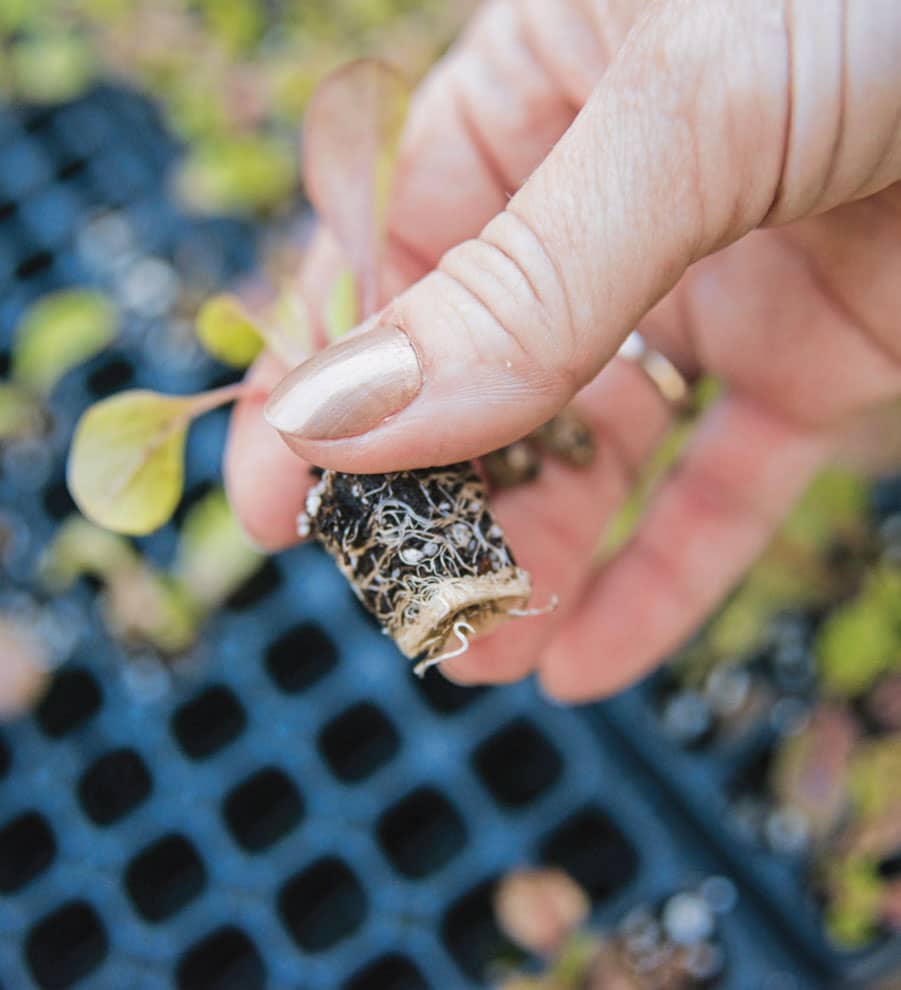
By pampering your seedlings, they’ll have strong, healthy roots, which will help them grow and produce well.
How to Pot Up Seedlings
• Prepare the containers and potting soil. If you plan to use recycled plant pots, make sure they’ve been sanitized. I use biodegradable containers, which can be planted straight into the garden.
• Fill the containers halfway with potting soil.
• Gently remove the seedlings from the tray. Use an old dinner fork to lift the seedling out of a propagation tray cell. If more than one seedling is growing per cell, separate the plants, gently teasing their roots apart.
• Insert the seedling into the container with potting soil. Add more soil to just below the first set of leaves.
• Firm the soil around the base of the plant’s stem and adjust the plant to straighten it.
• Place the plants into a tray and move tray under grow lights.
• Water the plants thoroughly but don’t overwater.
• Fertilize using diluted fish emulsion or compost tea once per week.
• Raise the grow lights as plants grow.
• Monitor water, light, and pests.
Potting Soil
Potting soil is my biggest expense when I grow seedlings. Because I grow for market, I’m not willing to take a chance on killing my precious, finicky plants by potting them up into garden soil that’s potentially laden with fungus or bacteria that might kill them. I’m also too busy in spring to heat-treat garden soil to kill contaminants, plus heat treatment also kills good organisms in the soil. So, I buy many enormous bags of organic commercial potting soil.
However, as the plants grow and strengthen, I make sure the soil in the garden offers them the perfect environment to thrive. When creating new raised beds, I use the following soil formula to fill them, which is also a mix that can be used when potting up. It lessens the expense of buying multiple bags of pricey potting soil.
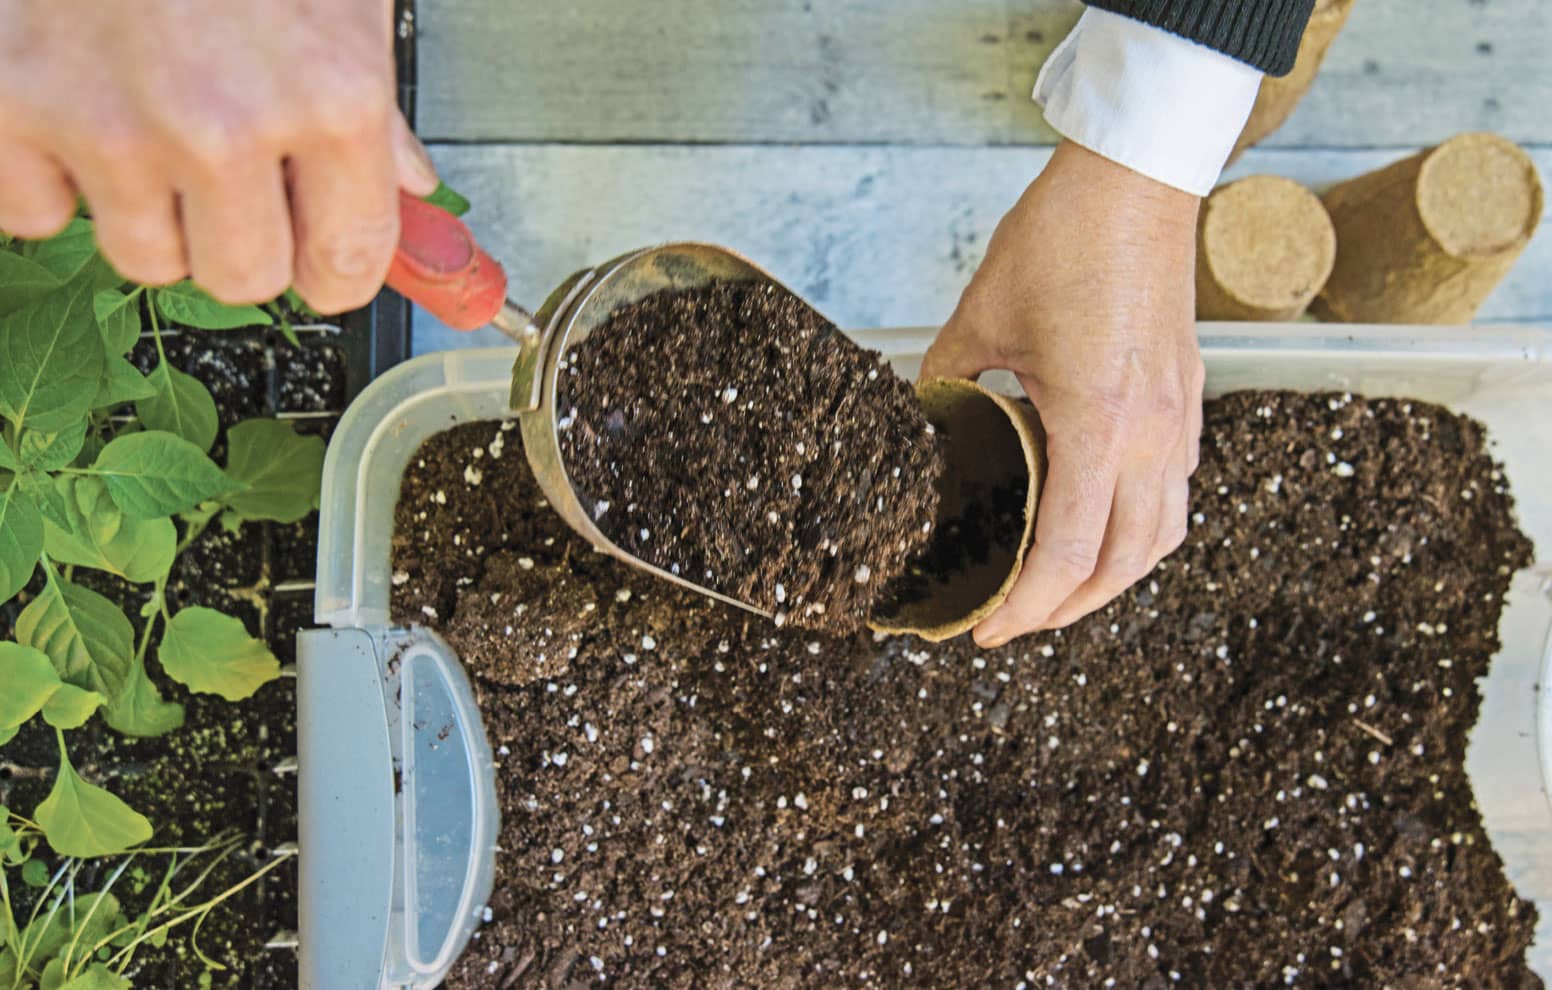
Fill biodegradable pots partially with soil, then place the seedling and continue adding soil until its roots are covered and the plant is firmly situated in its new home.
COMBINE EQUAL PARTS:
• Compost, aged and screened: Make sure it’s processed well and has reached the proper temperature to kill weed seeds and diseases. I like to blend well-rotted manure, leaf mold, and aged kitchen compost, making sure it’s all screened very finely. (Remember, depending on temperature and components, a compost pile takes months to break down completely. Plan ahead.)
• Bagged garden soil
• Vermiculite: This is an important ingredient to improve soil aeration and retain water.
Mix the ingredients well in a container, ensuring equal distribution. Add water to moisten the soil, and you’re ready to pot up! (When I’m preparing the mix for raised beds, I add the ingredients in layers in the bed, then mix them well with a rake or shovel to blend them.)
Prepping the Garden
Before you begin sowing seeds or planting transplants into your garden, take a survey of the area where you intend to plant. Much like a new home, it’s easier to tackle renovations prior to moving into the garden.
Check your light: If you’re planting food crops, you’ll want an area with good sunlight, preferably 8 hours of full sun daily. Are there any limbs that need to be trimmed to provide more sun? Do you need to build a raised bed in a different location? The proper location is key for growing success, and it varies depending on your plants’ needs.
Assess the soil: A soil test is the single best investment I recommend. Depending on what you plan to grow, a soil analysis tells you a soil’s pH, the nutrients that are lacking (if any), as well as how to balance the soil so your plants will thrive. Soil test kits are available online and at garden centers. However, many university cooperative extension programs offer soil testing for a small fee. For the price of a cup of fancy coffee, you can receive a full report on your soil that tells how you need to amend it to grow your favorite plants.
Remove any weeds from the beds: Weeds compete with your seedlings, siphoning off water and nutrients. Clean the beds prior to planting.
Clear a flat spot in the garden to harden off seedlings: You’ll be transitioning seedlings from shade to partial sun to full sun for about two weeks. Make sure you have access to a water source, both near the seedlings and in the garden for the beds.
Clean and repair your tools: Sterilize clippers and trowels to ensure you don’t pass along any diseases. Also repair leaky hoses or irrigation systems. Replace any broken boards for raised beds or damaged plant supports in the garden as well. (I also use an alcohol wipe to sterilize nonporous supports.)
Remove leaves and debris: If you didn’t clean up the garden beds in the fall, it’s time, particularly if you’re growing food crops. Remove hiding places that shelter voles or pest insects. Also remove any rocks that impede planting.
Add screened compost: After checking my soil, I almost always add finished, screened compost to my raised beds. Rake it in well, breaking up any soil clumps, and smooth the bed.
As your plants grow and thrive in your garden, continue to monitor them for water and pest issues. Add an organic fertilizer if needed for plants that are heavy feeders, like tomatoes. Some plants require staking as they grow.
Remember: the more time you spend in the garden, the more likely you’ll catch problems early, which can save your harvest. Make a habit of walking through the garden daily, both for pleasure and to check your plants’ progress.
Before you take your trays to the garden to plant those precious green babies you’ve nurtured for months, you need to gently introduce them to their new environment. After all, those tender plants aren’t accustomed to bright sunlight, wind, or chilly evenings. Spend a few weeks preparing the transplants for their new home so they will thrive.
First, find a level spot in your garden that’s protected from wind. Place your trays there for an hour to begin introducing the plants to the great outdoors, extending their outside time by an hour each day. If the area is partially sunny, perfect. After a few days, allow the plants more sunlight. Move the plants so they receive an hour or two of full sun for few days, increasing the exposure a bit each day. Be careful to avoid sunscald—take it slowly. If the weather is cold, move the trays inside at night.
Monitor the plants’ water needs. Plants will be thirsty in this new environment of wind and sun. Don’t let them dry out. Conversely, if they’ve withstood a rainstorm, make certain to pour standing water out of the trays.
Continue exposing the plants to more sun each day, until they’re finally in full sun for 6–8 hours. If the conditions are right—temperatures are appropriate for the crops you’re planting and the danger of frost has passed for tender plants—you can now transition the plants into their final garden home.
Ensuring Pure Seeds
As a slightly obsessive seed lover, I’ve been known to fill my pockets with seeds from my garden, from friends’ gardens, and from nature outings. (Don’t collect seeds from botanical gardens without permission though. The staff horticulturist may have plans for those seeds.)
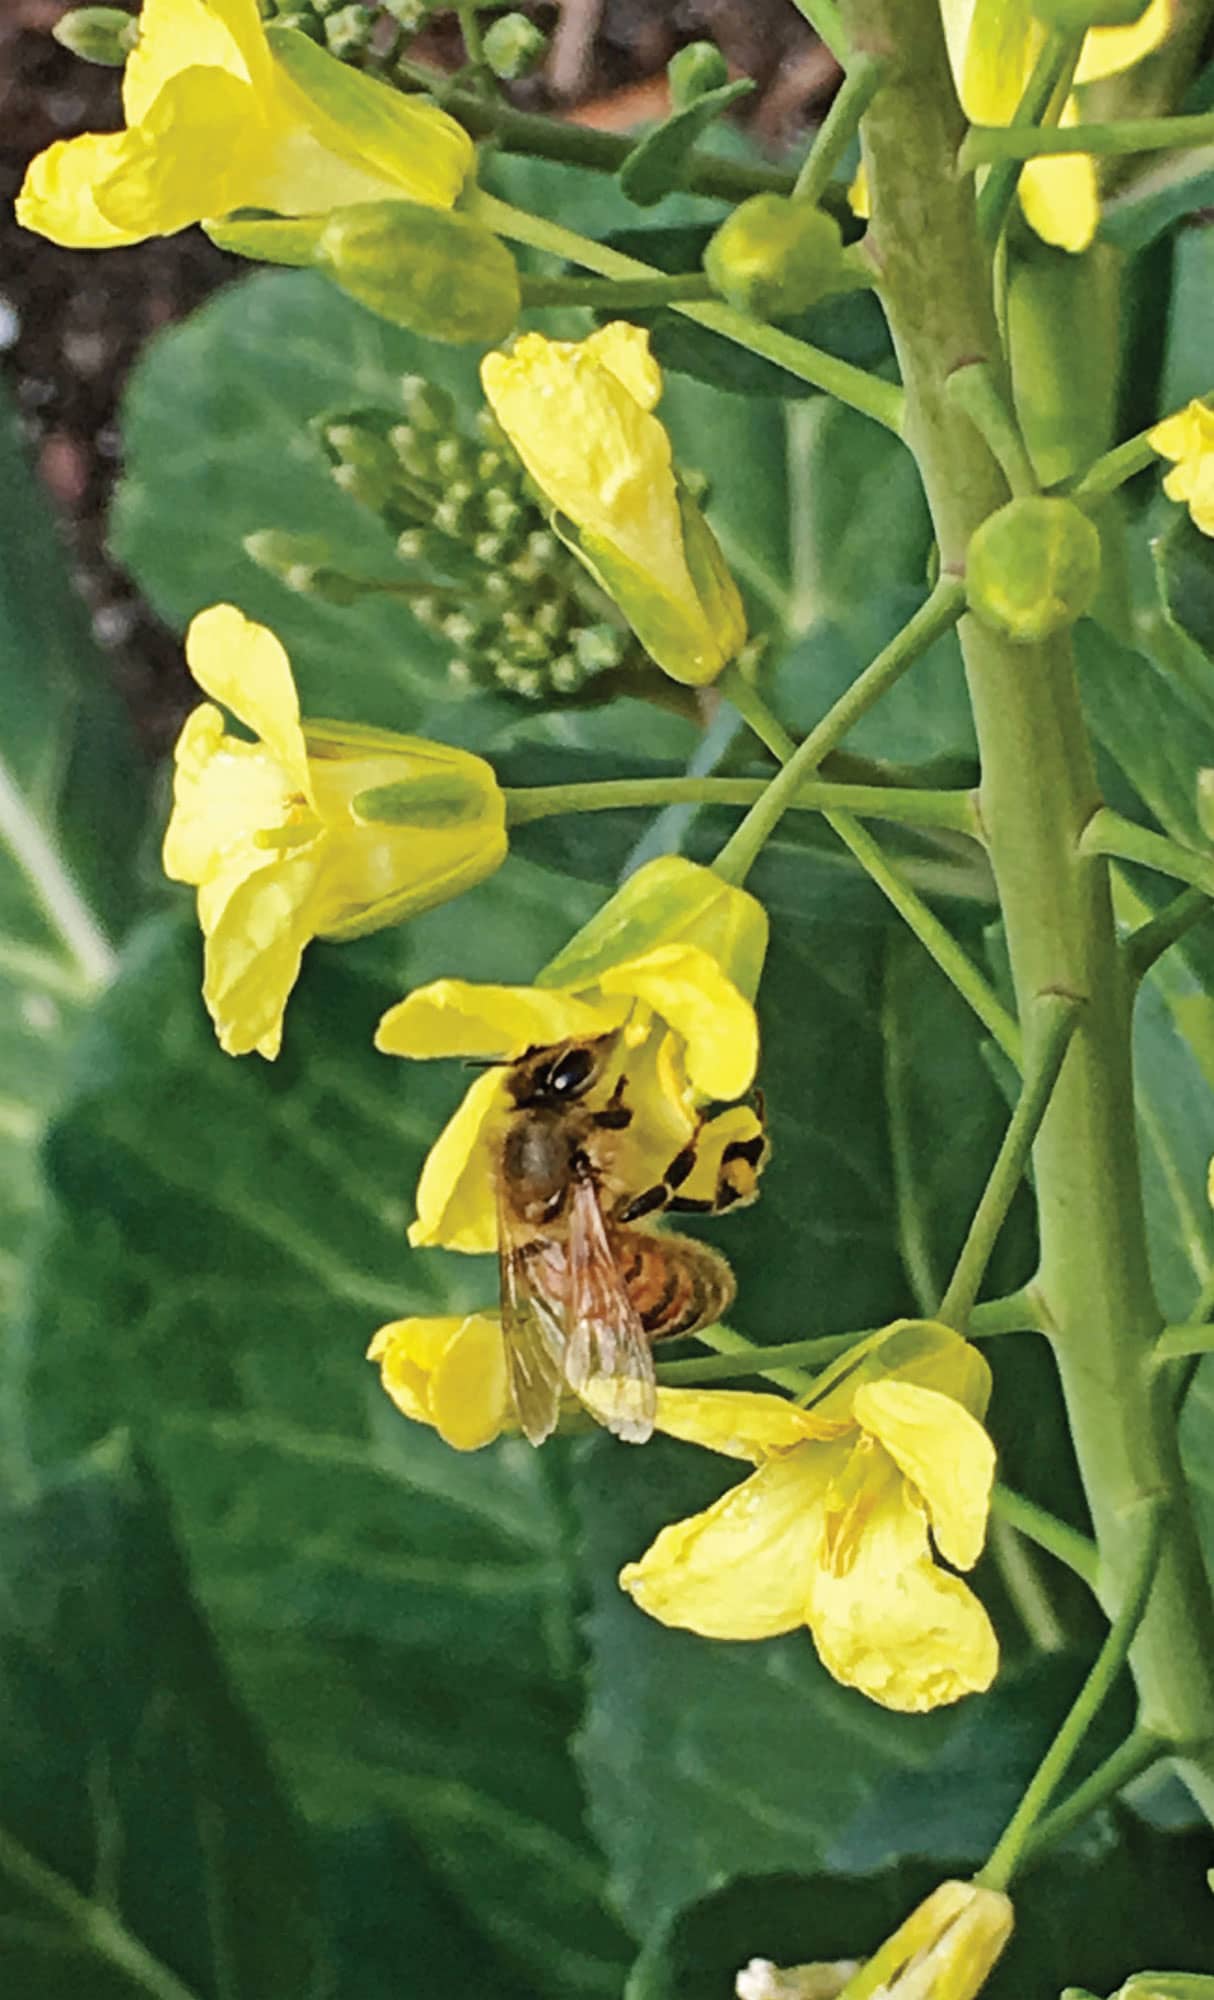
Random seed collecting is fun but not exacting. If you’re looking to maintain varietal purity, it’s important to plan ahead in your garden and follow fairly simple techniques to ensure the seeds you collect are true to the parent plant. After all, if you’ve fallen in love with ‘Chinese 5-Color’ peppers, you’ll want to ensure that the seeds you save from them are indeed ‘Chinese 5-Color’ peppers, not a new hybrid created by rogue pollen introduced by a busy bee. (Remember: save seeds from open-pollinated plants, not hybrids, as discussed in chapter 1.)
Note that the seed-saving techniques I’m sharing in this book are intended for the home gardener. Commercial seed production occurs on a much larger scale and with much greater acreage than most home gardeners possess. Also, commercial seed production must include many, many factors, such as promoting genetic diversity, increasing population size, eliminating plants with undesirable characteristics . . . all things that help perpetuate the specific plant varieties and ensure their future availability. While these factors are important and home gardeners need to adopt some of the ideas, saving seeds in the home garden doesn’t need to be as complicated as producing seeds for commercial sale.
Remember: You don’t need to worry about cross-pollination with some plants, but with others it’s important to avoid cross-pollination. For each plant entry in chapters 4 and 5, you’ll find specific seed-saving preparation and techniques listed in the details. The primary methods include isolation distance and timing, bagging, and caging. Also, remember that you’ll need to plant several—even a dozen or more—of the same variety to maintain genetic diversity and avoid inbreeding depression.
It’s important to avoid cross-pollination when saving seeds, or you might experience an unpleasant surprise in next year’s garden due to impure seeds.
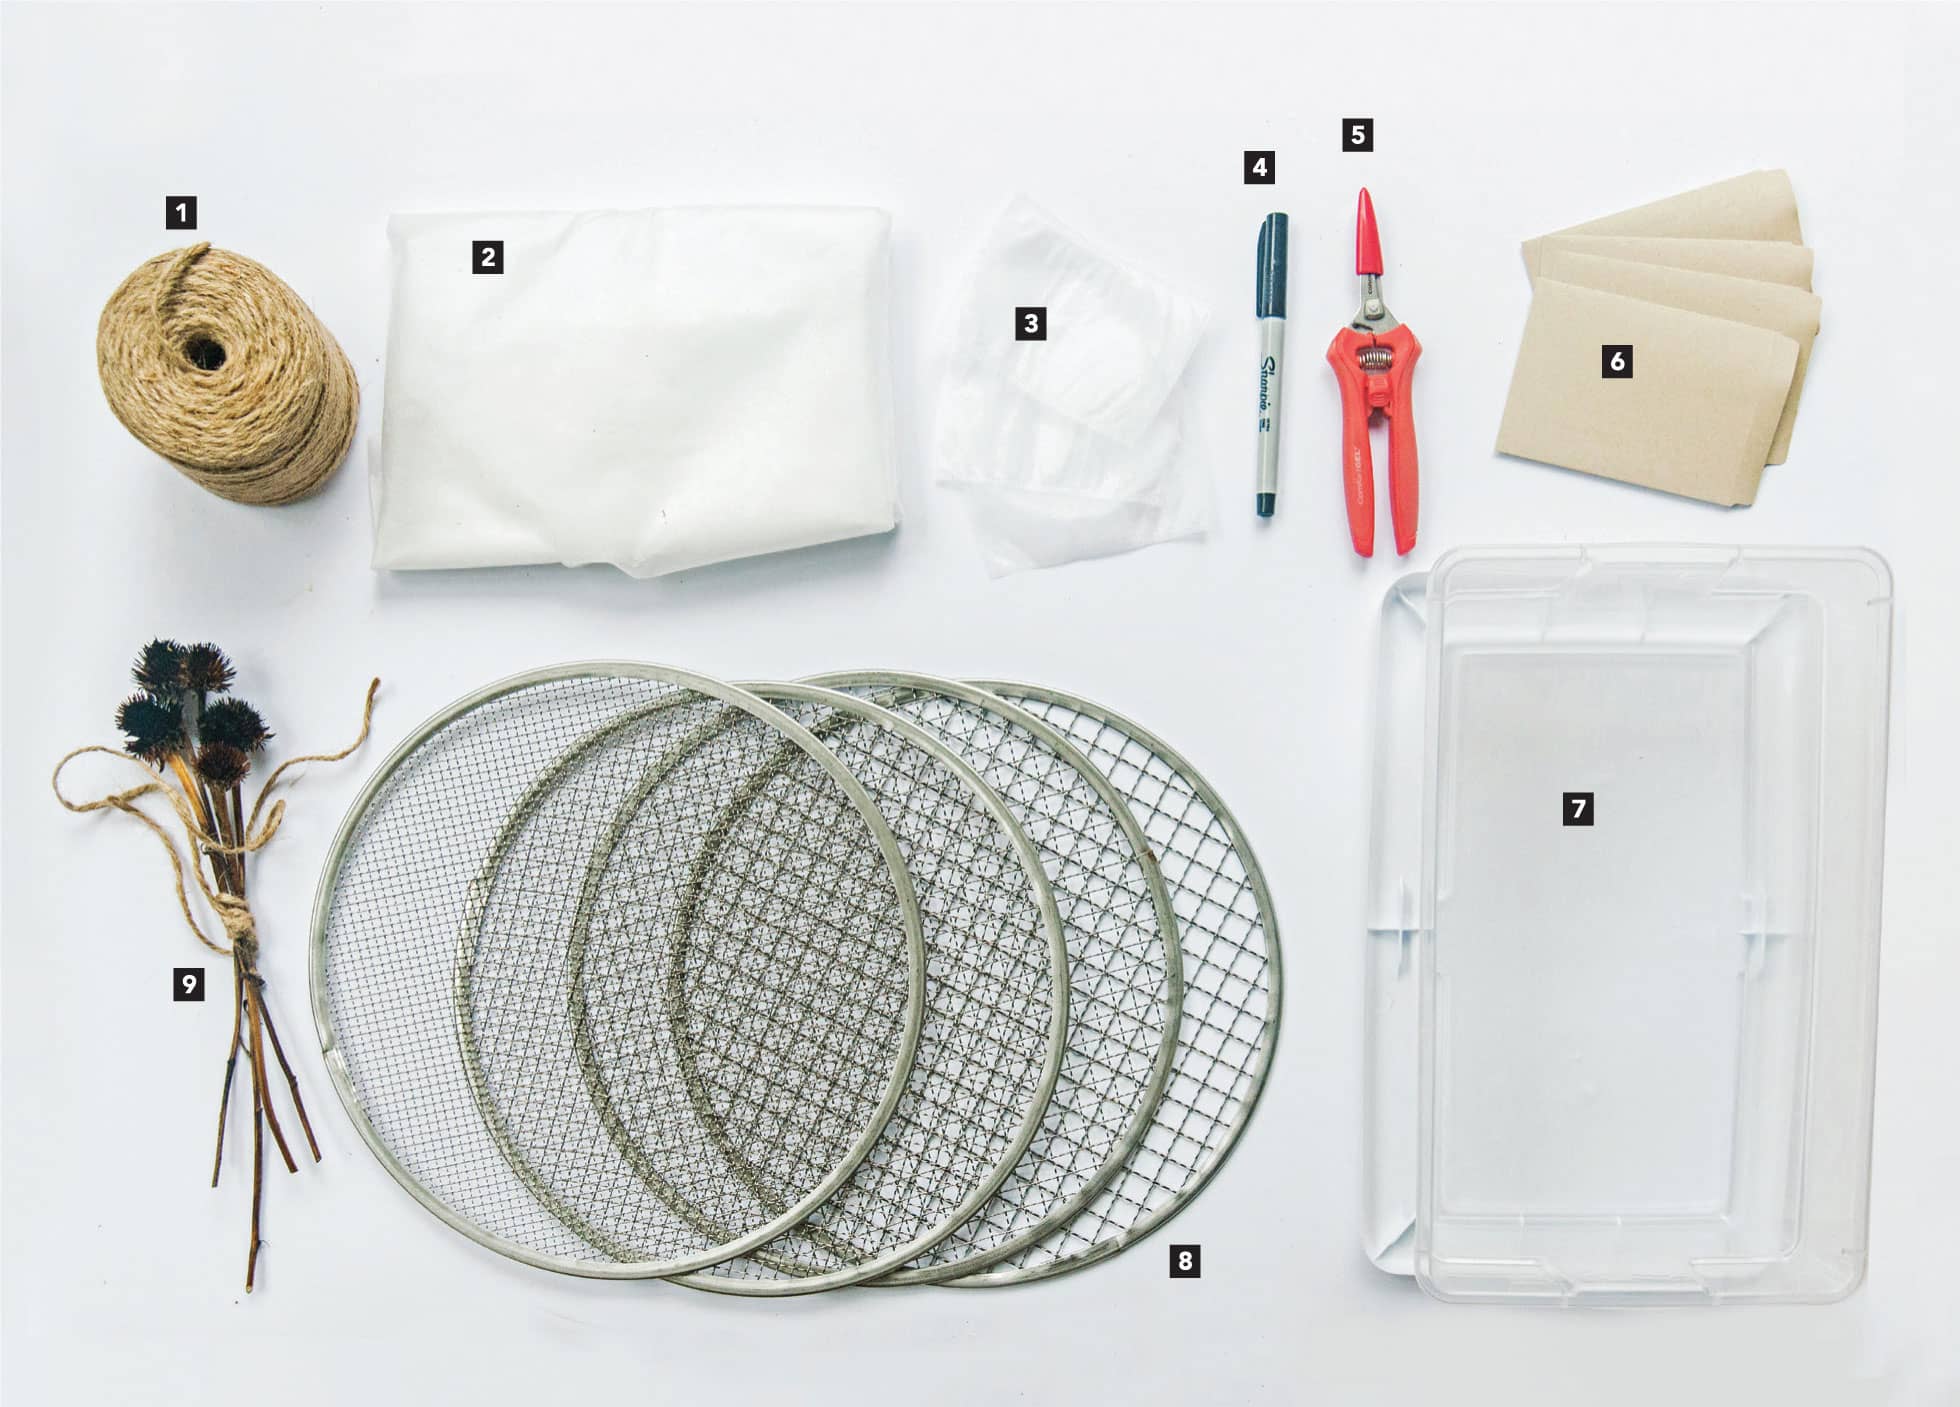
Seed-saving supplies
1 twine
2 row cover cloth
3 blossom bag
4 marker
5 snips
6 envelopes
7 storage container
8 seed cleaning screens
9 Echinacea seedheads
Distance and Time Isolation
Isolation refers to the practice of growing crops away from any other variety that might lead to cross-pollination. There are three main ways to isolate plants and distance isolation is the most challenging for home gardeners.
There are several reasons for this. To start, most distance isolation recommendations range from 800 feet to several miles, a bit much for most home gardeners. While barriers, like a tall hedge or wall surrounding the garden, can lessen the distance isolation requirements, structural barriers don’t provide absolute isolation to ensure pure seeds. Also, unless you form an arrangement with your neighbors to grow only the same varieties that are in your garden, you risk cross-pollination. Even if you have the space, insects and wind are also a factor. It’s nearly impossible to control the insects that visit your garden. Bees travel miles and wind is unpredictable, reaching through cracks and across distances to cross-pollinate wind-pollinated plants.
Time isolation is better for home gardeners but still a bit cumbersome. The method is just what it sounds like: If you have crops that you’d like to grow together but that may cross-pollinate, like lettuce, simply select ones with different bloom times. Check the maturity dates of the crops before you begin and plan accordingly. Plant the earliest-maturing crop first. As it flowers, sow seeds for the second variety. The first variety should set its seeds prior to the second crop beginning to flower, avoiding cross-pollination. (If any flowers remain on the first crop after seed setting, pinch off the blooms before the second crop can flower.)
Mechanical Isolation Such as Bagging and Caging
Now we come to the third option, mechanical isolation. In this case I’ve saved the best for last as mechanical isolation is the technique I recommend for most home gardeners. It relies on two simple techniques: bagging and caging.
Bagging refers to placing a bag or cloth over a plant’s flowers to prevent cross-pollination by insects or wind. (Even self-pollinating plants risk cross-pollination from insects.) While you can bag an entire plant, it’s inconvenient for tall plants and simpler to focus on the flowers. Bags are constructed from lightweight, light-colored fabric, like spun polyester cloth or tulle. Small organza gift bags found in dollar stores make perfect blossom bags. If the bag doesn’t have a drawstring, a twist tie works well to secure it tightly to a plant’s stem. Do not, however, use clear plastic bags, as they lack proper ventilation and may cause the plants to overheat in direct sun. Bagging is best for self-pollinated plants, but you can also hand-pollinate the flowers that typically require assistance of insects or wind. Here’s how:
1 Start by placing the bag over the plant’s flower bud before it begins to open. Secure the bag tightly around the stem so that insects can’t enter. If you’re bagging a cluster of flowers and one has already opened, pinch off that bloom to avoid any potential of prior cross-contamination.
2 If the plant is not self-fertile, remove the bag briefly when the flowers open and hand-pollinate the blooms. Do not allow insects onto the flowers. Replace the bag immediately.
3 Leave the bag in place until the plant forms an immature fruit or seed. Remove the bag, as no chance of cross-pollination remains.
4 Mark the fruit or seedpod with a ribbon or tape to indicate that it’s to harvest for seed saving upon maturity.
5 Allow the fruit to grow unimpeded.
While bagging is a good option for many plants, it doesn’t protect all plants, particularly those with extremely fine-grained pollen. Check the notes in chapters 4 and 5 to determine which plants benefit from bagging.
Caging is similar to bagging but on a larger scale. While both techniques protect plants from cross-pollination, bagging focuses on individual or smaller clusters of blooms for seed saving, while caging can protect an entire plant or even groups of the same variety of plants. Several options work well for caging:
• Use the same lightweight fabric, like row cover cloth or tulle, to cover the entire plant, securing it at the base of the plant.
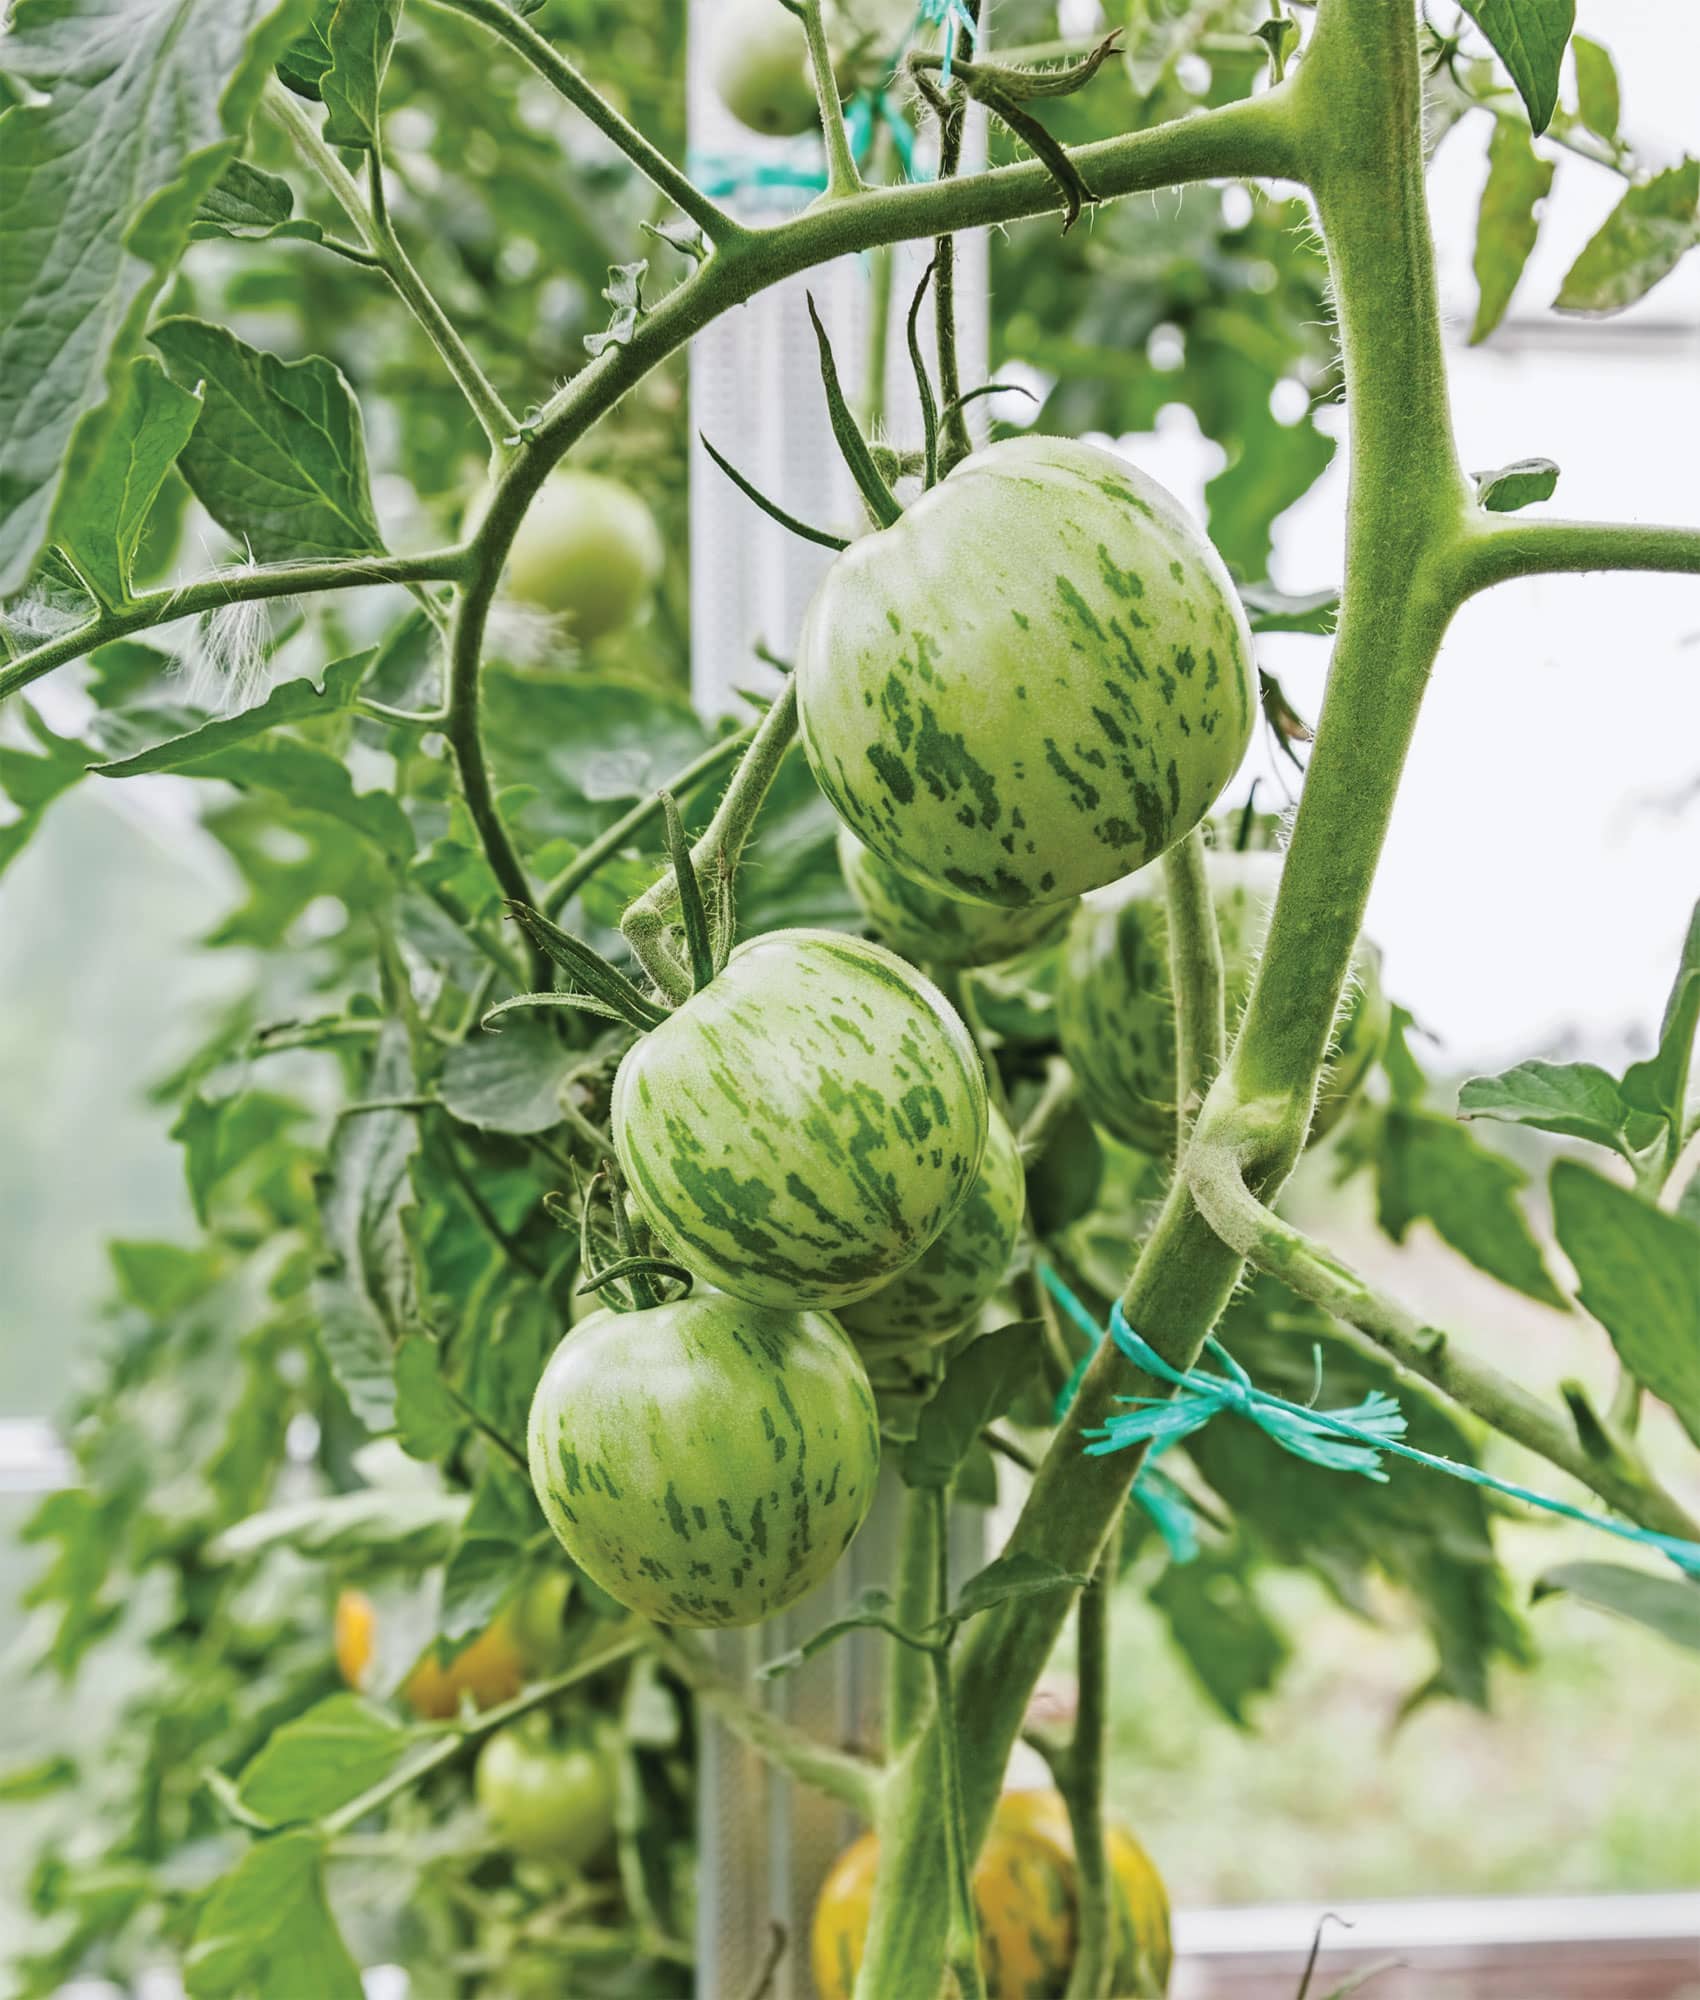
• Cover a tomato cage with the fabric, securing the fabric to the cage and also to the base of the plant.
• Build a cage out of wood and staple a fine-mesh screen or row cover fabric to cover the frame. Constructing a cage allows you to customize it to accommodate your garden’s specific size needs.
While the cage keeps out unwanted pollen, it also bans pollinators. For crops that require the assistance of pollinators to produce fruit, you have two options: introduce pollinators into cages or hand-pollinate plants.
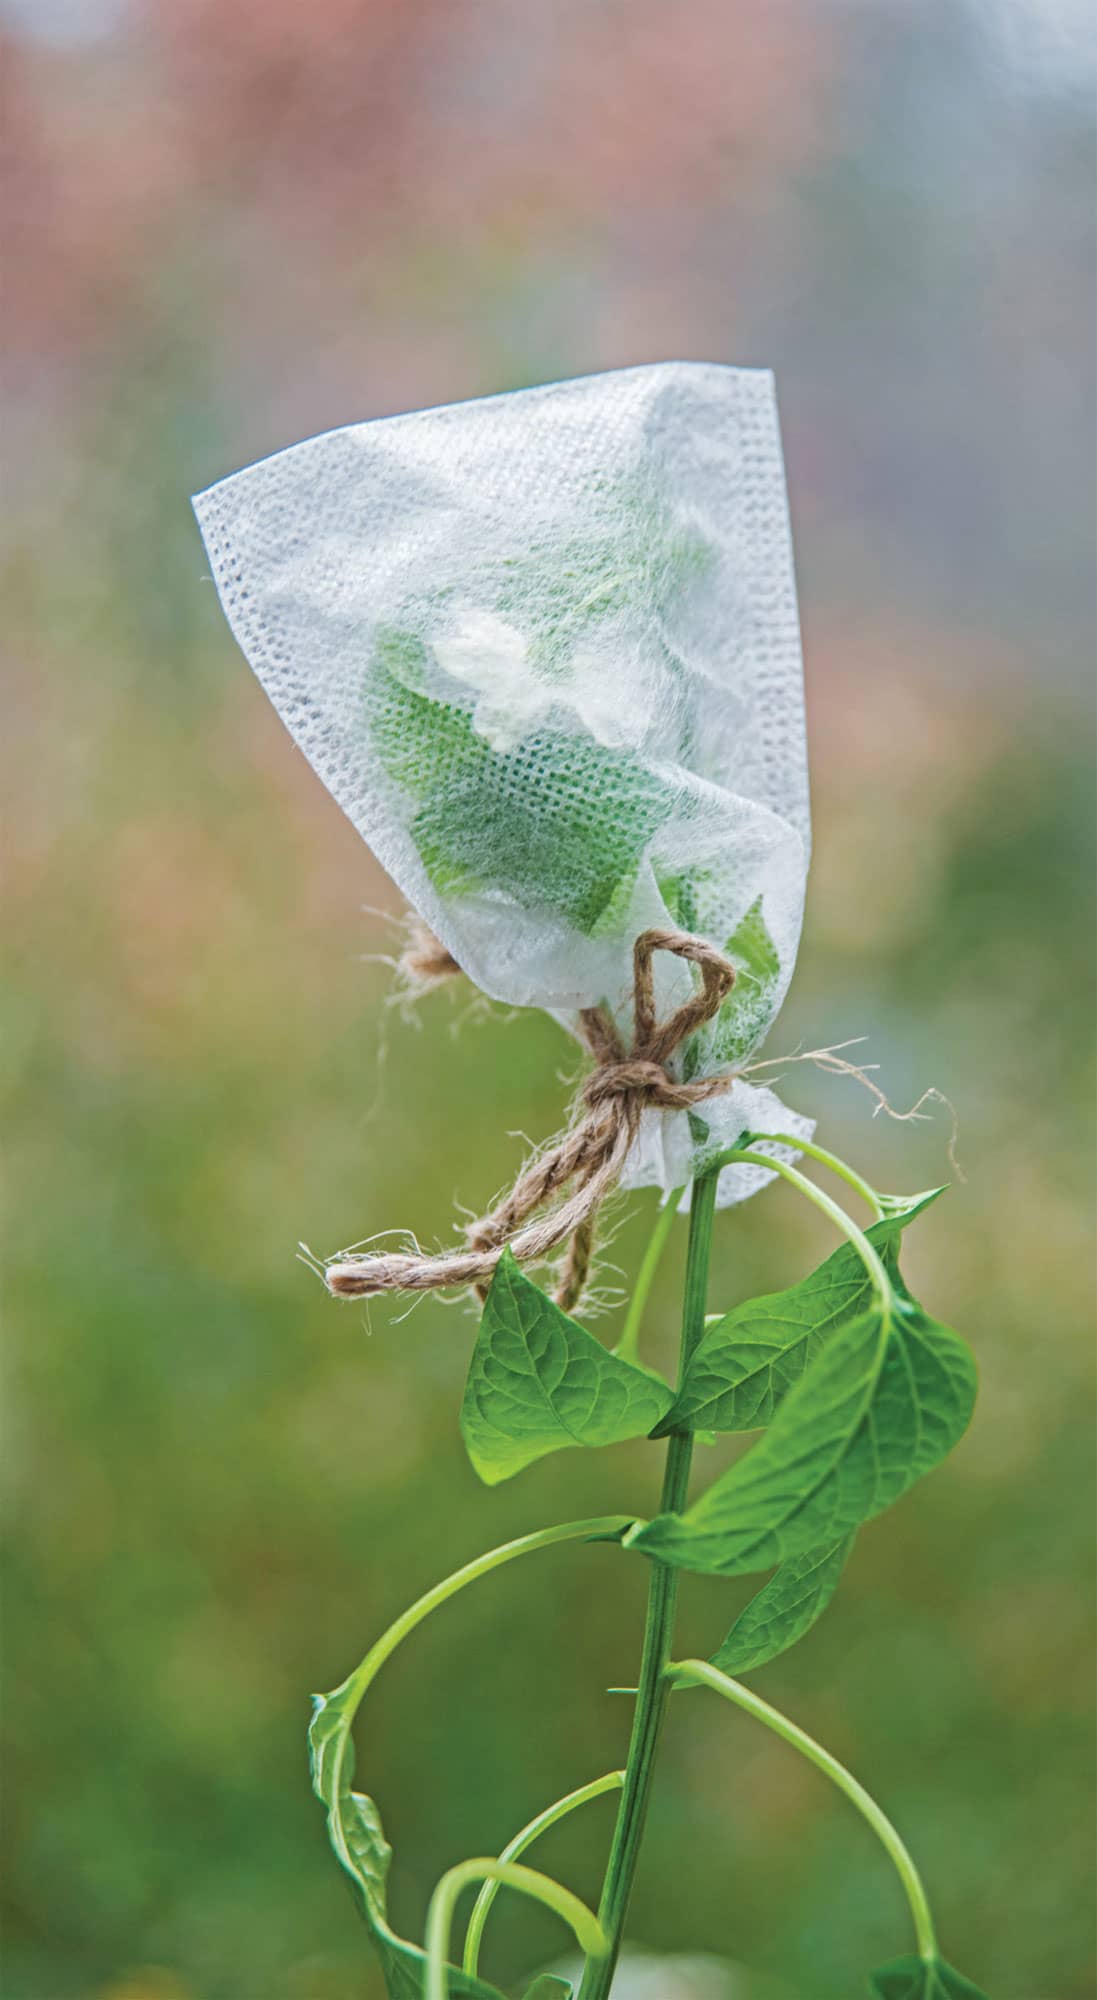
Bagging blooms to prevent cross-pollination is one of the easiest ways for home gardeners to ensure pure seeds.
Introducing pollinators to your cage can be a bit tricky. Attracting bees to a plate of honey is the easy part. Moving them into the caged setting isn’t too challenging. (If you’re allergic to bees, enlist someone to handle this step for you.) The bees will initially attempt to escape the cage, but eventually they should settle in and begin enjoying the blooms. Once immature fruit or seeds form on the plants, release the bees.
For many gardeners, myself included, hand-pollinating caged plants presents a better option. Hand-pollination involves collecting pollen from male flowers and transferring it onto stigmas of female flowers to produce fruit and seeds that remain true to type. An inexpensive artist’s paintbrush is a perfect tool to pollinate many plants, but hand-pollination techniques vary by plant. Check chapters 4 and 5 for specific plant requirements. Remember: make certain to replace the cage or bag after hand-pollinating, leaving it in place until fruit or seeds develop. You don’t want some sneaky bee or butterfly ruining your work!
Many plants need pollinators in order to produce seeds. Introduce pollinators into cages so pollinators can reach blooms. If that’s not an option, you can hand-pollinate flowers.
While the process takes place easily in nature, we’ve learned to trick plants into flowering through vernalization, which is an artificially induced chilling period that shortens the vegetative phase, speeds flowering, and, ultimately, seed production. Stay tuned for more details in chapter 4 about plants that require vernalization to produce seeds, as well as how to chill those plants.
Harvesting and Processing Seeds
One of the most important aspects of seed saving is to consider your plants when harvesting. Is your pepper productive or slow to produce fruit? Does your bean plant thrive, or is it covered in powdery mildew? Are you constantly battling aphids on tomato plants, or are you eating fruit straight off the vine, free of pests?
Select desirable plants by observing your plants throughout the season, instead of just judging the fruit. Selecting healthy, productive, drought-tolerant, and disease-resistant plants provides seeds with similar characteristics. That said, you should also consider the color, shape, size, productivity, and flavor of the fruit, as those are the fruits or flowers you want to replicate in your garden next year. You can even judge the seeds: bigger is better. Save the largest seeds from your harvest, as they’ll generally produce the most vigorous plants.
When harvesting your fruits and seeds, you’ll also need to make certain you’re confident of the variety. I know it seems like you’ll never forget what’s planted where when you set out those precious little seedlings in the spring. However, life happens. Memories fade, plant tags disappear. As soon as I plant my garden, I take a photo of each bed and then I write down (in order by row) the varieties that are planted there. Is it a little obsessive? Yes. But my obsessive recording has also saved my sanity on more than one occasion.
Last but not least, you’ll need to harvest when the fruits or vegetables are mature. For some plants, like tomatoes, the seeds ripen at the same time as the fruit, making harvests simple. Eat the fruit, save the seeds. For others, like fennel, seeds need to dry on the plant or remain within an overripe fruit, like eggplant, to achieve maturity. Sometimes, seeds on one plant, such as the umbel of dill, don’t ripen all at once. You’ll find information on when to harvest each variety in chapters 4 and 5.
Be careful! Some seedheads, such as those from chives and leeks, shatter easily, scattering seeds into the garden if they’re not harvested gently.
Wet Processing
You’ve harvested the fruit and flower seedheads from the garden. Now, how do you save the seeds? Most seeds fall into two processing categories: wet processing and dry processing.
Wet processing is used to remove seeds embedded in the wet flesh of fruit. Melons, tomatoes, and cucumbers, for instance, fall into wet processing seed collection. Wet processing is a bit more involved than dry processing, but it’s still quite simple.
Remove the seed from the fruit. This might involve squeezing tomato seeds and the pulp into a container or grating eggplant to remove the seeds from the flesh. Sometimes the seeds need to go through a fermentation process. (Specific cleaning techniques for each plant are listed in chapters 4 and 5.) Ferment the seed mix, if needed (see here).
Wash the seeds. To clean seeds and separate them from pulp or fermentation mixture, add twice the amount of water as the volume of seeds and pulp. Stir vigorously to clean. Allow the mixture to settle. Nonviable, hollow seeds and pulp/debris will float to the top of the mix.
Take a strainer and scoop off this top layer. The viable seeds will sink to the bottom of the container. Add more water, stir to clean the seeds one more time, then pour the water through a fine-mesh strainer, collecting the seeds. Using a paper towel, blot the bottom of the strainer to absorb excess water.
Dry the seeds. Pour seeds onto a nonstick surface, like a plate, to dry. (Do not place seeds on a paper towel as they will stick to it when drying.) Spread seeds into a single layer, shaking the plate gently each day to ensure even drying. Protect seeds from excessively high temperatures. Never dry seeds in an oven or in direct sunlight.
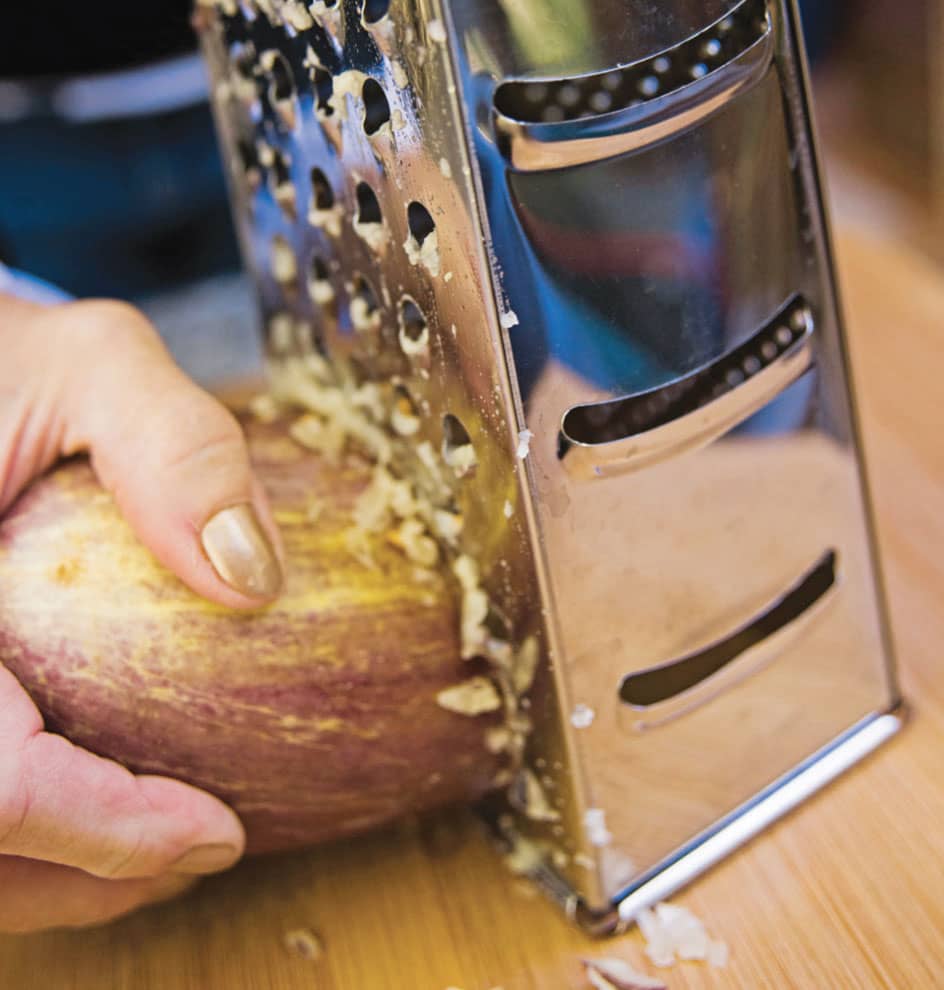
When seeds are embedded into the fruit’s flesh, like with eggplant, use a grater as the first step in separating the seeds.
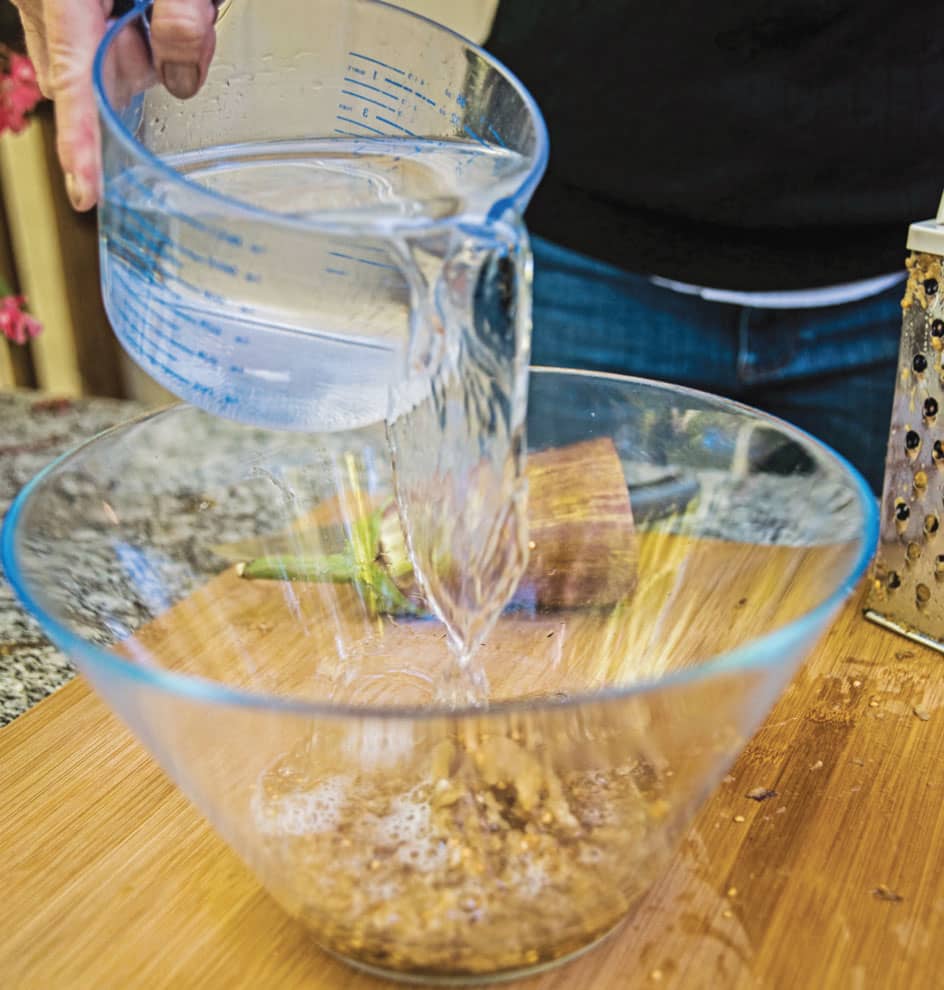
Add water to the seeds and pulp and allow the mixture to separate. Pulp and debris will rise to the top, where you can skim it off. Viable seeds settle to the bottom.
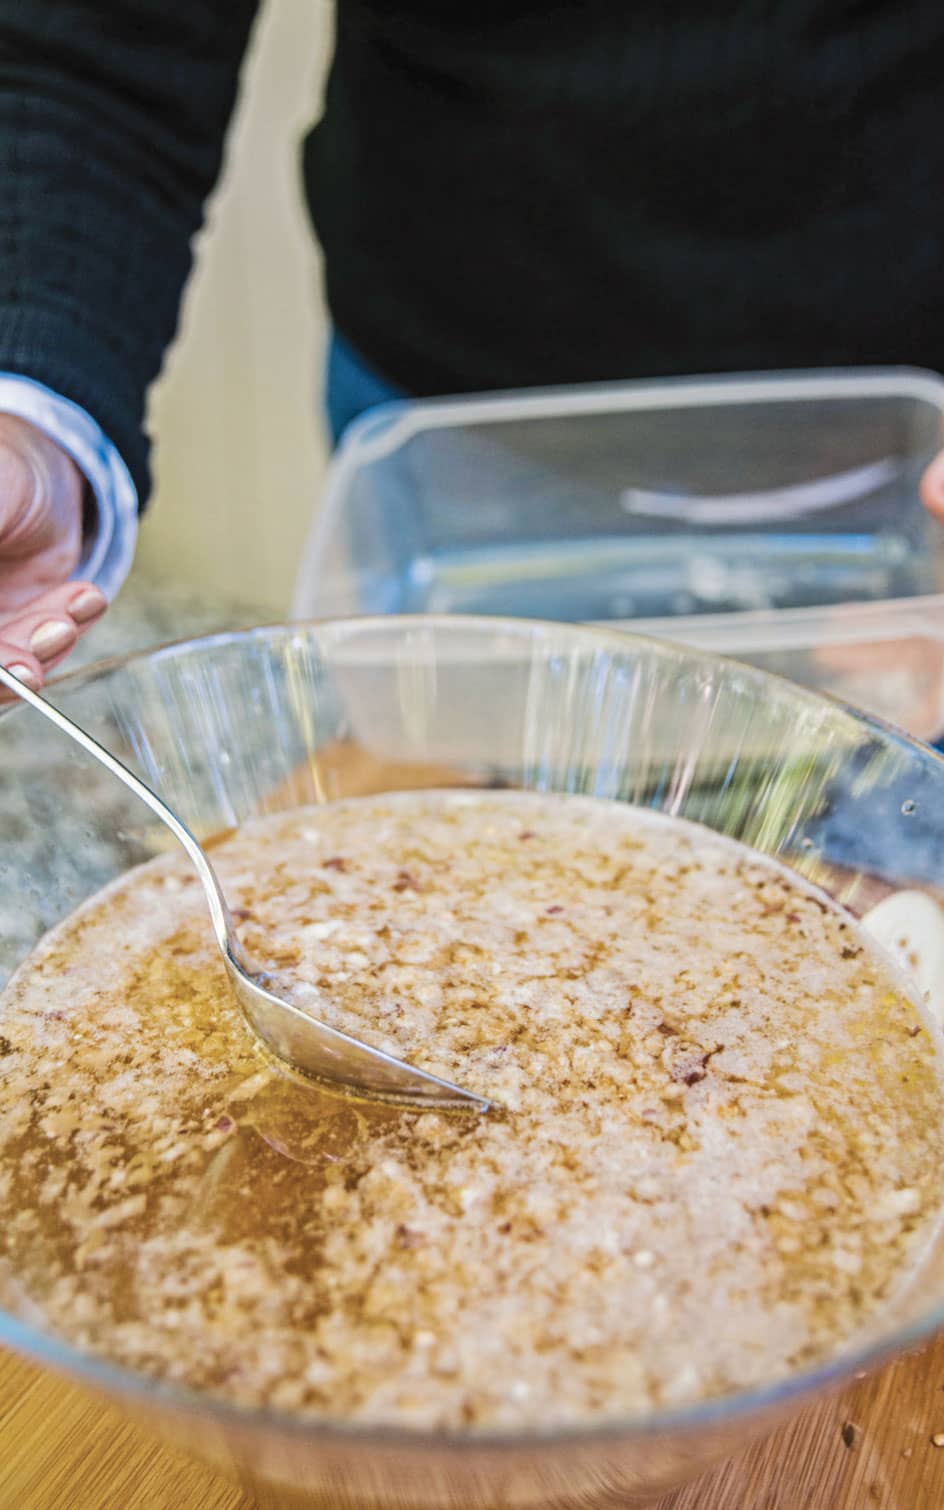
Allow the mix to settle. The pulp and nonviable seeds will rise to the top, where they can be skimmed off with a fine-mesh strainer.

After separating the seeds from the pulp, rinse them well.
When seed saving, we mimic nature’s handiwork. The fermentation process is important to seed saving, as the microorganisms it produces destroy many seed-borne diseases that affect future plants.
Fermentation time may be influenced by temperature, as well as too much water added to the seed mix. (I add only a small amount of water to seed mix if there’s not much moisture present.) Also, watch the mix carefully. Once a layer of mold appears on the surface of the seed mix, it’s time to clean the seeds. Don’t wait too long, as the seeds may begin to germinate.
Wash the seeds, rinsing them through a strainer, to clean them. For a step-by-step description of fermenting tomato seeds, see chapter 4.
Dry Processing
Dry processing occurs when seeds are harvested from pods or husks that dried on the plant. Beans, peas, okra, brassicas, lettuce, radish, carrot umbels, and corn, to name a few, fall under dry processing.
Dry processing is simple: Collect the seedheads and seedpods when they’re fully dried and clean accordingly. If a freeze threatens before the seeds have matured and dried on the plant, you can harvest the entire plant, hang it in a shed or garage that doesn’t freeze, and allow the seeds to continue to mature on the plant. Harvest the pods as they dry.
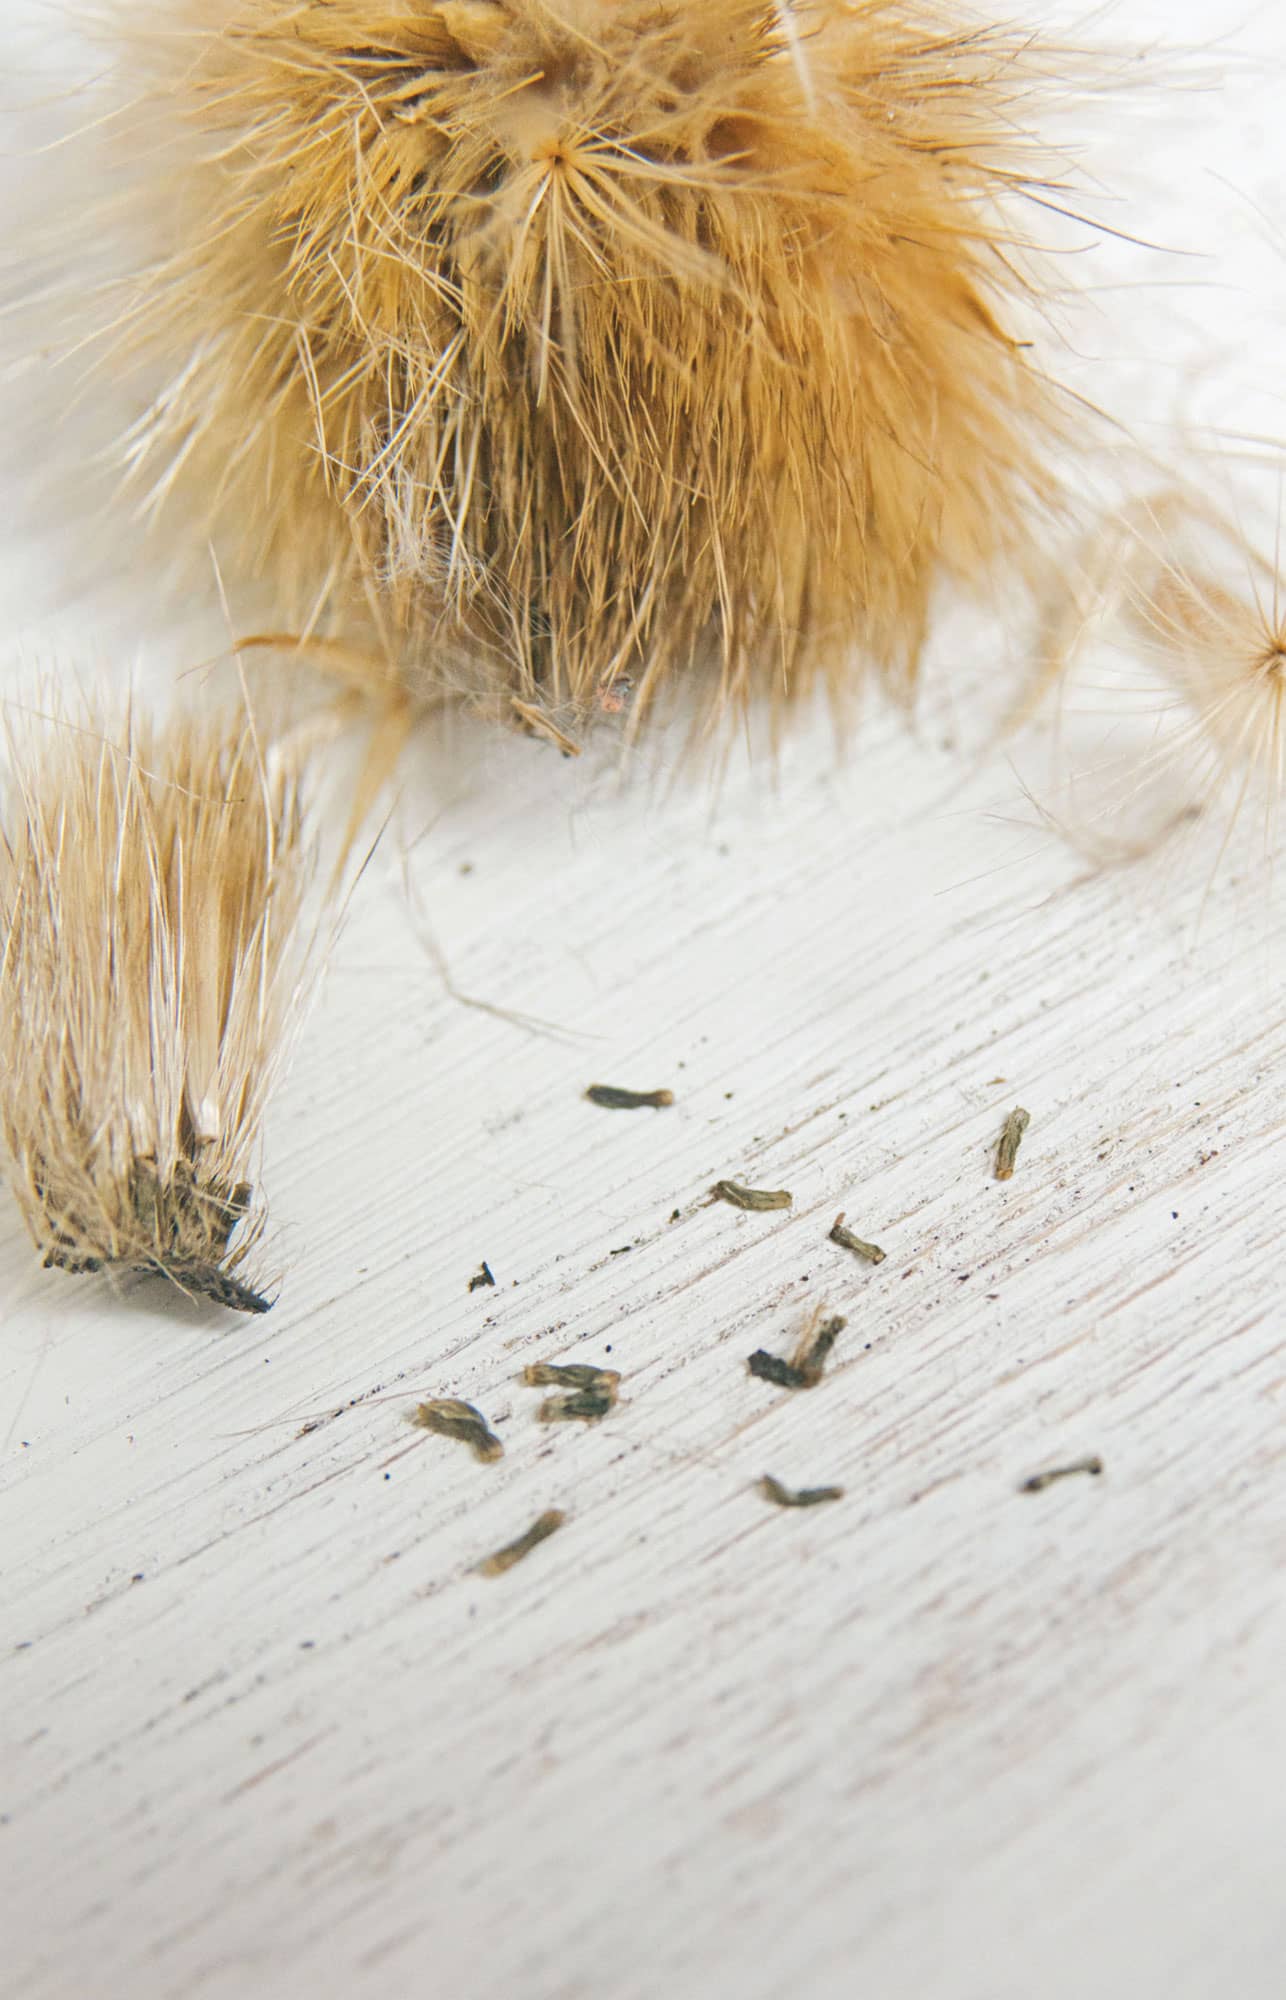
Some plants are rather stubborn about releasing their seeds. Other plants encase the seeds in quite a bit of fluff, and there’s much debris when harvesting. Yet separating seeds is generally easy if you know how.
Threshing involves breaking seeds free from their coverings. While some seeds come free easily with a vigorous shake or by rubbing the seedheads with your fingers, others are quite prickly. Threshing includes rubbing, beating, and flailing seedpods to release seeds. An old pillowcase is a perfect tool. Place any stubborn seedpods inside the pillowcase and jump on it to break open the pods. Or close one end of the pillowcase with a rubber band and whack it over a rock. Pummeling the pillowcase with a rolling pin is also quite effective in releasing seeds, plus it’s therapeutic if you’re having a bad day.
Placing seedpods between two boards and mashing the pods also works well to separate seeds. However, only use this technique for small seeds. You may accidentally split larger seeds, like beans, with the boards.
Some seedheads, such as those from artichokes, require winnowing to separate the seeds from chaff.
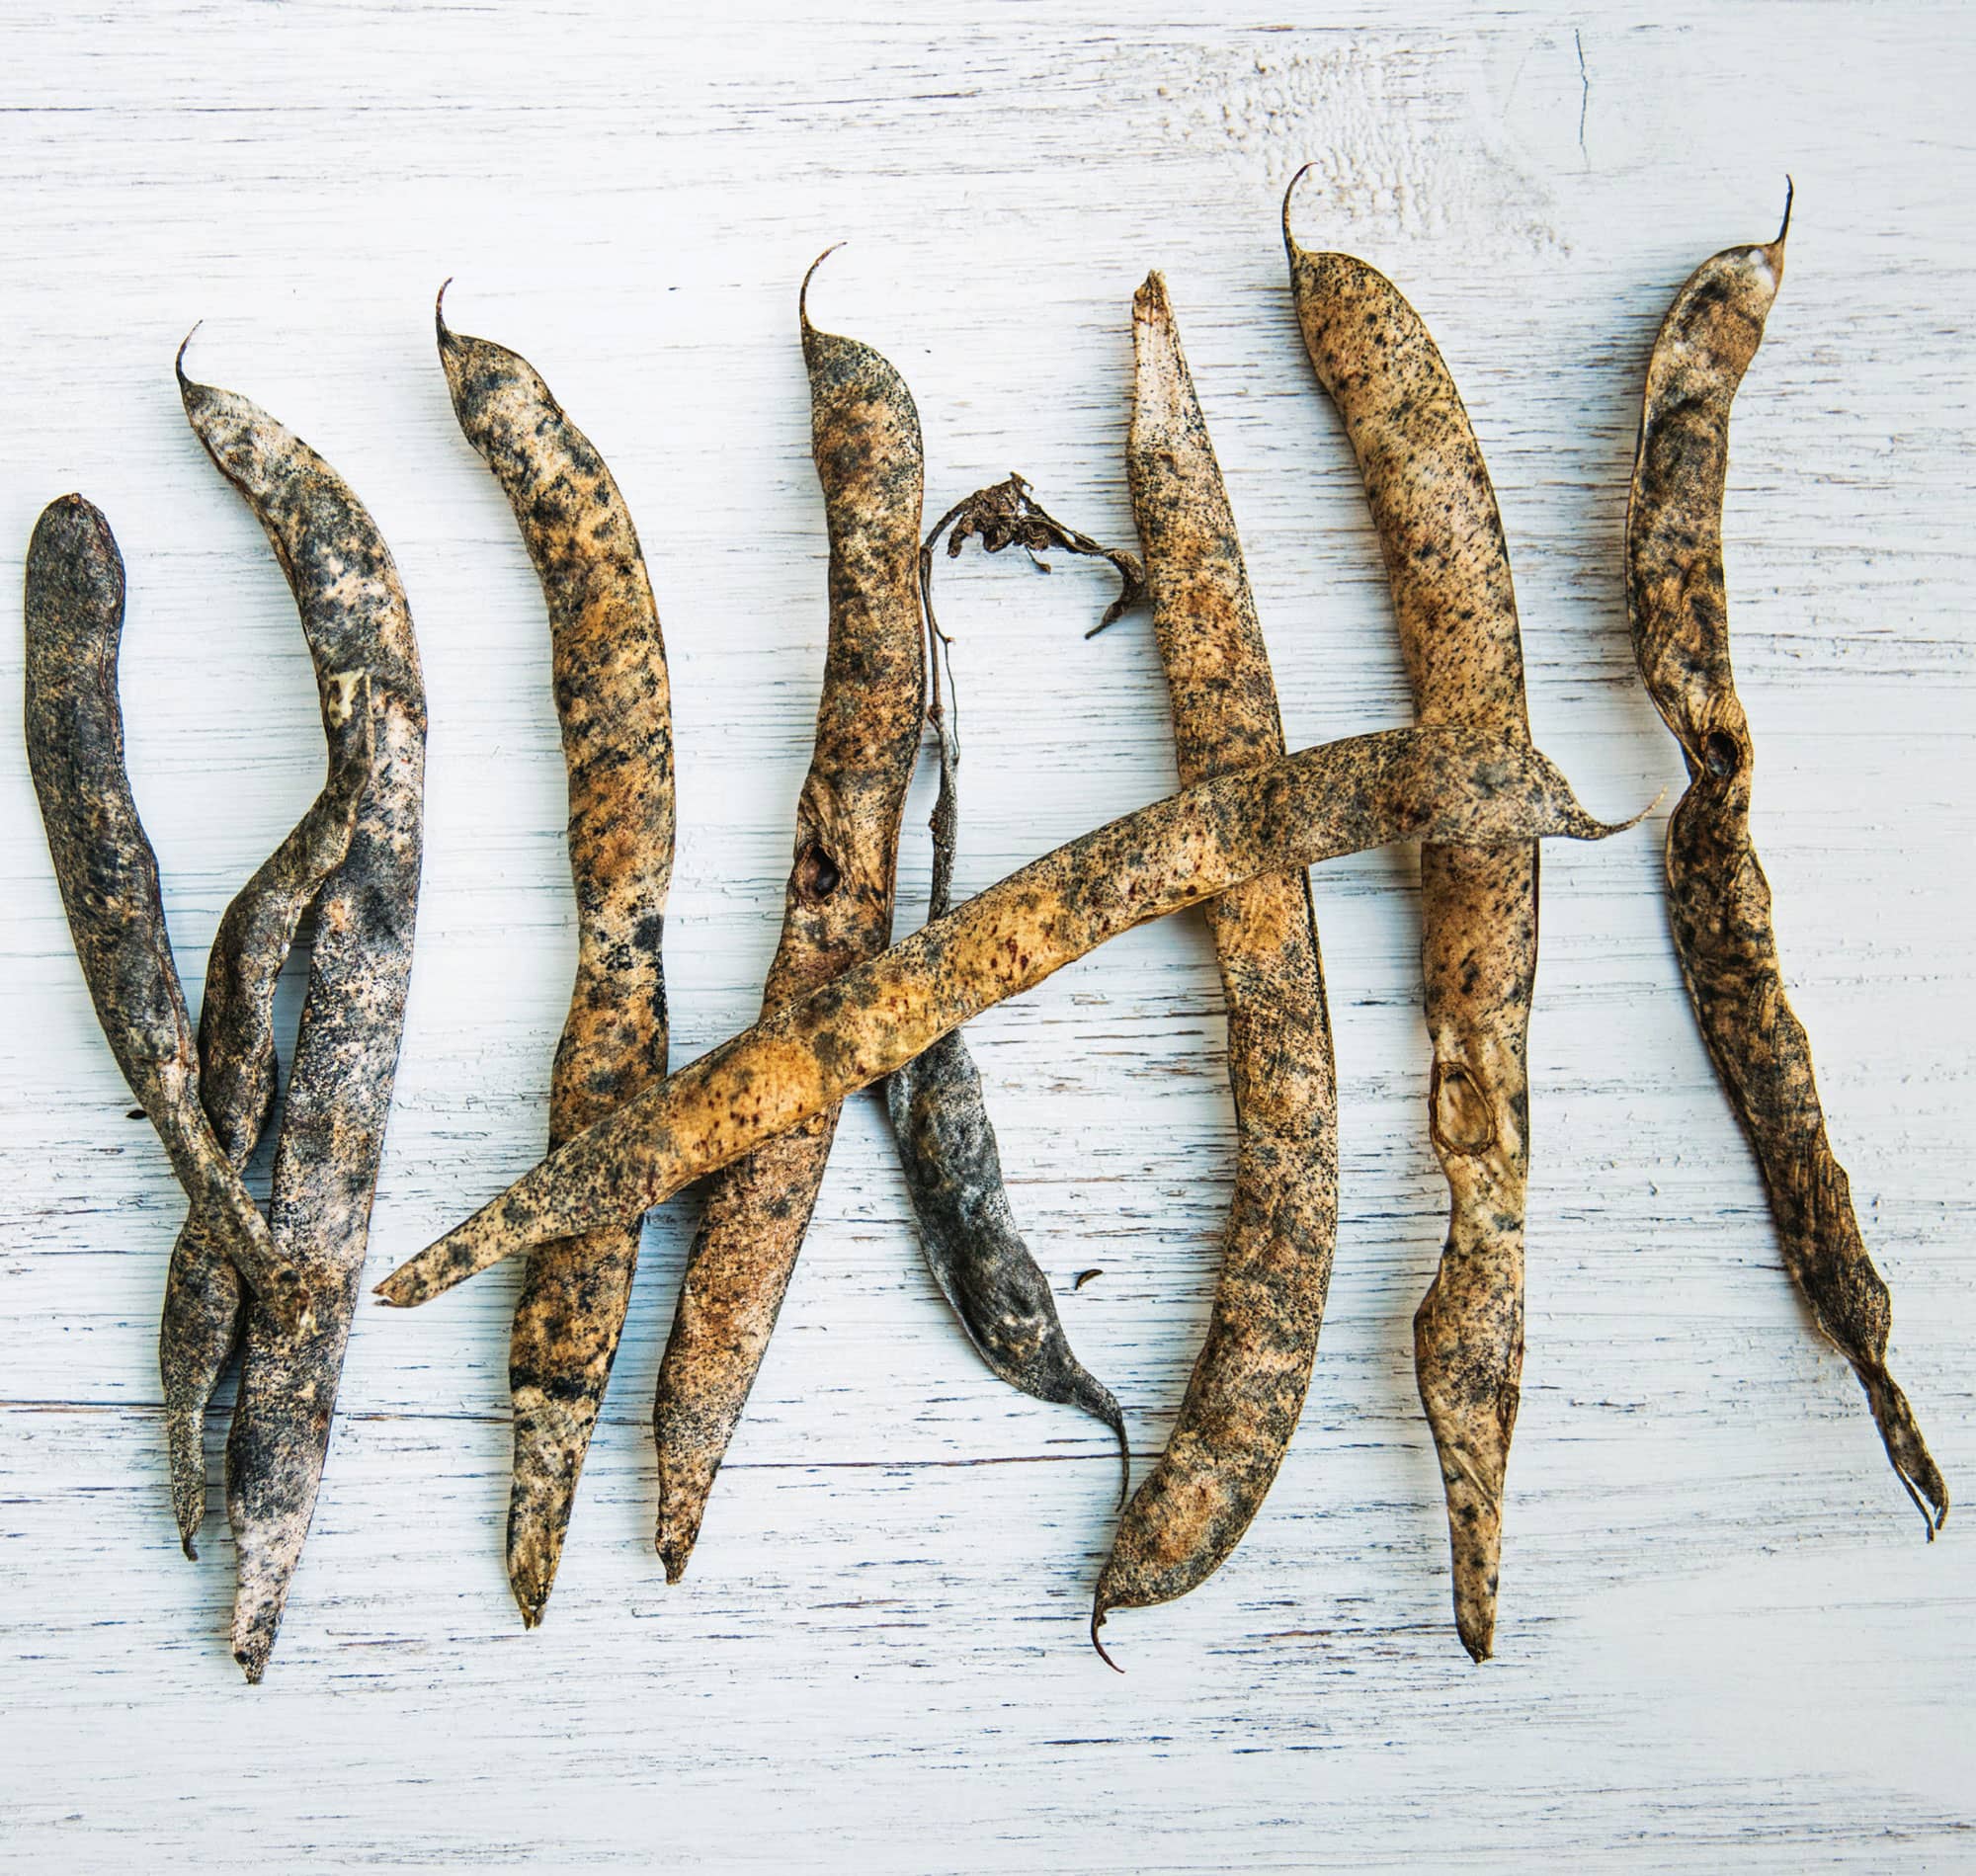
Bean seeds are some of the easiest to save. Allow the pods to dry on the vine until they’re brown, then simply open the pods and remove the seeds.
Once you’ve released the seeds, it’s time to winnow. Winnowing is the process of separating the debris and chaff from the seeds. If you’re only saving a small amount of seeds, winnowing is easily accomplished by hand. However, for larger quantities, a small fan or hair dryer set on the coolest setting helps separate chaff from seeds. Make sure to cover your work space with cloth or plastic. Collect the seeds, and then shake out the drop cloth to remove debris. Make certain the cloth is clean before you begin cleaning the next variety to ensure seeds remain separate.
If you’re saving a large quantity of seeds, you may want to build a seed-screening station. A graduated series of screens allows chaff to remain in the top layer, while smaller debris falls through to the bottom screen, with the seeds caught in the middle screen, depending on seed size.
Use several sizes of mesh screen: fine, medium, and coarse. Stack the screens so that the mesh with the largest opening is on top, the medium-sized mesh is in the middle, and the finest mesh is on the bottom. Pour the seeds on top of the screens and shake them, helping the seeds to separate from the chaff. Remove the clean seeds from the screen to store and clean the debris from the screens.
Storing and Preserving Seeds
Once you’ve cleaned your seeds, it’s time to store them for your future garden. You’ve worked hard, growing beautiful plants, enjoying their fruit, and harvesting their seeds. You’ve tolerated the stench of fermentation, pricked your fingers harvesting okra pods, and chased milkweed fluff throughout your house. Your friends teased you about the dozens of paper plates residing on the dining room table, carefully marked with variety names and filled with drying seeds. Well done, you!
Now stay vigilant for one more step, so that you’re not undoing all your efforts: Store your seeds carefully. It’s not difficult, I promise, particularly with seeds harvested from a typical kitchen garden or cutting bed. Simply remember these three words: cool, dry, and dark.
Most seeds are resilient, but keep in mind that each seed is alive. While a seed wants nothing more than to perpetuate, bringing new life into the world, protect it so that it remains viable. By removing environmental factors that damage seeds, like moisture, direct sunlight, and fluctuating temperatures, you’re slowing a seed’s metabolism without damaging the embryo within the seed coat. Store seeds in a cool location, out of direct sunlight (preferably in the dark), and away from dampness. Easy, right? After all, most of us can sacrifice space on a bedroom closet shelf to store our precious seeds.
Stored in proper conditions, many seeds remain viable for years. However, viability varies per plant. Refer to chapters 4 and 5 to gauge how long your seeds may last. (In a cruel twist of fate, some weed seeds can remain viable for half a century, much longer than most of the crops gardeners hope to grow! It’s not fair, I know.)
Package seeds in small paper envelopes, carefully labeled with the date harvested and varietal name. Make certain the seeds dry completely before storage because moisture threatens seed viability. No one wants to open carefully collected packages of seeds to find a disappointing, moldy mess.
For an added layer of security, place the envelopes into an air-tight canning jar or container. Store the container in a cool, dry, dark location. Then you can rest. You’ve successfully completed the journey of gardening from seed to seed! Congratulations!
Now, it’s time to start dreaming of next year’s garden . . .