There are whole books devoted to old beads, new beads, and beads made of glass, stone, polymer, bone, metal, and so on. My intent here is only to give you an idea of what shapes work well on quilts, leaving the finding of what you like to use up to you. Because this is a book about sewing beads onto quilts, we will look at the kinds of beads, the finishes, and the sizes and shapes available that work well with quilts. For now, let’s look mainly at contemporary beads made of glass.
The Beads
Seed Beads
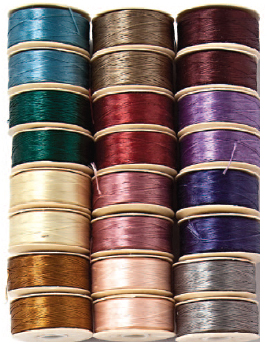
The base for most of my designing is the seed bead, so called because of its distinctive seedlike shape. Seed beads are made by heating a long, hollow tube of glass until it is almost molten, and then stretching the tube until it is the appropriate diameter. It is then chopped into the appropriate-sized pieces. The pieces are screened to take out the ones that are too big, and then they are put into a kiln and heated until they are almost, but not quite, molten. This rounds the edges and gives them the distinctive seed shape.
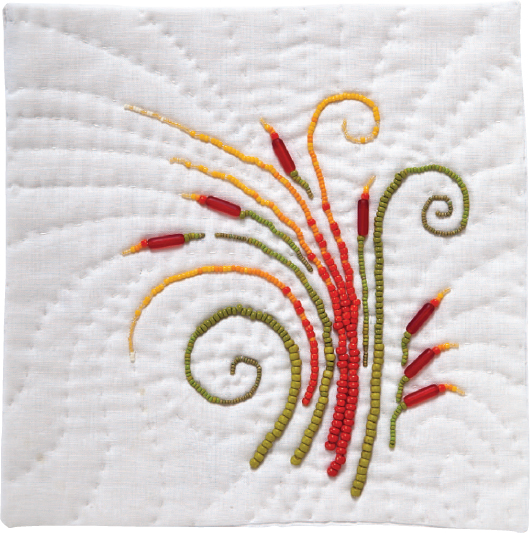
Graduated lines of seed beads, same color and graduated color
Seed beads come in many sizes, which are assigned numbers. Like needles and wire gauges, the larger the number, the smaller the size. I’ve been told that the number indicates the number of beads that equal an inch. These sizes are only an approximate indicator of how large the bead is. You will find variation within a particular batch of beads and from manufacturer to manufacturer. In general, Czech seed beads are more erratic in size and shape than Japanese beads.
The most common size used is #11; you will find these in the broadest array of colors and finishes, and they are most readily available. The tiniest beads I use are #14 and #15. When I was first starting to bead, I used to think that these were way too small for my large hands. I now use them a great deal. I always buy colors or finishes I like of the small beads when I see them, even if I may already have some, because they are not as readily available as #11 or #8. Seed beads go up in size to #6 and #4, and I often use a sequence of #6, #8, and #11, and then finish off with #15, all of the same color, for a nice tapered line. Finding all those sizes in the same color is difficult, and sometimes I will use a lighter shade of a color for the smallest bead and graduate to darker, or vice versa, depending on the effect I want and the availability of the beads.
One more type of seed bead, which I do not use often, is the Japanese Delica. These beads are more tube shaped, rather than barrel shaped. Delicas are known for their regularity of size, in both length and diameter, and are wonderful for doing peyote stitch amulet bags or other off-loom bead weaving. I, however, find their regularity boring. Sometimes one wants beads all the same size and shape, but in general, I prefer the Czech beads with their charming irregularity.
With seed beads, you can make dots of color and lines, thick or thin. You can even fill in solid spaces with a particular color, which will give it texture.
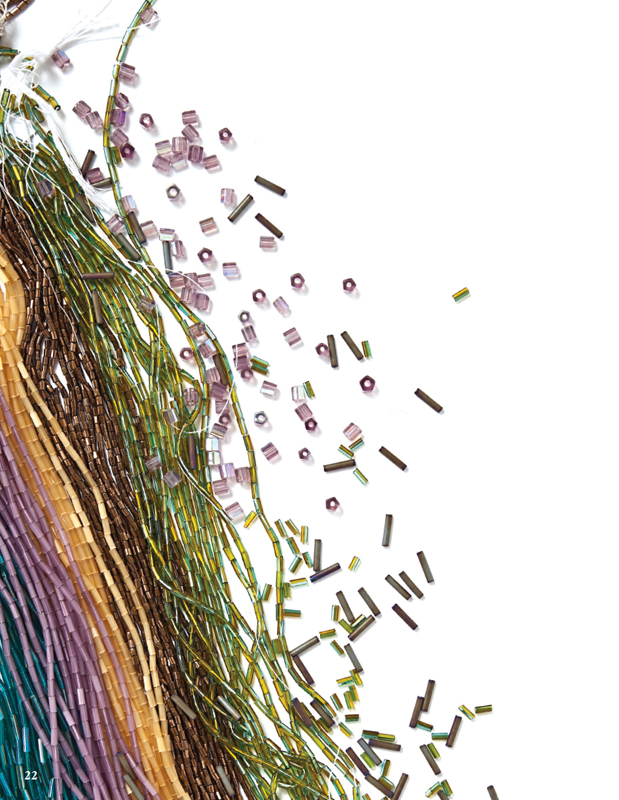
Hex, Triangle, Cube, and Bugle Beads
Hex (or hexagonal), triangle, and cube refer to the shape of the cross section of the bead, and these beads also come in various sizes. Having flat sides that are at angles to the surface, they reflect tiny spots or short lines of light and can be used to add sparkle to a piece. They are more tube shaped, being longer than they are wide, and are usually a little longer than a seed bead of the same size designation. Use them for angularity and a little more visual weight.
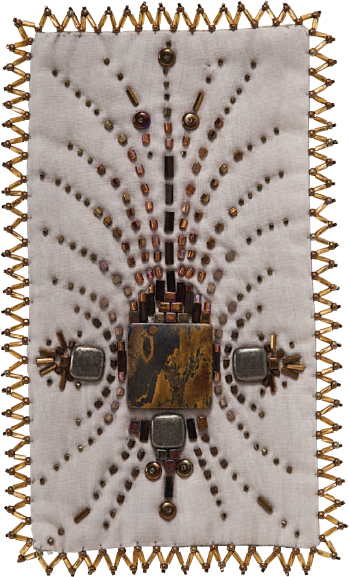
Square beads of hematite and a large square bead of tigereye for focal points, with lines of cubes, bugle beads, hex, and triangle beads around them
Bugle beads are a longer tube of glass and may be round, hexagonal, or twisted. They will create lines of light that read across a room, especially the silver-lined beads. They are made basically the same way as seed beads, with a tube of glass stretched out to the appropriate diameter, both exterior and interior, and then chopped into segments of varying lengths, usually denoted in millimeters. Because of their nature, they are not usually put in a kiln after cutting, and the edges can be sharp. Thread passing over the lip of a bead at a right angle is vulnerable to being cut. How many garments have you seen with threads sticking out and beads missing? To prevent this, the bugle beads can be bracketed by putting a seed bead at each end. Some finishes will, by their nature, round the edges. To matte a bead, the beads are put into an acid bath, which etches the surface, thereby rounding the sharp edges. Metallic and AB (Aurora Borealis) finishes are fired on, and the heat rounds the edges as well. These beads need not be bracketed, but the rule of thumb is, “When in doubt, bracket.”

Bracketed single bead and bracketed couched beads

Single unbracketed bead and unbracketed couched beads
NOTE
• Bugle beads go in and out of fashion, and vendors carry what they can sell of what is available. Specific colors or finishes of bugle beads sometimes become unavailable. As I write this, the available variety of Japanese bugle beads in matte and metallic finishes is diminishing. Manufacturers simply aren’t making them at this time. Glittery, silver-lined, twisted bugle beads are available in many colors, but not many in metallic or matte.
• Rule of thumb: Like yarns, the colors of beads can change, sometimes drastically, from lot to lot, so when you see a color, size, or finish you like, buy more than you think you will need. Or buy as many as you can afford; they may not be available next month, and availability is one of your design elements.
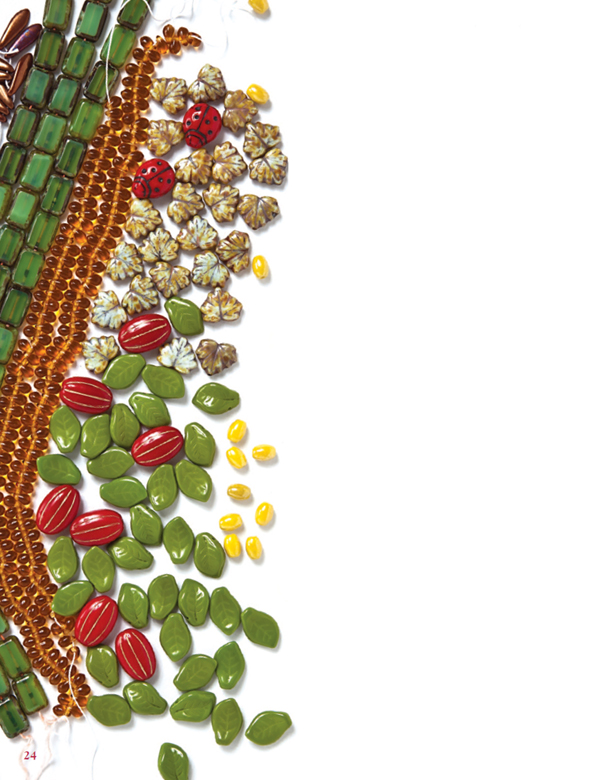
Depending on the shape and size, pressed glass beads are made, either singly or in small lots, in a mold with molten glass. The colors and finishes available are almost as numerous as the shapes. Pressed glass beads, like seed beads, may be clear, translucent, or opaque. Color is infused by adding chemicals to the silica base. The amount and kind of chemicals added determine whether the glass is translucent or opaque. Then the bead may be sprayed with a metallic finish or something to give it a rainbow shimmer. The rainbow finishes can be either opaque (called AB for Aurora Borealis) or transparent (called Iris). The color of the bead itself may not be visible under the finish. The surface also may be matted by use of chemical etching, so the surface might be an AB matte finish on an opaque or translucent bead. Some of these finishes are baked on; some are just washes or dips. All are subject to wear, which in art quilts is not as important a factor as when the beads are used in jewelry or on clothing, but it is still something to be considered.
NOTE
When buying beads, it is advisable to know your vendors and ask them about the various finishes if you have any doubts. Some finishes are subject to fading in direct sunlight, and some are subject to wear. Again, with art quilts, the impact of sun and wear will be minimal but should be taken into consideration before buying the beads. Unless you know a vendor regularly stocks certain beads, my rule of thumb here is, “If you like the color and the size, and will probably use them, buy them! You may never see them again.”
Some of the many shapes of pressed glass beads available include leaves, flowers, animals, fish, skulls, butterflies, and claws. Flat geometric shapes include circles, ovals, hexagons, donuts, lentils, triangles, squares, and cubes. The beads I find easiest to use are generally ones that have at least one flat side. How the hole goes through the bead is also important, and here the beads fall into three general categories: holes straight through lengthwise, vertical holes, and horizontal holes through one end of the bead.

Needles, Thread, Scissors, and Other Useful Tools
Needles
All the needles I refer to are a brand made in England called John James. I use three types and two or three diameters of each. The length of the needle is referred to by name: sharps, straws, or beading needles. The diameter of the needle is referred to in number form: #12, #11, or #10 (again, the larger the number, the smaller the diameter).
SHARPS
Sharps are the shortest of the three types I use, about an inch long. They are too short for my taste, but they do come in handy for maneuvering in tight spaces, and I am not as likely to turn one into a pretzel. The #11 is my preferred diameter when using sharps. When I need a needle that will pass through a very small hole, #12 is the one I use, and I use #10 only when all the beads I’m using have big enough holes.
STRAWS
Straws are my needle of choice and are currently only available in #11s and #10s. I’m told they are called such because the diameter is the same the entire length of the shaft, including the eye. The #11 straw is the needle I use most of the time. I have large hands and grip the needle firmly, so I am prone to turning needles into corkscrews. The #10 needles seem to be the most resistant to this, but they will not go through most #15 seed beads, some #11 seed beads, or almost any pearl. Hence, I usually use #11s and switch to #10s only when I can, like when I’m basting or am using only beads with large holes.
BEADING NEEDLES
I usually use beading needles only for fringe, since they are too long for most tight places and are cumbersome, even for couching (and I turn them into complicated corkscrews very quickly). They are available in sizes #12, #11, and #10. When I’m going to make a lot of fringe, my beading needle of choice is a #11, provided I am using a wide selection of beads with similar-sized holes.
NOTE
Pearls are notorious for having small holes! They come in a wonderful variety of colors, shapes, and sizes, but those tiny holes! When using Nymo thread (page 26) and a #12 needle of any type, you can pass through only once or twice. It is almost always necessary to use a #12 needle if you are going to use pearls or #15 or #14 seed beads in the strand. Remember that the number designation refers to the diameter, not the length.
My sister, Robin Atkins, a well-known bead artist, introduced me to Nymo thread, and it has become my thread of choice. Nymo is synthetic thread and is made up of many very thin fibers. Nymo comes in several weights, but B and D are the weights I use the most, because they are readily available and fit through most bead holes. This thread is very strong and comes in many colors, in bobbin or spool form. It also comes in cones of black or white.
I started by using bobbins but found I would go through four or five of them in a medium-size quilt. This meant I was sometimes changing color, especially when I had run out of one color before finishing the quilt. Changing the color of the thread is occasionally, but not often, desirable, at least for me. I now try to keep a number of spools in stock in colors I frequently use, so I can choose the thread color that will best blend with the back of my quilt.
I even use this thread for almost all of my hand sewing. It’s much stronger than cotton or cotton/polyester, although it does sometimes tend to fray.
Scissors
Small scissors with sharp points and thin blades seem to work best for working with beads on quilts. The scissors I use most are Ginghers embroidery scissors. They fit my hand nicely, and I can get into small spaces to cut thread easily. Find the pair that works best for you. Test-drive them to be sure they cut thread well because sometimes you will be cutting very close to the beads.
Chain-Nose Pliers
Chain-nose pliers are not absolutely essential, but they do come in handy, and I resort to them frequently. When too many beads are on a piece of thread not long enough for them to sit side by side, one option is to take out the stitches. A much easier way to rectify the situation is to crush one or more of the beads. Chain-nose pliers are exactly the right size and shape to do that. The caveat here is that there is always the possibility of breaking the thread, and that possibility increases exponentially with the size of the bead. I’ve crushed a great many #11 seed beads and not broken the thread. However, when crunching #8 beads, the likelihood of breaking the thread greatly increases; #8s are also much more difficult to crush, requiring more strength. Always wear protective lenses and/or keep one hand over the bead to be crushed. Tiny pieces of glass do fly. The table and floor where I work are frequently littered with bits of broken beads.
Nymo thread bobbins
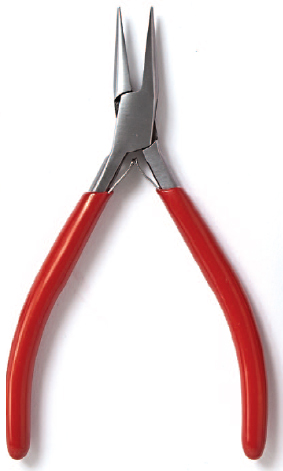
Chain-nose pliers
When I first started quilting and was faced with batting choices, cotton seemed to work best. Polyester required too much subduing and seemed too commercial. Bamboo batting seemed too exotic for me. Then, a fellow teacher told me that she always used Hobbs Wool. It is resin bonded to resist bearding and has a very nice loft, yet compresses easily for texture. I tried some, and now Hobbs Wool is my batting of choice if I want a lot of texture, for either hand sewing or machine quilting.
Backing
When choosing a backing for a quilt, I prefer to use a fabric with colors that relate to and support the face design. I used to only hand quilt, mainly with the application of the beads, and not use any machine sewing because I didn’t like the combination of stitches on the back. One time, I was in a hurry and needed a piece for a demo that was mostly finished, so I machine quilted a great deal of it. I finished it with the beading and found that the combination of stitches on the back wasn’t bad. Now I choose fabrics for the back with overall patterns that are small and busy, so the machine and hand stitches will not show too much. Batiks are always a good choice because the color varies within a small range and the fabric is a tight weave and gives the quilt lots of support.
I use a thread color that blends in with the color of the back for both machine and hand stitching. That way the stitches disappear, and you don’t have to be quite as careful about stitch length. However, when a stitch is too long, as sometimes happens when you think you are traveling in the batting and have gone through to the back, use a waterproof Sharpie pen to camouflage the line. After all, even though no one is supposed to, everyone looks at the back! It might as well be pretty, too!
Terrifically Tacky Tape
Yes, that is really its name. I didn’t make it up. Terrifically Tacky Tape is a double-sided transparent membrane that comes in rolls of varying widths and is generally available at craft stores. It is usually used for scrapbooking; I use it to secure cabochons, buttons, or certain beads, when I want to hold them in place to sew them down or create bezels. It comes with iodine-colored plastic film covering one side. Make sure the tape is at least 1″ wide. I buy rolls that are 5´ long, and they seem to last forever. You should avoid using your good scissors when cutting tacky tape because they will get gummy. Although that is not a disaster, because the goo is fairly easy to clean off, it still is a bother.
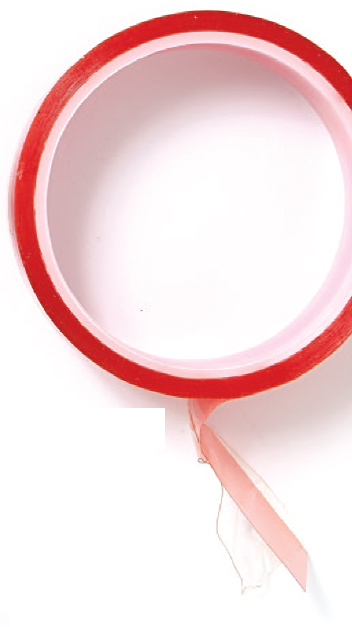
Terrifically Tacky Tape
Bead Cloths and Trays
A bead cloth is useful for putting out a large assortment of beads on a flat surface where you can easily pick them up with a needle. I like to use the commercially available bead cloths made out of something such as Polartec or a similarly thin synthetic fleece. The fleece comes in a variety of colors, but I prefer a neutral off-white or pale gray-green. It depends, of course, on the color of the beads you are using. Small off-white beads are difficult to see on an off-white cloth. Bead cloths should be small enough so you can turn them around to reach all the beads.
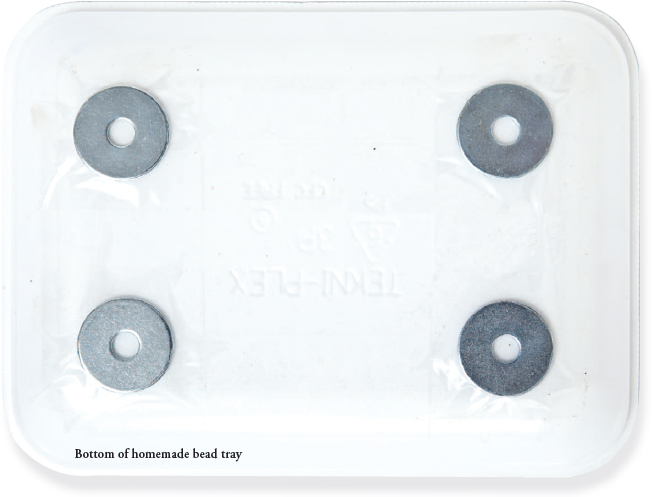
I’ve come to like the portability of small bead trays when working on large artworks. I make them out of shallow white Styrofoam meat trays that I line with Polartec cut to size and secured with Terrifically Tacky Tape or adhesive tape. Because the trays are very light—and a flick of the finger can scatter beads widely—I tape four large metal washers to the underside with packing tape to help stabilize them. I make them in several sizes, so I can put them right on the quilt where I’m working and move them around at will. I will frequently work with two or three different trays with different assortments of colors and sizes of beads in each.
Bead Scoops
I have made my own bead scoop from one of my grandmother’s silver teaspoons by cutting the end off, flattening out the bowl, and then filing a beveled edge, so I can gather up beads when I am through with them and return them to the plastic bags in which I store them. There is a commercially available version that is a combination of scoop and tweezers. The corners of the scoop can be used to corral runaway beads back into neat piles and to sort out strays.
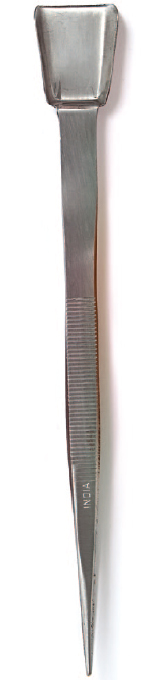
Bead scoop