chapter five
GATHERINGS
Cooking spectacular modern vegetarian food for larger dinners and parties is surprisingly easy. There is a balanced pitch to be found between overwrought and makeshift and—if you put beautiful vegetables center stage—it isn’t a difficult note to hit. Keep the mantra “joyful, fresh and seasonal” uppermost in your mind when shopping and cooking for crowds, more than at any other time, and your food will follow suit (and needn’t be expensive; a very real consideration when cooking for others).
The recipes here run the whole gamut from party snacks (sweet potato fries and raw vegetable platters with fresh dips, see Sweet Potato Fries with a Green Herb Dip and Raw Vegetable Platter with Avocado-Pistachio Dip), to quite involved suppers to make in advance (Baked Purple Goat Cheese Gnocchi), to summer lunches and barbecue food (a slow-baked frittata and Smoky Carrot and Millet Burgers), all with a particular emphasis on bold flavors. This is confident food, full of texture and abundant in nature.
Large serving dishes create that sense of bounty and modernity, highlighting fresh ingredients and textures. It is hard to better the color of vibrant vegetables, so offer them casually with generous serving spoons tucked into a platter. A Nectarine, Tomato and Burrata Salad, with a basil dressing and baked sourdough, for example, is easy to put together, but manages to be one of the most vivid plates in the book because of the quality and color of the ingredients. It is simply stunning, both to look at and to eat.
If you build around a central dish—winter squash, olive and lentil tagine, say, or roasted roots on coriander salt (see Squash, Green Olive and Lentil Tagine and Salt and Coriander Roasted Roots with Smoky Yogurt)—you can bring it to the table last, having first amassed any accompanying grains, salads and sauces. It only takes one main dish to create drama; any extras really can be as simple as a bowl of leaves or a loaf. Having the confidence to pare the table back even further—serving just one or two humble recipes—can take courage if you are a natural over-caterer (as most keen cooks are), but, when the occasion fits, why not pull a bubbling and rich gratin of chard (see Chard Gratin with Gruyère) out of the oven to eat with, say, simple lentils and roasted carrots? Or a dish of richly sauced gigantes beans (see Baked Giant Beans with Dill), cooked the day before and simply reheated? Both are relaxed and frugal, but on a cold and wintry Sunday night, they are more than enough.
Incidentally, it’s no accident that a page on cooking lentils falls in this chapter. Legumes are hard to better as a base to build from, accepting flavor as well as adding it and bringing high-quality protein at a low cost. I use them frequently as both accompaniment and star dish and, if you partner them with thoughtfully cooked ingredients—sticky roasted alliums, a vibrant gremolata and roasted cauliflower mash (see Sticky Alliums with Lentils and Hazelnut Gremolata), for example—they are most definitely both supper-party-worthy and refined.
Catering for groups or parties is as much about making it easy and enjoyable for you, the host, as making the food good, so it makes sense to prepare everything you can in advance. I don’t mean that you should emulate restaurant chefs, who spend hours behind the scenes chopping and simmering, making flavorful stocks, bases and sauces before they are ready to start their dishes. This is home cooking, and, especially for those who get nervous when cooking for others, trying to replicate complicated restaurant dishes will set you on the road to fraught. The recipes in this chapter are relaxed and modern enough not to warrant endless sauces and garnishes. Be kind to yourself.
What I do mean is that, unless it’s something particularly simple or thrown together, you will rarely find me making anything for a party or supper with friends that can’t be at least partially prepared in advance. It’s an unusual dressing, for example, that can’t be made ahead of time, even if you add any herbs at the last minute to keep them from degrading in lemon juice or vinegar. Vegetables can be prepped at least a couple of hours ahead, gnocchi cooked, croutons baked. . . . Even better, in the case of slowly simmered recipes, tagines and the like, the entire recipe can be made a day ahead, save for the herbal flourishes thrown on at the very end, then gently reheated as your diners gather and mingle.
Where a recipe is a little more involved—the brown rice sushi, for example—I suggest making everyone sing for their supper. Get the main components cooked or prepared (in that case the sushi rice, filling ingredients and pickled ginger, if you are making it), then put them out on the table so everyone can help with the rolling. The results won’t look perfect, but that is hardly the point. And you could definitely double the recipe, as many hands would make a larger quantity of sushi achievable. Likewise, the Shiitake Mushroom Bun Noodle Bowls can be served as a modern version of a buffet, ready for everyone to put their own bowls together. It’s a relaxed way to serve supper, and that is what cooking for loved ones is all about: creating a convivial atmosphere with thoughtfully prepared, beautiful food.
I hope you’ll see in this chapter that it is easier than you might think.
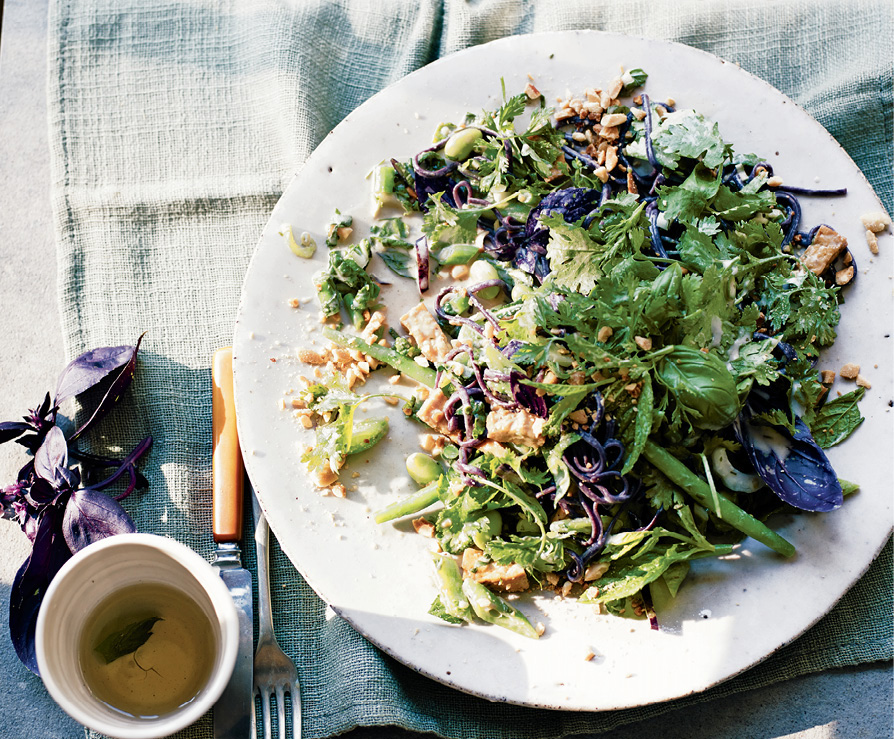
Rice Noodle Salad with Coconut Green Goddess Dressing
A celebration of spring herbs and vegetables, with a few noodles for substance and a delicate coconut dressing. You could just as well serve this hot from a wok as more of a stir-fry, adding the herbs and dressing right at the end. The deep purple (black before cooking) noodles I have used are for dramatic effect only. They taste exactly the same as standard rice noodles.
Serves 6
• ¾ cup (100 g) cashews
• 1 pound 5 ounces (600 g) mixed green vegetables, such as pak or bok choy, sugar snap peas, green beans, young pea pods, baby zucchini . . .
• One 13.5-ounce (400 ml) can coconut cream
• 1 plump garlic clove, crushed
• 1 or 2 green chiles, roughly chopped
• 1-inch (2.5 cm) piece fresh ginger root, peeled and finely grated
• 2 lemongrass stalks, trimmed and finely sliced
• 3 fresh or frozen makrut lime leaves, shredded
• 2 to 3 tablespoons tamari sauce
• 1 to 2 tablespoons palm sugar
• Juice of 2 limes
• Handful of cilantro leaves
• Handful of mint leaves
• Handful of Thai basil leaves
• Sea salt
• 9 ounces (250 g) fine, dried black or white rice noodles
• 6 ounces (160 g) store-bought marinated tofu cubes (ideally those in tamari)
• Handful of purple basil leaves, if in season
- Preheat the oven to 375°F (190°C). Spread the cashews out on a baking sheet and roast for 6 to 8 minutes, until golden brown. Cool slightly, then crush or chop.
- Carefully cut the green vegetables into bite-size pieces. Set aside.
- To make the dressing, blend the coconut cream with the garlic, chiles, ginger, lemongrass and lime leaves. Add 2 tablespoons of the tamari, 1 tablespoon of the sugar and two thirds of the lime juice, along with half the herbs (excluding any purple basil, if using, purely to keep the dressing green). Blend again to finely chop. Taste and adjust the seasoning as needed: You may wish to add the extra tamari or sugar or lime juice . . . or you may not. Set the seasoned dressing aside.
- Lightly blanch the vegetables in plenty of boiling, salted water for 2 to 3 minutes, or until barely tender. Immediately refresh under ice-cold water and drain well.
- Simmer the noodles in plenty of boiling water for 2½ to 3 minutes, then refresh under ice-cold water and drain well.
- Toss the dressing with the blanched vegetables, cooked noodles and marinated tofu pieces. Shower with the remaining herbs and the crushed cashews to finish.
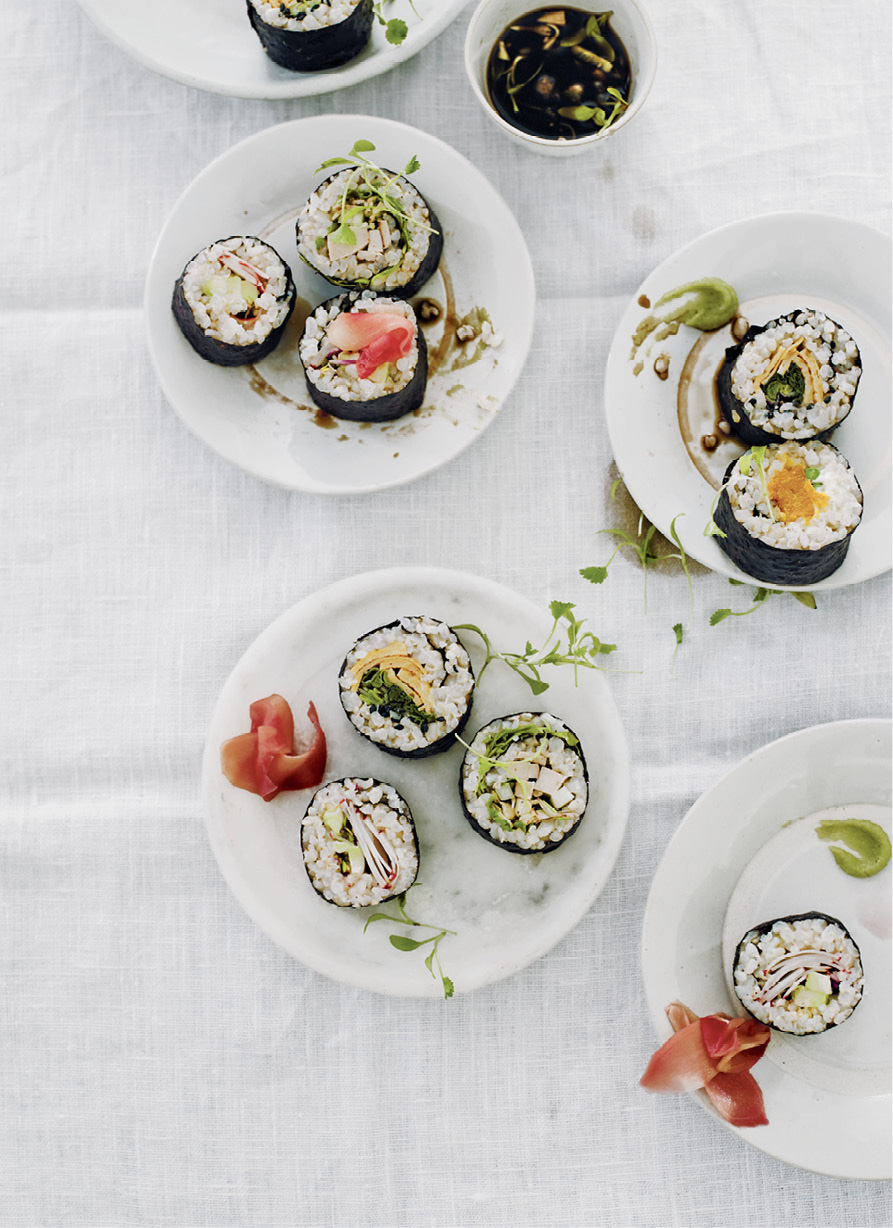
Brown Rice Sushi with Quick-Pickled Ginger
Plan on this serving two very hungry people, or four as a snack. Either make all four fillings—each makes enough for one roll or six pieces—or choose two variations and double the quantities, to make life simpler. A note on tamari: I have suggested using it to keep the recipe gluten-free (though check the bottle), but you could just as well use light soy sauce, if gluten isn’t a consideration.
Makes 24 pieces
For the quick-pickled ginger
• Two 1-inch (2.5 cm) pieces fresh ginger root, peeled and thinly sliced
• 1 slice of raw beet, optional (purely for color)
• 3 tablespoons rice wine vinegar
• 1 tablespoon unrefined sugar
• 1 teaspoon sea salt
For the sushi
• 1½ cups (250 g) brown sushi rice or black short-grain rice
• 3 tablespoons rice wine vinegar
• 2 tablespoons unrefined sugar
• Pinch of sea salt
• 4 nori seaweed sheets, toasted or untoasted
• Your chosen filling (see Filling Ideas)
• Tamari sauce, wasabi and steamed edamame beans, to serve
- To make the quick-pickled ginger, put all the ingredients in a bowl and stir to coat the ginger. Leave at room temperature for 1 hour and drain well before eating. The ginger will keep, chilled, for a couple of weeks or so.
- Rinse the rice well, then put it in a large saucepan with 3 cups (700 ml) of water and set aside to soak for 1 hour. Place over medium heat and bring to a boil. Reduce the heat, cover with a lid and simmer gently for 40 minutes until all the water has been absorbed and the rice is tender.
- Meanwhile, gently heat the rice vinegar, sugar and salt in a saucepan, stirring until the sugar dissolves. Set aside until the rice is cooked.
- Pour the vinegar mixture over the cooked rice, stirring to combine, then spread the rice out on a large plate to cool, fanning occasionally.
- Place a sheet of nori, shiny side down, on a rolling mat or a piece of plastic wrap with a short side in front of you. Wet your hands and spread an even, thin layer of rice over three quarters of the sheet, positioning the uncovered section of nori furthest away from you. This will soften and stick the sushi rolls in place. Place the filling across the center of the rice in a neat line, then carefully and firmly roll up, using the mat or plastic wrap to help you. Leave in a cool place (do not refrigerate, or the rice will harden) for up to 1 hour until ready to slice.
- Wet a sharp knife and slice each sushi roll into 6 pieces. Serve with tamari, wasabi, steamed edamame beans and the quick-pickled ginger.
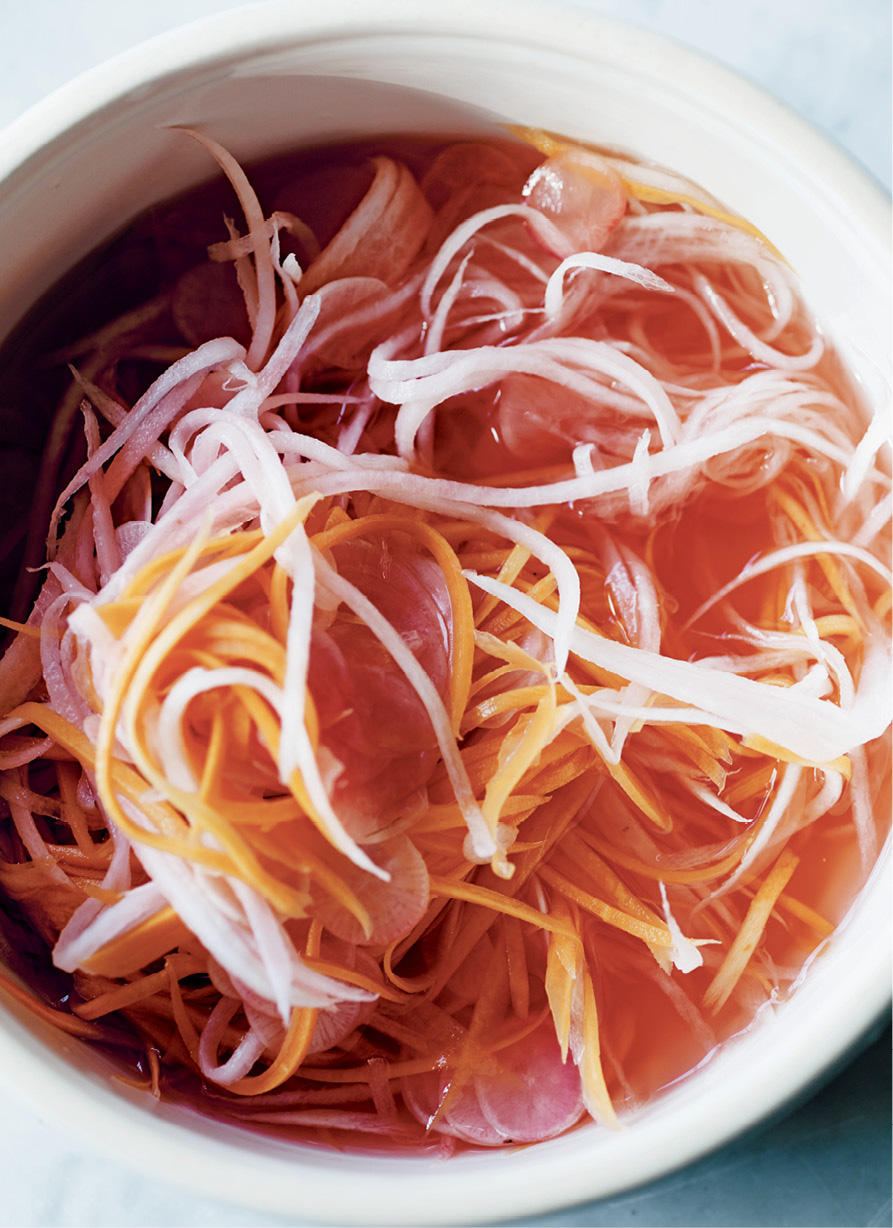
FILLING IDEAS
OMELET, KALE AND SESAME
Beat 1 egg with 1 teaspoon tamari sauce and a few drops of toasted sesame oil. Pour into a hot medium frying pan that you have first coated with flavorless oil. Reduce the heat and cook gently for 2 minutes until set, flip over and cook for 30 seconds more. Transfer onto a chopping board, roll up and shred into ribbons. Blanch a scant handful of shredded kale and drain well. Slice a trimmed scallion into fine strips. Arrange the omelet strips, kale and scallion across the sushi, sprinkling 1 teaspoon black sesame seeds over before rolling up.
AVOCADO, SESAME, SPROUTS AND RADISH
Cut a small, ripe avocado half into chubby strips and slice 2 red radishes very finely by hand or with a mandoline. Lay on the rice in a line, topping with 2 tablespoons purple radish sprouts and a generous pinch of toasted sesame seeds. Roll up.
ASPARAGUS, SWEET POTATO AND WASABI MAYONNAISE
Cut 1 cup (150 g) peeled sweet potato into small cubes and cook with 1 to 2 tablespoons flavorless oil in a frying pan over medium heat, stirring often until golden and tender. Season and set aside. Blanch 6 fine or 2 regular trimmed asparagus spears until just tender. Stir ½ teaspoon wasabi paste into 1 tablespoon (ideally Kewpie) mayonnaise and spoon in a line on the rice. Lay the sweet potato and asparagus spears on top in a line and roll up.
CUCUMBER, SMOKED TOFU, CILANTRO AND SUNFLOWER SPROUTS
Cut a piece of peeled cucumber the size of a small matchbox into batons. Do the same with a matchbox-sized piece of smoked tofu (the very firm variety with chopped almonds and sesame seeds is good here). Lay on top of the rice in a neat line, topping with a couple of tablespoons cilantro microgreens (coriander cress) or regular cilantro leaves and a tablespoon of sprouted sunflower seeds. Roll up, roll up.
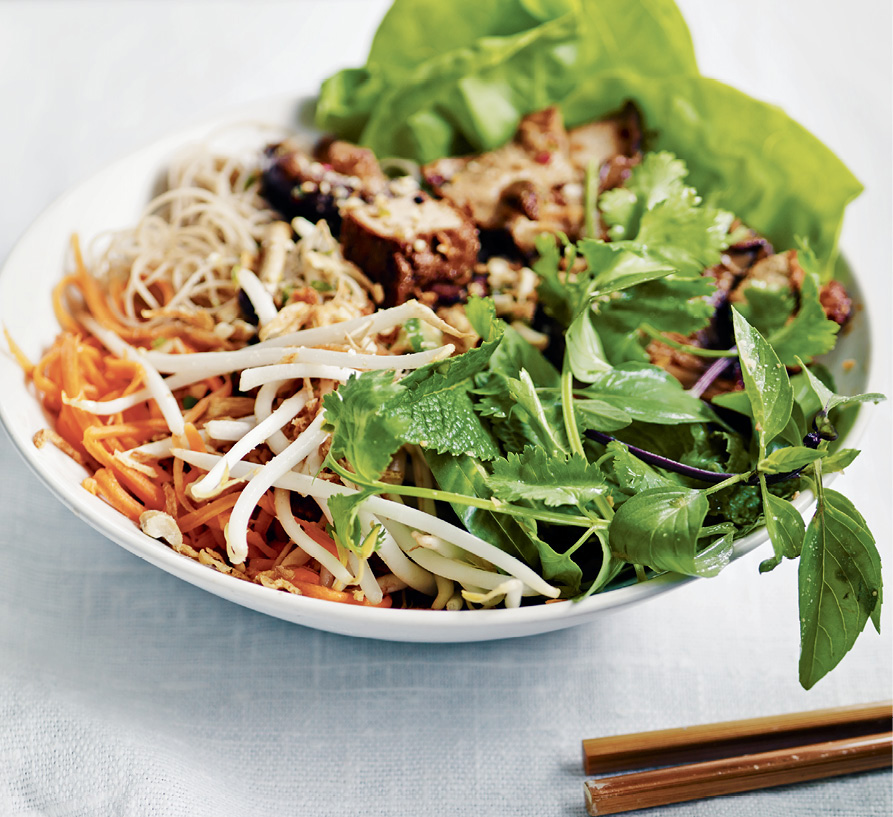
Shiitake Mushroom Bun Noodle Bowls
There is no getting around this: Most Vietnamese food demands a bit of chopping and a few separate components. But once that chopping is done—and you can cheat with a mini food processor—the method is a cinch. Serve this in the warmer months as a light and summery supper. To save yourself the trouble of plating, arrange the ingredients on platters and ask everyone to build their own bowls.
Serves 4
For the mushrooms
• 3 garlic cloves
• 2 red chiles, halved
• Two 1-inch (2.5 cm) pieces fresh ginger root, peeled
• 2 lemongrass stalks, trimmed
• 3 tablespoons palm sugar or brown sugar, or to taste
• ¼ cup (60 ml) Vegetarian “Fish” Sauce or tamari sauce
• 10.5 ounces (300 g) shiitake mushrooms or a mix of exotic mushrooms
• 7 ounces (200 g) firm tofu, cubed
• 1 teaspoon five-spice powder
• 3 tablespoons rice wine vinegar
• Juice of 1 or 2 limes, to taste
• Sea salt
• 2 tablespoons peanut oil
For the noodle bowls
• 5.3 ounces (150 g) dried fine rice noodles
• 1½ cups (150 g) bean sprouts
• ¼ cucumber, sliced
• Handful each of cilantro, mint and Thai basil leaves
• 1 head lettuce, leaves separated
• Quick Vietnamese Pickles
• ¾ cup (100 g) roasted peanuts or cashews, crushed
- Start by finely chopping the garlic, chiles (deseed first, if you wish to reduce the heat), ginger and lemongrass. You can do this in a mini food processor if you wish. Transfer to a large bowl and stir in the sugar and “fish” sauce. Remove half of this mixture to a small bowl, cover with plastic wrap and set aside for the moment.
- To the original large bowl, add the mushrooms, tofu and five-spice, folding through to coat. Leave for at least 20 minutes or up to 1 hour.
- Meanwhile, add the rice vinegar and the juice of 1 lime to the small bowlful with 1 tablespoon of just-boiled water. Stir well, taste and adjust with more lime juice, salt or sugar, to make a balanced sweet, salty, sour and hot dipping sauce. Cover and set aside until needed; the sugar should dissolve.
- Cook the rice noodles according to the package instructions, then refresh in cold water and drain. To blanch the bean sprouts, have a bowl of ice water ready. Plunge the bean sprouts into a small saucepan of boiling water for 30 to 45 seconds. Transfer into a colander to drain and immediately submerge them in the ice water for a minute. Drain thoroughly.
- Divide the bean sprouts, noodles, cucumber, herbs, lettuce leaves and pickles to taste between 4 large serving bowls, keeping everything in distinct piles. Set aside in a cool place for a few minutes.
- Set a large frying pan over high heat until smoking hot and add the oil. Scoop up the tofu and mushroom mixture, leaving the liquid in the bowl. Cook for 4 to 5 minutes until well browned. Add the liquid and bubble down until all is richly glazed and highly colored.
- Divide the tofu and mushrooms between the bowls. Spoon one quarter of the dipping sauce over each serving and scatter with the crushed nuts.
Griddled Halloumi Salad with Date Dressing
A sweet, hot and sharp dressing, full of herbs, dates, preserved lemon and chile, makes an incredible contrast to hot, salty halloumi. Consider grilling it over hot coals. Make sure everyone is ready to eat before cooking the cheese; it tends to turn rubbery when it cools, so the magic lies in getting it from pan to plate as quickly as possible.
Serves 4 to 6
• 1 small red onion, sliced paper-thin
• Juice of 1 lemon
• ¼ cup plus 1 tablespoon (75 ml) extra virgin olive oil
• 12 Medjool dates, pitted and chopped
• 2 preserved lemons, rind only, cut into fine strips
• 1 red chile, finely sliced
• Handful of mint leaves, roughly chopped
• Small handful of parsley, finely chopped
• Sea salt and freshly ground black pepper
• 1 pound (500 g) halloumi cheese, cut into ⅜-inch (1 cm) slices
• 1 tablespoon mild olive oil
• 3⅓ cups (100 g) tender spinach leaves
• Flatbreads, toasted on the grill or warmed in a low oven, to serve, optional
- Start by mixing the red onion and lemon juice together in a bowl. Set aside for 10 minutes or so; the onion should turn a lurid pink as it pickles.
- To make the dressing, add the extra virgin olive oil, dates, preserved lemon rind, chile, mint and parsley to the red onion and lemon juice bowl, making sure you crush some of the softer date pieces into the mix to add background sweetness (a foil for the salty halloumi). Taste and season with salt and pepper as needed, remembering the cheese will be salty.
- Place a frying or griddle pan over high heat until smoking hot. You could also cook the halloumi directly on the bars of a white-hot grill, in which case make sure there’s no trace of flame and that the coals look ashen before beginning.
- Pat the halloumi slices dry with paper towels and coat with the regular olive oil. Dry-fry or griddle, in the hot pan or on the grill, until well marked. This should take 1 to 2 minutes per side. Be careful not to overcrowd the pan or everything will stew. The cheese will release itself from the pan or grill grate when it’s browned and ready, so don’t fiddle with it.
- Pile the spinach and cooked halloumi in a bowl or on a platter, spoon the dressing over and serve immediately with warmed flatbreads on the side, if you like.
Smoky Carrot and Millet Burgers
A sturdy burger, full of both roasted and grated carrots. Rendering this vegan would be easy; swap out the cheese for a couple of teaspoons of nutritional yeast flakes, or a tablespoon of seaweed seasoning, to mimic the umami notes. I like the sweet, rich flavor of brioche as a bun here, but sub with any roll you like, or leave out the bread completely in favor of the polenta fries (see next page) and a salad.
Serves 4
• 5 medium (1 pound/500 g) carrots, trimmed and scrubbed
• 2½ tablespoons olive oil
• 1 teaspoon hot smoked paprika
• Sea salt and freshly ground black pepper
• 2 shallots, finely chopped
• 1 fat garlic clove, crushed
• ½ teaspoon dried oregano
• 1 cup (100 g) millet flakes
• ¾ cup (200 ml) strong vegetable stock
• ¾ cup (50 g) walnuts, finely crushed
• 3 tablespoons finely grated vegetarian Parmesan cheese
• 4 brioche buns
• ¼ cup (60 g) mayonnaise
• 8 small lettuce leaves
• 1 avocado, sliced
• Large handful of store-bought carrot chips
• ½ small container mustard or garden cress, snipped
- Preheat the oven to 400°F (200°C). Slice 4 of the carrots (about 14 ounces/400 g) on the diagonal to make ⅜-inch (1 cm) thick slices. Toss in a roasting pan with 1 tablespoon of the olive oil, half the paprika and salt and pepper. Spread out in an even layer and roast for 25 minutes or so, until very soft and slightly browned. Crush with a potato masher to make a rough paste and set aside.
- Put 1 tablespoon olive oil in a medium saucepan with the shallots. Cook over medium-low heat for 8 to 10 minutes, stirring often, until soft and translucent. Add the garlic, dried oregano and millet flakes. Cook for a few minutes, until the millet begins to color, then stir in the stock and bring to a boil. Cover with a lid, reduce the heat and simmer briskly for 5 minutes, stirring once or twice, until the stock has been absorbed and the mixture looks like a very thick paste. Replace the lid and set aside to cool for 10 minutes.
- Finely grate the remaining carrot and add to the millet pan with the crushed roasted carrots, walnuts and Parmesan. Mix really thoroughly, season to taste (it is fine to try the mixture at this stage) and firmly shape into 4 burgers. Chill for 30 minutes if you want to grill the burgers, or cook immediately if frying.
- Put the remaining olive oil in a large frying pan set over medium heat, swirling to coat the pan. Add the burgers and cook for 2 to 3 minutes on each side, flipping with a spatula once well colored. If cooking on the grill, brush the burgers with oil before cooking for the same time, flipping very carefully only when colored enough to release from the grate easily. Split the buns and lightly toast in a toaster or under the broiler.
- Cover the lower bun halves with a spoonful of mayonnaise, a shake of paprika and a couple of lettuce leaves each, followed by a few pieces of avocado. Put a burger on top and cover with a few carrot chips and a good hat of cress. Top with the bun lid and eat immediately.
Chubby Polenta Fries with Almond Za’atar Salt
Serve these chubby fries with drinks, or as part of a larger spread with antipasti-style vegetables and olives. Roasted Tomato and Pickled Lemon Relish is excellent as a dip for them.
Baking the polenta before leaving it to set adds to the flavor significantly. It is a hands-off method but it takes time, so if you need these in a rush, stir 1¼ cups (250 g) quick polenta into 3½ cups (850 ml) simmering stock and cook, stirring, for a few minutes until very thick. Pour into the dish and leave to set for at least 2 hours, as below. Preparing the polenta can also be done up to 2 days in advance; keep it covered in the fridge until needed.
Serves 6 as a starter or as part of a spread
• ¼ cup (60 ml) olive oil
• 1¼ cups (250 g) coarse cornmeal or polenta
• 5 cups (1.2 L) vegetable stock
• ½ teaspoon plus 1 tablespoon sea salt
• Freshly ground black pepper
• Large handful of flat-leaf parsley, finely chopped
• ¾ cup (100 g) blanched almonds
• 1 batch Sesame Seed Za’atar
- Preheat the oven to 350°F (180°C). Line an 8 × 12-inch (20 × 30 cm) baking pan or dish with plastic wrap and set aside. Use 1 tablespoon of the olive oil to grease a second medium-size pan or dish and add the polenta and vegetable stock. Stir in 1⅔ cups (400 ml) of water and the ½ teaspoon of sea salt. Bake, uncovered, for 40 minutes, then stir well and cook for 10 minutes more.
- Immediately stir in half the chopped parsley and a really generous amount of black pepper. Pour into the lined pan or dish, quickly level the surface and set aside to cool completely, for at least 2 hours.
- Preheat the oven to 400°F (200°C). Cut the polenta into chubby “fries” and carefully toss with the remaining 3 tablespoons of olive oil. Spread out on 2 lined baking sheets and bake for 25 minutes, turning halfway, until golden and crisp.
- To make the za’atar salt, spread the almonds out on a baking sheet and roast alongside the polenta fries for 6 to 8 minutes, until golden brown. Blend or crush in a mini food processor, or with a mortar and pestle, with 2 tablespoons of the za’atar to form a lumpy mixture. It needs to be fine enough to dip into, but don’t take it too far or the nuts will turn to butter. Stir in the remaining za’atar, the 1 tablespoon of sea salt and the remaining parsley.
- Serve the za’atar salt in a couple of small bowls alongside the hot fries, ready to scatter over or use as a potent dip.
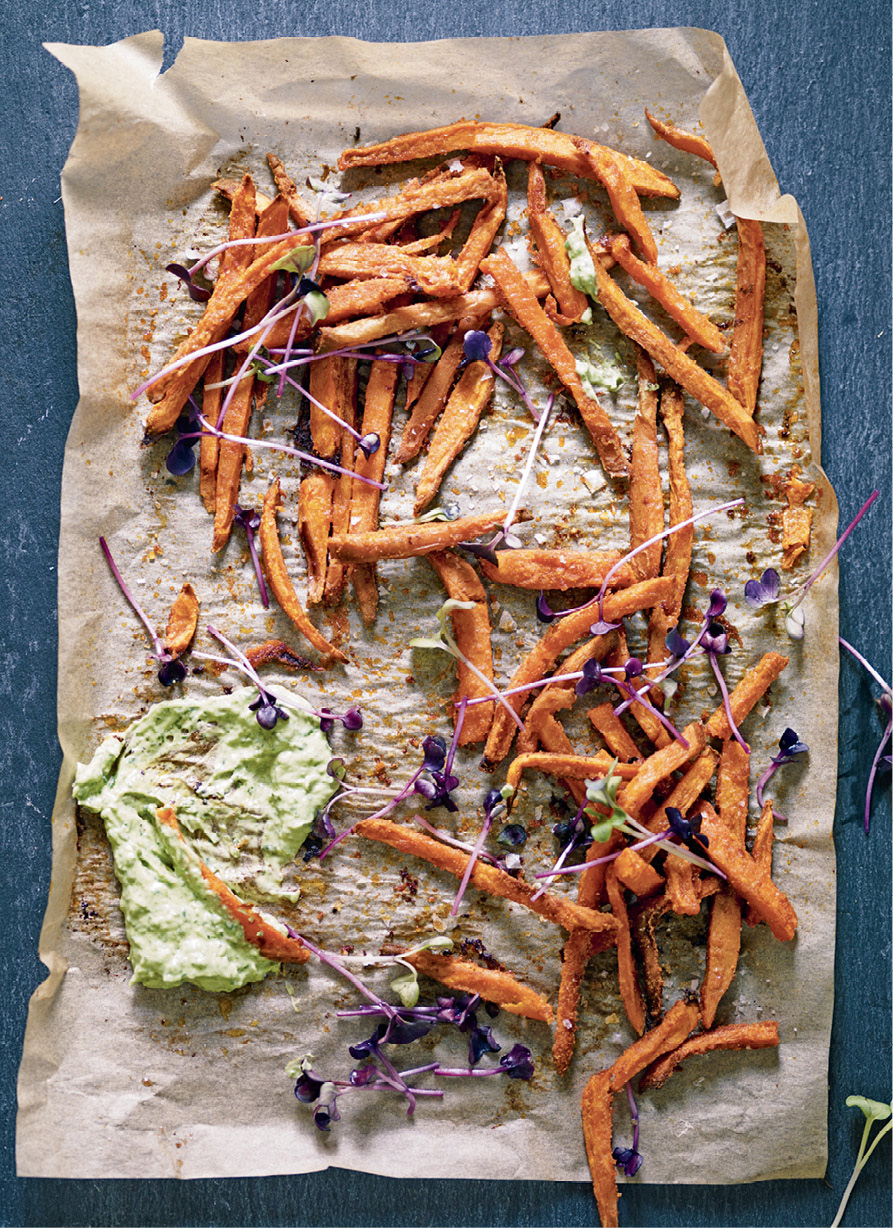
Sweet Potato Fries with a Green Herb Dip
Truly crisp, baked sweet potato fries are an elusive beast. Soaking them draws out starch, which helps immensely. Add a generous hand when spreading the fries out (if in doubt, give them more space), a spiced cornmeal coating and a good seasoning after cooking, not before (it will only make them soggy), for caramel-edged results. Temper the sweetness with a soothing avocado dip, stuffed with herbs, for spooning over or dunking in.
Serves 4 as a starter, side dish or snack
• 2¼ pounds (1 kg) sweet potatoes (about 4 medium), scrubbed
• 2 heaping teaspoons cornstarch
• 1 teaspoon fine cornmeal
• ½ to 1 teaspoon hot paprika, depending on heat tolerance
• ½ teaspoon dried garlic powder
• 3 tablespoons peanut or sunflower oil
• 1 small, ripe avocado, halved, pitted and flesh scooped out
• ¾ cup (200 g) Greek yogurt or crème fraîche
• Juice of ½ lime
• Sea salt and freshly ground black pepper
• 2 generous handfuls of soft summer herbs, such as basil, mint and cilantro in any combination, plus more herb leaves, sprouts or shoots, to serve
- Start by slicing the sweet potatoes from top to tail to create large oblongs, about ½ inch (1.5 cm) thick. Stacking a few at a time, slice lengthwise into long ½-inch (1.5 cm) thick batons. Submerge them in a large bowlful of cool water. Set aside for at least 1 to 2 hours; if you have more time, put the bowl in the fridge and leave for up to 12 hours.
- When ready to cook, preheat the oven to 425°F (220°C) and line your largest 2 baking sheets with parchment paper (the fries really need this or they will stick). Combine the cornstarch, cornmeal, paprika and garlic powder in a small bowl.
- Drain the sweet potatoes in a colander and transfer into a clean, dry kitchen towel. Rub and pat from all sides to get as much excess water off as possible.
- Now transfer the fries into a large plastic bag or, failing that, a large mixing bowl. Either way, sprinkle with the cornstarch mixture and shake the bag or toss the fries to coat thinly and evenly. Transfer the oil into the bag or bowl and again, shake or toss to coat. Divide the fries between the baking sheets. If they don’t sit in a single layer with space to breathe, use a third baking sheet, too (a bit bothersome, but overcrowding = soggy). Roast for 15 minutes, then rotate the pans and cook for 10 to 15 minutes more until browned.
- Meanwhile, throw the avocado into a blender with the yogurt and lime juice. Blend until smooth, season with salt and pepper to taste and add the herbs. Pulse a couple of times, to roughly chop the leaves rather than purée them, then spoon the lot into a small bowl.
- Allow the fries to cool for 5 minutes, then carefully remove from the pans. Shower with salt and pepper and serve with the dip and a fistful of herbs or shoots, such as the purple radish sprouts in the picture.
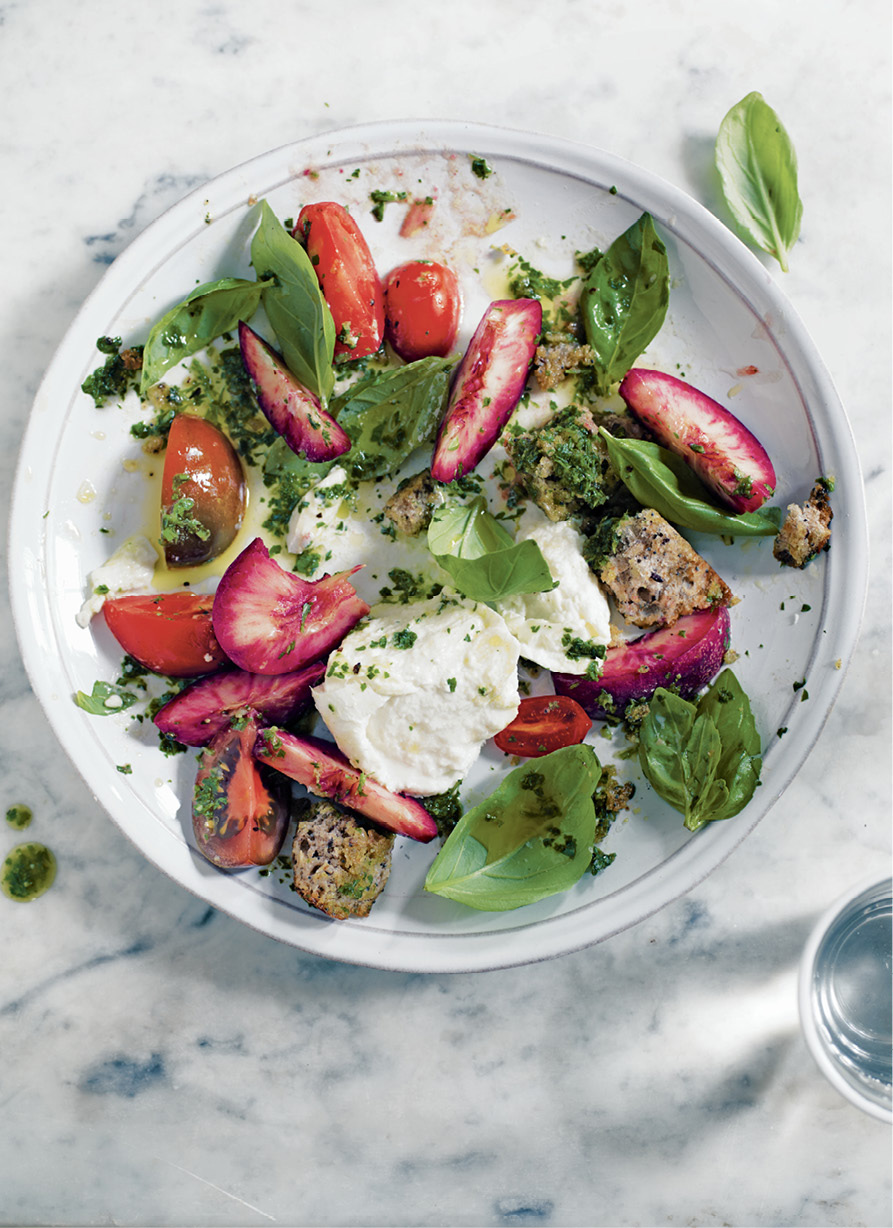
Nectarine, Tomato and Burrata Salad
A beautiful salad for a summer lunch or outdoor supper, heavily inspired by a Skye Gyngell recipe using similar flavors. As with anything simple, this dish relies wholly on the quality of its components, so make it in late summer when ripe tomatoes, heady basil and the most fragrant nectarines or peaches are in season. I used blush-red nectarines with an incredible flavor for this photo.
Serves 4
• 7 or 8 slices (300 g) stale sourdough bread
• 2 tablespoons extra virgin olive oil, plus more for the dressing
• Sea salt and freshly ground black pepper
• 2 handfuls of basil leaves
• Small handful of mint leaves
• ½ small garlic clove, crushed
• Squeeze of lemon juice
• 4 ripe nectarines or peaches
• 12 ripe, heirloom tomatoes, depending on size
• 2 spheres of vegetarian burrata or mozzarella, drained
• Good balsamic vinegar, to drizzle
- Preheat the oven to 350°F (180°C). Slice the crusts from the bread and tear the remainder into generous bite-size pieces. Toss with the extra virgin olive oil. Season with salt and pepper and roast in the oven for about 15 minutes, turning at least once, until pale golden and crisp. Transfer into a bowl.
- Put half the basil and all the mint into a mini food processor, or mortar and pestle, with the garlic, a generous pour of extra virgin oil and a good pinch of salt. Blend or pound to form a rough, sludgy purée, adding more oil if it needs loosening further. Stir in lemon juice to brighten, taste and adjust the seasoning. Spoon a couple of tablespoons into the bread bowl and toss to coat the bread lightly.
- Halve and pit the nectarines, slicing them into thick wedges. Slice the tomatoes into wedges according to size; you want all the pieces to be easy to eat, but not so small they lose their identity.
- Toss the nectarines and tomatoes with the remaining basil (tearing the larger leaves) in the bread bowl. Divide between serving plates with the burrata or mozzarella, loosely torn over the plates as you go. Spoon more basil and mint dressing over, season and finish with a few drops of good balsamic vinegar.
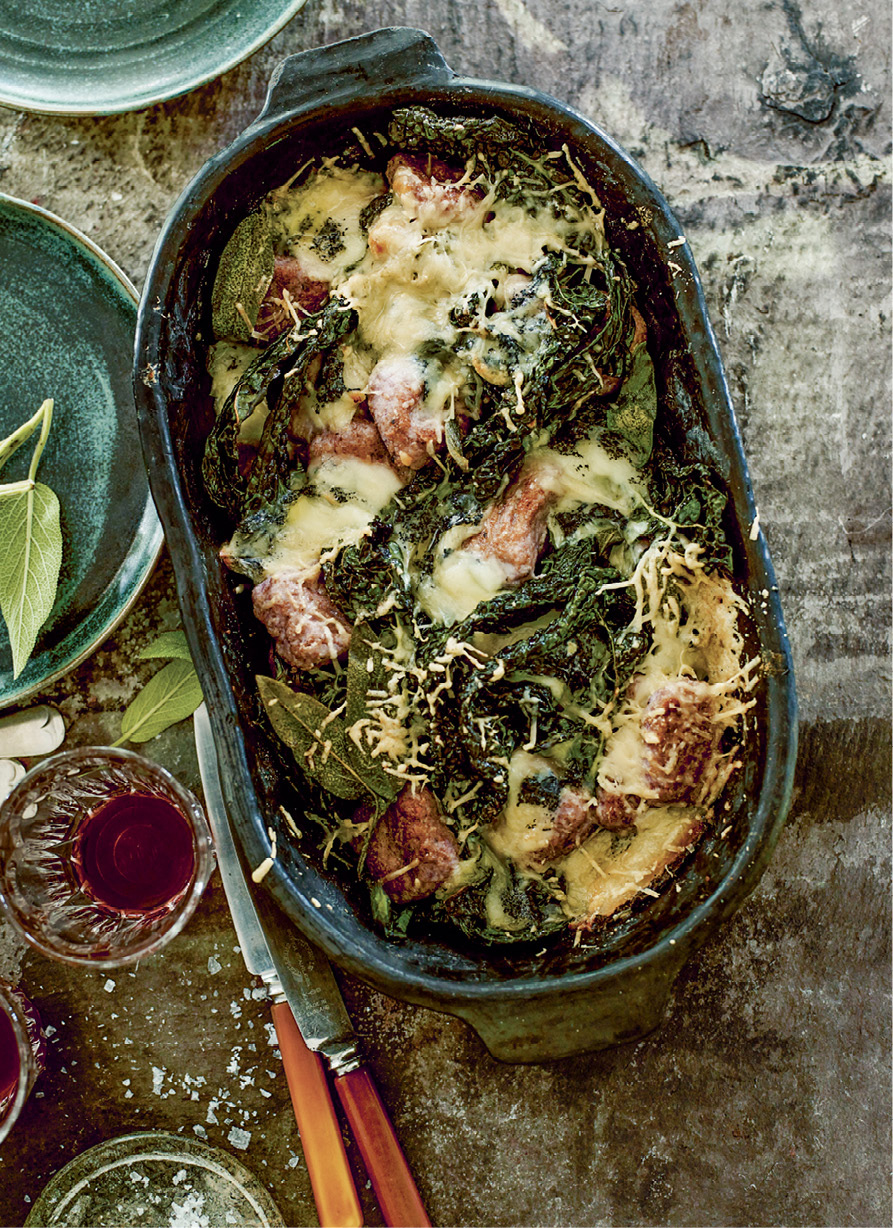
Baked Purple Goat Cheese Gnocchi
The gnocchi can be formed and chilled—or boiled and chilled—before the final bake, if you want to get ahead. I tend to take the recipe right through to the point of baking, assembling it completely and chilling it for a day, ready to slide into the oven. You could also skip the final baking step and simply toss the ingredients in the hot pan to finish. It goes without saying that any floury potato will do, purple or not.
Serves 4
• 2 cups (500 g) ricotta cheese
• 1¼ pounds (600 g) smallish purple potatoes, scrubbed
• Sea salt and freshly ground black pepper
• 1 cup (100 g) finely grated vegetarian Parmesan cheese
• 2 medium eggs, lightly beaten
• Generous grating of nutmeg
• 1¾ to 2 cups (225 to 250 g) whole-grain spelt flour, plus more to dust
• 1 tablespoon olive oil, plus more for the tray
• 4 tablespoons unsalted butter
• Small bunch of fresh sage leaves
• 1 fat garlic clove, finely chopped
• Large bunch of lacinato kale (cavolo nero), coarse ribs removed, leaves roughly chopped
• 7 ounces (200 g) soft and fudgy goat cheese, chopped or broken up
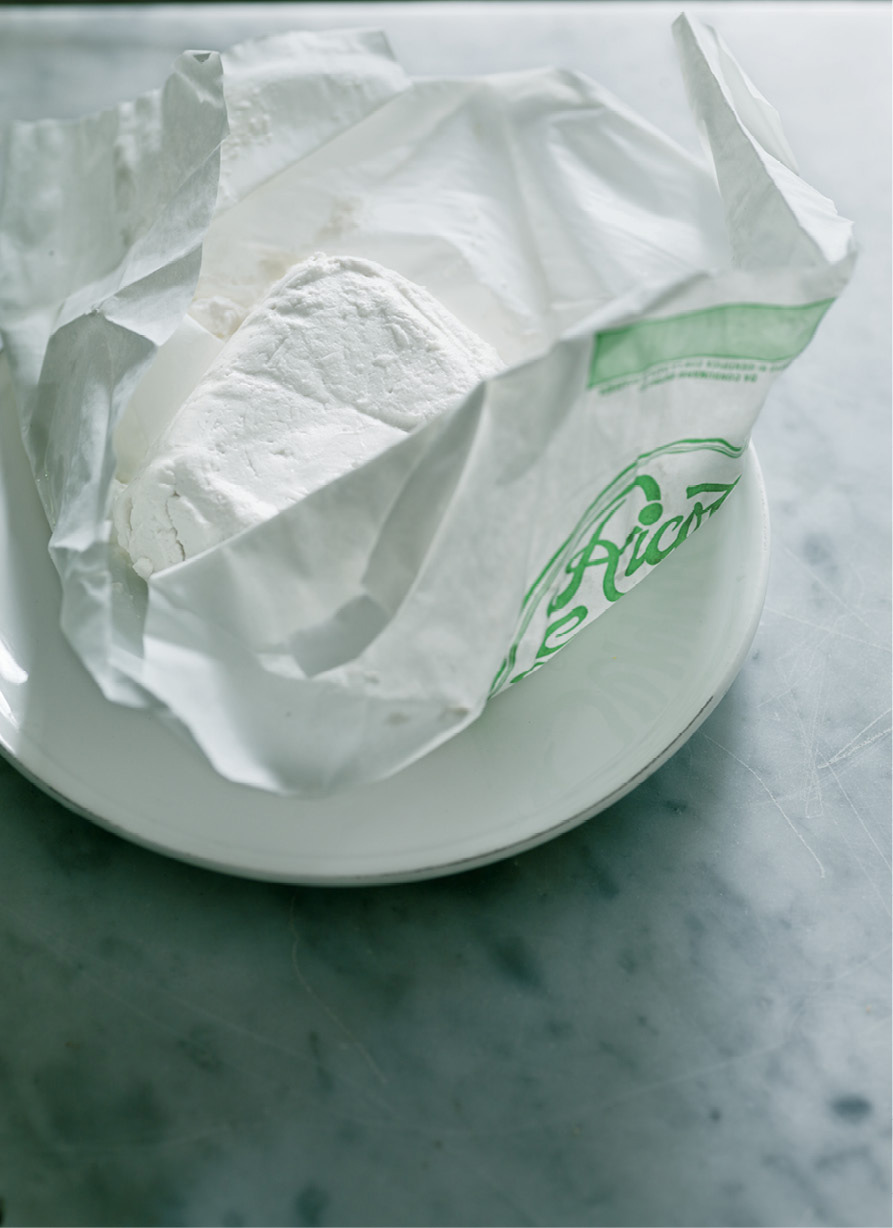
- Put the ricotta on a plate lined with a double layer of muslin or cheesecloth. Put another couple of layers of muslin or cheesecloth on top, cover with a second plate and press down firmly for a couple of minutes, changing the cloths if needed. When the ricotta is firm and flattened, weigh it. You will need 1¼ cups (300 g) for the gnocchi dough. Any extra can be reserved and added to the goat cheese quantity later on in the recipe.
- Cook the potatoes in their skins in a large saucepan of boiling salted water until tender. This will take 15 to 20 minutes, depending on their size. Drain and cool slightly.
- Peel the spuds by scraping the skins off with a small knife. Pass through a potato ricer into a large bowl. (If you don’t have a potato ricer, use a masher.) Beat in the drained ricotta, then add half the grated Parmesan, the eggs and nutmeg. Mix lightly to combine, seasoning and adding as much of the flour as needed to make a firmish, moldable dough. Do not overwork, or the gnocchi will be heavy.
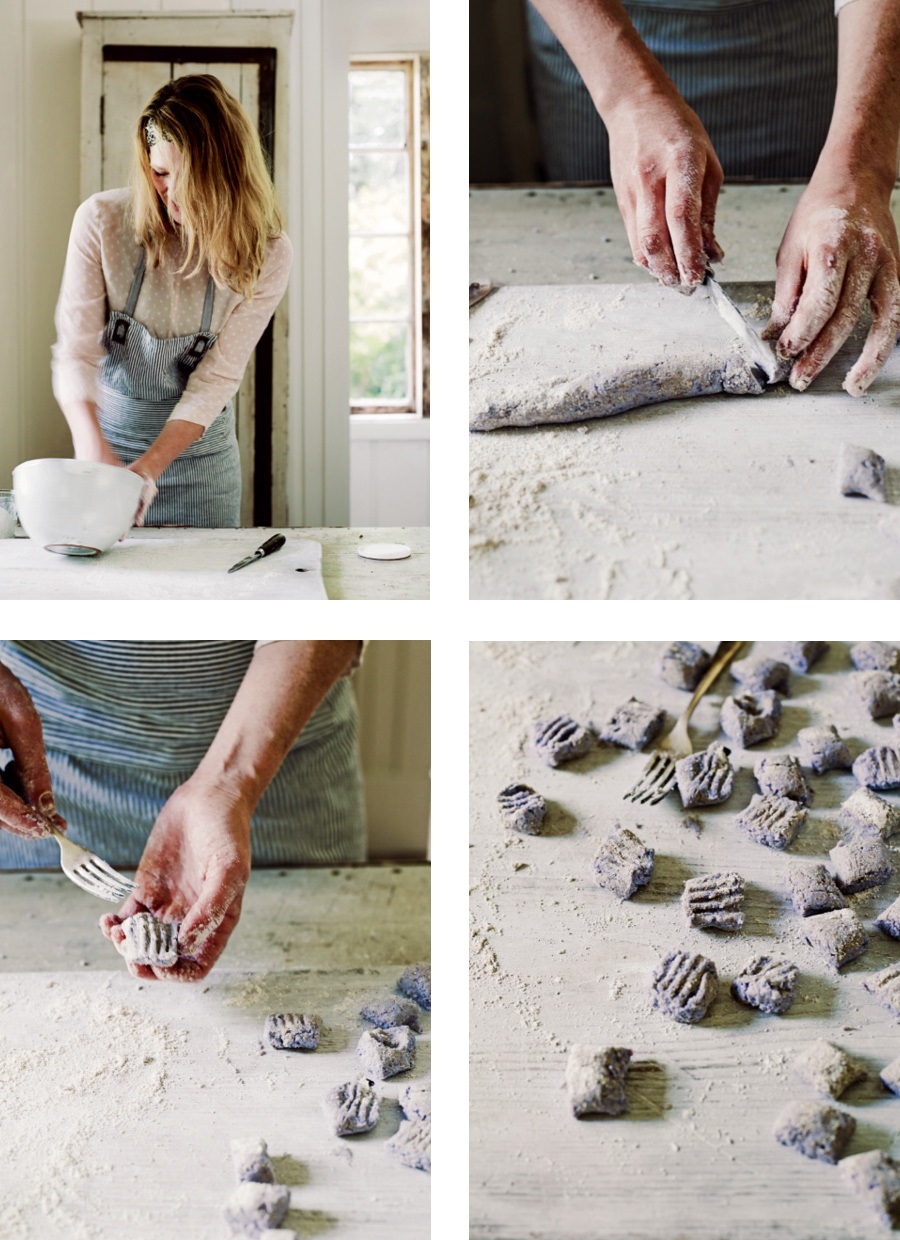
- Divide the dough into 6 even pieces and roll each out on a lightly floured work surface to make ¾-inch (2 cm) thick cylinders. Cut the cylinders into 1-inch (2.5 cm) lengths and roll each gnocchi over the well-floured tines of a fork to mark it, pushing your floured thumb into the other side to create an indent as you do so. Space out on lightly floured trays and chill for up to 1 hour if not cooking immediately.
- Cook the gnocchi, in batches, in a large saucepan of gently simmering salted water. Remove them with a slotted spoon after they have floated to the surface and remained there for no more than 2 minutes. Transfer to a lightly oiled tray and set aside. At this stage the gnocchi can be cooled, covered and chilled for up to 1 day.
- Preheat the oven to 425°F (220°C).
- Melt ½ tablespoon of the olive oil and 1 tablespoon of the butter together in a large frying pan set over medium heat. Working in 2 batches, add half the gnocchi to the pan and brown quickly on all sides. Remove to a large gratin dish or roasting pan (or you can use 2 medium dishes or pans) with a slotted spoon. Repeat, with more oil and butter, to brown the remaining gnocchi.
- Reduce the heat under the now-empty pan slightly and add the remaining butter. Add the sage leaves and cook for a few seconds until just starting to brown. Remove and set aside. Stir in the garlic and kale and cook, stirring often, until the leaves are dark and wilted (3 to 4 minutes). Add to the gnocchi dish or dishes with the sage leaves, combine gently and dot any reserved ricotta and all the goat cheese on top, finishing with the rest of the grated Parmesan.
- Bake for 15 minutes, or up to 20 minutes if the dish has been assembled and chilled in advance, until the goat cheese has melted and is bubbling.
Raw Vegetable Platter with Avocado-Pistachio Dip
The idea here is to take a selection of really beautiful seasonal vegetables and salads, carefully prepared, ready to dunk first in the buttery-smooth dip and second into a pistachio-lime blend. Plan on a good handful of prepared veggies for every person. Both pistachios and avocados are expensive, so pumpkin seeds are a good (and tonal) alternative for half or all the pistachios, if you would rather.
Serves 6 to 8 as party food or a starter
• A selection of raw vegetables and leaves (a good handful, prepped, per person): such as chicory and endive, crisp lettuce leaves, radishes, baby carrots, young asparagus, green beans, sugar snaps, cucumber, cherry tomatoes, cauliflower, celery, fennel, kohlrabi . . .
• 1 large, very ripe avocado
• 1½ cups (150 g) unsalted (shelled) pistachios
• 1 fat garlic clove, chopped
• 1 green chile, chopped
• ¼ cup (60 ml) cold-pressed avocado or extra virgin olive oil
• Small handful of cilantro, roughly chopped
• Finely grated zest and juice of 1 large lime
• Sea salt and freshly ground black pepper
- Take the time to gently scrub your crisp and colorful vegetables, removing any mud or grit. Halve, quarter or slice them as needed to make them easy to eat, but try to keep any decent leaves or green stalks in place on, say, radishes or baby carrots, to pick them up with. Halve, pit and scoop the flesh from the avocado. It needs to be perfectly ripe to blend smoothly.
- Put the pistachios in the small bowl of a powerful food processor or blender and blend to a rough mixture using the pulse button. Transfer into a bowl.
- Now take out the most finely ground third and set aside. Return the remaining two thirds of pistachios to the food processor with the garlic, chile and avocado. Blend on a high speed, stopping to scrape down the sides. Add the oil, cilantro, lime juice, a pinch of salt and 3 tablespoons of water. Blend again until buttery-smooth (this is when a powerful blender will really come into its own), then taste and adjust the seasoning with salt and pepper as needed. Divide between a couple of small serving bowls.
- Combine the reserved pistachio mixture with the lime zest and a pinch of salt and transfer into a third small bowl.
- Arrange the vegetables on an abundant platter and nestle the 3 dip bowls among them.
Chard Gratin with Gruyère
I rarely cook with cream these days, preferring bright flavors to shine through unfettered . . . but when it’s worth doing, the results can be incredibly luxurious. Serve this velvet-textured and buttery chard gratin as a convivial winter’s supper in itself; a simple treat, with braised lentils or excellent bread and an easy side dish, such as a bowl of roasted carrots, to accompany.
Serves 6 as a main course, or 8 as a side dish
• 2¼ cups (500 ml) vegetable stock
• 1 fresh bay leaf
• 1¼ cups (300 ml) heavy cream
• 3½ tablespoons unsalted butter
• 2 tablespoons whole-grain plain or spelt flour
• ¾ teaspoon freshly grated nutmeg
• 1½ cups (150 g) grated vegetarian Gruyère cheese
• 2 egg yolks
• 2¼ pounds (1 kg) Swiss or rainbow chard
• 2 garlic cloves, crushed
- Preheat the oven to 350°F (180°C).
- Put the stock in a small pan with the bay leaf and simmer until reduced by one third. Add the cream and keep warm.
- Melt half the butter in a medium saucepan over medium heat, stir in the flour and continue to cook for 1 to 2 minutes, stirring constantly. Reduce the heat to low. Slowly add the cream mixture, whisking all the time with a balloon whisk, until smooth, thickened and silky. Keep simmering gently for 5 minutes to cook out the flour. Remove from the heat and stir in the nutmeg and half the Gruyère, continuing to stir until it has melted. Whisk in the egg yolks. Cover the surface with plastic wrap to prevent a skin forming and set aside.
- Slice the chard stalks from the leaves. Shred the leaves into ⅜-inch (1 cm) thick ribbons and set aside. Cut the stems into 1-inch (3 cm) pieces and keep separate.
- Put the garlic and remaining butter in a large frying pan, place over low heat and fry very gently for a couple of minutes, until softened but not colored. Stir in the chard stems and cover with a lid or baking sheet. Continue to cook for 5 minutes until the stems are translucent and soft. Uncover, increase the heat and stir in the leaves, cooking briskly for a couple more minutes until the leaves have wilted and the liquid in the pan has evaporated.
- Transfer into a large gratin dish and cover with the sauce, tossing to combine slightly. Scatter with the remaining Gruyère and bake for 25 minutes, until golden and bubbling.
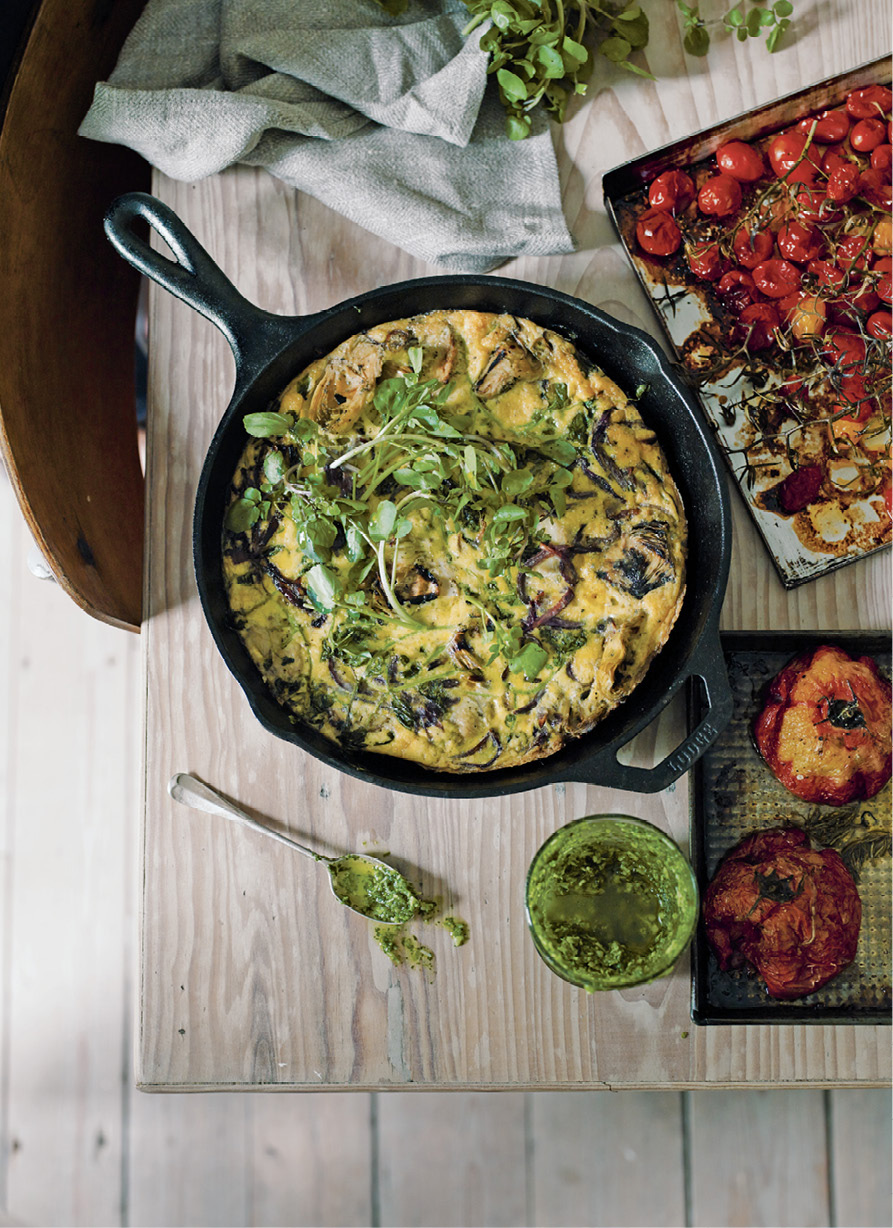
Slow-Baked Artichoke Frittata, Watercress Pesto and Slow-Roasted Tomatoes
Cooking a frittata slowly and gently, as you would a quiche, makes perfect sense if you have ever tried cooking one under the broiler—as I have—and cut into it only to find an unwelcome layer of runny egg hiding under a beautifully browned top. You won’t have that problem here. Use any almonds you like in the watercress pesto: Skin on, blanched or sliced will all do perfectly.
Serves 4 to 6
• 1 pound (500 g) flavorful tomatoes, halved if larger than a walnut
• 1 cup (200 g) charred artichoke hearts in olive oil, drained (oil reserved)
• Sea salt and freshly ground black pepper
• 2 garlic cloves, roughly chopped
• Large pinch of chile flakes
• ¼ cup (30 g) roughly chopped almonds
• 2 bunches of watercress
• ½ to ¾ cup (120 to 200 ml) extra virgin olive oil, or other cold-pressed oil, plus more to serve
• ½ cup (50 g) finely grated vegetarian Parmesan cheese
• Lemon juice, to taste
• 1 red onion, finely sliced
• 12 eggs
- Preheat the oven to 350°F (180°C). Put the tomatoes on a baking sheet, drizzle with a little oil drained from the artichokes, season with salt and pepper and put in the oven to roast slowly; they’ll be ready at the same time as the frittata.
- Pound or blend the garlic, chile flakes and a pinch of salt with a mortar and pestle or in the bowl of a mini food processor. Add the almonds and pulverize by hand or machine until roughly chopped. Reserving a handful of the prettiest watercress sprigs for later, add the rest of 1 bunch of watercress to the mortar or food processor bowl. Again, pound or blend, adding enough extra virgin olive oil to loosen and get the pesto running freely, starting with ½ cup/120 ml. Stir in half the grated Parmesan and check the seasoning, using a little lemon juice to brighten, if you like.
- In a large, heavy-based frying pan (ideally 10 inches/25 cm in diameter), cook the sliced onion in 2 tablespoons more drained artichoke oil with a pinch of salt over low heat for 10 minutes, until softened and lightly browned.
- Lightly whisk the eggs with the remaining Parmesan and some salt and pepper in a mixing bowl.
- Increase the heat under the onion pan. Add the artichokes and remaining watercress (except the reserved sprigs), stirring over the heat for 30 seconds to wilt the greens. Pour in the egg mixture and cook for a further 30 seconds. Slide the pan into the oven and cook for 25 to 30 minutes, until the eggs are just set and the tomatoes look a bit shriveled (they will have had about 1 hour). Serve the frittata with a squeeze of lemon juice and a drizzle of extra virgin olive oil, the roasted tomatoes, watercress pesto and reserved watercress sprigs.
Baked Squash, Ricotta and Sage
It is a relief, I find, to accept that food for friends or family doesn’t always have to be served piping hot. As it cools slightly, this layered bake of squash- and sage-spiked ricotta firms up enough to turn out and slice. I suggest a round cake pan here, as most people have one, but a loaf pan would also work well. Serve it just warm, or even at room temperature, as an alternative to pâté, with sourdough bread, a drizzle of balsamic vinegar and dressed salad leaves, or roasted pepper antipasti.
Serves 4 to 6
• 2½ pounds (1.1 kg) firm and dense winter squash, such as butternut, peeled and deseeded (prepared weight)
• 3 tablespoons olive oil
• ½ teaspoon chile flakes
• 12 medium-size fresh sage leaves
• 2 cups (500 g) ricotta cheese, drained
• 3 eggs, lightly beaten
• 1 cup (50g) finely grated vegetarian Parmesan cheese
• ½ cup (75 g) pine nuts, toasted (see Rye Toasts with Pine Nut Butter and Avocado)
• Sea salt and freshly ground black pepper
• 1 tablespoon small capers, rinsed and dried
- Preheat the oven to 425°F (220°C). Carefully slice the squash into ½- to ¾-inch (1.5 to 2 cm) thick slices, making them as long and even as possible. Toss the slices with 2 tablespoons of the olive oil and the chile flakes and divide between 2 large baking sheets, so they sit in a single layer with no overlapping and roast quickly without steaming. Roast for 20 minutes, until softened and beginning to brown. Set aside to cool slightly.
- Reduce the oven temperature to 350°F (180°C). Finely chop half the sage leaves. Mix the ricotta, eggs, grated Parmesan, chopped sage, pine nuts and plenty of salt and pepper in a mixing bowl.
- Line a deep 8-inch (20 cm) cake pan with parchment paper. Cut an extra sheet of parchment to cover the pan later. Line the base with a double layer of roasted squash slices, making sure there are no gaps. Cover the sides with squash slices as best you can. Spoon half the ricotta mixture over evenly. Repeat the layers of squash and ricotta, finishing with a final layer of squash slices to cover completely. Bake for 50 minutes to 1 hour, until slightly risen and springy to the touch.
- If you want to turn this out, cover with the reserved sheet of parchment and weigh down with a couple of unopened cans. Set aside to cool for 30 to 40 minutes. (Or leave it in the fridge overnight and serve cold.) When ready, remove the unopened cans and paper, top with a serving plate and flip the whole lot over.
- Heat the remaining 1 tablespoon of olive oil in a frying pan over medium heat and add the capers and whole sage leaves. Cook for 1 to 2 minutes, until beginning to sizzle. Drain on paper towels, season with pepper and spoon onto the strata.
- Slice into wedges and serve.
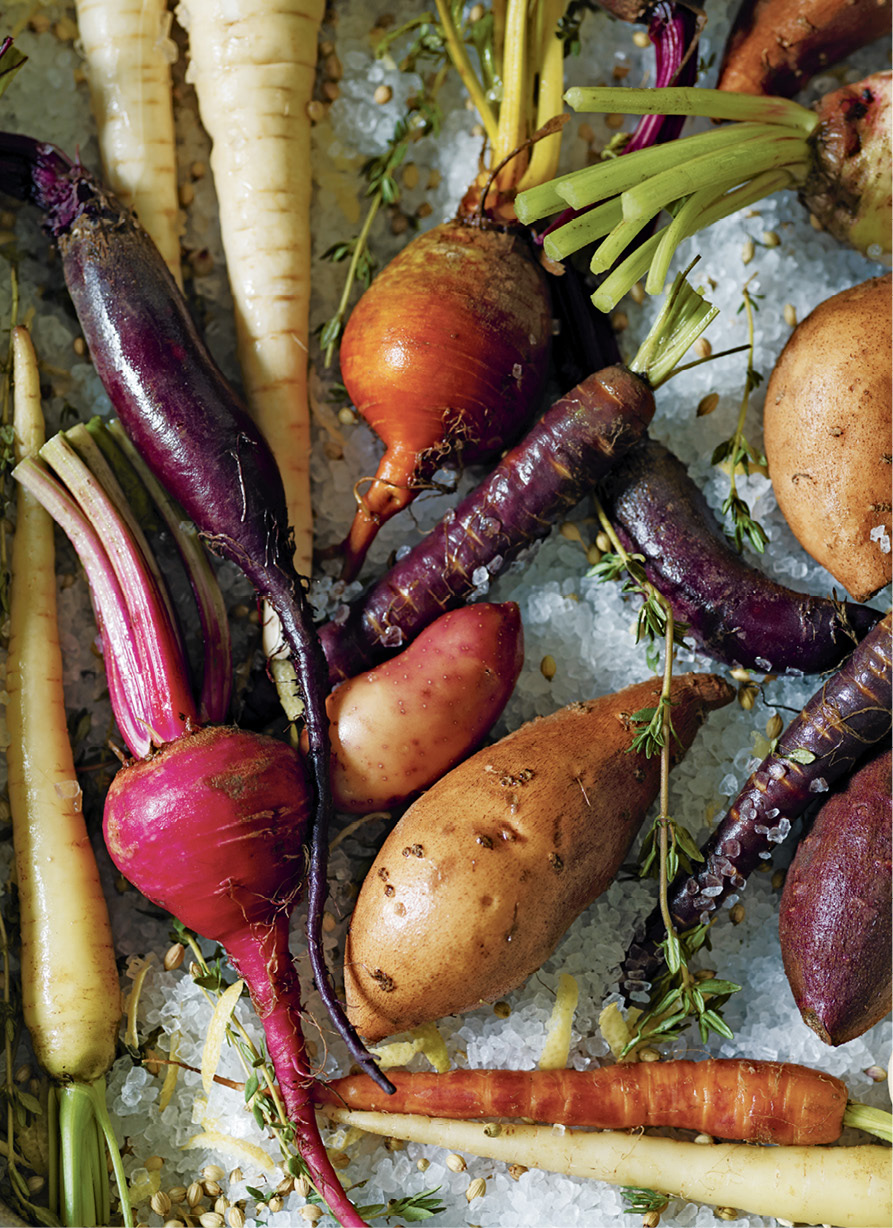
Salt and Coriander Roasted Roots with Smoky Yogurt
A bed of spiced salt adds theater to an easy roast; it intensifies the vegetables’ flavors, too. I haven’t added egg white to the salt crust to make a paste, as I didn’t find it necessary and because, with such a large quantity of salt, it seemed a shame to make it unusable a second time. This way, it can be reused as a seasoning, if you don’t mind the odd zip of zest or coriander seed, or even used to bake more roots.
Serves 6 to 8 with salad
• 6½ pounds (3 kg) rock salt
• Finely grated zest of 2 unwaxed lemons, plus 1 tablespoon juice
• ¼ cup (20 g) coriander seeds, roughly crushed
• Handful of thyme sprigs, plus thyme leaves to serve
• 3¼ pounds (1.5 kg) baby or small root vegetables in their scrubbed skins, such as multicolored beets, multicolored carrots, parsnips, orange and purple sweet potatoes, new potatoes . . .
• 1⅓ cups (300 g) mild Greek yogurt
• 1 small garlic clove, crushed
• Freshly ground black pepper
• 2 or 3 chipotle chiles in adobo, crushed, or 2 teaspoons chipotle paste
• ½ teaspoon hot smoked paprika
• Cold-pressed oil (olive, canola, pumpkin seed, hemp . . . ), to drizzle
• Seasonal greens, to serve
- Preheat the oven to 400°F (200°C).
- Combine the salt with the lemon zest, crushed coriander seeds and thyme sprigs. Spread half this mixture out across a very large roasting pan (or divide between 2 smaller pans). Nestle the roots into this mixture, making sure any larger ones aren’t touching to give the heat a chance to circulate around them properly. Spread the rest of the salt on top, mounding it up to cover every vegetable. Slide into the oven and cook for 50 minutes to 1 hour, until a skewer slides into the center of the largest vegetable easily (stick it in, right through the salt). Spoon the top layer of salt away, but keep the roots nestled in the salt to serve (everyone can peel or split their own veggies as they eat).
- Combine the yogurt with the crushed garlic, lemon juice and pepper to taste in a serving bowl. Swirl in the crushed chipotle and dust with the paprika. Drizzle with the cold-pressed oil, shower with extra thyme leaves and serve alongside the roots and a large pile of salad leaves, spooning over the yogurt as you eat.

Baked Giant Beans with Dill
These are incredible. It really is worth tracking down dried gigantes beans. You could, I suppose, make this with 2¼ pounds (1 kg) of luscious, jarred, ready-made gigantes, but it would be very expensive and the beans are already tender, so you’d have to reduce both liquid and baking time, taking great care when stirring. Cooking your own keeps costs low, and means you can control the firmness of the beans. Serve them with an arugula salad—dressed with lemon juice and olive oil—and rice, roasted vegetables or toasted pita breads.
Serves 8
• 1 pound (500 g) dried gigantes beans or lima beans
• 2 carrots
• 2 celery stalks
• 2 onions
• 5 garlic cloves
• ¾ cup (200 ml) extra virgin olive oil
• 2 teaspoons dried oregano
• Two 14.5-ounce (400 g) cans plum tomatoes
• Sea salt and freshly ground black pepper
• Bunch of dill, finely chopped
• 1⅓ cups (200 g) crumbled feta, optional
- Cover the beans with cool water in a very large bowl and soak overnight, or for at least 8 hours. If you don’t have the time, put the beans in a very large saucepan, cover generously with cool water and bring to a boil. Simmer for 2 minutes and skim the foam off. Turn the heat off and set aside for 3 hours. Either way, drain the beans in a colander and rinse well.
- Again, cover the beans with fresh water—this time in a very large saucepan—and bring to a boil. Skim off any foam with a large spoon (keep this nearby to skim regularly) and simmer for 45 to 50 minutes, until very nearly cooked. Start checking after 40 minutes, as cooking time can vary. Strain the beans, reserving 2¼ cups (500 ml) of the cooking liquid.
- Preheat the oven to 340°F (170°C). Finely chop the carrots, celery, onions and garlic. Add to the rinsed-out pan with about 3 tablespoons of the olive oil and the dried oregano. Cook very slowly and gently for 15 minutes or so, stirring often, until soft and sweet. Don’t let them brown. Open the tomato cans and snip the tomatoes with scissors to chop roughly. Pour into the pan and increase the heat to medium. Cook for 5 to 10 minutes, until the oil separates. Stir in the reserved bean-cooking liquid and remove from the heat. Add the remaining olive oil and season generously.
- Put the beans in a large baking dish and pour the tomato mixture over. It will look very liquid. Carefully slide into the oven and bake for 1 hour 45 minutes, or until the sauce looks thick and rich. Stir every 30 minutes while they cook. Keep an extra ¾ cup (200 ml) water on hand and, if the beans look at all dry after the first hour, add a little. Once finished, the beans should be cloaked in a thick, rich sauce. Remove from the oven, leave to sit for 10 minutes, then gently stir in the dill. Scatter with feta, if using, and leave for 5 more minutes for the cheese to soften before serving.
Cooking for groups can be costly, so a cheap, nutritious lentil base, ready to soak up and enhance aromatic additions, is a valuable tool. Every variety teems with insoluble fiber, sustaining protein, folic acid, iron and useful levels of potassium, among other minerals and vitamins. As a rough guide, stick to a lentil classically used with the flavors you want. Red lentils, for example, combine perfectly with Asian spices, tomato, coconut and greens, collapsing to form a dal, but a small French-style lentil would need hours of cooking to do the same.
A basic, beautifully cooked pan of lentils will provide many satisfying suppers. A sturdy type—say a Puy lentil, black Beluga or humble brown—will do well. As a guide, 1½ cups (300 g) will feed four to six, depending on appetite.
So, how to cook them? First, place your lentils into a sieve to check for stones. Hold them under cold running water for a quick rinse, too, removing any grit or dirt. Transfer to a saucepan and add scrubbed vegetables freely. I nestle in a whole carrot, a celery stalk, a halved onion and half a garlic bulb. This is also a good place to add flavorful parsley stalks. Essentially, you are creating stock in the pan. As lentils simmer, they swell, absorbing liquid and, if you let them, aromatics. A judicious hand with woody herbs (rosemary, bay, thyme) will pay dividends if it will suit your end flavors; simply fish out the stalks before serving. Similarly, toasted spices (cumin, caraway, coriander, black pepper . . . ) will infuse lentils with warmth, but you can always stir them in after a quick sauté with a chopped onion.
The issue of salting lentils is contentious. I dare say that boiling a lentil in sea water might give it a tough jacket, but I have not found that a meager amount of salt makes any difference. So, cover the lentils with a generous layer of water, adding a pinch of salt. I always include a bay leaf. (I once read that bay, added to lentil cooking water, helps to neutralize unwanted effects after eating. However, bay’s sharp, peppery notes enhance lentils beautifully, so the habit is as much for flavor as anything else.)
Bring to a boil, reduce the heat and simmer gently for 25 minutes. Begin to check after this time, but expect to cook them for up to 30 minutes more. Season and let them rest for five minutes to settle before draining well. Keep the lentils—chilled—for a few days before eating as is, or add further character with oils, sautéed vegetables, spices or herbs to skew the flavor and feel to pretty much any region of the world. They could be the foundation to a salad, vegetarian patty, curry or braise, or, cooked down further, as a soup or mash. A panful of possibilities.
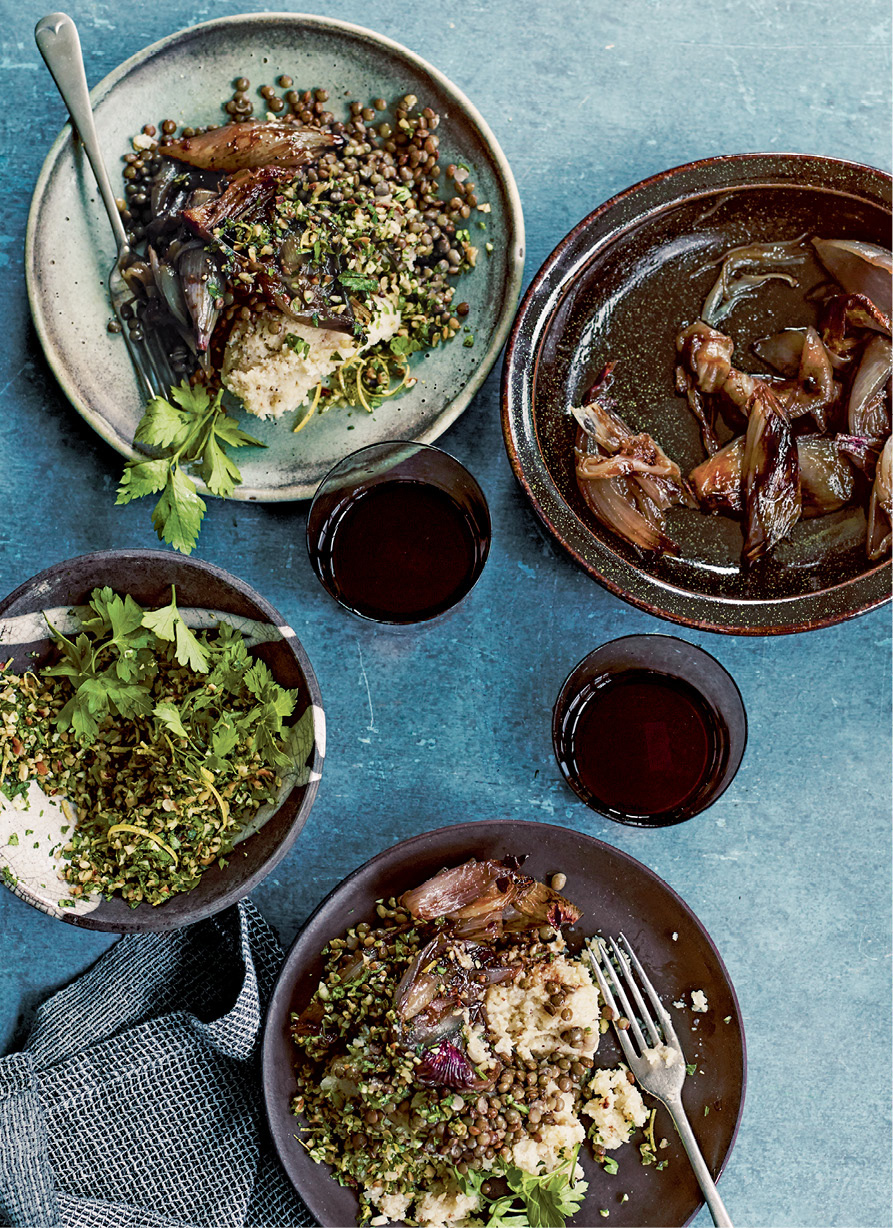
Sticky Alliums with Lentils and Hazelnut Gremolata
A zesty gremolata, more commonly scattered over Italian braises, lifts this unpretentious dish—based on roasted cauliflower, lentils and mellow balsamic shallots—into sophisticated, main course territory. If your bottle of balsamic vinegar is a good-quality version, you could drizzle a little extra over each plate at the end.
Serves 6 as a light main course
For the dish
• 1 cup (200 g) Puy lentils
• Sea salt and freshly ground black pepper
• 4 to 5 tablespoons extra virgin olive oil, plus more for drizzling
• Squeeze of lemon juice
• 14 ounces (400 g) banana shallots or large shallots, peeled and halved
• 1 sweet onion, peeled and quartered
• ¼ cup (60 ml) balsamic vinegar
• 1 large cauliflower head, cut into small florets
• 2 garlic cloves, peeled
For the gremolata
• Large bunch of flat-leaf parsley, finely chopped
• ¾ cup (75 g) shelled hazelnuts, toasted and crushed
• 3 garlic cloves, finely chopped
• Finely grated zest of 2 unwaxed lemons
- Cover the lentils with plenty of cool water, bring to a boil, add a generous pinch of salt, reduce the heat and leave to simmer gently for 25 to 30 minutes, until tender. Drain and dress with a dash of olive oil and lemon juice.
- Preheat the oven to 400°F (200°C). Put the shallots and onion in a small roasting pan, season with salt and pepper and drizzle with 2 tablespoons of the olive oil. Cover tightly with foil and roast for 40 minutes until very soft. Uncover, drizzle with the balsamic vinegar and return to the oven for 5 to 10 minutes, stirring once or twice, until caramelized and sticky.
- Toss the cauliflower and whole garlic cloves with 2 to 3 more tablespoons olive oil, as needed to coat. Spread out in a roasting pan and roast for 20 to 25 minutes, until the cauliflower is very tender and just beginning to brown. Transfer the cauliflower to a food processor with an extra drizzle of olive oil. Blend until smoothish. Alternatively, mash the cauliflower and garlic by hand with a potato masher. Season with salt and pepper.
- To make the gremolata, combine all the ingredients in a bowl, cover and set aside in a cool place until needed.
- Serve a generous spoonful of warm cauliflower mash with a spoonful of lentils on top, followed by the sticky alliums. Scatter with gremolata and drizzle lightly with olive oil to finish.
Squash, Green Olive and Lentil Tagine
This celebratory tagine, made with inauthentic Puy lentils, is even better made the day before you want to serve it, giving the flavors time to round out and settle. If you do make it in advance, be sure to add the cilantro only just before serving; and be mindful not to overcook the squash first time round, as it will cook a little more when you reheat the tagine. Serve this with a steamed grain or couscous with plenty of herbs and lemon zest stirred through.
Serves 6
• 1 cup (200g) Puy lentils
• Pinch of saffron threads
• 2 pounds 10 ounces (1.2 kg) firm winter squash, peeled and deseeded
• 4 tablespoons unsalted butter
• 1 tablespoon olive oil
• ¾ cup (100 g) blanched almonds
• 1 red onion, sliced
• 1½ teaspoons cumin seeds
• Large cinnamon stick
• 1-inch (2.5 cm) piece fresh ginger root, peeled and finely grated
• 3 plump garlic cloves, finely chopped
• 2 preserved lemons, rind only, roughly chopped
• 3 cups (700 ml) weak vegetable stock
• 1 tablespoon honey
• ¾ cup (120 g) pitted green olives
• Sea salt and freshly ground black pepper
• Handful of cilantro, chopped
- Rinse the lentils in a sieve, checking for any stones. Transfer to a saucepan, cover with plenty of cool water and bring to a boil. Simmer for 20 to 25 minutes, until only just tender. Drain well.
- Boil a kettle and put the saffron in a small bowl. Pour a couple of tablespoons of boiling water onto the threads and set aside for 5 minutes.
- Cut the squash into large pieces (about 2 inches/5 cm square, if you’re counting).
- Heat the butter and olive oil in a large Dutch oven or saucepan over medium heat and add the almonds. Cook for a few minutes, stirring occasionally, until the nuts are golden all over. Scoop on to a plate with a slotted spoon and set aside.
- Add the onion to the pan and cook for 5 minutes. Stir in the cumin and cinnamon and cook for 1 minute or so, followed by the squash pieces. Cook, stirring occasionally, for a few minutes, until the squash begins to brown, then stir in the ginger, garlic, preserved lemon rinds, stock, honey and saffron (with its soaking water). Bring to a boil, then cover. Reduce the heat and simmer very gently for 20 to 25 minutes, or until the squash is just tender. Stir in the lentils, being careful not to break the squash down.
- Plunge the olives into a separate saucepan of boiling water, to remove some of their salt. Drain after 20 seconds and add to the simmering tagine with the golden almonds. Cook for a further 5 minutes or so, until the squash is very tender but still holding its shape. Taste and season with salt and pepper; it should only need a little salt, if any, due to the preserved lemons, stock and olives. Scatter with the cilantro to serve.
Caramelized Fennel Tagliatelle
There’s a good amount of toasted sweet butter here. If the quantity offends you, cut it by half, or replace it with olive oil . . . but a little butter here and there is celebratory and adds richness to a simple dish. The sauce is spectacular folded through braised lentils, with or without goat cheese, as a warm salad. Look for the plump, round female fennel bulbs rather than their slim, tall brothers, who tend to be stringy.
Serves 4
• 2 large fennel bulbs
• 4 tablespoons unsalted butter
• 1 tablespoon olive oil
• 1 garlic clove, finely chopped
• Fat pinch of chile flakes
• Scant ½ cup (100 ml) white wine
• Scant ½ cup (100 ml) vegetable stock
• ⅓ cup (50 g) walnut halves
• 12 ounces (350 g) dried whole wheat tagliatelle
• Sea salt
• Finely grated vegetarian Parmesan cheese, to serve, optional
- Trim any woody stalks from the fennel bulbs, also trimming the bases and removing the entire outer layers if they are very woody or tough. Slice the bulbs in half and cut out most of the solid cores. Slice across the bulbs very finely, as you would an onion (easiest on a mandoline, if you have it). Roughly chop and reserve any fronds.
- Heat the butter and oil in a large Dutch oven or deep frying pan set over medium-high heat. Add the fennel slices, spread out well and cook for 15 minutes, stirring occasionally, until browned and sweet. Stir in the garlic and chile flakes and cook for 1 minute, then pour in the wine and stock. Bubble for 1 minute, then reduce the heat to as low as it will go. Simmer for 15 to 20 minutes, stirring often, until the liquid has been absorbed and the fennel is very tender. Add a little water if it sticks at any point.
- Meanwhile, preheat the oven to 375°F (190°C). Spread the walnuts out in a roasting pan and cook for about 8 minutes, until toasted and fragrant. (You can toast the nuts in a dry frying pan if you would rather not turn the oven on, but roasting them gently brings out more flavor.) Place on a chopping board and, when cool enough, roughly chop the nuts. Some should be chopped fine, some a little larger.
- Cook the pasta until al dente in plenty of boiling salted water, according to the package instructions. Drain in a colander, reserving a few tablespoons of cooking water. Place the drained pasta into the fennel pan with the nuts and reserved pasta water to emulsify the butter. Turn the pasta with tongs to coat in the sauce and serve as is, or with grated Parmesan, if you like.


