EVALUATING YOUR SPACE
MEASURING & PLANNING YOUR GARDEN
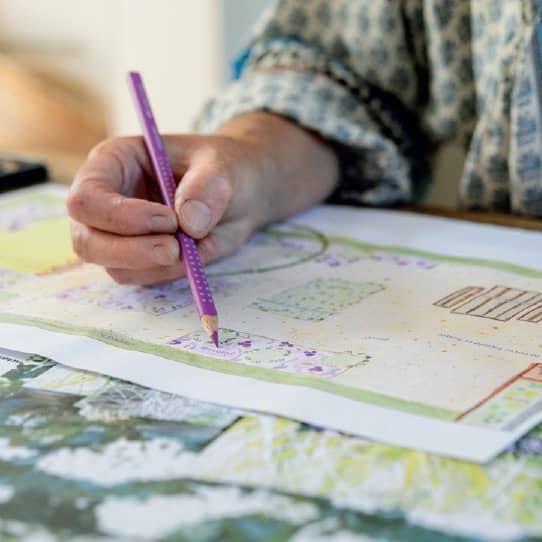
Make a plan to help visualise your ideas.
Whatever the size of your outside area, you will be able to grow some plants. Look at the space through fresh gardener’s eyes and imagine it filled with flowers, colour, perfume and happiness. The happiness comes not only from the beautiful result, but also from the satisfaction in creating it.
When making a garden, large or small, there will be a certain amount of trial and error. Just accept that you may make the odd mistake as you learn, and enjoy the journey. Whether you have identified a potential new growing space, wish to reshape an existing bed or border, or if you are planning to design a small garden from scratch, the first step is to measure it carefully. This may sound obvious, but it is surprising how many people just make a few rough estimates on the back of an envelope, only to find that their planned planting and features don’t fit.
If you have a front or back garden, courtyard, balcony, roof terrace or any area that is bigger than the stretch of your own arm span, enlist some help so that the measurements are accurate. Make a careful note of the length and width of the space, together with the length of the diagonals from corner to corner. Add as many other measurements as possible, including the height of any variations in level, both on the ground if there are steps or terraced areas, and of the boundaries, which may not be the same height on both sides. Once you have the dimensions, plot the area to scale on graph paper.
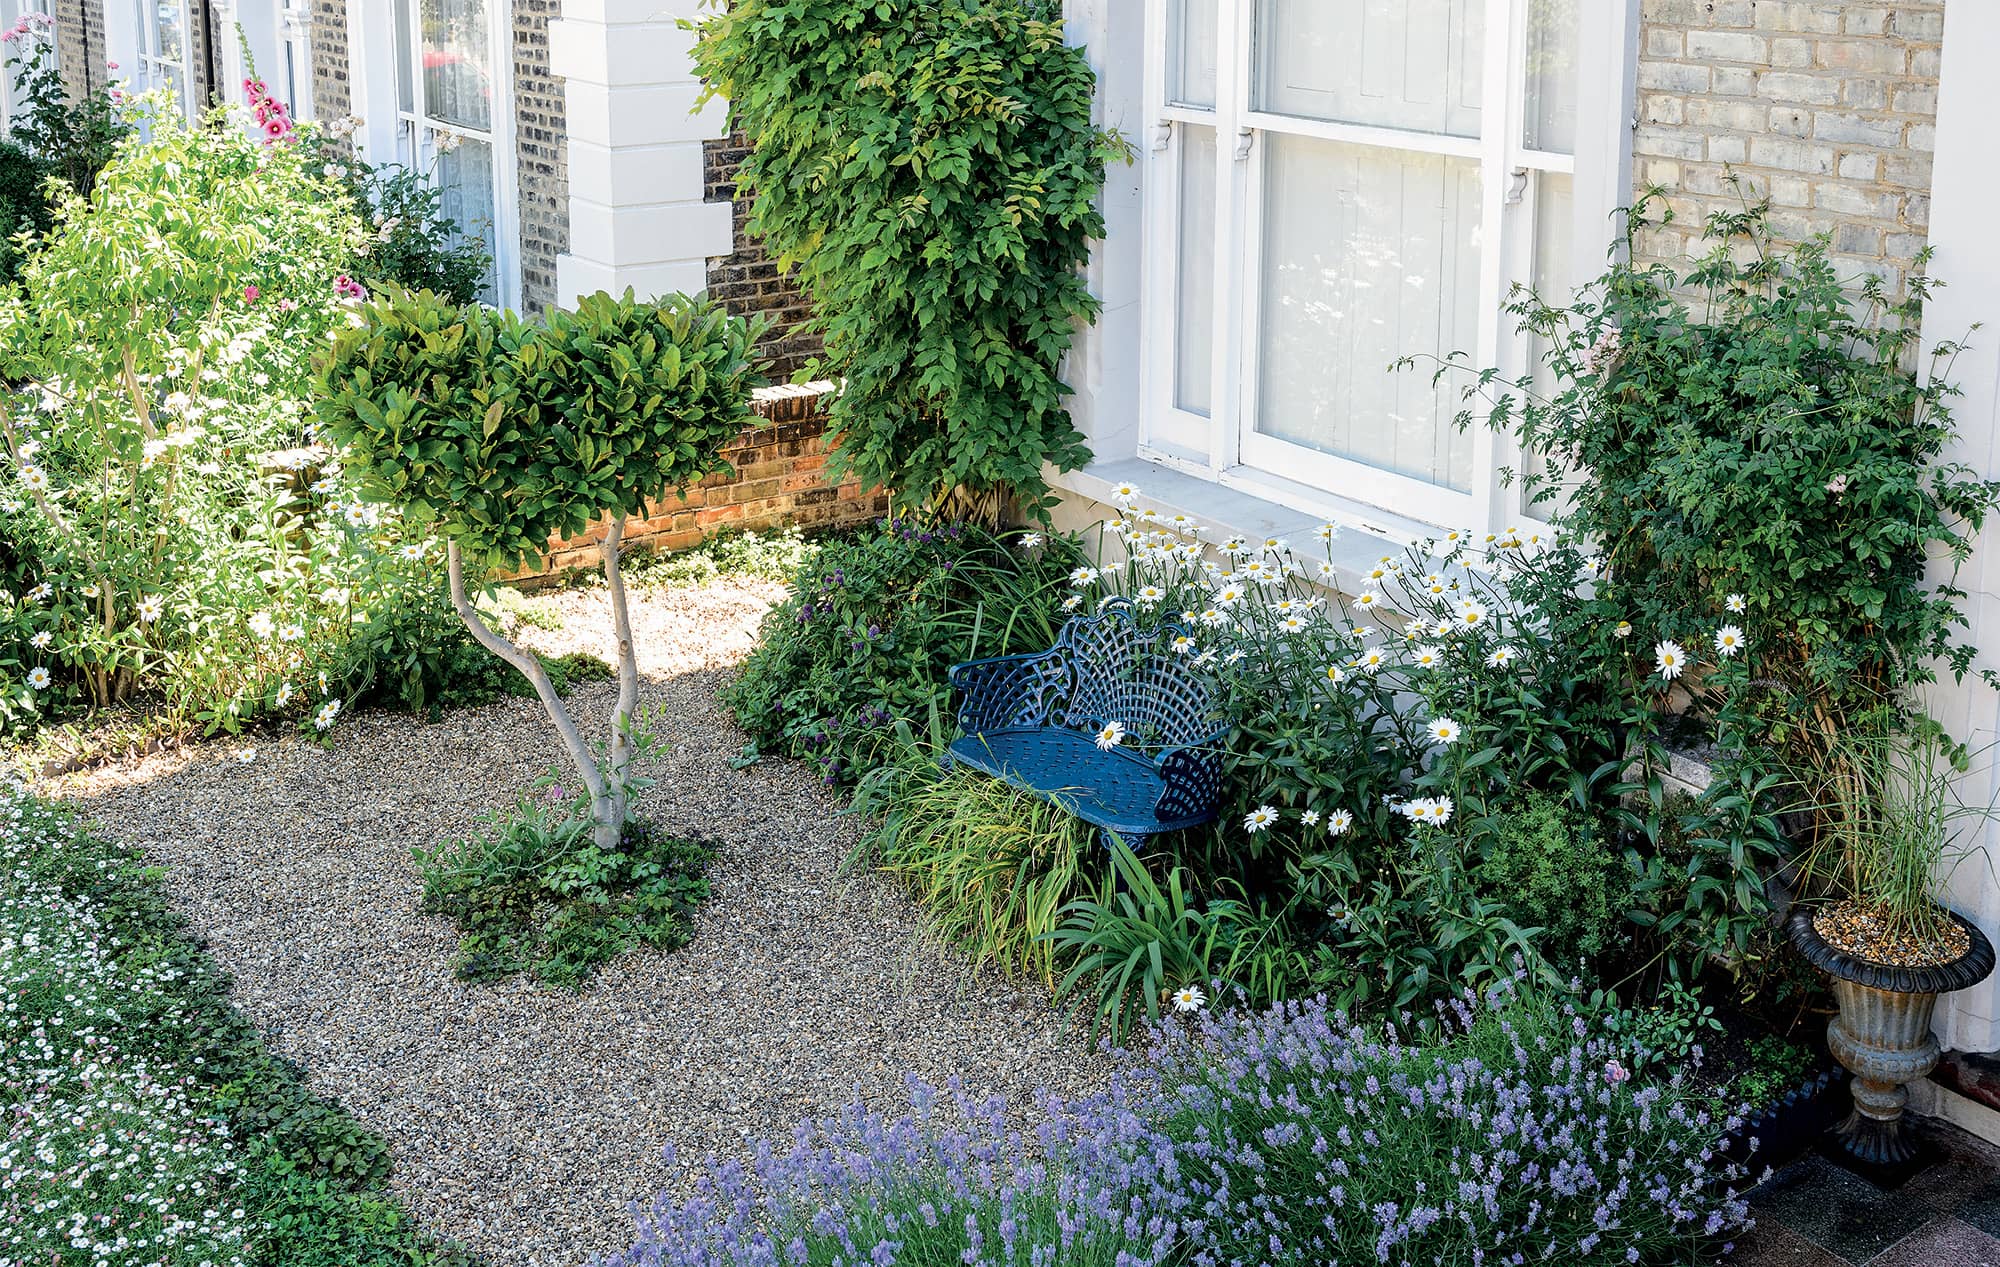
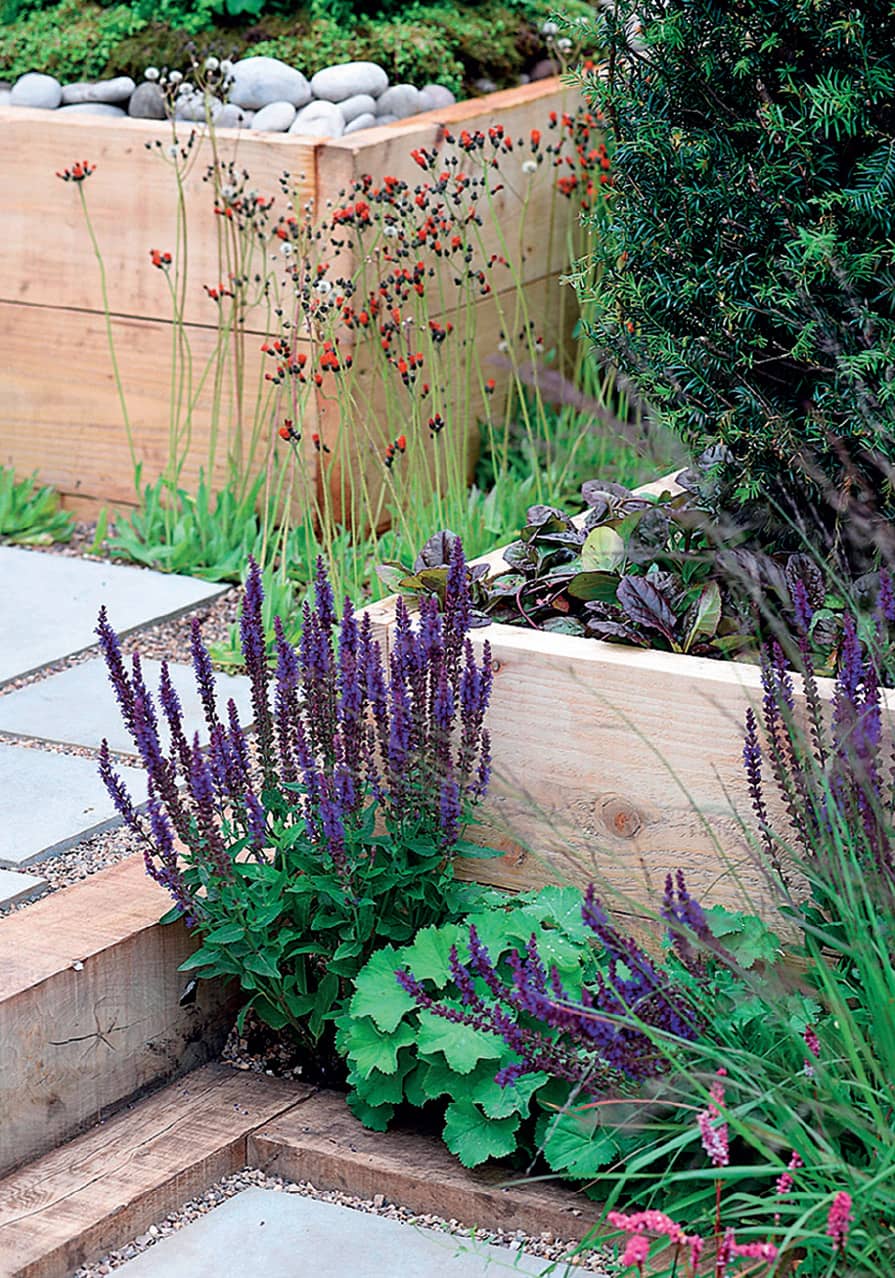
Custom-made raised beds can be cut to size and built to fit any space. This one was created from new timber that has weathered beautifully over time and blends perfectly with the cottage-garden style planting in this small garden.
Adding the details
After creating this plan on paper you will see before you a flat layout of an empty space. Now add in any other relevant information to build up a more detailed image. Include the position of your property and any other buildings, marking the windows and doors that open out on to the area, along with any other access points, such as side doors. Existing beds and borders, retaining walls and fencing should also be drawn in.
The position of pathways, steps, and any structures, such as a greenhouse, shed or covered seating area, need to be indicated on your plan, too, as do shrubs, trees and other plants that you will be keeping. Include at this point any neighbouring trees or shrubs that overhang your space which may affect the light levels and therefore your planting plans.
This plan will help you to build up a visual reference of your space, enabling you to keep a picture in your head of what you hope to achieve.
Using the space
Think about how and when you are going to use your garden space. For example, if you are only going to be outside in the evenings you will need to look at lighting and how to install it. This may require an outdoor electrical supply, which will need to be installed by a qualified electrician. If you want to use the garden for entertaining, consider the seating arrangements, or if you plan to make it your personal retreat from the outside world, work out how to optimise your privacy and create a sense of seclusion. In gardens that will be used by small children, you will need to prioritise safety and ensure the space is secure.
The final plan will provide you with a clear outline of what you have to work with and you can then start to fill in the gaps. Play around on paper with new beds, borders and planters of different sizes so there is a good balance of hard and soft landscaping. Allow enough room to accommodate your planting ideas but remember to include somewhere to relax, even if it is just space for some beanbags or folding chairs.
You might try out several different layouts before you find the one that feels right and it can help to go back outside and mark out your plan in three dimensions, using string or chalk to check that everything will fit comfortably. When you are completely happy, you can get out the crayons or felt-tips pens if you are so inclined.
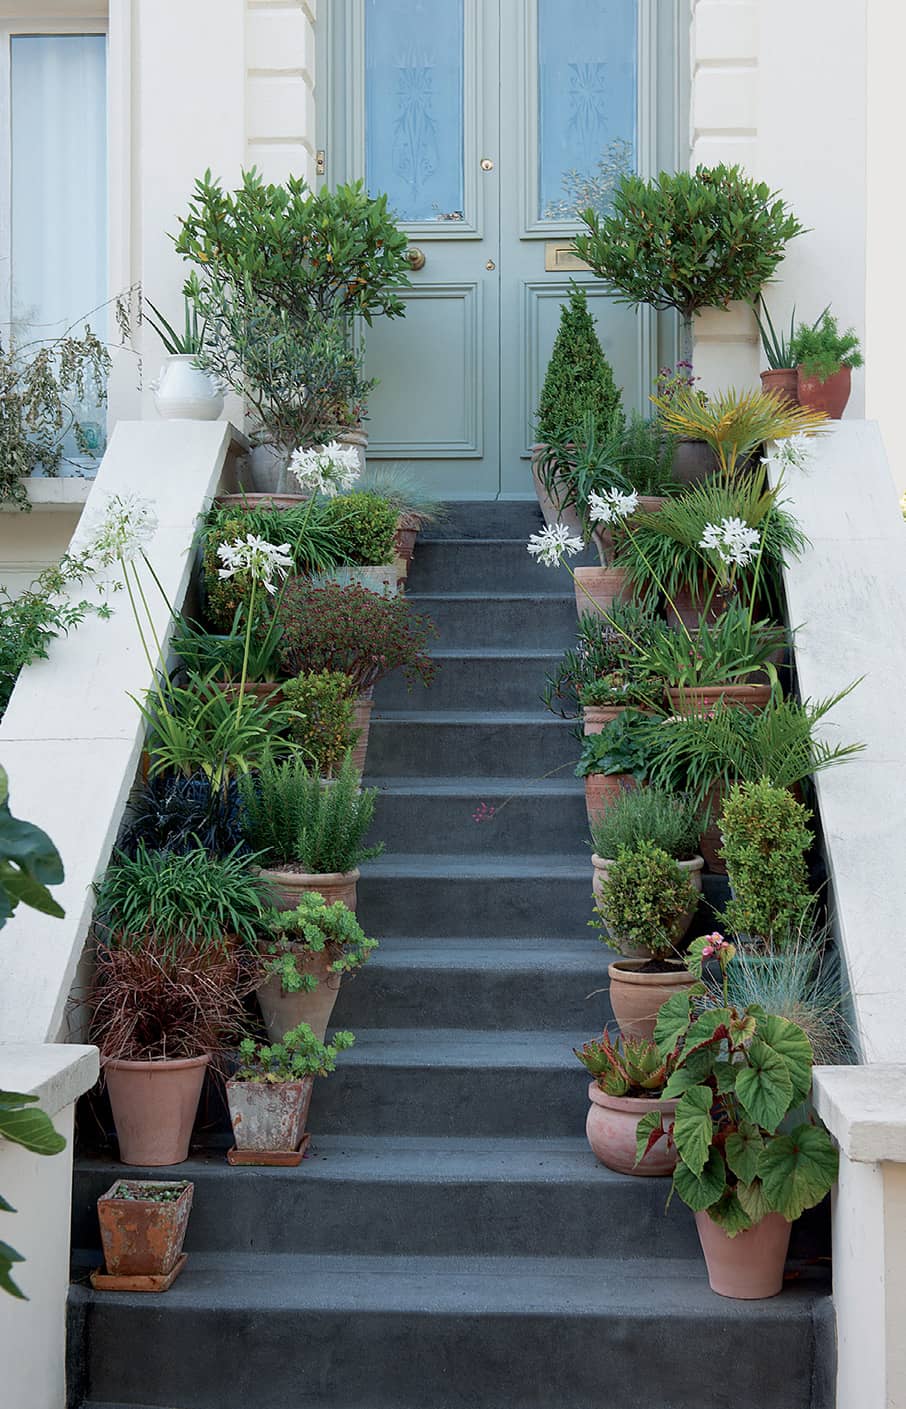
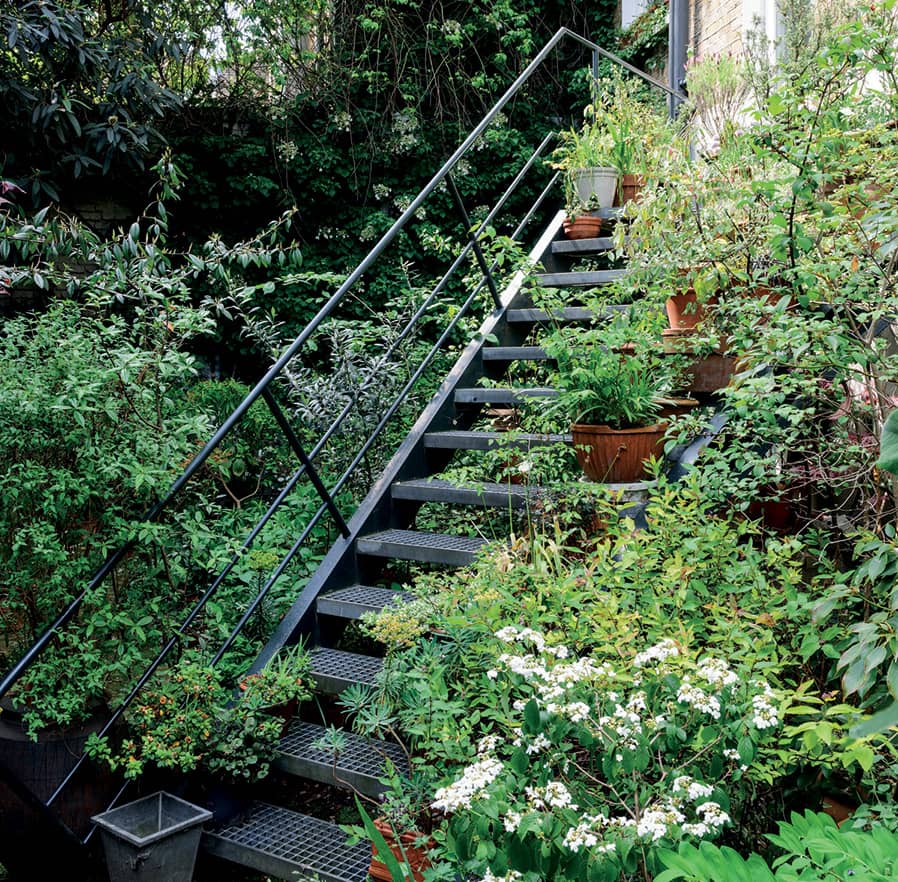
A staggered display of pots on both sides of these steps creates an instant flexible garden design.
Computer packages
There are various design packages available that allow you to create a garden plan and planting design on the computer, and if you are technically skilled then it is a speedier way of working out how best to use your space.
On the other hand, for me, using a computer removes the fun of designing. I enjoy the creative process and find colouring my planting spaces by hand incredibly therapeutic.

Photograph the space you want to design and overlay the image with tracing paper to play around with shapes of different sizes that represent your plants.
ASSESSING YOUR SITE’S SOIL & ASPECT
Your soil type and the way your garden faces, as well as the amount of sunlight it receives, are the most important factors to consider when planning a planting scheme, and they will determine the long-term success of the plants you choose to grow.
Checking the soil
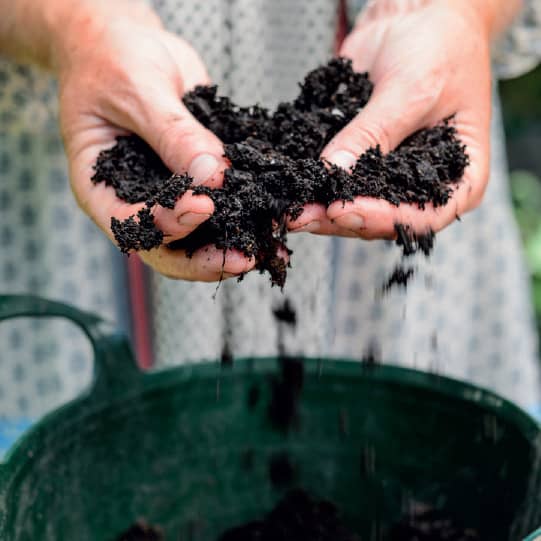
Soil sustains plants. Together with warmth, light and water, it provides an anchor and food source, which plants depend on for healthy growth. If you are planning a redesign of existing beds or borders you have inherited, or if you simply want to embellish the planting, then look at what is already flourishing. Identify the plants that are growing well, and then check what kind of soil they thrive in, which will indicate the type you have in your garden. You can also work it out by looking at and handling your soil (above).
Clay tends to be reddish in colour. It is also sticky when wet, has a smooth texture, and will keep its shape when rolled into a ball. Clay soils are prone to waterlogging and are difficult to dig, forming a hard pan on the surface when dry. However, they tend to be rich in nutrients.
Sand can be identified by its gritty texture and it will sift through your fingers. When damp, sandy soils will fall apart if you try to roll them into a ball. Easy to dig, they are also prone to drought and tend to hold few plant nutrients.
Silt has a silky or soapy texture when wet, and has similar characteristics to sand, although it contains more nutrients. Silty soils are also prone to compacting, but retain water well, which plants can take up easily.
Moist loam is the soil most gardeners dream about. It contains an almost equal mix of sand and clay particles and holds plant nutrients and water well, while also allowing free drainage, providing ideal growing conditions. You can help to achieve this optimum mix, whatever your soil type, by digging in well-rotted organic matter, such as garden compost, or spreading it over the surface as a mulch for the worms to take down into the soil.
Soil-based and multi-purpose composts are made from either a mix of soil and decayed organic matter, or just organic matter, which may include peat. They provide the best growing media for pot-grown flowers, and you can buy them in plastic sacks from your local garden centre or DIY store, or order them online for a home delivery.
Monitoring light levels
Assessing the aspect of your garden means working out which direction it faces and its exposure to sunlight. A compass will tell you this, but you can observe for yourself by noting where the sun rises and sets.
South facing: sun all day from sunrise to sunset.
East facing: sun in the morning.
West facing: sun in the afternoon and evening.
North facing: little direct sunlight (but don’t let that put you off – you can still grow flowers).
Typical city gardens and courtyards are bordered on every side by mature gardens, high walls and fences. Tall neighbouring tree canopies and buildings will reduce light levels but they also create a mild microclimate. Wind, rain and snow can damage plants and freezing temperatures will kill tender or half-hardy types, but if your space is protected from the elements they have a much greater chance of surviving. The same applies to balconies and terraces sheltered by the walls of a property. Unless they face north, they will form sun traps that provide an opportunity to grow a range of Mediterranean plants, which thrive in these conditions.
If wind is a problem on a roof terrace, try creating a barrier or windbreak with a row of tall flexible plants like bamboo to mitigate the effects. Or use shelving units or purpose-made plant stands to provide added protection for smaller plants in containers and pots.
North-facing gardens, dark side returns or dingy basement light wells present challenges for the flower gardener, but even these can be transformed with a few design tricks. Painting boundaries a pale colour will help, and using Perspex or reinforced glass instead of tiles on the roof of a side return will also increase light levels.

This south-facing terrace is in direct sunlight all day long and provides a home for pots of geraniums (Pelargonium) and Mediterranean herbs that love hot, dry conditions and thrive with minimal watering.
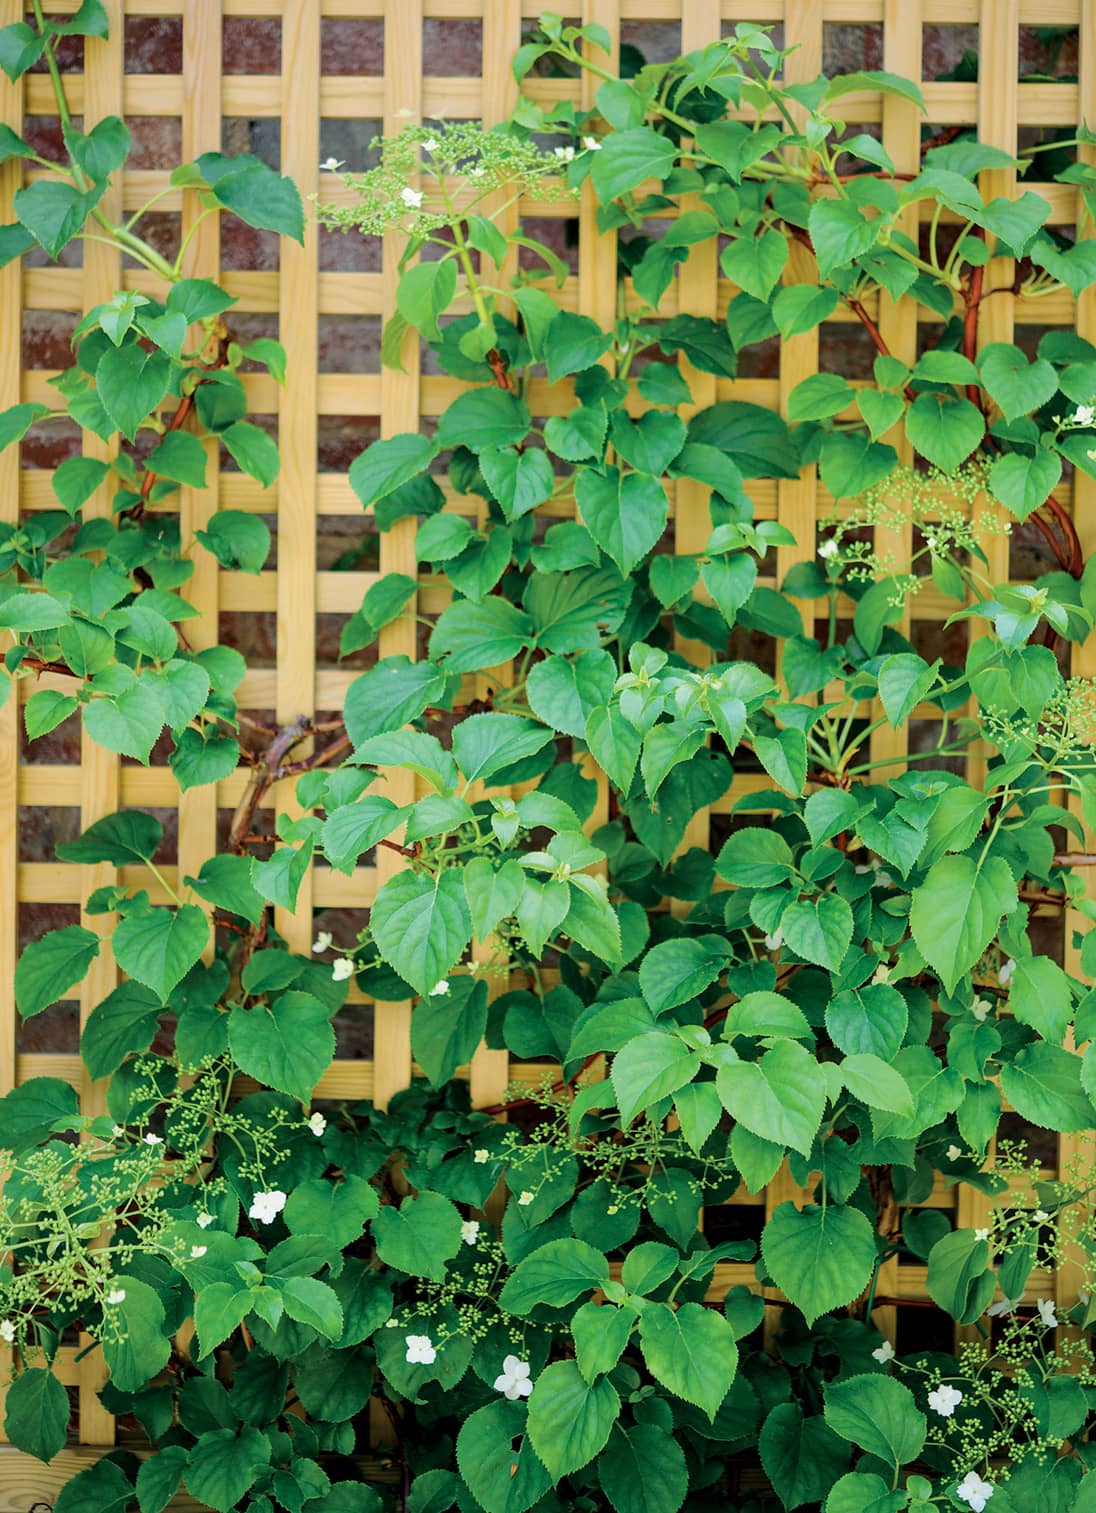
The walls of this dark courtyard garden are clothed with white-flowered climbing hydrangeas (Hydrangea anomala subsp. petiolaris) that instantly make the space feel lighter and less oppressive.
Planting in gloomy spaces
Many plants love shade or dappled light. Look for large-leaved foliage plants, including hostas, ferns and calla lilies. White or pale-coloured blooms, such as Vinca minor f. alba, will also shine in dark spaces. Some climbers prefer shade too. The climbing hydrangea, Hydrangea anomala subsp. petiolaris is a case in point, and will cover a gloomy wall with lacy white florets in summer. Another good choice is the variegated ivy Hedera helix ‘Glacier’, or try the climbing roses ‘Albéric Barbier’, ‘Madame Alfred Carrière’ and ‘New Dawn’, which all grow happily in part shade, covering walls with their scented blooms.
Dappled light provides the perfect conditions for a wide range of plants. Look for those that show a preference for partial shade, such as box (Buxus) and hardy geraniums, if your space does not face due south.
MAINTAINING YOUR GARDEN
No planted space will magically look after itself, and even the tiniest of containers requires watering and a little vigilance to keep the plants happy and healthy. Before you embark on any gardening project it’s essential to be realistic about the time you have to devote to its care.
Choosing a watering system
You only need to water established plants in the ground when the weather has been dry for a week or two, so in a tiny space wandering around with a watering can in high summer should not be too demanding. However, if you have plants in pots, you will need to water them regularly from spring to autumn, regardless of the weather, as their leaves can shield the compost, leaving it dry even after a deluge.
In a larger space, it makes sense to invest in a hose so that watering does not become a chore. If a daily commitment to watering is too much, consider installing an irrigation system. You can buy various kits and there are also apps available that enable you to water via a smartphone. If you are gardening on a terrace or balcony where there is no outside tap and you have to go up and down stairs to fetch water, think about installing a water butt, bucket or rain harvesting system to provide a more readily available supply.
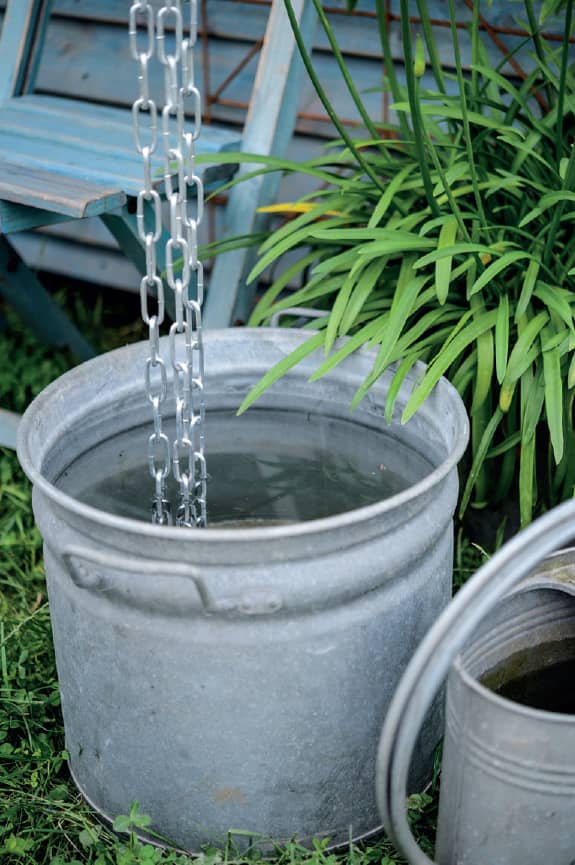
Rain-water harvesting systems like this one provide easy access to water where no outside tap is available.
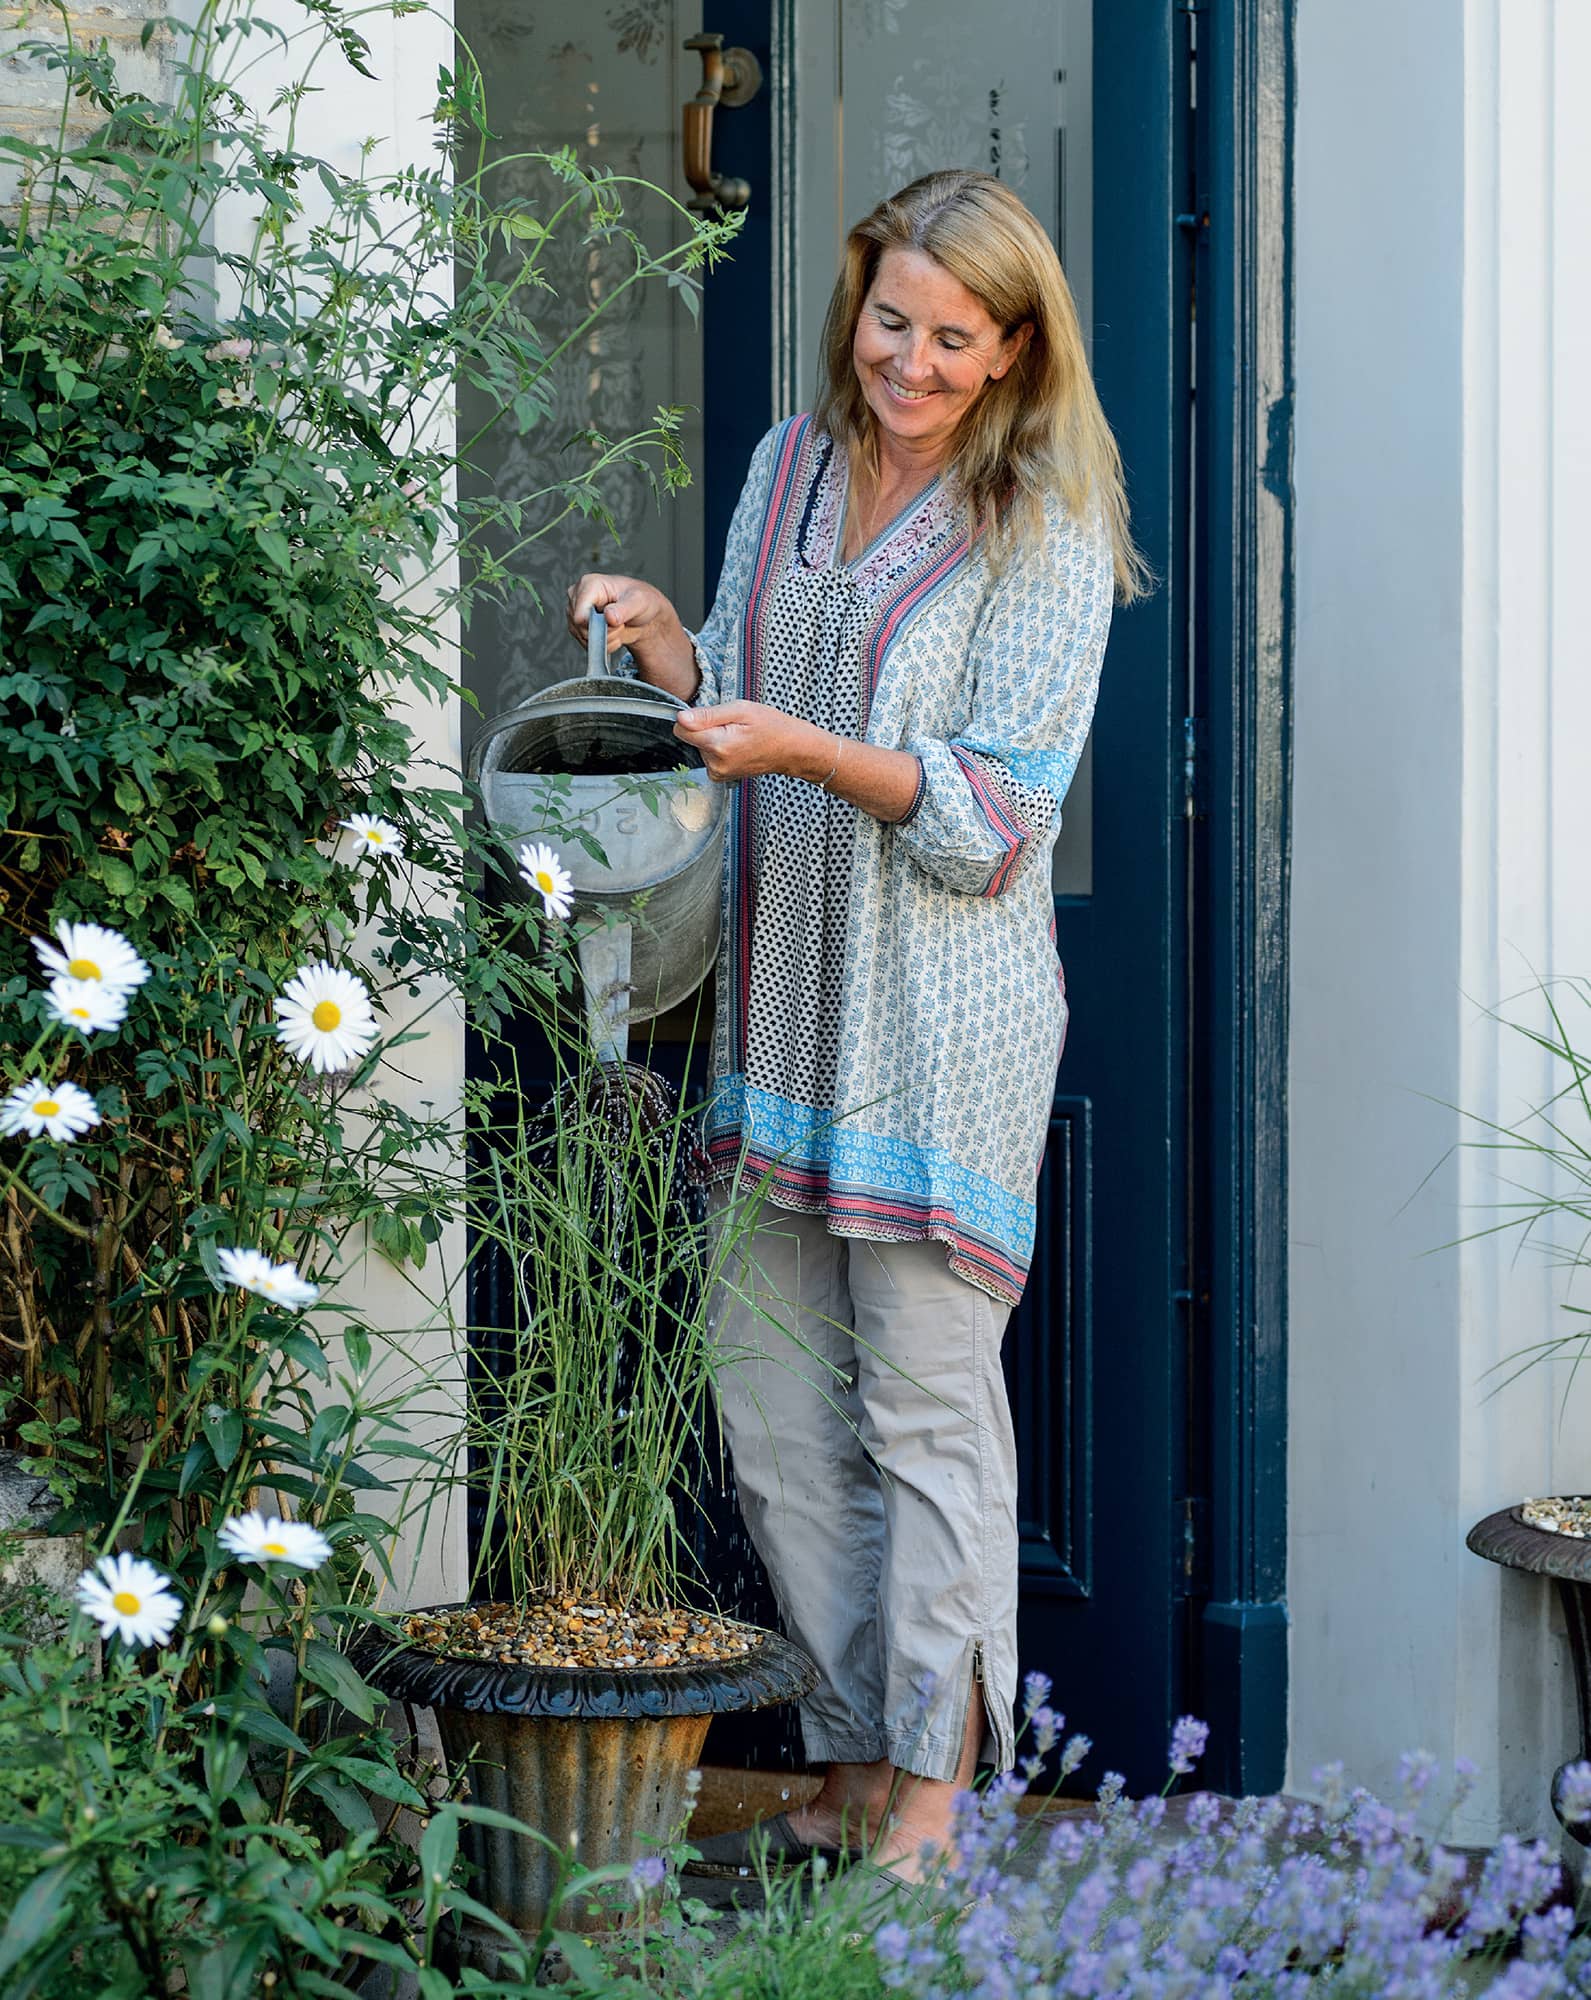
Plants in pots and containers will require watering daily, or even twice a day, in the summer.
Tidying, weeding and pruning
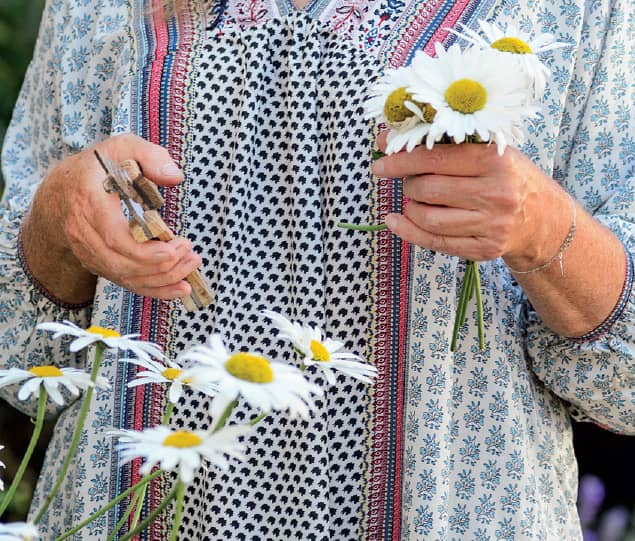
Borders, raised beds and containers need to be maintained to look their best. Pottering about with a pair of secateurs and a trowel should be a calming, relaxing activity and if you can set aside some time each week for deadheading (above), tidying and cutting back, you will stay on top of it. You will gradually learn the difference between a cultivated flower and a weed, and the latter will only grow where there is space, so keep bare soil to a minimum. Use ground-cover plants to keep weeds at bay and, after planting beds and pots, dress the surface with stone chippings, gravel or bark to suppress them and make it easier to remove any that do sneak in.
USING POTS & CONTAINERS
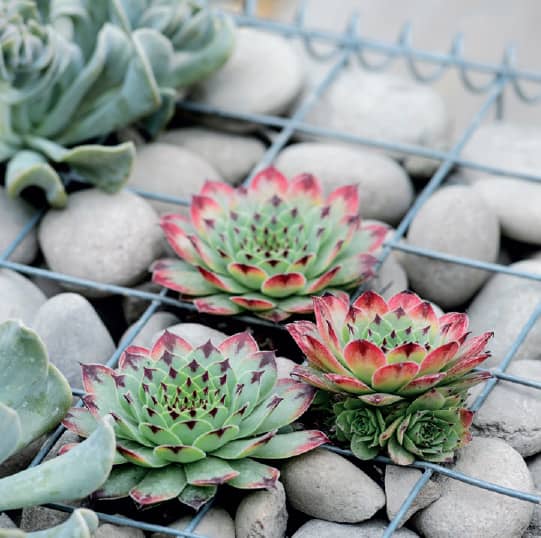
Houseleeks require almost no watering.
All the step-by-step projects in this book are ideas for growing flowers in containers, because for many people this is their only option. Pots provide flexibility and the chance to grow all kinds of plants, creating a beautiful floriferous space where there is no soil or alternative area for planting.
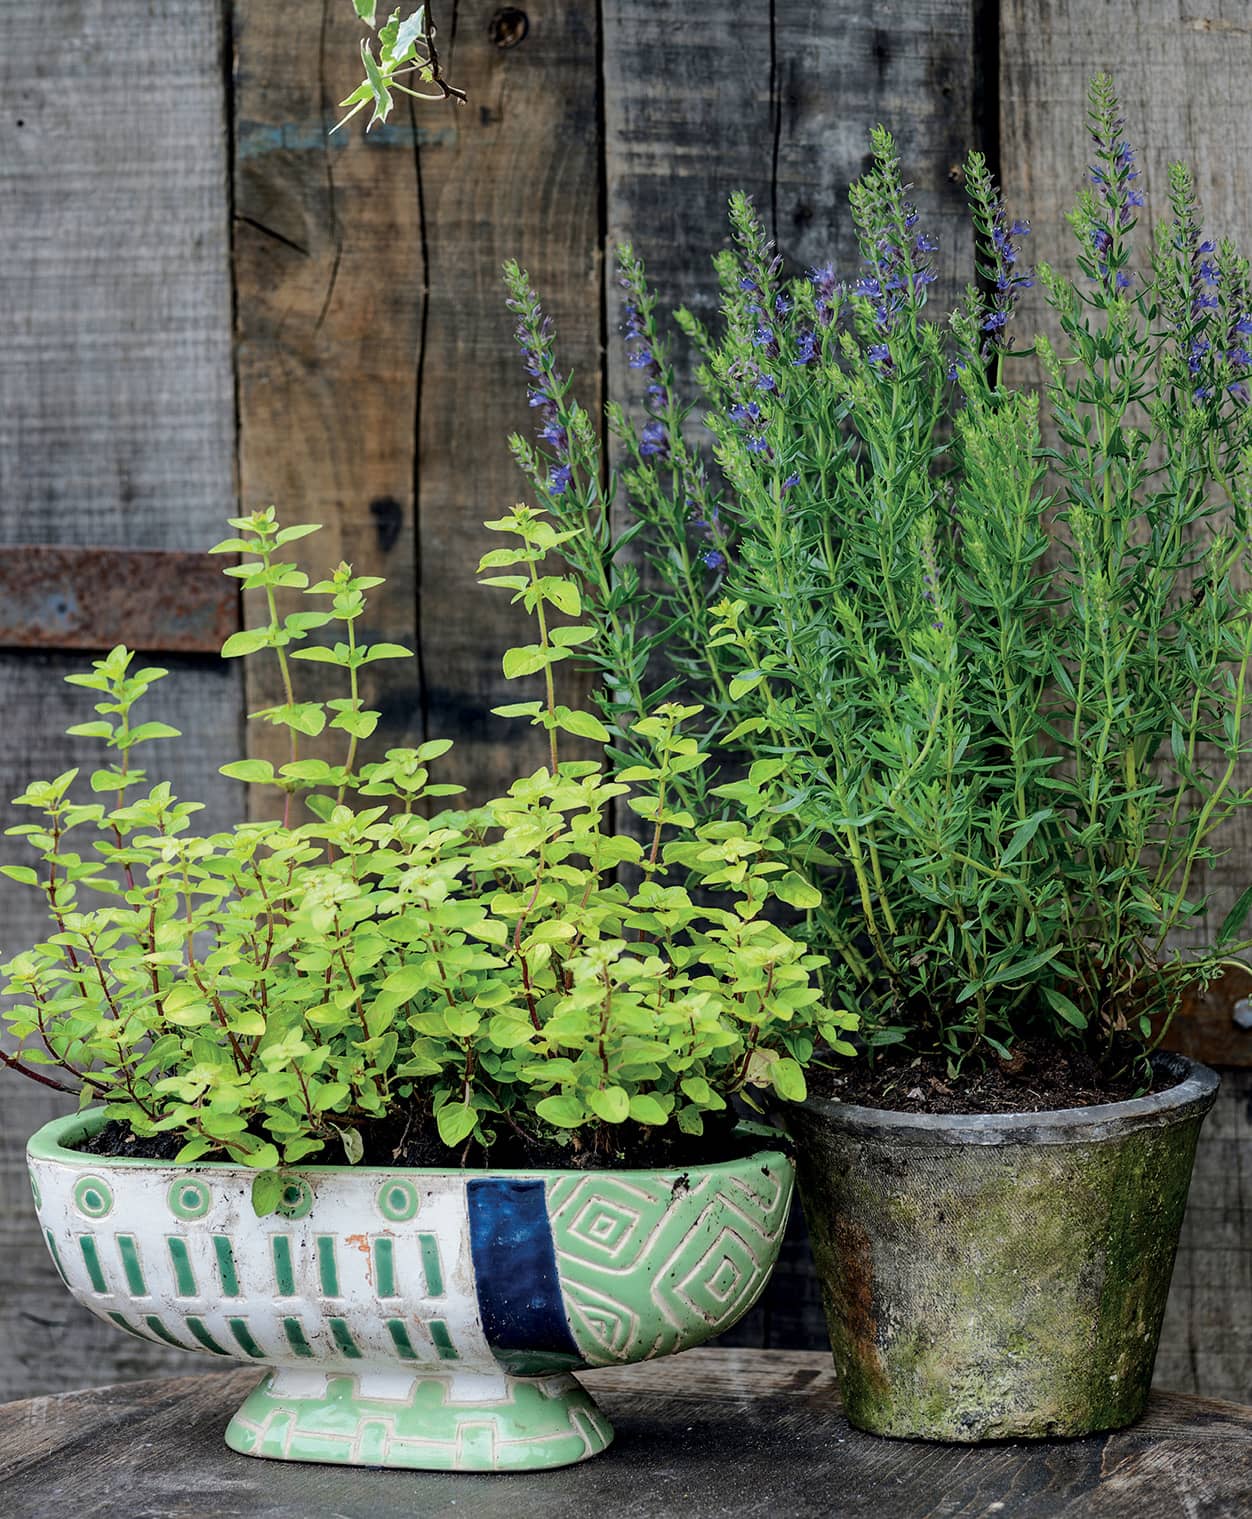
One large container provides the means to create a miniature garden, while several offer the opportunity to produce a series of little plots, with different types of flowers in each that collectively complement one another. If you are using a range of containers of varying sizes and heights, made from different materials and with different finishes, then play around with them before planting to get the presentation right. Small or shallow pots may be best displayed on wooden or metal boxes or tables and chairs so they can be seen – they will get lost if set on the ground. Some of the best effects can be created by grouping small miscellaneous pots in uneven numbers and introducing some repetition in the planting. Alternatively, you can use a few containers of the same style, perhaps in different sizes, to help your design flow.
The Japanese style of gardening, where bonsai trees and other miniature evergreens are cultivated in pots, demonstrates how every detail matters in an intimate space. Each individual plant is carefully pruned and shaped to create an overall environment that feels tranquil and serene, where nothing jars or clashes. In the same way, container gardening allows you the luxury of tending to your flowers and paying particular attention to each one, so that you come to recognise its various habits.
If your time is limited, invest in just one large or medium-sized container, which will be easier to care for than a series of smaller pots. Try planting it with evergreens or grasses to create a permanent backdrop, and use the rest of the space to experiment with seasonal blooms that introduce splashes of colour, but can be easily removed when they have finished flowering.
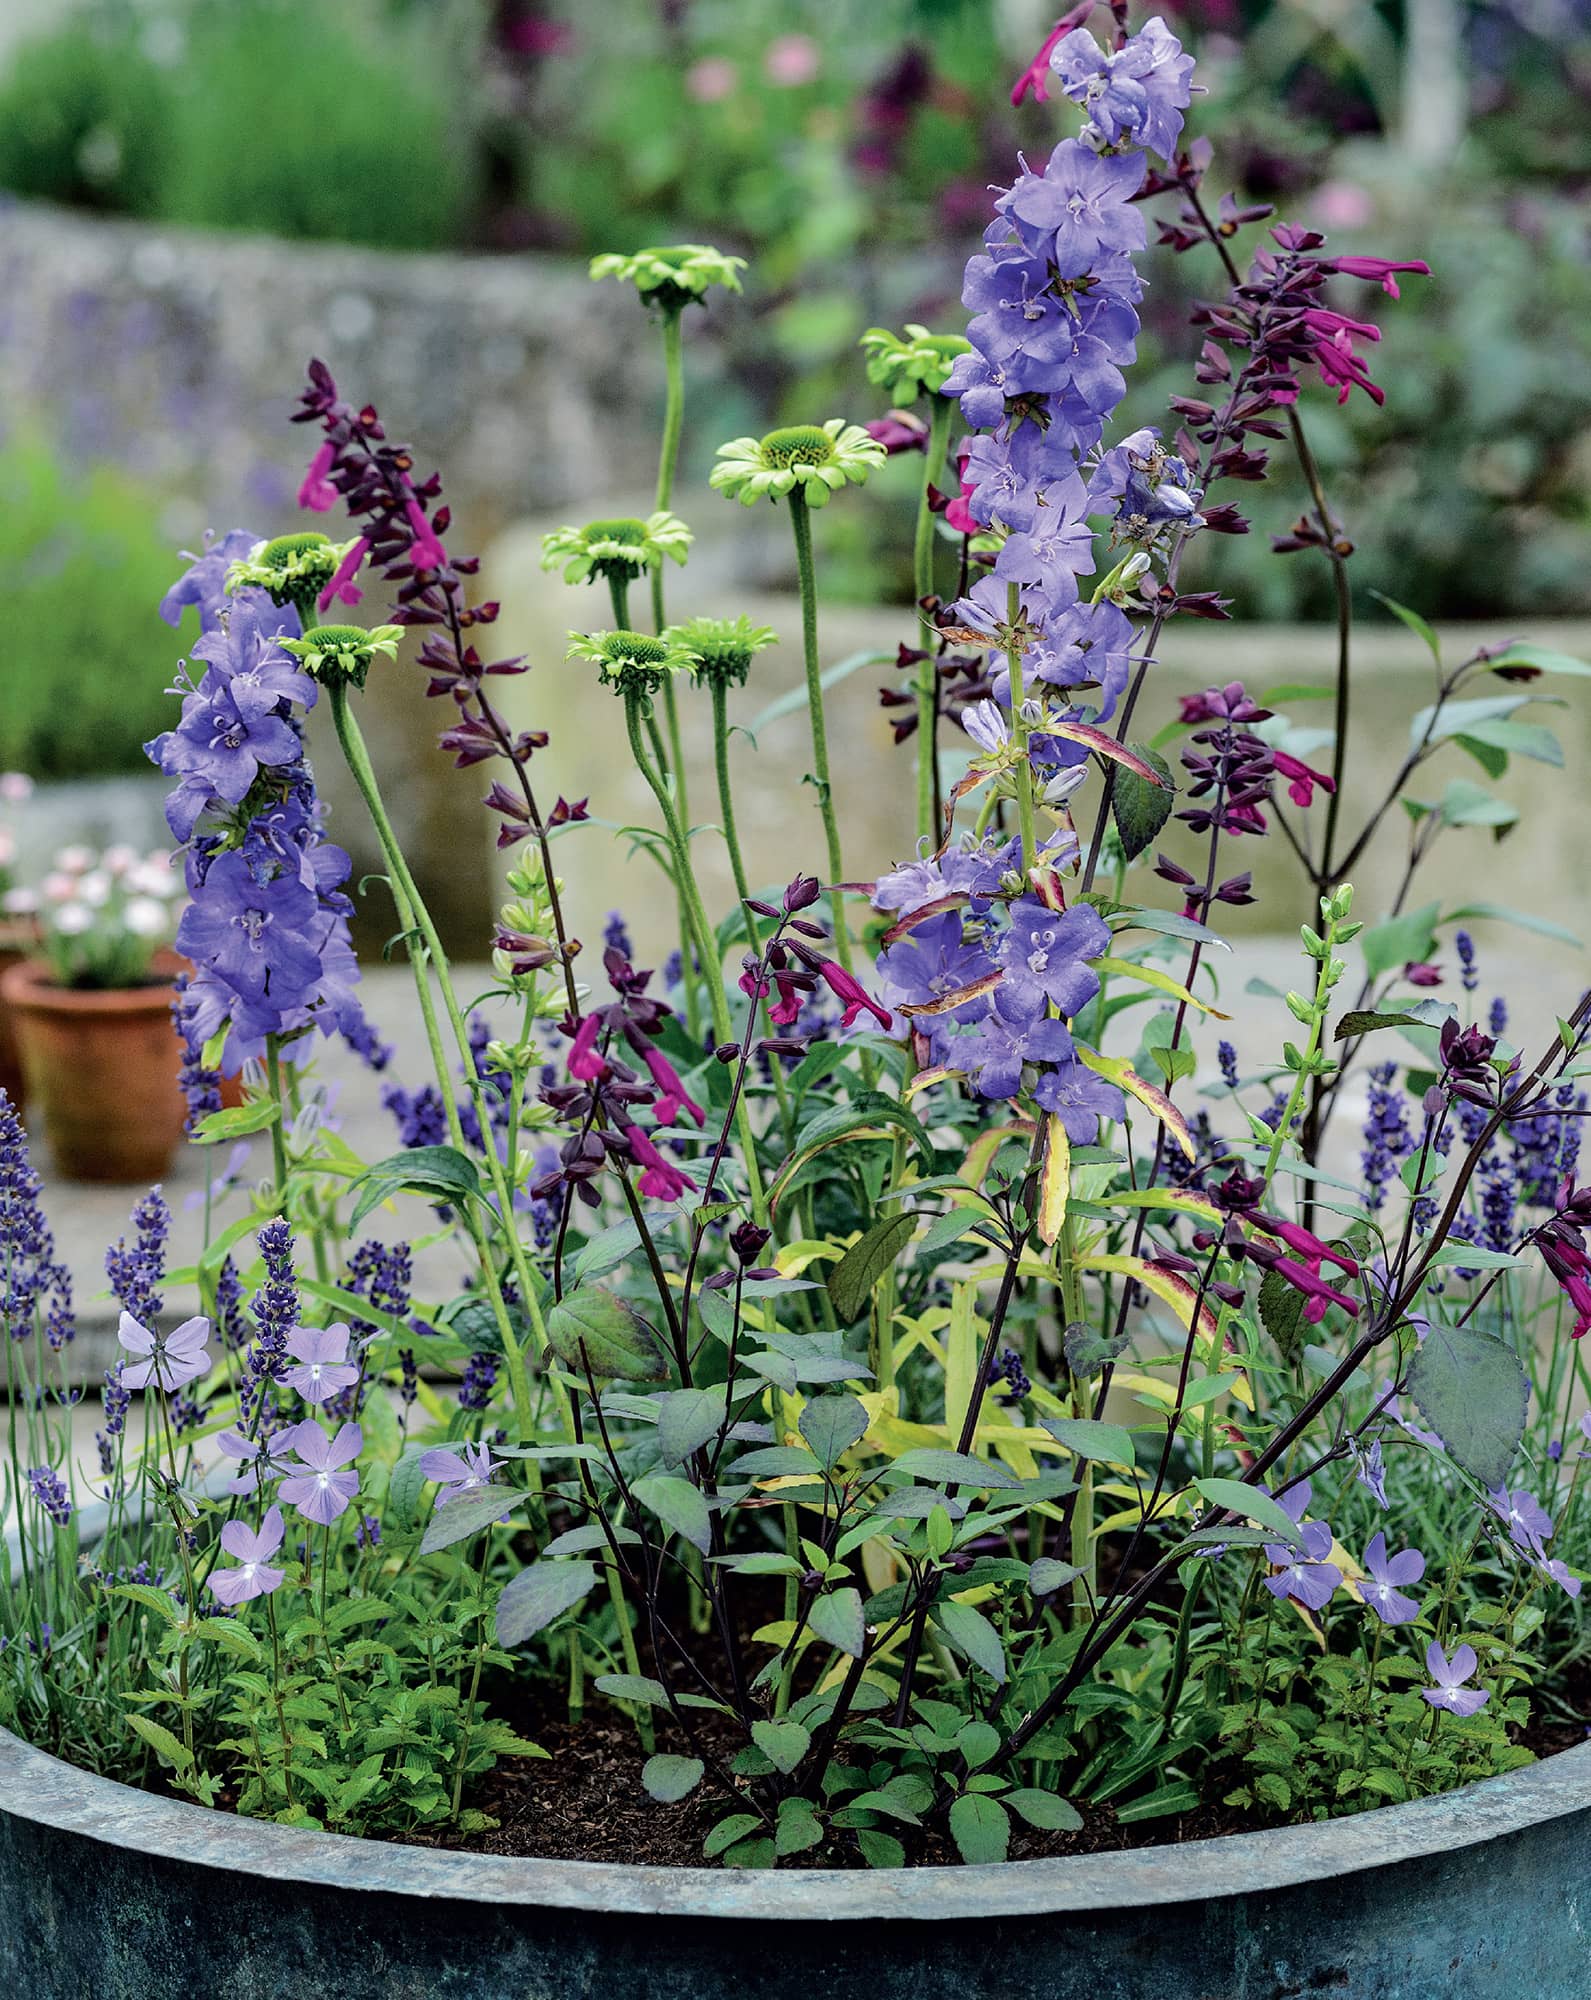
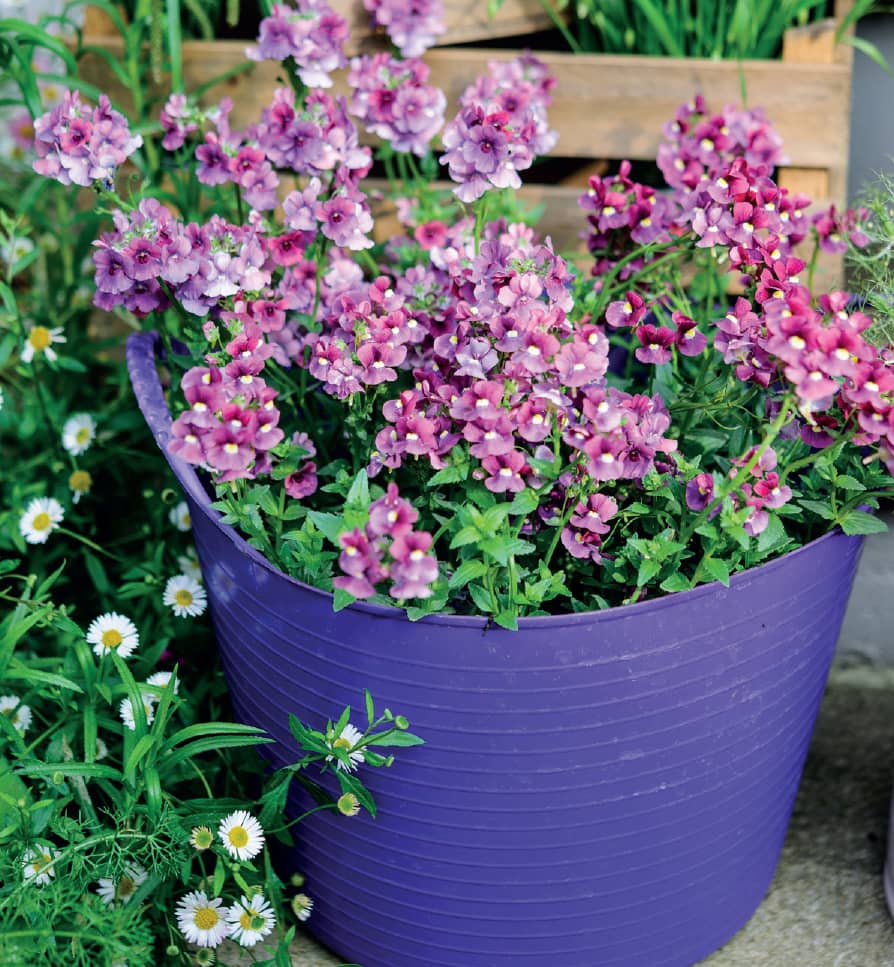
Selecting a tonal colour scheme, such as blue–purple, for a range of different plants in a single container is pleasing on the eye.
Setting the stage for flowers
Stairs and steps offer fantastic planting and staging opportunities. Pots and planters can be displayed on them at different levels, and you can move things around to show them off when they are at their best and then hide or remove them when they start to go over. Growing some herbs or scented shrubs that release their perfume as you brush past provides a lovely way to make use of this type of space. If you have to access your planting area via stairs or steps, to get to a roof terrace, for example, bear in mind the logistics of going up and down with your arms full. Use lightweight containers that are not easily broken, or consider small growbags with handles or portable plastic tubs. Buy compost in small bags that are easy to carry, and fill all your pots, tubs and bags when they are in situ.
Portable plastic trugs make lightweight, durable and inexpensive planters for summer bedding plants.
Keep up the suspension
Container planting need not be restricted to pots that are set on the ground. There are many planters designed for specific situations, or you can fashion your own from existing pots with the addition of sturdy hooks and wires. Window boxes and balcony planters can be fastened onto railings and you can create a hanging garden in pots suspended from hooks on window and door frames to make a planting space out of thin air. With a little imagination you can create a container garden almost anywhere.
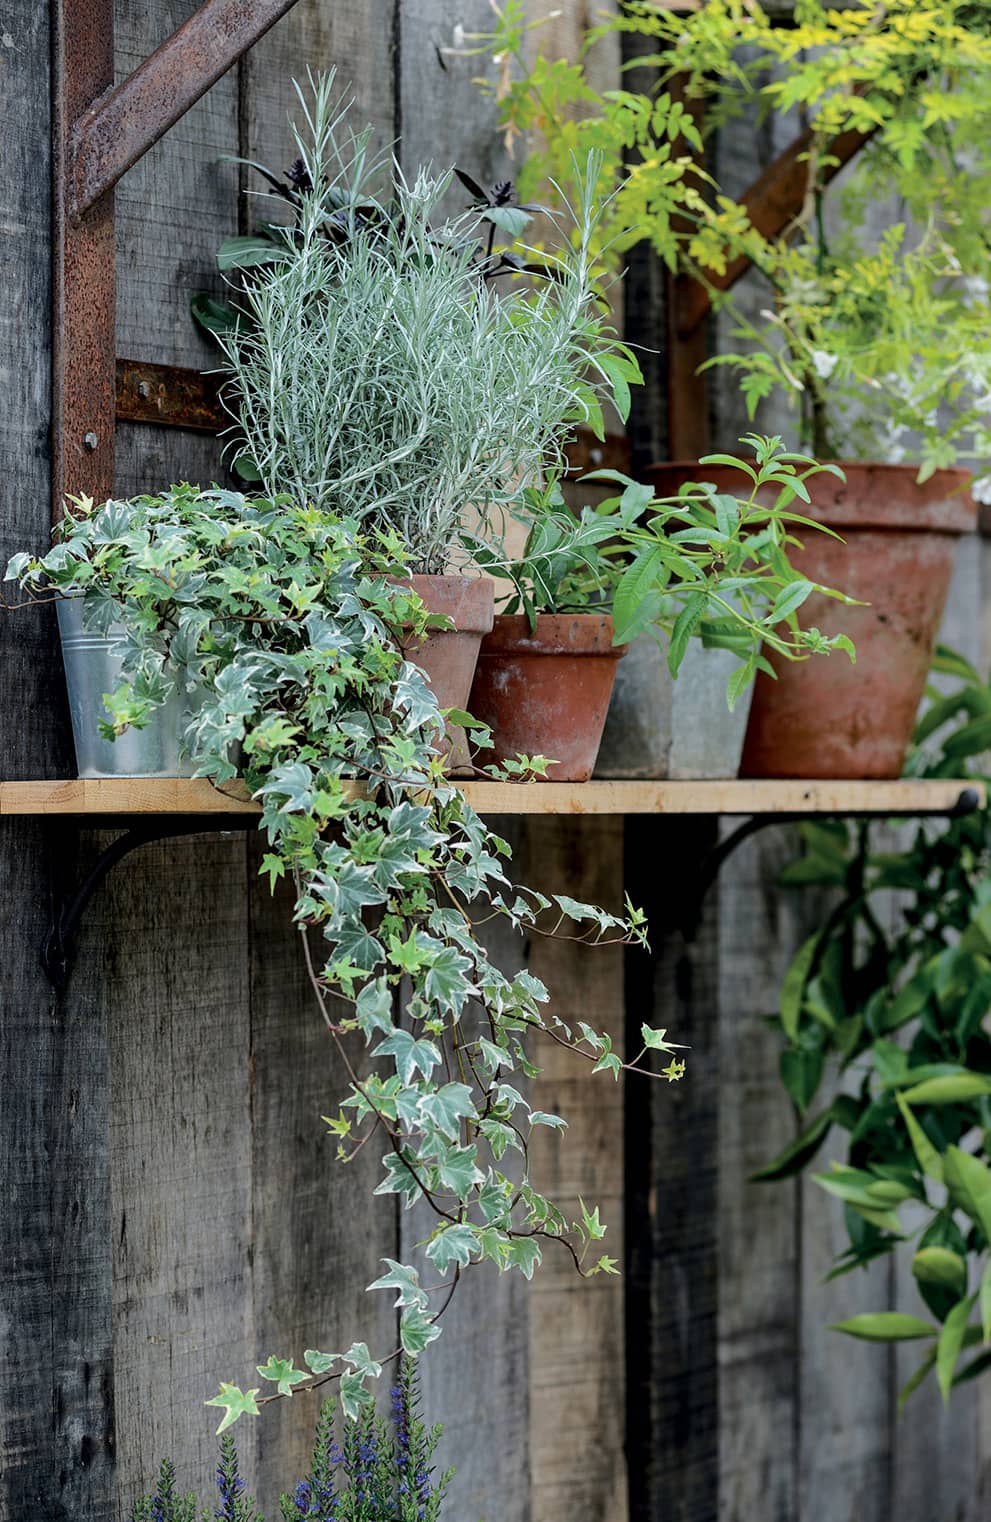
Aged terracotta pots and zinc buckets look lovely filled with herbs and trailing ivy.
Pot up vintage vases but be sure to incorporate extra drainage material such as grit or gravel below the compost.
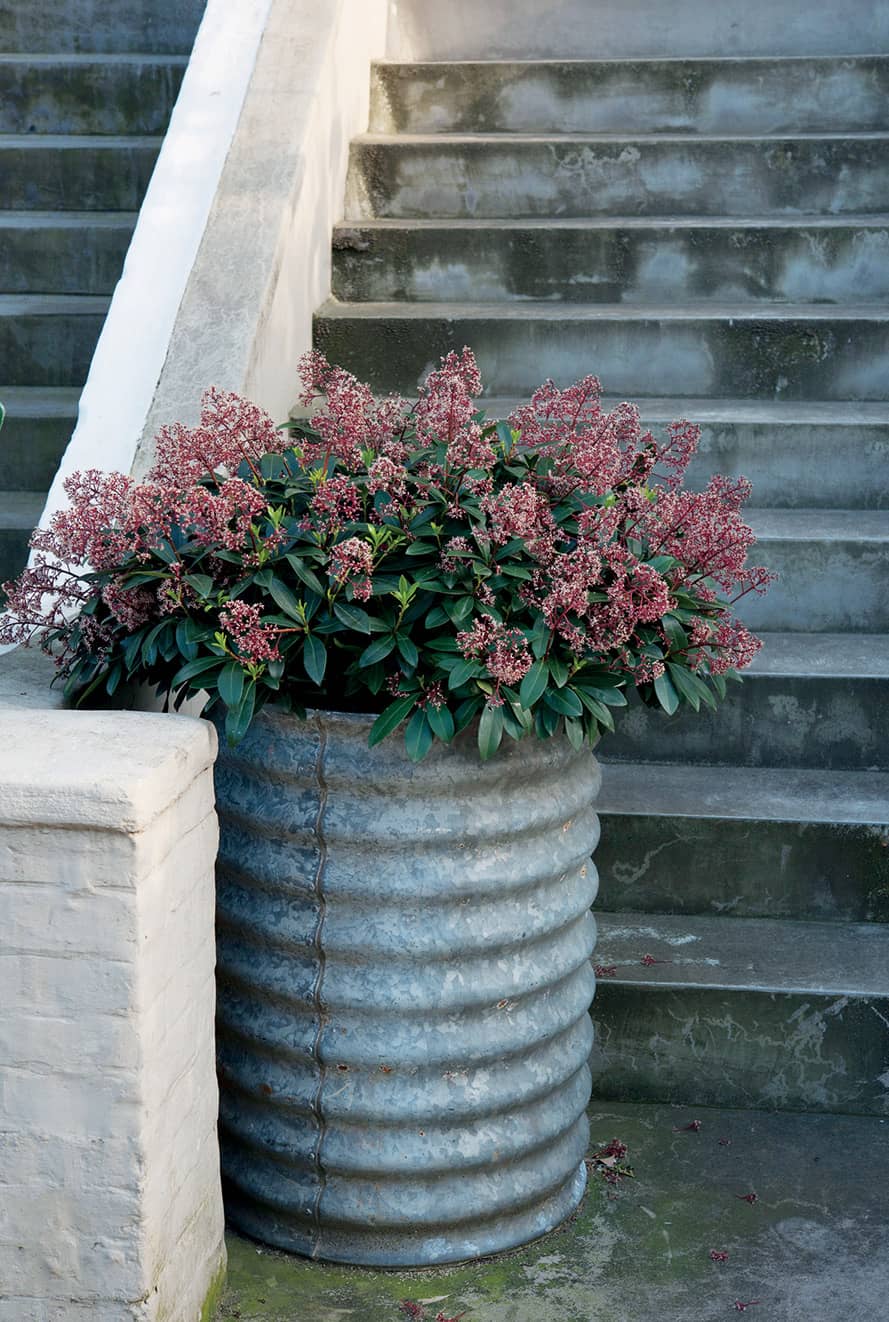
A galvanised dustbin will provide a home for a small tree or large shrub like this skimmia.
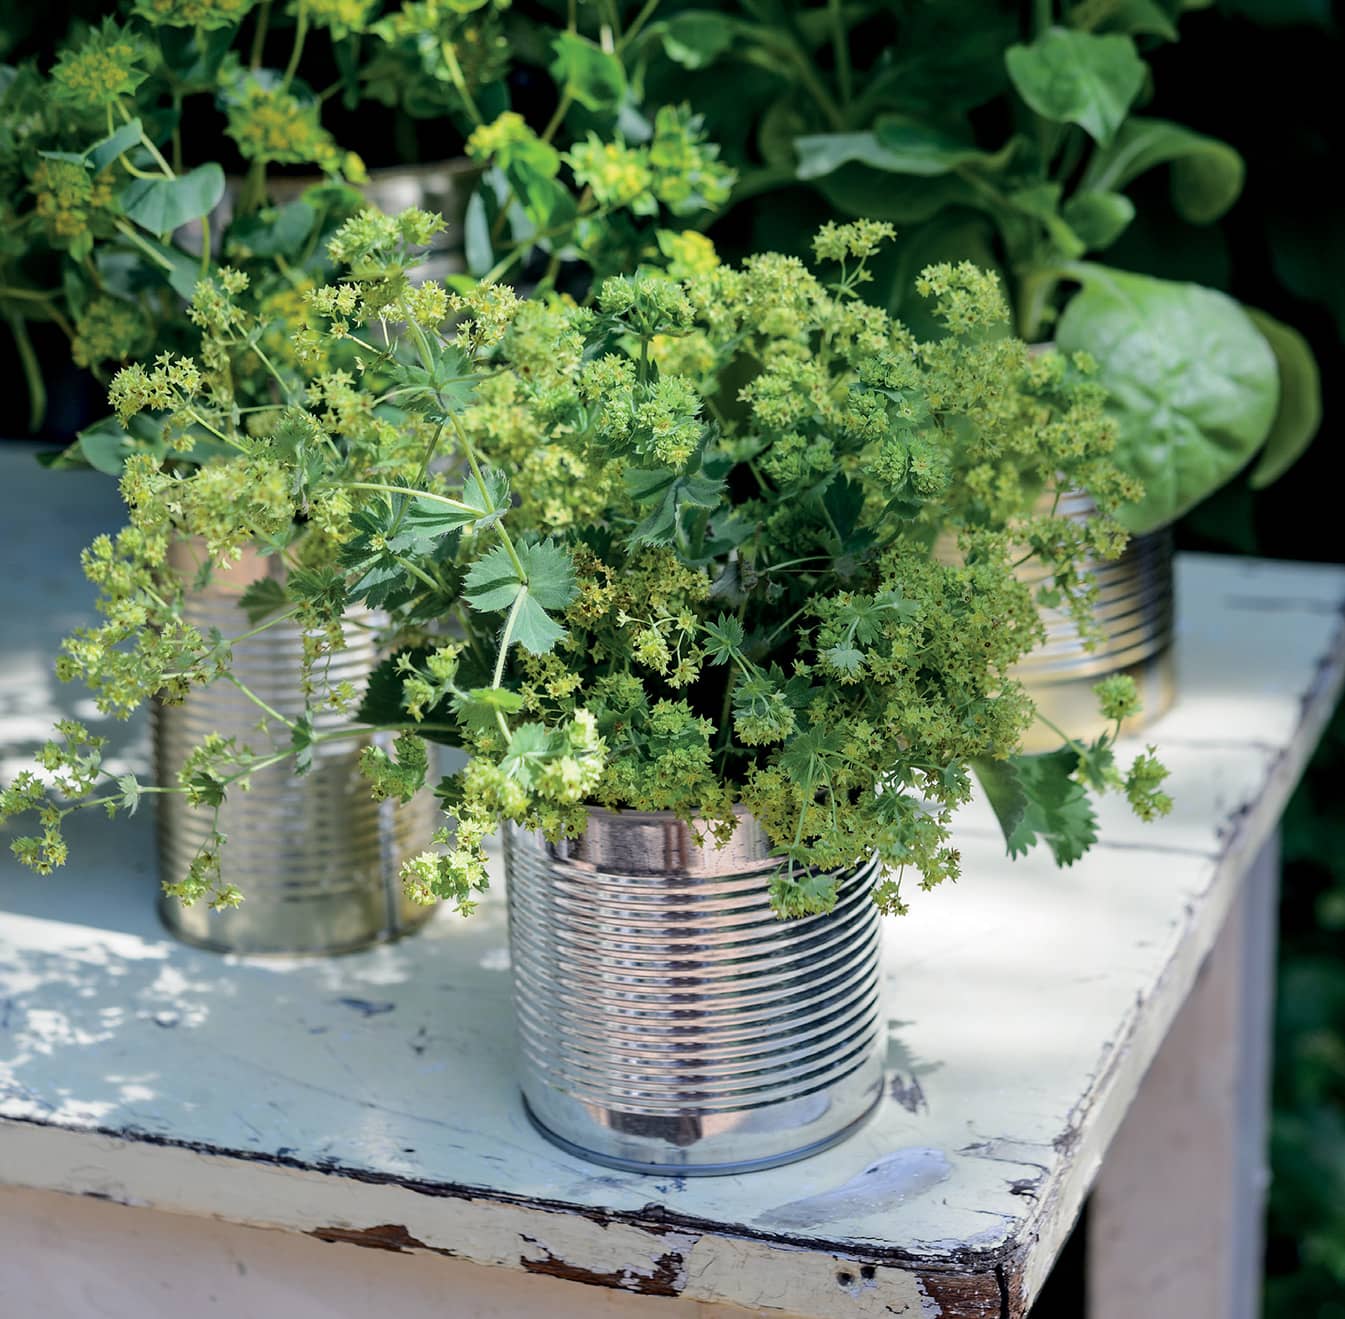
Upcycled cans make cheap, pretty alternatives to traditional pots; just make drainage holes in the bases.
WALLS, ROOFS & OTHER FLAT SURFACES
Walls and boundary surfaces form the backbone of urban topography, but rather than hemming us in, they can be embraced to form an integral part of the garden, with plants growing up, through and over them. Try these ideas for greening up your boundaries and buildings.
Walled, private gardens have always been seen as desirable spaces, but many of the large town houses that featured them have been divided up into smaller apartments, maisonettes and duplexes, and their gardens have been carved up too. But more recently, I have visited a number of properties where the owners have reversed this trend. They have knocked down dividing walls and removed fences to create large communal gardens where there is space for everyone to enjoy being outside and those that want to get their hands dirty can really get stuck in.
While you may not be in a position to remove a wall, remember that it does not need to be a physical or psychological barrier. If your neighbours have beautiful gardens, there is no need to block them out. Use them as inspiration and borrow their backdrop, if it is attractive, and integrate it into your own design. Match the planting on either side of a wall and it will be doubly lush and generous. I have planted a fig adjacent to where my neighbour has one, so that in the height of summer it looks like one enormous tree, and we share the fruit too.
Try integrating your walls or fences using the tips opposite, so that they form as much a part of the garden as the planting and other hard landscaping features. Blurring the boundaries in this way will help to make your space feel bigger and less restricted.
Green roofs and other flat spaces
Any flat roof can provide a fantastic planting opportunity but before you start such a project check the rules and regulations pertaining to usage, as well as health and safety requirements. For many projects, other than plants in pots or containers, this will mean bringing in professional help. For the purposes of growing flowers to pretty up an ugly flat roof or to make use of the only space available, whether it is a bin or log store, communal bike shelter or garden shed, you will not need permission if you own the freehold. In other cases, check with your landlord or management company.
Pre-grown sedum matting, which is widely available on easy-to-lay rolls, requires very little maintenance and no watering. Sedums will provide you with a year-round green roof but if you want more seasonal colour, then wildflower turf in a roof meadow mix is the answer. Turf is denser and heavier than sedum matting, so you will need to check the load capacity of your roof first. It also rolls out like carpet, and is grown on a netting base that will eventually biodegrade. Meadow turf attracts insects and birds and will bring colour and character to an uninviting flat space.
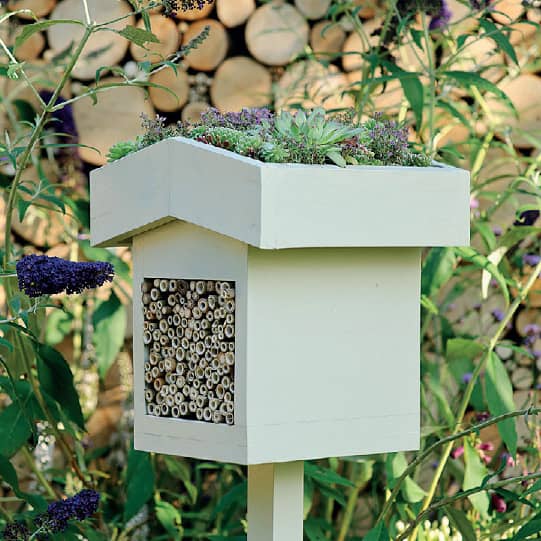
You can also plant the roofs of bin or log stores, insect hotels (above), sheds and storage units in shallow crates tailored to fit them; fill these with lightweight compost and drought-tolerant plants.

A green roof made up of drought-tolerant houseleeks (Sempervivum) and sedums will transform a plain wooden shed into a beautiful garden feature.
NOOKS, CRANNIES & DIFFICULT CORNERS
Every space contains one or more difficult corners. At worst they are dark, neglected spaces with no signs of life or vegetation, but pay them a little attention, and they can be transformed into extra growing spaces with the help of some tough, accommodating plants.
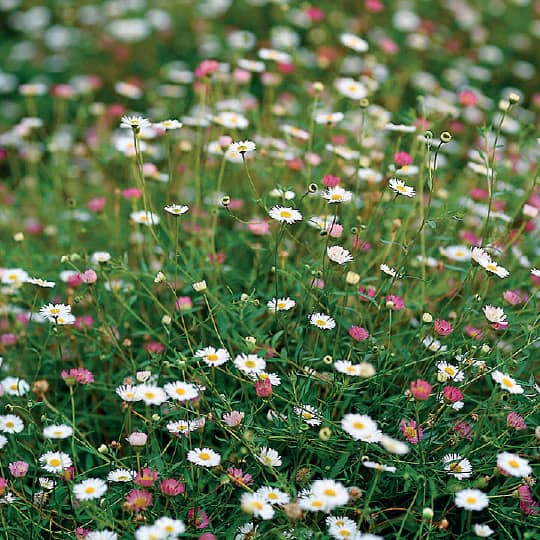
Clumps of the little daisy, Erigeron karvinskianus (pictured above), will quickly take up residence in cracks between bricks or timber joists and these joyful little flowers, which bloom virtually all year round in the city, will bring cheer to any nook. Another plant to encourage is Campanula poscharskyana. It grows anywhere and everywhere and will form small mounds of bell-shaped purple or white flowers in the most unlikely spots. Either can be planted directly into a crack in a wall by gently inserting the roots of a young plant into some dampened compost and securing it in place with moss (see here).
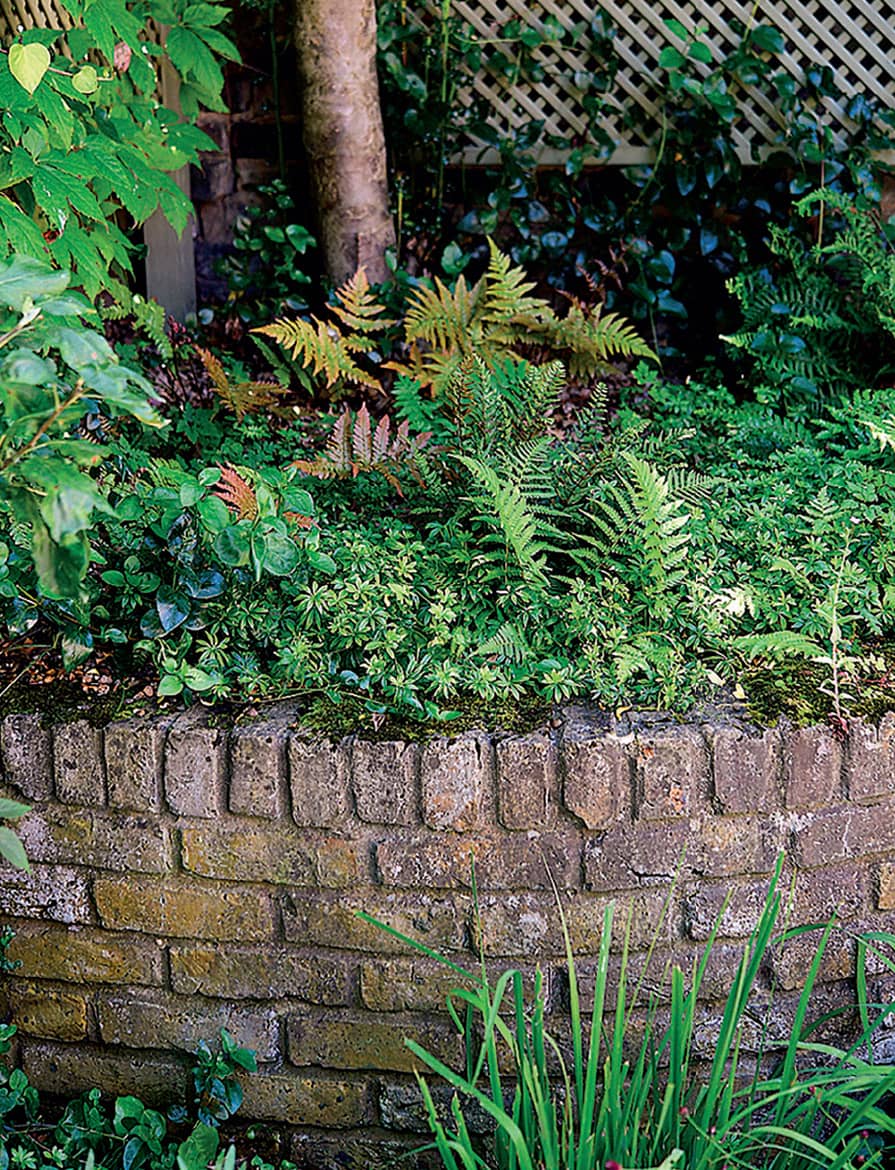
Ferns and ivies lighten up dark, shady corners.
Greening up hard surfaces
In hard paved spaces, which may on first sight appear totally uninhabitable, try installing a small log pile to create a natural setting. The logs will gradually attract lichens and mosses and become a haven for insects and other wildlife. It is also possible to use hard surfaces to create tiny planting spaces. A few large boulders, pebbles and gravel surrounding a series of pots will provide a welcoming environment for colonising plants to take root. By creating these artificial pockets you can transform the most inhospitable spot into a plant-friendly place.
Leave planting pockets along the edges of steps and raised beds, and break up paved areas with drought-loving plants to soften the hard landscaping.
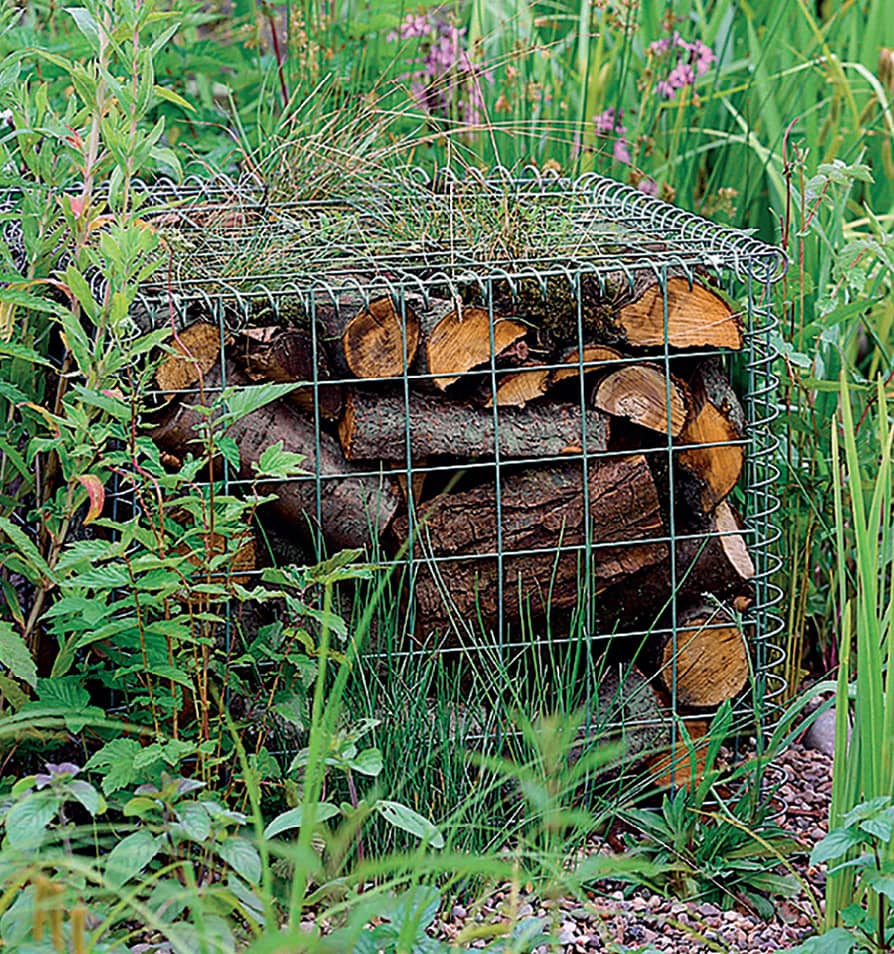
A log pile is easy to assemble and creates a natural habitat for wildlife and plants.
INTRODUCING PRIVACY
In a densely populated area living cheek by jowl with other people is the quid pro quo. Although seclusion has to be a state of mind rather than a reality, since it is impossible to create total privacy in most urban gardens, some design tricks can help.
Place seats to face into the garden, with their backs to the boundary.
Most urban gardens are overlooked from every angle by neighbouring buildings, and if you live in a flat or an apartment with a garden, then your space will be on view to the people living above you as well. Even if you are lucky enough to have a small area that isn’t totally overlooked you will still be aware of the noise and activity of other people going about their daily lives.
Accepting your lack of privacy is half the battle, but you can still design a quiet, tranquil space for yourself. A sense of privacy is all that is required. This can be achieved by using plants as a screening device or by installing fencing or trellis to create the impression of being in a self-contained private space. Horizontal fencing panels work really well along boundaries because they are not solid and allow light to filter through. They look attractive when bare but also provide a good support for climbing plants to scramble up.
Making a peaceful haven
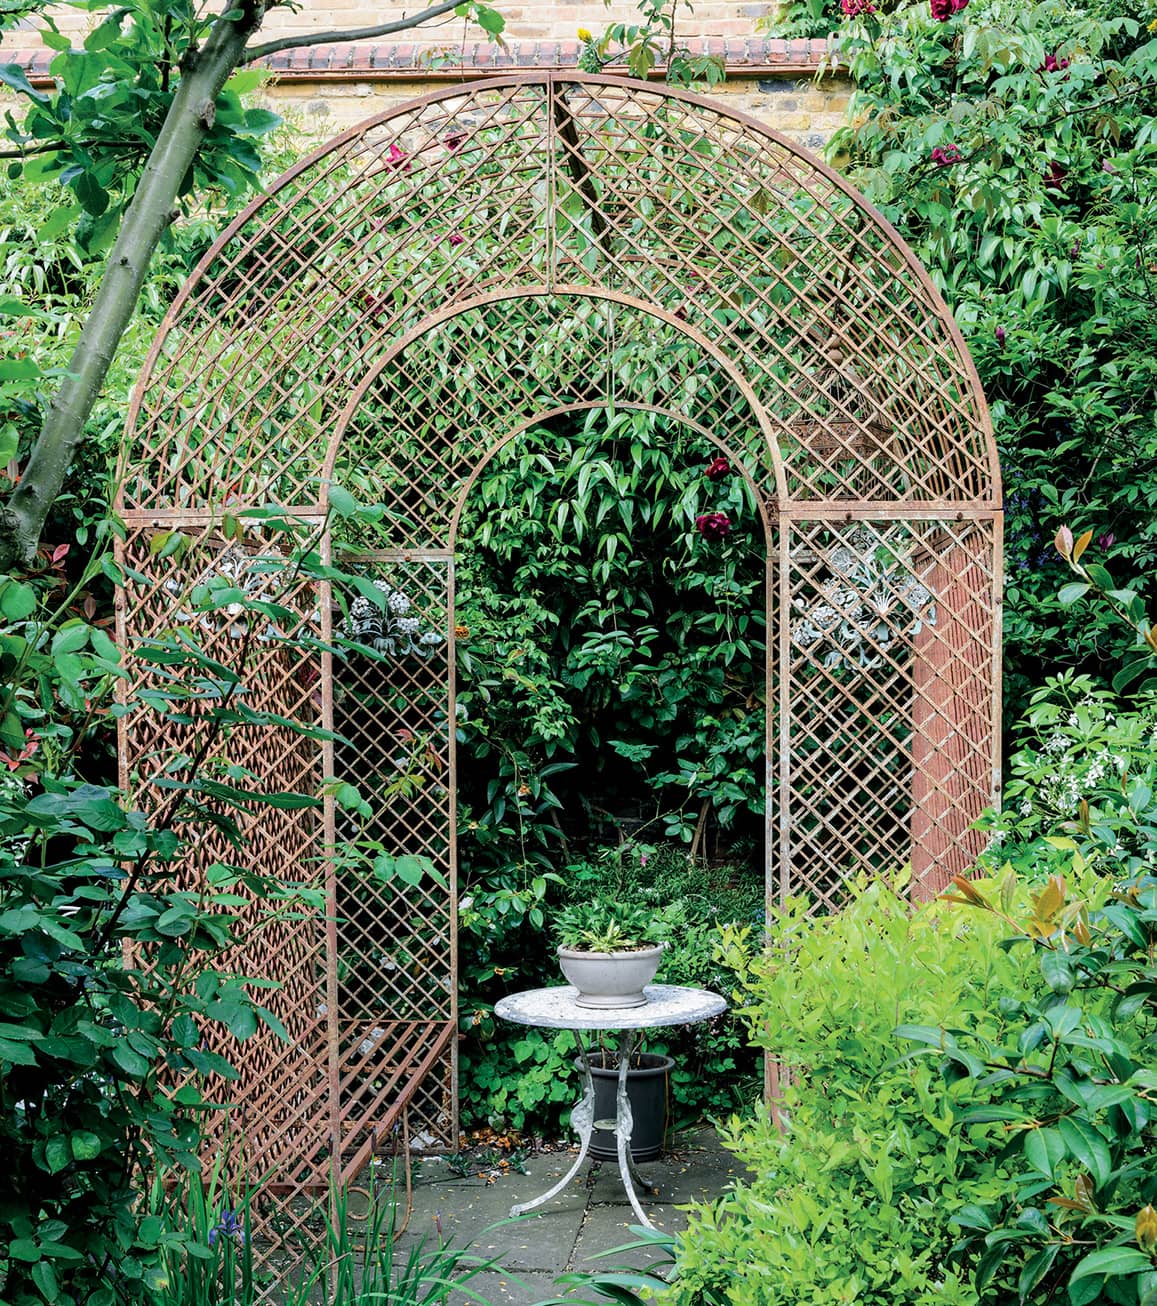
Creating a false boundary in front of your existing walls and fences offers an added feeling of protection. It may mean losing some space but this can be worth it if seclusion is your top priority. By installing trellis in front of an existing fence or wall you also double the planting opportunities, but make sure that the original boundary is clothed in an evergreen that requires little maintenance if the area is difficult to access.
Make use of existing tree canopies, and don’t cut back everything in sight, as this will expose your space. Where the branches from a neighbour’s tree overhang your garden but also block out their windows, leave them in place and prune judiciously. Any tree, however small, provides shelter and security, so if you have space, I would advise planting one (see here for planting suggestions). Olive trees or large shrubs in pots on balconies and terraces can be positioned to obscure overlooking windows. Bamboos make particularly effective screening and their rustling leaves can muffle other intrusive noises too. Bubbling water in a small bowl or fountain will have the same effect.
Positioning seats and chairs so that you have your back to the boundary will focus your attention into, rather than out of, your garden, and increase the sense of privacy and protection. Also install a pergola or other structure over your seating area and clothe it with climbers, such as scented roses and jasmine, to mask prying eyes and help establish your own personal Eden in the midst of the urban frenzy.
Painted horizontal fencing panels make an attractive enclosure.
A small pergola creates a private seating area.
Trellis covered in foliage works as a second boundary to create an added sense of privacy.
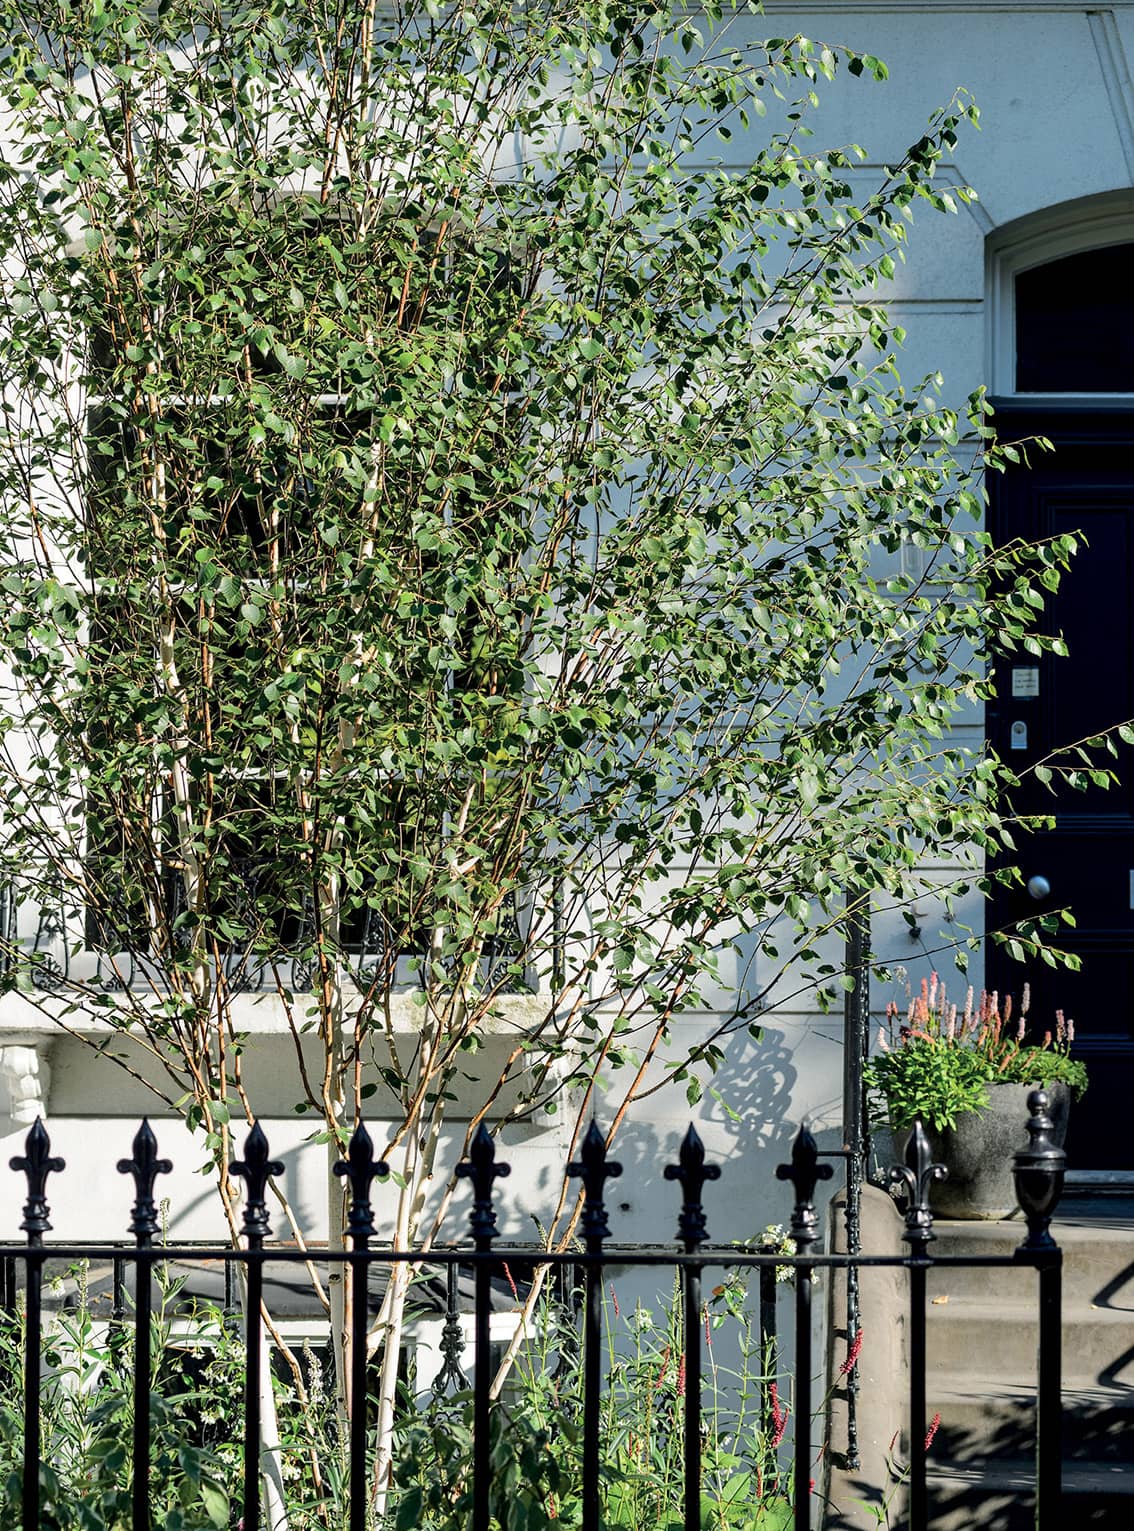
Multi-stemmed birch trees prevent passers-by from looking in but don’t block the light.