REAPING YOUR REWARDS
DECORATING YOUR LIVING SPACE
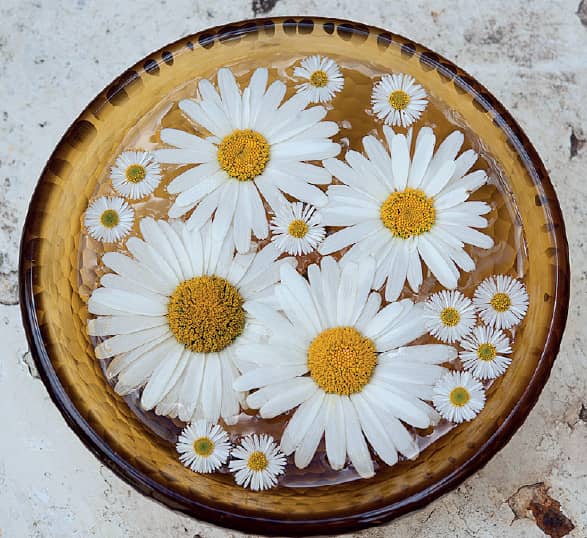
Floating the heads of home-grown flowers or foraged blooms in a shallow glass bowl makes a simple but effective display for the home.
The rewards that come from growing your own flowers are numerous. The more you grow the more you will, quite literally, reap. Whether you sow seeds in pots on a patio or tend a small urban garden, you can extend your enjoyment by bringing blooms, berries and leaves indoors for displays in your home.
With a few home-grown plants you can bring a little of the outside indoors to embellish your living space. You don’t need to create huge, extravagant bouquets; I find that single stems poised in tall glass bottles look fantastic, either in groups of different heights or all of the same size lined up with military precision along a shelf, windowsill or mantelpiece.
Start a collection of containers and vessels that match your décor to display your cut flowers and foliage. Personally, I prefer to keep it simple and stick to clear or coloured glass to match the hue of my flowers. I only buy vases when really required, and again I tend to purchase those with simple, elegant outlines. It is useful to have a few of varying shapes and sizes to accommodate different flower groups. A low, squat vase with a rounded bowl or dish shape is ideal for floating flower heads or massing together an arrangement of short-stemmed blooms; a medium-sized glass cube is incredibly versatile and useful for displaying hand-tied mixed posies; a tallish oval–shaped vase will accommodate just about everything else you wish to display.
Upcycled jars
You can also start accumulating a few jam jars in various sizes. Large types that hold pickles and condiments, especially the catering sizes that you can often pick up for free from cafés and delicatessens, come in pleasing shapes. Or try grouping plain glass cylindrical household jam jars of slightly different heights, and use them to display flowers of the same variety. These everyday containers can look just as stunning as one expensive vase.
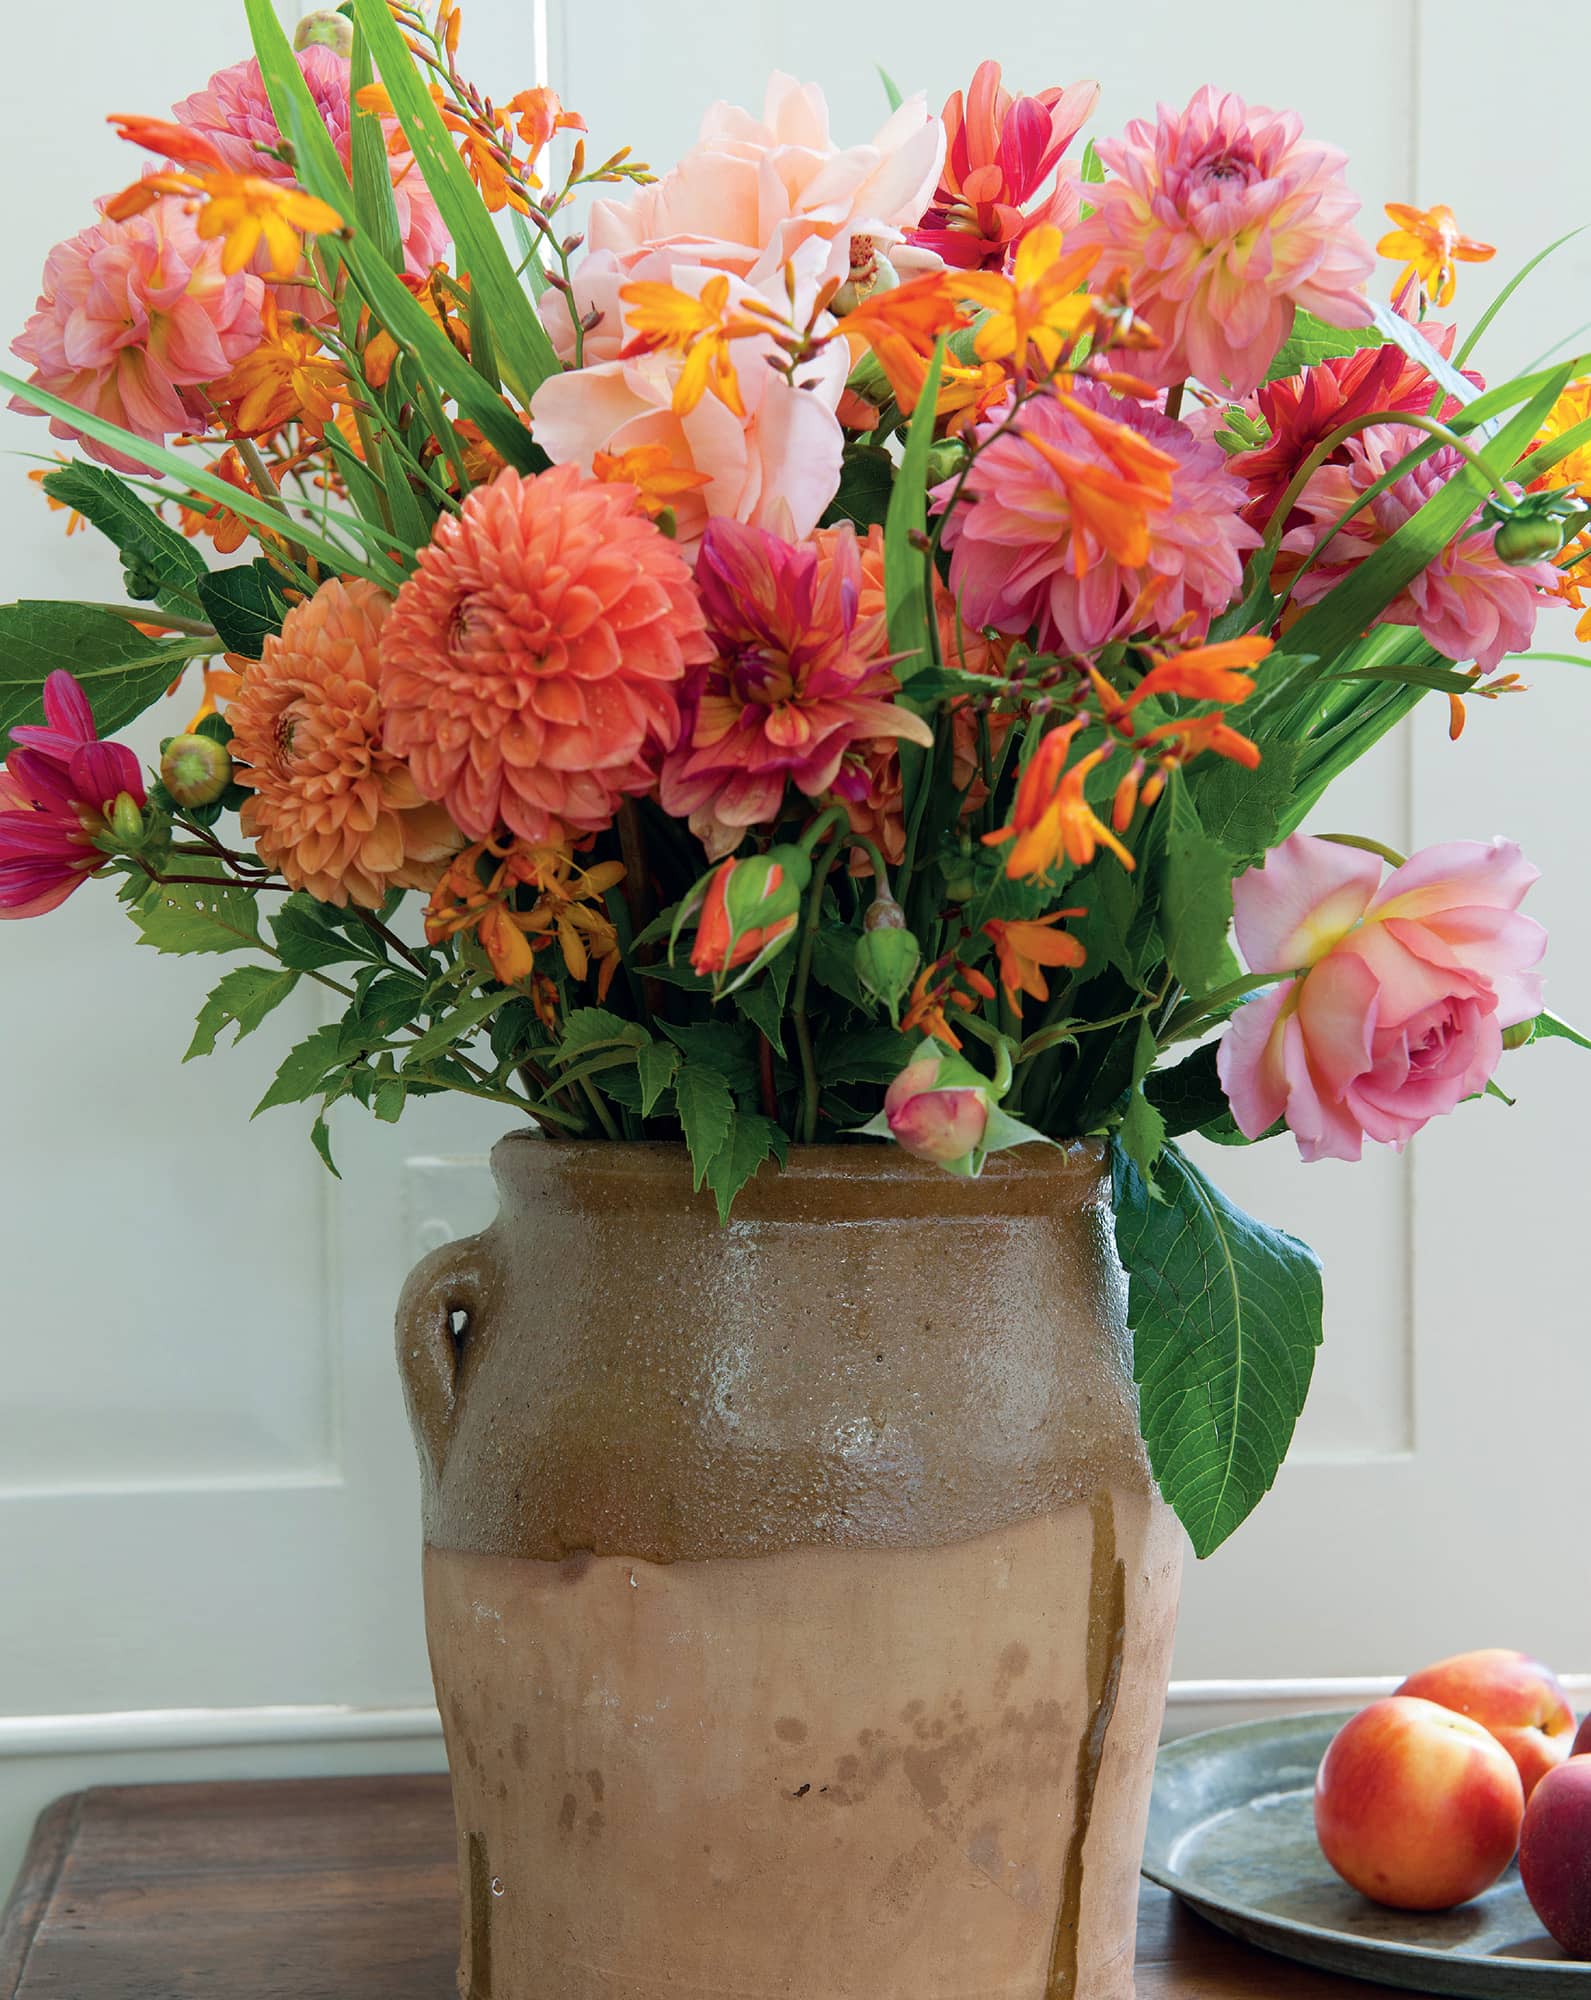
Personally, I think that jam jars, hand-crafted glazed clay pots and glass bottles with the odd imperfection suit the relaxed aesthetic of home-grown flowers. The blooms you grow yourself are likely to have the odd twist or quirky stem and will not be as uniformly straight or rigid as shop-bought blooms, so they tend to look more natural if the heights and shapes of your containers are different too. Experiment with the glassware you have at home to see what works for you.
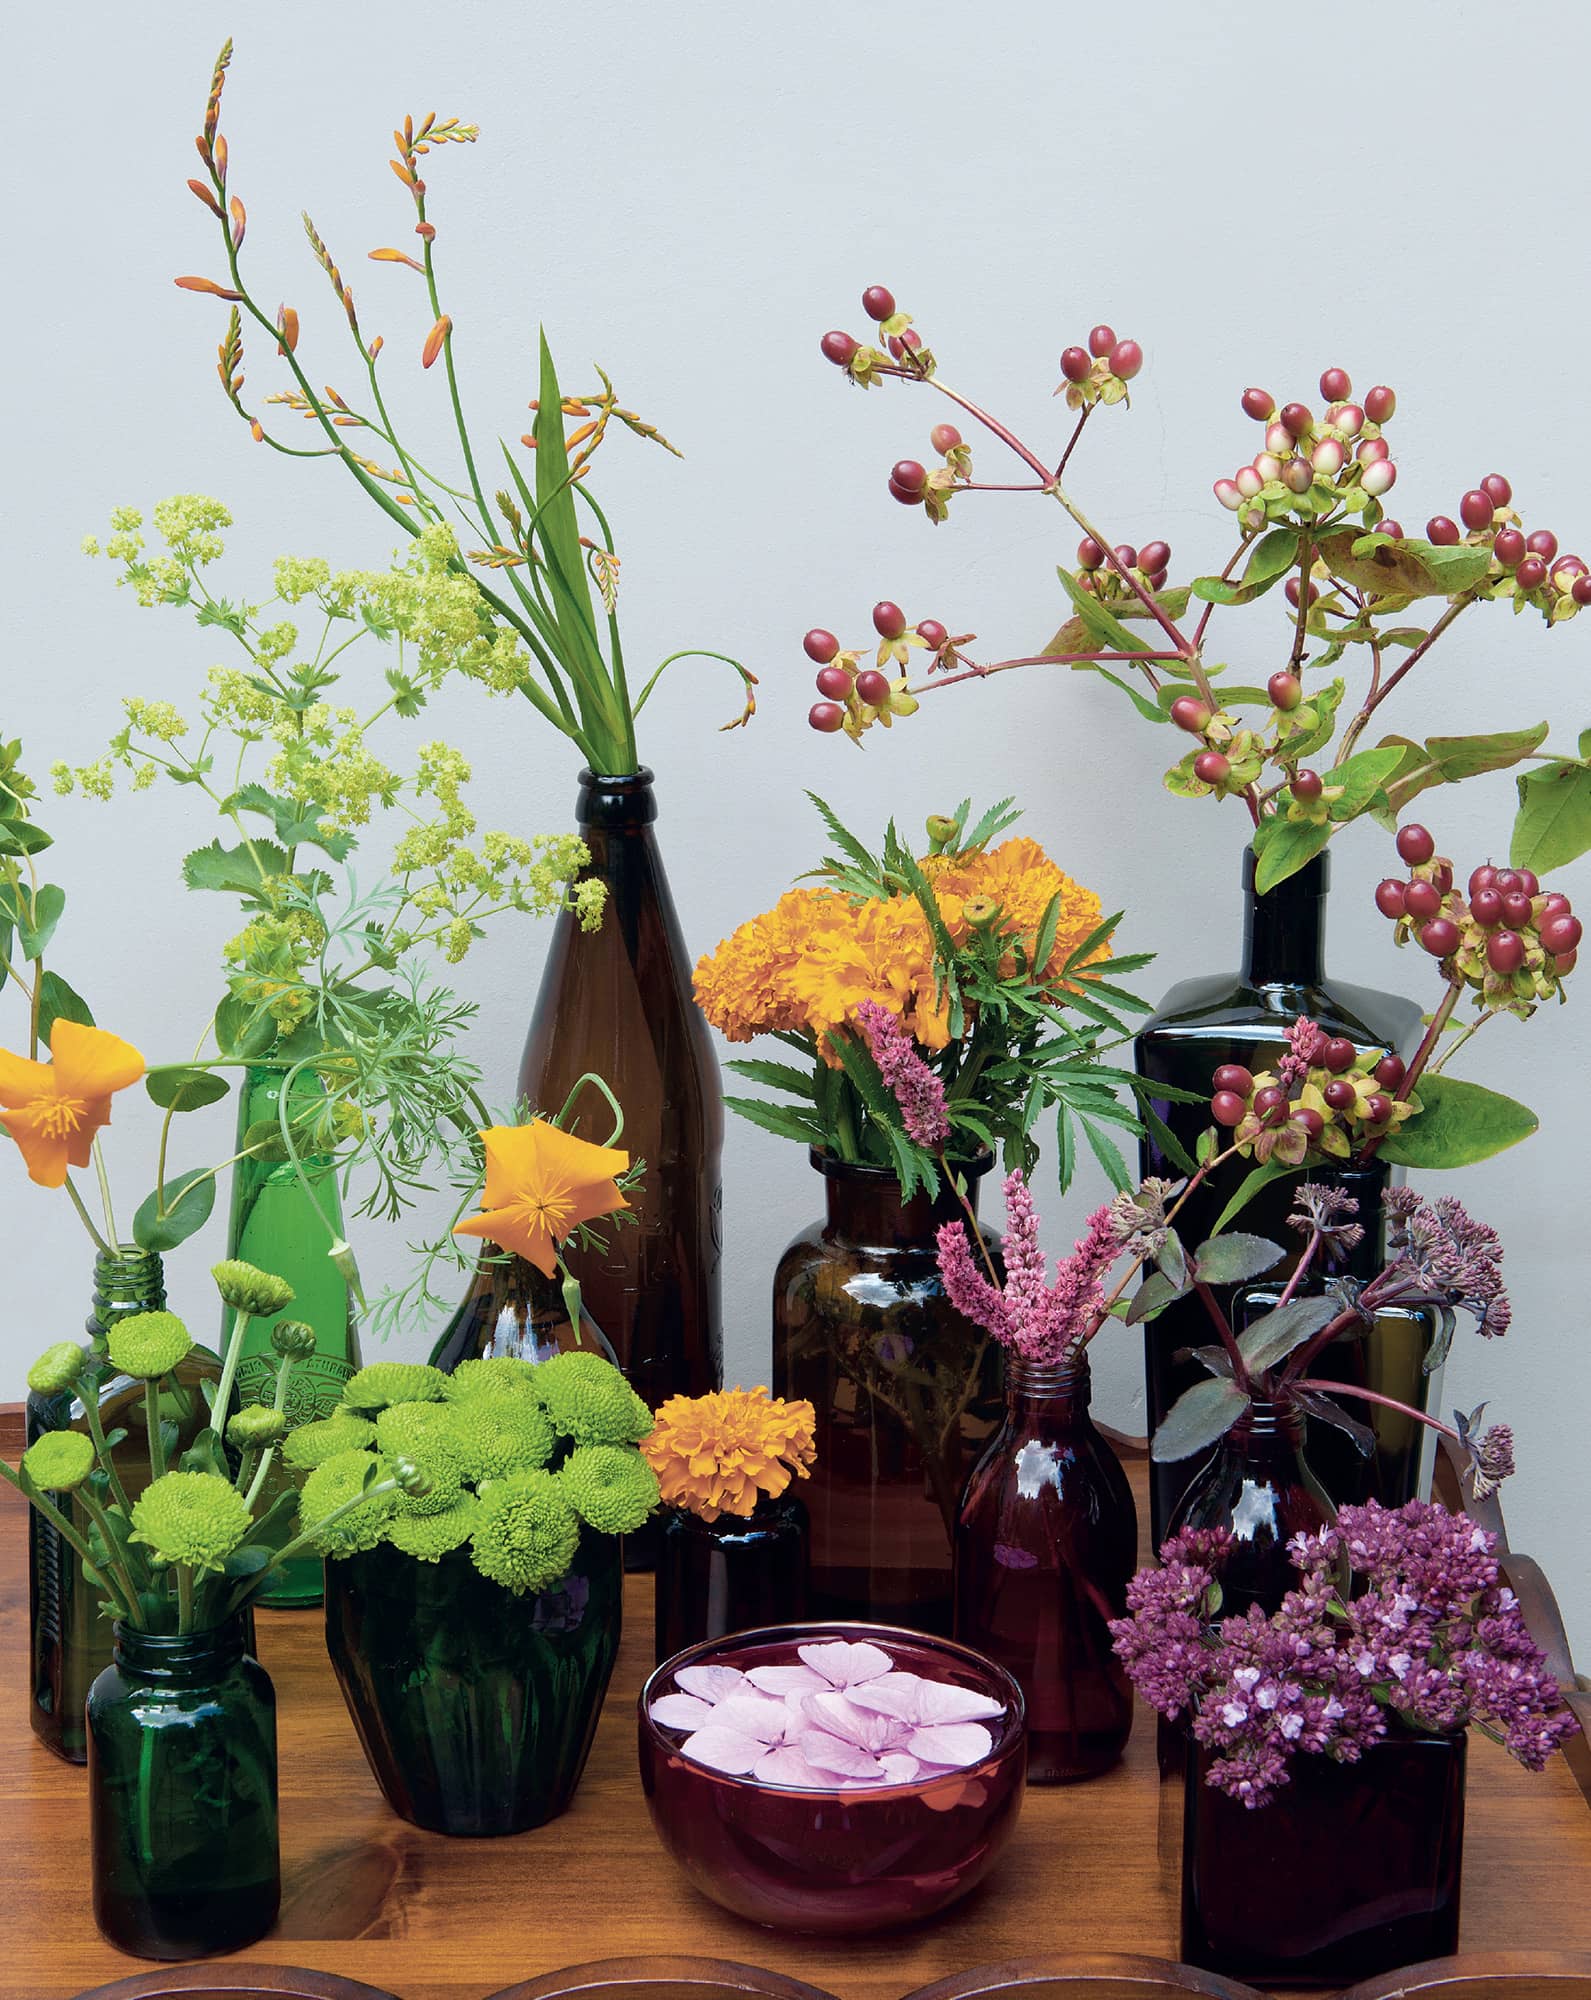
Glass bottles of different hues are the perfect vessels for showing off single stems. Grouped together on a small table they create a lovely still-life.
Buying flowers for indoor displays
For a special occasion, party or dinner, you may want more flowers than your growing space can provide, or you may wish to only pick sparingly from your precious crop. In these instances, you will need to purchase some extras and, if this is the case, it’s worth checking out the flower stall at your local farmers’ market or making friends with you nearest independent florist. That way you are more likely to be buying local, seasonal flowers that haven’t been flown half way across the world with a stack of air miles behind them. They will also be more complementary to those you have grown yourself. While I can see that the cellophane-wrapped bunches you find in big supermarkets have their place, and that they form part of a global economy, I tend to eschew these in favour of blooms that have been grown with love and care by an artisan flower farmer. Small flower farms are growing in numbers due to increasing demand from discerning buyers, and many offer the chance to pick your own. Check out these independent growers online and visit them if you can. They will also be able to advise you on the best blooms for your displays.
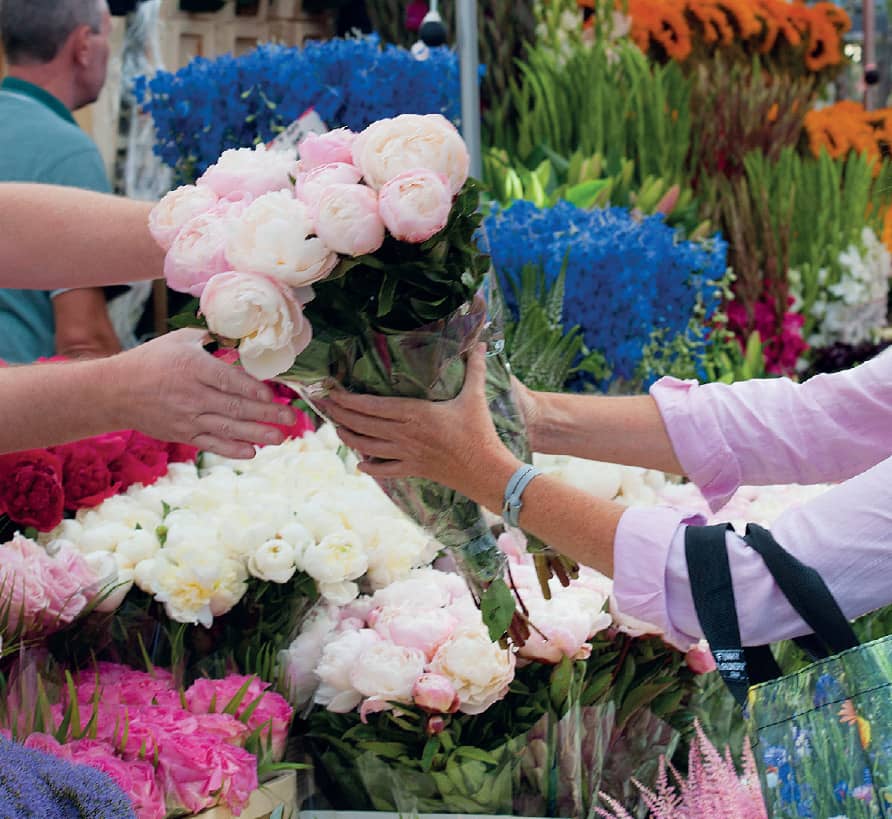
Buying blooms from local flower growers is the most environmentally friendly option.
CONDITIONING & CARING FOR CUT FLOWERS

Whether you have grown your own, foraged for flowers, or bought from a local market, your blooms will last longer and look their best if you condition them before putting together a bouquet or indoor display. This only takes a few minutes and is easy to do.
There is nothing complicated about conditioning your flowers. It simply involves stripping the stems to remove all the lower leaves and then cutting them to take off a couple of centimetres (inch) from the bottom, before plunging them into very cold water. This allows the exposed new plant cells to absorb more water and provides your flowers with the best chance of survival in a vase or jam jar. It is useful to have a designated flower bucket or two for this task, ideally one with handles so you can move it around easily when it’s full of flowers and water. Keeping a bucket solely for conditioning fresh flowers will also reduce the risk of spreading bacteria to the stems if you rinse it out with a drop of bleach after every use. The bleach will not harm the flowers if any residue is left behind.
Before arranging your flowers, give them a good long drink; submerge the stems up to their necks and set them in a cool place for 24 hours. You can leave cut flowers in cold water for a few days if you refresh it before it becomes stagnant.

Sharp flower snips, floristry twine and waterproof tape, coloured wires and flower frogs make up the flower enthusiast’s essential tool kit. Buy them all online from specialist suppliers.
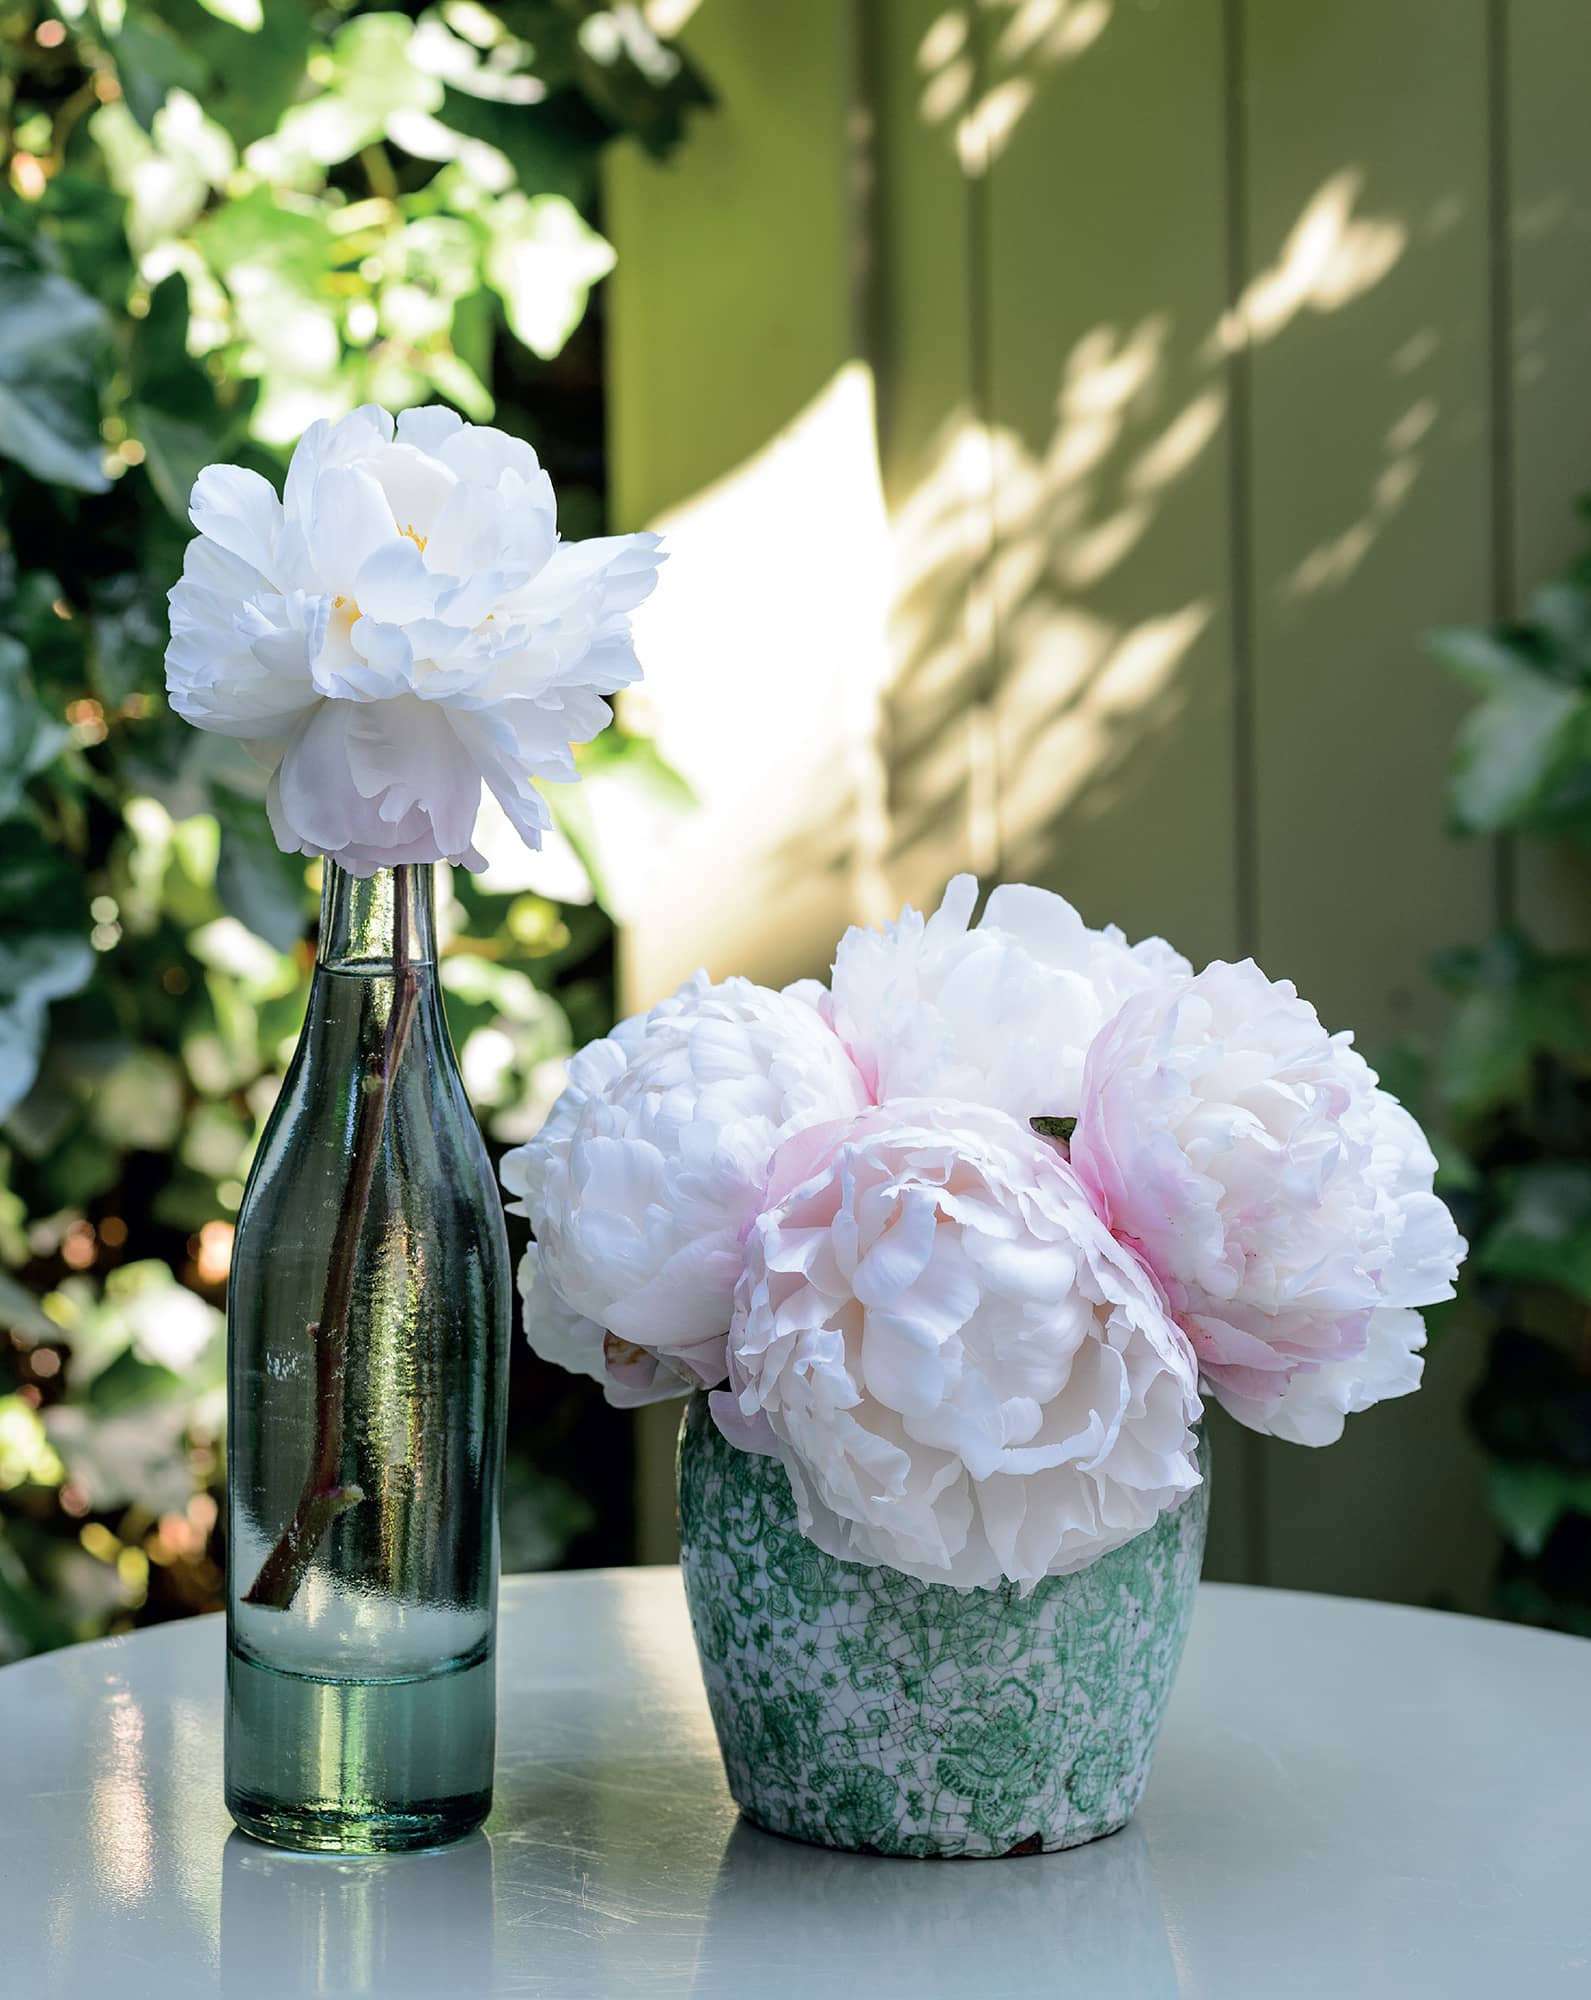
Five peonies divided between a ceramic vase and a glass bottle offers the opportunity to study each of the blooms up close.
Fixing blooms into position
Whether you become an expert at making hand-tied bouquets, or if a single stem repeated in a row of glass bottles suits your style better, you may need a little help keeping them in place. Although floral foam is widely used to create static arrangements, particularly for events, I prefer not to use it. Whether it helps flowers last longer is debatable, but because it does not decompose, it is not environmentally friendly.
If you want to keep your flowers in position and prevent them from moving, without making a hand-tied bouquet, try a flower frog or an old-fashioned flower bowl with a fitted lid pierced with holes. Alternatively, use small stones or pebbles or a ball of chicken wire at the bottom of your vase to keep flower stems in place.
You can also make your own framework by fixing strips of clear sticky tape to form a grid pattern across the top of a vase, ensuring the neck is completely dry beforehand. Then simply pop the stems through the holes.
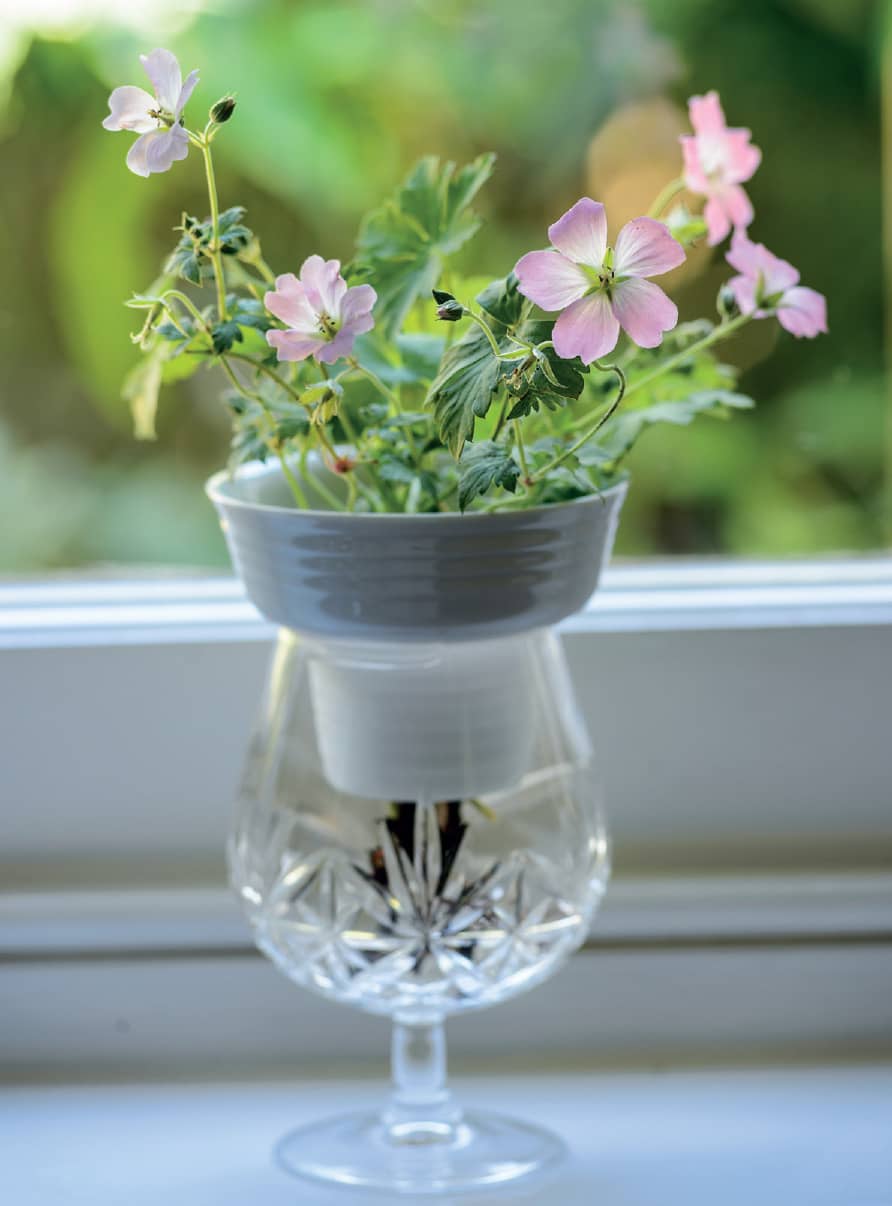
A porcelain holder keeps a stem of garden grown geraniums upright.
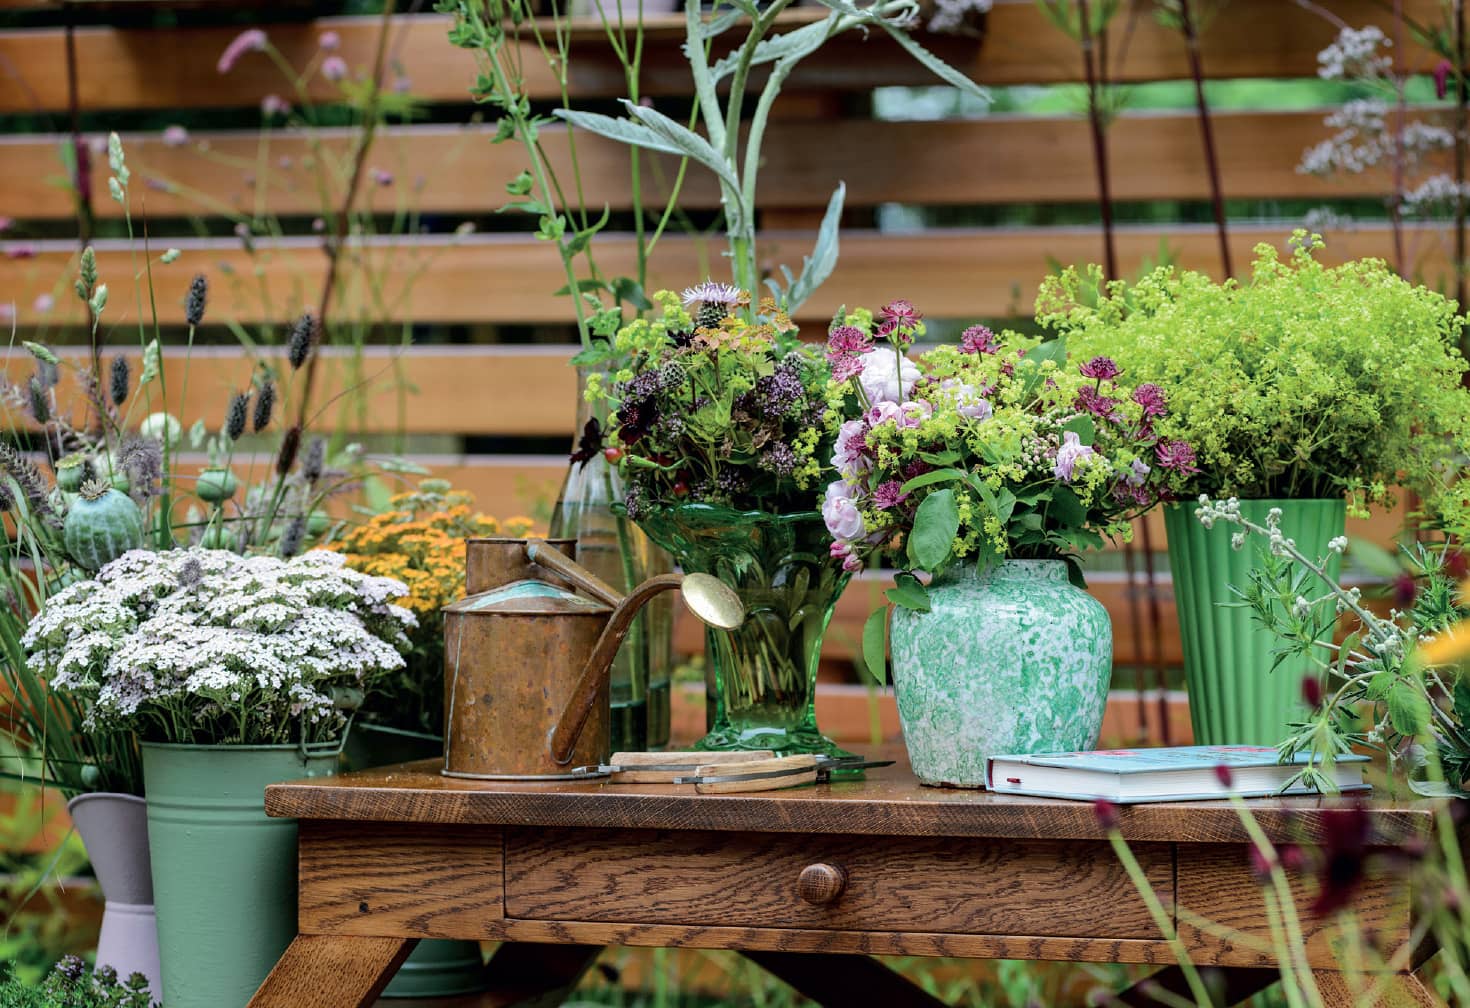
This flower display formed part of my show garden at RHS Hampton Court Flower Show and lasted a whole week when given fresh water daily.
HAND-TIED GIFTS
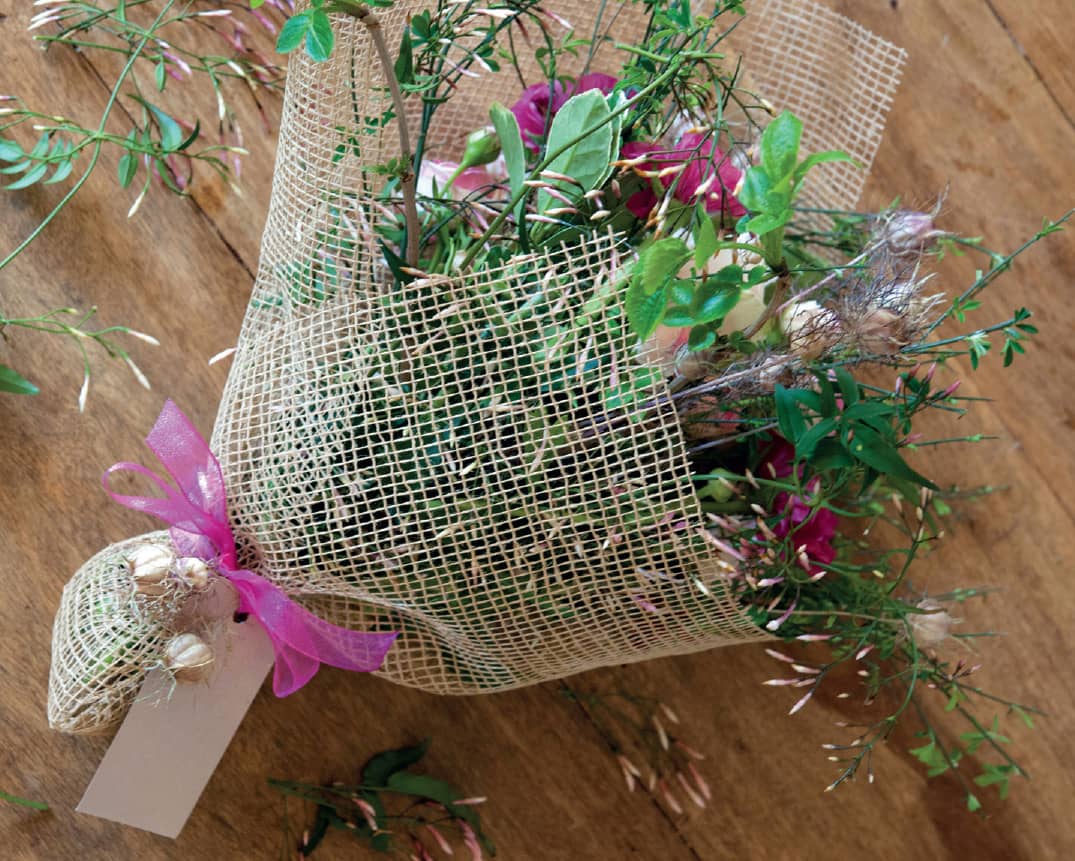
Nothing beats a home-grown hand-tied posy presented as a special gift. It is the equivalent of baking a cake for someone and the effort you put in will be greatly appreciated.
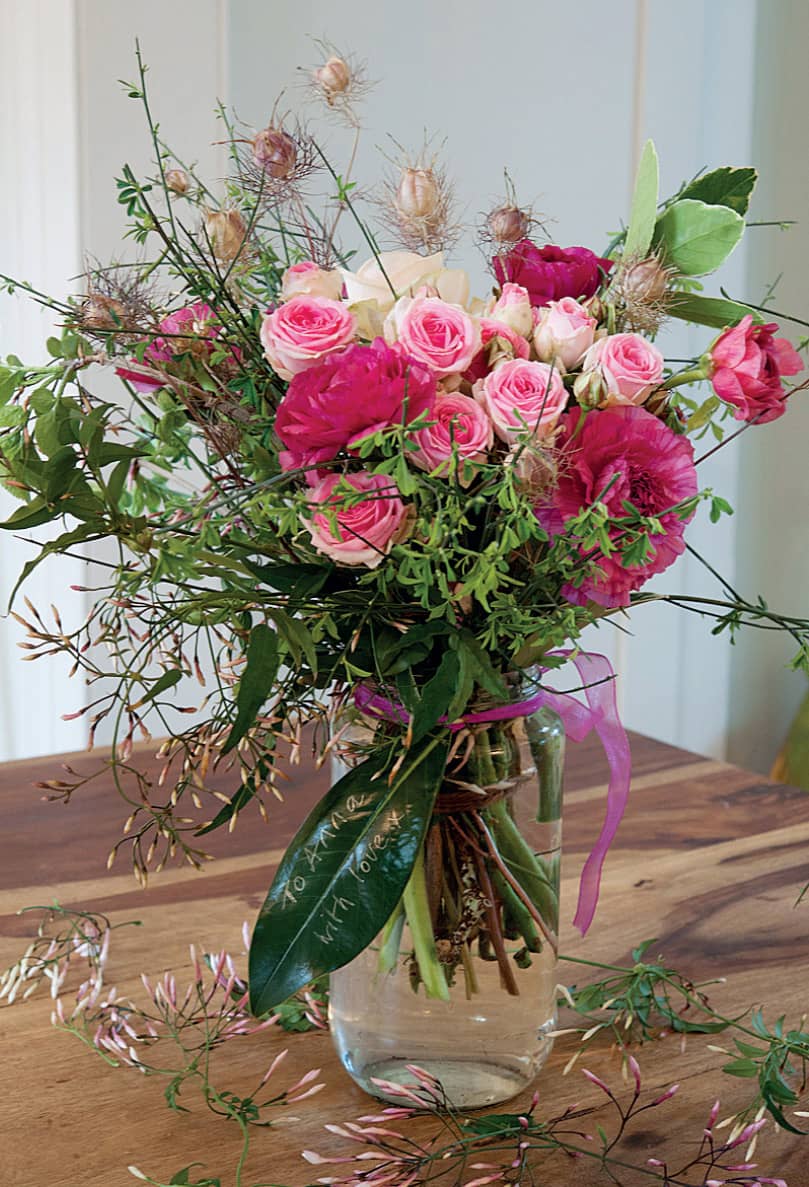
Combining a selection of home-grown flowers in hand-made arrangements in recycled jam jars is the prettiest way to present them. Tie a ribbon or piece of natural twine around the jar, together with a brown luggage label bearing a hand-written message, or use the shiny side of a flat leaf as a tag and inscribe it with a gold pen. If it is not practical to transport jars of water, wrap your posy in a square of hessian or a piece of floral fabric and tie with ribbon or string. I keep old bits of material for this purpose, but if you don’t have any to hand, a couple of sheets of newspaper or plain brown paper are effective alternatives and also lend a contemporary, urban look.
STEP-BY-STEP
How to make a round bouquet
Just as you need the right ingredients to bake the perfect cake, there is an ideal mix of plants when it comes to successful flower arrangements. You will need the same amount of foliage material as flowers, or more. Work in uneven numbers of blooms and combine them with a selection of seasonal berries and dried seed heads in autumn or winter to achieve an exuberant “just-picked from the hedgerow” look.
Once you have given your fresh plant ingredients a good long drink, assemble everything in front of you. You will need a length of twine or raffia and strong scissors, or secateurs for woody stems, close to hand.
Ingredients for the bouquet
I have used five stems of ranunculus, three stems of bought spray roses, one single large rose-head, nine stems of dried love-in-a-mist (Nigella) seed heads, nine stems of jasmine, and nine stems of mixed foliage from a nearby building site and my garden.
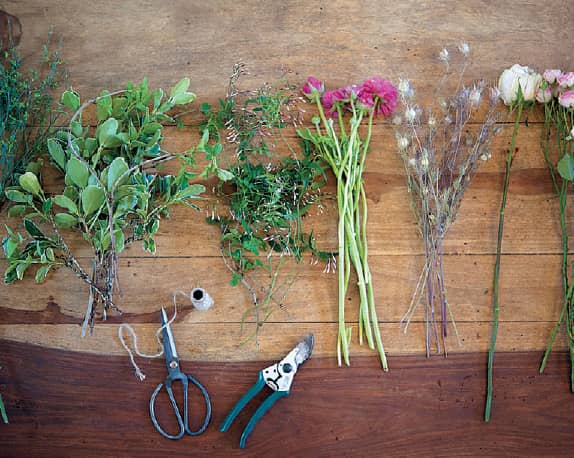
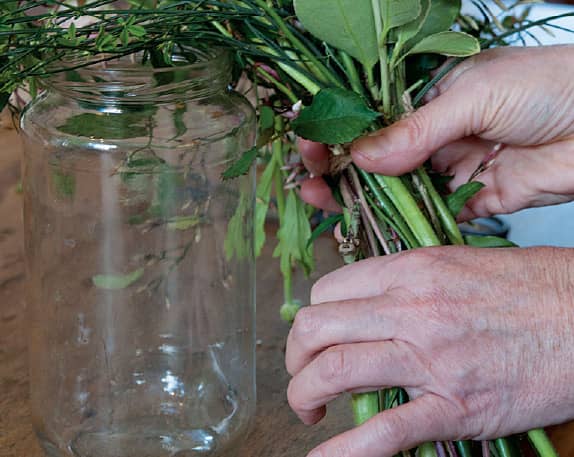
1. Collect together all your plant ingredients (see Ingredients for the bouquet for a list of those I am using here) and strip the leaves from your flowers and the lower sections of your foliage plants, so that you have bare stems of approximately equal length. Arrange all the flowers and leaves by group on a table in front of you.
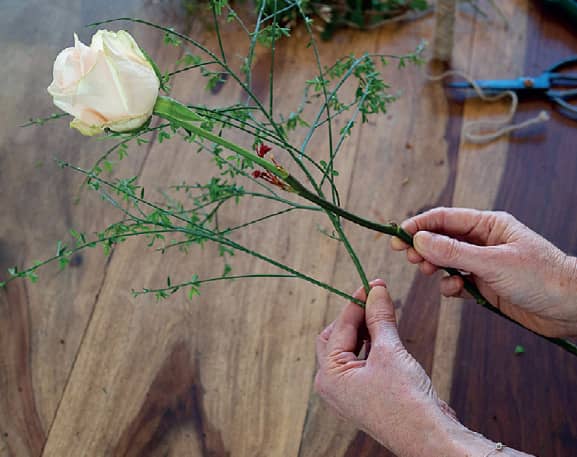
2. Take a foliage stem in your left hand if you are right-handed or vice versa if you are left-handed. Add the single rose, or other large flower head, with your right hand at a slight angle; take hold of it with your left and twist clockwise. This will become the centre point of your hand-tied bouquet.
3. Work through each group, selecting one or two stems from each in rotation and twisting in the same direction every time. You are holding the bouquet at the binding point and the looser your grip, the more natural looking it will appear. Aim for an equal distribution of flowers, foliage and seed heads.
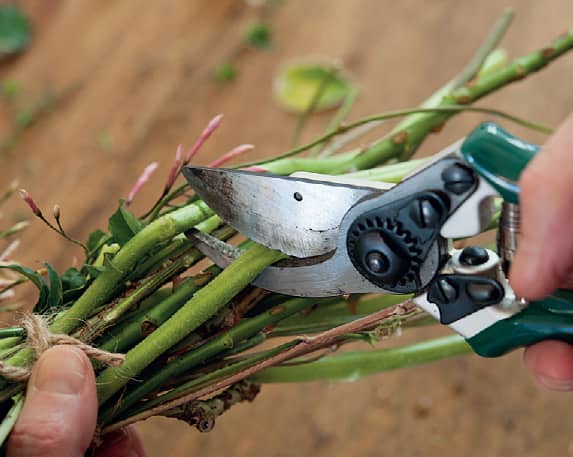
4. Keep checking the mix as you go, and fill in any gaps. When you are happy with it, fix your bouquet by tying with twine using a lasoo-style knot. The higher your binding point, the tighter your bouquet will sit, so if you are making an arrangement for yourself, work out which vase or jar you are going to use in advance and judge the size of its neck accordingly. Once your bouquet is firmly tied, recut each stem on a slight diagonal, ensuring they are all the same length.
5. The lower stems should all be clear of foliage and spiral pleasingly to give an attractive appearance in a clear glass vase. Remember, practice makes perfect and it may take a few attempts to get the hang of this technique, but with enough home-grown flowers to spare, you can keep trying until you get it right.
PROLONGING THE VASE LIFE OF YOUR FLOWERS
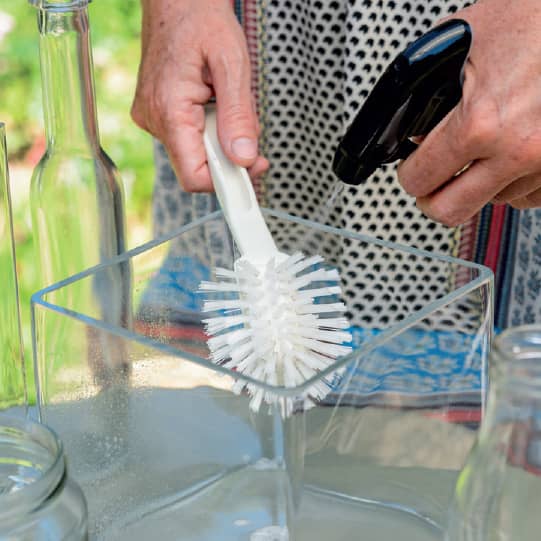
Keeping vases and containers scrupulously clean is the key to prolonging the life of cut flowers.
There are numerous myths and tips on how to increase the life of your cut flowers. The essential advice is to display them in a cool place away from direct sunlight or any other heat source, and to ensure that the water they are plunged into remains clean and crystal clear at all times.
To ensure success, keep your vases and jars sparkling and disinfect them thoroughly after every use. If the glass starts to stain, or becomes watermarked through repeated use, add some handfuls of white rice and top up with vinegar, then swirl the mix against the sides of your vase and the stains should lift off. The beauty of using jam jars is that once they have lost their sheen you can put them in the recycling bin.
Replacing the water daily is the best way of enhancing the lifespan of cut flowers. With an extra large arrangement this is not always practical, so the easiest option is to refresh the whole thing by setting the vase under a running cold tap and leaving the flowers in situ. Other tips include adding one of the following to the water: a drop of bleach; a teaspoon of vinegar and sugar; an aspirin; a drop of lemonade; or even vodka if you can spare it. I have tried all these methods, apart from the vodka, and I can say that all seem to work well, so take your pick. These ingredients extend the flowers’ lives in the same way as the little packets of flower food that often accompany cellophane-wrapped bouquets sold in supermarkets. Bleach will kill any bacteria lurking in the vase, so that is my personal recommendation, but it is worth experimenting.
After a while in water, soft stems produce a green slime which, if left unchecked, will kill the flowers. To prevent this slime, recut the stems regularly under cold running water. I am also not an advocate of mashing stems before immersing them in water, although some professional flower arrangers swear by this method.
Hot tips for delicate blooms
Searing the stems with a naked flame is another trick I use for poppies and other flowers with very fine flimsy stems, as it seems to keep them more upright. To prevent drooping rose heads, which is caused by an air block in their necks, plunge the stems into boiling water and then immediately into very cold water or even a bucket of ice. This will release the blockage and perk them up.
Ideally, a vase or hand-tied display should last five to seven days, and there is no reason for home-grown flowers to die more quickly than shop-bought if you follow this advice.
Large arrangements can be more easily refreshed by placing the whole vase under a cold tap and running it until the water pouring out is clear.
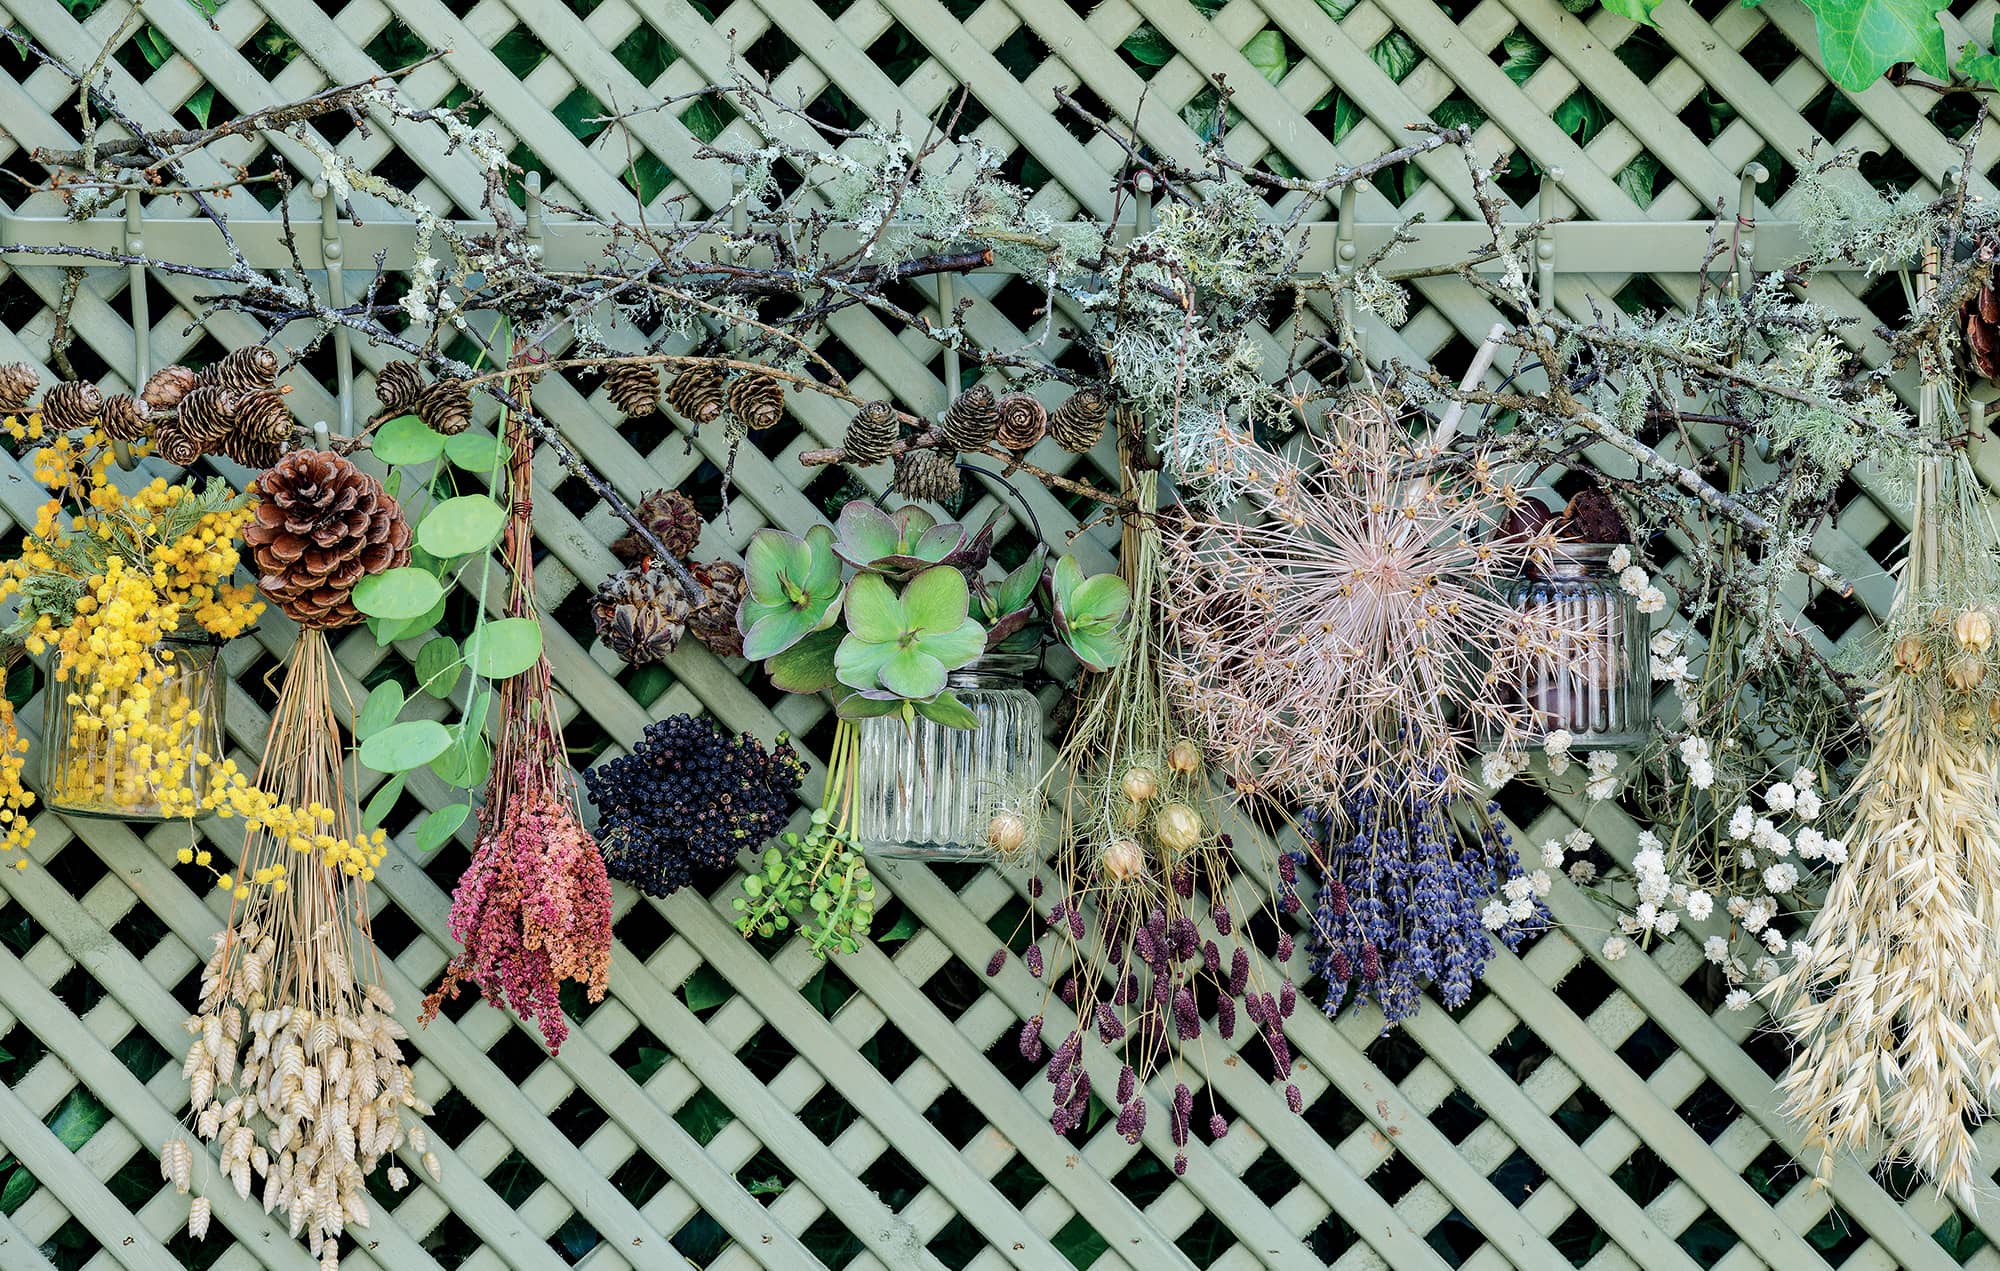
DRYING FLOWERS
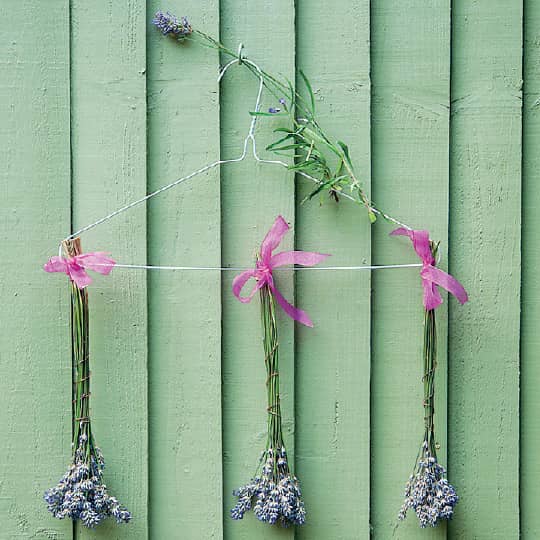
Dry long, thin flower stems such as lavender in small groups and hang upside down.
Growing flowers to harvest for drying and preserving, as well as for fresh cut displays, is another reward for your hard work. The following methods guarantee displays that last a lot longer than seven days and provide you with material to work with year-round.
Dried flowers have fallen out of fashion of late, but this can only mean that they are due a comeback. Whatever the latest trends dictate, I like to mix dry with fresh blooms in many of my arrangements. The trick to drying flowers so that they retain their colour is to pick them when they are at their peak. Not all flower varieties are suitable for drying but the obvious candidates are roses, lavenders, mop-head hydrangeas, thistles, alliums, gypsophila, achillea, many herb varieties (see here for more details) and most grasses. I especially like to work with the light textured heads of dried greater quaking grass (Briza maxima) which is incredibly easy to grow and will dry out on the plant. Quite a few flowers do this to save you a job. Alliums, for example, lose their tiny petals to leave intricate globe-shaped structures that are pure works of art and make beautiful displays. You can even use them as alternatives to gaudy Christmas baubles.
The drying process
Many flowers need some help to dry effectively. One of the easiest ways to do this is to air-dry them. Pick the flowers on a fine day and remove any excess moisture by dabbing them with some absorbent kitchen paper. Remove the lower leaves as you would when preparing fresh flowers and bunch together groups of small blooms or long spikes, such as lavender and gypsophila, and secure with a rubber band. Slip them onto a wire coat hanger so that the flowers are suspended upside down. Large, round-headed blooms should be hung up individually. The aim is to keep the stems straight so they will support the dried heads as they become brittle. Hang your flowers in a dry room where there is not too much direct sunlight, which may bleach them. Most flowers take about four weeks to dry out completely and, although their colours will fade over time, they can last for several years.
Alternative methods
A quicker method of drying your blooms is to cut the stems very short and pop them in the microwave for ten second bursts on a low setting, repeating this until all the moisture has evaporated. Or leave them in the oven on a very low setting and again, keep watching, until you can see that they are fully dried but not so fragile that you won’t be able to work with them. Alternatively, if you have an airing cupboard, place some flowers in there and leave them for a few days, or weeks, checking on them regularly. Lavender will scent your clean laundry at the same time. All these methods are proven to work, but if your flowers turn brown, or worse, go mouldy, it is usually because they were picked at the wrong stage, so do not lose heart and try again.
Choosing blooms
You will come to recognise flowers that are suitable for drying and some will surprise you. I have had huge success with Persicaria bistorta; it has retained its pale pink colour really well and looks fabulous with the dried heads of Sanguisorba tenuifolia ‘Pink Elephant’. Other options include statice (Limonium) and strawflowers (Helichrysum). Sow seed for the latter in the spring or autumn for a crop of colourful flower heads with papery-thin petals that can be picked when they have dried out on the plants.
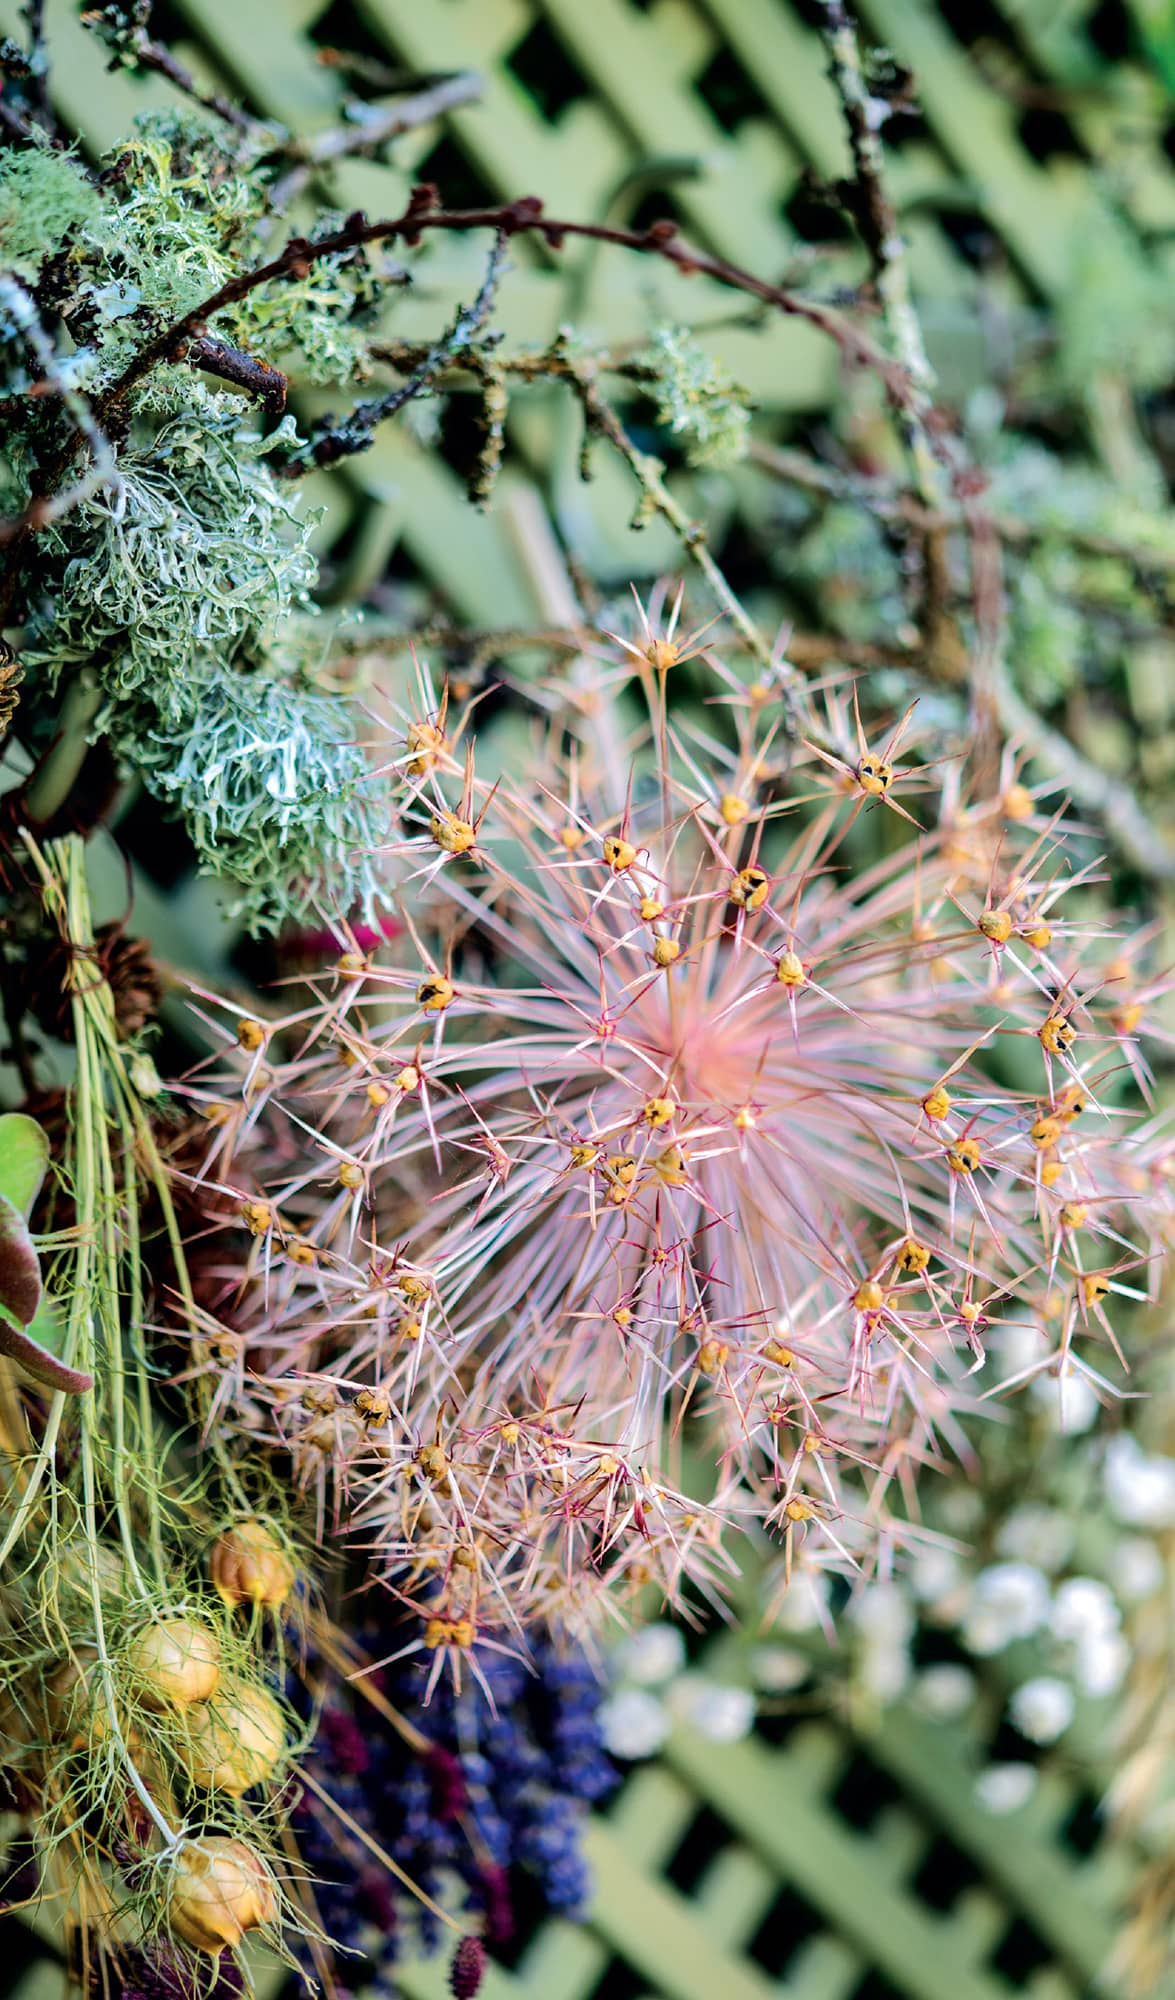
The fragile heads of dried alliums can be kept intact by spraying them gently with hair spray or matt varnish.
PRESERVING PLANTS & FLOWERS
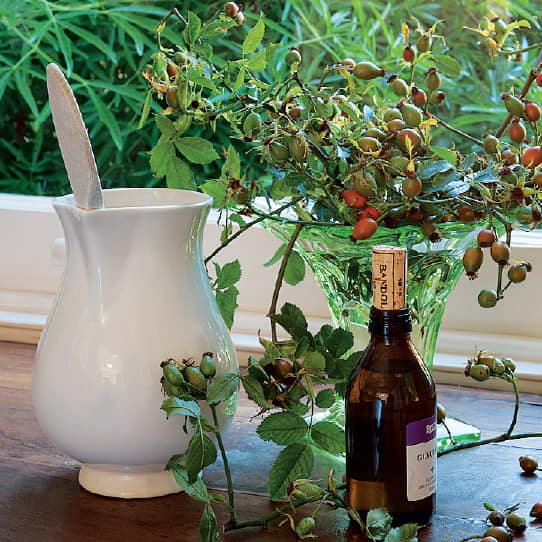
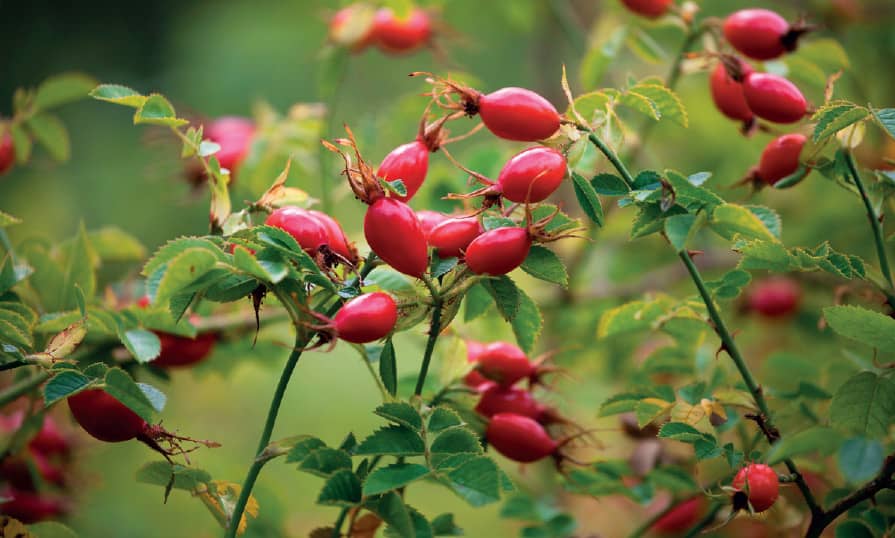
Leave rose hip stems to soak up a glycerin solution until they have drunk every drop.
One way of ensuring you have some colour for your arrangements throughout the colder months of the year is to preserve cut flowers and hedgerow clippings. Another easy method to try, the results can be used to make beautiful wreaths and seasonal indoor vase displays.
I love to do this job in autumn when the colours of the leaves are just turning and there are berries and hips in abundance. Preserving is the opposite to drying and rather than removing moisture, it locks it into the plants, thereby prolonging their lives.
Preserving rose hips
A mix of different types of preserved rose hips makes a striking arrangement. Pick them in the autumn when they are firm and a good rich colour. Hips range from bright crimson to a deep, dark black-red. Some of the single roses produce tiny fruits no bigger than a holly berry that look like little jewels, while others are fat and luscious, and almost as large as plums. If you pick them and leave them in water they will wrinkle after a few days and lose their glossy sheen, but if you preserve them, they will last for several months. The technique is very easy, and all you will need, apart from the hips, is some glycerin, sold by chemist or pharmacy shops as a skincare product. Mix one part glycerin with two parts warm water in a vase or container and stir well. Remove the lower leaves from your rose-hip stems and discard any mottled or brown foliage surrounding the hips. Arrange the stems in the glycerin solution and allow them to drink it up. Leave the stems immersed for a week or so. You do not need to top up the mixture but if the solution turns brown, replace it with a fresh batch. You will end up with a semi-permanent display to combine with dried flowers, or use hips and foliage posies to tie onto seasonal gifts. They can also be added to winter wreaths and table arrangements, and this preserving technique works for other berries and leaves too.
If the hips you want to preserve are on thorny stems, wear gloves to pick and handle them.
STEP-BY-STEP
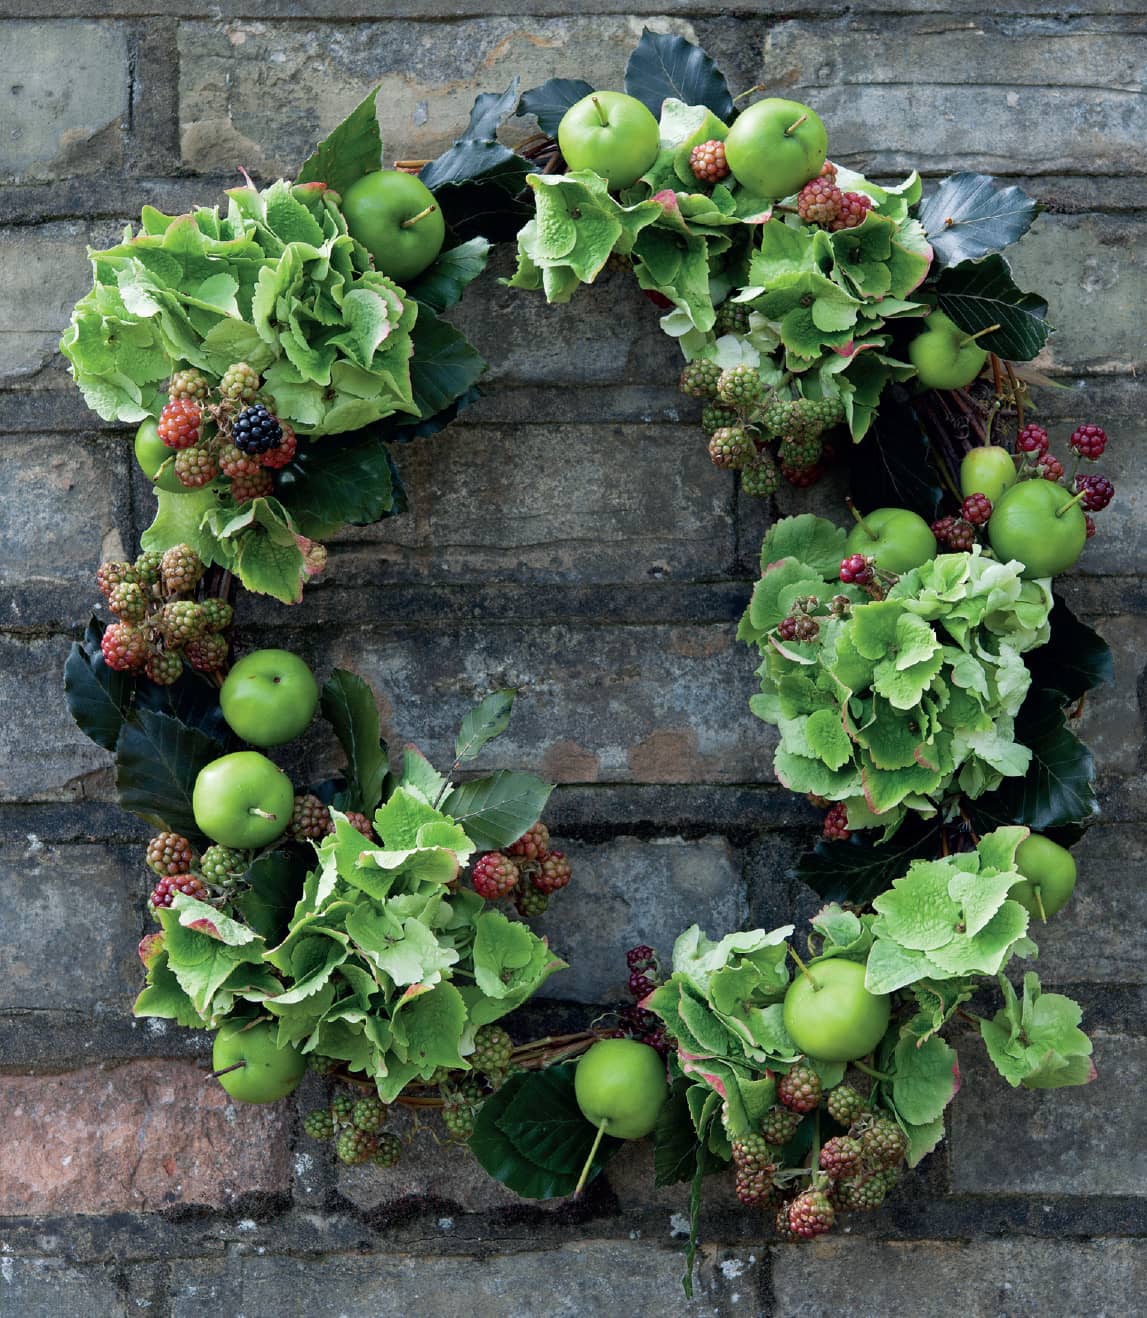
How to make a preserved wreath
Either buy or make a wreath base, and collect together a branch of preserved green beech leaves (use the method for hips, opposite) and sprigs of unripe blackberries. These will continue to ripen but to prolong their life set them in cold water first. Choose small apples or crab apples and paint them with a clear coat of matt varnish, and split one large hydrangea head into five florets.
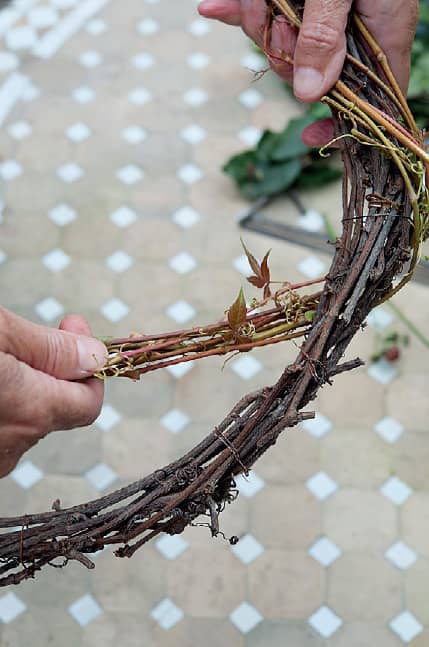
1. Make a base by twisting flexible vine or willow stems and wiring them together to form a circle, as shown.
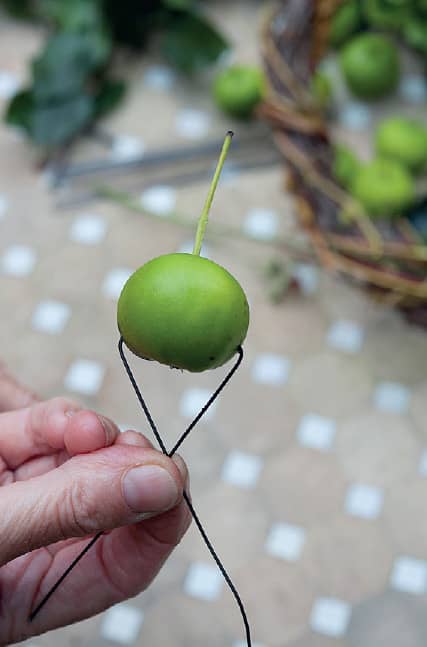
2. Wire the apples by piercing one side and pushing the wire through to the other side. Twist the wires to secure.
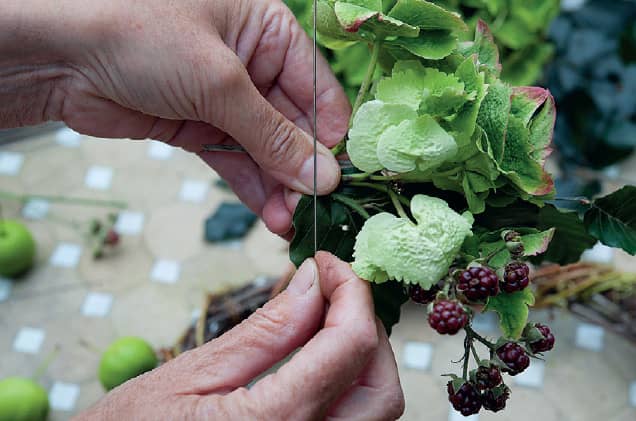
3. Cover the base with the preserved beech leaf stems, using wire to secure them. Wire on groups of hydrangea and blackberry sprigs, spacing them evenly.
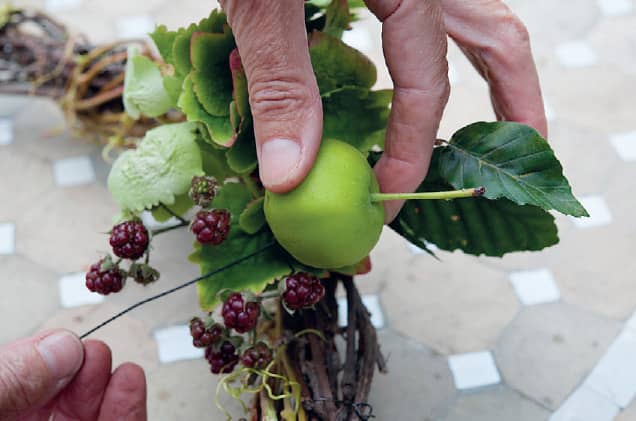
4. Space out the apples and wire them on firmly. The wreath will last for many weeks inside or out. When the berries and apples perish, replace with holly.
PRESSING FLOWERS
Pressing your home-grown blooms is a lovely way of keeping a visual record of your garden or outdoor space. Although the colours will eventually fade, keep them in a cool, dry place and they will look good for many years, bringing back memories of their former glory.
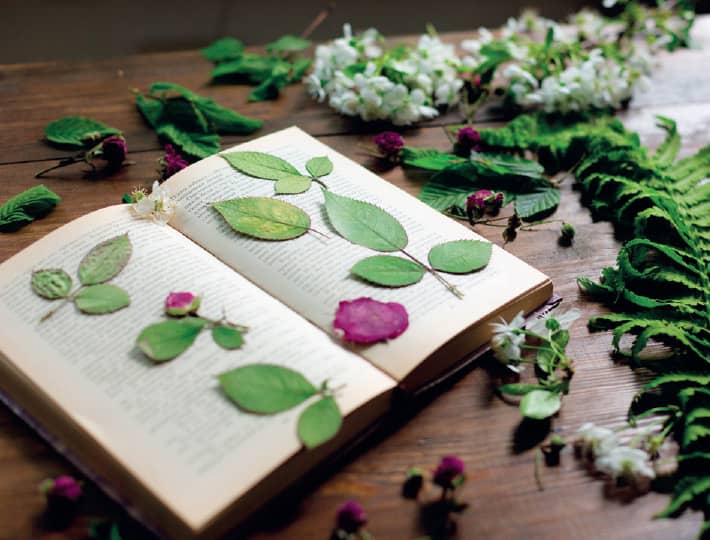
Pressing flower petals, heads and leaves in an old book takes me back to my childhood.
I have come back to pressing flowers after a long absence. I find the more flowers I grow, the more I want a long-lasting reminder of their beauty, and sometimes the flowering season is all too short. There are many ideas online and you can also search for instructions on how to make your own flower press or details of where to by one. I have experimented with different pressing techniques but in my experience, using old books as I did as a child delivers perfect results.
Flower choices
Following the same initial steps as you would for drying flowers (see here), pick those you intend to press on a clear day and remove any excess moisture by dabbing their heads carefully with a piece of kitchen towel. This will also dislodge any insects. Experiment with as many flower varieties as you can spare and include leaves and grasses, seed heads, slivers of bark, and fruits. You will work out yourself which flowers give the best results although cornflowers (Centaurea cyanus), pincushion flowers (Scabiosa) and love-in-a-mist (Nigella) are all good contenders, as they flatten and maintain their shape well. Very fleshy, dense heads are not so amenable and with a peony or a large rose, for example, you will find it easier to press the petals separately and put them back together to resemble the flower shape when mounting them. Grasses and tiny flowers on thin stems also press well, while fruits and berries, such as rose hips, should be cut in half lengthways to reveal their seed pouches.
Pressing techniques
Once you have dried and inspected your blooms, lay them out and remove any damaged petals or leaves with a pair of small scissors. Place double sheets of newspaper or two pieces of blotting paper spaced at equal intervals between the pages of a heavy book and position your flowers between them. I tend not to mix up the flower varieties because they are easier to label if you keep them separated on different pages. If you have two stems of the same flower it is a nice idea to press the front and the back. The backs of many flowers can be just as beautiful, but we don’t often bother to look at them.
Make sure you are happy with the flower presentation as once you close the book there is no going back. Use tweezers, if necessary, to unfurl any leaves that refuse to lie flat. Once you have completed your pressings, the book should be secured with two elastic bands, one vertically and one horizontally, to keep everything in place. If you have more books or other heavy objects, place them on top or put the book on a bookcase wedged between other weighty tomes.
Drying time will take up to two weeks, and although it is tempting to peek, I have found it better to leave well alone for at least this long, as your specimens will move once you open the book. They will feel papery when completely dry.
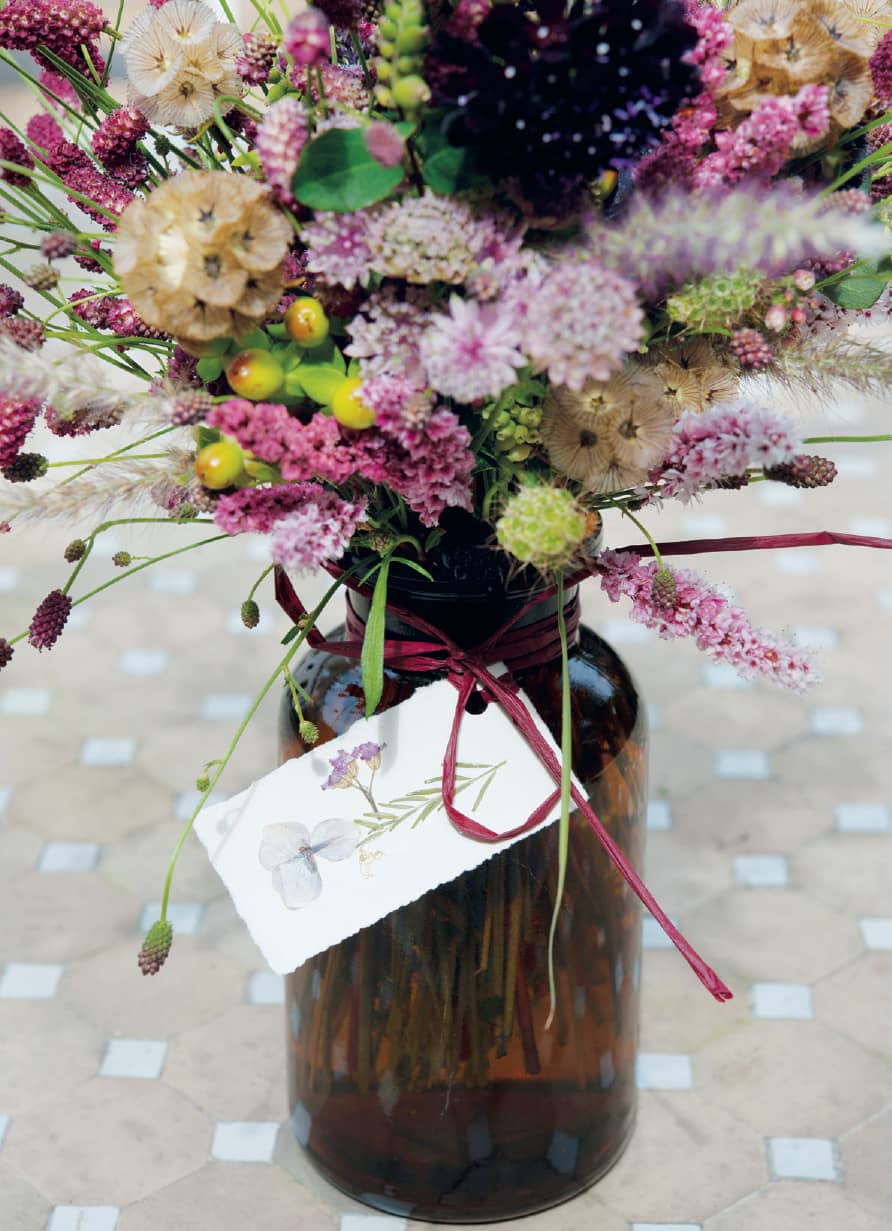
Use pressed flowers and leaves to make gift tags for personalising your hand-tied posies.
Perfect displays
I like to display the best results in clear glass photo frames. You can also make greetings cards and gift tags, fixing your pressings in place with water-soluble glue. Also try wall displays by taping the stems gently to a plain white background, or make a montage on a piece of stiff card. Keep your pressed flowers in place by stitching them on with a needle and thread or use floristry tape or linen tape, available from craft shops. If you want to keep a journal as a record of your flower growing, then make sure you identify and label your specimens correctly. Along with the Latin and common names, also make a note of any special characteristics and include the date of picking. This will give you something to look back on during the winter when your flowers outside have faded and died.
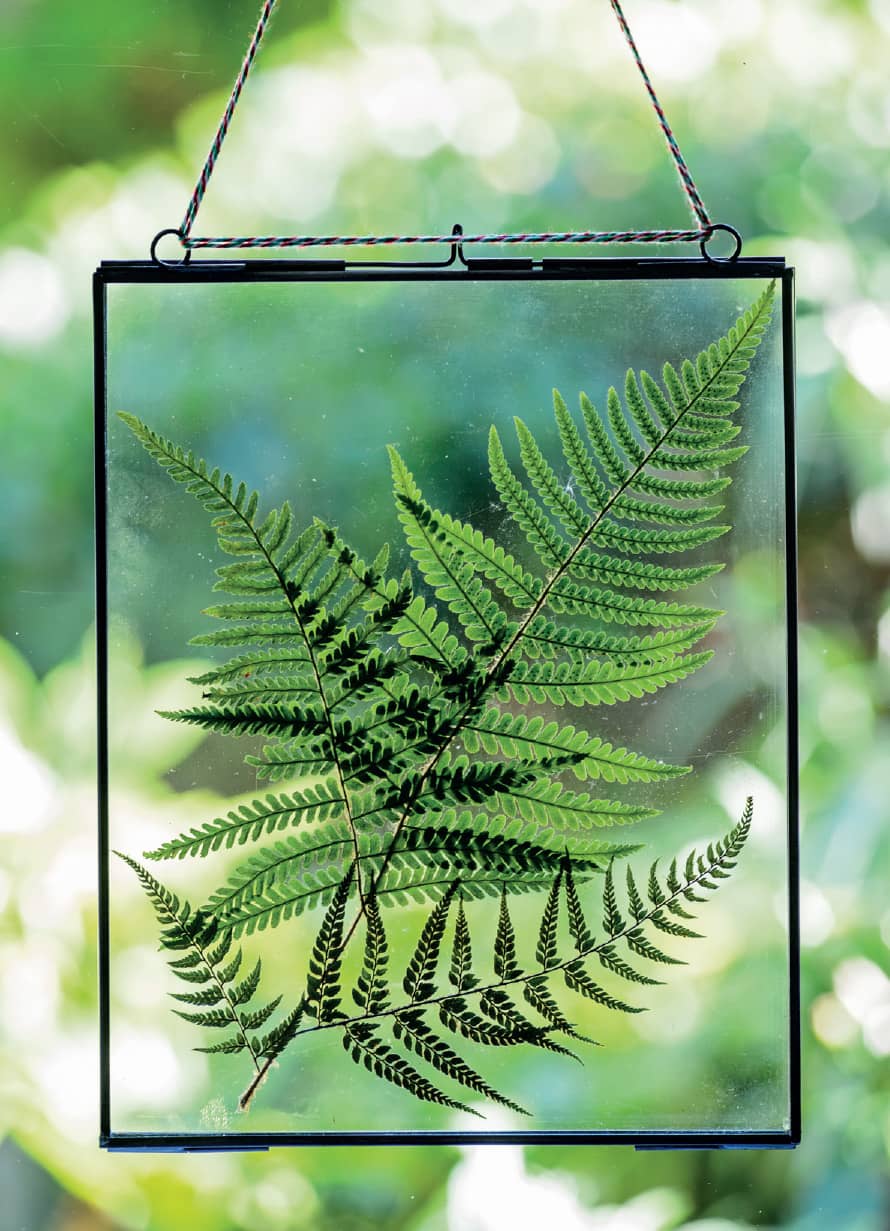
Plain metal photograph frames are the best way to display your flowers and foliage.
HARVESTING YOUR OWN SEEDS
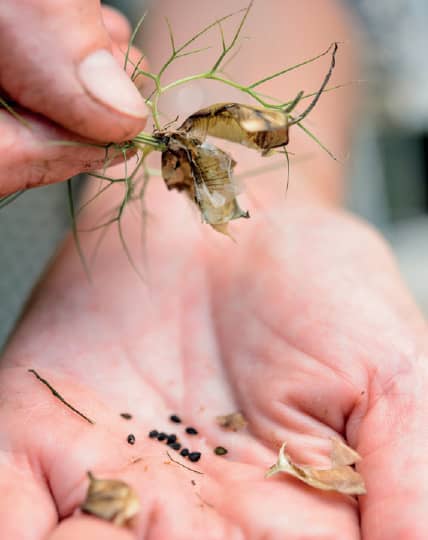
Harvest and resow seeds from the dried heads of love-in-a-mist (Nigella) by gently breaking the casing and scattering the black pips where they are to grow.
The more involved you are in the life of your flowers, the more you come to realise that nature has its own rewards. Although you can search seed catalogues for a range of beautiful blooms, remember that those you have already sown can offer more of their bounty for free.
Although many gardeners diligently order their seeds from catalogues in winter so they arrive in time for sowing in spring, your own little plot will offer up similar rewards for free. Nature’s bounty is a no-cost payback but you need to be ready to grab it at just the right moment. This means watching your flowers as they bloom and fade but resisting the temptation to cut them off before the heads turn brown. If you leave them and observe, you will witness the miracle of nature turning flower to seed. Collect the seed heads before they have a chance to disperse naturally or the birds get to them, and you can then sow them where you want them to grow the following year.
Many annual and perennial flower seeds are easy to harvest and some are just as beautiful as the original flower. If you examine the pod of a poppy it is pure perfection, a feat of natural engineering with its own built-in air vents.
Harvesting hints
When harvesting, watching and waiting is key. If you harvest too soon before the seeds are fully developed they will not germinate; too late and nature will have beaten you to it. You will soon be able to tell which seeds are ready and, as with flowers, they are best picked on a fine, dry day. Using a pair of sharp secateurs, snip off the seed heads and put the whole thing in a paper envelope or bag, or shake it so the seeds fall inside. Label your envelopes or bags straight away so you know what you have collected. Do not seal them, and leave them in a dry place for a few days, during which time the seeds in the pods will probably have dispersed naturally. If they have not, gently break open the pod and release them yourself. Remove the casing and clean off any chaff. Store your seeds in small glass containers, jars or glassine envelopes; then label them and leave somewhere bone dry until spring.
Easy seeds
The flowers that have provided me with the best results are granny’s bonnets (Aquilegia), poppies, Nigella, lupins, and nasturtiums, in that order. All have seed heads that are easy to harvest. You many find that some flowers grown from shop-bought seeds may not look exactly the same, in terms of their colour or shape, as those sown from their harvested seeds, but this is part of the fun.
STEP-BY-STEP
How to make your own seed bombs
You can make your own seed bombs very easily. They offer a good way of mixing different varieties, so that when the seeds germinate you end up with a beautiful group of flowers that look as if they have self-sown naturally.
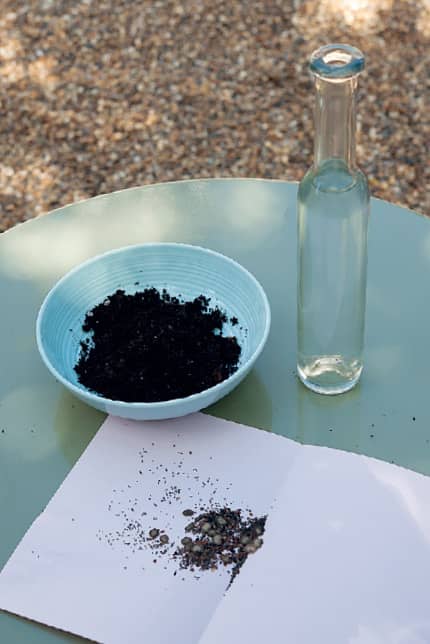
1. Mix a handful of multi-purpose compost with some clay soil, a couple of pinches of harvested or bought seed and a few drops of water.
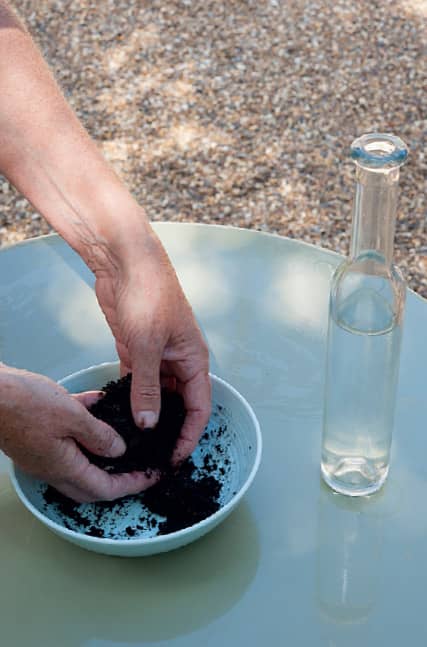
2. Your own harvested seeds are perfect for this project. If you do not have any clay soil in the garden, you can use a little shop-bought clay from a craft store instead. Knead the mix well with your fingers so that you incorporate all the seeds into it.
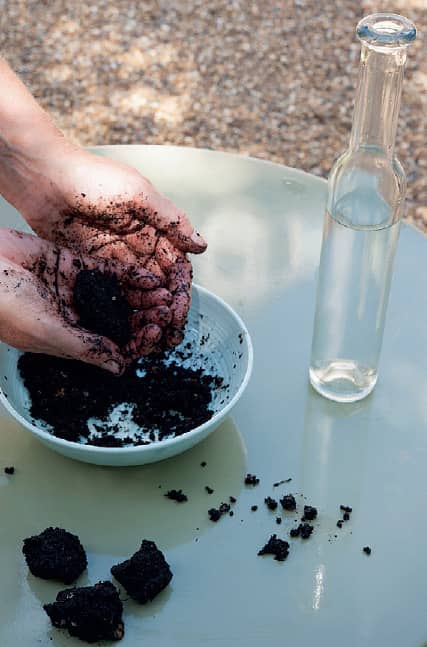
3. Divide the mixture into small amounts and roll these so that each is about the size of a golf ball. Leave the bombs in a cool place to dry out. Then store them in a cool, dry area, such as a shed, until you are ready to sow them in spring.
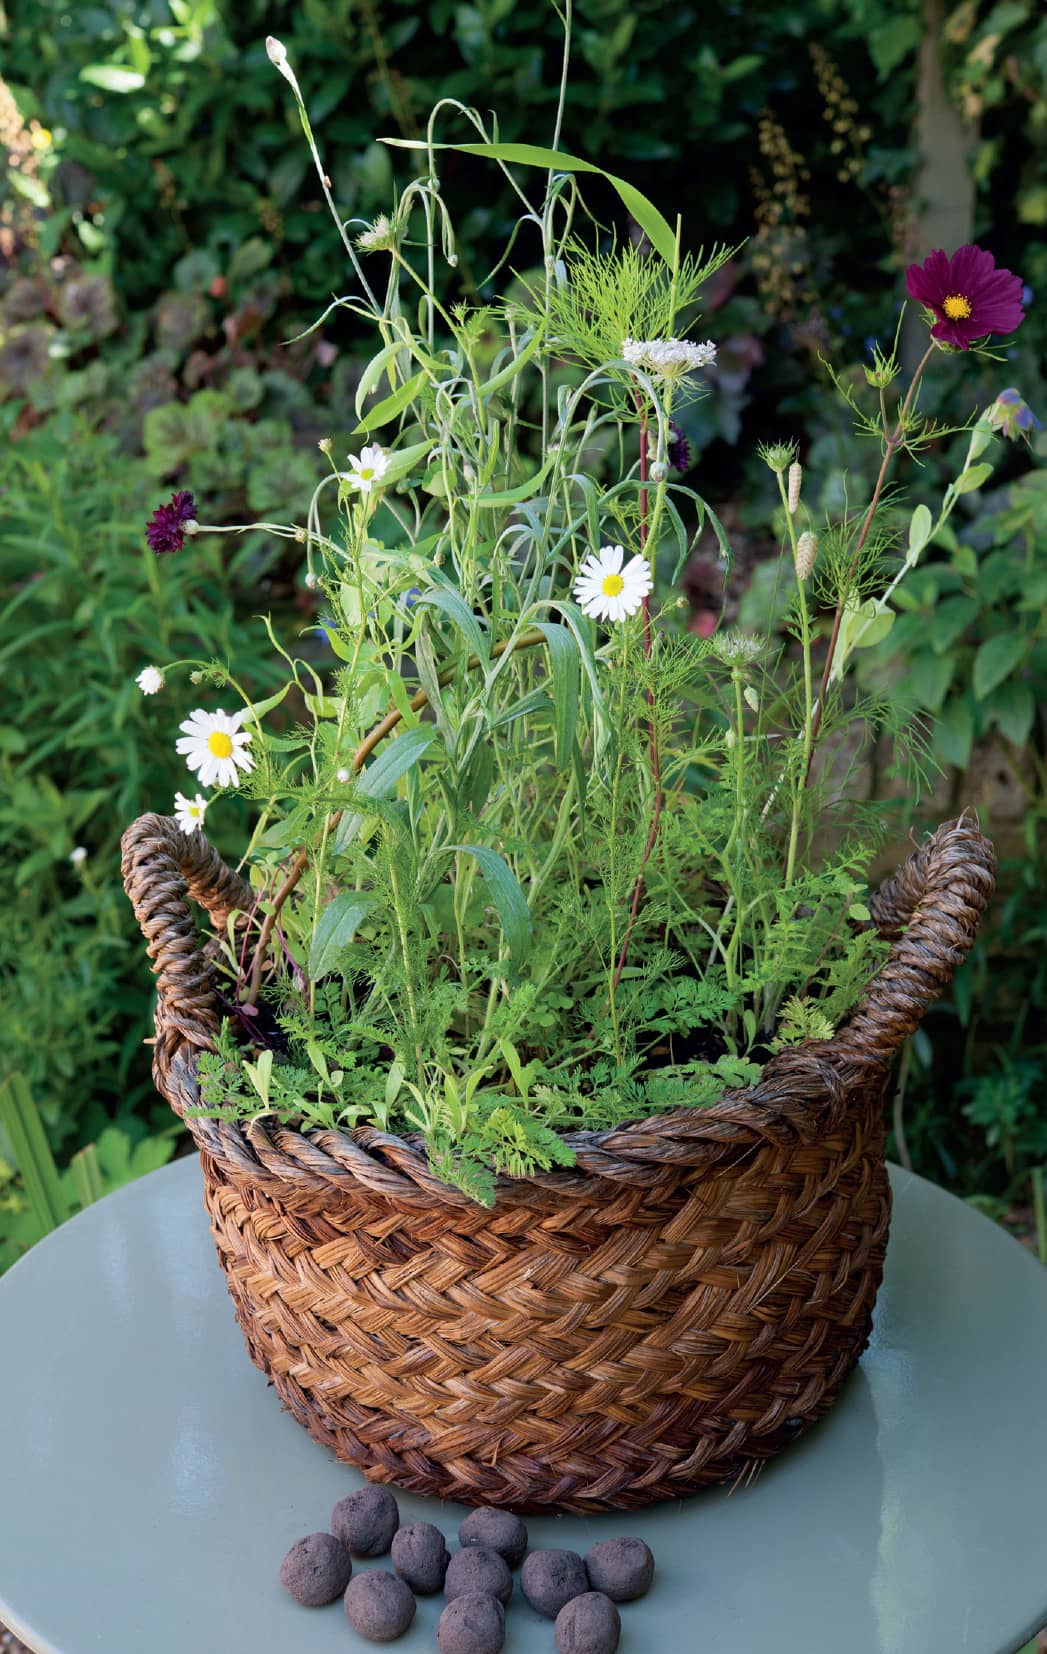
4. In early spring, if sowing hardy seeds, or later for half-hardy types, break up and scatter the bombs on multi-purpose or soil-based compost in pots or window boxes, or over raked soil in a border, away from trees and shrubs. The seeds will start to germinate after it has rained. You can also give the bombs away as gifts: present them in brown paper or coloured tissue, together with a few sowing instructions.
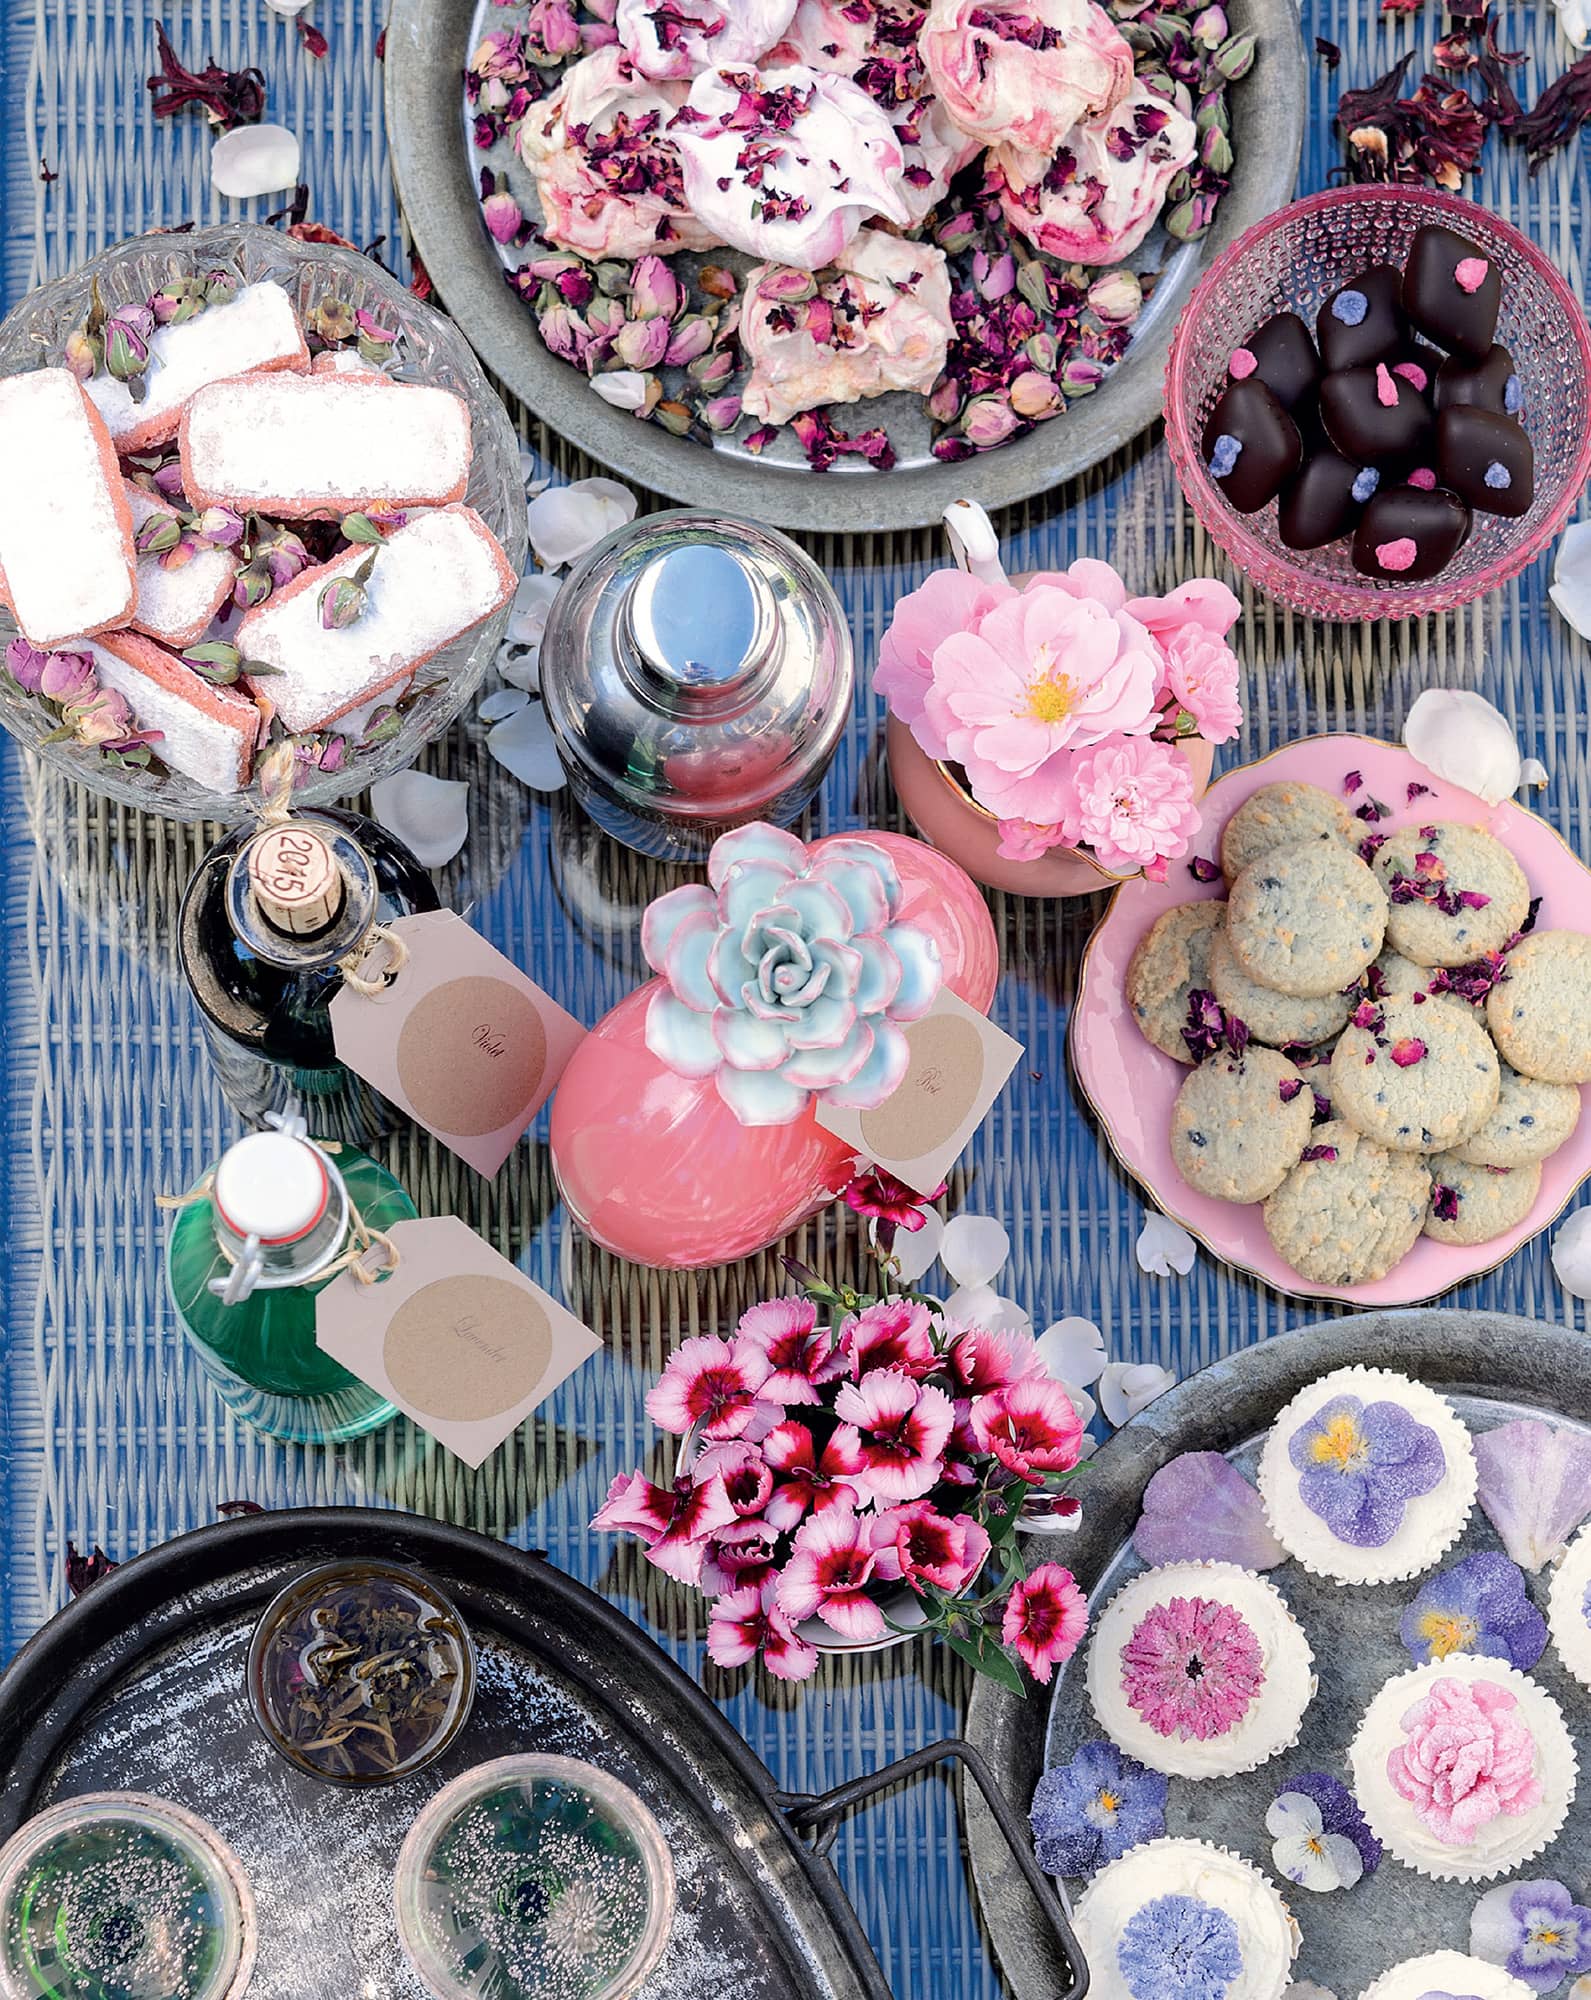
MAKING EDIBLE FLORAL TREATS

As a final reward, many of the flowers featured in this book can be used in the kitchen as well as in floral decorations. I have devised a number of recipes that include scented flower flavourings as an ingredient, and I also use home-grown blooms to dress up cakes.
Real flowers can be used to flavour food, but you are more likely to get a distinct aromatic taste if you use distilled culinary waters and essences. These are generally available in the baking areas of large supermarkets and also in Middle Eastern stores, where rosewater and orange blossom essence, in particular, are used widely in both sweet and savoury dishes. You can also buy flower syrups and cordials or make your own by boiling petals with water and sugar and then straining them well before bottling and sealing. These are perfect for making ice creams and sorbets and adding to cakes, desserts and cocktails.
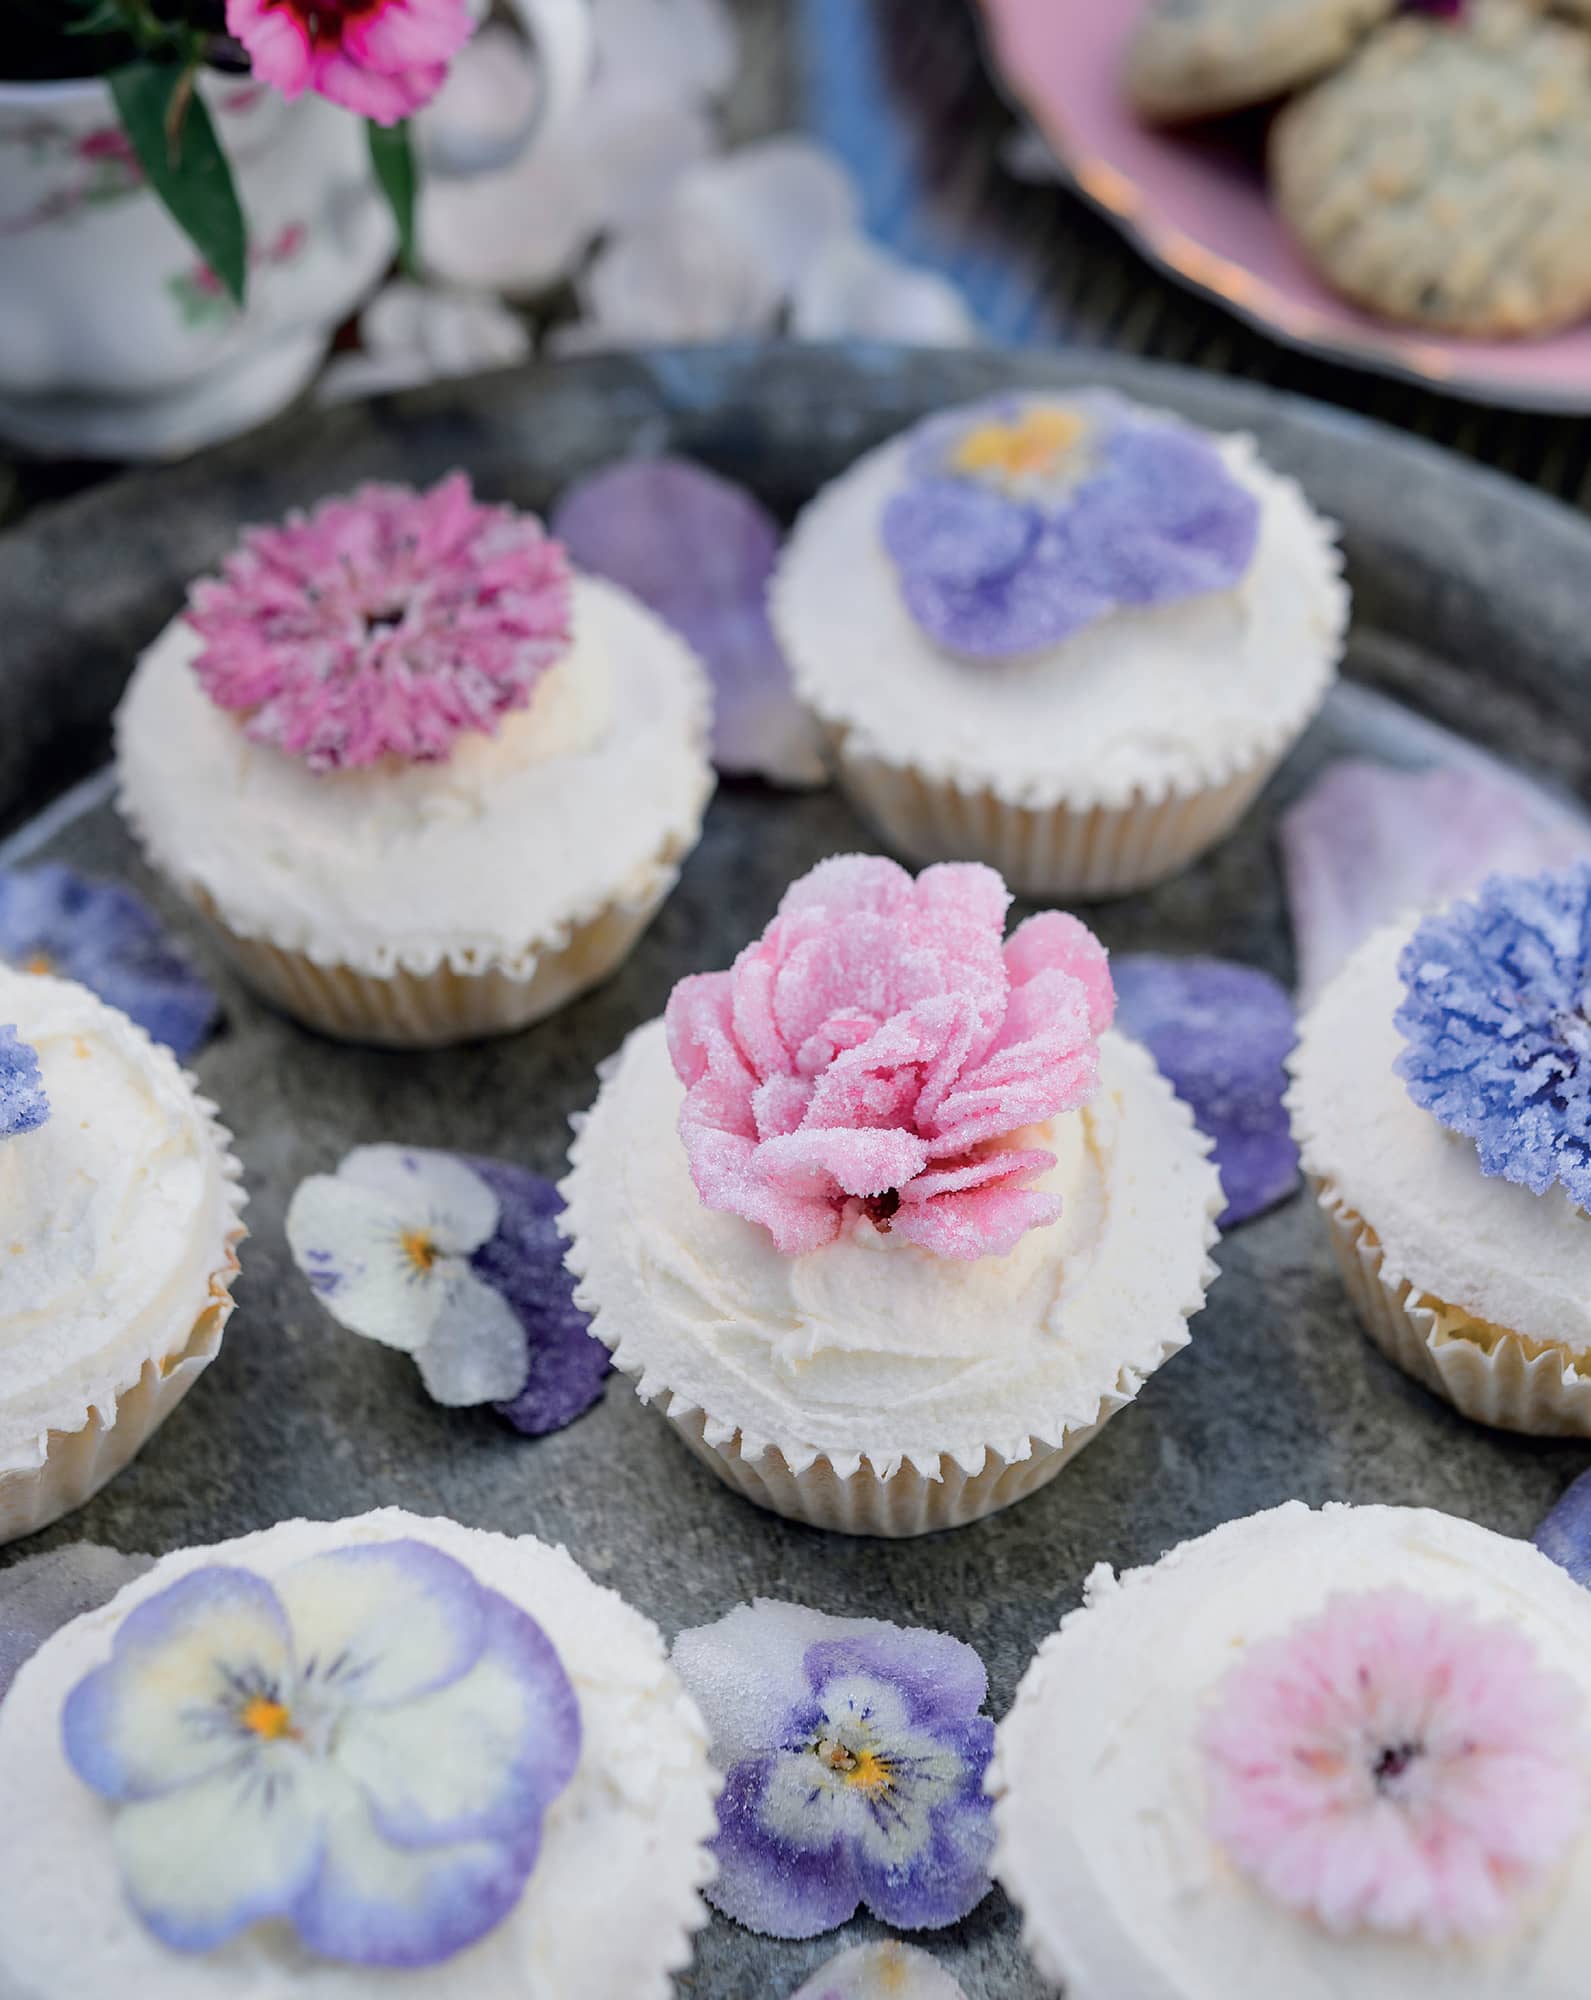
Decorate home-made fairy cakes and muffins with crystallised petals and whole blooms for an added flower-themed twist.
Crystallising edible blooms
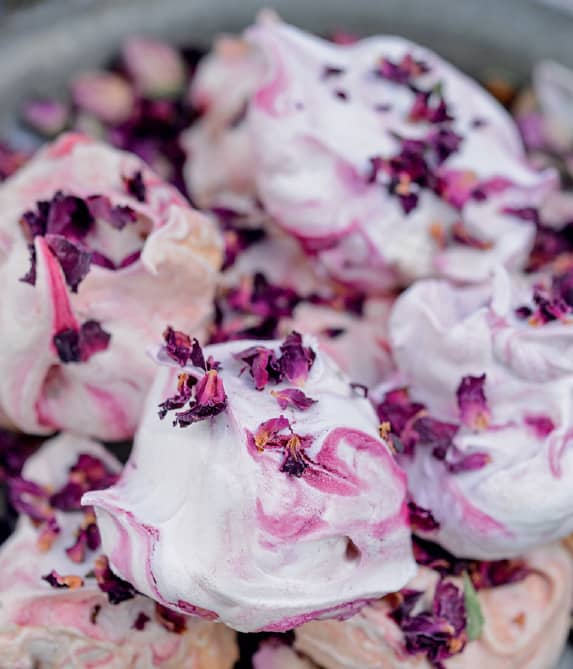
For some extra floral zing, embellish your home baking with freshly picked edible flowers. You can crystallise the petals of roses, violas and pinks by painting them with egg white and dusting them with icing sugar. Leave them to dry overnight before applying another coat or two, and then put them aside to harden. Use them to decorate home-made chocolates, truffles, biscuits, cup cakes, macaroons or meringues. Serve with a flower-flavoured infusion or a sparkling floral cocktail as a toast to celebrate all that is truly wonderful about a flower-filled life.
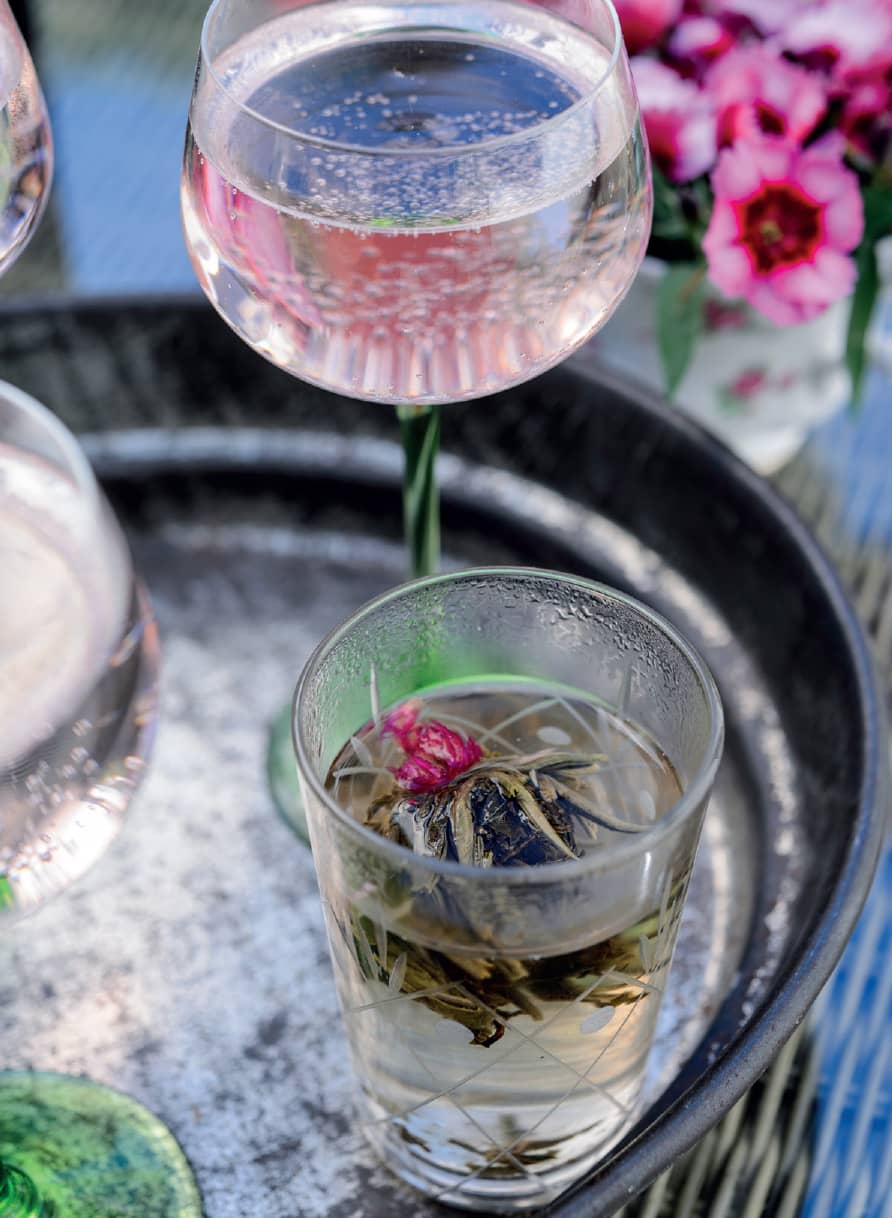
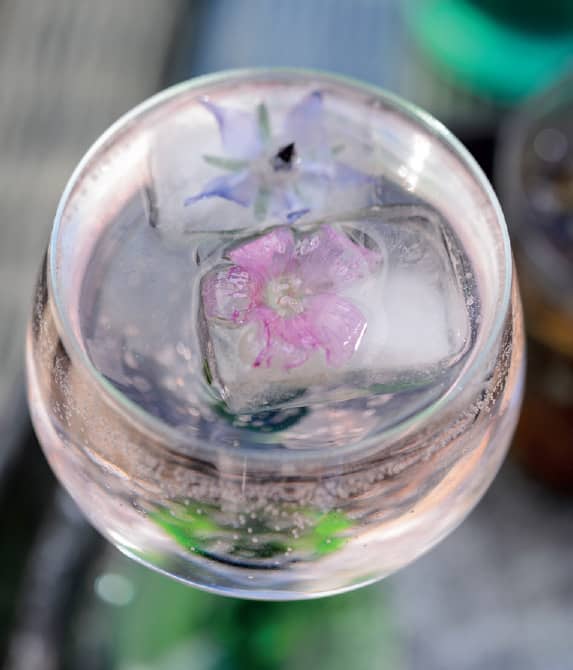
Serve flower-flavoured cocktails and iced flower infusions to complement sweet treats.
Simple flower & plant recipes
If you want to eat your home-grown flowers, ensure they are organically grown and not treated with any chemicals, and do not use foraged flowers or florist-bought blooms for cooking.
Flower meringues
Ingredients
• 4 egg whites
• 250g (9oz) caster sugar
• 1 tsp rose essence/syrup
• 2 tsp red food colouring
• crystallised rose petals
Method
• Beat the egg whites until they are stiff. Gradually add the sugar spoon by spoon until the mixture takes on a sheen.
• Fold in the rose essence gently. Add the food colouring and swirl through the mixture.
• Spoon out small portions evenly on parchment paper.
• Bake at 150°C (300°F) for about 1 hour. Leave to cool, then decorate with rose petals.
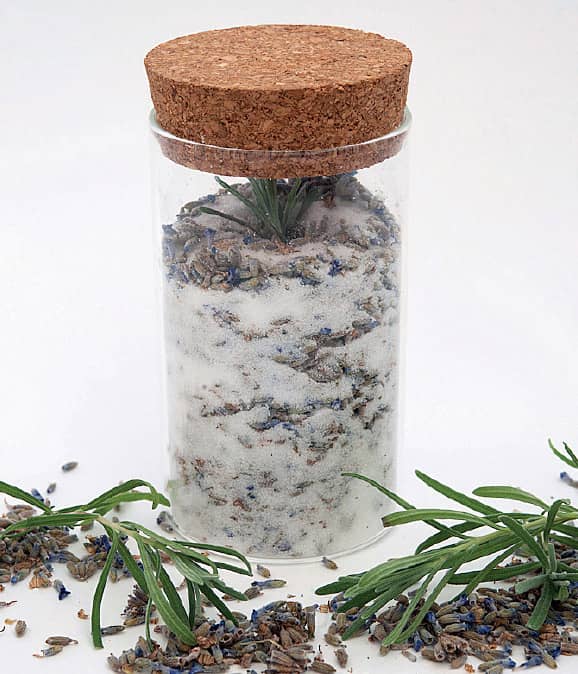
Flavoured sugar
Ingredients
• 1 tsp previously dried lavender flowers, or 1 tbsp fresh but dry lavender flowers
• 225g (8oz) caster sugar
• airtight spice jar or jam jar
Method
• Add a layer of sugar to the bottom of a jar and then add a layer of lavender flowers. Continue to layer to the top of the jar, seal with a screw lid or cork and give it a good shake.
• The sugar soon takes on a lavender flavour, becoming stronger over time as the flower oils disperse. Keep for 6 months.
• Use it to add flavour to muffin, shortbread or cookie recipes.
Sparkling floral cordial
Ingredients
• 20 scented pink rose heads
• 900g (32oz) granulated sugar
• 2 litres (68 fluid oz) still mineral water
• half a lemon, sliced
• sparkling mineral water
• clean bottles
Method
• Remove the rose petals and put them into a large bowl or pan with the sugar, still mineral water and lemon slices.
• Cover and leave to infuse for 24 hours, stirring occasionally.
• Strain the liquid and decant into clean bottles. Refrigerate and serve diluted with the sparkling water and crushed ice.