
FRUIT DESSERTS
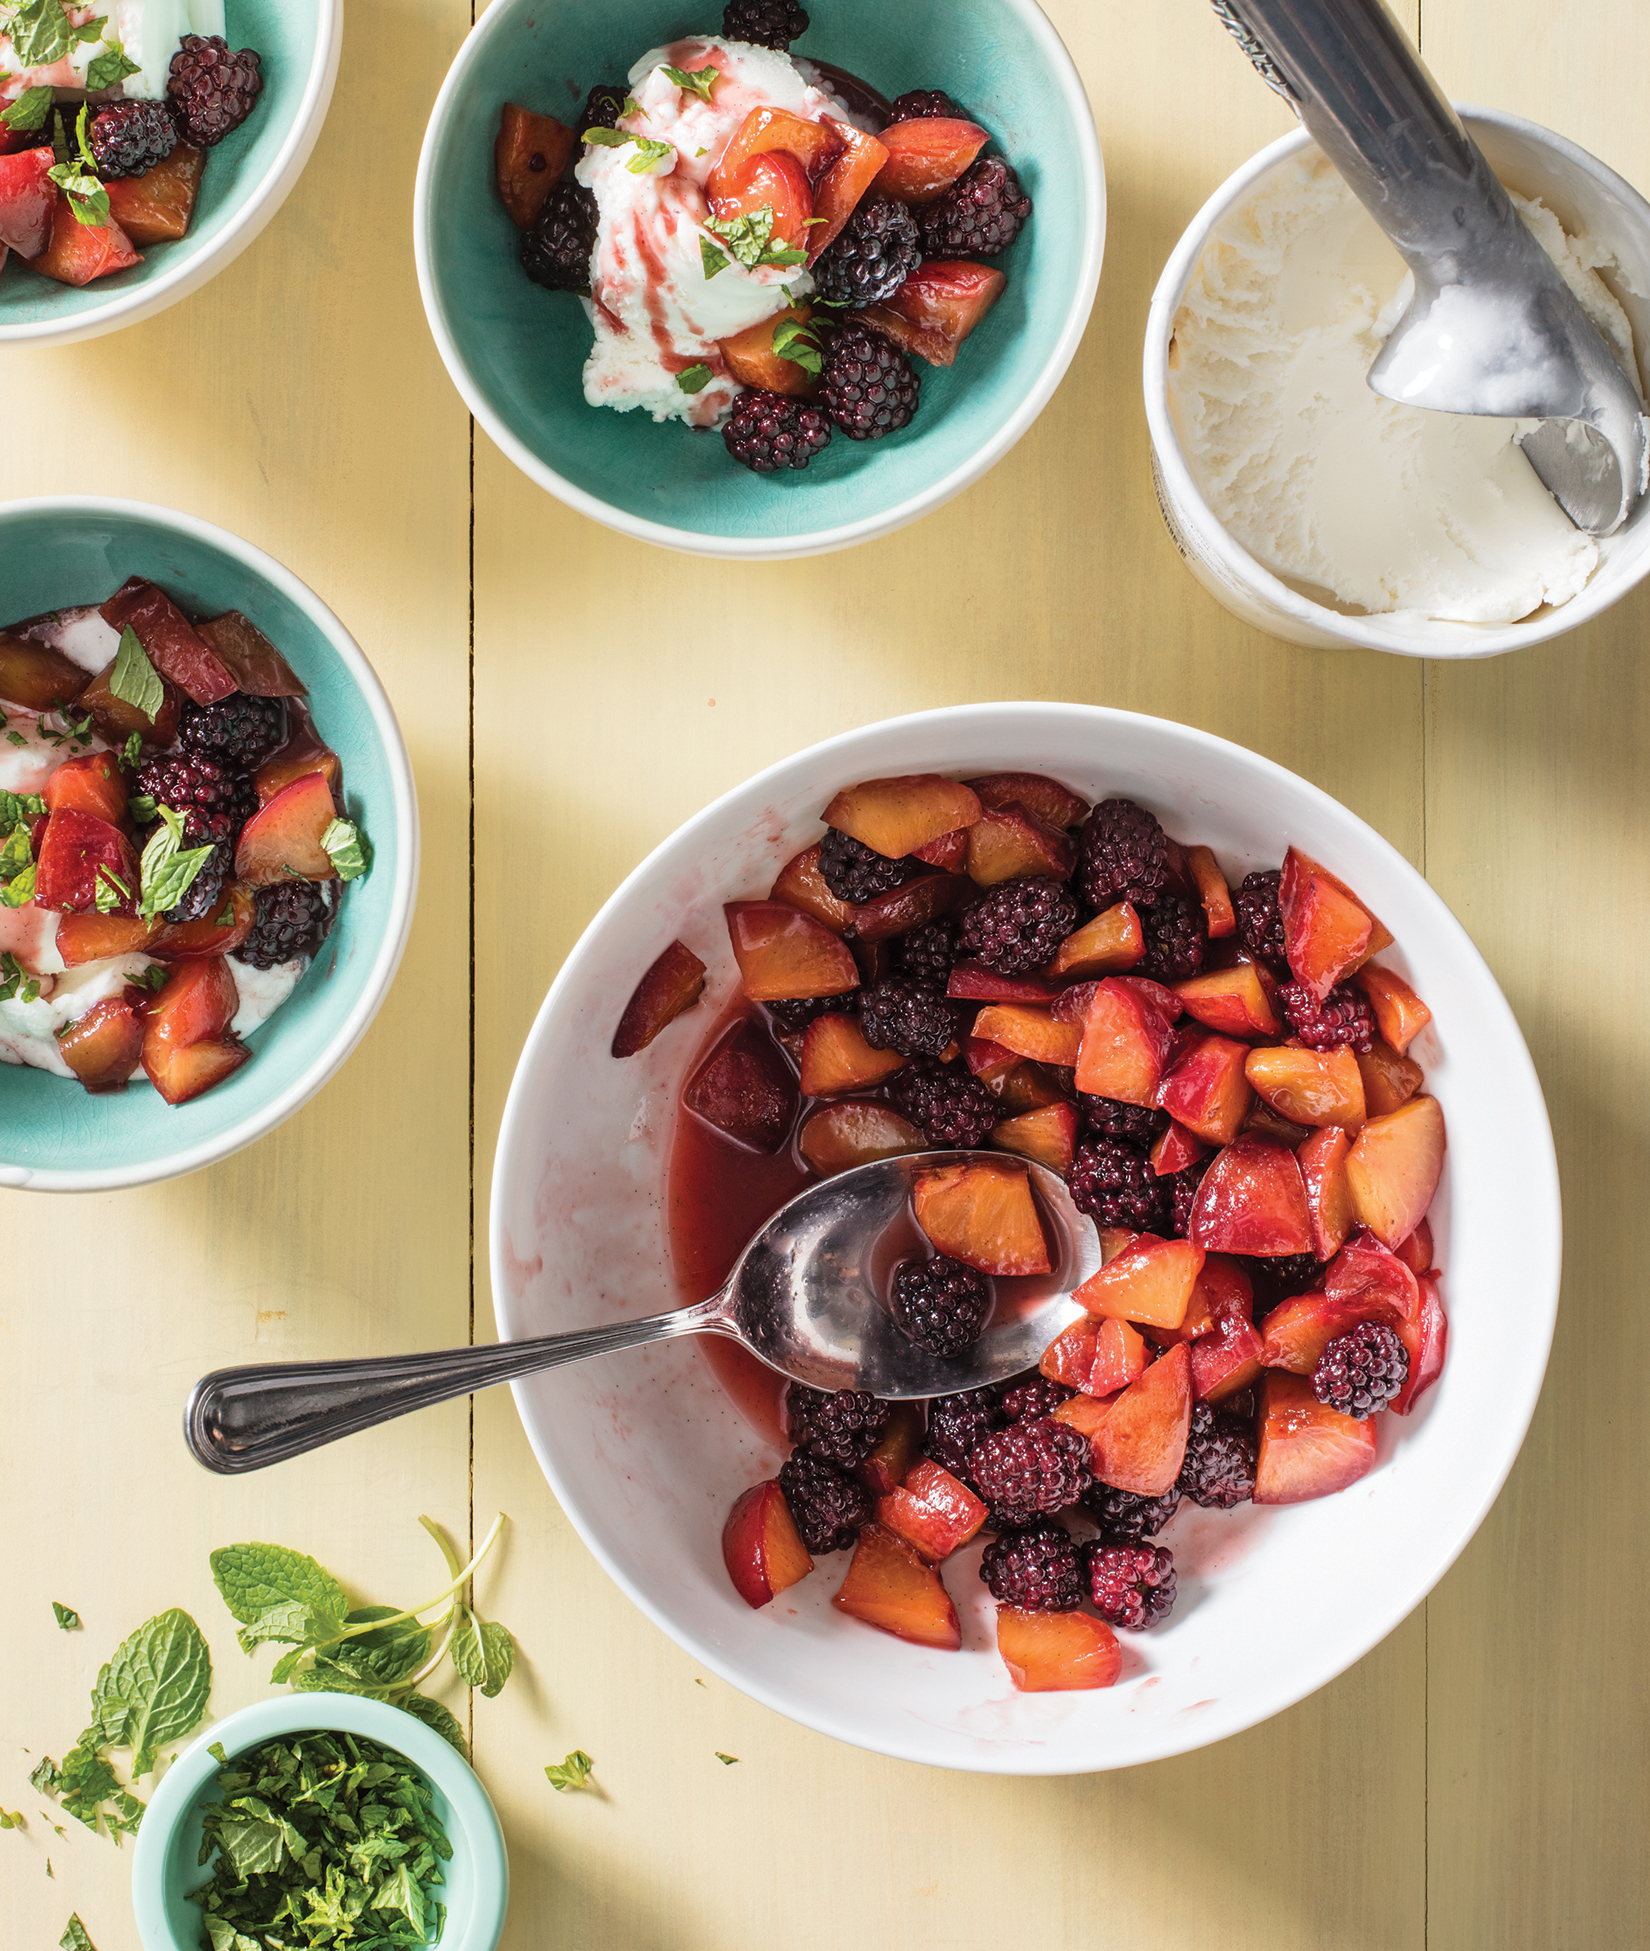
Melon, Plums, and Cherries with Mint and Vanilla 
Peaches, Blackberries, and Strawberries with Basil and Pepper
Cider Baked Apples with Dried Cranberries
Cider Baked Apples with Ginger and Orange
Cider Baked Apples with Rum and Golden Raisins
Roasted Pears with Dried Apricots and Pistachios
Roasted Apples with Dried Figs and Walnuts
Roasted Plums with Dried Cherries and Almonds
Peaches and Cherries Poached in Spiced Red Wine
Strawberry Shortcakes with Coconut Whipped Cream
TARTS, PIES, AND A COOKIE
PUDDINGS AND FROZEN DESSERTS
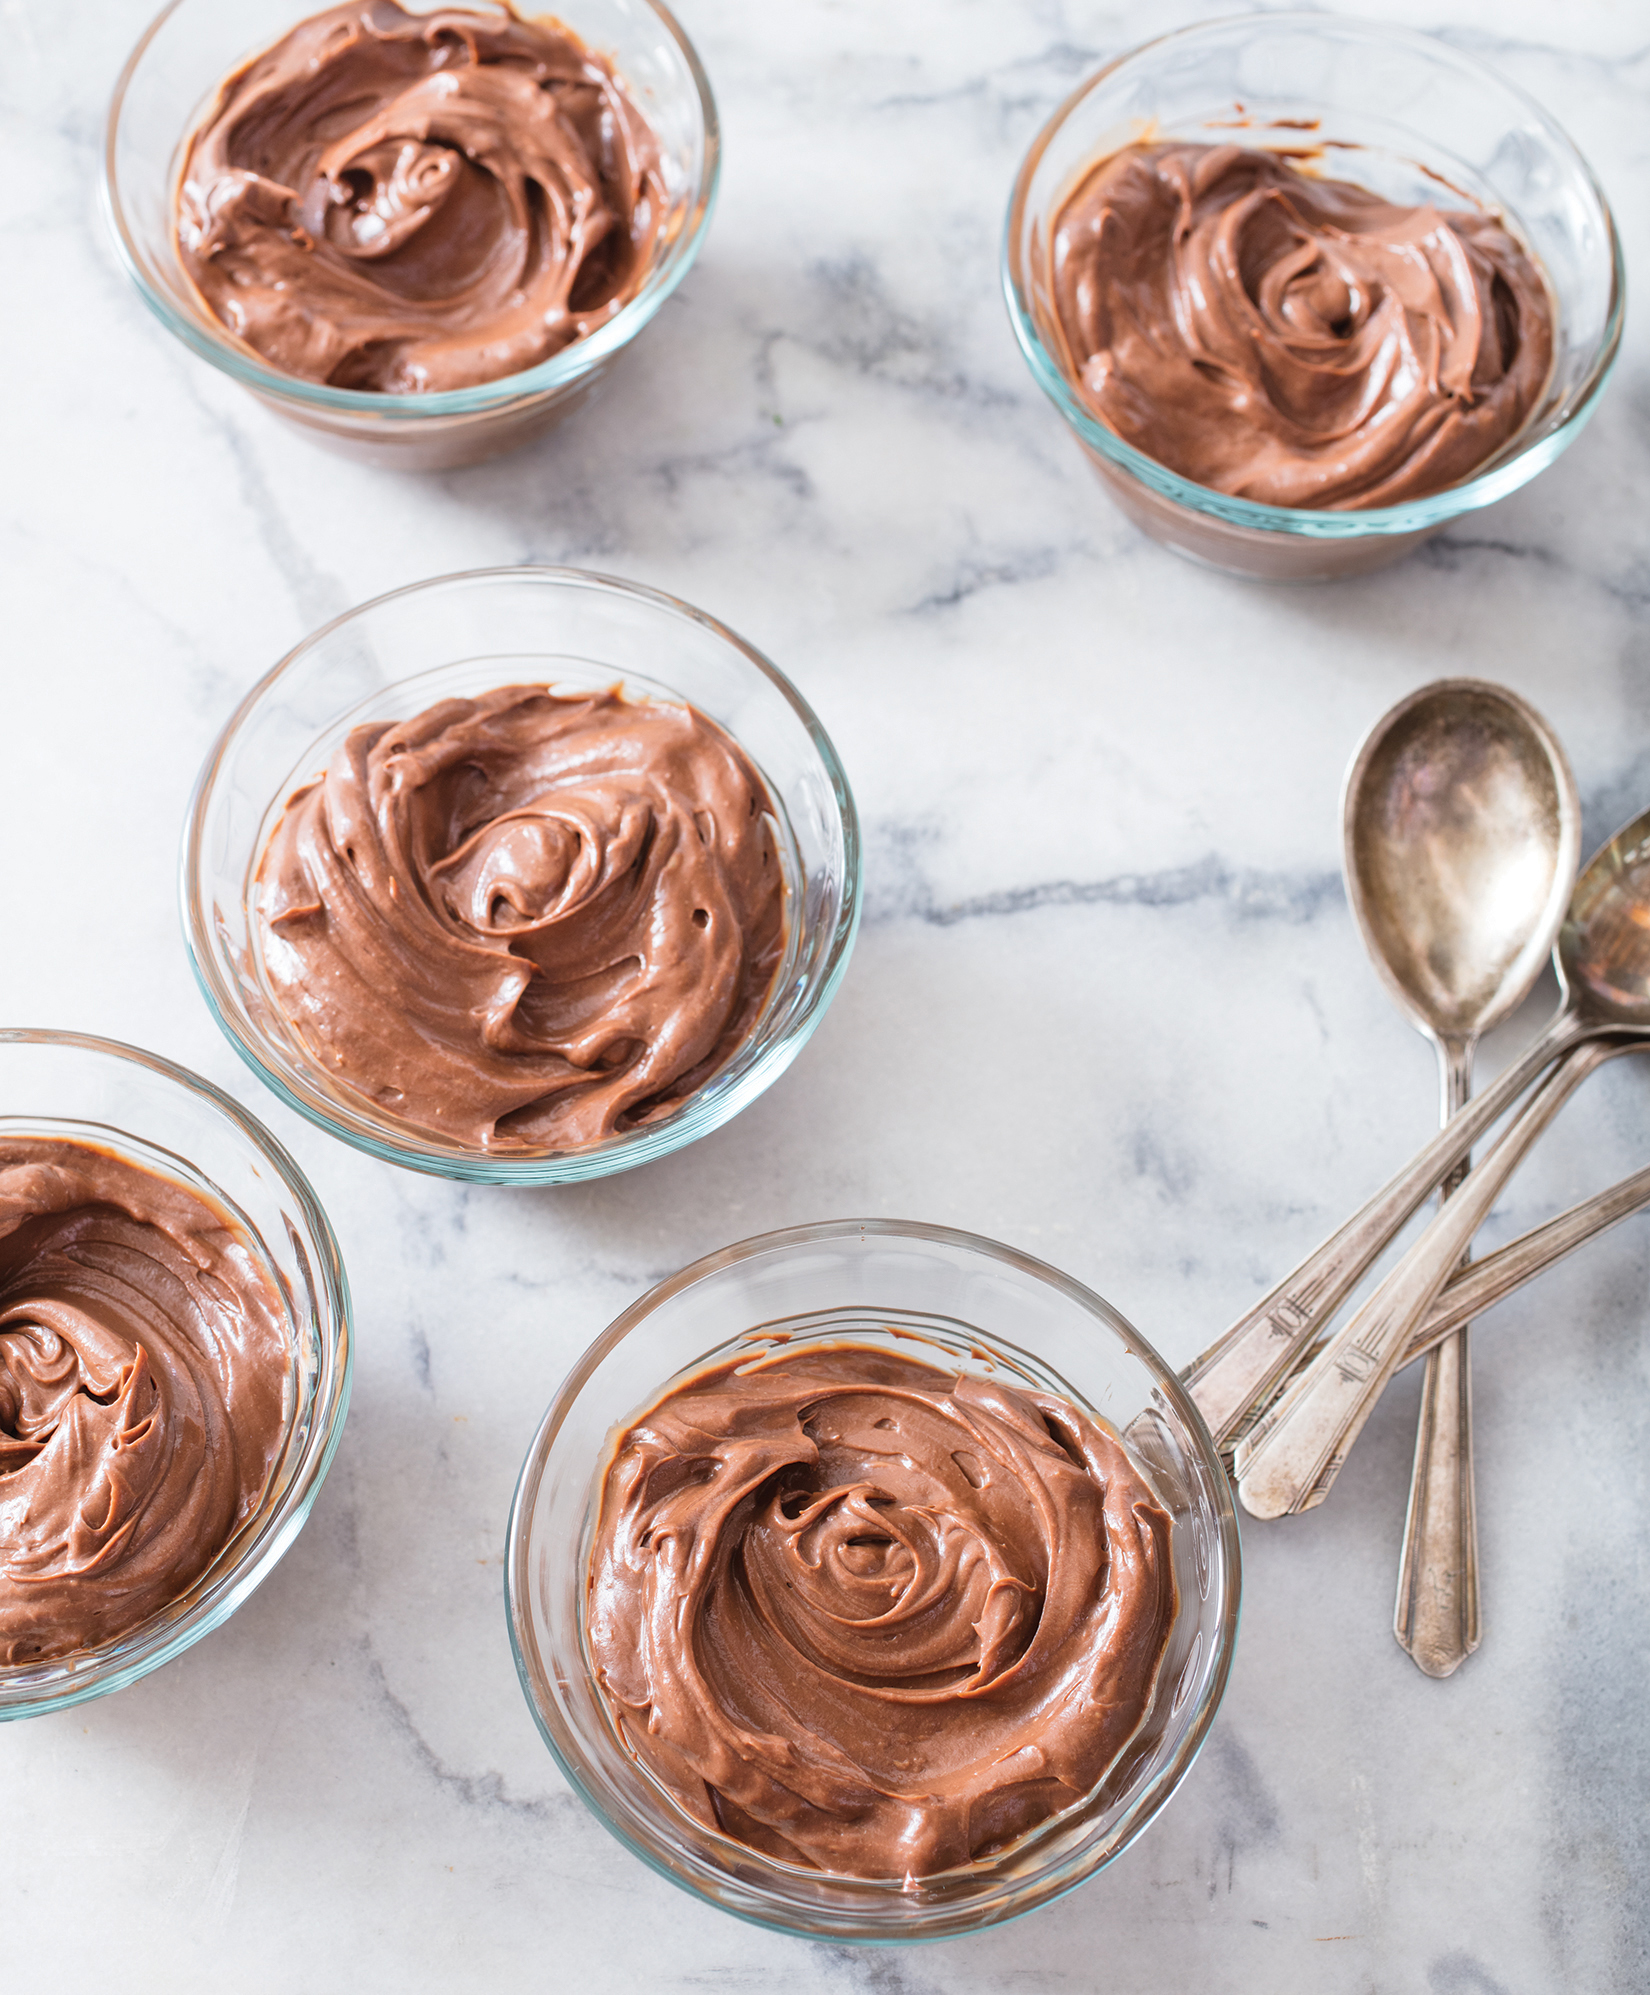
Dark Chocolate Avocado Pudding
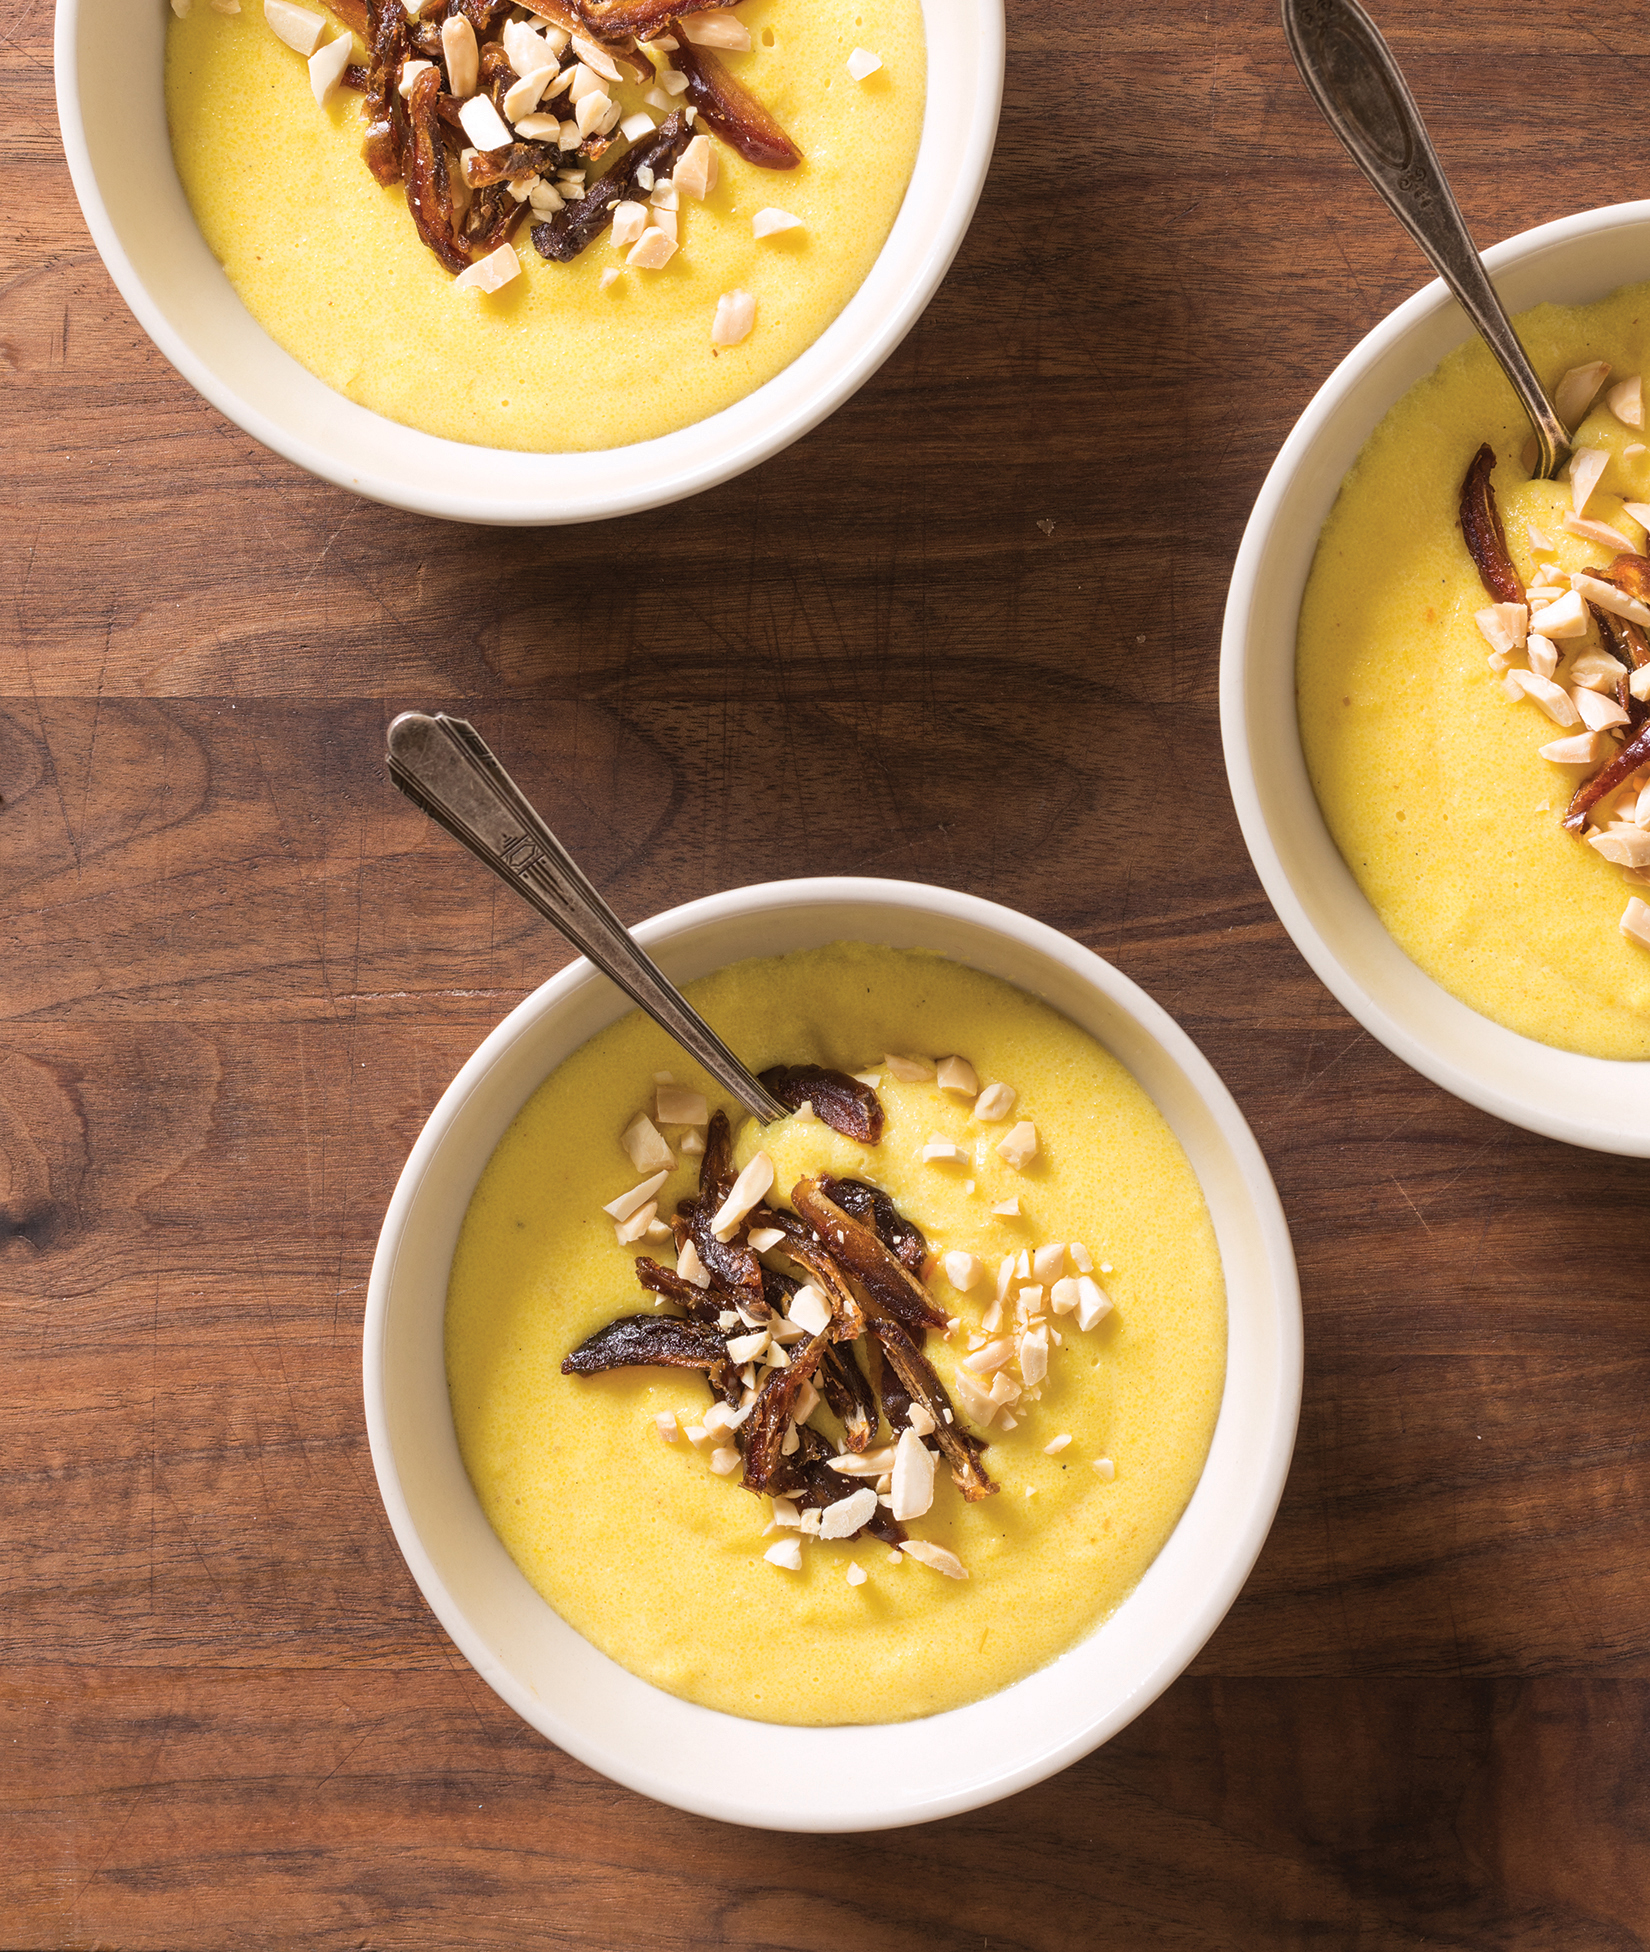
Semolina Pudding with Almonds and Dates
Banana–Peanut Butter Ice Cream
Banana-Chocolate Ice Cream with Walnuts
Raspberry Sorbet with Ginger and Mint
RECIPE EXTRAS
FAST (45 minutes or less total time)
Photos: Tropical Fruit Pavlova; French Apple Tart; Grilled Fruit

Serves 4 to 6 
Why This Recipe Works This elegant fresh fruit salad is equally at home on a dessert table as it is at brunch. We chose a combination of cantaloupe, plums, and cherries, which not only offered a range of complementary flavors but also looked gorgeous. A small amount of sugar encouraged the fruit to release its juices. We balanced that sweetness with fresh lime juice, but tasters wanted even more complexity. Mashing the sugar with fresh mint before stirring it into the fruit worked perfectly and ensured even distribution of bright minty flavor. Since our fruit salad had come together so easily, we decided to apply the same techniques to a variation with peaches and berries, using fresh basil in place of the mint and a small amount of pepper to bring the flavors to life. Blueberries can be substituted for the cherries.
4 teaspoons sugar
1 tablespoon minced fresh mint
3 cups ½-inch cantaloupe pieces
2 plums, halved, pitted, and cut into ½-inch pieces
8 ounces fresh sweet cherries, pitted and halved
¼ teaspoon vanilla extract
1 tablespoon lime juice, plus extra for seasoning
Combine sugar and mint in large bowl. Using rubber spatula, press mixture into side of bowl until sugar becomes damp, about 30 seconds. Add cantaloupe, plums, cherries, and vanilla and gently toss to combine. Let sit at room temperature, stirring occasionally, until fruit releases its juices, 15 to 30 minutes. Stir in lime juice and season with extra lime juice to taste. Serve.
VARIATION
Peaches, Blackberries, and Strawberries with Basil and Pepper
Serves 4 to 6
Nectarines can be substituted for the peaches.
2 tablespoons chopped fresh basil
4 teaspoons sugar
½ teaspoon pepper
1½ pounds peaches, halved, pitted, and cut into ½-inch pieces
10 ounces (2 cups) blackberries
10 ounces strawberries, hulled and quartered (2 cups)
1 tablespoon lime juice, plus extra for seasoning
Combine basil, sugar, and pepper in large bowl. Using rubber spatula, press mixture into side of bowl until sugar becomes damp, about 30 seconds. Add peaches, blackberries, and strawberries and gently toss to combine. Let sit at room temperature, stirring occasionally, until fruit releases its juices, 15 to 30 minutes. Stir in lime juice and season with extra lime juice to taste. Serve.
Serves 4
Why This Recipe Works Fresh apples stuffed with dried fruit, nuts, and spices and baked until tender make a dessert that’s simultaneously cozy enough to snack on in front of the TV and sophisticated enough to serve to company. We preferred baking the apples uncovered instead of wrapping them in foil because the fruit caramelized better when exposed to the oven’s heat. To allow steam to escape and thereby keep the apples from bursting, we found that removing a strip of skin around the apple’s stem end with a vegetable peeler did the trick. Use Golden Delicious, Cortland, or Baldwin apples here. To keep all the flavorful fillings from leaking out, take care not to puncture the blossom end (opposite the stem end) of the apples when coring them.
4 large apples (8 ounces each)
½ cup dried cranberries or cherries
¼ cup (1¾ ounces) sugar
¼ teaspoon ground cinnamon
1½ cups apple cider
2 cinnamon sticks
¼ cup walnuts, toasted and chopped (optional)
1. Adjust oven rack to middle position and heat oven to 350 degrees. Using vegetable peeler, remove strip of apple peel from top of each apple, then use melon baller to remove stem and core of apple, being careful not to cut all the way through blossom end.
2. Place apples in 8-inch square baking dish. Spoon 1 tablespoon dried cranberries into each apple. Combine sugar and ground cinnamon, then sprinkle in and around apples in dish. Add remaining ¼ cup dried cranberries, cider, and cinnamon sticks around apples in dish.
3. Bake apples until tender when pierced with fork or skewer, 45 to 55 minutes, brushing apples with cider several times during baking. (Be careful not to overbake apples or skins will split.)
4. Transfer apples to individual bowls and tent with aluminum foil while making sauce. Pour cooking liquid with cranberries and cinnamon sticks into small saucepan, bring to simmer over medium-high heat, and cook until liquid has reduced to 1 cup, 7 to 10 minutes.
5. Discard cinnamon sticks. Spoon some of sauce over each apple; sprinkle with walnuts, if using; and serve, passing remaining sauce separately.
PREPARING APPLES FOR BAKING

After removing strip of peel from stem end of apple with vegetable peeler, use melon baller to scoop out core, being careful not to puncture blossom end.
VARIATIONS
Cider Baked Apples with Ginger and Orange
Substitute one 3-inch-long strip orange peel and one 1-inch piece fresh ginger, peeled and sliced into ¼-inch-thick rounds, for cinnamon sticks. Before serving, discard orange peel and ginger.
Cider Baked Apples with Rum and Golden Raisins
Substitute golden raisins for dried cranberries and add ¼ cup dark rum to dish with cider in step 2. Before serving, stir 2 tablespoons dark rum into sauce.

Serves 4 to 6
Why This Recipe Works Pears are often poached, but when they’re roasted until bronzed and adorned with a few simple embellishments, they make a lovely after-dinner treat. Since pears contain a lot of liquid, we needed to drive off some moisture before we could achieve browning, so we jump-started cooking the pears on the stovetop. Transferring the skillet to the oven for the rest of the cooking time ensured even and consistent browning and fork-tender fruit. A quick pan sauce made the most of the flavorful browned bits left in the pan. White wine, lemon juice, and cardamom offered an aromatic flavor profile. A small amount of sugar and some dried apricots brought balanced sweetness. For textural contrast, we sprinkled on a handful of toasted pistachios just before serving. We prefer Bosc pears in this recipe, but Comice and Bartlett pears also work. Use a medium-bodied dry white wine such as Sauvignon Blanc or Pinot Grigio.
2 tablespoons extra-virgin olive oil
4 ripe but firm Bosc pears (7 to 8 ounces each), peeled, halved, and cored
1¼ cups dry white wine
½ cup dried apricots, quartered
⅓ cup (2⅓ ounces) sugar
¼ teaspoon ground cardamom
⅛ teaspoon table salt
1 teaspoon lemon juice
⅓ cup shelled pistachios, toasted and chopped
1. Adjust oven rack to middle position and heat oven to 450 degrees. Heat oil in 12-inch ovensafe skillet over medium-high heat until shimmering. Place pears cut side down in skillet and cook, without moving, until just beginning to brown, 3 to 5 minutes.
2. Transfer skillet to oven and roast pears for 15 minutes. Being careful of hot skillet handle, flip pears and continue to roast until toothpick slips easily in and out of pears, 10 to 15 minutes.
3. Being careful of hot skillet handle, remove skillet from oven and carefully transfer pears to serving platter. Add wine, apricots, sugar, cardamom, and salt to now-empty skillet and bring to simmer over medium-high heat. Cook, whisking to scrape up any browned bits, until sauce is reduced and has consistency of maple syrup, 7 to 10 minutes. Off heat, stir in lemon juice. Pour sauce over pears and sprinkle with pistachios. Serve.
VARIATIONS
Roasted Apples with Dried Figs and Walnuts
Use a medium-bodied dry red wine such as Pinot Noir.
Substitute Gala apples for pears, dry red wine for white wine, dried figs for apricots, ¾ teaspoon pepper for cardamom, and walnuts for pistachios.
Roasted Plums with Dried Cherries and Almonds
Substitute unpeeled plums for pears, dried cherries for apricots, ground cinnamon for cardamom, and sliced almonds for pistachios. Reduce oven roasting time in step 2 to 5 minutes per side.
Serves 6
Why This Recipe Works Poaching fruit makes for an elegant dessert presentation, allowing the shape and texture of the fruit to remain intact while rendering it tender and enhancing its pure, fresh flavor. Sweet cherries and floral peaches made a perfect pair when poached in a red wine syrup. We found that a 2:1 ratio of wine to sugar was necessary to achieve a glossy syrup that would nicely coat the fruit. Poaching the delicate fruit over the heat directly in the syrup caused it to break down too much; instead, we boiled the syrup first to dissolve the sugar completely, then allowed the fruit to cook gently by pouring the hot syrup over it and letting it poach off the heat. Slicing the peaches thin ensured that they would cook at the same rate as the cherries. To infuse the fruit with flavor as it cooled in the syrup, we added half a cinnamon stick (a whole one was overpowering) and a couple of whole cloves. Serve this compote as is or spooned over plant-based or dairy yogurt, frozen yogurt, or ice cream.
1 pound fresh sweet cherries, pitted and halved
1 pound ripe but firm peaches, peeled, halved, pitted, and sliced ¼ inch thick
½ cinnamon stick
2 whole cloves
2 cups dry red wine
1 cup sugar
Combine cherries, peaches, cinnamon stick, and cloves in large bowl. Bring red wine and sugar to boil in small saucepan and cook, stirring occasionally, until sugar has dissolved, about 5 minutes. Pour syrup over fruit, cover with plastic wrap, and let cool to room temperature. Discard cinnamon stick and cloves. Serve.
NOTES FROM THE TEST KITCHEN
For neater cherry pitting, place a large bowl of water in the sink. Add cherries and then pit them at the bottom of the bowl. Pits float to the surface for easy removal, the cherries are rinsed in the process, and your hands (and the kitchen walls) aren’t bright red.
Serves 6
Why This Recipe Works Peak-season fruit is transformed into the simplest of desserts, to be served as is or spooned over plant-based or dairy yogurt or ice cream or our Greek Lemon Rice Pudding (this page). We followed up this classic duo of strawberries and rhubarb with a couple of colorful stone fruit and berry combinations. Gentle cooking released the juices of the rhubarb or stone fruit without turning them into jam. Adding the delicate berries at the end prevented an overly soft compote, as did transferring the compote to a bowl to cool. Do not overcook the rhubarb or it will become stringy. You may substitute 1 teaspoon vanilla extract for the vanilla bean; stir it in with the coconut oil in step 2.
½ vanilla bean
6 tablespoons sugar
¼ cup water
Pinch table salt
8 ounces rhubarb, peeled and cut into 1-inch lengths
20 ounces strawberries, hulled and quartered (4 cups)
1 tablespoon refined coconut oil or unsalted butter
1. Cut vanilla bean in half lengthwise. Using tip of paring knife, scrape out seeds and reserve bean. Bring vanilla seeds and bean, sugar, water, and salt to simmer in 12-inch nonstick skillet over medium heat. Stir in rhubarb and cook until rhubarb begins to soften and sauce thickens slightly, 4 to 6 minutes.
2. Off heat, gently stir in strawberries and oil and let sit until oil has melted. Discard vanilla bean, transfer compote to bowl, and let cool to room temperature, 10 to 15 minutes. Serve. (Compote can be refrigerated for up to 1 day; return to room temperature before serving.)
Try to buy plums of similar ripeness so that they cook evenly.
½ vanilla bean
6 tablespoons water
¼ cup sugar
Pinch table salt
1½ pounds plums, pitted, sliced ⅓ inch thick, then halved crosswise
10 ounces (2 cups) blackberries
1 tablespoon refined coconut oil or unsalted butter
1. Cut vanilla bean in half lengthwise. Using tip of paring knife, scrape out seeds and reserve bean. Bring vanilla seeds and bean, water, sugar, and salt to simmer in 12-inch nonstick skillet over medium heat. Stir in plums and cook until plums begin to soften and sauce thickens slightly, 5 to 7 minutes.
2. Stir in blackberries and continue to cook until blackberries begin to soften, about 1 minute. Off heat, stir in oil and let sit until melted. Discard vanilla bean, transfer compote to bowl, and let cool to room temperature, 10 to 15 minutes. Serve. (Compote can be refrigerated for up to 1 day; return to room temperature before serving.)
REMOVING SEEDS FROM A VANILLA BEAN

1. Use paring knife to cut vanilla bean in half lengthwise.

2. Scrape vanilla seeds out of bean using blade of knife.
Try to buy nectarines of similar ripeness so that they cook evenly.
½ vanilla bean
3 tablespoons sugar
2 tablespoons water
Pinch table salt
1½ pounds nectarines, pitted, sliced ⅓ inch thick, then halved crosswise
10 ounces (2 cups) blueberries
1 tablespoon lemon juice
1 tablespoon refined coconut oil or unsalted butter
1. Cut vanilla bean in half lengthwise. Using tip of paring knife, scrape out seeds and reserve bean. Bring vanilla seeds and bean, sugar, water, and salt to simmer in 12-inch nonstick skillet over medium heat. Stir in nectarines and cook until nectarines begin to soften and sauce thickens slightly, 3 to 5 minutes. Stir in blueberries and continue to cook until blueberries begin to release their juice, 2 to 4 minutes.
2. Off heat, stir in lemon juice and oil and let sit until oil has melted. Discard vanilla bean, transfer compote to bowl, and let cool to room temperature, 10 to 15 minutes. Serve. (Compote can be refrigerated for up to 1 day; return to room temperature before serving.)
Why This Recipe Works Grilled fruit makes a simple but fantastic al fresco dessert, either on its own or alongside a scoop of our Lemon Ice (this page). The natural sweetness of the fruit is intensified by the caramelization that happens on the grill. In the chart below, we have included those fruits that we believe do best on the grill. Use smaller plums, peaches, apples, and pears when grilling, since larger fruits may burn on the outside before heating through to the center. All fruit to be grilled should be ripe but still firm. Grill delicate fruits with their skins intact, as the skins keep the fruit from falling apart on the grill. To prevent sticking, be sure to clean your cooking grate thoroughly before adding the fruit. Grilled fruit is also delicious served with plant-based or dairy yogurt, frozen yogurt, or ice cream.
Prepared fruit (see chart)
Vegetable oil
1A. For a charcoal grill Open bottom vent completely. Light large chimney starter three-quarters filled with charcoal briquettes (4½ quarts). When top coals are partially covered with ash, pour evenly over grill. Set cooking grate in place, cover, and open lid vent completely. Heat grill until hot, about 5 minutes.
1B. For a gas grill Turn all burners to high, cover, and heat grill until hot, about 15 minutes. Turn all burners to medium-high.
2. Clean and oil cooking grate. Lightly brush prepared fruit with oil. Grill fruit as directed in chart. Fruit is done when it is marked on exterior and just barely softened and heated through at center.
NOTES FROM THE TEST KITCHEN
PREPPING FRUIT FOR THE GRILL
|
FRUIT |
PREPARATION |
GRILLING DIRECTIONS |
|
Banana |
Leave skin on; cut in half lengthwise using sharp paring knife. |
Grill skin side up for 2 minutes; turn and grill skin side down for 2 minutes. |
|
Mango |
Peel, pit, and cut into 4 pieces. |
Grill larger pieces for 5 minutes, smaller pieces for 4 minutes, turning all pieces once halfway through cooking time. |
|
Peach |
Cut in half and remove pit. |
Grill skin side up for 4 minutes; turn and grill skin side down for 3 to 4 minutes. |
|
Apple |
Cut in half through core. Remove core with melon baller. Use paring knife to cut out stem. |
Grill skin side up for 5 to 6 minutes; turn and grill skin side down for 5 to 6 minutes. |
|
Pear |
Cut in half lengthwise. Remove core with melon baller. Use paring knife to cut out stem. |
Grill skin side up for 5 minutes; turn and grill skin side down for 5 minutes. |
|
Pineapple |
Cut into half-circles. |
Grill for 6 minutes, turning once halfway through cooking time. |
|
Plum |
Cut in half and remove pit. |
Grill skin side up for 4 minutes; turn and grill skin side down for 2 minutes. |
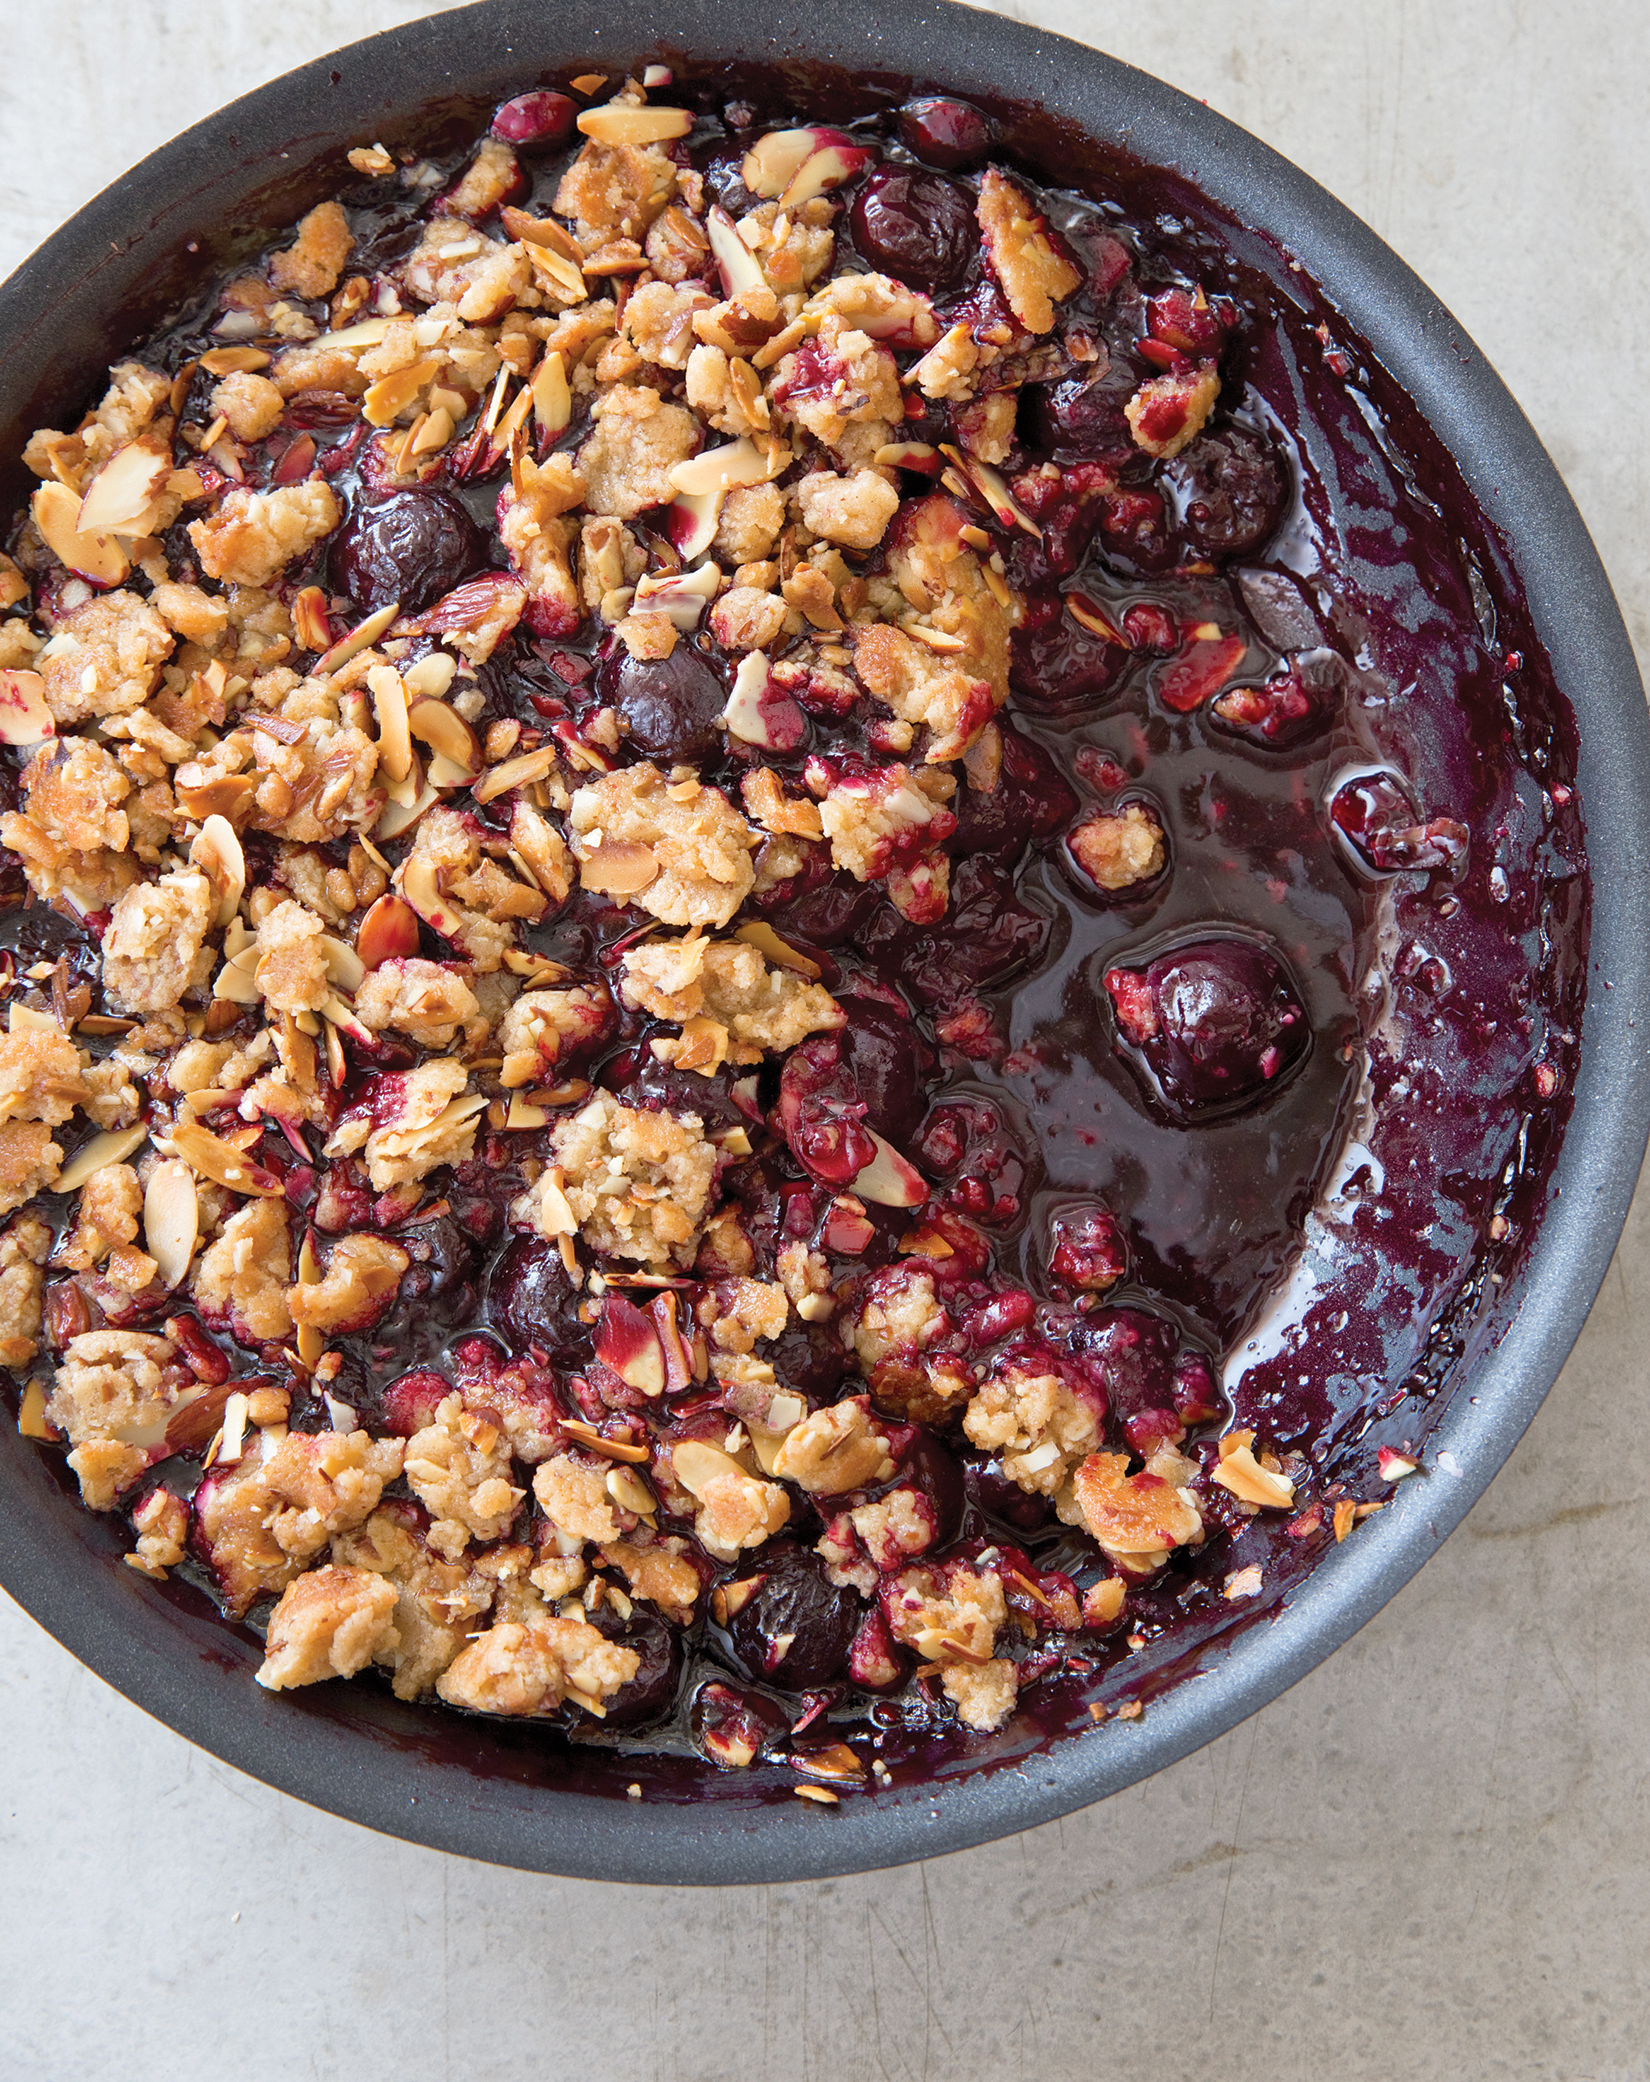
Serves 6
Why This Recipe Works Most fruit crisps are baked, but oven versions we tried of this sweet cherry crisp either emerged with stodgy fillings or the filling boiled up over the topping in the oven, making it soggy. So we migrated to the stovetop. After browning a topping of almonds, sugar, flour, and coconut oil (or butter) in a skillet on the stovetop, we used the same pan to cook the filling, sprinkling on the crispy cooked topping at the end. Starting with frozen pitted cherries is superconvenient, making this a great year-round dessert, and they were luscious once combined with sugar, lemon juice, and almond and vanilla extracts. Adding dried cherries soaked up excess moisture from the frozen fruit while adding texture, and cornstarch thickened the filling to a syrupy consistency. You will need a 10-inch nonstick skillet with a tight-fitting lid for this recipe. Serve with Coconut Whipped Cream (this page) or dairy whipped cream.
Topping
¾ cup sliced almonds, divided
⅔ cup (3⅓ ounces) all-purpose flour
¼ cup packed (1¾ ounces) light brown sugar
¼ cup (1¾ ounces) granulated sugar
½ teaspoon vanilla extract
½ teaspoon ground cinnamon
¼ teaspoon table salt
6 tablespoons refined coconut oil or unsalted butter, melted
1 tablespoon water
Filling
5 tablespoons (2¼ ounces) granulated sugar, divided
1 tablespoon cornstarch
2 pounds frozen sweet cherries
1 tablespoon lemon juice
1 teaspoon vanilla extract
½ teaspoon table salt
¼ teaspoon almond extract
⅔ cup dried cherries
1. For the topping Finely chop ¼ cup almonds. Combine flour, brown sugar, granulated sugar, vanilla, cinnamon, salt, and chopped almonds in bowl. Stir in melted oil and water until mixture resembles wet sand and no dry flour remains.
2. Toast remaining ½ cup almonds in 10-inch nonstick skillet over medium-low heat until just beginning to brown, about 4 minutes. Add flour mixture and cook, stirring constantly, until lightly browned, 8 to 10 minutes; transfer to plate to cool. Wipe out skillet with paper towels.
3. For the filling Combine 2 tablespoons sugar and cornstarch in small bowl; set aside. Combine cherries, lemon juice, vanilla, salt, almond extract, and remaining 3 tablespoons sugar in now-empty skillet. Cover and cook over medium heat until cherries thaw and release their juice, about 7 minutes, stirring halfway through cooking. Uncover, stir in dried cherries, and simmer until cherries are very tender, about 3 minutes.
4. Stir in cornstarch mixture and simmer, stirring constantly, until thickened, 1 to 3 minutes. Off heat, sprinkle topping evenly over filling. Return skillet to medium-low heat and cook until filling is bubbling around edges, about 3 minutes. Let cool for at least 30 minutes before serving.
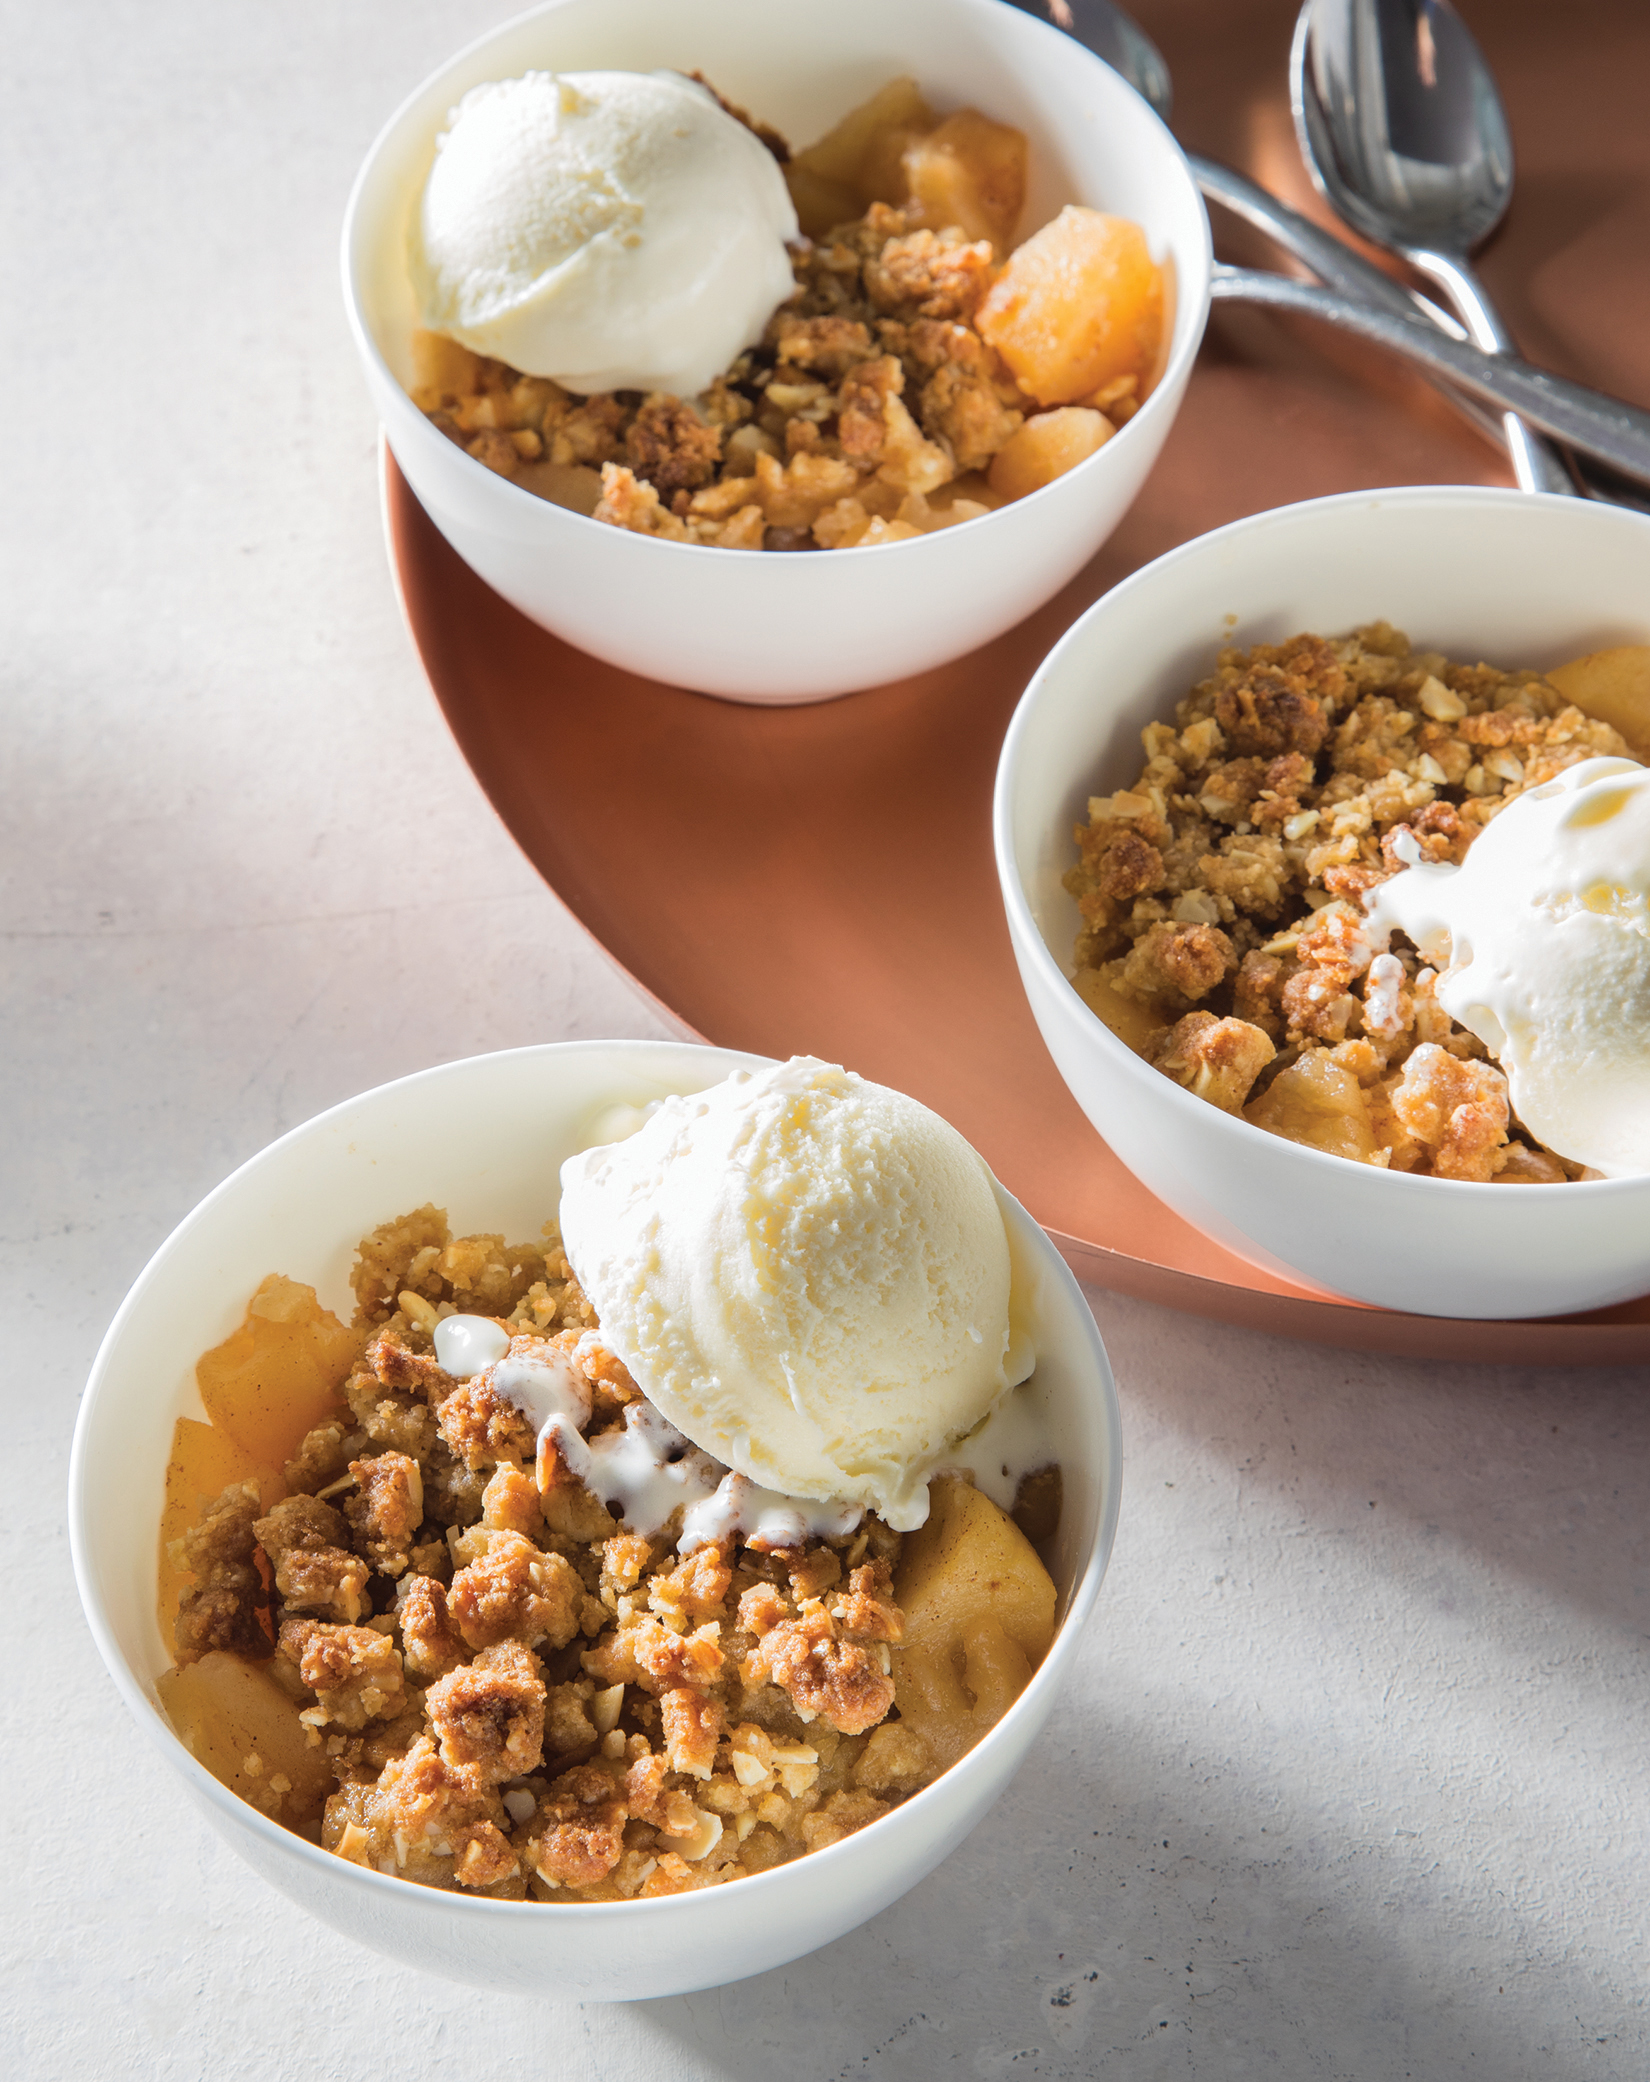
Serves 6 to 8
Why This Recipe Works This is an apple lover’s apple crumble: By dialing back the sweetness and packing in as much fruit as possible, we allowed all the bright, tart flavor of the apples to shine through without blanketing it under a mountain of sugar and streusel. Parbaking the apples before adding the topping meant that we could pack the baking dish to the top with raw fruit. After it softened and collapsed in the oven’s heat, we added our lightly sweetened topping and finished baking the crumble to golden perfection. Waiting to add the topping also prevented it from becoming soggy. For the best texture, we chose Golden Delicious, an apple variety that offers near-universal availability, plus balanced sweet-tart flavor and enough structural integrity that it wouldn’t turn to mush. You can use Braeburn or Honeycrisp apples in place of the Golden Delicious or a combination of all three. Serve with plant-based or dairy frozen yogurt or ice cream, if you like.
4 pounds Golden Delicious apples, peeled, cored, and cut into ¾-inch pieces
2 tablespoons packed brown sugar, plus ½ cup packed (3½ ounces)
2 tablespoons lemon juice
¾ teaspoon ground cinnamon
½ teaspoon table salt, divided
1 cup (5 ounces) all-purpose flour
½ cup sliced almonds, chopped fine
6 tablespoons refined coconut oil or unsalted butter, melted
2 teaspoons vanilla extract
2 teaspoons water
1. Adjust oven racks to upper-middle and lowest positions and heat oven to 400 degrees. Toss apples, 2 tablespoons sugar, lemon juice, cinnamon, and ¼ teaspoon salt together in large bowl. Transfer to 8-inch square baking pan with at least 2-inch tall sides and press into even layer. Cover pan tightly with aluminum foil and place on foil-lined rimmed baking sheet. Transfer sheet to oven and bake on lower rack for 35 minutes.
2. While apples bake, whisk flour, almonds, remaining ½ cup sugar, and remaining ¼ teaspoon salt in medium bowl until combined. Add melted coconut oil, vanilla, and water and stir with spatula until clumps form and no dry flour remains.
3. Remove sheet from oven and smooth top of apples with spatula. If apples have not collapsed enough to leave at least ¼ inch of space below rim of pan, replace foil, return sheet to oven, and continue to bake 5 to 15 minutes longer.
4. Sprinkle topping evenly over apples, breaking up any clumps larger than a marble. Transfer sheet to upper rack and bake until topping is evenly browned and filling is just bubbling at edges, 20 to 30 minutes. Let cool for at least 45 minutes before serving.
PLANT POWER
Many fruits are naturally high in pectin, a complex polysaccharide that acts as a sort of glue, binding mixtures when it comes into contact with liquid. As a fruit dessert cools, the fruit’s pectin molecules (which dissolve in the fruit’s water during cooking) form a gel that immobilizes the water, resulting in a nicely set filling. It may be hard to resist waiting 45 minutes to dig into either of our fruit crumbles, but scooping before that gel has firmed will cause the filling to run out like hot soup.

Serves 4 to 6
Why This Recipe Works Peaches are certainly juicier than apples, but they can also vary quite a bit more than apples in terms of juiciness and sweetness. To get a great peach crumble every time with fickle peaches, we let peeled, sliced peaches macerate in sugar for half an hour before draining them and measuring out the amount of peach juice that would be added back to the filling: always ¼ cup. This both concentrated the peaches’ flavor and controlled their moisture content. To ensure that the crumble topping would stay crisp on top of the delicate peaches, we parbaked it separately first (while the peaches were macerating) and then added it to the fruit in the baking dish to bake until browned and bubbling. We recommend fresh peaches in this recipe. Serve with plant-based or dairy frozen yogurt or ice cream, if you like.
Filling
3½ pounds ripe but firm peaches, peeled, pitted, and cut into ¾-inch-thick wedges
⅓ cup (2⅓ ounces) granulated sugar
1 tablespoon lemon juice
1¼ teaspoons cornstarch
Pinch table salt
Pinch ground cinnamon
Pinch ground nutmeg
Topping
1 cup (5 ounces) all-purpose flour
¼ cup (1¾ ounces) granulated sugar
¼ cup packed (1¾ ounces) brown sugar
2 teaspoons vanilla extract
⅛ teaspoon table salt
6 tablespoons refined coconut oil or unsalted butter, melted
½ cup sliced almonds, divided
1 tablespoon water
1. Adjust oven racks to lower-middle and upper-middle positions and heat oven to 350 degrees. Line rimmed baking sheet with parchment paper.
2. For the filling Gently toss peaches and sugar together in large bowl and let sit for 30 minutes, tossing occasionally. Drain peaches in colander set over large bowl. Whisk ¼ cup drained peach juice, lemon juice, cornstarch, salt, cinnamon, and nutmeg together in small bowl; discard excess peach juice. Toss juice mixture with peaches and transfer to 8-inch square baking dish.
3. For the topping While peaches are macerating, pulse flour, granulated sugar, brown sugar, vanilla, and salt in food processor until combined, about 5 pulses. Add melted oil, ¼ cup almonds, and water and process until combined, about 30 seconds, scraping down sides of bowl as needed. Add remaining ¼ cup almonds and pulse until combined, about 2 pulses. Transfer mixture to prepared sheet, pinch into rough ½-inch chunks with some smaller, loose bits, and spread into even layer. Bake on upper rack until lightly browned and firm, 15 to 19 minutes.
4. Sprinkle topping evenly over peaches and spread into even layer with spatula, packing down lightly and breaking up any very large pieces. Place dish on lower rack and increase oven temperature to 375 degrees. Bake until topping is well browned and juices are bubbling around edges, 20 to 30 minutes. Let cool for at least 45 minutes before serving.

Serves 8
Why This Recipe Works Strawberry shortcakes, with their rustic biscuits, juicy berries, and fluff of whipped cream, capture the casual fun of summer days. But this treat is a three-part dessert, and only one—the fruit filling—is naturally vegan. We tested through vegan shortcakes with tough, crumbly biscuits and soupy, bland dairy-free cream before hitting on this winning combination. For the biscuits, we melted and slightly cooled coconut oil before adding it to cold milk (plant-based or dairy). The oil acted similarly to butter (which also works here), instantly solidifying into tiny clumps that added richly flavorful fat pockets, making for tender biscuits. Some lemon juice added a buttermilk-style tang. For the whipped cream, canned coconut milk whipped perfectly into velvety billows, and its mild coconut flavor beautifully complemented the sweet strawberries and rich biscuits. You will need to chill the unopened cans of coconut milk for at least 24 hours before use. You may serve this with dairy whipped cream instead, if you like.
Strawberries
2 pounds strawberries, hulled and quartered (6⅓ cups)
6 tablespoons (2⅔ ounces) granulated sugar
Shortcakes
2 cups (10 ounces) all-purpose flour
2 tablespoons granulated sugar
2 teaspoons baking powder
½ teaspoon baking soda
½ teaspoon table salt
1 cup plant-based milk or dairy milk, chilled
½ cup refined coconut oil or 8 tablespoons unsalted butter, melted and cooled slightly
1 tablespoon lemon juice
1 tablespoon turbinado sugar
1. For the strawberries Using potato masher, mash one-third of strawberries with sugar in bowl. Stir in remaining strawberries, cover, and let sit while making shortcakes, at least 30 minutes or up to 2 hours.
2. For the shortcakes Adjust oven rack to middle position and heat oven to 475 degrees. Set rimmed baking sheet in second baking sheet and line with parchment paper. Whisk flour, granulated sugar, baking powder, baking soda, and salt together in large bowl. Whisk milk, melted oil, and lemon juice together (oil will clump) in second bowl. Stir milk mixture into flour mixture until just incorporated.
3. Using greased ⅓-cup dry measuring cup, drop level scoops of batter 1½ inches apart on prepared sheet. Sprinkle evenly with turbinado sugar. Bake until tops are golden, 12 to 14 minutes, rotating sheet halfway through baking. Transfer biscuits to wire rack and let cool completely, about 30 minutes.
4. Split each biscuit in half and place bottoms on individual plates. Using slotted spoon, portion strawberries over biscuit bottoms, then top with dollop of coconut whipped cream. Top shortcakes and serve immediately.
Makes about 2 cups
The cream from canned coconut milk easily whips into delicately flavored soft-peaked billows.
4 (14-ounce) cans coconut milk
2 tablespoons granulated sugar
2 teaspoons vanilla extract
Refrigerate unopened cans of coconut milk for at least 24 hours to ensure that 2 distinct layers form. Skim top layer of cream from each can and measure out 2 cups of cream (save any extra cream and milky liquid for another use). Using stand mixer fitted with whisk attachment, whip coconut cream, sugar, and vanilla on low speed until well combined, about 30 seconds. Increase speed to high and whip until mixture thickens and soft peaks form, about 2 minutes. (Coconut whipped cream can be refrigerated for up to 4 days.)

Serves 8
Why This Recipe Works Pavlova is a gorgeous dessert featuring a meringue that’s a little crispy on the outside and a little chewy on the inside. Piled with whipped cream and fresh fruit, it’s a showstopper. Since aquafaba, the liquid in canned chickpeas, is a magical egg-replacing ingredient, we figured that creating a vegan pavlova by whipping aquafaba and sugar into a stiff, fluffy foam would be a cinch. But were we wrong. The first hurdle was sugar: Confectioners’ sugar had too much starch, and we were better able to achieve a glossy sheen from granulated sugar. The second hurdle was color: The bottoms of our meringues turned spotty brown, which signified sugar crystals sinking to the bottom, so we heated the aquafaba mixture to ensure that the sugar dissolved properly. The third hurdle was appearance: We had mottled meringues from too many air bubbles. Although aquafaba takes longer than egg whites to whip, there was a point when the meringue went from dense and glossy to aerated and cottony—a sign of overwhipping. Chilling the mixture before whipping helped us achieve the proper stage faster, preventing the likelihood of mottling. Last, though propping the oven door open for cooling is typical for egg white meringues, this caused our vegan meringues to deflate, so we left the door closed. Finally, we were ready to celebrate with our creamy and fruity toppings! You will need to refrigerate the unopened cans of coconut milk for the coconut whipped cream for at least 24 hours before use. You may use sweetened dairy whipped cream instead of the coconut whipped cream, if you like. If you can’t find Thai basil, you can use Italian basil. These are a bit crisper than egg white meringues, so we let the assembled pavolvas sit for a short time before serving to let them soften.
Meringues
⅔ cup (4⅔ ounces) sugar
4 ounces (½ cup) aquafaba (this page)
½ teaspoon vanilla extract
¼ teaspoon cream of tartar
Fruit Topping
1 mango, peeled, pitted, and cut into ¼-inch pieces
2 kiwis, peeled, quartered lengthwise, and sliced crosswise ¼ inch thick
1½ cups ½-inch pineapple pieces
1 tablespoon sugar
⅓ cup chopped fresh Thai basil
1 recipe Coconut Whipped Cream
½ cup unsweetened coconut, toasted
1. For the meringues Adjust oven rack to upper-middle and lower-middle positions and heat oven to 250 degrees. Heat sugar and aquafaba in small saucepan over medium-low heat, whisking until sugar is dissolved, about 5 minutes (mixture should not be bubbling). Transfer to bowl of stand mixer and refrigerate until chilled, about 1 hour.
2. Fit stand mixer with whisk attachment and whip chilled aquafaba mixture, vanilla, and cream of tartar on high speed until stiff peaks form and mixture is dense and bright white, 7 to 9 minutes, scraping down the bowl halfway through. (Do not overwhip.)
3. Spoon about ¼ teaspoon meringue onto each corner of 2 rimmed baking sheets. Line sheets with parchment paper, pressing on corners to secure. Spoon ⅓ cup meringue into 4 evenly spaced piles on each prepared sheet. Evenly distribute any remaining meringue among piles and spread each with back of spoon or spatula from center outward, building 4-inch disks that are slightly higher around edges.
4. Bake meringues for 50 minutes. Without opening oven door, turn off oven and let meringues cool in oven for 1 hour (meringues will still be soft to the touch, but will firm as they continue to cool). Remove meringues from oven and let cool completely before topping, about 15 minutes. (Cooled meringues can be wrapped tightly in plastic wrap and stored at room temperature for up to 2 days.)
5. For the fruit topping Gently toss mango, kiwis, and pineapple with sugar in bowl. Let sit at room temperature until sugar has dissolved and fruit is juicy, about 30 minutes. Just before serving, stir basil into fruit mixture.
6. To assemble, place meringue shells on individual plates and spoon heaping ¼ cup coconut whipped cream into each. Top with about ½ cup fruit (some fruit and juice will fall onto plate) and let sit for about 15 minutes. Sprinkle with toasted coconut and serve.
Makes 24
Why This Recipe Works Chock-full of oats, nuts, seeds, dried fruit, and chocolate chips, these cookies are perfect for tucking into your backpack for a hike, sneaking into a lunch box, or simply nibbling on for an afternoon or bedtime snack. To create them, we tweaked the test kitchen’s classic recipe for chocolate chip cookies, removing the eggs (no substitute needed!) and using all brown sugar, which gave the cookies richer flavor and a softer center. We substituted part of the flour with toasted rolled oats, which added nuttiness and wholesome texture, and added almond butter to stand in for the toffee-like richness usually provided by butter. Letting the mixed dough rest for 1 to 4 hours at room temperature created a chewier cookie (which we preferred): The proteins and starches in the flour start breaking down and the sugar dissolves, hydrates, and later retains this moisture better during baking, preventing the cookie from becoming brittle. Then we turned to the mix-ins: We knew we wanted dried fruit, nuts, and seeds—trail mix classics—to add texture, crunch, and richness. Pepitas added nice pops of color and texture, and pecans added rich, sweet crunchiness. Sweetened dried cranberries gave us bites of tangy fruitiness, and chocolate chips were a must. Not all chocolate chips are vegan, so check ingredient lists carefully. Do not use quick or instant oats in this recipe.
1 cup (3 ounces) old-fashioned rolled oats
1⅔ cups (8⅓ ounces) all-purpose flour
1½ teaspoons baking powder
½ teaspoon baking soda
½ teaspoon table salt
1⅓ cups packed (9⅓ ounces) light brown sugar
½ cup refined coconut oil or 8 tablespoons unsalted butter, melted and cooled slightly
6 tablespoons water, room temperature
⅓ cup unsalted creamy almond butter
2 teaspoons vanilla extract
½ cup (3 ounces) bittersweet chocolate chips
½ cup dried cranberries, chopped
½ cup pecans, toasted and chopped
¼ cup raw pepitas
1. Adjust oven rack to middle position and heat oven to 350 degrees. Spread oats on rimmed baking sheet and bake until fragrant and lightly browned, about 10 minutes, stirring halfway through baking; let cool completely.
2. Whisk flour, baking powder, baking soda, and salt together in bowl. Whisk sugar, melted oil, water, almond butter, and vanilla together in large bowl until smooth. Using rubber spatula, stir flour mixture into oil mixture until just combined, then fold in toasted oats, chocolate chips, cranberries, pecans, and pepitas.
3. Cover bowl with plastic wrap and let sit at room temperature for at least 1 hour or up to 4 hours. (Dough can be refrigerated for up to 24 hours; let sit at room temperature for 30 minutes before portioning.)
4. Line 2 rimmed baking sheets with parchment paper. Working with 3 tablespoons dough at a time, roll into balls and space them evenly on prepared sheets. Press dough to 2-inch width using bottom of dry measuring cup.
5. Bake cookies, 1 sheet at a time, until edges are light golden and have begun to set but centers are still soft, about 14 minutes, rotating sheet halfway through baking. Let cookies cool completely on sheet. Serve. (Cookies can be stored at room temperature for up to 3 days.)
Serves 8
Why This Recipe Works This showstopping dessert is little more than apples artfully arranged in a pastry crust and baked until golden. We used our foolproof recipe for vegan tart dough and cooked half of the apples into a concentrated puree to fill the shell; we sliced the remaining apples and parcooked them until they were pliable enough to adorn the top with concentric circles in a rosette shape. A thin coat of apricot preserves and a run under the broiler provided a shiny, caramelized finish. You may have extra apple slices after arranging the apples in step 5. If you don’t have a potato masher, you can puree the apples in a food processor. To ensure that the outer ring of the pan releases easily, avoid getting apple puree or apricot glaze on the edge of the crust.
10 Golden Delicious apples (8 ounces each), peeled and cored, divided
3 tablespoons refined coconut oil or unsalted butter, divided
1 tablespoon water
½ cup apricot preserves
¼ teaspoon table salt
1 recipe Vegan Tart Dough, fully baked
1. Adjust oven rack to lowest position and heat oven to 350 degrees. Cut 5 apples lengthwise into quarters and cut each quarter lengthwise into 4 slices. Melt 1 tablespoon oil in 12-inch skillet over medium heat. Add apple slices and water and toss to combine. Cover and cook, stirring occasionally, until apples begin to turn translucent and are slightly pliable, 3 to 5 minutes. Transfer apples to large plate, spread into single layer, and set aside to cool. Do not clean skillet.
2. While apples cook, microwave apricot preserves until fluid, about 30 seconds. Strain preserves through fine-mesh strainer into small bowl, reserving solids. Set aside 3 tablespoons strained preserves for brushing tart.
3. Cut remaining 5 apples into ½-inch-thick wedges. Melt remaining 2 tablespoons oil in now-empty skillet over medium heat. Add remaining apricot preserves, reserved apricot solids, apple wedges, and salt. Cover and cook, stirring occasionally, until apples are very soft, about 10 minutes.
4. Mash apples to puree with potato masher, then continue to cook, stirring occasionally, until puree is reduced to 2 cups, about 5 minutes.
5. Set baked tart shell on wire rack in rimmed baking sheet. Transfer apple puree to tart shell and smooth surface. Select 5 thinnest slices of sautéed apple and set aside. Starting at outer edge of tart, arrange remaining slices, tightly overlapping, in concentric circles. Bend reserved slices to fit in center. Bake tart for 30 minutes. Remove from oven and heat broiler.
6. While broiler heats, warm reserved preserves in microwave until fluid, about 20 seconds. Brush evenly over surface of apples, avoiding tart crust. Broil tart, checking every 30 seconds and turning as necessary, until apples are browned in spots, 1 to 3 minutes. Let tart cool for at least 1½ hours. Remove outer metal ring of tart pan, slide thin metal spatula between tart and pan bottom, and carefully slide tart onto serving platter. Cut into wedges and serve.
MAKING THE APPLE ROSETTE
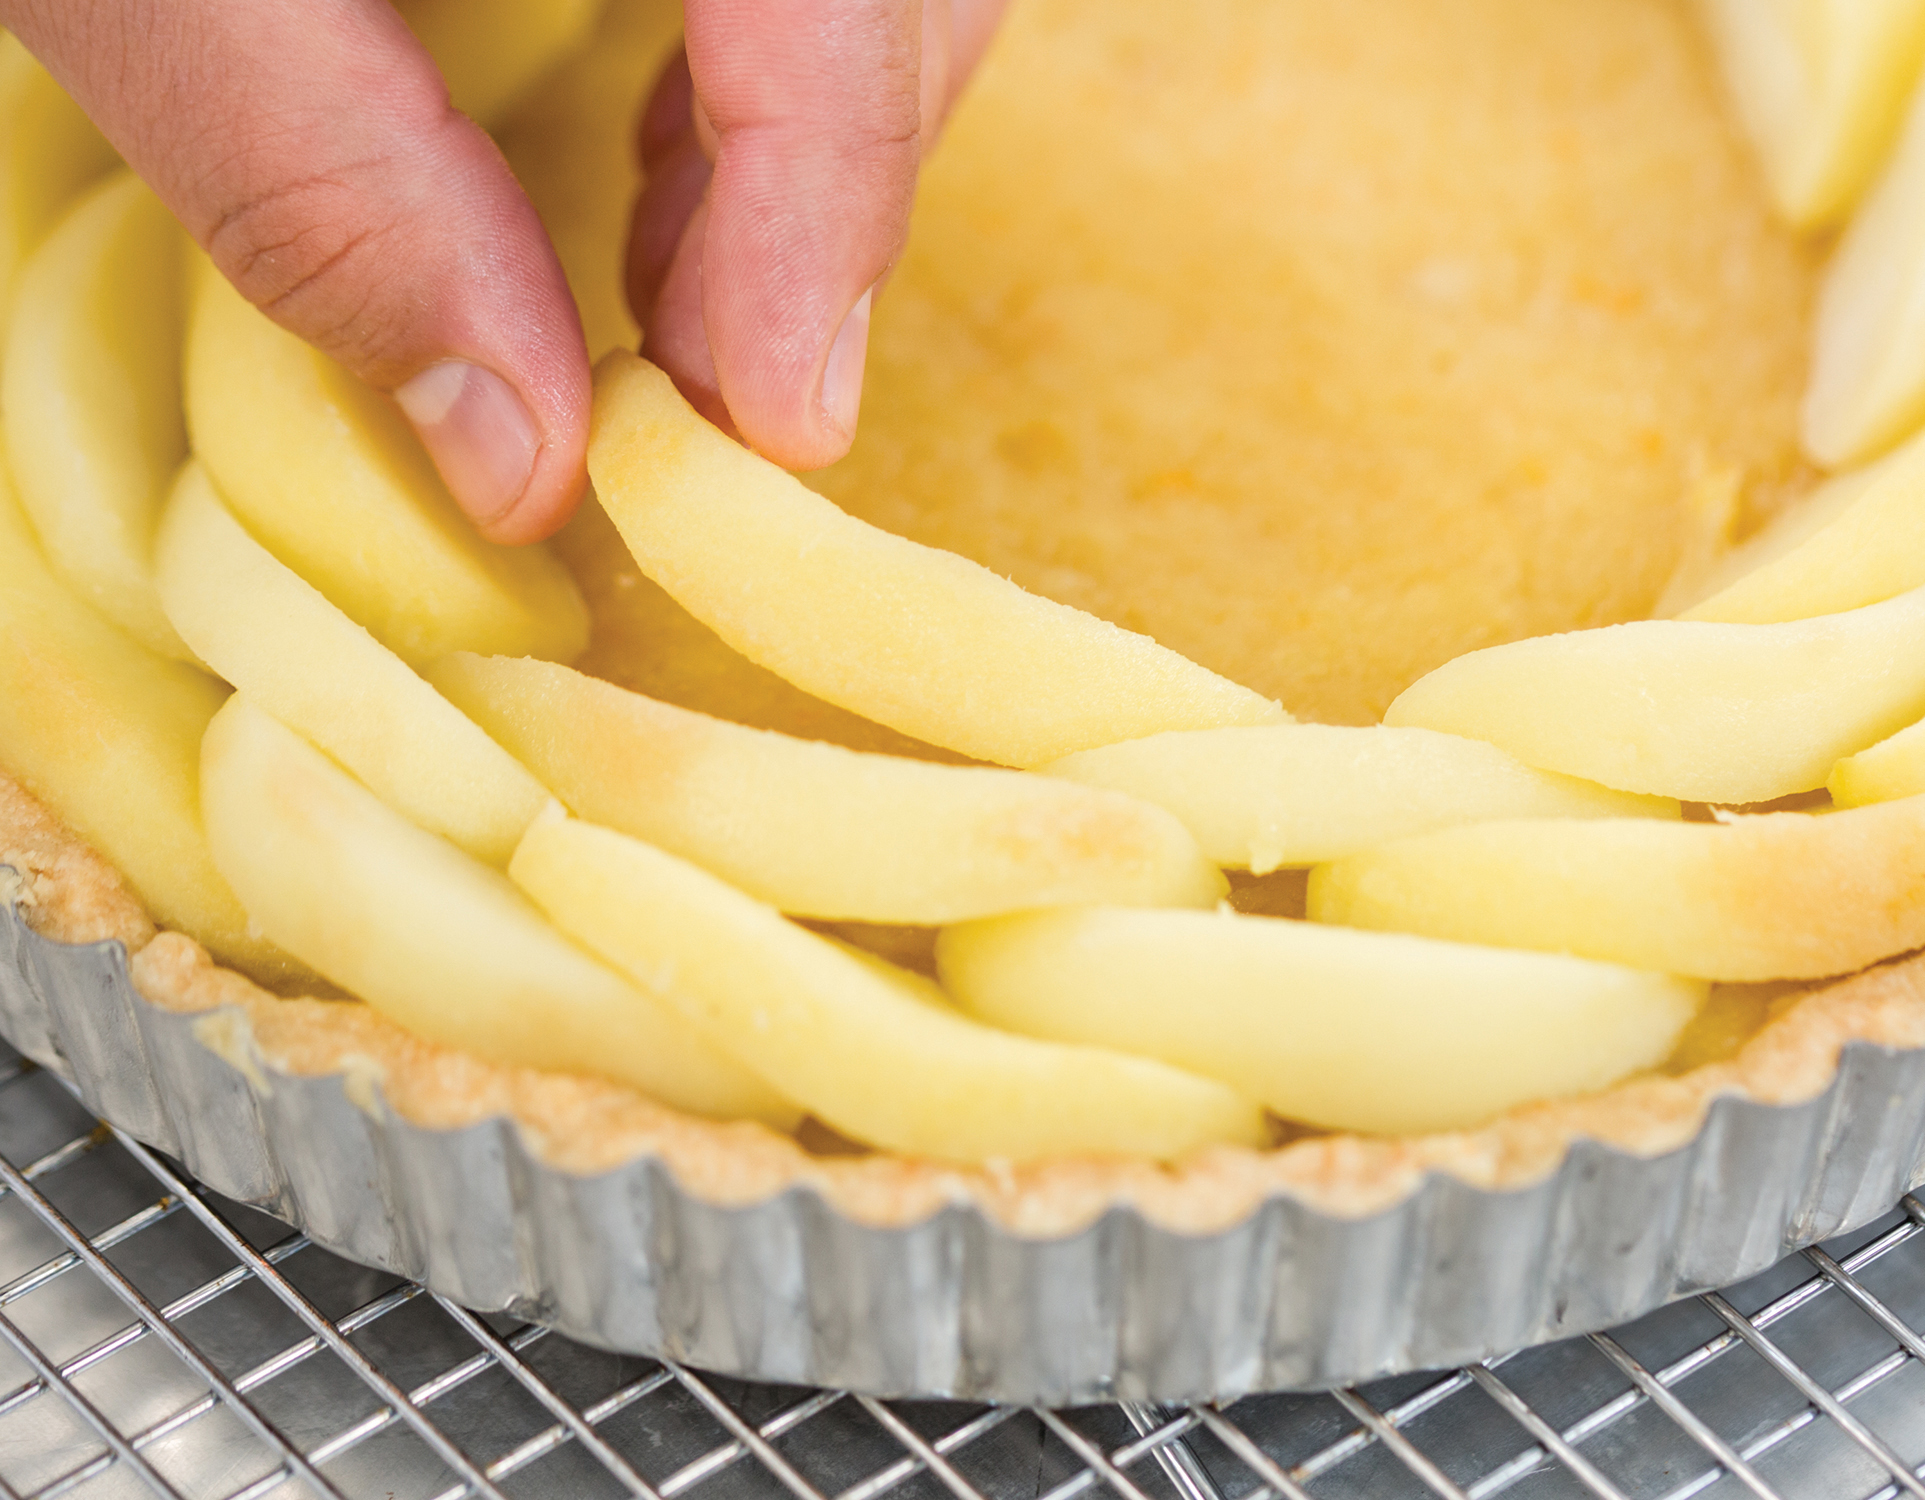
1. Starting at outer edge of tart, arrange apple slices, tightly overlapping, in concentric circles.

2. Bend 5 thinnest slices of sautéed apple to fit in center.
Makes one 9-inch tart crust
While tart crusts typically get their shortbread-like texture from butter, we achieved the same effect using melted coconut oil plus a little water. The water replaced the moisture that butter contains and prevented a crumbly crust.
1¾ cups (8¾ ounces) all-purpose flour
3 tablespoons sugar
¼ teaspoon table salt
½ cup refined coconut oil, melted and cooled slightly
3 tablespoons water
1. Whisk flour, sugar, and salt together in bowl. Add melted oil and water and stir with rubber spatula until dough forms. Roll dough into 12-inch circle between 2 large sheets of parchment paper. Remove top sheet of parchment and, working quickly, gently invert dough (still on bottom sheet parchment) onto 9-inch tart pan with removable bottom. Center dough over pan letting excess dough hang over edge and remove remaining parchment. Ease dough into pan by gently lifting edge of dough with your hand while pressing into corners and fluted sides of pan with your other hand. Run rolling pin over top of pan to remove any excess dough. Prick dough all over with fork, then wrap pan loosely in plastic wrap and refrigerate for 30 minutes. (Dough-lined tart pan can be refrigerated for up to 24 hours or frozen for up to 1 month).
2. Adjust oven rack to middle position and heat oven to 350 degrees. Line chilled tart shell with double layer of aluminum foil and fill with pie weights. Bake on rimmed baking sheet until tart shell is evenly pale and dry, 30 to 35 minutes, rotating sheet halfway through baking.
3. Remove foil and weights and continue to bake tart shell until light golden brown and firm to touch, about 20 minutes, rotating pan halfway through baking. Set aside to cool completely. (Cooled crust can be wrapped in plastic wrap and stored at room temperature for up to 24 hours. Do not refrigerate or crust will become hard.)

Serves 10 to 12
Why This Recipe Works “Showstopping” and “dead-easy” are terms rarely used to describe the same dessert. But this pull-out-all-the-stops chocolate tart with a dreamy espresso “meringue” is so elegant and sophisticated, yet so simple, that even we science-based test cooks thought it must be magic. We started with our vegan tart dough, which we rolled out to fit the tart pan; docking it and baking it with pie weights kept it in good shape. Next, we made the simplest “water ganache,” an emulsion of chocolate and hot water (instead of the usual heavy cream) that became smooth and silky with a little whisking, set up beautifully glossy at room temperature, and sliced like a dream. Finally, the crowning touch: a three-ingredient espresso “meringue” inspired by Dalgona coffee. Instant espresso crystals, when dissolved in water with sugar and then whipped, created a billowy, glossy foam that could be piped or dolloped as an elegant decoration. Not all brands of bittersweet chocolate are vegan, so check ingredient lists carefully. We used bittersweet chocolate with 60 to 70 percent cacao for the filling (higher-percentage cacao will set faster). We had the best results using a stand mixer to whip the topping; you can skip the topping if you like and just dust the tart with cocoa powder or confectioners’ sugar, or add a dollop of Coconut Whipped Cream (this page) or dairy whipped cream. For an accurate measurement of boiling water, bring a full kettle of water to a boil and then measure out the desired amount.
1 recipe Vegan Tart Dough (this page), fully baked and cooled
Filling
10½ ounces bittersweet chocolate, chopped fine
¼ cup (1¾ ounces) sugar
¼ teaspoon table salt
¾ cup boiling water
Topping (optional)
6 tablespoons (2⅔ ounces) sugar
¼ cup ice water
4 teaspoons instant espresso powder
Unsweetened cocoa powder (optional)
1. For the filling Place chocolate, sugar, and salt in bowl. Pour boiling water over chocolate mixture and let sit for 30 seconds, then whisk until mixture is completely smooth. Transfer filling to cooled tart shell, popping any large bubbles that form with a toothpick, and let tart sit at room temperature until chocolate is set, at least 2 hours and up to 24 hours. (Do not refrigerate or crust will become hard.)
2. For the optional topping Using stand mixer fitted with whisk attachment, whip sugar, ice water, and espresso powder on high speed until soft peaks form, 2 to 3 minutes. Transfer mixture to pastry bag fitted with star tip and pipe decoratively over filling (or use zipper-lock bag with corner snipped off). Dust with cocoa powder, if using, and serve.
FITTING TART DOUGH INTO THE PAN

1. Ease dough into tart pan by lifting dough and gently pressing it into corners and fluted sides of pan.

2. Run rolling pin over top of pan to remove any excess dough.

Serves 8
Why This Recipe Works Classic pecan pie relies heavily on butter and eggs to get the texture of the sweet filling right, so we knew it would be a challenge to develop a hallmark vegan version. Things seemed promising when we tried our favorite recipe and simply omitted the dairy and eggs, but the filling never set up, even long after cooling, with a result more like a sticky caramel-nut pie—good, but not a true pecan pie. Eventually we struck upon using a classic French technique usually reserved for savory sauces: a roux. By cooking a little flour in hot coconut oil and whisking in some maple syrup, sugar, and water, we were able to create a thick emulsion that gave our pie filling body and cohesion. However, by the time we had incorporated enough of the roux to hold our pie together after slicing, the cooked filling felt too heavy. By changing our tactic and baking the pie in a very low oven until it puffed, we cooked off some of the extra moisture, and our filling assumed the light custardy texture and glossy sheen we were looking for with less roux. Plus, the low temperature meant the parbaked crust never got too dark.
⅓ cup refined coconut oil
⅓ cup (1⅔ ounces) all-purpose flour
1¼ cups maple syrup
¾ cup water
⅔ cup packed (4⅔ ounces) dark brown sugar
½ teaspoon table salt
2½ cups (10 ounces) pecans, toasted and chopped
4 teaspoons vanilla extract
1 recipe Vegan Single-Crust Pie Dough (this page), fully baked and cooled
1. Adjust oven rack to middle position and heat oven to 275 degrees.
2. Heat oil in large saucepan over medium heat until shimmering. Whisk in flour and cook, whisking constantly, until combined and pale honey-colored, about 2 minutes. Whisking constantly, add maple syrup, water, sugar, and salt and cook until combined and sugar is dissolved, about 1 minute. Bring to boil, then reduce heat to medium-low and simmer, stirring occasionally, until rubber spatula leaves trail when dragged across bottom of saucepan, 3 to 5 minutes. Off heat, stir in pecans and vanilla.
3. Transfer pecan mixture to pie shell and spread evenly with rubber spatula. Bake until edges of filling are slightly puffed and few small bubbles appear around edges, 45 to 55 minutes. Let pie cool completely on wire rack until filling has set, about 4 hours, before serving.
FLAVOR BOOSTER
MAPLE SYRUP
Pure maple syrup is simply sap from sugar maple trees that has been boiled to concentrate its sugar. In the plant-based kitchen, it’s a great stand-in for honey. It’s not cheap, but anyone who’s tasted the real thing knows that there is no substitute.
Makes one 9-inch pie crust
We typically favor all-butter pie dough in the test kitchen, finding dough with all shortening to be tender but greasy and lacking structure. And vegetable oil dough is an out-and-out failure. We’d hesitated to try coconut oil, because it hardens when chilled—too hard to roll. But when we substituted room-temperature coconut oil for chilled butter (and passed on chilling the dough itself), we achieved a flaky, nicely browned crust. However, it crumbled when sliced. So, for structure we turned to a test-kitchen-standard method: We mixed only half the flour with the coconut oil; we then pulsed in the remaining flour before folding in our water. This managed the hydration level for dough that was tender and rich yet also structured enough to support the filling. This dough will be more moist than most pie doughs.
1½ cups (7½ ounces) all-purpose flour, divided
1 tablespoon sugar
½ teaspoon table salt
½ cup plus 1 tablespoon refined coconut oil
¼ cup ice water, plus extra as needed
1. Process ¾ cup flour, sugar, and salt in food processor until combined, about 5 seconds. Pinch off ½-inch pieces of oil into flour mixture and pulse until sticky and dough begins to come together, 10 to 16 pulses. (If dough clumps around blade, redistribute around workbowl.) Add remaining ¾ cup flour and pulse until just incorporated, 3 to 6 pulses; transfer to large bowl.
2. Sprinkle ice water over top of dough, then, using rubber spatula, fold and press dough to fully incorporate water and bring dough together, being careful not to overmix. If dough doesn’t come together, add up to 1 tablespoon ice water, 1 teaspoon at a time. Form dough into 4-inch disk. (Dough can be wrapped tightly in plastic wrap and refrigerated for up to 2 days or frozen for up to 1 month. Let dough sit at room temperature to soften completely before rolling out, about 2 hours if refrigerated or 4 hours if frozen.)
3. Roll dough between 2 large sheets parchment paper into 12-inch circle. Remove top parchment and gently flip into 9-inch pie plate; discard second sheet parchment. Ease dough into plate by gently lifting edge of dough with your hand while pressing into plate bottom with your other hand.
4. Trim overhang to ½ inch beyond lip of plate. Tuck overhang under itself so that folded edge is flush with edge of plate. Crimp dough evenly around edge of plate using your fingers. Wrap dough-lined plate loosely in plastic and refrigerate until dough is firm, about 45 minutes. (Dough-lined plate can be refrigerated for up to 24 hours.)
5. Adjust oven rack to lowest position and heat oven to 400 degrees. Set rimmed baking sheet in second rimmed baking sheet. Line chilled pie shell with double layer of aluminum foil, covering edges to prevent burning, and fill with pie weights. Bake on prepared sheet until pie dough looks dry and is pale in color, about 30 minutes, rotating plate halfway through baking. Remove foil and weights and continue to bake crust until light golden brown, 10 to 15 minutes, rotating plate halfway through baking. Let crust cool completely in plate on wire rack. (Cooled crust can be wrapped with plastic wrap and stored at room temperature for up to 24 hours.)
Serves 8
Why This Recipe Works For a blueberry pie with a firm, glistening filling of still-plump berries bursting with bright flavor, we favored tapioca as a thickener, which allowed the fresh berry flavor to shine through. Too much of it, though, and we had a congealed mess. Cooking and reducing half of the berries helped us cut down on the tapioca, but not enough. Another inspiration came when we remembered that apples are high in pectin. Along with a modest 2 tablespoons of tapioca, a peeled and shredded Granny Smith apple thickened the filling to a soft, even consistency. To vent the steam from the berries, we used a biscuit cutter to cut out circles in the top crust. We thought a pie wouldn’t be complete without the glistening, bronzed top that comes from an egg wash. But we successfully borrowed a technique sometimes used when baking rye breads: We painted a hot cornstarch slurry over the crust when we pulled it from the oven. Once dried, it gave the pie the gleaming, golden finish we wanted. Use the large holes of a box grater to shred the apple. Measure the tapioca, which may be sold as “minute tapioca,” before grinding it. Grind the tapioca to a powder in a spice grinder or a mini food processor.
30 ounces (6 cups) blueberries, divided
1 recipe Vegan Double-Crust Pie Dough
1 Granny Smith apple, peeled, cored, and shredded
¾ cup (5¼ ounces) plus 1 tablespoon sugar, divided
2 tablespoons instant tapioca, ground
2 teaspoons grated lemon zest plus 2 teaspoons juice
Pinch table salt
2 tablespoons refined coconut oil or unsalted butter
⅔ cup water
2 teaspoons cornstarch
1. Place 3 cups blueberries in medium saucepan. Cook over medium heat, stirring and mashing occasionally with potato masher, until half of blueberries are broken down and mixture measures 1½ cups, 7 to 10 minutes. Transfer to large bowl and let cool completely, about 20 minutes.
2. Meanwhile, adjust oven rack to lowest position and heat oven to 400 degrees. Line rimmed baking sheet with aluminum foil. Roll 1 disk of dough between 2 large sheets parchment paper into 12-inch circle. Remove parchment on top of dough round and gently flip into 9-inch pie plate; peel off second sheet parchment. Ease dough into plate by gently lifting edge of dough with your hand while pressing into plate bottom with your other hand. Roll other disk of dough between 2 large sheets parchment paper into 12-inch circle.
3. Place shredded apple in center of dish towel. Gather ends together and twist tightly to drain as much liquid as possible. Transfer apple to bowl with cooked blueberry mixture and stir in remaining 3 cups uncooked blueberries, ¾ cup sugar, tapioca, lemon zest and juice, and salt until combined. Spread mixture into dough-lined pie plate. Pinch ½-inch pieces of coconut oil and disperse evenly over top of blueberries.
4. Using 1¼-inch round cookie cutter, cut out single round in center of 12-inch dough circle. Cut out 6 more rounds from dough, 1½ inches from edge of center hole and equally spaced around center hole. Loosely roll dough circle around rolling pin and gently unroll it onto filling.
5. Trim overhang to ½ inch beyond lip of plate. Pinch edges of top and bottom crusts firmly together. Tuck overhang under itself; folded edge should be flush with edge of plate. Crimp dough evenly around edge of plate using your fingers. Sprinkle surface evenly with remaining 1 tablespoon sugar.
6. Set pie on prepared baking sheet and bake until crust is light golden brown, about 25 minutes. Reduce oven temperature to 350 degrees, rotate sheet, and continue to bake until juices are bubbling and crust is golden brown, 40 to 50 minutes.
7. Whisk water and cornstarch together in small saucepan. Whisking constantly, bring to boil over high heat; remove pot from heat. Working quickly, brush surface of pie with cornstarch mixture, being careful to avoid pooling. Let pie cool completely on wire rack, about 4 hours, before serving.
MAKING THE TOP CRUST OF BLUEBERRY PIE

Using 1¼-inch round cookie cutter, cut round from center of dough. Cut 6 more rounds from dough, 1½ inches from edge of center hole and equally spaced around center hole.
Makes enough for 1 double-crust 9-inch pie
3 cups (15 ounces) all-purpose flour, divided
2 tablespoons sugar
1 teaspoon table salt
1 cup plus 2 tablespoons refined coconut oil
½ cup ice water, plus extra as needed
1. Process 1½ cups flour, sugar, and salt in food processor until combined, about 5 seconds. Pinch off ½-inch pieces of oil into flour mixture and pulse until sticky and dough just begins to clump, 12 to 15 pulses. Redistribute dough around workbowl, add remaining 1½ cups flour, and pulse until just incorporated, 3 to 6 pulses; transfer to large bowl.
2. Sprinkle ice water over top of dough, then, using rubber spatula, fold and press dough to fully incorporate water and bring dough together, being careful not to overmix. If dough doesn’t come together, add up to 2 tablespoons ice water, 1 teaspoon at a time. Divide dough in half and form each half into 4-inch disk. (Dough can be wrapped tightly in plastic wrap and refrigerated for up to 2 days or frozen for up to 1 month. Let dough sit at room temperature to soften completely before rolling out, about 2 hours if refrigerated or 4 hours if frozen.)
Serves 12 to 16
Why This Recipe Works In pursuing a plant-based cheesecake that would be as irresistibly creamy as any dairy rendition, we first focused on creating a thick, creamy base. So we looked to cashews: Soaked and pureed, the mild nuts made a velvety ricotta-like mixture. However, once unmolded from the pan, the cake slumped into a mound of pumpkin mousse. We tried fortifying the base with silken tofu, but it turned out rubbery. Blotting the pumpkin puree with paper towels before mixing it with the other ingredients helped eliminate some moisture, but the cake still lacked the dense, set-up structure of true cheesecake. So we tried some melted coconut oil. Because coconut oil becomes solid at or below room temperature, the cheesecake set up into a sliceable dessert after some refrigeration time. A small amount of cream cheese (plant-based or dairy) provided tanginess. Not all graham crackers are vegan, so check ingredient lists carefully. For the best results, chill the cheesecake for the full 24 hours. Don’t let the cheesecake sit at room temperature for more than 1 hour; it will soften too much.
Filling
4 cups (1¼ pounds) raw cashews
1 (15-ounce) can unsweetened pumpkin puree
⅔ cup refined coconut oil, melted and hot
2 tablespoons lemon juice
1½ tablespoons vanilla extract
1⅓ cups (10⅓ ounces) sugar
1 teaspoon ground cinnamon
¾ teaspoon table salt
½ teaspoon ground ginger
¼ teaspoon ground nutmeg
¼ teaspoon allspice
8 ounces plant-based cream cheese, softened
Crust
8 whole graham crackers, broken into 1-inch pieces
1 tablespoon sugar
⅓ cup refined coconut oil, melted
1. For the filling Place cashews in bowl and add water to cover by 1 inch. Soak at room temperature for at least 12 hours or up to 24 hours.
2. For the crust Adjust oven rack to lower-middle position and heat oven to 325 degrees. Spray bottom and sides of 9-inch springform pan with vegetable oil spray. Line pan bottom with parchment paper and grease parchment.
3. Process graham crackers and sugar in food processor to fine, even crumbs, about 30 seconds. Sprinkle melted oil over top and pulse to incorporate, about 5 pulses. Sprinkle crumbs into prepared pan and press into even layer with bottom of dry measuring cup. Bake until fragrant and edges begin to darken, about 13 minutes. Let cool completely on wire rack, about 1 hour.
4. While crust cools, line baking sheet with triple layer of paper towels. Spread pumpkin puree on paper towels into even layer. Cover pumpkin with second triple layer of paper towels and press firmly until paper towels are saturated. Discard top layer of towels, then transfer pumpkin puree to now-empty food processor bowl.
5. Rinse and drain soaked cashews well. Add cashews, hot melted oil, lemon juice, and vanilla to food processor and process until thoroughly combined and cashews are finely chopped, 2 to 3 minutes, scraping down sides of bowl as needed. Add sugar, cinnamon, salt, ginger, nutmeg, and allspice. Continue to process until thoroughly combined, about 1 minute. Add cream cheese and process until very smooth and creamy, about 3 minutes, scraping down sides of bowl as needed (mixture will be grainy like ricotta cheese).
6. Pour filling into cooled crust and, using offset spatula dipped in hot water and wiped dry, smooth top. Refrigerate for at least 6 hours or up to 24 hours.
7. To unmold cheesecake, run thin knife between cake and sides of pan, then remove sides of pan. Slide thin metal spatula between parchment and crust and carefully slide cheesecake onto plate. To slice, dip sharp knife in hot water and wipe dry between cuts. Serve immediately.
Serves 6
Why This Recipe Works Making a luscious chocolate pudding by substituting avocados for the cream and eggs has become an established vegan trend. But more often than not, these puddings are a far cry from the silky-smooth, ultra-chocolaty pudding we crave, as they yield a grainy texture and lackluster chocolate flavor that doesn’t conceal the vegetal notes. We knew we could do better without making the recipe too complicated. Rather than simply blending everything together, we started by creating a simple hot cocoa syrup in a saucepan (with a touch of espresso powder, vanilla, and salt to enhance the chocolate flavor). Meanwhile, we processed the flesh of two large avocados for a full 2 minutes, until it was absolutely smooth. Next, with the food processor running, we carefully streamed in the cocoa syrup until the mixture was velvety and glossy. We finished by blending in a moderate amount of melted dark chocolate to give our pudding additional richness and wonderfully full chocolate flavor.
1 cup water
¾ cup (5¼ ounces) sugar
¼ cup (¾ ounce) unsweetened cocoa powder
1 tablespoon vanilla extract
1 teaspoon instant espresso powder (optional)
¼ teaspoon table salt
2 large ripe avocados (8 ounces each), halved and pitted
3½ ounces bittersweet chocolate, chopped
1. Combine water; sugar; cocoa; vanilla; espresso powder, if using; and salt in small saucepan. Bring to simmer over medium heat and cook, stirring occasionally, until sugar and cocoa dissolve, about 2 minutes. Remove saucepan from heat and cover to keep warm.
2. Scoop flesh of avocados into food processor bowl and process until smooth, about 2 minutes, scraping down sides of bowl as needed. With processor running, slowly add warm cocoa mixture in steady stream until completely incorporated and mixture is smooth and glossy, about 2 minutes.
3. Microwave chocolate in bowl at 50 percent power, stirring occasionally, until melted, 2 to 4 minutes. Add to avocado mixture and process until well incorporated, about 1 minute. Transfer pudding to bowl, cover, and refrigerate until chilled and set, at least 2 hours or up to 24 hours. Serve.
Serves 8
Why This Recipe Works Rice puddings are found in cuisines all over the world, from India to Mexico. We especially love Greek-style rice pudding, which uses short-grain rice and is distinguished by its custardy and velvety-smooth texture and a hit of bright lemon flavor. We were delighted to discover that swapping in plant-based milk for dairy milk did not detract from our pudding’s texture or taste. For the most appealing rice flavor and satisfyingly rich consistency, we cooked starchy short-grain Arborio rice in water and then added milk (plant-based or dairy) to make the pudding. Bay leaves, a traditional addition to Greek rice pudding, offered a balanced floral note. Adding the lemon zest off the heat ensured that its citrus notes weren’t dulled by cooking. We adjusted the texture of the pudding just before serving so that it would be nicely thick≈and creamy but not heavy and to accommodate for the differences in texture and thickness among the different types of plant-based milks.
2 cups water
1 cup Arborio rice
½ teaspoon table salt
1 vanilla bean
4½ cups plant-based milk or dairy whole milk, plus extra as needed
½ cup (3½ ounces) sugar
½ cinnamon stick
2 bay leaves
2 teaspoons grated lemon zest
1. Bring water to boil in large saucepan over medium-high heat. Stir in rice and salt. Reduce heat to low, cover, and simmer until water is almost fully absorbed, 15 to 20 minutes.
2. Cut vanilla bean in half lengthwise. Using tip of paring knife, scrape out seeds. Stir vanilla bean and seeds, milk, sugar, cinnamon stick, and bay leaves into rice. Increase heat to medium-high and bring to simmer. Cook, uncovered, stirring often, until rice is soft and pudding has thickened to consistency of yogurt, 35 to 45 minutes.
3. Off heat, discard bay leaves, cinnamon stick, and vanilla bean. Stir in lemon zest. Transfer pudding to large bowl and let cool, about 2 hours. Stir pudding to loosen and adjust consistency with extra milk as needed. Serve at room temperature or chilled. (Pudding can be refrigerated for up to 2 days.)
Serves 6 to 8
Why This Recipe Works Describing this as a porridge-type pudding makes it sound rather humble, but the saffron, cardamom, and dates flavoring this dessert make it anything but ordinary. Sweetened grain puddings are popular throughout the Middle East, flavored with a variety of aromatic ingredients including rose water, orange blossom water, and more. As with our rice pudding (this page), swapping in plant-based milk for dairy milk worked perfectly. Traditional semolina flour, which is made from durum wheat, thickened the pudding nicely and gave it a pleasantly coarse texture; toasting the semolina added flavor depth. Almonds brought a nutty crunch, and dates offered a contrasting honeyed sweetness. Traditional recipes often call for chilling the pudding, but we preferred to serve it warm so the texture was creamy rather than firm. We adjusted the texture of the pudding just before serving so that it would be nicely thick but not heavy and to accommodate for the differences in texture and thickness among the different types of plant-based milks.
1 tablespoon extra-virgin olive oil
¾ cup fine semolina flour
4½ cups plant-based milk or dairy whole milk, plus extra as needed
½ cup (3½ ounces) sugar
½ teaspoon ground cardamom
⅛ teaspoon saffron threads, crumbled
⅛ teaspoon table salt
½ cup slivered almonds, toasted and chopped
3 ounces pitted dates, sliced thin (½ cup)
1. Heat oil in 12-inch skillet over medium heat until shimmering. Add semolina and cook, stirring occasionally, until fragrant, 3 to 5 minutes; transfer to bowl.
2. Bring milk, sugar, cardamom, saffron, and salt to simmer in large saucepan over medium heat. Whisking constantly, slowly add semolina, 1 tablespoon at a time, and cook until mixture thickens slightly and begins to bubble, about 3 minutes. Remove saucepan from heat, cover, and let pudding rest for 30 minutes.
3. Stir pudding to loosen and adjust consistency with extra warm milk as needed. Sprinkle individual portions with almonds and dates before serving warm.

Serves 8 (Makes 1 quart)
Why This Recipe Works Developing a recipe for ice cream without milk, cream, or eggs seemed like a pretty tall order, but we were determined to make a thick, creamy plant-based frozen treat with the dense texture of the premium ice creams we love. Tasters enjoyed the clean coconut flavor and silky texture of canned coconut milk for the base. In addition to sugar, we added corn syrup, which minimized unpleasant ice crystal formation. Cornstarch also prevented ice crystal formation while acting as a stabilizer. But tasters noticed a persistent grainy, starchy texture—and it wasn’t caused by the cornstarch. As it turned out, it came from unemulsified bits of coconut fat. To solve this, we blended our hot mixture after cooking so that the fat became fully emulsified. The lightly coconutty base was the perfect backdrop for flavor variations—we liked one version with lime and another with warm spices. We prefer to make this recipe in a canister-style ice cream maker; the ice cream was grainy when made in self-refrigerating models. Be sure to freeze the empty canister for at least 24 hours and preferably for 48 hours before churning. Make sure your blender is only two-thirds full or less, open the lid vent, and hold in place with a dish towel in step 2. Do not use light coconut milk in this recipe.
2 (14-ounce) cans coconut milk, divided
2 tablespoons cornstarch
½ cup (3½ ounces) sugar
¼ cup light corn syrup
1 teaspoon vanilla extract
¼ teaspoon table salt
1. Shake unopened cans of coconut milk to form homogeneous mixture. Whisk ¼ cup coconut milk and cornstarch together in small bowl and set aside. Combine remaining coconut milk, sugar, corn syrup, vanilla, and salt in large saucepan. Cook over medium-high heat, whisking often to dissolve sugar and break up any clumps, until small bubbles form around edge of saucepan and mixture registers 190 degrees, 5 to 7 minutes. Reduce heat to medium. Whisk cornstarch mixture to recombine, then whisk into coconut milk mixture in pan. Cook, constantly scraping bottom of pan with rubber spatula, until thickened slightly, about 30 seconds.
2. Carefully transfer mixture to blender, let cool slightly, about 1 minute, then process on high speed for 1 minute. Pour ice cream base into large bowl and let cool until no longer steaming, about 20 minutes. Cover with plastic wrap and refrigerate for at least 6 hours or up to 24 hours. (Alternatively, place bowl over ice bath of 6 cups ice, ½ cup water, and ⅓ cup table salt and chill base to 40 degrees, stirring occasionally, about 1½ hours.)
3. Whisk chilled ice cream base until recombined and smooth, then transfer to ice cream machine and churn until mixture has consistency of soft-serve ice cream and registers 22 to 23 degrees. Transfer to airtight container, cover, and freeze until firm, at least 6 hours. Serve. (Ice cream is best eaten within 2 weeks.)
VARIATION
Add ¾ teaspoon ground cinnamon and ⅛ teaspoon ground cloves to coconut milk mixture in saucepan before cooking in step 1. Serve topped with toasted sliced almonds.
Substitute 1 tablespoon lime juice for vanilla extract. Add 2 teaspoons grated lime zest to coconut milk mixture with lime juice in step 1.
Serves 8 (Makes 1 quart)
Why This Recipe Works This supersimple, silky-smooth ice cream ditches the ice cream machine altogether, instead using only standard kitchen equipment. Bananas were a perfect choice for the base: Their high pectin content allowed them to remain creamy when frozen and their natural sweetness meant that we didn’t even need to add any sugar. We started by simply freezing whole peeled bananas and then sliced them and processed them into a smooth puree. Letting the bananas come to room temperature for 15 minutes before slicing made them easier to cut through and kept the processing time to only 5 minutes. The end result had good banana flavor but wasn’t as creamy as tasters wanted. We thought about adding plant-based creamers, but these are typically lower in fat than dairy heavy cream, and since there is no added sugar here, the fat component was important. So instead, we added canned coconut milk to reach the goal of our desired creamy consistency. (And likewise, if you make this with dairy, we recommend heavy cream.) Lemon juice and cinnamon gave the ice cream more dimension, while vanilla rounded out the other flavors. Be sure to use very ripe, heavily speckled (or even black) bananas in this recipe. You can skip the freezing in step 3 and serve the ice cream immediately, but the texture will be softer.
6 very ripe bananas
½ cup canned coconut milk or dairy heavy cream
1 tablespoon vanilla extract
1 teaspoon lemon juice
¼ teaspoon table salt
¼ teaspoon ground cinnamon
1. Peel bananas, place in large zipper-lock bag, and press out excess air. Freeze bananas until solid, at least 8 hours.
2. Let bananas sit at room temperature to soften slightly, about 15 minutes. Slice into ½-inch-thick rounds and place in food processor. Add coconut milk, vanilla, lemon juice, salt, and cinnamon and process until smooth, about 5 minutes, scraping down sides of bowl as needed.
3. Transfer mixture to airtight container and freeze until firm, at least 2 hours or up to 5 days. Serve.
VARIATIONS
Banana–Peanut Butter Ice Cream
Reduce amount of coconut milk to ¼ cup. Add ¼ cup peanut butter to food processor with bananas in step 2.
Banana-Chocolate Ice Cream with Walnuts
Add ½ cup unsweetened cocoa powder to food processor with bananas in step 2. Before removing ice cream from processor, add 1 cup walnuts, toasted and chopped, and pulse to combine, about 5 pulses.

Serves 8 (Makes 1 quart)
Why This Recipe Works Raspberry sorbet is mouth-wateringly fruity—but it’s often too icy to be worth eating. For smooth, velvety scoops without the jagged ice crystals that often develop on homemade sorbets, we froze a small portion of the base separately, adding it back to the rest before churning. Because this small amount froze so rapidly, there wasn’t enough time for large ice crystals to grow; mixing this superchilled mixture into the larger base encouraged the growth of similarly small crystals, for a fine-textured result. Using corn syrup in addition to sugar also contributed to the smooth texture. We added store-bought pectin to boost the berries’ natural amount and give the sorbet stability in and out of the freezer. If using a canister-style ice cream machine, be sure to freeze the empty canister for at least 24 hours and preferably 48 hours before churning. For self-refrigerating machines, prechill the canister by running the machine for 5 to 10 minutes before pouring in the sorbet mixture. Let the sorbet sit at room temperature for 5 minutes to soften before serving. Fresh or frozen berries may be used. If using frozen berries, thaw them before proceeding. Don’t use regular Sure-Jell here.
1 cup water
1 teaspoon Sure-Jell for Less or No Sugar Needed Recipes
⅛ teaspoon table salt
1¼ pounds (4 cups) raspberries
½ cup plus 2 tablespoons (4⅓ ounces) sugar
¼ cup light corn syrup
1. Heat water, pectin, and salt in medium saucepan over medium-high heat, stirring occasionally, until pectin is fully dissolved, about 5 minutes. Remove saucepan from heat and let cool slightly, about 10 minutes.
2. Process raspberries, sugar, corn syrup, and cooled water mixture in food processor until smooth, about 30 seconds. Strain puree through fine-mesh strainer into bowl, pressing on solids to remove seeds and pulp (you should have about 3 cups puree); discard solids. Transfer 1 cup puree to small bowl and place remaining puree in large bowl; cover both bowls with plastic wrap. Place large bowl in refrigerator and small bowl in freezer and chill for at least 4 hours or up to 24 hours. (Small bowl will freeze solid.)
3. Remove puree from refrigerator and freezer. Using tines of fork, scrape frozen puree into large bowl with chilled puree. Stir occasionally until frozen puree has fully dissolved.
4. Transfer mixture to ice cream machine and churn until mixture resembles thick milkshake and lightens in color, 15 to 25 minutes. Transfer to airtight container and freeze until firm, at least 2 hours or up to 5 days. Serve.
VARIATION
Raspberry Sorbet with Ginger and Mint
Substitute ginger beer for water in step 1. Add 2-inch piece of peeled and thinly sliced ginger and ¼ cup mint leaves to food processor with raspberries. Decrease amount of sugar to ½ cup.
Serves 8 (Makes 1 quart)
Why This Recipe Works Perfect lemon Italian ice is tart and sweet and never bitter and always supremely refreshing on a hot summer day. A cup of sugar gave our lemon ice the ideal amount of sweetness; less sugar left it with a pronounced bitterness, and more sugar made our ice taste too much like frozen lemonade. Using spring water might seem fussy, but we found that it really made a difference in this recipe, with a cleaner, less metallic flavor than tap water. We opted to add a bit of vodka to ensure a soft, slightly slushy texture (softer than our Raspberry Sorbet) and a pinch of salt to boost the flavor. To achieve a fluffy ice with a pleasingly coarse-grained texture and crystalline crunch, we froze the mixture in ice cube trays and then pulsed the cubes in the food processor right before serving. For even more refreshment, try the variation with mint. Or for a softer-edged Italian ice, try the orange version.
2¼ cups water, preferably spring water
1 cup lemon juice (6 lemons)
1 cup (7 ounces) sugar
2 tablespoons vodka (optional)
⅛ teaspoon table salt
1. Whisk all ingredients together in bowl until sugar has dissolved. Pour mixture into 2 ice cube trays and freeze until solid, at least 3 hours or up to 5 days.
2. Place medium bowl in freezer. Pulse half of ice cubes in food processor until creamy and no large lumps remain, about 18 pulses. Transfer mixture to chilled bowl and return to freezer. Pulse remaining ice cubes; transfer to bowl. Serve immediately.
VARIATIONS
Bring 1 cup water, sugar, and salt to simmer in small saucepan over medium-high heat, stirring occasionally. Off heat, stir in ½ cup torn fresh mint leaves and let steep for 5 minutes. Strain mixture through fine-mesh strainer into medium bowl. Stir in remaining 1¼ cups water, lemon juice, and vodka and let cool to room temperature, about 15 minutes. Freeze and pulse ice cubes as directed.
Reduce lemon juice to 2 tablespoons and sugar to ¾ cup. Add ¾ cup orange juice (2 oranges) to mixture in step 1.