Bottling requires some basic pieces of equipment, assuming that you will bottle condition your beer.
 Bottles. I suggest buying new bottles at a homebrew supply shop or selecting heavy-duty returnable bottles that can be stripped of their labels and cleaned up. Do not use lightweight, one-way glass bottles that have become the norm for 6-packs of American beer. Even the classic bar bottles that were returnable longnecks have faded into obscurity. I like flip-top bottles, because they are made of heavy glass and do not require caps. If you want flip-tops, expect to pay a pretty penny for them and make sure you get your bottles back if you give beer to friends. Keep in mind that the rubber gasket that seals the lid will require replacement every so often and also requires routine cleaning after every use.
Bottle trees. This tool is used to air dry bottles and make the chore of cleaning bottles a little easier.
When you use your bottling equipment for the first time, remember to have priming sugar on your shopping list so that you have everything you need to complete the task.
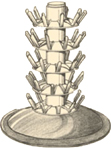
Bottle tree
Hose and racking cane. To get the beer into the bottle, you need a hose. The hose and racking cane you use to rack beer from fermenter to fermenter and from fermenter to bottling bucket works here as well. Little gizmos (racking tube clips) are available to shut off the flow from your siphon hose; these make it easier to transition from one bottle to the next without having to squeeze the siphon hose and risking a mess if not done properly.
Bottle capper and caps. These are must-haves.
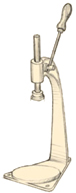
Bench bottle capper
Counterpressure kit. A more advanced bottling technique is counterpressure bottle filling. It allows one to bottle carbonated beer that can be consumed immediately after bottling. This technique requires a keg setup with a carbon dioxide cylinder and a counterpressure filler. These fillers have a valve used to pressurize the bottle with carbon dioxide, a beer inlet to bring beer into the pressurized bottle, and a vent valve to allow gas to exit the bottle as beer flows in. If you want to filter your beer and not reyeast for bottle conditioning, these fillers are a must-have tool.
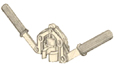
Hand bottle capper
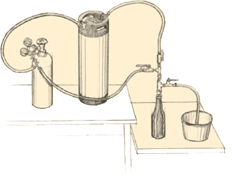
Counterpressure bottle filler
Q What are the basics of bottling?
A Bottling is very easy with the proper equipment. Begin with an elevated bottling bucket so that you are not working on the floor. To bottle a batch, all you need to do is rack the beer into the bottling bucket, mix in your priming sugar, siphon the beer into the bottle, and cap the bottle. It is important to have consistent fill heights and to leave a minimum amount of headspace of about 1/2 inch (12–13 mm), so that you have minimal air in the head-space. Excessive headspace can result in oxidation as well as undercarbonation.

Q Do you have to sanitize bottle caps before using them?
A Many brewers feel the need to boil their caps to sanitize them before bottling. In my opinion, this step is overly cautious if you are using clean caps that come from a plastic bag. Commercial brewers do not sanitize caps and rely on a supply of clean caps to mitigate the potential of contaminating beer with stuff on the cap. Some crowns have liners in them that scavenge oxygen; moisture activates the substance in the liner. If you use this type of crown, you do not want to get it wet before use, as moisture will render the special liner useless.
Q How can I figure out how much priming sugar to add for carbonation?
A The two most important things to consider before adding priming sugar to your fermented beer and bottling it are 1) the volume of beer you wish to carbonate, and 2) the amount of carbonation you want in the beer.
Assuming you rack your fermented beer to a bottling bucket on bottling day, determining volume is easy. I recommend fixing a vertical strip of masking tape to the outside of the bucket and calibrating the tape by adding a quart (946 mL) of water to the bucket at a time and placing a mark on the tape for each addition.
Volume is important because the amount of priming sugar depends on the amount of beer being carbonated. Even if you always brew the same batch size, the volume of beer to be carbonated varies because some beer may have been lost during fermentation through blowoff, and the amount of beer left in the primary after racking varies with the fluffiness of the yeast.
The second question is: How much carbonation do you personally desire? I can’t help you on this decision, but let’s just say your last brew was carbonated to your satisfaction and that you added ⅔ cup (158 mL) of priming sugar to 4¼ gallons (16 L) of beer. That works out to be 0.157 cups (37 mL) per gallon (3.8 L) of beer. One cup is roughly the same as 237 mL. Using the metric system, we get 158 mL (⅔ cup) of priming sugar per 16 L (4¼ gallon) or 10 mL per liter.
The next time you brew and get ready to bottle, you can use this figure: Suppose you have 4¾ gallons (18 L) of beer and want to know how much priming sugar to add. This is easily determined by multiplying 4¾ gallons by 0.157 cups of sugar per gallon — you need ¾ cup of sugar. This is equal to about 180 mL. In a small volume of beer, the carbonation produced by ⅔ cup (158 mL) versus ¾ cup (176 mL) is the difference between fully carbonated and undercarbonated. Find out the levels you like in your beer, and you can apply this calculation to future beers.
Q How much carbon dioxide is produced by the different priming sugars commonly used?
A Corn sugar (glucose) and invert sugar (equal mixtures of glucose and fructose) produce the same results when used for carbonation. Both types of sugars produce 0.489 grams (.017 oz.) of carbon dioxide per gram of sugar (dry weight) when completely fermented by yeast. Sucrose (table sugar) yields 0.515 grams (.018 oz.) of carbon dioxide per gram of sugar (dry weight). Dry malt extract and wort yield a wide range of carbon dioxide levels, because wort fermentability depends on the mashing schedule.
Q What are volumes of carbon dioxide?
A Beers range in carbonation levels, and one measure of carbon dioxide content is the volume. One liter of beer containing two volumes of carbon dioxide has enough carbon dioxide to fill a 2-liter balloon at atmospheric pressure and 32°F (0°C). Most beers range from 2 to 3 volumes of carbon dioxide. In simple terms, 2 volumes seems flat, 2.5 volumes is typical of most bottled beers, and 3 volumes is on the high side for most beers (some weizen beers are up around 5 volumes). Another scale is to express carbonation in terms of grams of carbon dioxide per liter of beer; 4, 5, and 6 grams/liter correspond to 2.05, 2.55 and 3.05 volumes, respectively.
Q I’ve been conditioning my newly bottled beer upstairs because it’s much too cold in the basement. I keep it next to the heater vent, where the average temp is 72°F (22°C). My beer has been carbonated in about 3 to 4 days, whereas in the summer it takes about 2 weeks in the basement. I know that good things come to those who wait, but am I doing my beer a disservice by this method of turbo conditioning?
A This is a real world problem for commercial breweries selling bottle-conditioned beers. As you point out, storing beer in the basement or an underground cellar reduces the air temperature to the average earth temperature of the location of the cellar. In most parts of the world, the average earth temperature is about 55°F (13°C). This temperature impairs the speed of bottle conditioning and, for many ale strains, is really too cold to get much carbonation at all.
This is why bottle-conditioned beers are typically stored in warm cellars controlled to a comfortable temperature of about 75°F (22°C). This temperature is plenty warm for the yeasties to do their work in a reasonable time frame and not so warm that the beer starts to prematurely age because of high storage temperature. This practice is relatively common in Europe and the United States among brewers who bottle condition their beers. I know three breweries with warm cellars: Duvel in Belgium, Sierra Nevada in California, and New Belgium in Colorado. Sierra Nevada holds its beer for about a week before releasing it for sale.
So, in the commercial world of brewing where time is money, warm conditioning reduces the number of cases that are sitting around waiting for carbonation to happen. Bean counters like to minimize this type of inventory. At home, the economic drivers of inventory control are different, but why wait 2 weeks to sample your next tasty brew when you can cut the time to 1 week? There is no reason whatsoever not to practice this method . . . I declare open season on “turbo conditioning”!
Q I bottled my beer with priming sugar 1 week ago, and it is still flat. Why isn’t it carbonating?
A At this stage of the game, you really have only one option, and that is to wait and see if the beer will carbonate with more time. One week is often too short for beer to carbonate in the bottle. If a batch has a relatively high concentration of healthy yeast and the bottles are conditioned at room temperature, it is common to have fully carbonated beer in a week’s time.
However, if the yeast count is low or in poor condition (like old yeast from a batch that has been aged for several weeks prior to bottling), carbonation may take much longer. If this batch remains flat, a quick fix that would make the beer drinkable would be to blend it with a carbonated beer. If it is a flat pale ale, blend it with a carbonated porter in your favorite mug and have a half-and-half. The blend will have a lower carbonation level, but it won’t taste quite so flat.
This batch may be a lost cause with respect to its drinking qualities, but it does present a good lesson on bottle conditioning. For brewers who put the entire batch in a keg and wind up with flat beer, I would suggest checking the keg for gasket leaks — after all, if the keg doesn’t hold pressure, the beer won’t carbonate! The other thing I always question when dealing with weights and volumes is accuracy. Recipes always give priming sugar suggestions based on a 5-gallon (19 L) batch, but a 5-gallon batch rarely contains 5 gallons of beer when it comes time to bottle. When you measured your priming sugar are you sure you measured out the right amount? I don’t like relying on sugar volumes for priming (⅔ cup, for example), because powders do not pack or settle consistently. That’s the main reason why bakers measure flour volume after sifting. I prefer working with weight measurements.
Finally, think about the yeasts. These little critters pump out the carbon dioxide needed for carbonation and can only do that if they are active. If you have healthy yeast, it really does not take much for conditioning.
Q To what extent does the use of various dry malt extracts as priming sugars contribute to the flavor or color of the beer?
A This is a question I often ask myself when reading recipes. It seems to me that using dry malt extract or saving wort for priming is a pain in the neck. The contribution of color or flavor to beer from priming sugar is insignificant compared to the flavor and color present in wort before fermentation. Even if the priming sugar added some flavor, an argument could be made for adding it before wort boiling, for example, brown sugar.
I think the best sugar to use for priming is either corn or invert sugar because they are both 100 percent fermentable and easy to handle. The problem with using wort or dry malt extract (DME) for priming is the inconsistent fermentability of wort. If you use DME with an unknown fermentability for priming, then it’s impossible to control the carbonation level. Commercial brewers who prime with wort measure wort fermentability before priming and base the amount of primings on this measured number.
The main difference between beers primed with DME or wort versus those primed with corn sugar is that the beers primed with corn sugar are not in compliance with the Reinheitsgebot, the German beer purity law.
Invert sugar consists of equal parts glucose and fructose. When fructose is transported into the yeasts, it’s converted to glucose and enters the glycolytic pathway, where it’s used as cellular fuel and ends up as alcohol and carbon dioxide. When maltose from wort is transported into the yeast cell, it’s first converted to two molecules of glucose and then follows the same biochemical pathway as the glucose from corn sugar. The only difference between wort and a corn sugar solution are the nonfermentable sugars, proteins, and color compounds present in wort. These compounds are present in much higher concentrations in the original wort.
Q I have some leftover wort with a gravity of 1.113 SG and would like to use it to prime my latest batch of barleywine (original gravity 1.018), but I don’t know how much to use. I don’t want bottle bombs, nor do I want undercarbonated brew. How much should I add in a 4½-gallon (17 L) batch to give the proper carbonation level?
A Priming with wort is very tricky, because it is not completely fermentable and its fermentability varies from batch to batch. Breweries that bottle condition with wort determine the fermentability of each lot before use and have tables that enable them to consistently carbonate with it.
If you want your barleywine to be its best and want to carbonate with wort, add 1 liter (34 oz.) of the high-gravity wort to the beer, condition it in a keg, and carefully bleed off the excess pressure to fine-tune the carbonation level. If you try to bottle it using wort, the results very likely will be disappointing unless you do some trial runs to determine the right amount to add. By using a series of voodoo calculations, I estimate your 1.113 SG wort has 190 grams (7 oz.) of fermentable sugar in 1 liter (34 oz.). These 190 grams of sugar will produce about 95 grams (3.4 oz.) of carbon dioxide. A good carbonation level is 5 grams of carbon dioxide per liter of beer; therefore, to carbonate 4.5 gallons (17 L) of beer you will need 900 mL (30 oz.) of your 1.113 SG wort. This sounds convincing, but I don’t have much faith in bottle conditioning unless I run some trials. So condition it in a keg or, if bottling, use plain old corn sugar for the priming.
Q Does bottle conditioning greatly improve beer stability? Is it possible to bottle condition my homebrew so there is little or no yeast sediment at the bottom of the bottle?
A Contrary to popular belief, bottle conditioning is not the cure-all to the problems of bottling. It is true that yeast can scavenge some oxygen from bottle-conditioned beer and perhaps ward off oxidation, but the yeast is also very capable of causing flavor deterioration. This process begins when yeast cells autolyze and release intracellular enzymes and yeasty flavors into beer. Some of these enzymes, called esterases, break down esters (esters contribute fruitiness to beer) and alter the beer’s aroma profile. Other enzymes, proteases, chew up foam-stabilizing proteins and reduce foam stability over time. The flavors released when yeast autolyze can make a good beer taste like dead and decaying yeast. Yum! So there are some good reasons to control the amount of yeast in a bottle-conditioned beer. The idea is to have enough yeast to allow for conditioning while keeping the level low enough to minimize the negative effects of yeast autolysis.
You want to begin by first clarifying your homebrew. Several clarification methods do not require filtration. Beer naturally clarifies if held cold, 32°F (0°C), from 5 days to several weeks. Cold storage not only gets rid of most of the yeast, but it also chillproofs the beer, which guards the beer from subsequent chill hazes caused by the coprecipitation of proteins and tannins in cold beer. Fining agents, such as isinglass and collagen, can be used to quickly remove yeast from the beer. These finings also provide some protection from chill hazes, although they are not as effective as cold storage.
Another useful technique is to select yeasts that have good flocculation properties. These kinds of yeast will naturally drop from the beer at the end of fermentation. Of course, flocculent yeast coupled with cold storage or finings makes for the easiest clarification, if filtration is not an option. If you do have a filter, then use it to filter cold beer. It is always best to filter beer colder than the anticipated minimum serving temperature to guard against unwanted chill hazes.
After your beer is clarified, add yeast and priming sugar to it. Remember that the quantity of priming sugar depends not only on the desired carbonation level in the finished beer, but on how much beer you are bottling. A bottling bucket with a volumetric scale is always best. The tricky part of this process is adding the yeast, because not much yeast is needed. The target concentration in the beer is about 1,000,000 cells per milliliter of beer. This is about 10 times less than the amount added to wort before fermentation. If you’re using dry yeast, about 1 gram (0.04 oz.) per 5 gallons (19 L) of beer will do the trick. If you want to use a liquid yeast slurry, the amount will be a bit more inexact, because yeast concentration is not as consistent in liquid as it is in dry yeast. A rule of thumb is to use 1 mL (0.03 oz.) of thick yeast slurry per liter (34 oz.) of beer or about 19 mL (0.6 oz.) of yeast slurry per 5 gallons (19 L) of beer. I define thick slurry as the consistency of yeast harvested from the bottom of a fermenter.
Q My bottle carbonation always seems to be slightly off, even though I am following the recipe for the amount of priming sugar to add. What is going on?
A Carbonation level is one very important beer attribute that can be somewhat difficult to control, especially if the beer is bottle conditioned. Recipes that call for a volume of priming sugar per batch — for example, ⅔ cup (158 mL) priming sugar per 5 gallons (19 L) of beer — are inherently flawed.
The first problem is that ⅔ cup of priming sugar is not a constant weight because the density (weight per volume) of sugar depends on how fine the sugar is ground and how tightly it is packed into the measuring cup. Carbonation level is a function of the weight of priming sugar added to the beer, not the volume.
The second flaw with priming sugar directions is the assumption that a 5-gallon (19 L) batch actually produces 5 gallons (19 L) of beer at the time of bottling. Steps in the brewing process, such as racking the beer from the primary fermenter to a secondary fermenter or taking samples out of the fermenter for measuring or tasting, result in beer loss. Not every 5-gallon (19 L) batch will have the same losses, and so the volume of beer being primed is always different.
My preferred method for priming is to convert everything to grams of priming sugar per liter of beer. This works well if you have a carboy with a calibration strip taped to the outside. This is used to determine the beer volume to be primed. The carboy is used to hold the beer while the primings are mixed — after they’ve been carefully weighed on an accurate scale. Home experiments are useful to zero in on the ratio of primings to beer that suits one’s personal taste. (See determining priming sugar additions, page 261.)
Q Is there a rule of thumb to use for the appropriate levels of carbonation for different styles of beer?
A In the United States, carbonation level is expressed in terms of volumes of carbon dioxide. A volume of carbon dioxide is defined as the volume of gas that could be removed from a volume of beer at 20°C (68°F) at one atmosphere of pressure. For example, a liter (34 oz.) of beer with 2.5 volumes would fill a 2.5-liter (84 oz.) bag with carbon dioxide if all the gas were removed at 20°C (68°F) at one atmosphere of pressure. This really is a weird unit of measure! Almost all other countries express carbon dioxide in grams per liter, a more logical measurement.
Most beers in the United States contain between 2.5 and 2.6 volumes of carbon dioxide. Beers such as Bud, Miller, and Coors fall into this carbonation range. These beers served on draft have slightly lower carbon dioxide levels and fall about 0.05 to 0.1 volumes below their bottled brethren. Bottled lagers from Europe have a little less carbonation, about 0.1 volume less than American lagers, but they seem dramatically less fizzy because most European lagers are all malt, and that has a dramatic effect on beer body.
Traditional English ales served from casks have very low levels of carbon dioxide, usually somewhere around 1.8 volumes. Since beer at 55°F (13°C) contains about 1.3 volumes of carbon dioxide when it is sitting in an unpressurized carbon dioxide environment, English ales fall at the very low end of the carbon dioxide scale when compared with other beers from around the world. Bottled ales tend to be higher in carbonation, but they still have less than most lagers. Typical values fall between 2.2 and 2.4 volumes.
The wheat and fruit beers of the world, such as Berliner weiss beers, Bavarian hefe-weizens, Belgian wit beers, and lambics, have very high levels of carbon dioxide to give them a light and refreshing palate. These beers have carbon dioxide levels ranging from 3 to 5 volumes. Like Champagne, these beers are often served in fluted glassware to present them with elegance.
Some generalizations can be drawn about carbonation and flavor. Beers that have complex palates usually have lower levels of carbon dioxide, so the beer’s true identity isn’t masked by carbonation. Beers with less complex palates that are meant to be served ice cold typically have more carbonation. Since carbonation stimulates the trigeminal nerve, the nerve that is also stimulated by spicy foods, some noted brewing experts have given these beers the nickname “pain beers.” Pain beers often derive a significant portion of their flavor from the carbonation, and many taste downright nasty if that high level of carbonation is lost.
When microbrewed beers are dragged into the picture, things get a little jumbled. Most microbrewed beers have complex palates, leading one to speculate that they also have low carbon dioxide levels. However, many have carbon dioxide levels equaling or exceeding American lagers. When consumed, the beers don’t seem to be over-carbonated because their full flavors are able to carry a higher level of carbon dioxide without seeming unbalanced.
Rules of thumb are useful guides but cannot be rigorously applied to all scenarios. It is up to the brewer to discover the level of carbonation best for him or her.
Q My lager recipe calls for adding more yeast at bottling time. Is this an accepted method, and do you recommend it?
A The problem with brewing lagers at home is that the yeast almost completely settles out during lagering. Hence, when it is time to bottle, there may not be enough yeast to carbonate the beer.
One solution for homebrew recipes is to add more yeast to the beer, usually in the bottling bucket, at the time of bottling. The method works well, but too much yeast in the bottle can lead to yeasty flavors from yeast autolysis (yeast death and decay) if the bottled beer is stored warm for long periods. If you want to bottle condition a well-aged lager beer, then adding more yeast at bottling is a good idea.
If this practice doesn’t appeal to you, an alternative is to age your lager in a keg and carbonate naturally during aging. This is how commercial breweries naturally carbonate their lagers, except they age and carbonate in large lagering vessels and then filter the carbonated beer prior to packaging. To age and carbonate in a keg, rack your lager from the fermenter to the lagering vessel (a soda keg) when the specific gravity is 1.016–1.018 SG and complete the fermentation in the sealed keg. This practice will create sufficient pressure to carbonate the lager.
Age the beer in the same container. After aging, you can rack the beer under counterpressure into another keg or use a counterpressure filler to bottle. If I had to choose a method to brew lagers at home, I would lager in a soda keg, rack the beer off the yeast after lagering, and bottle it or serve it from the keg. This method avoids having to add more yeast, uses no priming sugar for carbonation, and removes the settled yeast before serving. The resulting beer would be a traditional lager beer that uses the same procedures as a commercial brewery minus filtration.
Q How can I use nitrogen to carbonate my beer?
A The process of adding nitrogen to beer is referred to as nitrogenation. This is somewhat of a misnomer, since nitrogenated beers also contain carbon dioxide and the gas blend used for the process is usually 75 percent nitrogen and 25 percent carbon dioxide. This mix is used to dispense draft Guinness Stout and is easy to find in markets that have draft Guinness.
Nitrogenated beers typically contain very low amounts of carbon dioxide, around 2.4 g/L or 1.2 volumes, and an even lower concentration of nitrogen of about 20 mg/L. Typical beers contain about 5 g/L of carbon dioxide and no nitrogen. The concentration of nitrogen is much lower than the carbon dioxide content, because nitrogen is not very soluble in liquids. When dispensed through a special faucet, the nitrogen breaks out of the beer and forms very small, stable bubbles. Nitrogen foams are much more stable than carbon dioxide foams, because the atmosphere is about 79 percent nitrogen and there is not much driving force between the gas concentration in the bubble and the concentration in the atmosphere. That’s why nitro beers have such awesome, stable foam. The foam’s density and creaminess also add terrific mouthfeel to the beer.
Like many brewers, I love nitrogenated beers and have some rules of thumb on the procedure. Once you have the right equipment (see page 278), follow these steps for proper nitrogenation:
1. Rack your beer to a keg after fermentation is complete (add finings if desired) and pressurize the headspace of the keg with mixed gas (75 percent nitrogen and 25 percent carbon dioxide) to a pressure of 10–15 psi. This pressure seals the keg and does not nitrogenate the beer. Do not pressurize with 100 percent carbon dioxide because the beer will absorb too much.
2. Transfer the keg to the coldest place you can find, preferably a refrigerator set at about 34°F (1°C) and allow it to clarify for about 2 weeks. Step 2 (alternate): Filter the beer after holding cold for about 1 week. Nitro beers pour much better when they are free of yeast.
3. Make sure your beer is cold (34–38°F/1–4°C). Connect the mixed gas supply to the carbonating stone and set the pressure regulator to 30 psi. Gas will bubble through the beer until the headspace pressure reaches 30 psi. At 30 psi, slowly loosen the pressure-relief fitting on the top of the keg until you hear a very low flow of gas escaping from the fitting. Allow the mixed gas to slowly bubble through the beer for 30 minutes. (If foam begins to come out of the fitting, tighten the fitting and allow the beer to rest for 30 minutes before continuing the slow bleed.) After this 30-minute purge, tighten the pressure-relief fitting and allow the beer to rest for 30 minutes, and then do another 30-minute purge.
4. Hook up the mixed gas to the headspace of the keg and set the pressure regulator to 30 psi. Let the beer sit still for a few hours before pouring.
5. Pour yourself a pint of nitro homebrew! If the foam seems excessive, you should use a lower pressure the next time around. If the beer seems a bit flat, you can repeat Step 3, using a higher pressure.
Q Is it true that only certain styles of beer work well with the nitrogenated draft system?
A I do love a good pint of mixed-gas beer dispensed from stout faucets: the rich creamy head, the smooth, full mouthfeel, and the amazing drinkability of beers like Murphy’s or Guinness. It just so happens that both of these beers are stouts, but any beer can be made to dispense like these, and there are no special recipe requirements.
Q What determines how long a beer will need to age?
A Aging. The word alone conjures images of perfection, like a fine wine that has spent a couple of decades in a dank cellar. Aging beer is much different from aging wine because most beers do not benefit from long aging. There are obvious exemptions to this blanket statement; certain Belgian ales, barleywines, and some strong lagers (e.g. bocks and doppelbocks) can change for the better during aging. Usually the beers that benefit from aging have high original gravities and high alcohol contents. The changes that occur during aging are numerous and complex, but two key changes with big effects on flavor are oxidation reactions and yeast autolysis, the latter occurring only in beers containing yeast (bottle-conditioned beers).
Oxidation reactions all require the presence of oxidizing compounds. The most common oxidant is oxygen, but certain metal ions, such as iron (Fe3+) and copper (Cu2+), are potent oxidizers that will quickly change beer flavor. The presence of oxidizing metal ions is never favorable. The most common cause of oxidation is headspace air from bottling. This problem can be minimized if the beer is foamed immediately before capping, but this foaming requires some dissolved carbon dioxide. Oxygen reacts primarily with alcohols (both ethanol and higher alcohols or fusel oils) and lipids in beer to form a class of organic compounds called aldehydes. Aldehydes can give rise to a range of flavors including green apple (acetaldehyde), paper or cardboard (trans-2-nonenal), and sherry (sherry is the quintessential oxidized wine). When lipids are oxidized, cheesy flavors are also produced because the lipids are broken down into volatile fatty acids (cheesy) and aldehydes. In dark beers, certain malt-derived compounds oxidize to lend sweet, malty flavors to the finished beer.
Yeast autolysis also occurs during aging and can really cause some nasty flavors to show up in beer. However, in small quantities these flavors can lend complexity to some beers. One of the key attributes to sparkling wines employing bottle conditioning (method champenoise as opposed to tank carbonation) is yeast autolysis. The yeast is removed at a certain point in the process to prevent excessive yeast bite and to allow further aging. To help prevent excessive yeast bite, beers meant to age should contain very little yeast.
In general, beers begin to lose their edge upon aging. Hop notes, fruity aromas, and alcoholic flavors begin to fade. As these fresh beer flavors become more subtle, dark beers will gain sweet, caramel-like, honey, toffee, and cheesy aromas. In lighter beers, wet paper aromas are the most obvious oxidized flavors, and their fresh flavors become dulled.
The types of beers that typically benefit from these age-related mellowing changes are robust, dark, and highly alcoholic beers; kind of like an overenergetic teenager chilling out with age and becoming a little more tolerable. Barleywines and Trappist ales are examples of beers that mellow gracefully with age. Thomas Hardy Ale from England — reported to improve for up to 25 years — begins to show pruney, raisiny notes after a couple of years that meld into a mellow and complex mélange of rich fruitiness after further aging.
Q I overcarbonated my bottled beer. Can I bleed off some of the carbonation by lightly tipping the cap and resealing when the gas escapes? Is there another way to blow off some of the carbonation to even the beer out?
A I suppose you could open all the bottles, allow them to degas for a while and recap them to help salvage the batch. The potential risk I envision is that if you keep the beer around for much time, the beer will become notably oxidized. Good luck with your rescue attempt, and be careful when opening the bottles. Wear safety glasses when uncapping the bottles and point the top of the bottle away from people (including yourself!).
Q How long does homebrew bottled by a counter-pressure filler remain good?
A Every brewer who bottles beer wants a definitive answer to this question, but it depends on bottling techniques. When carbonated beer is bottled, the shelf-life clock starts ticking. (Bottle-conditioned beers age differently, so this answer is only for counterpressure-filled beers). With few exceptions, dissolved oxygen increases when beer is transferred to a bottle. Even commercial brewers with the most modern fillers equipped with bottle preevacuation features worry about oxygen pickup at the filler.
Oxygen is public enemy number one when it comes to beer stability, be it bottled or kegged beer. Most counter-pressure fillers are designed so that carbon dioxide can be purged through the fill tube and out of the top of the bottle prior to filling. This helps reduce the oxygen in the bottle and oxygen pickup during filling. During filling, it really helps to minimize splashing, because beer foams when splashed and also picks up more oxygen. Most counterpres-sure fillers have long fill tubes that extend to the bottom of the bottle to minimize splashing.
Once the beer has been gently transferred to the bottle, the fill tube is removed and the bottle prepared for capping. This step is critical. The idea is to get the beer to foam controllably so that the air in the bottle headspace is displaced with foam, and only then is the bottle capped. This is easier said than done. Sometimes the beer sits in the bottle and does not foam and other times it gushes out of the top like a geyser at Yellowstone. I like the former situation because it is easy to make beer foam, either by knocking the bottle on the counter or by rapping gently on the side with a plastic screwdriver handle. Geysers can be avoided by properly cooling your beer prior to bottling. The last protective measure to ward off oxygen pickup is to use bottle caps with an oxygen-absorbing liner. These caps can make a good system better, but they are not able to prevent oxidation without other preventive measures in place.
Beer bottled using a counterpressure filler under ideal conditions should remain fresh for at least 2 months and typically will stay fresh for 4 months. This is assuming the beer is kept cool or cold, is unfiltered, and is not some high-alcohol behemoth — these giant beers will last much longer and some of the changes brought about by aging affect these beers positively. In general, darker beers have a better shelf life than light beers because compounds responsible for beer color also play an antioxidant role. The most difficult beers to bottle are the really light styles, like Pilsners and American-style lagers. If bottled improperly, these lighter beers can show signs of oxidation within days of bottling, especially if stored warm.
Q What could cause my beer bottles to break if overcarbonation doesn’t seem to be an issue?
A Bottles breaking due to age and diminished strength is not only possible but quite common. Although domestic breweries recycle very few beer bottles through returnable glass programs, returnable containers are standard in many other countries. Returnable glass comes back to the brewery in a wide range of conditions. Some of the bottles have been emptied by their borrower, rinsed with water, and carefully placed back in the carton from which they came. These bottles simply have to be delabeled, cleaned, sterilized, and inspected before reuse. Other bottles have not had it so good. They have been emptied, dropped on the floor, and stuffed full of half-burned cigarettes.
Many homebrewers, including me, intercept returnable glass by buying cases of empties at the local dive bar with the largest selection of cheap beer in bar longneck glass (12 oz./355 mL). Through careful rinsing, cleaning, and delabeling, these grungy, stinky bottles can be readied for duty.
The problem is that no homebrewer I know has an inline glass inspector to see hairline fractures in the bottles the way commercial breweries do. Damaged glass is dangerous, plain and simple. If bottles fracture during capping, especially with gooseneck cappers, it is very easy to slice your arm on the fractured bottle. I know a person with permanent nerve damage caused by such an accident. If the bottle does not fracture on filling, pressure created during carbonation can cause failure. Again, if this occurs near somebody, injury can ensue. I remember an accident involving an exploding beer bottle that resulted in blindness in one eye of the injured person. I don’t want to create unnecessary fear regarding bottling, but I want to be realistic. With the large number of microbreweries around the country, new glass is fairly accessible at reasonable prices at many homebrew supply stores. Given the potential risks involved with used glass, new glass is not a bad deal.
Q How does a counterpressure bottle filler work?
A A counterpressure bottle filler is designed to deliver a carbonated product into a bottle without excessive foaming. The idea behind these devices is to pressurize the beer bottle to the same pressure as the keg holding the beer. After the bottle is pressurized and the beer valve allowing beer to enter the bottle is opened, the beer will only begin to flow if the keg is placed higher than the bottle.
The beer flow will stop quickly as the forces pushing it from the keg and those slowing it from entering the bottle become equilibrated. When this happens, the bottle vent is opened and the beer flow will continue until the bottle is full. Then, the pressure in the bottle is slowly relieved and the filler is removed from the bottle. If everything went right, there is little foam coming out of the bottle and a cap can be quickly placed on the bottle.
Q What causes carbonation in my bottles to be uncertain, often stuck? When this happens I move the bottles to a warmer location for a week, shaking occasionally. This seems to do the trick.
A It may simply be related to the temperature at which you have been holding your bottled beers during conditioning. For fast and reliable carbonation, especially with ale yeast, it is best to hold the bottles at room temperature for 7 to 14 days before cooling them down.
Another possibility is that your conditioning is working well; it clarifies the beer during the process. The result of good gravity clarification may be a beer that contains insufficient yeast for carbonation purposes, or at least insufficient to carbonate the way you originally were accustomed. Although insufficient yeast for carbonation can happen, it is very difficult to really remove that much yeast without filtration. It is, however, fairly easy to change the yeast concentration enough to affect the rate of carbonation.
The last resort to this sort of problem is to add fresh yeast at bottling time. This method works very well, and there is nothing wrong with the practice. It provides healthy, fresh yeast that usually carbonate beer much more quickly compared with the old, cranky yeast carried over after aging. I consider this a last resort because most homebrewed beers have plenty of yeast to carbonate beer in the bottle and adding more yeast will only increase the yeast load.
If the finished beer is very clear, then a small addition of yeast, about 10 percent of a proper pitch for primary, will provide plenty of yeast for carbonation. A proper pitch for primary is about 14 grams (0.5 oz.) of dry yeast or about 1 cup (237 mL) of thick slurry harvested from a previous fermentation.
Q Do you have any suggestions for finding the right kind of corks for bottling my Belgian-style beers?
A Your attempt to recreate the entire package at home is admirable, and more challenging than using crown caps on normal beer bottles. Fortunately, the challenge has more to do with finding the proper tool for the job than honing a delicate technique. The type of cork used to seal bottle-conditioned beer bottles is virtually identical to a champagne cork — the market for the cork is the only thing that really differs!
Making this type of cork begins by forming high-quality granulated cork into a high-density composite with uniform mechanical properties. Often, two to three discs of fine natural cork are then laminated to the end of the cork that ends up on the inside of the bottle. Their mushroomed tops make beer and champagne corks easy to recognize; the shape forms when the cork is inserted into the neck of the bottle with a special type of corker. The wire cage covering the cork is very important, because it holds the cork in place and prevents the bottle pressure from ejecting the seal.
Pretty simple . . . If you want to create the ultimate in package presentation for your Belgian-style ales, you need to purchase the proper tools for the job. A quick Internet search will yield numerous suppliers of champagne corkers as well as the special corks and required wire cages. Plastic corks should work quite well, unless you are using recycled tops or are mismatching the cork with the bottleneck diameter.
Here are some other keys to using corks as a closure for beer: Keeping the cork in the bottle is just as important as getting it out. Not all corks for beer and champagne have the same diameter before cramming them into the neck of the bottle. This can lead to carbonation issues.
Another occasional problem that haunts winemakers is the dreaded corked off-flavor caused by the compound trichloroanisole (TCA) that is associated with a combination of mold growth in the cork and bleach used to sanitize the cork. This compound has an incredibly low threshold of detection of about 5 parts per trillion — that’s 5 nanograms per liter, or the equivalent of 5 gallons per trillion gallons . . . a trillion is a thousand billions, in case you’re wondering. A very small concentration indeed!
The recommended cork for your mission is a 27 mm (1 in.) Sabaté Altec composite cork from France equipped with a solid disk end. This cork reportedly has good memory, will seal your bottle for a long time, and will free itself when beckoned. You do need to buy the special corking tool to get this bad boy into its temporary home.
Q Is it possible to successfully use twist-off style bottles for homebrews with success?
A If a brewery like Sierra Nevada can add yeast and sugar to beer and package it in a bottle with a twistoff cap, then it follows that the same practice can be used at home. The key here is recognizing a few things about bottles, caps, and cappers.
There are two types of bottles sold for use by brewers: one-way and returnable. One-way bottles are intended for only one use and are lighter in weight than returnable glass. In this country, returnable glass has just about vanished.
One-way bottles are designed for one use and are much lighter than their returnable cousins. This means that the first thing you need to find is a source of one-way bottles with a twist-off neck.
When you put a cap on a twist-off bottle, you can use a standard style crown rather than finding special twist-off crowns. Commercial brewers do like the printed caps with the “Twist Off” arrow on the crown to assure consumers that twisting will indeed permit consumption!
You do need a capper that doesn’t grab the neck of the bottle. Most handheld cappers grab the small ring around the perimeter of the neck, using it to hold the crowner tight to the bottle. This ring on the one-way, twist-off bottles often breaks when capped with a handheld capper. The ring is simply too thin and too weak for use with hand cappers. Benchtop cappers do not grab onto this ring and are preferred to put crowns on twist-off bottles.
The last thing to consider about bottles is carbonation level. One-way glass is designed for normal carbonation levels. If you want to do a beer with high carbonation, such as a Belgian-style or hefe-weizen, you should use a stronger bottle. This is where a collection of returnable half-liter bottles or an investment in flip-top bottles is handy.
Q What equipment do you need for a basic homebrew keg setup?
A Keg setups are great because they eliminate bottling, which can become a chore if you brew regularly. Plus, beer can be ready to drink within 2 to 3 days of kegging.
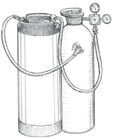
The only things you need for a basic keg setup are a keg, carbon dioxide bottle, two-stage regulator, and some type of tap. Most homebrewers use Cornelius kegs, which are available from several companies that refurbish used Corneliuses to sell to homebrewers.
Basic keg setups come with a hose and a plastic tap, just like those you get when you buy a keg of beer for a picnic. You can make this basic system fancier by adding a barstyle beer tap and drip tray to the door of a refrigerator. Although the cost of this setup is a bit more, it is really nice to have. Just toss the keg in the fridge and when you want a beer, you simply pull the tap on the door. If you want to really go wild, you can build your own bar and run a draft line between the refrigerator holding the keg and the tap at the bar. This adds another level of complexity, since the beer line between the refrigerator and the tap should be cooled in order to prevent the beer in the line from becoming warm.
The great thing about the state of the homebrewing hobby is that there are numerous equipment suppliers. In the old days of homebrewing, if you wanted a keg setup you had to do a lot of digging around for parts and pieces and do a lot of the design work on your own. Many homebrewers would buy equipment from bar and restaurant supply companies and modify things intended for use with standard commercial beer kegs to work with their homebrew setup. Today it’s really easy to find kegging packages that have everything you need to get started for less than $200.
Kegging setup
Q What is your preferred method to force-carbonate a keg?
A Using bottled carbon dioxide to pressurize kegs of beer is a carbonation method that works well. Be patient. I usually begin by selecting the combination of temperature and pressure that will provide the desired level of carbon dioxide that I want in the beer. Charts provide this information if you know what carbonation level to select. (See page 272.) Suppose 13 psi of carbon dioxide pressure at 38°F (4°C) is the right combination for your beer. The best way to get the beer to the chosen level of carbon dioxide is to pressurize the keg to 13 psi and hold it in a 38°F (4°C) refrigerator for about 3 days, giving the keg a good shake once or twice a day. At the end of the period, the beer should be equilibrated with the temperature and pressure in the refrigerator and be properly carbonated.
Q My keg containing naturally conditioned ale loses pressure over time and I was wondering what causes this?
A When using a soda keg and carbonating with priming sugar, it is important to apply a top pressure of carbon dioxide from a bottled source to initially seal the keg. If you don’t do this, the keg might never seal. Instead, it will slowly vent the products of conditioning to the atmosphere. This happens if the keg lid is not firmly smashed to the top of the keg with gas pressure to get it to seal. The other common pitfall with kegs is a loose lid that never really seals, regardless of pressure. Obviously a leaky keg lid will always let your beer go flat and should be fixed or replaced. Check on the O-ring gasket on the top of the keg if you have a leaker.
Q How long will my beer stay fresh in a keg?
A The topic of beer shelf life and freshness after packaging does not have any hard and fast rules, because beers differ in their ability to stay fresh after packaging. In general, beer flavor changes much more slowly over time when stored cold. Freshness is affected by numerous variables, but the key factors for unfiltered beers are microbiological contamination, oxidation, and yeast autolysis.
Microbiological spoilage is a concern of all brewers. Off-flavors associated with wild yeast and wort spoilage bacteria can manifest themselves very rapidly and may be detectable within a week after wort production. These beers are frequently surrendered to the porcelain god and never make it to the bottle or keg stage of their lives.
Other contaminants, such as lactic acid bacteria (Lactobacillus and Pediococcus species), grow much slower and can take weeks or months to rear their ugly heads. When they have grown enough to be detected, the contaminated beer may taste sour and have a very noticeable diacetyl aroma. Clean yeast, short fermentation lag times, and excellent sanitation practices greatly reduce the risk of having beer contaminated with these sorts of organisms.
Homebrewers are in a much stronger position to monitor freshness than commercial brewers are because we have absolute control over our beer. Use clean yeast, keep the brewery clean, and minimize air pickup during bottling and you will be well on your way to producing a beer that will stay fresh for at least 60 days after packaging. Store it hot and this period will be reduced, store it cold and it will become longer. Refrigerated homebrew can taste excellent as much as 4 months after packaging. Taste your beer and develop your own opinion on the subject. You can then extend shelf life by simply focusing on those techniques in your process that can use improvement.
Q How long can I safely store my kegs at room or refrigeration temperature before the flavor is affected?
A The answer to your question has plagued brewers since beer was first conceived or however it came into being. Many famous scientists studied the spoilage of beer and wine, and Louis Pasteur developed the heat-preservation technique now called pasteurization for beer, not milk. If brewers only knew how long their beer would last after packaging, distribution and packaged beer control would be so much easier.
The homebrewer and the pub brewer do have it pretty simple, however, because the palate can tell when the beer no longer tastes good. The simple answer to your question is that your beer’s flavor will remain unaffected by storage until your palate is able to detect that it has changed! At this point, you may want to have a party and drink the rest of the beer before it becomes bad. Or if you detect the change in flavor at the same time it becomes bad, then you probably will want to dump the beer. This advice sounds crude but it works. Most pub brewers use their palate as the best indicator of freshness.
Q What is the best way to separate an ale from the yeast before I transfer beer to a keg? I want to do this to cut down on any off-flavors that the dead yeast might add to the beer.
A One of the best ways for homebrewers to clarify beer is to simply move the carboy to a refrigerator and hold it cold for at least a week; 38°F (4°C) is ideal, but anything colder than the final serving temperature should work. Chilling your beer will accomplish several important things. The most obvious effect of chilling is that a big portion of the total yeast in suspension will flocculate, or drop to the bottom of the fermenter. Chilling your beer will also help promote a reaction between proteins and tannins or polyphenols that results in chill haze. The great part of having chill haze at this stage of the game is that it will settle to the bottom of the fermenter. In a commercial brewery, the settling time takes weeks, but luckily for homebrewers, the beer depth in a carboy is about 2 feet and the settling time is measured in just days.
Depending on the flocculation characteristics of the yeast strain, this method may produce very clear beer or it may do very little to improve clarity.
A more active approach to yeast removal is to use a fining agent, such as isinglass. Isinglass finings are a very pure form of collagen and are derived from fish swim bladders. When hydrated in an acid buffer solution, the collagen protein becomes positively charged. When you add this solution to beer, the collagen will act like a big net to bind yeast cells and drag them to the bottom of the fermenter. There are some isinglass preparations available today that are treated with the acid buffer and then dried. They can simply be rehydrated in water before use to make preparation easier. I have always wondered how this practice first got started!
The last common option available is filtration. Few homebrewers filter their beer because filtration equipment is usually on the expensive side and, if done improperly, filtering can quickly ruin great beer. When filtration is carefully and properly performed, the result can be very gratifying. I have heard countless brewers, both commercial and hobbyist, bash filtration. Detractors of filtration claim that it strips flavor and color from beer and makes beer taste watery. While this can happen if certain types of filters are used, especially membrane filters, it is the exception. Most commercial beers are filtered to produce a brilliant beer. Some styles, like hefe-weizen, cask ale, and bottle-conditioned beers, are unfiltered, but you will find that most other styles are typically filtered.
Whether you rely on cold storage, isinglass, or filtration, you can reduce your yeast load. By doing so, you can worry less about autolysis (yeast death) and will also have a clearer beer that better displays the colors of the malts used in the brew. One factor that you should be mindful of is that bottle conditioning becomes difficult when too little yeast is present and impossible when there is none! Some brewers who bottle- condition actually filter their beers “bright” and then add a small dose of healthy yeast along with priming sugar just prior to bottling. (See fining agents, page 309.)
Q Does it matter if my ales are primed, carbonated, and aged in the keg at room temperature and then put in the fridge when ready for dispensing?
A Bottle- and keg-conditioned ales must go through several key steps before they can be refrigerated and enjoyed. The first step is to estimate the volume of beer and to add an appropriate amount of priming sugar for carbonation. Most brewers use less sugar to prime an equivalent volume of beer in a keg compared with bottles.
After the beer is primed and the container sealed, it should be transferred to a suitable environment for the carbonation or conditioning step. The normal temperatures for conditioning range from 60 to 70°F (16–21°C) for ale and 40 to 55°F (4–14°C) for lager. During conditioning, the yeast produce carbon dioxide from the priming sugar and also mature the beer flavor by absorbing butterlike diacetyl and green-applelike acetaldehyde molecules and converting them into flavorless compounds. These changes are good changes and will occur in 7 to 14 days in ales that are stored in the 60 to 70°F (16–21°C) range. Lagers will take longer and use a different procedure, but your question is about ales, so I will stick to ales!
Once the good changes brought on by conditioning have occurred, other changes begin that may have a negative effect on your beer’s flavor. The first bad thing to come will be yeast autolysis (yeast death and decay). Autolyzed yeast not only has an unpleasant flavor, but the intracellular goo that is excreted during autolysis is rich in enzymes and nutrients. Some of the enzymes secreted, such as proteases, damage beer foam. Others, specifically esterases, change the aroma of fresh beer.
Another change that will eventually occur in beer is oxidation. Although minimizing oxygen pickup during beer transfers and beer packaging will reduce the rate of oxidation, it is inevitable. In the early stages of oxidation, beer takes on a wet paper or wet cardboard aroma that some Americans who drink imported beer have learned to love! As the beer oxidizes more, it begins to smell like honey and eventually takes on aromas typically found in sherry and over-ripened dried fruits, such as raisins and prunes. Beer drinkers fond of the rich flavors found in aged barleywines, Belgian strong ales, and the like are responding positively to oxidation, but in most beers it is definitely considered a defect.
Brewers can delay these negative changes by minimizing the amount of yeast that is transferred into the bottle or keg, minimizing oxygen pickup, and using cold storage temperatures. If you store your kegs at room temperature before tapping, they may taste great for 2 to 3 weeks then begin going downhill. If they are refrigerated after conditioning, they can last for months and still taste great. In a nutshell, after your beer has been aged, it is best to cool it for longer-term storage.
Q I have one soda keg that has produced three batches in a row of different beer with a strong chemical taste. What can cause an iodine or strong chemical taste in my kegged beer?
A Chemical off-flavors are frequently encountered in beer and can be caused by numerous factors. The most obvious cause is traces of cleaning or sanitizing chemicals. Chemicals containing chlorine and iodine are well-known contributors of chemical off-flavors if the compounds remain on the equipment. Of the two, chlorine is the worst because it can combine with malt phenols to form a class of compounds called chlorophenols, which have a pronounced medicinal aroma. Iodine sanitizers usually cause no problems, if used at their recommended concentration.
Some brewers encounter problems with chlorine even without using chlorinated sanitizers. These problems are often traced to chlorinated tap water, such as that used for rinsing brewing equipment. One well-known craft brewer had problems with chlorophenols in his fruit beer that were eventually traced to the fruit. The fruit source had been rinsed at the farm with chlorinated water, and the chlorine was being introduced to the beer at the time of fruit addition. This problem took some good detective work to solve.
Medicinal aromas can also come from wild yeast contamination. In fact, the classic indicator of wild yeast contamination in beer is a distinct phenolic aroma. This aroma is often likened to cloves or the smell of standard bandages.
These are all possible explanations to your problem, but I don’t think they are the real culprit. All of your beers from all kegs would taste off if it were due to your chemical selection or city water, and wild yeast attacks probably would not be limited to one keg, although that is certainly possible.
I think the most probable cause of the off-flavor is leftover flavors in the keg gaskets. I think you have an old root beer keg on your hands, and the aroma in beer is not iodine or medicinal but root beer. The most notable aromas in root beer are phenolic by nature and do smell somewhat medicinal. They are also next to impossible to completely remove from rubber gaskets they contact. Many a pub brewer will tell awful stories of contaminating beer lines, gaskets, hoses, and beer fillers with root beer where the only solution was to replace all soft parts. This can be expensive in a commercial brewery! The lesson for them is to keep their root beer away from everything else. In your case, you inherited the taint but the solution is the same.
Take your suspect keg apart and remove all rubber O-rings and gaskets and replace them. Most homebrew stores selling kegging equipment will carry or have the ability to order replacement parts. Even if the problem is not from root beer, your problem is most likely associated with the keg’s previous resident!
Q What concerns should one have when doing cask-conditioned ales and serving with a beer engine?
A The concern many have with traditional cask ales is leaving the cask vented to the atmosphere for prolonged periods, resulting in beer oxidation. This begins to change the beer’s flavor, which some people like in a cask ale, but the oxygen also allows for the growth of aerobic beer spoilage organisms. These bugs only grow in oxygen-containing environments and are not a problem for beers dispensed with carbon dioxide.
However, cask beers can and do spoil due to aerobic bugs. The most notable example is spoilage from Acetobacter species, which convert ethanol in beer to acetic acid (vinegar). A slight overpressure of carbon dioxide or a mixture of carbon dioxide and nitrogen will prevent the problems associated with oxygen in the headspace of your keg. Care must be taken not to use too much pressure as the beer can over-carbonate, just as it can lose its carbonation with too little pressure.
Q Can I do anything to salvage an over-carbonated keg of wheat beer?
A I prefer to package beer in kegs for several reasons. Besides being convenient, it’s very easy to change the carbonation level in a beer. In your case, you either added too much priming sugar or went overboard with your carbon dioxide pressure during the carbonation step. Whatever the reason, the problem can be solved simply by releasing the top pressure on the keg. This method works to drop the carbonation level.
If you drop the head pressure in the keg, it will slowly return as the carbon dioxide in the beer reequilibrates with the headspace in the keg. If you have a Cornelius keg, make sure the lid reseals properly or you could lose a lot more carbon dioxide than planned.
After a few hours, you can hook your gas supply back up to the keg at your normal dispense pressure and check the level of carbonation. You may need to repeat this method a time or two, depending on how badly you over-carbonated your wheat beer! Although this is a nuisance, it is definitely a solvable problem. That’s the beauty of kegged beer. If the beer were bottled instead of kegged, then you would be out of luck.