Overview of Outlook Web App 985
MICROSOFT first introduced Microsoft Outlook Web Access in Microsoft Exchange Server 5.0 so that clients could access their Exchange Server mailboxes through a web browser. Microsoft has made significant improvements in Outlook Web Access in each new version of Exchange Server to provide support for a larger number of users, better performance, and improved functionality for clients. The latest version of this feature in Exchange Server 2010, now called Outlook Web App, provides most of the functionality of the Microsoft Outlook 2010 client.
This chapter explores Outlook Web App to help you learn why it can be an important feature to implement and how best to put it to work for you, and also to help you put it to work as an alternative or complement to Outlook 2010.
With Outlook Web App and a web browser, users can send and receive messages, view and modify their calendars, and perform most of the other tasks available through Outlook 2010. The features and appearance of Outlook Web App (or Outlook Web Access) depend on the version of Exchange Server that is hosting it. Each successive version of Exchange Server adds a new look and new capabilities.
Outlook 2010 provides full access to an Exchange Server mailbox. Although Outlook Web App isn’t intended as a complete replacement for Outlook 2010, it is useful for roaming users who want to access the most common mailbox features when they don’t have access to their personal Outlook 2010 installation. Linux, UNIX, and Macintosh users can also benefit from Outlook Web App by being able to access Exchange Server mailboxes and participate in workgroup messaging and scheduling. In addition, Outlook Web App can save the administrative overhead and support associated with deploying Outlook 2010 to users who don’t need everything that Outlook 2010 has to offer. These users can use a free web browser to access many functions provided by Exchange Server. However, you must still purchase a Client Access License (CAL) for each user or device that accesses the server running Exchange Server, even if the users do not use Outlook to connect to the server.
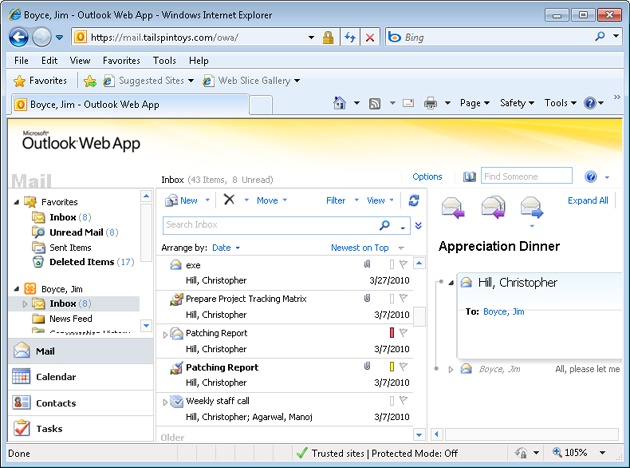
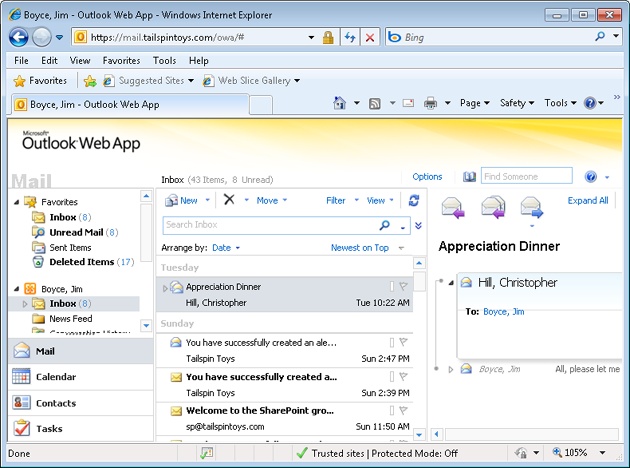
Because email is the primary function of Exchange Server and Outlook 2010, Outlook Web App supports email access. Users can view message headers and read messages (see Figure 42-1) as well as send, reply to, forward, and delete messages. This last capability—deleting messages—might seem commonplace, but it is a useful feature. If your mailbox contains a very large attachment or a corrupted message that is preventing you from viewing your messages in Outlook 2010, you can use Outlook Web App to delete the message without downloading or reading it. Just open your mailbox in your web browser, select the message header, and delete the message.
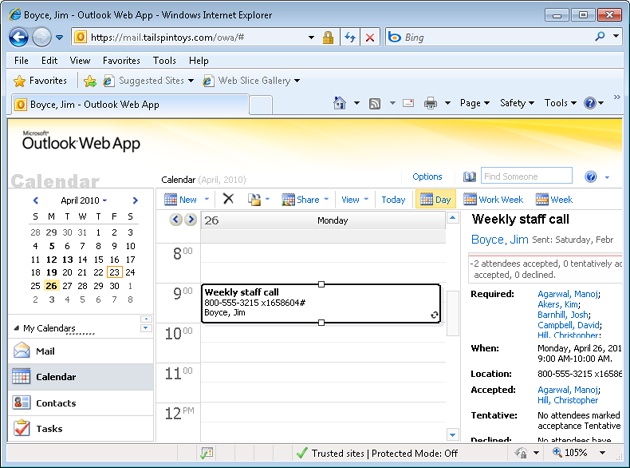
As mentioned earlier, you’re not limited to just messaging—you can also access your Calendar folder through Outlook Web App. You can view and modify existing items and create appointments (see Figure 42-2). You can’t perform all the same scheduling tasks through Outlook Web App that you can with Outlook 2010, but the ability to view your schedule and add appointments is useful, particularly when you’re working from a remote location or on a system without Outlook 2010 installed.
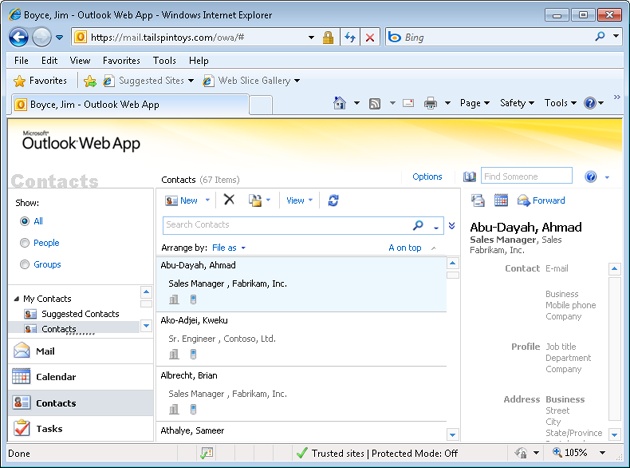
Contacts are another type of item that you can manage through Outlook Web App. You can view and modify existing contact items and add new ones (see Figure 42-3).
Each successive release of Exchange Server has incorporated changes to Outlook Web Access. These changes have included an interface to match the Outlook interface more closely, addition of spell checking, access to task lists, Secure/Multipurpose Internet Mail Extensions (S/MIME) support, Hypertext Markup Language (HTML) content blocking, scheduling and control of Out Of Office messages, the Scheduling Assistant, access to Microsoft SharePoint documents, Really Simple Syndication (RSS) subscriptions, support for rights management, and many other features. The end result is that Outlook Web App in Exchange Server 2010 provides most of the features offered by the native Outlook client.
To access your mailbox through Outlook Web App, you can use any web browser that supports JavaScript and HTML version 3.2 or later, including Microsoft Internet Explorer 4.0 or later and Netscape 4.0 or later. Some features, however, rely on Internet Explorer 5 or later, including drag-and-drop editing, shortcut menus, and native Kerberos authentication. In addition, browsers that support Dynamic HTML (DHTML) and Extensible Markup Language (XML) offer a richer set of features than those that do not. For example, Internet Explorer 5.x and later offer an interface for Outlook Web App that is much closer to the native Outlook 2010 client, including a folder tree for navigating and managing folders, as well as a Reading pane.
Outlook Web App offers several options for authentication:
Basic Use clear text and simple challenge/response to authenticate access. This option offers the broadest client support, but it also offers the least security because passwords are transmitted as clear text.
Integrated Windows Use the native Windows authentication method for the client’s operating system. Integrated Windows authentication provides better security than basic authentication because passwords are encrypted. The client doesn’t need to enter authentication credentials because the browser uses the client’s Windows logon credentials to authenticate on the Outlook Web App server.
Anonymous Use anonymous access for public folders in the Exchange Server store. This option can simplify administration.
Exchange Server 2003 and later support some additional options because of additions to Microsoft Internet Information Services (IIS) 6.0:
Digest authentication This authentication method works only with Active Directory Domain Services (AD DS) accounts. It offers the benefit of sending passwords as a hash rather than in plain text. However, to use digest authentication, you must configure AD DS to allow reversible encryption, which reduces security.
Microsoft Passport authentication This method enables users to authenticate with their Microsoft Passports.
In addition to these authentication methods, Outlook Web App supports the use of Secure Sockets Layer (SSL) to provide additional security for remote connections.
After your Exchange Server administrators install and configure Outlook Web App on the server(s), users can begin accessing their mailboxes through their web browsers rather than (or in conjunction with) Outlook 2010. This section explains how to connect to the computer running Exchange Server and use Outlook Web App to access your mailbox.
Note
This section assumes that you are connecting to Exchange Server 2010 with Outlook Web App. If you have an earlier version of Exchange Server, the features available to you are slightly different, and the look and feel are also different.
Typically, you connect to the computer running Exchange Server through the Uniform Resource Locator (URL) http://<server>/exchange, where <server> is the Domain Name System (DNS) name, Internet Protocol (IP) address, or NetBIOS name of the server. An example is https://owa.tailspintoys.com/exchange. This URL isn’t set in stone. The system administrator might have changed the virtual directory name for security purposes. Check with the system administrator if you’re not sure what URL to use to connect to the computer running Exchange Server.
Note
Windows Internet Naming Service (WINS) maps NetBIOS names (computer names) to IP addresses, performing a service similar to that provided by DNS (although DNS maps host names, not NetBIOS names). You can use an Lmhosts file to perform NetBIOS name-to-address mapping without a WINS server, just as you can use a Hosts file to perform host name-to-address mapping without a DNS server.
Depending on the server’s authentication settings, you might be prompted to log on. Enter your user name and password for the Exchange Server account. If the account resides in a different domain from the one in which the server resides, enter the account name in the form <domain>\<account>, where <domain> is the logon domain and <account> is the user account.
When you connect to your mailbox, you should see a page similar to the one shown in Figure 42-4 for Exchange Server 2010. Earlier versions of Exchange Server show a somewhat different interface (Outlook Web Access 5.5, not shown, is considerably different). Outlook Web App opens your Inbox by default, but you can switch to other folders as needed.
The left pane functions much as the Navigation pane does in Outlook 2010 (or, in the case of Exchange 2000 Server or Exchange Server 5.5, as the Outlook Bar in Outlook 2002 or earlier), and you can select folders from it. (Throughout this chapter, I’ll refer to the left pane as the Navigation pane for simplicity.) The right pane changes to show the folder’s contents.
Note
The interface for Outlook Web App changed slightly between Exchange Server 5.5 and Exchange 2000 Server, and even more so from Exchange 2000 Server to Exchange Server 2003. The following sections assume that you’re using Outlook Web App to access Exchange Server 2010, but the procedures are similar for Outlook Web Access with earlier versions of Exchange Server. Also note that some features are not available with Outlook Web Access and Exchange Server 5.5 or with versions of Internet Explorer earlier than 5.0. Certain other features, such as rules, are only available with Exchange Server 2003 or later.
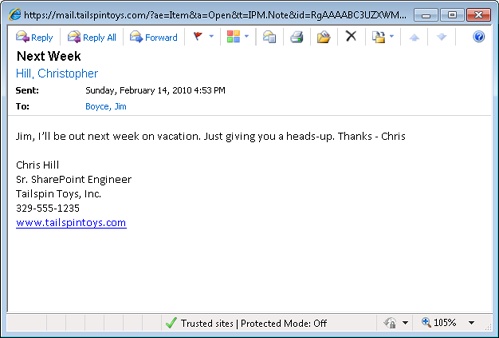
Outlook Web App automatically shows your current messages when you connect. To read a message, double-click its header to display a window similar to the one shown in Figure 42-5.
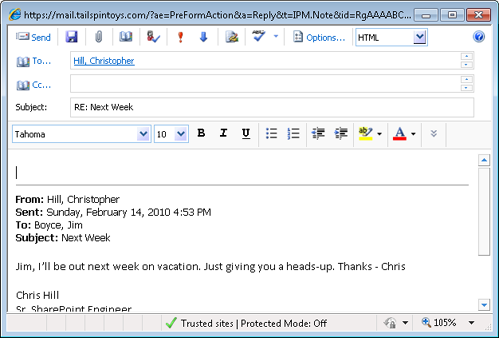
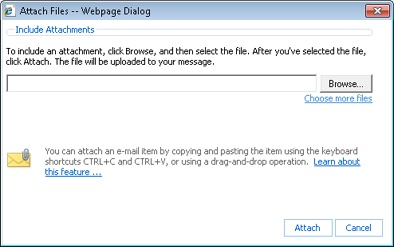
As in Outlook 2010, you can reply to or forward email messages. Simply click Reply or Reply To All to reply to a message or click Forward to forward a message. Outlook Web App opens a form similar to the one shown in Figure 42-6. Add addresses as needed and type your text. If you want to add an attachment, click the Attach File button on the toolbar at the top of the form. Outlook Web App opens the window shown in Figure 42-7 so that you can add one or more attachments to the message.
When you want to create a message, click the New button on the toolbar (refer to Figure 42-4). Outlook Web App opens a form similar to the one shown previously in Figure 42-6. You can specify addresses, attachments, body text, and other message properties.
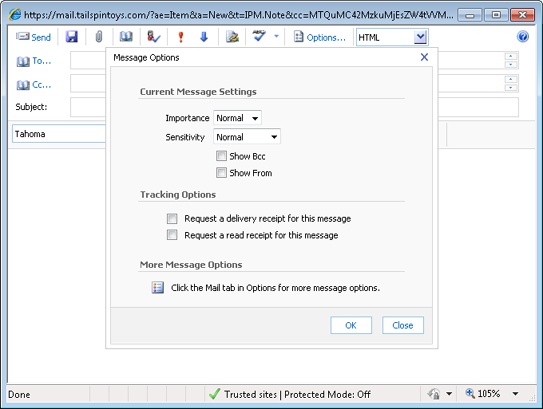
You can set a handful of options for a new message by clicking Options with the new message form open. These options correspond to some of the options available in Outlook 2010 (see Figure 42-8).
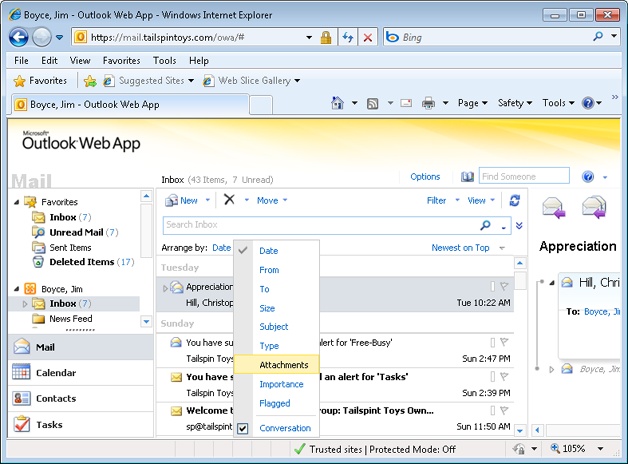
By default, Outlook Web App displays messages sorted by date and time received in multiline view. You can sort the messages by other properties as well. To do so, select the drop-down menu beside Arrange By and choose the field by which you want to sort messages (see Figure 42-9).
You can copy and move messages by dragging in Outlook Web App. Open the folder containing the messages that you want to copy or move. If the target folder is hidden, scroll and expand folders as needed in the Navigation pane to display the folder in the folder list. To move messages, drag them from the right pane to the destination folder in the folder list. If you want to copy the messages instead of moving them, hold down the Ctrl key while dragging.
Deleting messages in Outlook Web App is a good way to clean out your mailbox when you don’t have Outlook 2010 handy. It’s also particularly useful for deleting large or corrupted messages that would otherwise prevent Outlook 2010 from downloading your messages normally.
To delete messages in Outlook Web App, just select the messages and click the Delete button on the toolbar. Outlook Web App moves the messages to the Deleted Items folder.
Outlook Web App does not limit you to working only with your Inbox. You can work with your Mail, Calendar, Contacts, and Tasks folders. With Outlook Web Access 2007 and Outlook Web App, you can also work with SharePoint libraries and file servers configured on the computer running Exchange Server by the Exchange Server administrator(s). When you select a different folder in the Navigation pane, Outlook Web App 2010 displays the contents of the selected folder in the right pane.
While in Outlook Web App 2010, you can rename and delete folders in the Exchange Server mailbox that you have created—but note that you cannot rename or delete the default Outlook 2010 folders. To perform either of the first two actions, display the folder in the Navigation pane, right-click that folder, and then choose either Rename or Delete.
In addition to working with the Inbox or other message folders, you can manage your schedule, tasks, and contacts list on Exchange Server through Outlook Web App.
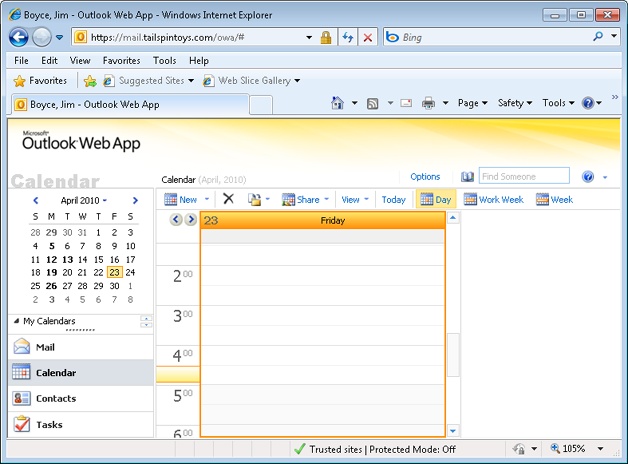
To manage your schedule, click the Calendar icon in the Navigation pane. Outlook Web App updates the right pane to display your Calendar folder. Click the toolbar buttons to choose between Today, Day, Work Week, Week, and Month views. The page also includes a Date Navigator similar to the one in Outlook 2010, which you can use to select dates (see Figure 42-10).
Click the New button on the toolbar or click the arrow beside the New button and choose Appointment to display an appointment form similar to the one in Outlook 2010. Use the appointment form to specify the title, the time, and other properties for an appointment, just as you would in Outlook 2010.
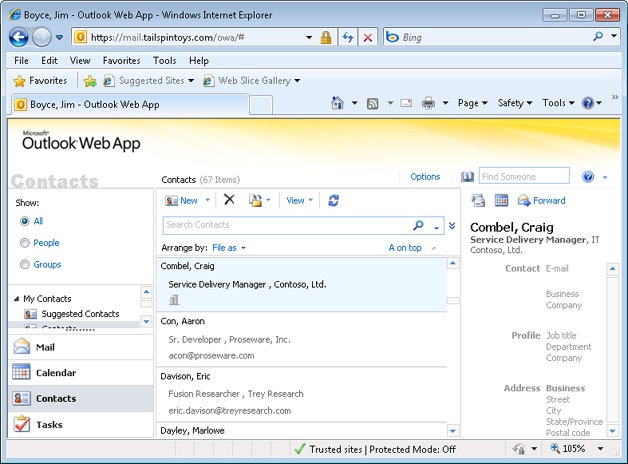
You can also view and manage contacts in Outlook Web App. Click the Contacts icon in the Navigation pane to display the Contacts folder (see Figure 42-11).
Simply double-click a contact entry in the list to open a form that contains detailed information for that contact. Click the New button on the toolbar to open the form shown in Figure 42-12, which you can use to create new contact entries. Click Save & Close to save a new contact entry or to save changes to an existing contact entry.
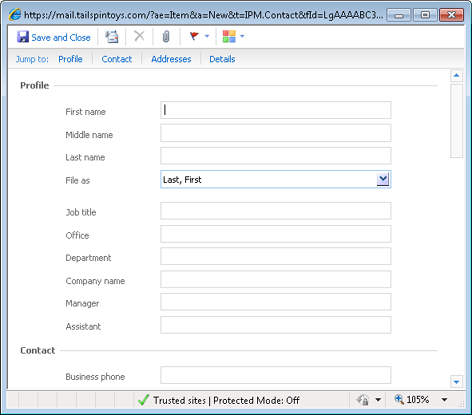
Figure 42-12. The form for creating contact entries in Outlook Web App is similar to the contact form in Outlook 2010.
As when you are working with your mail folders, you can click the drop-down button beside Arrange By to choose a different field for sorting contacts. To locate a contact, click in the Search Contacts text field and click the magnifying glass icon (which turns to a red X icon during the search). Click the red X to clear the search results.
In Outlook Web Access 2007 and Outlook Web App 2010, you can also work with the Tasks folder. With Outlook Web Access 2003, you can also work with the Journal and Notes folders. Outlook Web Access 2003 enables you to create messages, contact items, distribution lists, appointments, tasks, and folders. You can view but not create items in the Journal folder. Earlier versions of Outlook Web Access restrict you to creating messages, contact items, and appointments.
The Out Of Office Assistant automatically responds to messages when you are out of the office. The Out Of Office Assistant functions essentially as a server-side rule, replying to messages as they arrive in your Inbox. Although you usually configure the Out Of Office Assistant in Outlook 2010, you can also configure it in Outlook Web App.
Note
For details on using the Out Of Office Assistant, see the section Creating Automatic Responses with the Out Of Office Assistant, on page 345.
To configure the Out Of Office Assistant in Outlook Web App, connect to the server using your web browser and click Options to view the Options page. Then click Organize E-Mail, Automatic Replies to view the Out Of Office Assistant (Automatic Replies) properties. To turn on the Out Of Office Assistant, select Send Automatic Replies. Outlook Web App 2010 enables you to specify two different replies: one for people inside your organization and one for people outside the organization. When you are satisfied with the autoreply text, click Save to save the changes. When you want to turn off the Out Of Office Assistant, open the Options page again and select Don’t Send Automatic Replies.
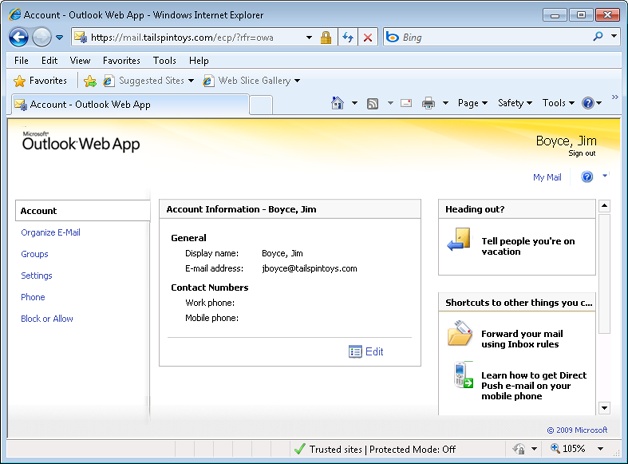
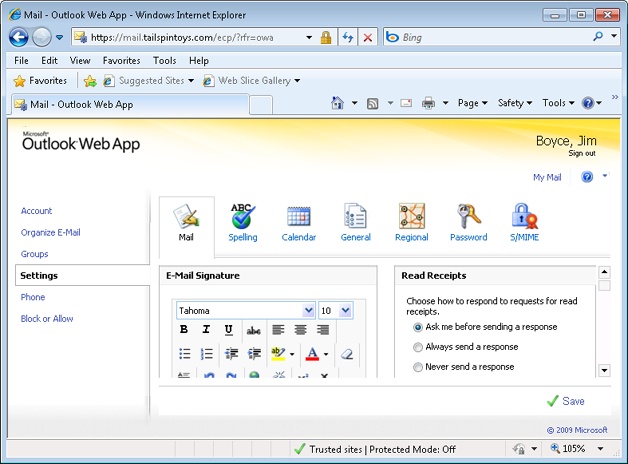
You can use the Outlook Web App Options page (see Figure 42-13) to set general options for your account. Click Settings to configure many other options for Outlook Web App (see Figure 42-14). You can configure date and time options, calendar options, and contact options; and you can also change your password. You can configure reminders, set up a signature for outgoing messages, set spelling options, and configure many additional options, all of which are essentially the same as those available in Outlook 2010 and covered elsewhere in this book.