Before you can delete, rename, move, copy, or otherwise tamper with any icon, you have to be able to select it somehow. By highlighting it, you’re essentially telling Windows what you want to operate on.
To select one icon, just click it once. To select multiple icons at once—in preparation for moving, copying, renaming, or deleting them en masse, for example—use one of these techniques:
Select all. Highlight all the icons in a window by using the “Select all” button on the Ribbon’s Home tab. (Or press Ctrl+A, its keyboard equivalent.)
Highlight several consecutive icons. Start with your cursor above and to one side of the icons, and then drag diagonally. As you drag, you create a temporary shaded blue rectangle. Any icon that falls within this rectangle darkens to indicate that it’s been selected.
Alternatively, click the first icon you want to highlight, and then Shift-click the last file. All the files in between are automatically selected, along with the two icons you clicked. (These techniques work in any folder view: Details, Icon, Content, or whatever.)
Highlight nonconsecutive icons. Suppose you want to highlight only the first, third, and seventh icons in the list. Start by clicking icon No. 1; then Ctrl-click each of the others. (If you Ctrl-click a selected icon again, you deselect it. A good time to use this trick is when you highlight an icon by accident.)
You can also highlight one icon, plucking it out of a sea of pretenders, by typing the first few letters of its name. Type nak, for example, to select an icon called “Naked Chef Broadcast Schedule.”
It’s great that you can select icons by holding down a key and clicking—if you can remember which key must be pressed.
Turns out novices were befuddled by the requirement to Ctrl-click icons when they wanted to choose more than one. So Microsoft created a checkbox mode. In this mode, any icon you point to temporarily sprouts a little checkbox that you can click to select it (Figure 7-6).
To turn this feature on, open any Explorer window, and then turn on “Item check boxes,” which is on the View tab of the Ribbon (visible in Figure 7-6).
Now, anytime you point to an icon, an on/off checkbox appears. No secret keystrokes are necessary now for selecting icons; it’s painfully obvious how you’re supposed to choose only a few icons out of a gaggle.
In some ways, a File Explorer window is just like Internet Explorer, the Web browser. It has a Back button, an address bar, and so on.
If you enjoy this PC-as-browser effect, you can actually take it one step further. You can set up your PC so that one click, not two, opens an icon. It’s a strange effect that some people adore, that some find especially useful on touchscreens—and others turn off as fast as their little fingers will let them.
In any File Explorer window, on the View tab of the Ribbon, click Options.
The Folder Options control panel opens. Turn on “Single-click to open an item (point to select).” Then indicate when you want your icon’s names turned into underlined links by selecting “Underline icon titles consistent with my browser” (that is, all icons’ names appear as links) or “Underline icon titles only when I point at them.” Click OK. The deed is done.
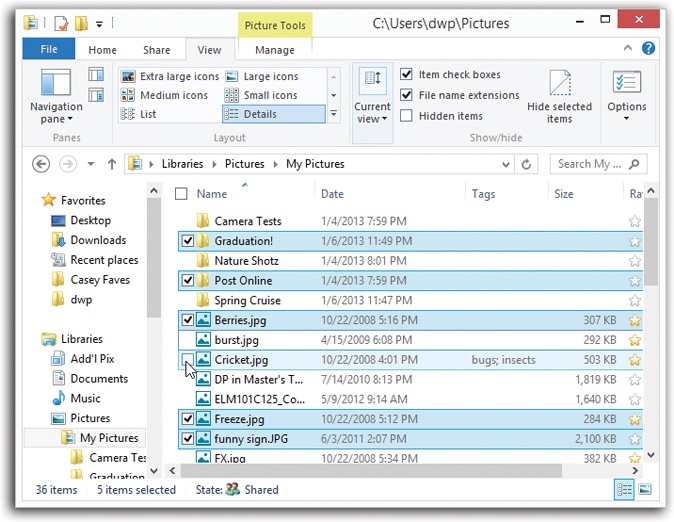
Figure 7-6. Each time you point to an icon, a clickable checkbox appears. Once you turn it on, the checkbox remains visible, making it easy to select several icons at once. What’s cool about the checkboxes feature is that it doesn’t preclude your using the old click-to-select method; if you click an icon’s name, you deselect all checkboxes except that one
Now, if a single click opens an icon, you’re entitled to wonder how you’re supposed to select an icon (which you’d normally do with a single click). Take your pick:
Point to it for about a half-second without clicking. (To make multiple selections, press the Ctrl key as you point to additional icons. And to drag an icon, just ignore all this pointing stuff—simply drag as usual.)
Turn on the checkbox mode described above.