The very first time you open it, Photo Gallery displays all the digital photos it can find in your Pictures and Videos folders.
This is important: You’re looking at the actual files on your hard drive. If you delete a picture or a movie from Photo Gallery, you’ve just deleted it from your PC. (Well, OK, you’ve actually moved it to your Recycle Bin. But, still, that’s a step closer to oblivion.)
If you store your photos in other folders, you can make Photo Gallery aware of those, too. You can go about this task in either of two ways:
The menu way. Choose File→“Include folder”; navigate to and select the additional folder, and then click OK.
The draggy way. Find the folder on your desktop or in any Explorer folder. Drag the folder directly onto the heading “All photos and videos” in the left-side list, or directly into Photo Gallery’s window (see Figure 17-2). Windows not only makes the contents appear in Photo Gallery, but it also copies them to your Pictures folder for safekeeping.
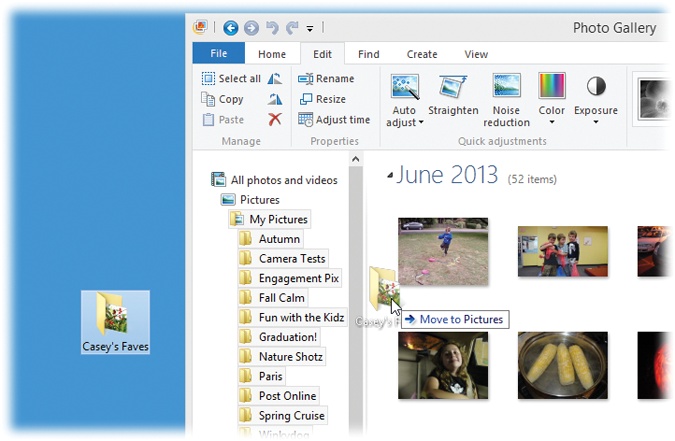
Figure 17-2. You can add a “watched folder” to Photo Gallery by dragging it off the desktop (or from any folder window) right onto a Pictures heading or into the main window, as shown here. The cursor changes to let you know that Photo Gallery understands your intention.
In Windows Live Photo Gallery, Microsoft has done a lot of work to make the camera-importing process smoother and smarter. Here’s how it goes:
1. Open Windows Live Photo Gallery.
For example, open the Start screen. Type gallery until you see the program’s name; click it.
2. Connect your camera to the PC. Turn the camera on.
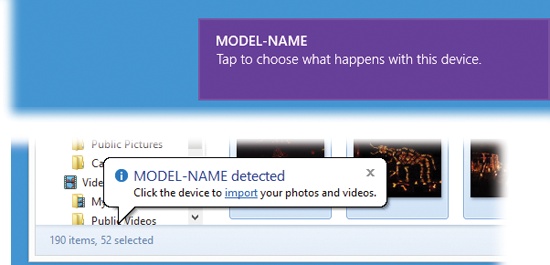
Now, if this is the first time you’ve ever connected a camera, you may be shown the standard AutoPlay dialog box—otherwise known as the “What am I supposed to do with this thing?” box; see Figure 17-3.
Figure 17-3. When you connect your camera or a memory card, two things happen. First, the AutoPlay box asks how you want to handle newly attached cameras in the future (top). Second, Photo Gallery alerts you that it’s discovered the camera or memory card and offers an import link to start the process.
You can read about AutoPlay on A Tale of Two Formats; for now, just ignore the box.
3. Begin the importing process.
You have three options: Click the “import” link shown in Figure 17-3, click Import on the Ribbon, or choose File→“Import photos and videos.”
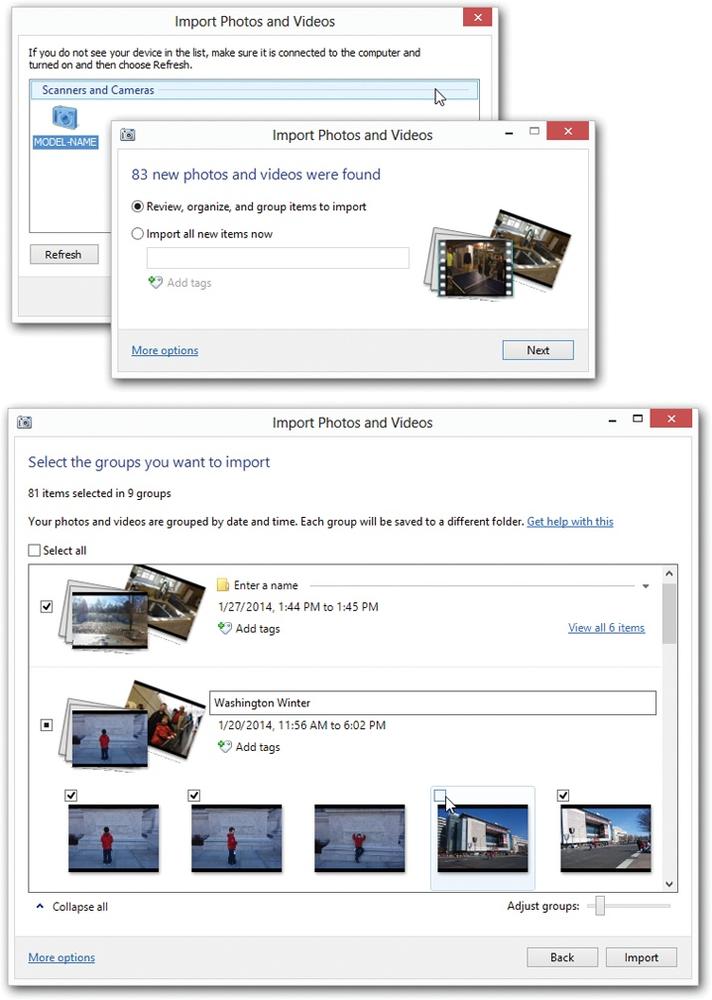
In each case, a dialog box appears, displaying the camera’s memory card as though it were a disk. Make sure the disk is highlighted (Figure 17-4, top).
4. Click Import.
Now the Import Photos and Videos dialog box appears (Figure 17-4, middle). Here the steps branch. If you’d like to review the photos and import only certain batches (by date), go on to step 5a. If you’d rather just import them all now, without all the examining and grouping, skip to step 5b.
5a. Click “Review, organize and group items to import,” and then click Next.
Now you see the impressive dialog box shown in Figure 17-4 (bottom).
In the old days, Photo Gallery just imported everything on your camera in one gigantic clump—even if it included photos from several different events, shot weeks apart. Now it automatically analyzes the time stamps in the incoming photos and puts them into individually named groups according to when you took them. Click “View all 20 items” (or whatever the number is) to see thumbnail previews of the photos in each batch, so you know what you’re talking about.
Your job here, then, is to click “Enter a name” and type a name for each event whose photos you’re about to import. It could be Disney Trip, Casey’s 5th Birthday, or Baby Meets Lasagna, for example—anything that helps you organize and find your pictures later.
Figure 17-4. Top: Do you want to examine the various clumps of photos before importing them? Or do you want to just slurp them all in at once and organize them later? Bottom: In this box, you can break up the camera’s contents into batches by date. You can also apply tags (keywords) to each batch. Above all, you can turn each group’s checkbox on or off, thereby importing only certain ones. Out of the box, Photo Gallery starts a new group after every 30 minutes of no picture-taking. But the “Adjust groups” slider can make that interval greater—a couple of hours, a whole day, even a whole month—which results in fewer separate groups. You can even drag the slider all the way to the right for “All items in one group,” if you like.
5b. Click “Import all new items now.” Enter a description, like “Fall Fun.”
Photo Gallery also invites you to type in tags to each of the incoming photos, separated by semicolons. More on tags later in this chapter; for now, it’s enough to know that you can use them to specify who was on the trip, the circumstances of the shoot, and so on.
Click Import when you’re ready. Photo Gallery brings the photos onto your PC.
6. Click Import.
Windows sets about sucking in the photos from the camera and placing them into your Pictures folder.
Not all loose and squirming—that’d be a mess. Instead, it neatly creates a Photo Gallery folder bearing the name or description you provided in step 5. (If you were to open the Pictures folder in File Explorer, you’d discover that there’s a new folder there, too, bearing the same name. Photo Gallery is just a mirror of what’s in your Pictures folder.) See Figure 17-5.

A USB memory card reader offers another convenient way to transfer photos into Photo Gallery. Most of these card readers, which look like tiny disk drives, are under $15; some can read more than one kind of memory card.
If you have a reader, then instead of connecting the camera to the PC, you can slip the camera’s memory card directly into the reader. Windows, or Photo Gallery, recognizes the reader as though it’s a camera and offers to import the photos, just as described on the previous pages.
This method eliminates the battery drain involved in pumping the photos straight off the camera. Furthermore, it’s less hassle to pull a memory card out of your camera and slip it into your card reader (which you can leave always plugged in) than it is to constantly plug and unplug camera cables.
Photo Gallery recognizes the most common photo file formats: .jpeg, .tiff, .png, .bmp, and .wpd, for example. (It doesn’t recognize .gif files or Photoshop files.)
Photo Gallery can also import and organize camera videos, if the movies are in a format that Movie Maker can understand, like .mov, .wmv, .asf, .mpeg, or .avi format.
To play one of these movies once they’re in Photo Gallery, see Figure 17-6.
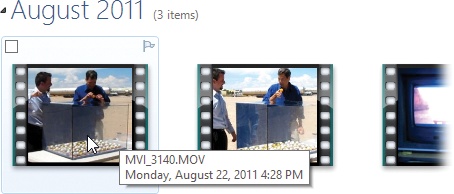
Figure 17-6. The first frame of each video clip shows up as though it’s a photo in your library. Your only clues that it’s a movie and not a photo are the film sprocket holes along the sides and the tooltip that identifies the movie’s running time. If you double-click one, it opens up and begins to play immediately.
GEM IN THE ROUGH: Auto Card Erase
Ordinarily, each time your camera’s card is full, you’ll want to dump all the selected pictures onto your PC.
Here’s the question: After you’ve finished dumping them, do you want the memory card erased so that it’s empty and ready to reuse?
Or would you prefer to leave the photos on the card, either to erase yourself or to add more photos to them?
If it’s safety you’re worried about, don’t bother. There’s zero risk that you’ll lose pictures if lightning strikes in mid-import; Photo Gallery doesn’t delete your pictures until after it has successfully copied them all to the Pictures folder. Even so, Windows doesn’t delete imported photos unless you tell it to.
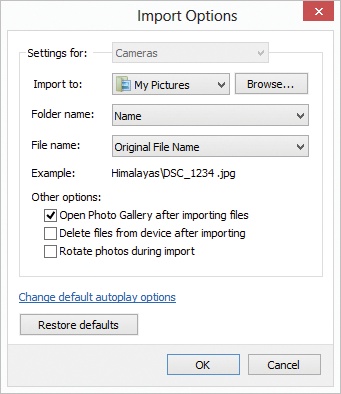
To do that, in Photo Gallery, choose File→Options. Click the Import tab. There you see the “Delete files from this device after importing” checkbox.
Finally, Photo Gallery can work with RAW files. And what’s a RAW file? Most digital cameras work like this: When you squeeze the shutter button, the camera studies the data picked up by its sensors. The circuitry then makes decisions about sharpening level, contrast, saturation, white balance, and so on—and then saves the processed image as a compressed JPEG file on your memory card.
For millions of people, the result is just fine, even terrific. But all that in-camera processing drives professionals nuts. They’d much rather preserve every last shred of original picture information, no matter how huge the resulting file—and then process the file by hand once it’s been safely transferred to the PC, using a program like Photoshop.
That’s the idea behind the RAW file format, an option in many pricier digital cameras. (RAW stands for nothing in particular.) A RAW image isn’t processed at all; it’s a complete record of all the data passed along by the camera’s sensors. As a result, each RAW photo takes up much more space on your memory card.
But once RAW files open up on the PC, image-manipulation nerds can perform astounding acts of editing to them. They can actually change the lighting of the scene—retroactively! And they don’t lose a speck of image quality along the way.
Most people use a program like Photoshop or Photoshop Elements to do this kind of editing. But humble little Photo Gallery can at least open and organize them—usually. Its success at this depends on which kind of RAW files you’ve added to your Pictures folder. Each camera company (Canon, Nikon, and so on) has created a different flavor of RAW files—their filename suffixes are things like .cr2, .crw, .dng, .nef, .orf, .rw2, .pef, .arw, .sr2, and .srf—and it’s up to Microsoft to keep Photo Gallery updated. If there are RAW files in your Pictures folder but they’re not showing up in Photo Gallery, well, now you know the reason.