When many people think about medicinal herbs, they tend to envision varieties that sound like they might pop up in a Victorian novel: blackwort, centaury, damiana, feverfew, juniperus, and perhaps the best named of all, false unicorn.
While there are plenty of those types of herbs in use, and we’ll cover some charmingly named ones in the next section, there’s also a wealth of medicinal options that come from a kitchen garden and wouldn’t be out of place on a spice rack.
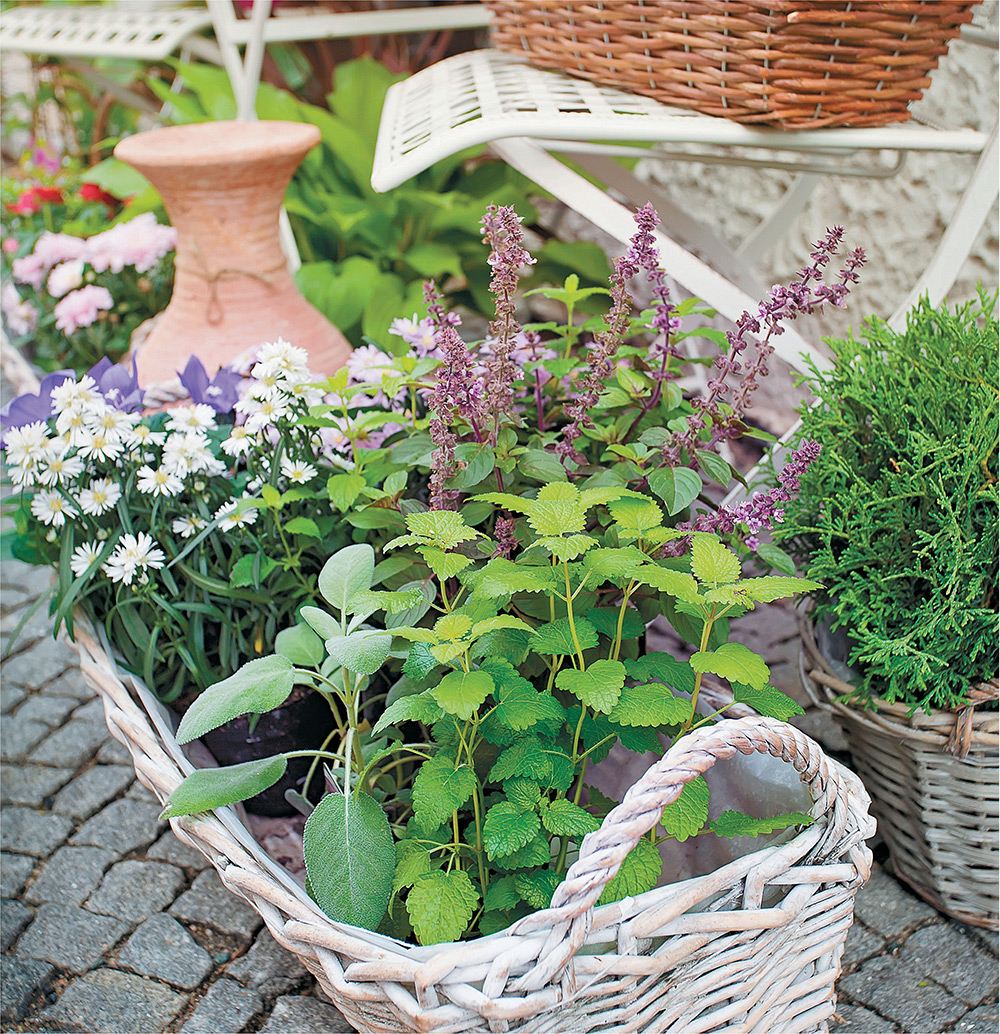
Herbs like sage, peppermint, oregano, and other culinary options give zip and flavor to meals, but they also have health benefits. Integrating these into your medicinal mix is easy, especially since they’re so tasty. Plus, finding medicinal uses helps to conquer the “too many herbs” issue when a whole garden is ready for harvest.
On our farm, I often sample these herbs throughout the day for a quick pick-me-up in the middle of harvesting or planting. My pockets always seem to have a few leaves of Thai basil or spearmint, so I can pop them into my mouth the same way other people might reach for gum.
Best of all, growing culinary herbs is generally simple, depending on plant hardiness zone (see the book’s introduction for a chart of zones). You can have a small windowbox of favorite herbs, or an expansive backyard garden that would make any chef pale with envy. So, let’s get growing.
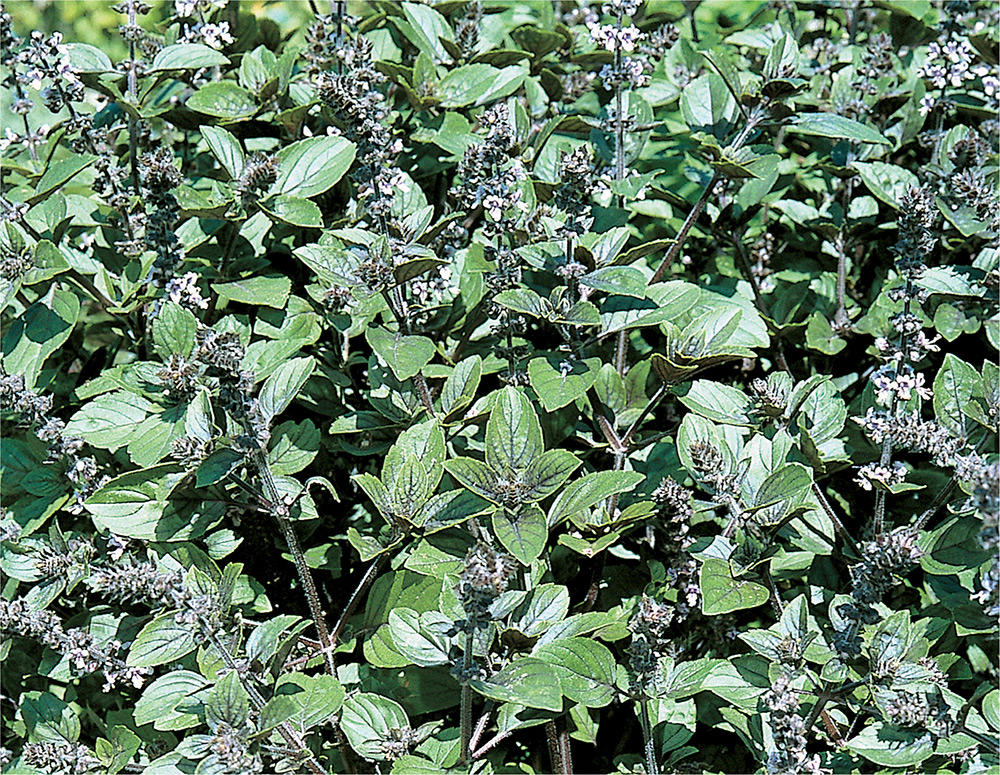
 Basil Ocimum basilicum
Basil boasts a rich history of medicinal as well as culinary uses. In addition to being utilized worldwide for flavoring sauces, soups, and killer pesto, basil has been used for Ayurvedic medicine, liqueurs, and traditional Chinese medicine. Most often, it’s used for treating the digestive system, although in some parts of the world, like Africa, basil also lends itself to kidney treatments and fever reduction. It’s been said to boost libido, clear the head during a cold, and improve concentration. Theories abound as to basil’s origins, and some sources place its birthplace as Southeast Asia while others believe it’s Africa. Either way, it arrived in Europe through the Middle East and landed first in Italy. From there, basil spread across the planet, although the United States has become one of the largest producers.
Basil leaf can impart sedative, diuretic, and antiseptic properties. The herb is safe for children, and can even hurry chicken pox through the body.
Here are a few ideas for your Rx/medicinal preparations:
 Chew on fresh leaves to reduce the impact of infections in the mouth, alleviate cold symptoms, or loosen mucus in the respiratory system.
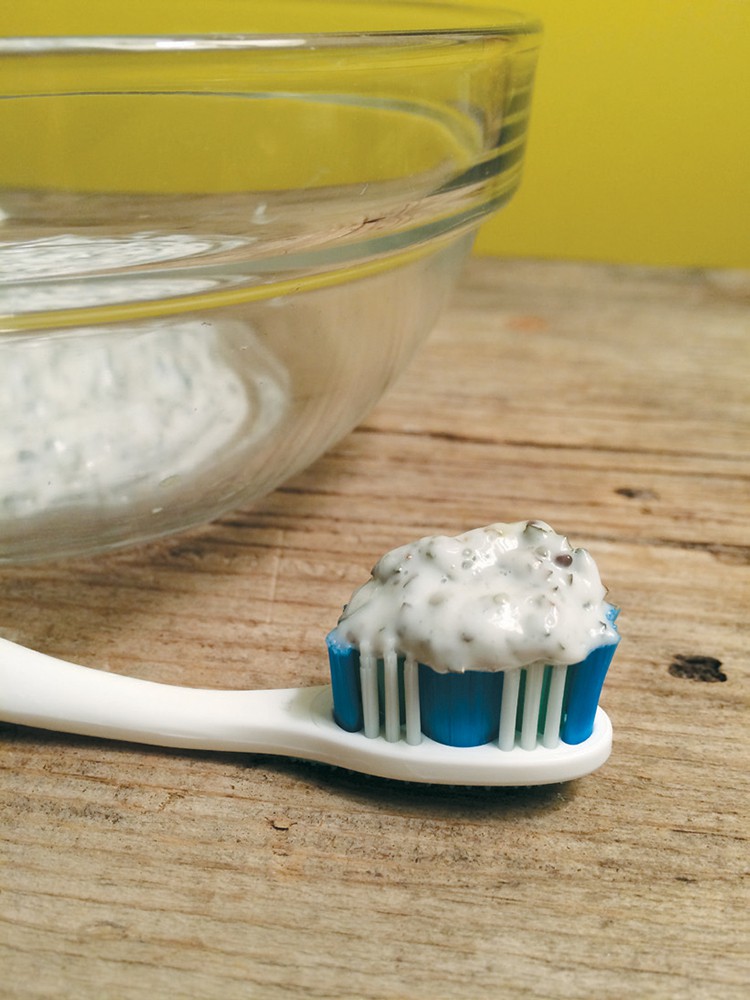
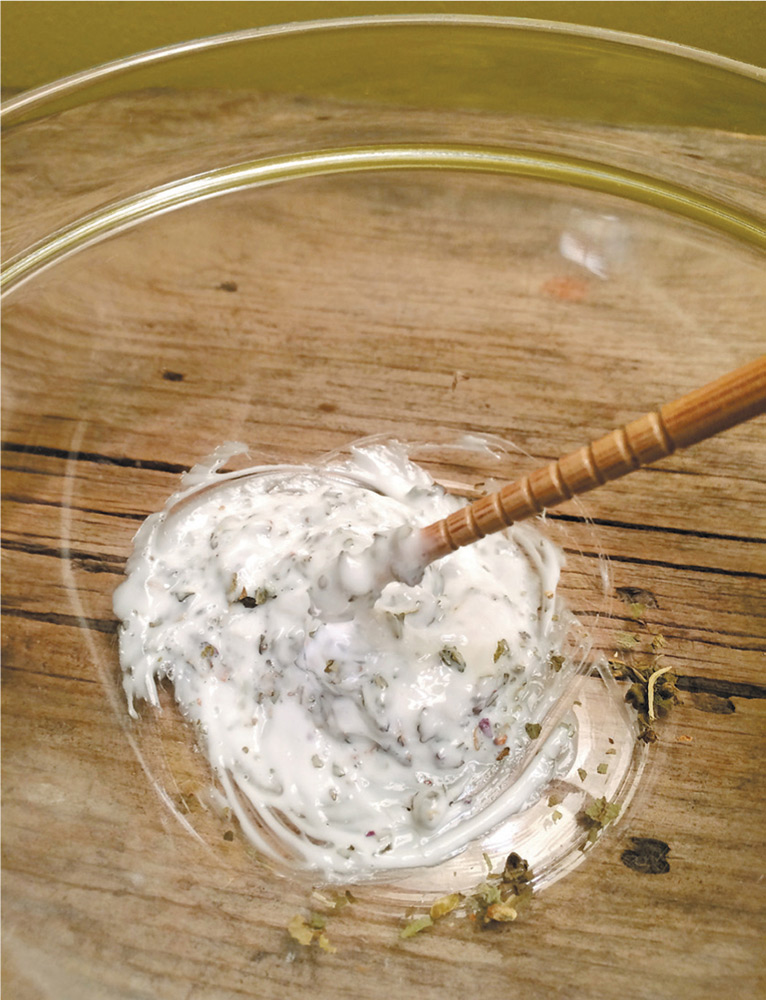
Grind up dried leaves into a powder and add to toothpaste to freshen breath and reduce bacteria.
Use dried leaves in a tea to alleviate headaches, act as a calmative for insomnia, or lessen menstruation pain.
Put chewed-up leaves on insect stings to reduce itching, pain, and inflammation.
Boil fresh leaves and strain, then drink to lower fevers; this method is especially useful if you mix in cardamom or feverfew.
 CHECKLIST
Sun: Six to eight hours per day
Shade: Some shade tolerance, especially in hotter climates
Soil: Well-drained, loosened soil
Fertilizer: Apply some around base every few weeks, particularly if plants are struggling. Does well with compost, bloodmeal, or cottonseed meal
Pests: Aphids, slugs, or beetles, but these tend to be minimal
Water: Regularly, depending on soil dryness
Grow Indoors? Yes
Basil isn’t particularly frost resistant, so it tends to be best in warmer climates, but can truly be grown almost anywhere. It does well with abundant sunshine, and in general, it’s a good choice for any region because it can be brought inside if temps begin dropping in fall.
 MEDICINE CABINET
Basil provides notable potential health benefits, particularly if used in essential oil form. In the academic journal Food Chemistry, researchers found high levels of antioxidants in basil oil, and some effectiveness as an antimicrobial and antibacterial remedy.
Reduce inflammation and swelling
A study presented at the Royal Pharmaceutical Society’s annual event revealed that “extracts of O. tenuiflorm (Holy basil) were shown to reduce swelling by up to 73 percent 24 hours after treatment.” 1
Anti-aging properties
According to research, basil can help prevent the harmful effects of aging. Holy basil extract was effective at killing off harmful molecules and preventing damage caused by some free radicals in the liver, brain, and heart.2
Rich in antioxidants
Results of a study published in the Journal of Advanced Pharmacy Education & Research showed that ethanol extract Ocimum basilicum had more antioxidant activity than standard antioxidants.3
1 http://www.hort.purdue.edu/newcrop/ncnu02/v5-575.html
2 Prakash P, Gupta N. Therapeutic uses of Ocimum sanctum Linn (Tulsi) with a note on eugenol and its pharmacological actions: a short review. Indian Journal Physiol. Pharmacol 2005; 49: 125-131
VARIETIES You’re likely to think first of sweet basil (like Genovese or Italian), the variety that appears in grocery stores and pasta dishes, but there are numerous options, and each boasts distinctive characteristics in terms of flavor. Basic medicinal properties are fairly consistent across varieties (although Holy basil has the most history as a healing herb), so choose based on taste preferences.
Thai basil: has such a strong anise flavor that it’s sometimes called “licorice basil”
Holy basil: also known as Tulsi; very popular in India and Thailand, where it’s treasured for its medicinal properties; spicy taste and slightly fuzzy leaves; a blend of minty and basil flavors
Italian large leaf basil: the classic sweet basil used most frequently in cooking; large green leaves; has a sweet taste that goes well with Italian dishes
Napoletano: similar in flavor to the Italian variety, but with huge leaves that resemble lettuce; needs plenty of room for growth
Purple basil: has several varieties like Purple Ruffles, Dark Opal, Red Rubin, and Amethyst; all have a luscious, deep purple color
Lemon basil: petite but very flavorful; has a citrus undertone that makes it perfect for teas
PLANT Basil does well started indoors and then transplanted outside, so if you have a greenhouse space, that’s ideal. However, even a kitchen windowsill will work. Place seeds in a tray or small individual pots, and water well. When starting seeds, depending on the warmth of the room, germination should take about five to ten days, but can be accelerated by using a germination mat—these are like plant heating pads that don’t scorch the roots but keep the plant cozy as it establishes. Once basil is 3 to 5 inches tall, transplant outdoors or into a large container, if that’s where you plan to grow it. Or, transplant into a bigger pot for indoor growing so the roots have more room to expand.
Many gardeners buy transplants rather than starting from seed, and this can be a stellar jumpstart, especially since basil is easily obtained from commercial growers. Look for hearty, well-established plants that have both established (mature) and new leaves. One advantage to buying transplants is that they’ve already been “hardened” (adapted) to outside temperatures, so they can be transplanted right away.
Aim for loose, well-drained soil in either outdoor or indoor plantings. If growing inside, make sure that the pot can drain properly—avoid letting the plant sit in water—so that the roots stay dry. If planting outside, be sure to loosen the soil around the transplant and avoid compaction when securing it in its new home.
Basil thrives most at around 80 degrees Fahrenheit, and needs around six to eight hours of sunshine per day; those living in hotter places should consider planting where there’s some shade at least part of the day.
GROW Once basil plants are established and thriving, water the soil rather than the leaves, to prevent disease or mildew. You can fertilize every few weeks; basil does well with compost, bloodmeal, or cottonseed meal. If the plants seem hearty, though, you’re fine skipping this step unless they seem to be struggling through slow growth or overly drooping leaves.
Aphids or beetles can sometimes be a problem, and you’ll see either the insects themselves, or leaves that are bitten with little holes or chewed along the edges. If that’s an issue, consider using a product like a fabric rowcover such as Reemay. This is a very lightweight fabric that lets sunshine and rain come through, but can keep pests out.
Depending on weather or indoor temperatures—hotter temps make basil grow faster—basil will begin flowering within a few weeks of maturity. Since this is a signal to the plant that its time is coming to an end, just snip off the flowers to prolong growth. Done often enough, this simple technique can extend your basil-growing season significantly.
Most varieties take about 60 to 75 days from planting to maturity, although you can harvest along the way if the plant is becoming well-established.
NUTRITIONAL VALUE OF BASIL
per 100 g (3.5 oz)
Basil is rich in vitamin A, vitamin K, vitamin C, magnesium, iron, potassium, and calcium.
Energy |
94 kJ (22 kcal) |
Carbohydrates |
2.65 g |
Dietary fiber |
1.6 g |
Fat |
0.64 g |
Protein |
3.15 g |
Water |
92.06 g |
Vitamin A |
264 g |
Thiamine |
0.034 g |
Riboflavin |
0.076 mg |
Niacin |
0.902 mg |
Vitamin B6 |
0.155 g |
Folate |
68 g |
Choline |
11.4 mg |
Vitamin C |
18.0 mg |
Vitamin E |
0.80 mg |
Vitamin K |
414.8 g |
Calcium |
177 mg |
Iron |
3.17 mg |
Magnesium |
64 mg |
Manganese |
1.148 mg |
Phosphorus |
56 mg |
Potassium |
295 mg |
Sodium |
4 mg |
Zinc |
0.81 mg |
Source: USDA Nutrient Database
HARVEST & STORE Basil does best with frequent harvesting. Leave the smallest top leaves alone and pluck off larger leaves to encourage growth and create a stronger, heartier plant. Often, I’ve stripped a plant down to almost nothing except a few leaves of new growth, to come back in a week or so to find it lush again. For best results, pluck off the leaves rather than cutting them. Store these ways:
Fresh: this is the best method for cooking and salads, since basil has such an intense, pleasant flavor. Just chop or tear the leaves.
Dry: you can use a food dehydrator, but I tend to get good results by simply placing the leaves on a mesh screen in a well-ventilated area like my porch. If you worry about pests or dust, lightly cover the leaves with Reemay or other lightweight fabric that allows for air circulation.
Concentrated: create an oil (see Using Your Harvest chapter, page 41 for info on infused oils) that can be used in a bath, daubed on insect bites, or even used in a salad dressing.
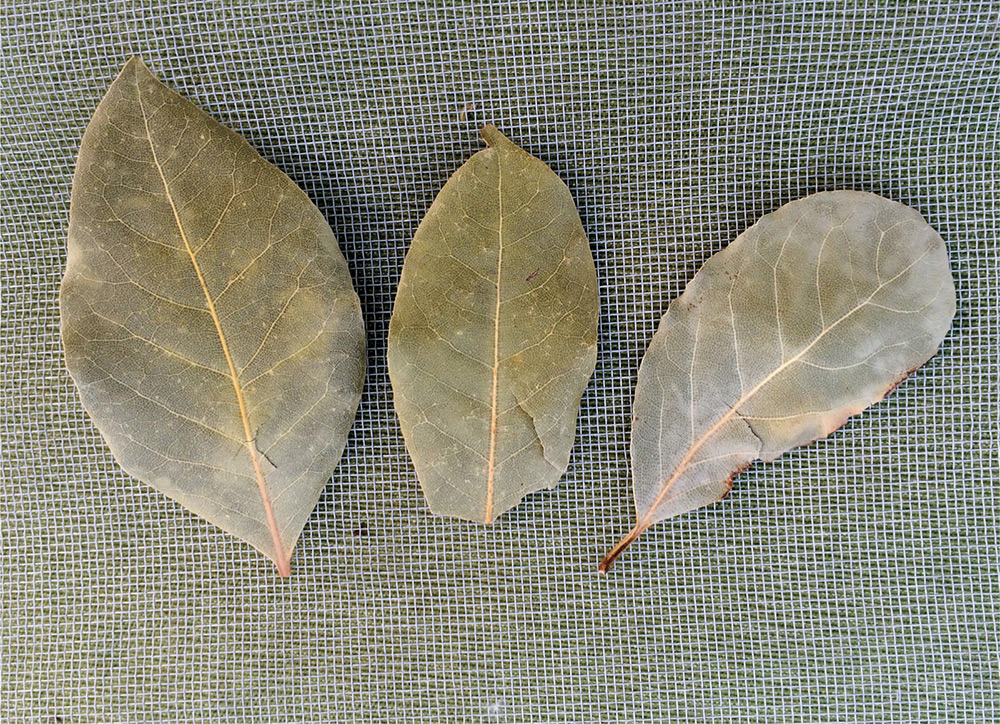
Bay leaf/Bay laurel Laurus nobilisEven when I was brewing teas with wild-growing nettles and eating lamb’s quarter salads (see the Wild Yard Friends chapter for info on both of these herbal standouts), I still didn’t see bay leaf as anything more than the inedible seasoning addition that got thrown into soups and stews. Now I’m humbled by that dismissal. Bay leaf has a long and rich history, both for its health properties and its metaphorical power. The Greeks and Romans believed the herb symbolized peace, wisdom, and honor, and the leaves were woven into wreaths that crowned athletes and royalty. Originating in Asia Minor, the leaves are now one of the most widely used herbs throughout North America and Europe, thanks to their distinctive flavor, unique fragrance, and distinctive health properties.
Legend notes that the Delphi princess in ancient Greece inhaled smoldering bay leaves in order to hear Apollo’s prophecies, so it’s only natural that bay is recommended for some less-than-medicinal purposes, like encouraging prophetic dreams (just tuck some under your pillow) or increasing psychic ability by inhaling smoke from a bay smudge. But the herb has wellness uses, especially for pain relief and digestion issues.
Here are a few ideas for your Rx/medicinal preparations:
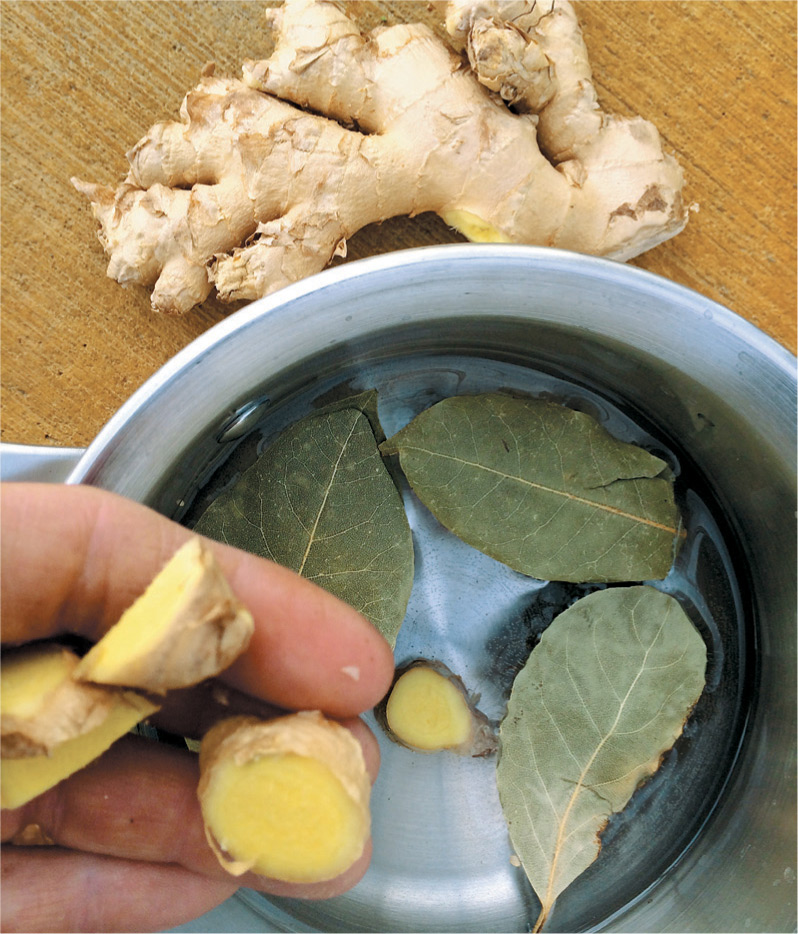
For a headache or migraine, lightly steam a few bay leaves—the steam setting of an iron works well—and then rest with the warm leaves on your forehead for at least half an hour.
Add bay leaves to marinades, soups, and stews to help with digestion; remove before eating, since the edges can be jagged.
Create a decoction (see Chapter 2 for instructions) and pour into a warm bath; this helps to relieve minor aches and pains in muscles and joints. This is a perfect soak if you’ve overdone the gardening during the day while tending to your formidable herb collection.
CHECKLIST
Sun: Eight to ten hours per day
Shade: Prefers full sun but can tolerate some shade
Soil: Well-drained, loosened soil
Fertilizer: Light fertilization once in spring and once in summer
Pests: Tend to be minimal, but can occur from overwatering or too much fertilization.
Water: Regularly, depending on soil dryness
Grow Indoors? Yes
MEDICINE CABINET
Bay leaves have been used to treat a range of maladies, from digestive issues to skin problems. Herbalists often use a bay leaf poultice to help wounds heal faster, and a 2006 study found that rats treated with bay leaf extract experienced accelerated wound healing. Other studies have focused on the herb’s antimicrobial properties.
Promising treatment for diabetes and cardiovascular diseases
Participants who received a small amount of ground bay leaf every day for 30 days experienced a decrease in blood glucose, cholesterol, and triglycerides. Researchers noted that consumption of bay leaves “decreases risk factors for diabetes and cardiovascular diseases and suggests that bay leaves may be beneficial for people with type 2 diabetes.”1
Potential for inhibiting tumor growth
Researchers looked at cultivated and wild laurel samples, including bay leaves, and found evidence that the properties contained within the plants worked to inhibit certain tumor cell growth. They also noted that each laurel extract had different bioactive properties, which means that some may be more effective against bacteria, fungi, or tumors than others.2
1. Khan, A., et al. “Bay Leaves Improve Glucose and Lipid Profile of People with Type 2 Diabetes,” Journal of Clinical Biochemistry and Nutrition. Jan 2009; 44(1): 52-56. http://www.ncbi.nlm.nih.gov/pmc/articles/PMC2613499/
2. Dias, M., et al. “Two-Dimensional PCA Highlights the Differentiated Antitumor and Antimicrobial Activity of Methanolic and Aqueous Extracts of Laurus nobilis L. from Different Origins,” BioMed Research International. vol. 2014, article ID 520464. http://www.hindawi.com/journals/bmri/2014/520464/
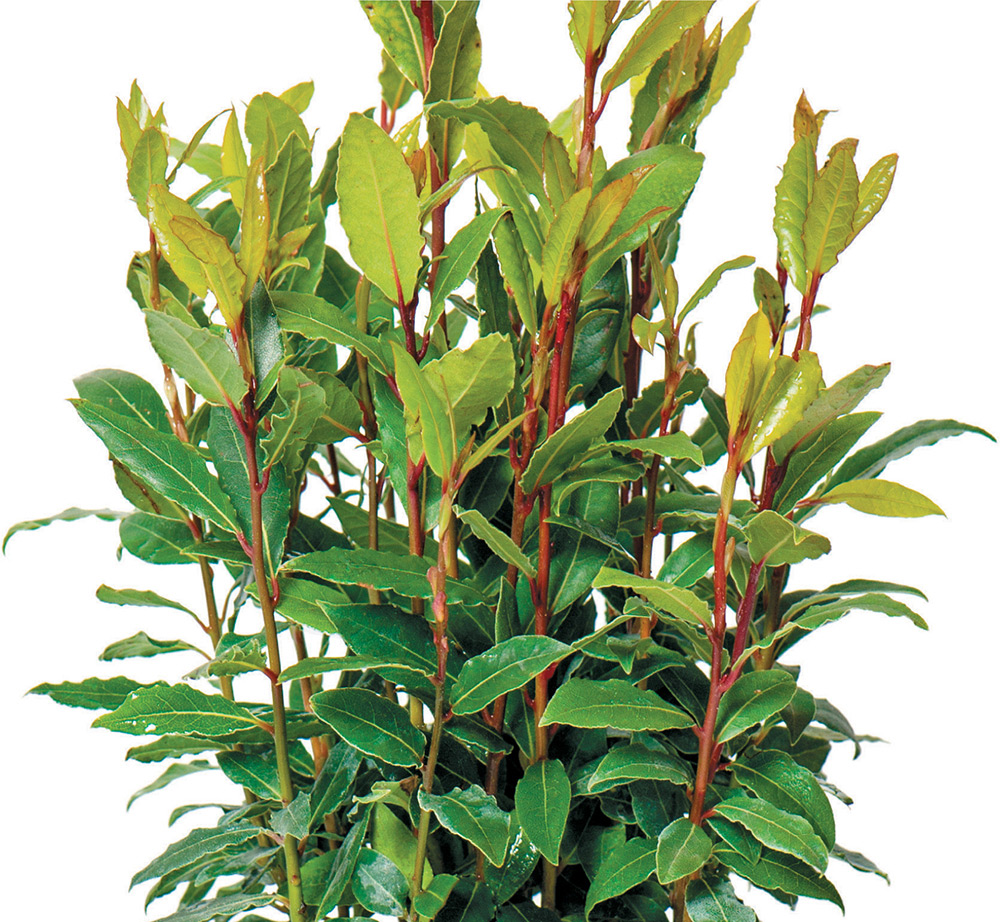
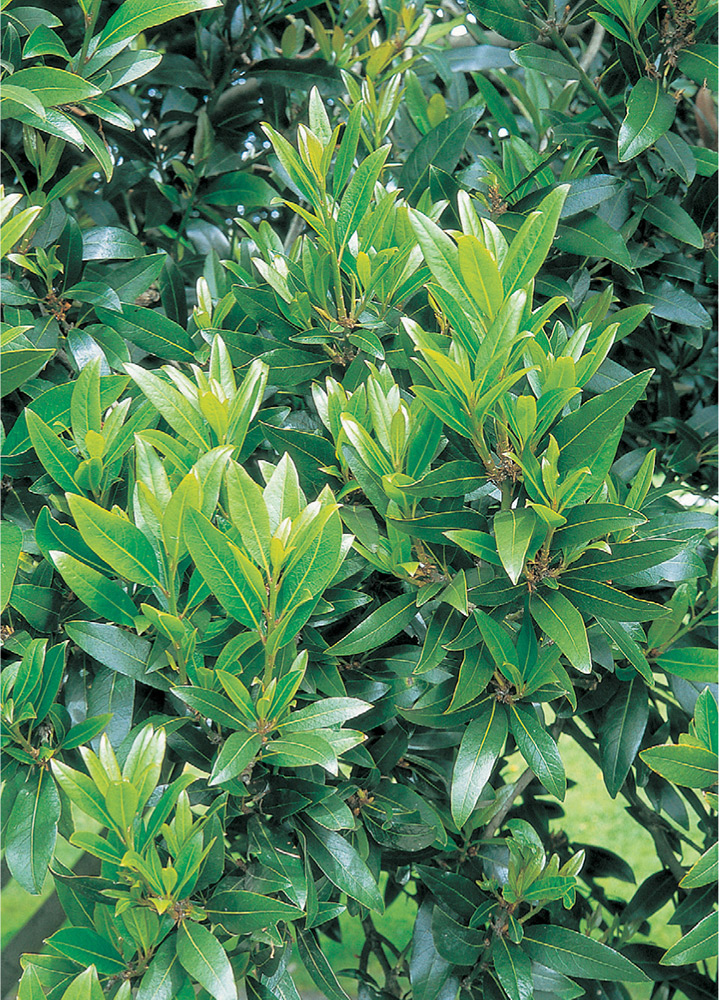
Bay leaves are plucked from a hardy tree called a bay laurel, which can reach up to 60 feet in its native Mediterranean landscape, but tend to be much smaller and more manageable, especially if being grown indoors as a houseplant. The bay laurel does very well in a container, and its glossy, thick leaves make it a nice ornamental for walkways, or tucked into the corner of a room inside. If planting outdoors, the tree does best in Zones 8 to 11 (see USDA Hardiness Zones map on pages 22 to 23), since it prefers full sun and warmer weather.
VARIETIES Bay laurel can also be known as sweet bay or Grecian bay, and when choosing from a nursery, be sure to check the name carefully. There are a few plants that have “laurel” in their name that are potentially toxic. Steer away from common laurel, cherry laurel, poet’s laurel, mountain laurel, or English laurel—these are beautiful ornamentals and resemble Laurus nobilis but should never be eaten. In terms of specific varieties, these rarely appear in seed descriptions or on transplants, and most nurseries or seed purveyors simply mark the plant as “bay laurel.”
PLANT Bay laurel is so well-suited to indoor growing that it’s usually best to put the shrub-like tree in a large container, which can be placed outside in warm months. The trees do best with soil that drains well, so augment potting soil with an amendment that will allow the water to flow through—one of the best choices is “cactus mix,” designed to improve drainage. Blend half of that mix with half potting soil.
If growing outside, pick a spot with full sunshine and soil that drains well. Compacted soil will result in slow growth, or even no growth at all, so if the soil of your chosen laurel spot seems dense, loosen up the area with a pitchfork or other cultivating tool. Also, keep in mind that the plant will likely last for decades if kept healthy, so pick a spot where it can thrive for the long-term.
Instead of seeding, the best option is to buy an already-established containerized bay laurel from a greenhouse or nursery. I promise, this isn’t cheating; laurels can be fussy to grow from seed, so getting a strong start with one that’s mature and healthy is a nice shortcut toward an earlier harvest. The plant is so notoriously difficult to grow in its early stages that some seed companies only ship bay laurel as a plant.
GROW Once established, bay laurel requires minimal care, beyond staying on top of its watering needs. The tree doesn’t do well with particularly dry or especially wet soil, so if there have been heavy rains lately, let the soil dry out for a few days before watering again.
Like all plants, a laurel also needs some amount of airflow, so if growing inside, open nearby windows to create a cross-breeze, or place a small oscillating fan in the room during warmer days.
In spring and summer, fertilize around the tree’s base with an all-purpose fertilizer or some compost.
NUTRITIONAL VALUE OF BAY LEAF
per 100 g (3.5 oz)
Bay leaf is rich in vitamin A, vitamin C, calcium, and potassium.
Energy |
313 kcal |
Carbohydrates |
74.97 g |
Dietary fiber |
26.3 g |
Fat |
8.36 g |
Protein |
7.61 g |
Water |
5.44 g |
Vitamin A |
309 µg |
Thiamine |
0.009 µg |
Riboflavin |
0.421 mg |
Niacin |
2.005 mg |
Vitamin B6 |
1.740 µg |
Folate |
180 µg |
Choline |
0 mg |
Vitamin C |
46.5 mg |
Vitamin B12 |
0 mg |
Vitamin K |
0 µg |
Calcium |
834 mg |
Iron |
43 mg |
Magnesium |
120 mg |
Manganese |
0 mg |
Phosphorus |
113 mg |
Potassium |
529 mg |
Sodium |
23 mg |
Zinc |
3.7 mg |
Source: USDA Nutrient Database
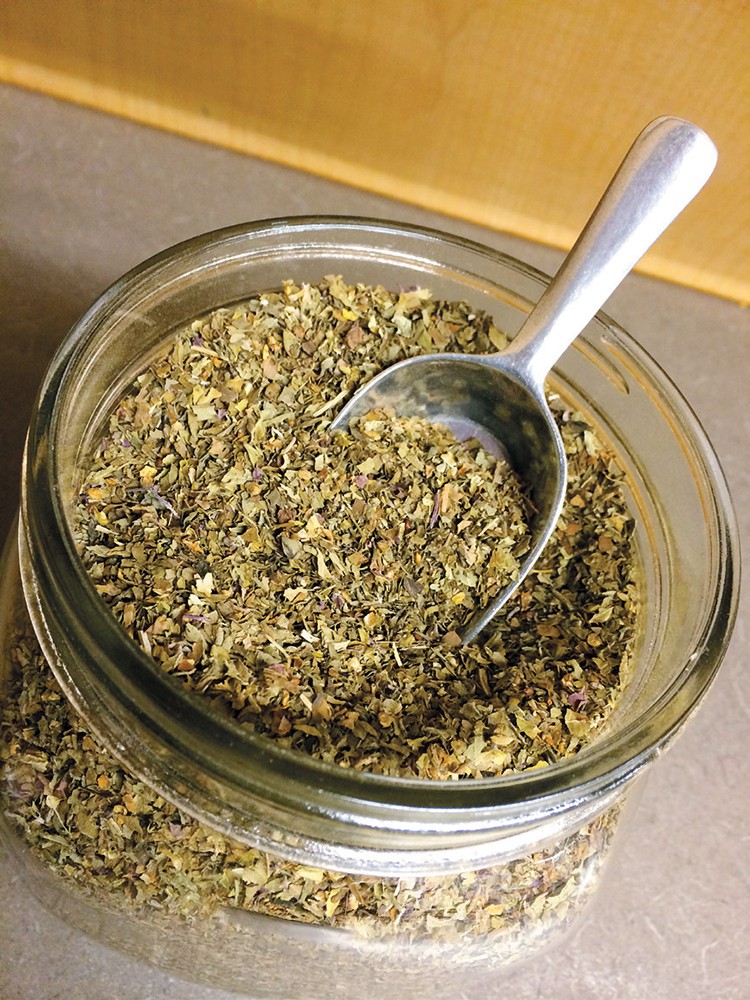
HARVEST & STORE Bay leaves can be harvested anytime of year, which is nice when it’s the middle of winter and you’ve got a soup planned or you’ve got a nagging headache. The leaves tend to be more flavorful in the summer, but still retain plenty of delicious taste in other seasons. To harvest, simply pluck the leaves from the tree. Yes, it’s just that easy.
If you’re not going to use the leaves immediately, you can dry them with a dehydrator, but I usually just lay them out on a cooling rack—the type used to provide airflow for just-baked breads and cookies—and forget about them for a week or two. Once dried, they’ll stay potent for up to a year, but they lose their flavor rapidly after that point.
Keep in mind that dried leaves don’t have some of the bitter-tasting compounds that exist in fresh leaves; this is beneficial if you don’t like the taste of fresh leaves, but some of the digestive healing properties that come with ingesting the herb in its bitter (fresh) form will be lost.
For cooking, simply use the entire dried or fresh leaf to add to dishes, or bundle together with sage and other herbs to make a bouquet garni. Be sure to remove the bay leaf before eating, because its brittle texture can potentially scratch your throat.
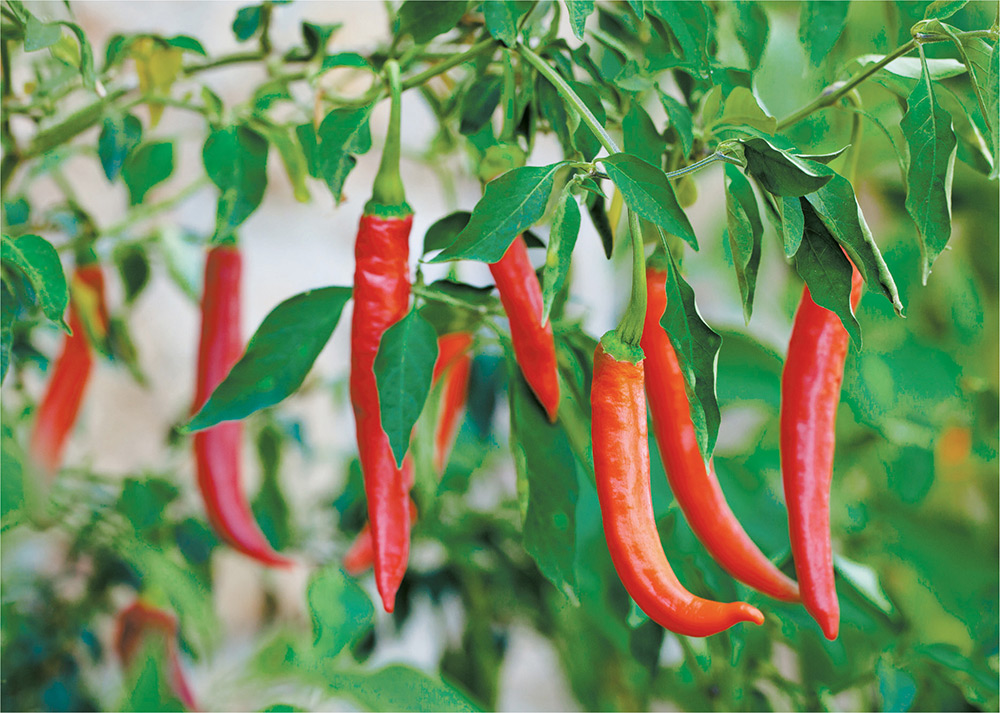
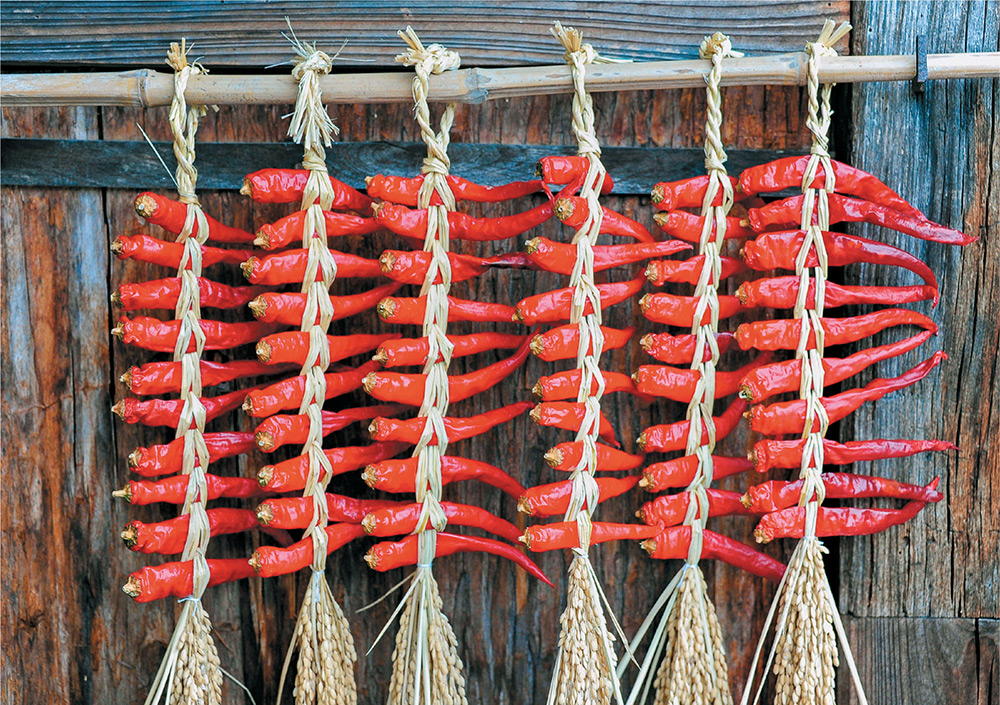
Cayenne Capsicum annuumNamed for the city of Cayenne in French Guiana, the cayenne pepper is also known as bird pepper, Guinea spice, and cow-horn pepper. Some estimates put pepper cultivation between 5200 and 3400 BCE, making them among the oldest cultivated plants in the world. Cayenne was introduced into the Americas in the 1500s, and has been used for culinary and medicinal purposes ever since. Today, cayenne is still recognized for its range of uses. Personally, I use the spice as an anti-cold remedy in the winter, by combining a teaspoon with 3 ounces of warm water, a little honey, and some crushed garlic. Taking this “shot” a few times a day whenever I feel cold symptoms coming on balances out my system within twenty-four hours.
Capsaicin works to alleviate pain by acting as a counter-irritant; the pain signals from the original condition like muscle aches or nerve pain become blocked. When eaten, cayenne stimulates stomach secretions, an action that helps to soothe the digestive tract.
Here are a few ideas for your Rx/medicinal preparations:
Create a remedy for a sore throat by mixing 1/2 teaspoon dried cayenne powder (less if you’re sensitive to the heat), 2 tablespoons salt, and 1 tablespoon of honey into 2 cups of water. Gently simmer the mixture for about fifteen minutes, allow it to cool until it’s just warm, and gargle with 1/2 cup at a time.
Address sinus congestion by putting a dash of cayenne pepper into warm water or tea and drinking it.
For general digestion help, cook with the peppers by adding them to dishes; you can adjust heat levels by leaving out the seeds entirely, or adding some into the dish.
CHECKLIST
Sun: Eight to ten hours per day
Shade: Prefers full sun
Soil: Well-drained, loosened soil
Fertilizer: Use compost, bone or blood meal
Pests: Can be an issue, especially with hornworms or blister beetles
Water: Regularly, depending on soil dryness
Grows Indoors? Yes, under the right conditions
Cayenne peppers are long, red, and are ideal for drying since they tend to have thinner skins than some other types of hot peppers. Although the time from seeding to harvest can be a few months, it’s worth the wait once you see the plants loaded with so many peppers it seems like it’ll collapse under the weight.
VARIETIES There are hundreds of hot pepper varieties, and pepper enthusiasts are developing new ones all the time—usually to increase the heat level. Cayenne still remains one of the most popular and dependable types, with some nice varieties within the category:
MEDICINE CABINET
The active ingredient in cayenne peppers is capsaicin, which is what gives the peppers their heat, and causes that lovely burning sensation in the throat when you eat them. When used externally, capsaicin acts as a natural pain reliever, and has been utilized to address joint pain, headaches, and nerve pain.
Effective for pruritus ani
Itching around the anal area is both embarrassing and very common, as well as difficult to treat. But researchers have found that capsaicin ointment offered relief, leading them to conclude that “capsaicin is a new, safe, and highly effective treatment for severe intractable idiopathic pruritus ani.”1
Aids in chronic pain
With pain caused by nerve damage, capsaicin can generate higher levels of pain relief, as well as show improvements in sleep, daytime fatigue, depression, and quality of life. High-concentration topical capsaicin is therefore similar to other therapies for chronic pain, researchers noted.2
1. Lysy, J., et al. “Topical capsaicin—a novel and effective treatment for idiopathic intractable pruritus ani: a randomized, placebo controlled, crossover study.” Gut Sep 2003; 52(9): 1323-1326. http://www.ncbi.nlm.nih.gov/pubmed/12912865
2. Derry, S., et al. “Topical capsaicin (high concentration) for chronic neuropathic pain in adults,” Cochrane Database Syst Rev. 2013; 2:CD007393. http://www.ncbi.nlm.nih.gov/pubmed/23450576
Joe’s Long Cayenne: these slender peppers are perfect for drying, and the thin size makes them look nice hanging in a kitchen too.
Cheyenne: sweeter than many cayenne varieties, this one has thicker walls, so they don’t dry as quickly as others, but they’re better for cooking.
Red Flame: boasts a sweet-hot taste, and the plants are very productive, to the point where you’ll see more peppers than leaves when they’re mature.
PLANT With cayenne, and other hot peppers, either buy already-established plants from a nursery or start the seeds indoors. Although you can go the traditional route with seed starting (place seed in soil, cover, give water, sun, and fussy attention), there’s a way to speed germination time, which is especially helpful if you’re getting started with peppers later in the season than you’d planned.
To kick off germination, get more moisture in the seeds by first dampening two paper towels and placing the seeds in a single layer across one of them, putting the other dampened paper towel on top. Seal the seeds and paper towels into a plastic bag (ziptop is great), or in a plastic container with a lid. Keep the bag or container in a warm area such as a kitchen, or near (but not on) a heater. Check the seeds after a few days; they should seem puffy, or even starting to sprout. Now you get to plant.
Sow each seed about 1/2 inch deep in a small pot that has holes for drainage, using an indoor soil mix that has a bit of fertilization in it, like worm castings or compost. Even if you’re going to grow the peppers indoors—which is completely doable, if you’ve got some nice sunlight—choose a pot that’s an appropriate size, around 3 inches deep, since that will help the start’s roots stay warm and cozy. Cover the pot with plastic wrap to help retain moisture and temperature. Take off the wrap when you start to see germination.
Warmth is crucial when germinating the seeds and getting them started, so if your house is on the colder side, like under 65 degrees Fahrenheit, consider investing in a germination mat. These look like little heating pads, but they don’t get hot to that degree. Instead, they warm the seed pots from underneath, creating a nice environment for a growing pepper and other starts.
Once the cayenne is germinated, which should be about two to four weeks after planting, keep it going with warmth and thorough watering. Peppers thrive with regular watering, and you should mist or water when the soil is just beginning to look dry. When the plant is about 6 to 8 inches tall, you can transfer to a larger pot for indoor growing, or plant outside in your garden, making sure to choose a spot with full sun and well-draining soil. Peppers appreciate slightly acidic soil, so work in compost or another natural fertilizer before planting, which will increase acidity. Plant about 2 feet apart.
GROW As pepper plants are adjusting to their new garden home, weed around them regularly, and consider mulching around the base, to retain moisture in the soil. Make sure to water often, since peppers tend to do best when they’re properly hydrated.
If you’re growing the peppers indoors, place the pot outside when it’s sunny and over 60 degrees Fahrenheit, since the airflow helps the plant to get stronger. If that’s not an option, just place in a sunny spot near a window that can open. Peppers need at least eight hours of sunlight every day, and they thrive with warm temperatures.
Whether indoors or outside, the peppers should begin to produce after about two to three months, depending on variety. This will feel like a very long time, I know. But once those peppers start popping, they should become abundant before long.
NUTRITIONAL VALUE OF CAYENNE
per 100 g (3.5 oz)
Cayenne is rich in phosphorus, vitamin A, vitamin C, and potassium.
Energy |
318 kcal |
Carbohydrates |
56.63 g |
Dietary fiber |
27.2 g |
Fat |
17.27 g |
Protein |
12.01 g |
Water |
8.05 g |
Vitamin A |
41610 µg |
Thiamine |
0.328 µg |
Riboflavin |
0.919 mg |
Niacin |
8.701 mg |
Vitamin B6 |
2.450 µg |
Folate |
106 µg |
Choline |
43.6 mg |
Vitamin C |
76.4 mg |
Vitamin E |
29.83 mg |
Vitamin K |
80.3 µg |
Calcium |
148 mg |
Iron |
7.8 mg |
Magnesium |
152 mg |
Manganese |
0 mg |
Phosphorus |
293 mg |
Potassium |
2014 mg |
Sodium |
30 mg |
Zinc |
2.48 mg |
Source: USDA Nutrient Database
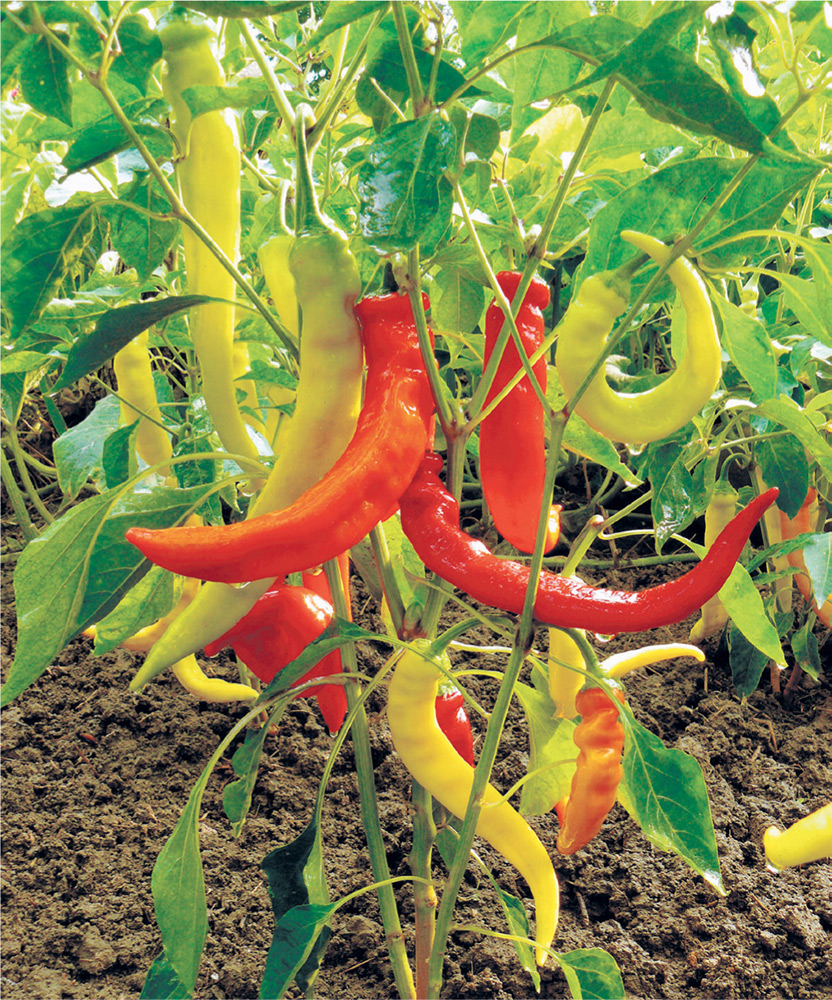
HARVEST & STORE Peppers start out green, and then change gradually to their final color in a process that’s stunning to watch. They’re ready to pick when they feel softened—occasionally “pinch” the peppers are they’re growing to get a feel for when the peppers start to mature.
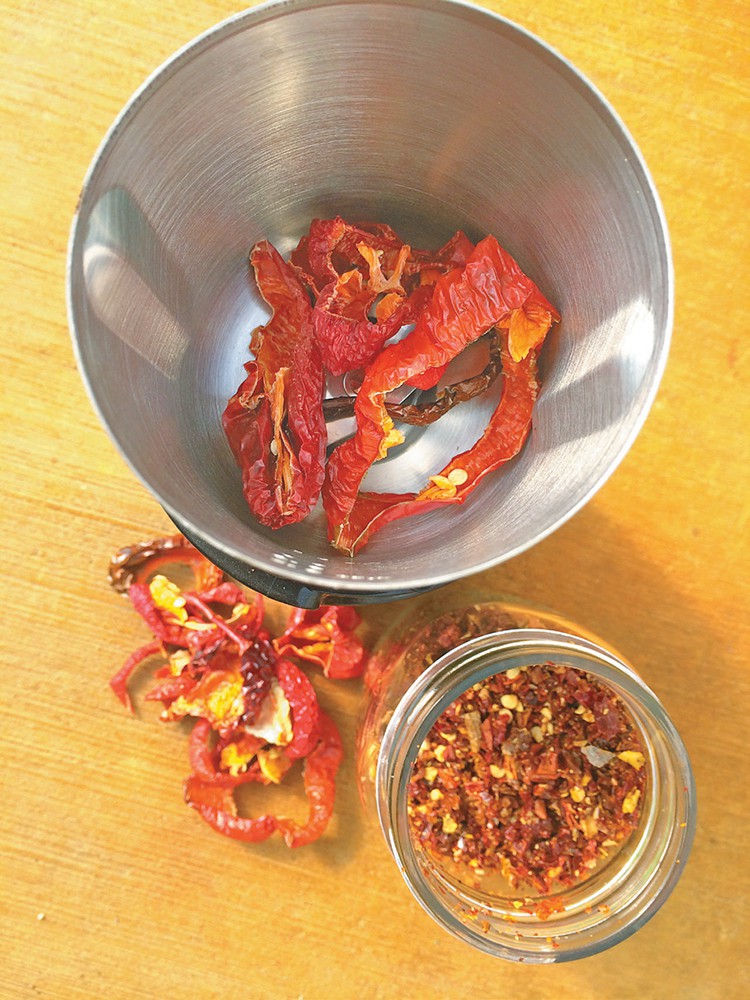
Once you pick them, either use them fresh or dry them. For the latter, thread a string through the stems and hang them in a dry, warm area, or use a food dehydrator. If going that route, just be sure to put the dehydrator in a well-ventilated space; when I first started drying peppers, I used the machine in my kitchen and loaded it up with hot peppers. After about an hour, it felt like I was trying to make homemade mace—everyone was coughing and rubbing their eyes—so the dehydrator got banished to the porch.
When the peppers are dried, they store very well in a glass jar, or you can use them immediately by crushing them in a spice grinder or coffee grinder. The resulting mix will be moist, so before storing the crushed pepper, spread the mixture evenly out on a clean cloth or paper towel and let it dry some more. Store the mix in a glass container with a tight-sealing lid.
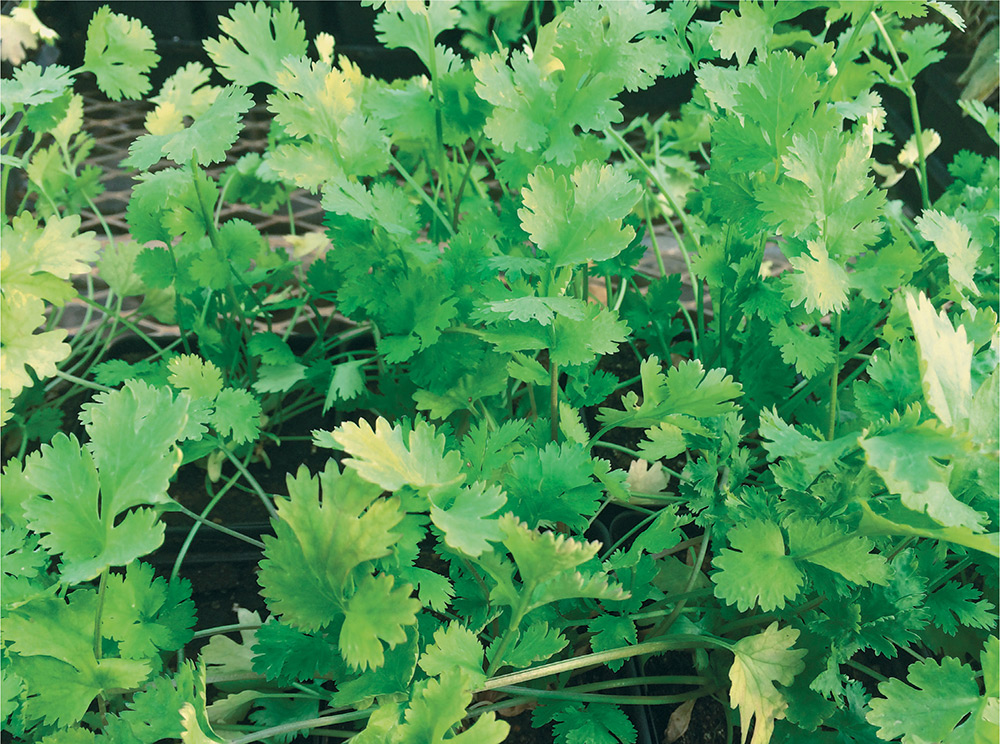
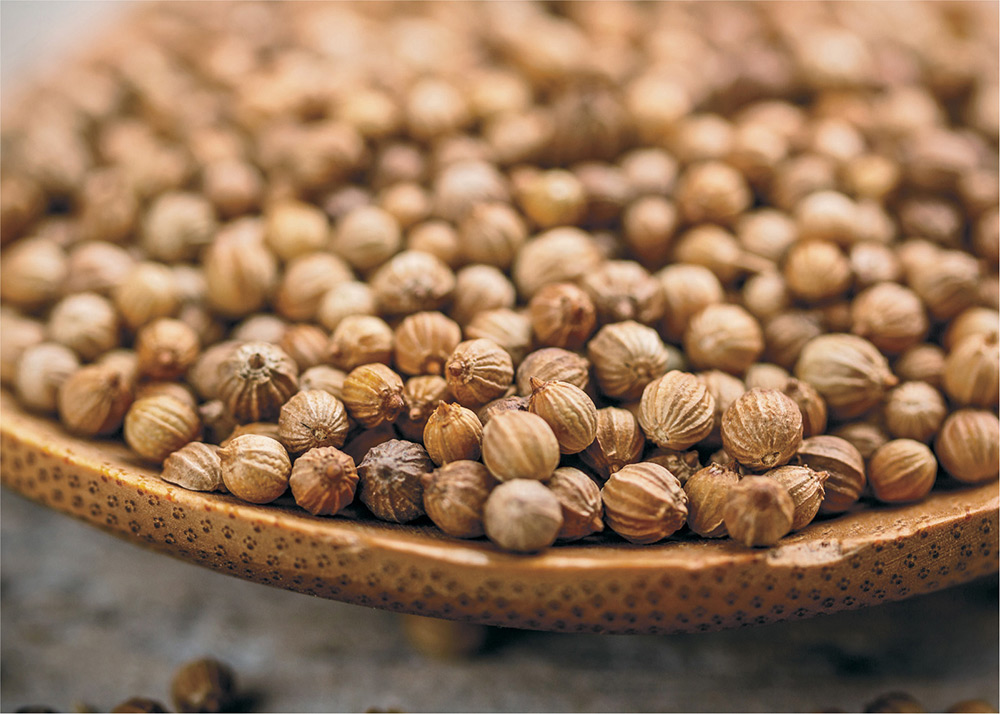
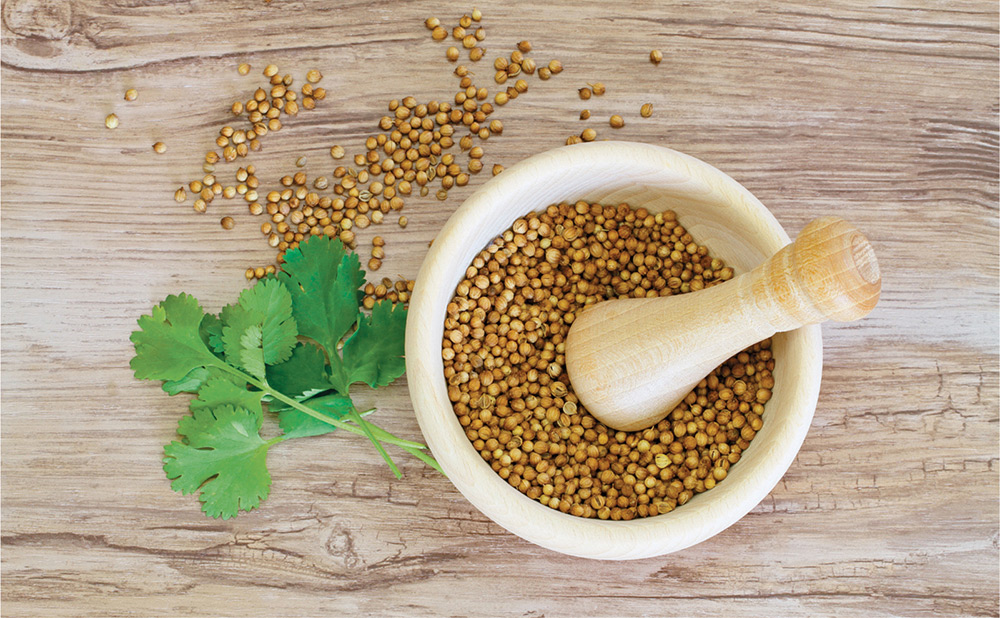
Cilantro/Coriander Coriandrum sativumAlso known as coriander, Chinese parsley, or dhania, cilantro seeds were found in the tomb of Tutankhamen, and the herb has been cultivated in Greece since at least the second millennium BCE. Some evidence has suggested it was once used to make perfume, but it’s always been a beloved flavoring. Brought to the British colonies in North America in the 17th century, cilantro was one of the first spices cultivated in the United States by those early settlers. Despite its rich history, cilantro has a way of dividing people into lovers or haters, but if you’re on the fence, a glimpse at the herb’s strong anti-inflammation effects might make cilantro taste more delicious to you.
Cilantro contains antioxidants, which are incredibly helpful for preventing illness and addressing issues like inflammation. The best herbal preparation for cilantro I’ve found is simply eating it, but there are other methods that can come in handy if you don’t like the taste.
Here are a few ideas for your Rx/medicinal preparations:
For indigestion, dry some cilantro leaves and steep them in hot water for a tea; the flavor will be different from the fresh leaves, and you can add honey if you need a sweetener.
Make a poultice by mashing fresh leaves into a paste with a mortar and pestle or in a blender (with a few drops of water), then spreading that over a clean cloth, which you put over the skin. Leave on for about fifteen to twenty minutes. This is particularly effective for arthritis pain.
To take advantage of cilantro’s antiviral and antifungal properties on minor wounds, sprinkle some dried, crushed cilantro on the scrape or wound, allow to sit for a few minutes, then wash the wound, dry it, and bandage.
CHECKLIST
Sun: Four to six hours per day
Shade: Partial sun; aim for shady spot during hottest part of the day
Soil: Well-drained, loosened soil
Fertilizer: Usually not necessary, the plant can do well with minimal intervention and inputs
Pests: Tend to be minimal
Water: Regularly, depending on soil dryness
Grow Indoors? Yes, but it’s fussy
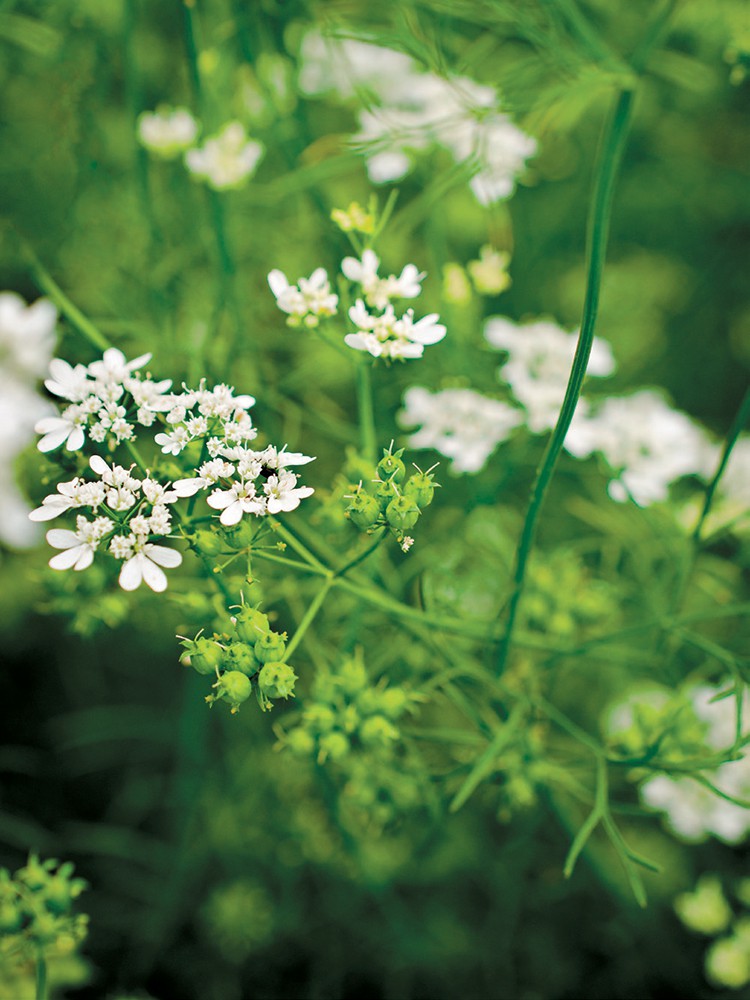
Cheery and abundant (sometimes too abundant for some gardeners), cilantro germinates quickly, can be sown throughout spring and summer, and does well with indoor growing. The herb’s abundant leaves and edible stems dry very well, and when it’s bolted (going to seed, an indication that it’s done with its growing season), the result is pretty white flowers that can look nice along a landscaped path.
VARIETIES Unlike some herbs, cilantro doesn’t have a huge range of varieties, and most will look very similar, with flat, toothed leaves. But there are some considerations, like bolting, that can steer your choice of variety. All of these have medicinal properties, and are fairly easy to grow:
MEDICINE CABINET
All parts of a cilantro plant are edible, and people tend to favor the fresh leaves and dried seeds for cooking. But in terms of medicinal properties, even the roots and stems can be used for both culinary and wellness purposes.
Antibacterial action
Researchers found that certain properties of fresh coriander leaves were found to possess bactericidal activity against Salmonella choleraesuis, a food-borne bacterium.1
Treatment for type 2 diabetes
A study on mice found that coriander extract created insulin-like activity, and assisted the mice in releasing insulin within their own systems. Researchers noted that this was promising for potential type 2 diabetes treatments.2
1. Kubo, I., et al. “Antibacterial Activity of Coriander Volatile Compounds Against Salmonella choleraesuis.” J. Agric. Food Chem. 2004; 52(11): 3329-3332. http://pubs.acs.org/doi/abs/10.1021/jf0354186
2. Eidi, M., et al. “Effect of coriander seed ethanol extract on insulin release from pancreatic beta cells in streptozotocin-induced diabetic rats.” Phytotherapy Research 2009; 23(3): 404-6. http://onlinelibrary.wiley.com/resolve/doi?DOI=10.1002/ptr.2642
Calypso: Sometimes a range of weather conditions can cause cilantro to bolt early, limiting harvest. This variety has been cultivated as very slow to bolt, and offers a high yield of leaves.
Santo: A very popular choice among growers, and if you’re getting cilantro from the grocery store, it’s likely that you’re buying Santo. The variety is easy to grow, and tolerates cooler conditions.
Santo Monogerm: Cilantro seeds are actually fruits that contain more than one seed within them, which is why the plants get so thick and bushy. If you’re looking for more precise planting, choose this variety of individual seeds.
Caribe: Compared to Santo, this variety has thinner stems and better bolt tolerance, and it’s favored by greenhouse growers and indoor gardeners.
PLANT Cilantro does well with direct seeding into a garden space, but can be easily transplanted if you purchase a start from a nursery. Ideally, plant in the spring since this herb prefers cooler temperatures, or plant in fall if you’re in warmer climates like Zones 8 to 10.
Choose a spot where the herb can stretch out and become abundant; but if you’re working with smaller garden spaces, it may be advisable to plant cilantro in a container to keep it controlled. Most important, find an area that gets early morning or late afternoon sun, but is shaded during the hottest part of the day, since cilantro appreciates a break from the heat. This herb can grow in full sun, and we do that all the time on our farm, but we’ve noticed that the growing season is shorter since heat makes cilantro bolt faster.
Either way, you can boost germination by first soaking cilantro seeds in water for 24 to 48 hours. This allows water to get into the seed and gives it a head-start on growing. Soaking can also increase the chance of germination for older seeds. If you’ve had problems growing cilantro in the past through direct seeding into the garden, consider starting the plants indoors and transplanting when the starts are about 2 inches tall.
If you’re eager to have plenty of cilantro, plant new seeds indoors or into the garden about every six weeks so you can replace the bolted plants with new ones.
GROW Like many herbs, cilantro does well with frequent harvesting, which encourages more growth, especially during the summer. When finished with the initial harvest season, just let it flower so that it can keep going strong and reseed, extending its next growing season, especially in the fall when cooler weather begins.
In terms of maintenance, cilantro is an easygoing addition to the herb mix, and doesn’t require much care beyond occasional watering. If the plant seems to be subject to insects like aphids, either buy an organic insecticidal soap or make your own by mixing a mild liquid soap (as unscented and as preservative-free as possible) with water and spraying on the leaves.
NUTRITIONAL VALUE OF CILANTRO
per 100 g (3.5 oz)
Cilantro is rich in potassium, vitamin A, vitamin K, and vitamin C.
Energy |
23 kcal |
Carbohydrates |
3.67 g |
Dietary fiber |
2.8 g |
Fat |
0.52 g |
Protein |
2.13 g |
Water |
92.21 g |
Vitamin A |
337 µg |
Thiamine |
0.067 µg |
Riboflavin |
0.162 mg |
Niacin |
1.114 mg |
Vitamin B6 |
0.149 µg |
Folate |
62 µg |
Choline |
0 mg |
Vitamin C |
27 mg |
Vitamin E |
2.50 mg |
Vitamin K |
310.0 µg |
Calcium |
67 mg |
Iron |
1.77 mg |
Magnesium |
26 mg |
Manganese |
0 mg |
Phosphorus |
48 mg |
Potassium |
521 mg |
Sodium |
46 mg |
Zinc |
0.50 mg |
Source: USDA Nutrient Database
HARVEST & STORE Since regular harvesting increases the lifespan of a cilantro plant, plan on clipping off growth fairly consistently. Rather than looking for new growth, as you would on many other types of herbs, you can harvest cilantro by just lopping off the top third of the plant; the new leaves will come from what’s left behind. Ideally, you should be harvesting about once a week, but it could be more often if the cilantro is hearty.
To store, dry the leaves and stems by placing on a clean mesh surface, such as cheesecloth or a plastic screen, or tie them in small bundles and hang them in your kitchen or other area that receives adequate airflow.
Fresh cilantro also freezes beautifully—often, I throw a bunch in a food processor with a dash of lemon juice and a small amount of olive oil and pulse until it’s a paste. Then, I put that into silicon ice cube trays and freeze overnight, popping them out in the morning into freezer bags. That way, I can either cook with the herb in the winter, or defrost a small amount to put into a poultice for scrapes or pain.
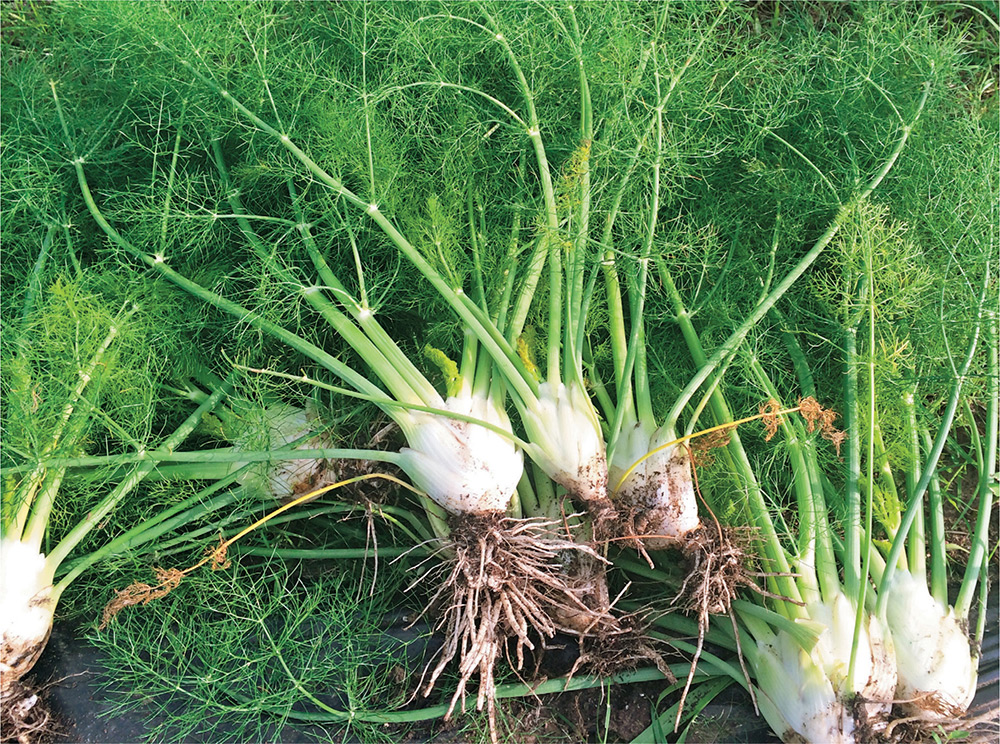
Fennel Foeniculum vulgareLooking very much like its relative, dill, fennel has a licorice scent and flavor, and boasts a wealth of culinary uses as well as medicinal properties. If you’ve ever been to an Indian restaurant, it’s likely you’ve seen a small bowl of fennel seeds (sometimes mixed with cardamom and anise seeds) near the register—that’s because this herb is used to freshen breath and aid digestion, acting on the smooth muscles of the stomach and intestines, as well as respiratory passages. Hint: that means take a few seeds the next time, and eat them on the way to your car. Because you can use fennel bulbs, fronds, and seeds, they make a great addition to any backyard garden, giving you plenty to use for cooking as well as medicinal remedies.
Fennel is best known for its ability to soothe a bumpy digestive system, and research has noted positive effects on the liver. Since you can use all parts of the plant, from roots to seeds, it makes a good all-around choice as a tonic.
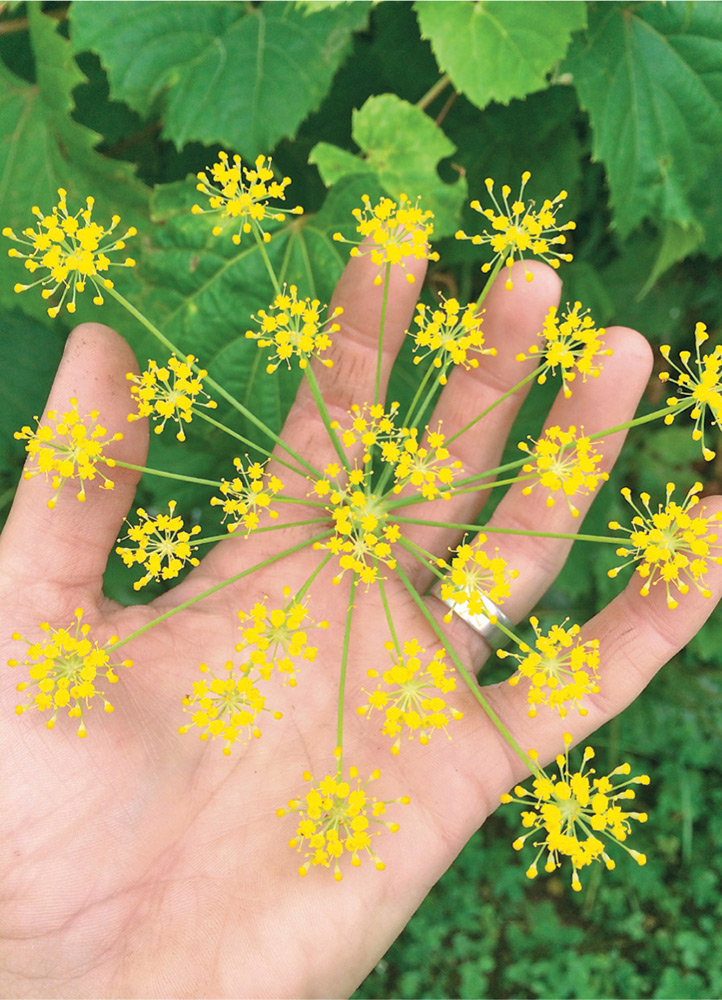
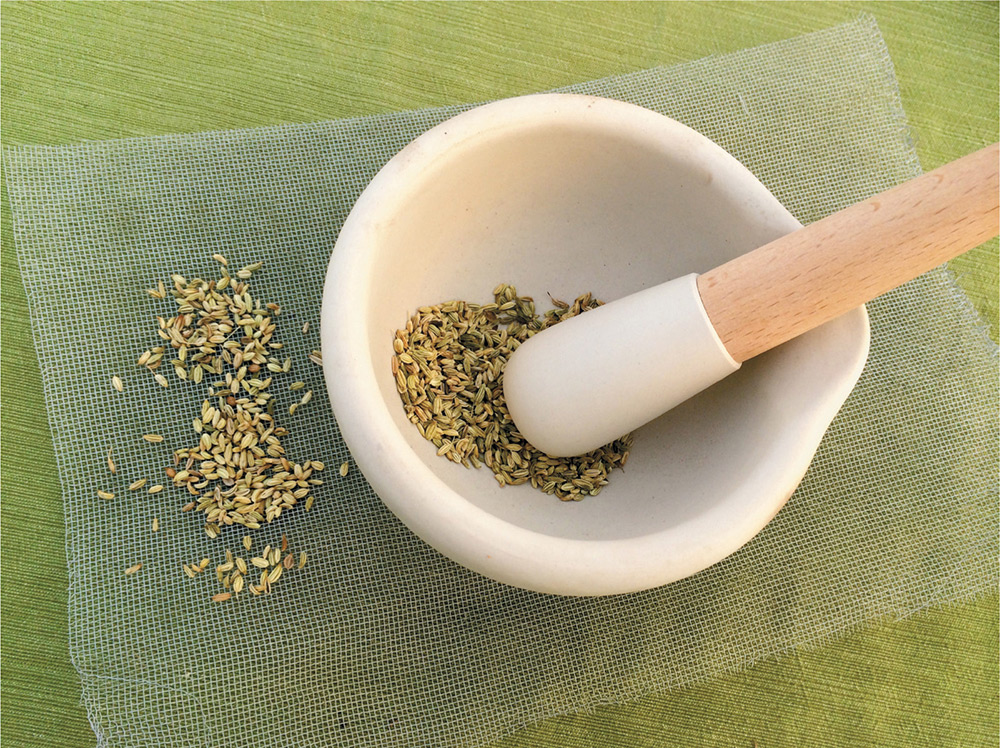
Fennel seeds are easily harvested.
Here are a few ideas for your Rx/medicinal preparations:
Chew on fennel seeds to freshen breath and aid in digestion. They’re safe to swallow too; just be sure to chew thoroughly.
In the fall, dig up some roots, clean thoroughly, and make a decoction by simmering the roots for about an hour, then straining through cheesecloth. Drink the strained liquid as a general tonic, or a detoxifier for the liver.
For irritated skin on the face, place fresh fennel leaves in a bowl and pour in boiling water; lean over the bowl with your head partially covered with a towel for a cleansing steam inhalation.
CHECKLIST
Sun: Six to ten hours per day
Shade: Full sun
Soil: Well-drained, loosened, fertile soil
Fertilizer: Minimal
Pests: Tend to be minimal
Water: Regularly; requires adequate irrigation for high yields
Grow Indoors? No
There are actually two categories of fennel: leaf and bulb. Both offer similar culinary and medicinal uses and result in edible seeds, stems, and leaves, but true to their names, the leaf fennel is mainly feathery foliage with some tender stems, whereas the bulb fennel has a rounded base just above the roots and is considered more of a vegetable than an herb. On our farm, we’ve grown both types and used them mainly for cooking, since we often use up our herbs before letting them go to seed. But several farmer friends have noted that allowing the fennel to go to seed results in some delicious teas.
MEDICINE CABINET
Found throughout the world, fennel has a pleasant, anise flavor and is used in both its vegetable and seed form. The herb is used for various digestive problems, and also works well for respiratory tract issues like bronchitis and coughs.
Helpful for osteoporosis
A major bone disorder in elderly woman, osteoporosis has often been treated with estrogen in hormone replacement therapy. However, that treatment is usually accompanied by effects like increased susceptibility to breast and ovarian cancers. Researchers noted that the situation is increasing demand for replacement with plant phytoestrogens, and that fennel shows promise for osteoprotective effects.1
Promising for colic
In a trial of 125 infants with colic, about 40 percent of infants receiving fennel showed relief of symptoms, compared with only 14 percent of those in the placebo group. Researchers noted that the results are promising and that more study should be done to confirm fennel’s efficacy for treatment.2
1. Mahmoudi, Z. “Effects of Foeniculum vulgare ethanol extract on osteogenesis in human mecenchymal stem cells,” Avicenna J Phytomed 2013 Spring;3(2):135-42. http://www.ncbi.nlm.nih.gov/pubmed/25050267
VARIETIES The variety of fennel you choose will most likely depend on your garden space and your interest in eating the bulbs. Although I find the bulbs unbelievably delicious, their anise flavor isn’t for everyone. If you’re interested just in teas, seeds, and using the fronds, leaf fennel may be a better choice since the flavor isn’t as strong. Either way, there are plenty of nice options:
Orion: a bulb fennel that produces large, thick rounded bulbs and solid stems that can be used like a licorice-infused celery.
Zefa Fino: Most fennel requires planting in the spring to prevent bolting, but this bulb variety was bred to be more bolt resistant, so you can plant it in the summer.
Bronze: if you’re looking for an ornamental plant as well as a medicinal one, this variety works well since it has a beautiful reddish gold color and tends to be shorter than bulb fennel. The leaves also make a lovely addition when sprinkled on top of dishes, thanks to its distinctive color.
Grosfruchtiger: a green leaf fennel, this variety has vigorous leaf production and tends to be sweeter tasting than other fennels, making it nice for a lighter, sweeter tea.
PLANT Fennel can be planted into a garden as a transplant, but most often, it’s directly seeded into a garden space in the late spring. For those in Zones 5 to 10, congratulations! Fennel is a perennial that can survive your winters and come back in the spring. But for those of us living in the refrigerator section of the US, you’ll have to consider the plant an annual, reseeding or replanting each year.
Before planting, loosen up the soil and add some compost (non-manure kind, so you’re not boosting the nitrogen too high). Fennel seeds only need a very light covering of soil, so plant close to the surface, about 10 inches apart for leaf fennel and 18 inches apart for bulb fennel, and sprinkle with soil. Be sure to water thoroughly—but gently, given the seeds’ position—as the seeds start to establish.
One important, quirky note: if you also have dill growing in your garden, separate that herb from the fennel. Put them on opposite sides of a garden, if possible. That’s because fennel and dill will cross-pollinate if given the chance, and although we all appreciate a story of forbidden love, you’ll end up with strange-tasting seeds if you’re using those for teas and salads.
GROW Fennel doesn’t require much care beyond occasional watering, making it an easy addition to a garden. If you find that it’s struggling in any way, consider misting around the roots with a mixture of water and fish emulsion (available at any garden store). In general, we call this blend “the magic juice” because it’s helpful for just about any issue we’re seeing, from yellowing leaves to drooping tomatoes.
NUTRITIONAL VALUE OF FENNEL SEED
per 100 g (3.5 oz)
Fennel seed is rich in potassium, magnesium, calcium, vitamin C, and phosphorus.
Energy |
345 kcal |
Carbohydrates |
52.29 g |
Dietary fiber |
39.8 g |
Fat |
14.87 g |
Protein |
15.8 g |
Water |
8.81 g |
Vitamin A |
7 µg |
Thiamine |
0.408 µg |
Riboflavin |
0.353 mg |
Niacin |
6.050 mg |
Vitamin B6 |
0.470 µg |
Folate |
0 µg |
Choline |
0 mg |
Vitamin C |
21.0 mg |
Vitamin E |
0 mg |
Vitamin K |
0 µg |
Calcium |
1196 mg |
Iron |
18.54 mg |
Magnesium |
385 mg |
Manganese |
0 mg |
Phosphorus |
487 mg |
Potassium |
1694 mg |
Sodium |
88 mg |
Zinc |
3.70 mg |
Source: USDA Nutrient Database
HARVEST & STORE Picking fennel is just as easy as maintaining it in a garden. Simply cut off the stems of leaf fennel as you need them, taking care to leave the small, compact new growth alone. These new growth leaves are easy to spot since they’re very compact and usually brightly colored.
For bulb fennel, you can harvest the stems with their leafy fronds, but most likely, you’ll be pulling up the whole bulb once it reaches adequate size, which depends on the variety. Some bulbs are round, like tennis balls, while others are flat, like side plates. Either way, grasp the bulb on each side, close to the ground, and pull. The whole bulb should come up with roots.
Then, you can dry the fronds for tea and put the bulb in the fridge for eating. If you’re looking to use the seeds, harvest those in the fall after the flowers have turned brown—leave the seeds to dry on the plant rather than collecting them and drying them on a screen. The seeds should come off the plant very easily, so put some kind of container underneath and brush the seeds off. Put the seeds in an airtight, glass jar and they should keep for at least six months; be sure to check them after the first week or so to make sure they’re dried enough and are not developing mold.
Fennel seeds are delicious, but if you have a fennel bulb and the feathery fronds, there’s a wealth of culinary possibilities. Usually, I coarsely chop the bulb, coat with olive oil, and grill for five minutes per side—the result is a caramelized, sumptuous side dish that goes well with the other grill-worthy fennel dish: salmon drizzled with butter, tucked into aluminum foil, and chopped-up fronds layered inside. Seriously delicious.
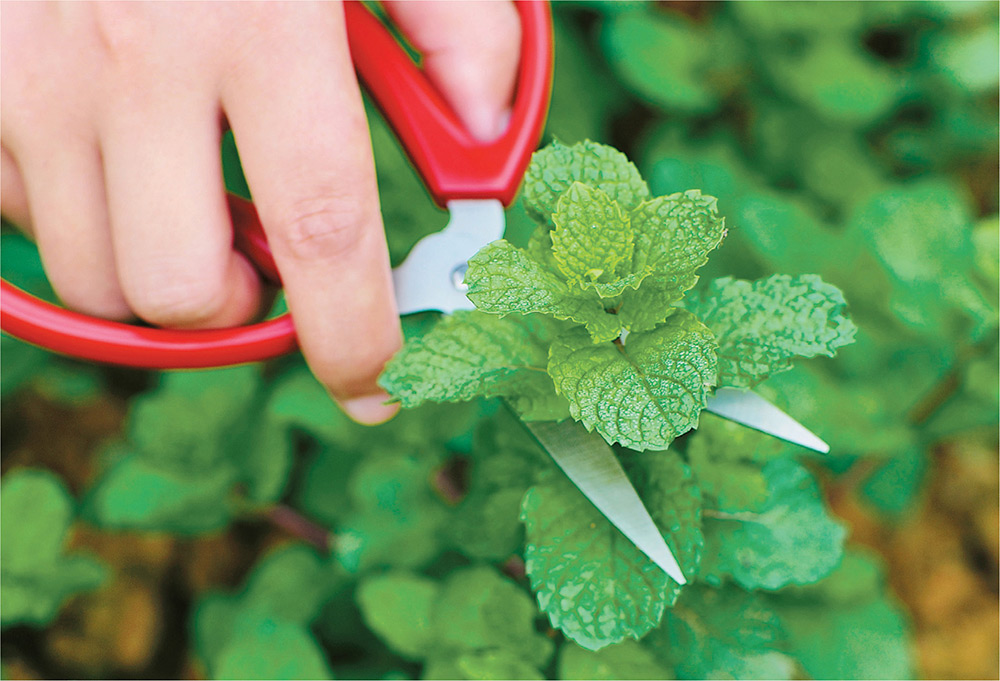
Mints Mentha spp.For this section, I decided to showcase a genus of herbs rather than discuss how to plant, grow, and use one specific species, like peppermint or spearmint. Although each mint certainly has its distinctive flavors, they tend to grow under the same conditions and can be used interchangeably in medicinal and culinary preparations. Honestly, I just love them all and it’s hard to pick a favorite, so I didn’t. In terms of history, “mint” comes from Menthe, a nymph in Greek mythology who was turned into a ground-clinging plant by jealous Persephone. Hades softened the transition by giving her the ability to sweeten the air when her leaves were pressed, but it doesn’t seem like much of a consolation. Still, that nymph sure does make a nice mint julep.
Most varieties of mint have stimulating properties, which is what makes them so ideal for digestion, and peppermint boasts additional antimicrobial and anti-spasmodic properties, making that mint particularly nice for chronic conditions like irritable bowel syndrome.
Here are a few ideas for your Rx/medicinal preparations:
Create an energy booster by first creating an infusion of 2 teaspoons of fresh peppermint leaves steeped in just-boiled water, then pouring into a warm bath.
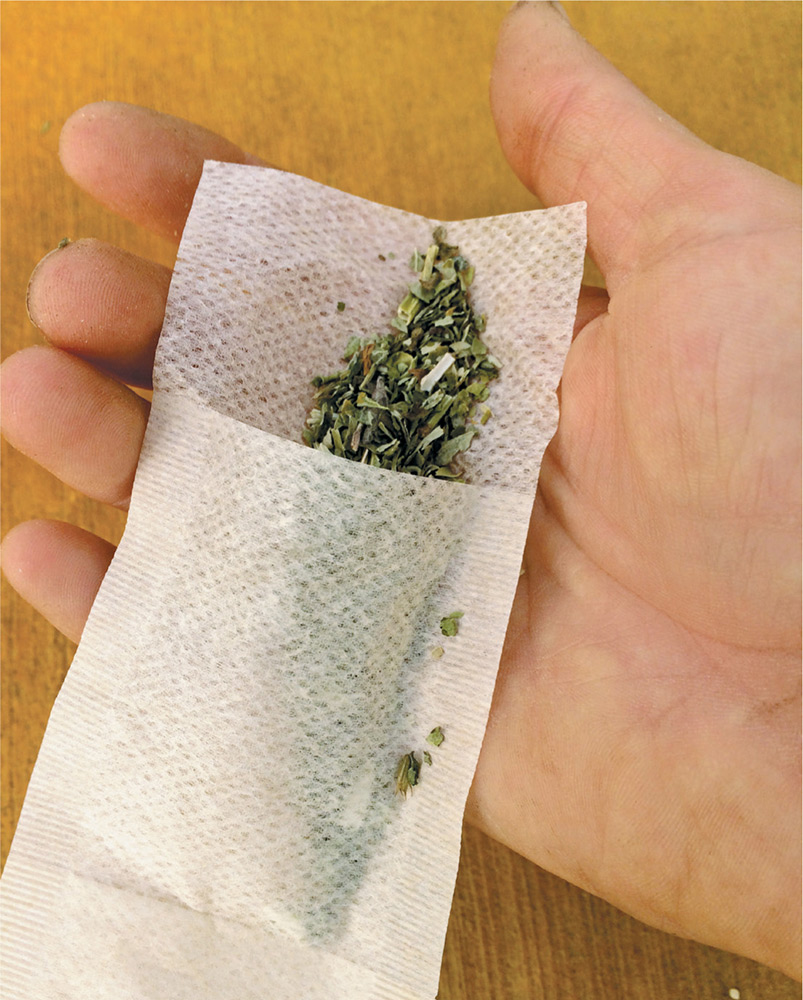
Dry mint leaves on a screen and make a tea that can be used to reduce indigestion. You can play around with tea strength by increasing the amount of leaves; just be sure to let it steep for only a few minutes. Any longer than that and the tea will get bitter. Start with about 2 heaping tablespoons of dried leaves to 16 ounces of very hot (not boiling) water.
To help with digestion issues, chop fresh leaves and put on a salad, or put whole leaves into fresh water or lemonade.
CHECKLIST
Sun: Six to eight hours per day
Shade: Prefers full sun but can do well in partial shade
Soil: Well-drained, loosened soil
Fertilizer: Every few weeks if you harvest often
Pests: Some, especially slugs and spider mites
Water: Regularly, depending on soil dryness
Grow Indoors? Yes
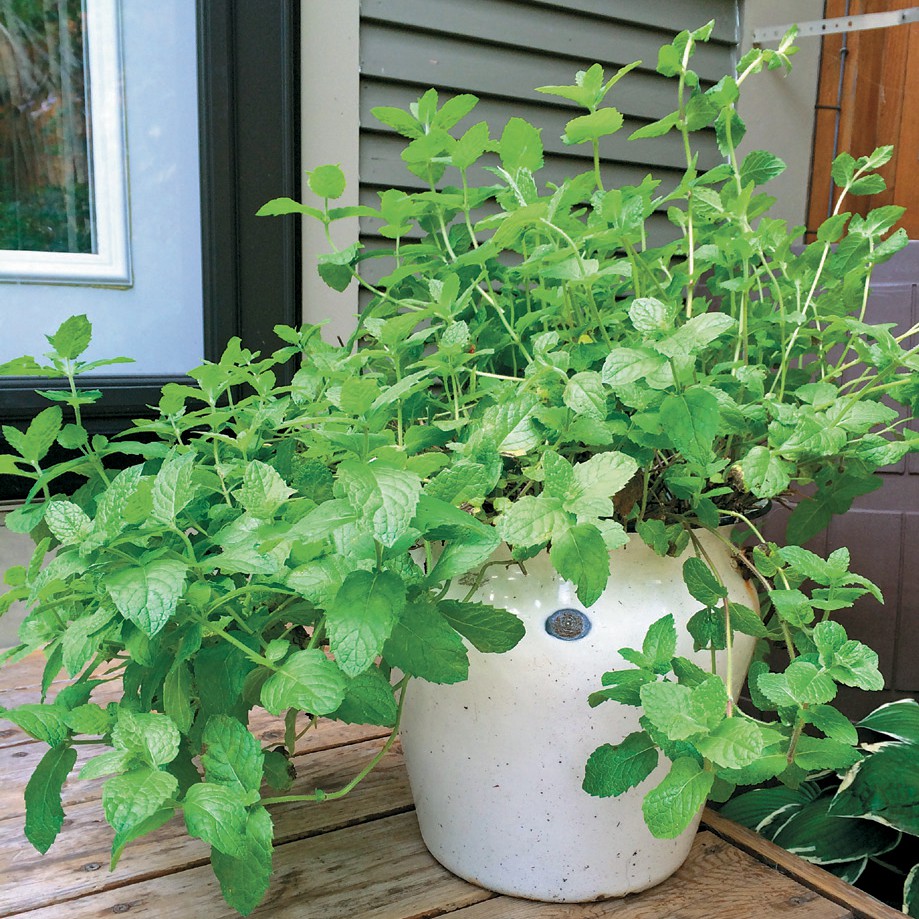
A common refrain for gardeners is that once you have mint you’ll always have mint. The leafy plant establishes quickly and spreads easily—perhaps a little too easily, in some cases. Mint can become invasive if left unchecked, and although it imparts a sweet aroma and flavor to dishes and medicinal preparations, most people don’t want to become mint growers. Because of that, it’s sometimes advisable to grow mint in a container so it can be controlled, or to grow it inside, where it can be quickly harvested.
MEDICINE CABINET
Mint has been used throughout history for digestion issues and stomach problems, as well as to freshen breath, so it’s no surprise that so many commercial toothpastes and antacids would feature mint flavorings.
Antimicrobial activity
An antimicrobial agent can kill microorganisms or inhibit growth, providing benefits against bad bacteria that can spread illness. Researchers noted that all extracts from Mentha longifolia showed different ranges of antimicrobial activities, and all showed antifungal activities against Candida albicans, a fungus that causes yeast issues in the body.1
Effective for chronic pain
The use of traditional medicine has been growing in the treatment of bladder pain syndrome, due to its high prevalence and insufficient treatment by conventional therapies, researchers noted. Researchers administered mint to register its effect as one of the more traditional herbs for pain in a patient with the syndrome. They found that in one patient with the diagnosis, there was a marked alleviation of signs and symptoms, suggesting further studies are needed.2
1. Bakht, J. “Report: Antimicrobial potentials of Mentha longifolia by disc diffusion method,” Pak J Pharm Sci 2014 Jul; 27(4):939-45. http://www.ncbi.nlm.nih.gov/pubmed/25015464
2. Latifi, S.A., et al. “Complementary treatment in chronic pelvic pain syndrome: a case report study,” Iran Red Crescent Med J 2014 Apr; 16(4):e13681. http://www.ncbi.nlm.nih.gov/pubmed/24910801
VARIETIES Once you begin to peruse seed catalogs, you’ll see why I couldn’t confine myself to describe just one variety of mint. There are mints that hail from Korea, the Middle East, South America, and China. Some impart a slight licorice flavor or feature edible flowers that can dried for sweet tea, while others smell like apple, or feature boosted spearmint flavor. One herb purveyor even offers a seven-mint set for those who can’t decide. Here’s just a sampling:
Arabian: with downy leaves and light blue leaves, this variety makes a pretty ornamental as well as a solid medicinal.
Chinese: used in traditional Chinese medicine to address fever, cough, sore throat, and irritated eyes, this variety has hearty leaves and a spearmint flavor.
Doublemint: with rounded leaves, this spearmint variety are particularly vigorous and good for container growing.
Applemint: with fuzzy leaves and an apple aroma, this variety is an excellent choice for teas, and makes a nice ornamental along walkways.
Mayan: considered a rare mint (although still available for purchase at some seed companies), with cone-like flowers and very sweet taste. The leaves have a purplish tint and the plant sends out runners, meaning that it drapes beautifully over rock walls.
Peppermint: a dependable variety with a familiar taste. Classic leaves, happy flavor, and dries well.
PLANT Mints are fast-growing plants that spread so quickly I’ve seen gardeners put them inside of a pot, and then put that pot inside of a container of other herbs or inside the ground. The herb sends out runners to claim more space, creating a lush bush that makes a good groundcover if you don’t mind the expansion.
Plant in the spring—or if you live in a climate without frost, you can plant in the fall as well—by direct seeding, or by taking a cutting of an existing mint plant from a friend or neighbor.
Because mint is so popular, it’s often found in nurseries, even in less-common options like chocolate mint or sweet mint. Because of that, it may be easiest to simply buy a transplant, since it will already be established and can be transferred directly to a garden space or indoor container.
When choosing a garden spot, consider using mint as a companion plant; because of its natural oils, the mint helps to deter insects from a number of vegetables, such as beets, broccoli, kale, kohlrabi, and others. Mint planted near tomatoes, cabbage, and peas reportedly improves the flavor and health of those plants.
GROW Mint tends to start blooming early, and will continue blooming from June to September. In order to keep the plant more compact, snip off the buds, and dry them for teas and other medicinal use.
To keep the plant more robust, trim off any yellowing lower leaves, and fertilize every two to three weeks by sprinkling some fertilizer around the roots. Make sure it’s a fertilizer that’s lower in salts (chat with your garden store about different brands and their salt content), otherwise the leaf tips will start to turn brown, and you can lightly mulch around the plant with straw or newspaper strips to help keep roots moist.
NUTRITIONAL VALUE OF PEPPERMINT
per 100 g (3.5 oz)
Peppermint is rich in potassium and vitamin A.
Energy |
70 kcal |
Carbohydrates |
14.89 g |
Dietary fiber |
8 g |
Fat |
0.94 g |
Protein |
3.75 g |
Water |
78.65 g |
Vitamin A |
212 µg |
Thiamine |
0.082 µg |
Riboflavin |
0.266 mg |
Niacin |
1.706 mg |
Vitamin B6 |
0.129 µg |
Folate |
114 µg |
Choline |
0 mg |
Vitamin C |
31.8 mg |
Vitamin E |
0 mg |
Vitamin K |
0 µg |
Calcium |
243 mg |
Iron |
5.08 mg |
Magnesium |
80 mg |
Manganese |
0 mg |
Phosphorus |
73 mg |
Potassium |
569 mg |
Sodium |
31 mg |
Zinc |
1.11 mg |
Source: USDA Nutrient Database
HARVEST & STORE Harvest mint leaves whenever you need them; like many other herbs, mints do best with frequent harvests. Fortunately, the leaves dry beautifully on a clean mesh screen or in the racks of an herb dehydrator. Then, you can crush them in a spice grinder and store in airtight glass jars.
When using fresh mint, the possibilities are seemingly endless, and all boast the kind of happy-digestion effects that you’d want in any dish. Tuck a few leaves into spring rolls, shred over salads, add to a pitcher of ice water, chop up finely and put into scrambled eggs, or combine with peas in a pasta dish.
Similar to other herbs, mint also freezes well. Throw a bunch in a food processor with a dash of lemon juice and a small amount of olive oil and pulse until it’s a paste. Then, put that into silicon ice cube trays and freeze overnight, popping them out in the morning into freezer bags. In the winter, when the landscape is either snowy and bleak or brown and lackluster (depending on your location), take those frozen cubes and add to lemonade; strain once they melt, and you’ll have a mint-infused drink that tastes like you’re in the middle of summer.
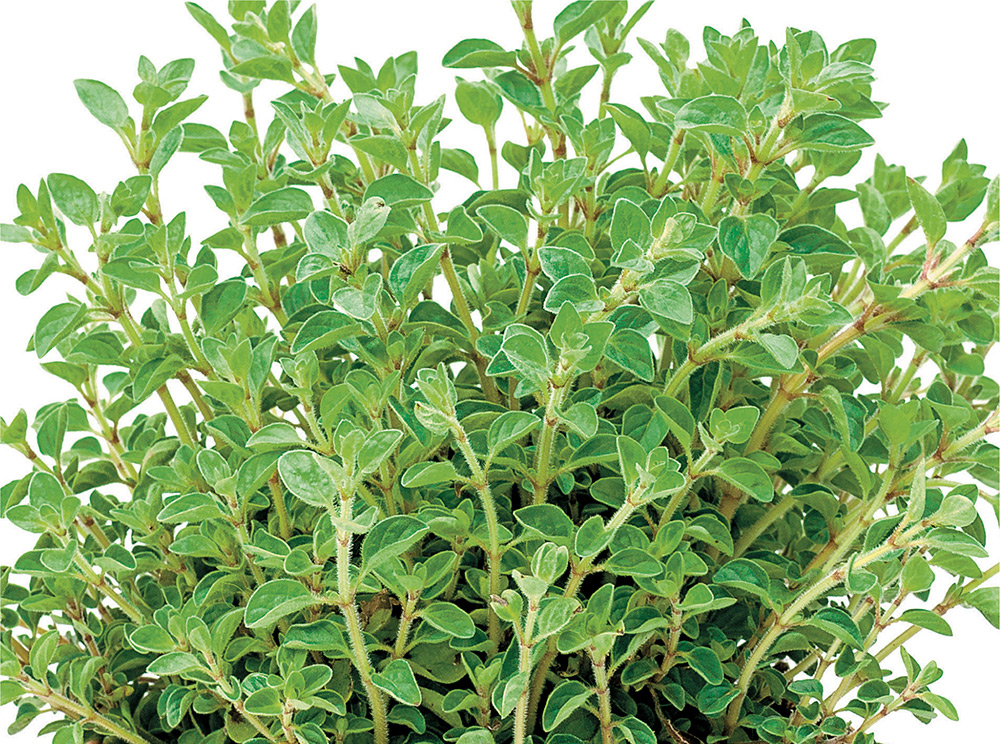
Oregano Origanum vulgareBesides serving as an excellent culinary ingredient in pasta dishes and soups, oregano has quite an impressive medicinal pedigree. Hippocrates reputedly used the herb as a treatment for stomach problems and respiratory issues, as well as antiseptic uses. Oregano is still very much in vogue in Greece today as a standard treatment for sore throats. In other parts of Europe, especially Austria, the herb is used for respiratory ailments and nervous system issues. Researchers in Poland have found some immune-boosting superpowers for the herb too. When tested against seventy other herbs for immunity effects, oregano came in first place. That makes this everyday culinary choice into a real standout.
Oregano’s oil-packed leaves make it a popular treatment for a range of issues, and oil of oregano can be a useful addition to any medicinal lineup. But unless you’re ready to set up a still and distill your own essential oils, it’s likely you’ll have to find easier ways to extract the potent properties. Fortunately, there’s an array of options.
Here are a few ideas for your Rx/medicinal preparations:
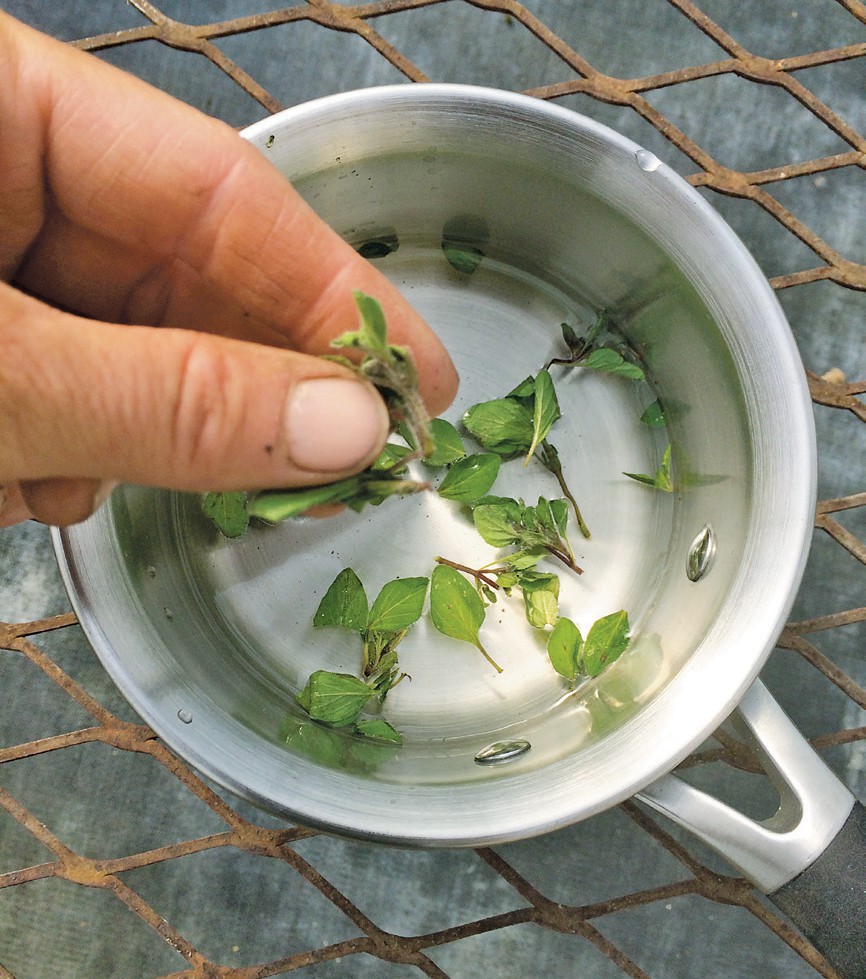
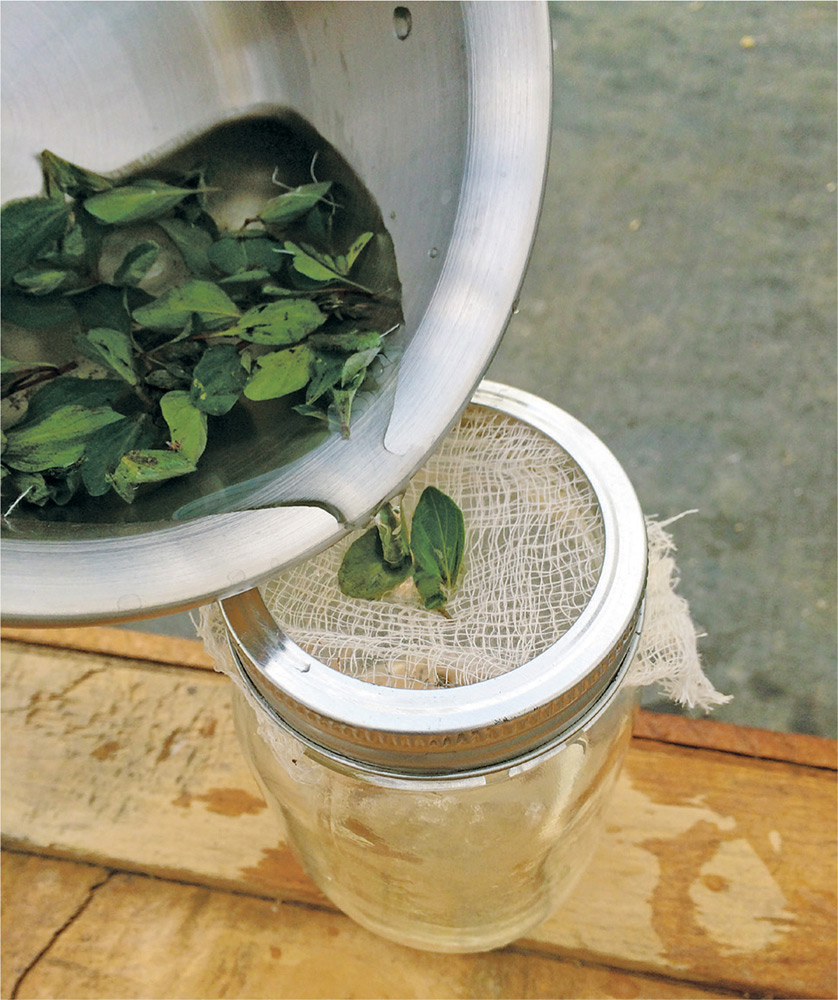
Dry the leaves, and make into a tea to help treat fatigue, irritable bowel syndrome, and bacterial infections. If you’re growing weary of tea (is that even possible?) you can also pack the dried leaves into empty gelatin capsules, available at many co-ops, and take in pill form.
To help with itching and swelling on the skin, mash the fresh leaves into a paste and add a small amount of hot water to help the mixture hold together. Sprinkle in a bit of oatmeal for thickening, and to help soothe skin, and cover irritated skin. Cover with clean gauze or towel.
Use cooled oregano tea to spray on pets, since the mixture can help kill fleas and act as an antibacterial, topical treatment that decreases itching.
CHECKLIST
Sun: Eight to ten hours per day
Shade: Full sun needed
Soil: Well-drained, loosened soil
Fertilizer: Usually not necessary
Pests: Tend to be minimal
Water: When the soil is dry
Grow Indoors? Yes
Oregano is particularly good as a small, well-controlled part of any garden you’ve planted for your backyard pharmacy. Non-invasive, easy to maintain, and robust if harvested regularly, the herb does well with warm temperatures and full sun, making it a perfect summer choice for a culinary mix. The herb also does well in indoor pots, especially if you’re extending the growing season. For example, oregano propagates well if you take a cutting from an existing outdoor plant and prepare it for growth inside. If that’s your strategy, simply cut a 4-inch section (measured from the tip of the stem/leaf toward the soil) and strip off about an inch or so of the lower leaves. Put the stem into a potting mix, such as vermiculite, and keep the mix somewhat moist as the plant establishes.
MEDICINE CABINET
Oregano is helpful for an array of maladies, from coughs and bronchitis to gastrointestinal disorders such as heartburn. It’s also been recommended for urinary tract infections, parasites, allergies, and even dandruff and spider bites. Consider all that the next time you skip sprinkling it on your pizza.
Controls blood sugar levels
Researchers from the University of Illinois noted that oregano and rosemary contain diabetes-fighting compounds, and show promise in treating type 2 diabetes. Researchers tested four different herbs for the study, and noted that greenhouse-grown herbs contain more polyphenols and flavonoids, two beneficial compounds, when compared to equivalent commercial herbs.1
May protect against drug-resistant bacteria
Oregano oil may be an effective treatment against dangerous drug-resistant bacteria, a researcher noted. Two studies have shown that oil made from the herb appears to reduce infection as effectively as traditional antibiotics.2
2. http://www.sciencedaily.com/releases/2001/10/011011065609.htm
VARIETIES When people buy oregano in dried or fresh form, it’s usually Greek oregano, a hearty variety with dark green leaves and a strong oregano taste and aroma. When the variety flowers, in small white blooms (similar to its relative, marjoram), it signals the end of the growth season, but they’re also edible and make a nice accompaniment to salads. But don’t limit yourself to a single variety—here are a few other choices:
Wild Zaatar: a good medicinal variety that grows wild in Israel, Jordan, and surrounding areas; flavor contains hints of thyme and marjoram as well as oregano. Be sure to use loose, well-draining soil in order to establish.
Oregano Vulgare: an Italian variety, with potent medicinal value. It does well with direct seeding compared to starting indoors as transplants. Though less flavorful than Greek oregano, it’s good for attracting beneficial insects, and good companion plant for vegetables. It’s especially nice as an edible ornamental, since it’s taller than Greek oregano, and features lavender-pink blooms.
PLANT Oregano can be direct seeded into a garden, if you have just the right conditions for it, but it thrives best if it’s transplanted from a start that’s been nurtured indoors for at least a month. Either buy a small start from a greenhouse, or grow one yourself in a warm and cozy indoor space in early spring for planting after the last frost.
If growing outside, pick a spot with full sunshine and soil that drains well. Compacted soil will result in slow growth, or even no growth at all, so if your chosen thyme spot’s soil seems dense, loosen the area with a pitchfork or other cultivating tool.
For inside growing, consider starting the seeds in a small container (about 2 inches or so) first, which will keep the roots warmer, aiding in germination. As the plant grows larger, transfer to a larger container (at least 6 inches) so the roots can establish more firmly. Whether the herb will be indoors or in a garden, put a small amount of slow-release fertilizer into the soil at the start of the season.
Sometimes oregano and other herbs can struggle if the pH of the soil is off, so in that case, test your soil to make sure it’s alkaline enough for the thyme; it should be between about 6 to 8; if it’s lower, boost it with a little lime sprinkled around the base of the plant.
GROW Like many herbs, oregano does well with frequent harvesting, which encourages more growth, especially during the summer. Allow the plant to grow to about 4 inches, then trim lightly, otherwise the plant will get dense and sometimes more woody.
Be sure to water thoroughly when it’s dry, but don’t water regularly. Oregano does well with minimal watering, and can be prone to root rot and insect issues if overwatered. It’s much better to soak the plants when the soil feels dry, and then water less often.
After plants are about three to four years old, thin them so they have more room to grow. Oregano is self-seeding, so you should see it in your garden each spring, but if not thinned after about three years, they can get too bushy.
Finally, consider dividing the plants so some grow indoors and others in your garden. This can be done by simply digging up part of the plant, roots and all, and transplanting into a pot filled with potting soil. Oregano does very well inside, and makes a stellar addition to a small culinary kitchen garden.
NUTRITIONAL VALUE OF OREGANO
per 100 g (3.5 oz)
Oregano is rich in iron, calcium, vitamin A, and potassium.
Energy |
265 kcal |
Carbohydrates |
68.92 g |
Dietary fiber |
42.5 g |
Fat |
4.28 g |
Protein |
9.0 g |
Water |
9.93 g |
Vitamin A |
85 µg |
Thiamine |
0.177 µg |
Riboflavin |
0.528 mg |
Niacin |
4.640 mg |
Vitamin B6 |
1.044 µg |
Folate |
237 µg |
Choline |
0 mg |
Vitamin C |
2.1 mg |
Vitamin E |
7.48 mg |
Vitamin K |
1714.5 µg |
Calcium |
1597 mg |
Iron |
36.80 mg |
Magnesium |
270 mg |
Manganese |
0 mg |
Phosphorus |
148 mg |
Potassium |
1260 mg |
Sodium |
25 mg |
Zinc |
2.69 mg |
Source: USDA Nutrient Database
HARVEST & STORE Usually, oregano is harvested as you need it, but it also freezes exceedingly well. To freeze, put in a food processor with a dash of lemon juice (to preserve color) and a small amount of olive oil and pulse until it’s a paste. Then, put that mix into silicon ice cube trays (which help prevent sticking) and freeze overnight, popping them out in the morning into freezer bags. When you want to cook with the herb in the winter, just grab a little cube and throw it directly into dishes.
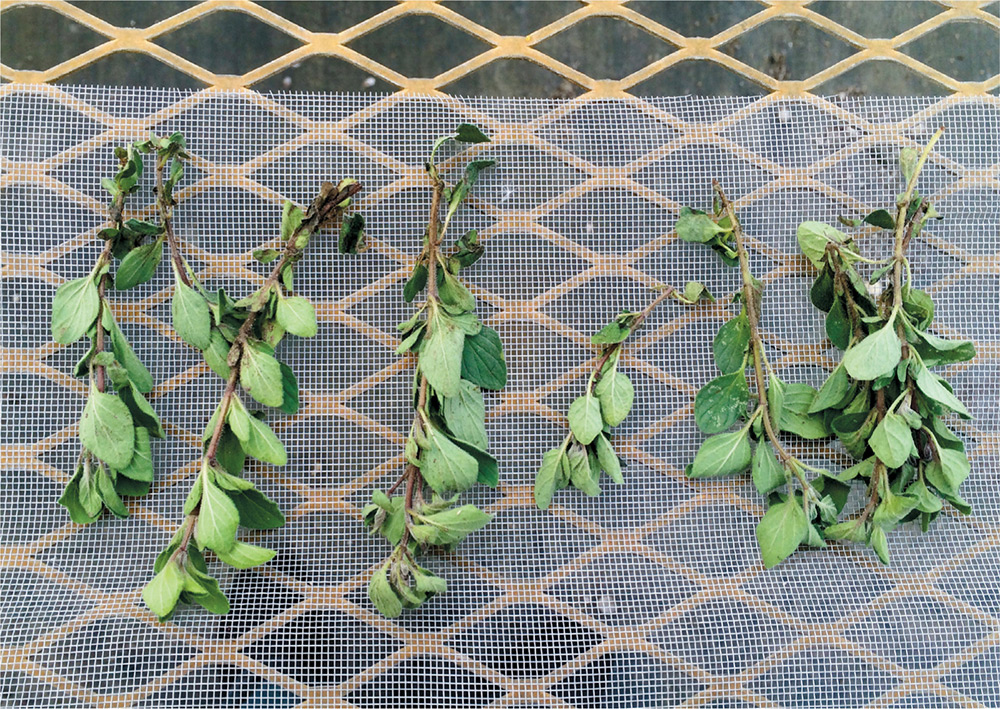
In the summer, I prefer to use fresh oregano for cooking and salads since I enjoy the taste, but I do dry quite a bit for winter cooking, especially near the end of the summer, when the oregano seems ready to fade. Oregano dries exceedingly well when placed together in a bundle and hung up to dry. Bundles can be stored in this form or stripped of their leaves, which are then placed in small jars for use in cooking, teas, and even small sachets that can freshen up the scent of drawers and closets.
For cooking and medicinal use, simply chop up the dried or fresh leaves and add to dishes, or store in airtight jars.
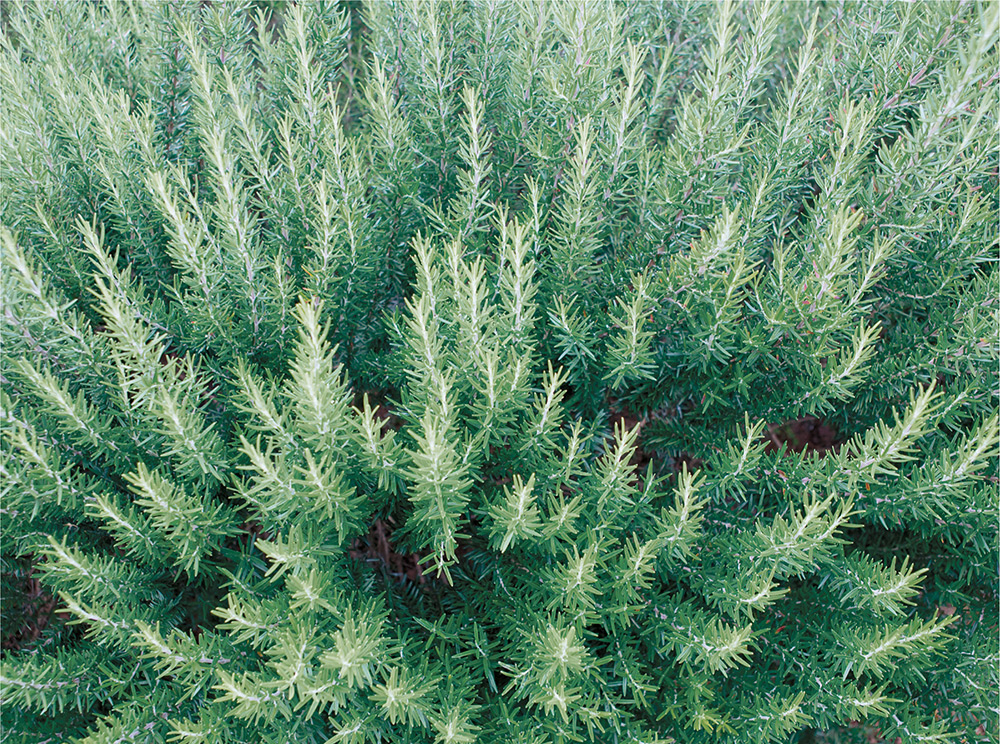
Rosemary Rosmarinus officinalisAlthough rosemary is a common culinary spice these days, the herb has a rich history of culinary, medicinal, and even cosmetic uses. It’s been used ceremonially to represent fidelity, friendship, and remembrance, particularly for important life events—brides would weave rosemary into their bouquets, and decorate pews with the herb to represent a vow of faithfulness. In Great Britain, churches would sprinkle rosemary on the floors at Christmas to remember those who’d passed during the year, and as acknowledgement of the herb’s role in Christianity—reportedly, the flowers used to be white, but changed to blue when the Virgin Mary threw her cloak over a rosemary bush on the flight from Egypt. Also, rosemary reportedly lives exactly thirty-three years, the length of Christ’s life. In addition to its major symbolism, the herb has been used as a hair rinse, as well as a treatment for headache, depression, and sciatia.
Rosemary is so plentiful that it makes a nice addition to any medicinal and culinary garden mix, particularly if it’s freshly harvested. The herb is a circulatory and nervine stimulant, and has a calming effect on the digestive system.
Here are a few ideas for your Rx/medicinal preparations:
To calm nerves or stimulate the appetite, create an infusion by pouring a cup of boiling water over a couple teaspoons of the dried herb and leaving in a covered container for about fifteen minutes. Drink up to three times per day, but don’t take for more than a couple days consecutively.
As a way to help digestion, use fresh rosemary in a mix used to marinate meat, combining the herb with ingredients like shallots, garlic, and parsley.
For dandruff or dry scalp, create a few cups of a rosemary infusion from fresh leaves and rinse hair after shampooing.
CHECKLIST
Sun: Six to eight hours per day
Shade: Prefers full sun
Soil: Well-drained, loosened soil
Fertilizer: Usually not necessary
Pests: Tend to be minimal
Water: Regularly, depending on soil dryness
Grow Indoors? Yes
Rosemary is a favorite in herb gardens and is especially good in container gardens because of its distinctive, woody look. The needlelike leaves can sometimes reach up to 3 feet in height, and even taller if not harvested. In my particular hardiness zone, the cooler temps cause our rosemary to seem stunted in comparison to warmer zones, where rosemary gets so robust that it sometimes makes good hedges. The plants are also tolerant of salt, unlike many other herbs, so it grows well in coastal areas. Rosemary also makes a nice choice for indoor growing, and can be included in a pot with other herbs like sage or basil.
MEDICINE CABINET
Rosemary boasts an impressive number of medicinal actions and is considered a carminative, anti-spasmodic, anti-depressive, and antiseptic. Research into other actions is showing promising results for conditions that range from cancer prevention to diabetes control.
Controls blood sugar levels
Researchers from the University of Illinois noted that oregano and rosemary contain diabetes-fighting compounds, and show promise in treating type 2 diabetes. Researchers tested four different herbs for the study, and noted that greenhouse-grown herbs contain more polyphenols and flavonoids, two beneficial compounds, when compared to equivalent commercial herbs.1
Antioxidant and anti-tumor properties
Rosemary leaves have potent antioxidant activity, researchers noted, and the herb also inhibits skin, colon, and mammary carcinogensis, which mean that it shows promise as a treatment for preventing tumors from forming.2
2. Chi-Tang, H., et al. “Antioxidative and Antitumorigenic Properties of Rosemary,” Functional Foods for Disease Prevention 1998; Chapter 15, pp. 153-161. http://pubs.acs.org/doi/pdf/10.1021/bk-1998-0702.ch015
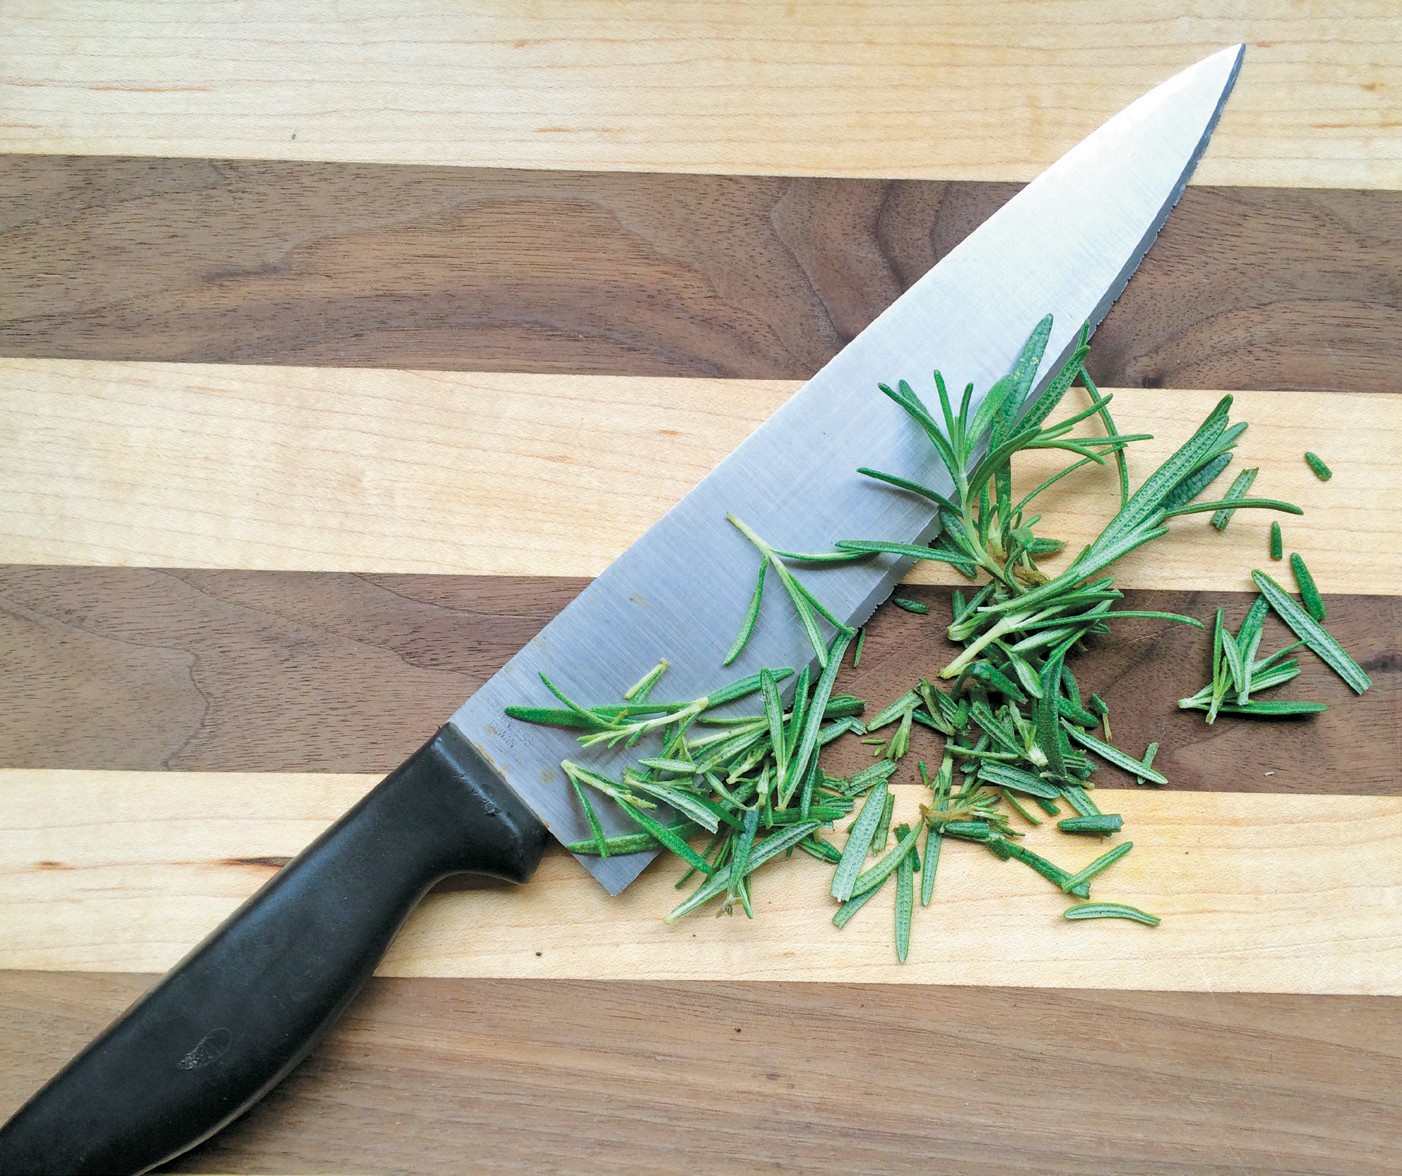
VARIETIES Rosemary’s distinctive aroma and taste have made it a favorite for chefs and herbalists alike. Harvesting is as easy as grasping the bottom of the stem and zipping off the pine needle-type leaves. When choosing a plant, many nurseries and seed purveyors often don’t designate a specific variety, and instead just sell “rosemary,” or “common rosemary,” but there are some other varieties worth noting, which all boast a nice amount of medicinal clout:
Lockwood de Forest: With lavender blue flowers, this variety makes an attractive border in ornamentals, and makes a good choice for container gardening.
Prostrate Rosemary: Awkwardly named, but it’s strangely fitting, since this variety has more tender stems that allow the plant to fall becomingly over the edges of pots and raised beds. A nice choice for draping over a stone wall.
Spice Island: Does very well in warmer climates, and is a perennial in Zones 7 to 9. Stands upright and has very strong flavor, making it a great culinary choice.
Gorizia: Named for a town in Italy where it originated, this variety is particularly mildew resistant, with unusually flat, large leaves.
PLANT When considering where to plant rosemary, find a spot with full sun and well-drained, loosened soil, preferably close to your backyard entrance so you can harvest frequently.
For inside or outside growing, consider starting the seeds in a shallow container (about 2 inches or so) first, which will keep the roots warmer, aiding germination. As the plant grows larger, transfer to a larger container (at least 6 inches deep) so the roots can establish more firmly. Whether the herb will be indoors or in a garden, put a small amount of slow-release fertilizer into the soil at the start of the season.
Sometimes, rosemary and other herbs can struggle if the pH of the soil is off, so in that case, test your soil to make sure it’s alkaline enough for the rosemary; it should be between 6 and 7. If it’s lower, boost the pH with a little lime sprinkled around the base of the plant.
Once you’ve planted the rosemary, mulch around the roots to insulate in winter and keep the soil uniformly moist in the summer.
GROW Like many herbs, rosemary does well with frequent harvesting, a practice that encourages more growth, particularly during the height of the growing season. As cooler weather begins, or if you’d just like a break from harvesting, let the plant flower so that it can keep going strong for the next year, but be sure to trim the plant back after flowering so that it doesn’t get woody with overly thick stems. Before the winter, bring the plant inside to continue growth, or prevent freeze damage by covering those plants in the garden.
In terms of maintenance, rosemary is an easygoing addition to the herb mix, and doesn’t require much care beyond occasional watering. If the plant seems to be struggling, try cultivating around the base so that the soil loosens for better drainage.
Rosemary can seem to have sluggish growth when you first plant it, but the herb grows much more robust in the second season onward.
NUTRITIONAL VALUE OF ROSEMARY
per 100 g (3.5 oz)
Rosemary is rich in folate, potassium, and vitamin A.
Energy |
131 kcal |
Carbohydrates |
20.7 g |
Dietary fiber |
14.1 g |
Fat |
5.86 g |
Protein |
3.31 g |
Water |
67.77 g |
Vitamin A |
146 µg |
Thiamine |
0.036 µg |
Riboflavin |
0.152 mg |
Niacin |
0.912 mg |
Vitamin B6 |
0.336 µg |
Folate |
109 µg |
Choline |
0 mg |
Vitamin C |
21.8 mg |
Vitamin E |
0 mg |
Vitamin K |
0 µg |
Calcium |
317 mg |
Iron |
6.65 mg |
Magnesium |
91 mg |
Manganese |
0 mg |
Phosphorus |
66 mg |
Potassium |
668 mg |
Sodium |
26 mg |
Zinc |
0.93 mg |
Zinc |
2.69 mg |
Source: USDA Nutrient Database
HARVEST & STORE Because rosemary has those needlelike leaves, you can harvest anytime of day, and from early summer to the end of the growing season. Harvest frequently, since this encourages more growth.
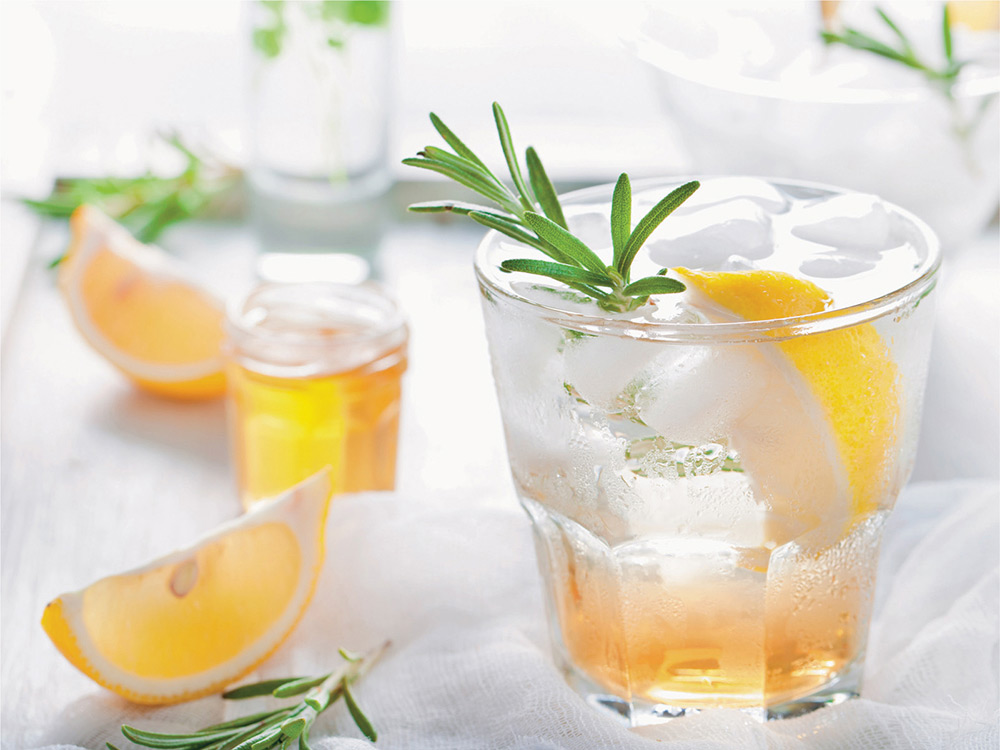
In the summer, I prefer to use fresh rosemary for remedies and medicinal preparations since the flavor and aroma are stronger. When cooking, for example, the scent of rosemary is almost intoxicating. In fact, it can be part of a drink that’s literally intoxicating: a vodka rosemary lemonade fizz, which combines lemon juice, sugar, rosemary sprigs, vodka, and club soda. Hello, summer.
Rosemary also dries very well, especially when bundled and hung up to dry. You can store the bundles this way in a cool, dust-free area, or strip them of their leaves and store those. Either way, you can use the leaves for cooking, teas, and other uses.
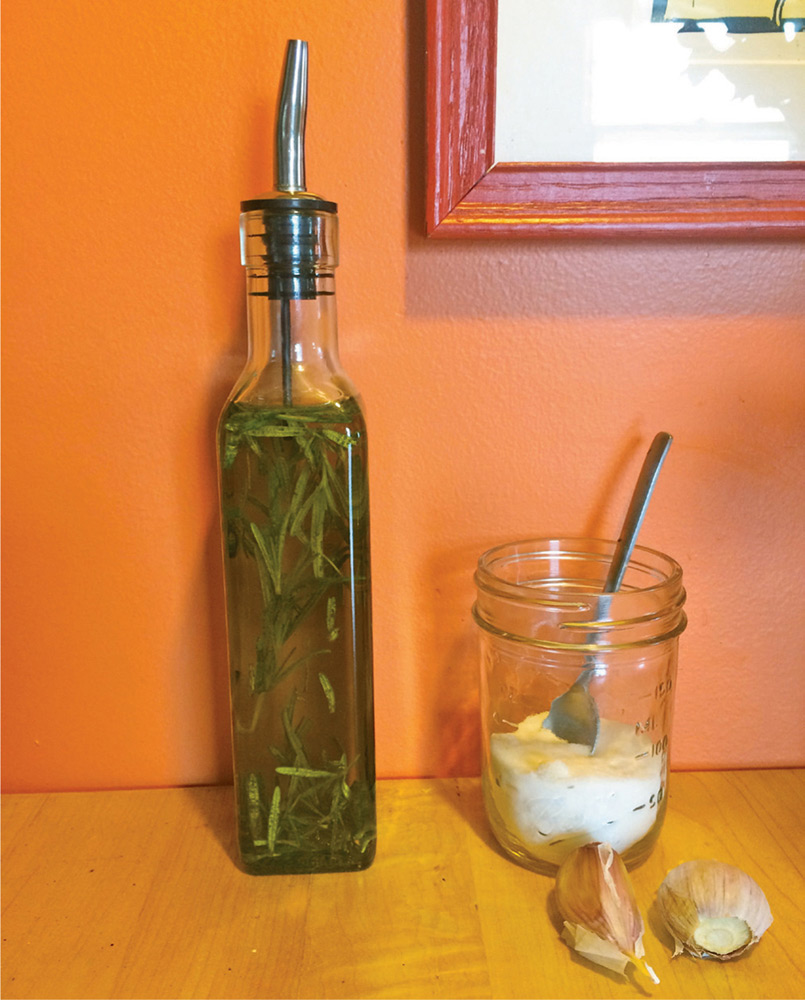
Create a nice culinary and medicinal mix of uses through cooking. Simply chop up the dried or fresh leaves and add to dishes, use the stem as a shishkabob for meats and vegetables, or make flavored olive oil by throwing three or four sprigs into a bottle. Another favorite option here at the farm is to finely chop the fresh leaves and mix into softened butter, then to use that on salmon, bread, or sandwiches. Not only are these uses tasty, but they make the most of rosemary’s calming effect on the digestion.
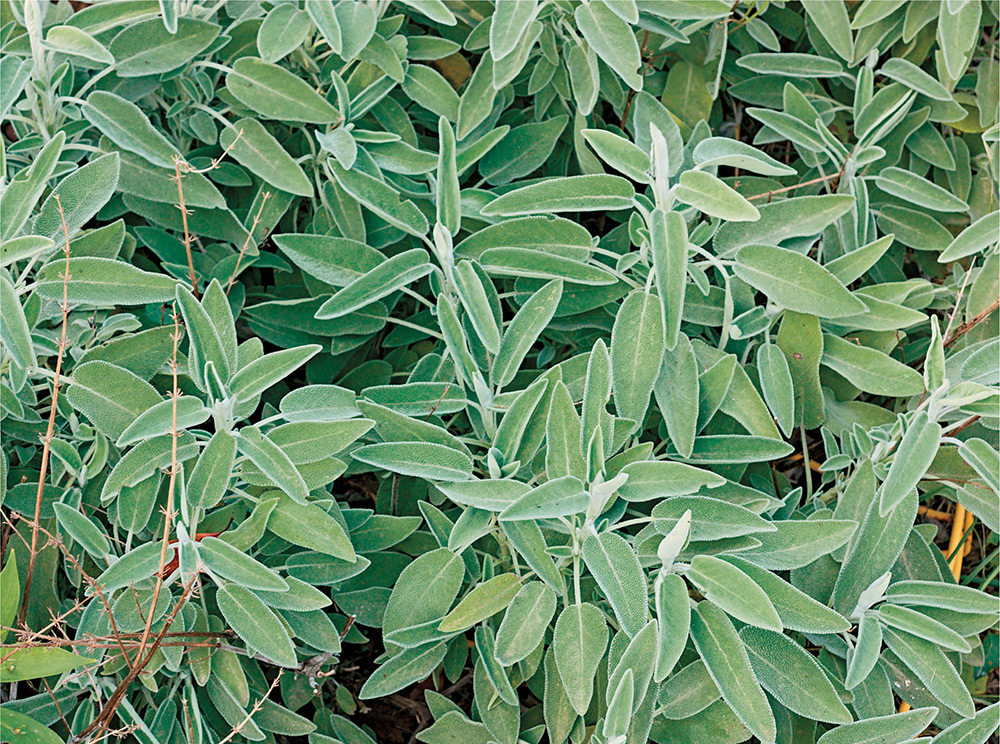
Sage Salvia officinalisSage’s botanical name comes from the Latin word salvere, meaning to cure or to save, and the powerful little herb can be true to that definition. Although it’s a favorite for culinary use, sage boasts a significant history for medicinal use, particularly in Chinese medicine, where it’s used as a nerve tonic. The Greeks believed that keeping sage in a garden prevented doctor visits, and an old Chinese proverb noted that a man can’t grow old with sage in his garden. Although neither of these claims seems likely to come true, it doesn’t hurt to give it a try. If nothing else, the herb is divine when it comes to whipping up Italian dishes, and it dries beautifully for making into an end-of-day tonic wine or an uplifting tea anytime.
A well-known digestive, sage also works as a tonic for the nervous system to decrease anxiety and depression. As research has shown for its effects on Alzheimer’s disease, sage can improve memory and increase an overall sense of well-being.
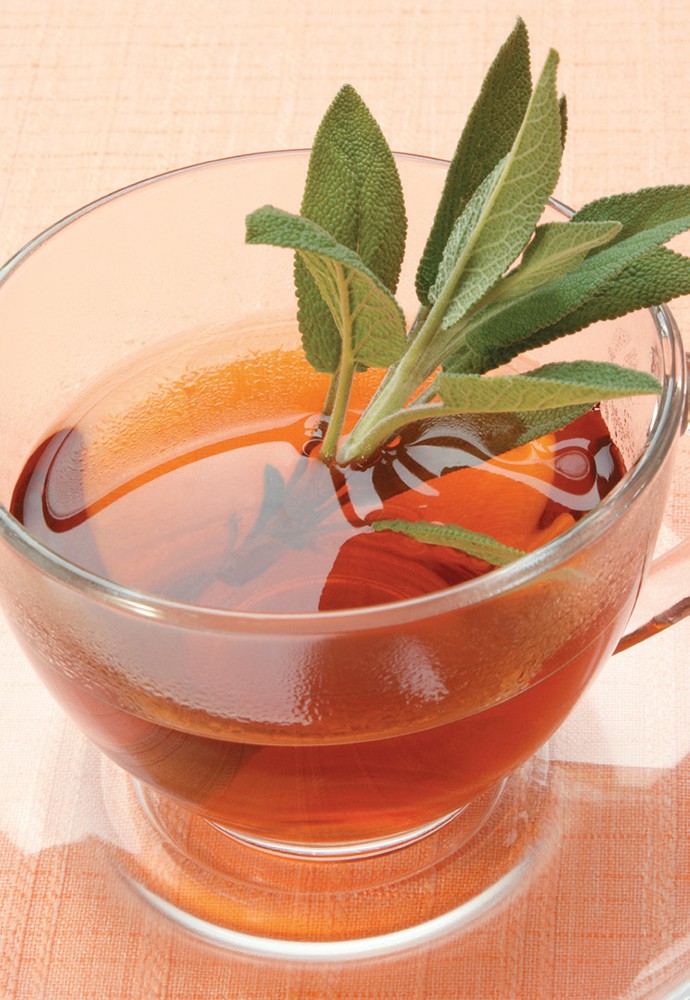
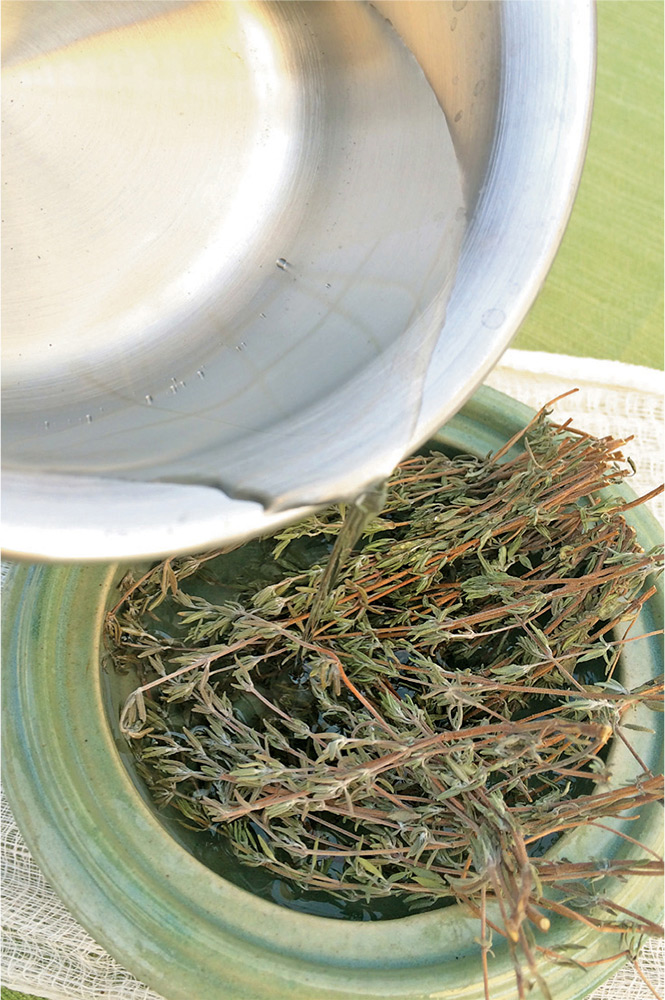
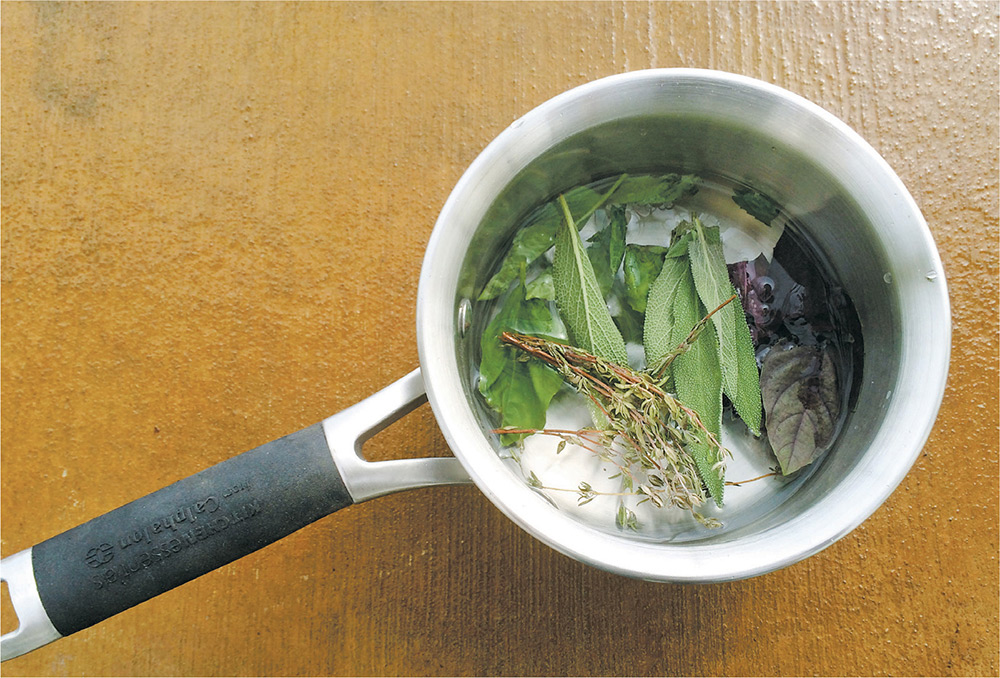
Freshly steeped sage, to be used as a gargle for a sore throat or a wellness tonic.
Here are a few ideas for your Rx/medicinal preparations:
Prepare an infusion by steeping dried or fresh leaves in just-boiled water and allowing it to cool. Use as a gargle for a sore throat, or drink as a general wellness tonic.
To aid digestion, put about 3 ounces of fresh leaves in a liter of dry white wine and let steep overnight. Drink a small glass before dinner.
For helping to balance blood sugar, create a tea by drying leaves on a clean mesh screen, and then crumbling or grinding them and placing in a tea bag. Drink once per day for a few days.
CHECKLIST
Sun: Six to eight hours per day
Shade: Prefers full sun
Soil: Well-drained, loosened soil; can grow in sandy soil
Fertilizer: Usually not necessary
Pests: Some, including aphids and whiteflies
Water: When soil seems dry
Grow Indoors? Yes
Considered a staple of many culinary and medicinal gardens, sage is a perennial that plays well with others both in container gardens and raised beds. Although it can get bushy, the herb isn’t invasive and grows easily. Its thick leaves appear almost dusty, and can be prone to picking up splashes of dirt after a rainfall. But it’s generally disease resistant and simple to use for both cooking and medicinal preparations.
MEDICINE CABINET
With leathery, hardy leaves that dry well and work nicely in teas and other remedies, sage is an easy pick when it comes to medicinal and culinary uses. The herb has often been used for digestive issues such as bloating, stomach pain, gas, and heartburn. It’s also been recommended for cold sores, menstrual problems, and gum disease.
Effective for hot flashes
Researchers undertook a trial to assess the tolerability and efficacy of fresh sage in treating hot flashes and other menopausal complaints, since sage has been used for those issues traditionally. They found that those study subjects using the sage showed significant decrease in hot flashes, with total number of hot flashes decreasing even more each week of the study.1
Improves mood and memory
Researchers noted in a study on Alzheimer’s disease that sage has been used in herbal medicine for centuries to improve mood and cognitive performance. In studying the herb on patients in Iran, they found that sage produced significantly better outcomes in disease management than a placebo, and may also be responsible for reducing agitation in the patients.2
1. Bommer, S., et al. “First time proof of sage’s tolerability and efficacy in menopausal women with hot flushes,” Adv Thera 2011 Jun; 28(6):490-500. http://www.ncbi.nlm.nih.gov/pubmed/21630133
2. Akhondzadeh, S., et al. “Salvia officinalis extract in the treatment of patients with mild to moderate Alzheimer’s disease: a double blind, randomized and placebo-controlled trial,” J Clin Pharm Ther 2003 Feb; 28(1):53-9. http://www.ncbi.nlm.nih.gov/pubmed/12605619
VARIETIES Sage boasts dependable, hearty leaves that dry like a charm. In early summer, small edible flowers appear that can also be added to dishes or teas. Usually, when buying sage at a store, you’re likely to get common sage, a familiar variety that has a uniform look, but there are others worth trying as well. Check out these, all with good medicinal properties:
White Sage: A Native American variety that’s often used to make smudge sticks that are burned in ceremonies. Makes a mild-tasting tea, and grows well in warmer climates.
Berggarten: Features oval leaves rather than the oblong leaves seen with other sage varieties. Purple edible flowers in early summer.
Extrakta: Considered a high-yielding variety that can thrive in cooler zones. High essential oil content.
Icterina: A newer variety with variegated leaves of green and yellow that makes a striking ornamental edible, especially in early season when edible purple flowers are present.
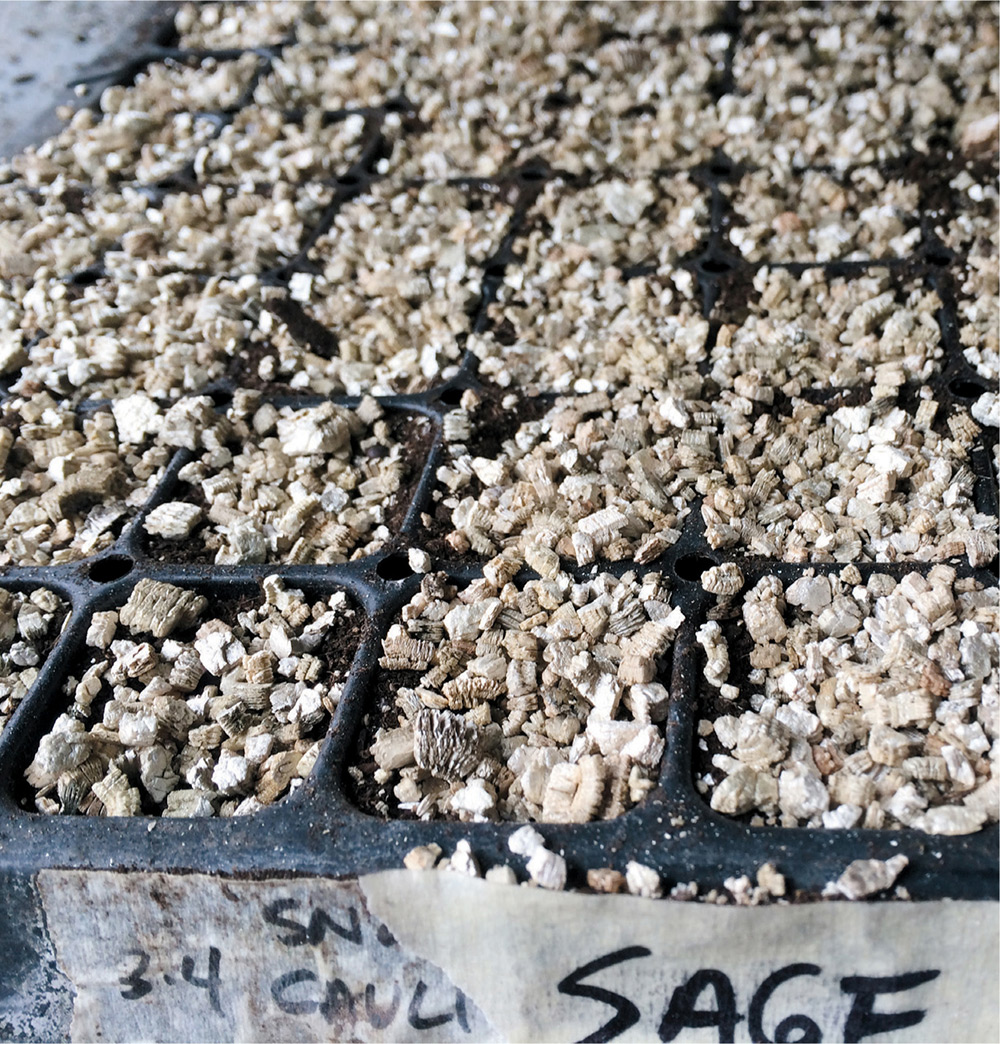
Using vermiculite after planting can keep the seeds warm and cozy for germination.
PLANT It isn’t too difficult to get sage started indoors, but it’s prone to death by overwatering. There have been many times where I see those tough leaves and think the plant looks dry, and then I end up killing it because it’s already well-watered. Also, many experts advise waiting a long time before harvesting while the plant gets established—up to a year in some cases. For me, the space in my kitchen growing area is too limited to nurse a plant that takes months before I can use it, but I do like to have a small pot going because the herb dries so well after harvest.
The best way to grow sage is from cuttings from an established plant, so if you happen to have any neighbors or friends with a robust sage plant, see if you can sweet talk them into helping you out. The best time to get cuttings is from July to September, after the flowers have already come and gone.
Use a sharp knife to cut a young shoot well below the leaf crown. Strip off lower leaves, leaving at least three pairs of leaves. Put the shoot into a pot with new soil that’s been worked with compost and water thoroughly but carefully so you don’t displace the shoot. As the sage is establishing, make sure soil stays moist but not soaked. When the cutting seems to be growing and maturing you can transplant outside or put into a larger pot for an indoor kitchen garden.
Alternately, put the cutting into a glass of water, making sure the leaves are above the water line. After a few weeks, you’ll begin to see roots, and the shoot can then be planted directly into a garden or a container. This is a fun activity for kids, since it allows them to see some progress on root growth.
If you’re lacking access to established sage and want to start from seed, consider starting the seeds in a shallow container (about 2 inches or so) first, which will keep the roots warmer, aiding in germination. As the plant grows larger, transfer to a larger container (at least 6 inches deep) so the roots can establish more firmly. Whether the herb will be indoors or in a garden, put a small amount of slow-release fertilizer into the soil at the start of the season.
GROW Once it’s established in a garden, sage is easy to maintain, and benefits from frequent harvesting, which encourages more growth. Just be sure to water younger plants more regularly so they don’t dry out, but in general, when plants are more mature, wait until the soil seems dry before watering so they don’t get root rot.
Sage can be subject to some pest and disease issues like aphids, powdery mildew, and stem rot, but these can be prevented by avoiding overwatering. If a plant does develop issues, remove the affected plant if the others around it seem fine. Otherwise, there are some organic pest sprays that can help, which are found at any nursery or greenhouse.
NUTRITIONAL VALUE OF SAGE
per 100 g (3.5 oz)
Sage is rich in vitamin A, vitamin K, potassium, and calcium.
Energy |
315 kcal |
Carbohydrates |
60.73 g |
Dietary fiber |
40.3 g |
Fat |
12.75 g |
Protein |
10.63 g |
Water |
7.96 g |
Vitamin A |
5900 µg |
Thiamine |
0.754 µg |
Riboflavin |
0.336 mg |
Niacin |
5.720 mg |
Vitamin B6 |
2.690 µg |
Folate |
274 µg |
Choline |
0 mg |
Vitamin C |
32.4 mg |
Vitamin E |
7.48 mg |
Vitamin K |
1714.5 µg |
Calcium |
1652 mg |
Iron |
28.12 mg |
Magnesium |
428 mg |
Manganese |
0 mg |
Phosphorus |
91 mg |
Potassium |
1070 mg |
Sodium |
11 mg |
Zinc |
4.70 mg |
Source: USDA Nutrient Database
HARVEST & STORE During sage’s first year, the herb won’t be as robust as it establishes, so harvest lightly to give it a chance to expand. You can cut it back in late summer, but leave some stalks so the plant can come back strong the following spring. When harvesting, make sure leaves are clean; sage tends to pick up dirt, so I usually rinse them thoroughly and pat dry with a clean cloth before drying or using.
Use fresh sage for cooking or make an infused olive oil—simply drop some leaves into a bottle of oil and seal securely; store in a cool, dry place for a week and then place in the refrigerator. The oil will keep longer if you use dried herbs, but I tend to prefer the flavor of fresh leaves in infused oil. Olive oil boasts its own medicinal powers, since bacteria can’t thrive in it, making it a good base for a remedy.
For teas and infusions, place cleaned leaves on a mesh screen and allow to dry completely before grinding or crumbling, then store in an airtight glass jar.
Thyme Thymus vulgarisAlthough thyme’s fragrance and flavor are associated with culinary efforts like pasta sauce and cooked meats, the plant’s wee leaves have a rich history when it comes to symbolism. In the Middle Ages, the herb was thought to ward off nightmares if tucked under a pillow, and was often placed on coffins to help souls find their passage to the next life. That’s likely why the ancient Egyptians used thyme for embalming as well. Apart from that maudlin usage, dried thyme—much like dried sage—has been utilized through the ages as a purifying agent, with smudge bundles burned in temples and homes. These days, it’s recognized for a powerful active compound, thymol, which is often used in mouthwashes and as an antiseptic in hospitals.
Thyme is very potent as an essential oil, and in that form, it’s been used to medicate bandages, treat infected toenails, and perform other anti-fungal medicinal tasks, although it also boasts anti-inflammatory and anti-bacterial properties. The herb is also a standout for its ability to treat coughs and bronchitis as a tea, and also does well when combined with other medicinal plants like lemon balm.
Here are a few ideas for your Rx/medicinal preparations:
For a nice addition to cough remedy teas, pack fresh thyme into the bottom of a jar and pour honey over the top; stir herbs into the honey and wait about a week for the infusion to “take.” Strain the herbs out, or include them with the honey when adding to hot water or tea.
Make a poultice by mashing fresh leaves into a paste; apply directly to rashes, minor sores, or other inflammation, with a clean cloth over the paste.
Crush fresh leaves slightly and put into a small jar, and cover with vodka or vinegar that still contains “the mother” (such as Bragg’s) as a preservative. Let the mixture sit at least overnight, and longer if possible; this mix works well as a mouthwash or antifungal wound wash.
CHECKLIST
Sun: Six to eight hours per day
Shade: Not happy with much shade; prefers full sun
Soil: Well-drained, loosened soil
Fertilizer: Usually not necessary; the plant can do well with minimal intervention and inputs
Pests: Tend to be minimal
Water: Regularly, depending on soil dryness
Grow Indoors? Yes
As a perennial, thyme is a favorite in backyard pharmacy gardens because it’s so hardy and keeps coming back strong. Unlike herbs in the mint family, thyme doesn’t get to be a bully in the garden, but instead stays fairly self-contained, bushy and tall instead of gangly and sprawling. Outdoors, thyme can tolerate drought, light freezes, and strong winds, so boasts a surprisingly long growing season after being planted in the spring. This is a nice choice for indoor growing as well, and can be included in a pot with other herbs like sage or basil.
MEDICINE CABINET
Thyme is useful for a range of maladies, from bad breath to soothing muscle spasms. The herb (like so many others) has been noted as a hangover remedy, but it shines brightest for skin treatments, and Hippocrates noted its value for respiratory issues.
Better for acne than prescriptions
Researchers from Leeds Metropolitan University studied the effects of thyme, marigold, and myrrh on a certain type of acne that stems from infected skin pores, and found that thyme was not only the best of the three, but also boasted a greater antibacterial effect than benzoyl peroxide, the active ingredient in most anti-acne medications.1
As effective as ibuprofen for menstrual pain
In studying dysmenorrhea, in which women experience significant pain during menstrual cycles, researchers at Babol University of Medical Sciences in Iran found that thyme essential oil was equally effective at reducing pain and spasms as ibuprofen, but didn’t cause the type of gastrointestinal complications sometimes seen with ibuprofen.2
1. Society for General Microbiology. “Thyme may be better for acne than prescription creams.” ScienceDaily. 27 March 2012. www.sciencedaily.com/releases/2012/03/120327215951.htm
2. Salmalian, H., et al. “Comparative effect of thymus vulgaris and ibuprofen on primary dysmenorrhea: A triple-blind clinical study,” Caspian Journal of Internal Medicine 2014; 5(2):82-88. http://www.ncbi.nlm.nih.gov/pmc/articles/PMC3992233/
VARIETIES The type of thyme found most often in medicinal preparation and cooking is German thyme, a hearty and dependable variety that’s as robust as a Frankfurt beer hall. Because of its bushy shape and needle-shaped evergreen leaves, the herb variety often makes a nice ornamental, particularly along walkways or alongside flowers. For a wider range of options, though, there are other varieties that are equally useful. Although these all have distinct culinary properties, they’re also powerful medicinals:
Orange Thyme or Lemon Thyme: With the classic thyme shape, these varieties are also ideal for indoor growing and outdoor herb spaces, and have a sweeter flavor than the rugged German variety. A citrus flavor note makes the varieties a good choice for fish and vegetable dishes, or a distinctive honey-and-thyme mix.
French Thyme: Tres bien for culinary dishes, although the flavor is more subtle than the German option. The variety is low growing, so it’s perfect for smaller spaces, and the leaves are more round and soft than spiky and needlelike.
Creeping Thyme: If you’re looking for an ornamental plant, this variety works well in warmer climates, and features rounded leaves that “creep” out as a groundcover. Bonus: it can withstand light foot traffic, and gives off a thyme-infused scent when you walk on it.
PLANT Thyme can be direct-seeded into a garden, if you have just the right conditions for it, but it thrives best if it’s transplanted from a start that’s been nurtured indoors for at least a month. Either buy a small start from a greenhouse, or grow one yourself in a warm and cozy indoor space in early spring for planting after the last frost.
If growing outside, pick a spot with full sunshine and soil that drains well. Compacted soil will result in slow growth, or even no growth at all, so if your chosen thyme spot seems dense, loosen up the area with a pitchfork or other cultivating tool.
For inside growing, consider starting the seeds in a small container (about 2 inches or so) first, which will keep the roots warmer, aiding in germination. As the plant grows larger, transfer to a larger container (at least 6 inches) so the roots can establish more firmly. Whether the herb will be indoors or in a garden, apply a small amount of slow-release fertilizer into the soil at the start of the season.
Sometimes, thyme and other herbs can struggle if the pH of the soil is off, so in that case, test your soil to make sure it’s alkaline enough for the thyme; it should be at about 7.0. If it’s lower, boost it with a little lime sprinkled around the base of the plant.
GROW Like many herbs, thyme does well with frequent harvesting, which encourages more growth, especially during the summer. When done with the harvest season (which will depend on your particular growing zone) just let it flower so that it can keep going strong for the next year, but be sure to trim the plant back after flowering so that it doesn’t get woody with overly thick stems. Over the winter, either pot it up to bring the plant inside to continue its growth, or protect it from deep freezes by covering it in the garden.
In terms of maintenance, thyme is an easygoing addition to the backyard pharmacy mix, and doesn’t require much care beyond occasional watering. If the plant seems to be struggling, either move it to a sunnier spot, or try cultivating around the base so that the soil loosens for better drainage.
NUTRITIONAL VALUE OF THYME
per 100 g (3.5 oz)
Thyme is rich in folate, choline, vitamin E, vitamin K, calcium, iron, magnesium, zinc, and potassium.
Energy |
1156 kJ (276 kcal) |
Carbohydrates |
63.94 g |
Dietary fiber |
37 g |
Fat |
7.79 g |
Protein |
9.11 g |
Water |
92.06 g |
Vitamin A |
190 µg |
Thiamine |
0.0513 µg |
Riboflavin |
0.399 mg |
Niacin |
4.940 mg |
Vitamin B6 |
0.550 µg |
Folate |
274 µg |
Choline |
43.6 mg |
Vitamin C |
50.0 mg |
Vitamin E |
7.48 mg |
Vitamin K |
1714.5 µg |
Calcium |
1890 mg |
Iron |
123.6 mg |
Magnesium |
220 mg |
Manganese |
7.867 mg |
Phosphorus |
201 mg |
Potassium |
814 mg |
Sodium |
55 mg |
Zinc |
6.18 mg |
Source: USDA Nutrient Database
HARVEST & STORE Because thyme is a hearty, prickly kind of herb and not a delicate princess of a plant, you can harvest anytime of day (as opposed to late morning-only harvest for flowering and leafy herbs). Harvest frequently, since this encourages more growth.
In the summer, I prefer to use fresh thyme for remedies and medicinal preparations, since the flavor and aroma are stronger. When combined with lavender, for example, thyme becomes a pick-me-up aromatherapy choice.
But for use in the winter, thyme dries exceedingly well when stems are clipped, tied together in a bundle, and hung up to dry. Bundles can be stored in this form or stripped of their leaves and placed in small jars for use in cooking, teas, and even small sachets that can freshen the scent of drawers and closets.
For cooking, simply chop up the dried or fresh leaves and add to dishes, or bundle the leaves together with sage and bay leaves to make a bouquet garni, used to make an amazing soup stock.