
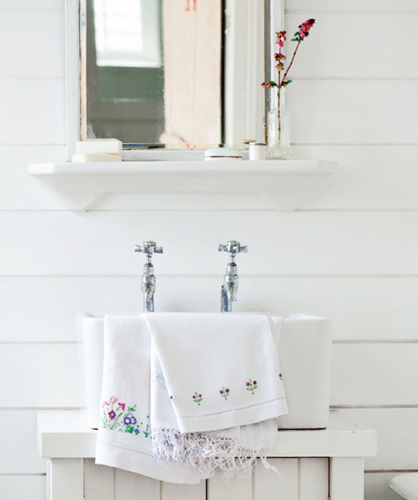
You could use many of the ideas in this book to add embroidery to the edge of textiles around your home.
Adding decoration to the edge of something is one of the simplest forms of embellishment, and embroidering borders along fabric edges is an effective way to introduce embroidery into your home. The decoration can be quite subtle and unexpected: a tiny floral detail at the bottom of a bed skirt or a loose cover, or a grand statement such as a heavily embroidered bed skirt around the frame of a four-poster bed. It is also a good way of using up some of the complicated and highly decorative variations on a stitch, such as the cross pattern using lazy daisy stitch illustrated in the box. Trails of leaves are one of the most common forms of border decoration, often punctuated with flowers.
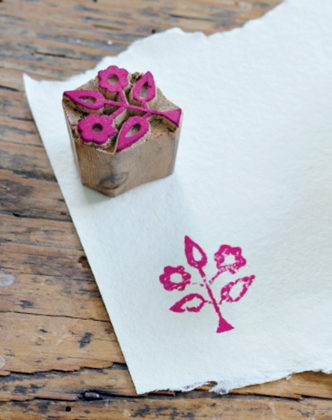
The vintage guest towel shown here was embroidered with a tiny floral motif derived from an Indian woodcut stamp. Stamps are very useful for creating the design for a decorative border, particularly if you are not confident about drawing designs yourself. Stamps or woodcuts provide outlines which you can fill with your own colors. It is a good idea to stamp your design on a piece of paper first.
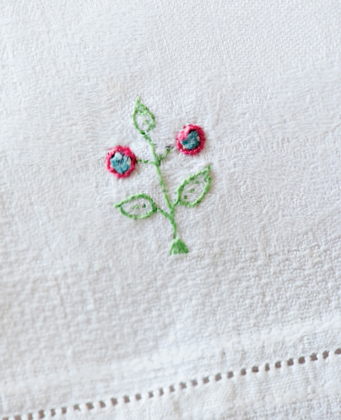
I was inspired by the stylized flower on the stamp to use bright colors to decorate the edge of a little vintage hand towel.
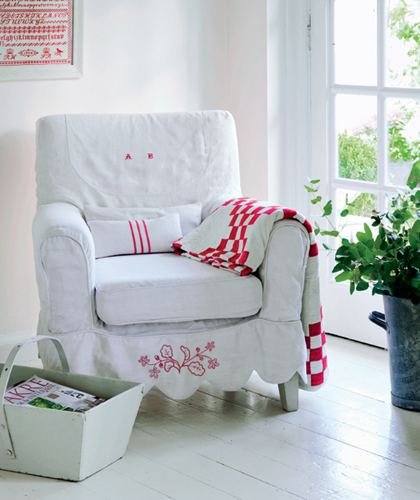
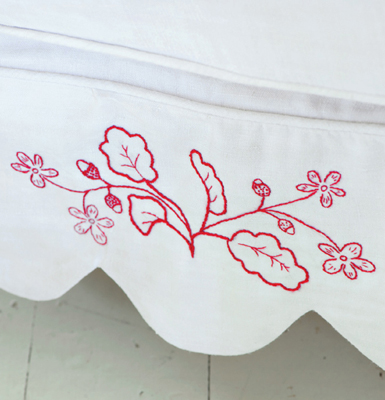
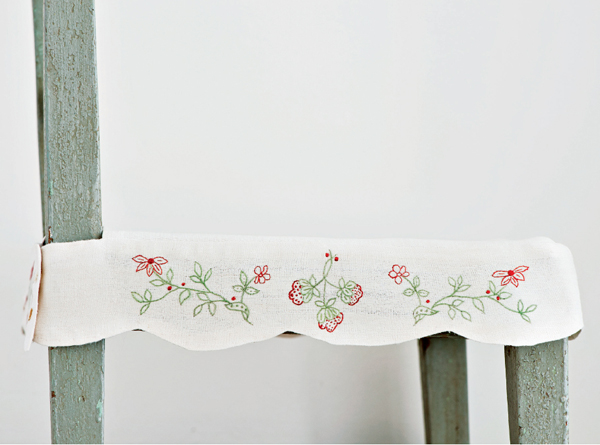
The edge of the scallop on this cover is the obvious area to embroider, but it would have been just as easy to have done the front edge of the chair pillow, or the two arms. The point is to choose one edge, and keep the decoration simple and subtle.
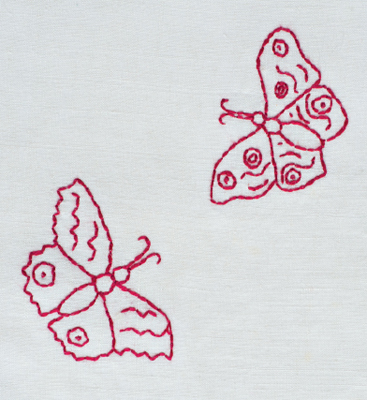
The craze for redwork led to the introduction of penny squares, little squares of cloth with transferred designs such as this patch of butterflies, which were sold for a penny and used in the making of quilts. These have been widely copied today, as have the red-and-white French redwork trims.
Red stitching on white is known as redwork, and is thought to have started in the mid-nineteenth century in Europe once colorfast red cotton thread had been introduced in Turkey. This innovation meant that the linen and cotton clothes of poor people could be embellished with red cotton embroidery and yet withstand the rough and tumble of washing. As a result redwork became enormously popular. Redwork patterns were printed in magazines and housewives would use them to embellish clothes, tablecloths, and sheets with charming motifs and monograms.
Loose covers for sofas and chairs are a blank canvas for red embroidery. Here a tiny red cross-stitch monogram from an antique French sheet was cut and seamed into the back of the cover, while the front of the chair was embellished with a simple red-and-white tracery of oak leaves, acorns, and flowers, all stitched in stem stitch with a few faux knots to fill the acorns. Try covering up small stains on a loose cover by embroidering a little flower or butterfly over the mark, creating a charming detail that is much nicer to look at.
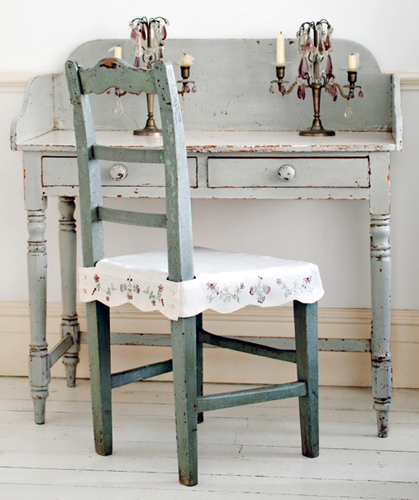
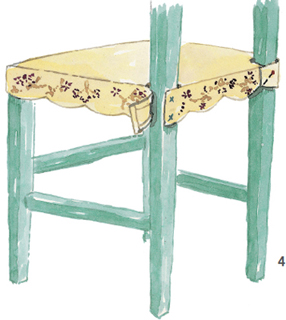
Slipcovers are an attractive way of adding a bit of softness to the look of plain wooden chairs. You may even want to make a set for special occasions, particularly if you dine in the kitchen but want to create a more formal atmosphere. Or you might wish, as I have done with this project, to create an embellishment for a single chair. I used antique linen, but if you prefer to use a modern fabric, choose one robust enough for regular washing and ironing, and with sufficient weight to hang well. The dropped edge lends itself to some embroidery. Here I chose threads in a gray-green and a blackberry-wine color to work with the antique Swedish desk and chair. You could however embroider the fruits in a raspberry red, and use a brighter green.
Materials
Fabric for cover
Threads
Paper to make a pattern
4 buttons
For the templates for the embroidery and the scallop
Stitches used:
Method
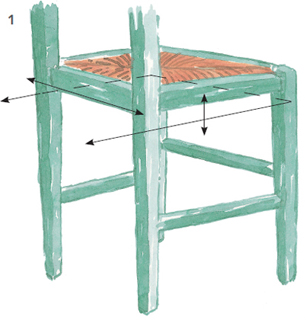
1 Cut a paper pattern to the shape and size of your chair seat. Use the pattern to cut your fabric, adding 1/2 inch seam allowance all round. For the valance, measure around the front and sides of the chair, including the cut-out for the leg. Add 1/2 inch seam allowance all round and and 13/4 inches for the buttonhole overlap. For the depth allow 23/4 inches to the narrowest part of the scalloped edge. Create paper patterns using the scallop template. Repeat to make a pattern for the back valance, and then cut both pieces out in fabric.
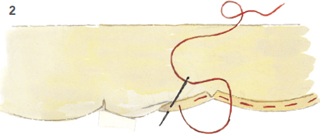
2 Iron the lower edge of the scallop, and cut a small notch into the scallop. Turn under the hem on the scalloped edge twice, baste, and slip stitch the hem.
3 Pin, baste, and machine stitch the valance pieces to the seat piece, right sides together. Turn under twice and slip stitch the remaining hems. The back panel is embroidered in double thread and I have filled the leaves with single-thread split stitch. On the side panels I varied things by using single thread stem stitch and no fills.
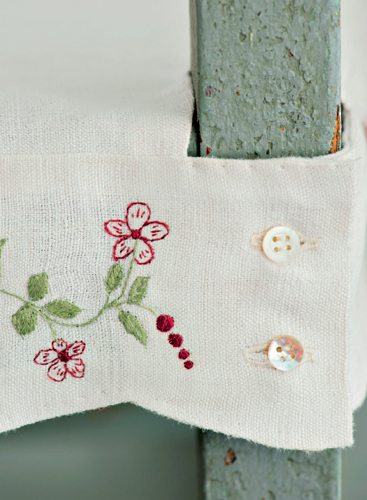
4 Place the cover on the chair and mark the buttons and buttonholes. Make two buttonholes on each of the overlaps and sew the buttons in place.
Inspired by antique lace
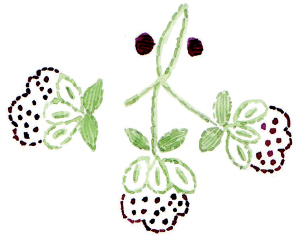
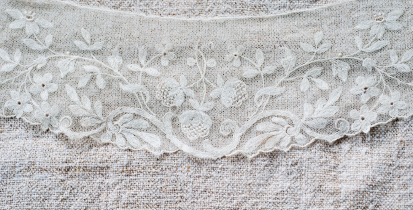
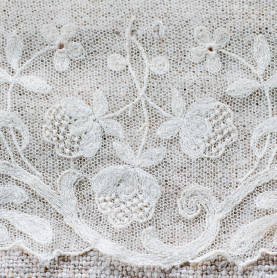
The embroidery in this design was derived from the pattern in a lace collar belonging to my grandmother. I have simplified it here and there but the central motif of the three fruits is the same. This shows how lace is in fact a form of embroidery and a good source of inspiration for your own designs. You can see further examples of patterns in lace.
Making paper templates
When you are fitting an embroidery to something which requires a degree of precision in the layout, it is useful to make paper templates and draw the design in full to make sure that it fits. Unlike something like the bookend, which is something I stitched without any form of preliminary sketch, I drew the design for this project in full and then lightly transferred it to the linen using a very soft pencil tracing. You cannot afford to find that you have reached the corner and run out of space for the design!
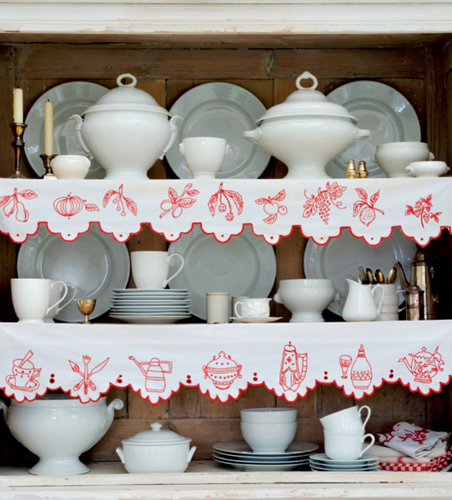
An antique country cupboard is used to store kitchen china. The deep shelves are edged with a red trim that was worked by a French housewife in the middle of the nineteenth century.
Antique decorative edging
Browsing through vintage textiles stalls at brocantes or vide-greniers in France you will often find lengths of scallop-edged trims, embroidered with red stem and satin stitching depicting fruit, vegetables, ceramics, and other household objects. These redwork trims were embroidered by French women during the first half of the nineteenth century. One reason the borders were so popular might be explained by the rather grim kitchens. Everything was dark and undecorated, and these bright strips of embroidery were not only a matter of pride, showing the skill of the housewife, but a way of introducing some color and cheer.
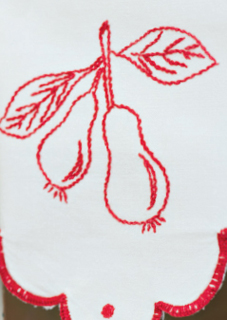
These pears were almost certainly not done using a transfer. I love the little stitches for the sometimes quite prickly hairs at the base of the pear, a detail from someone who handled pears, and who probably cooked up a great tarte aux poires.
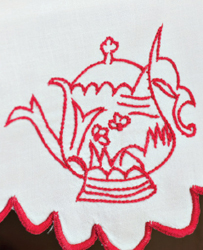
The coffee pot may have belonged to the housewife who stitched this trim. It has some Eastern infuence, as did so many of the French ceramics of the time.
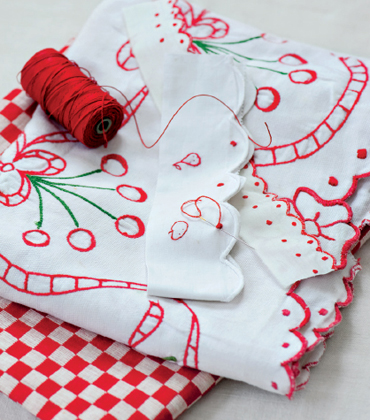
A selection of vintage hand-embroidered trims: note the delightful way the cherries are embroidered in straight stitch around the edges.
Occasionally it can be hard to identify a particular object that has been embroidered, and this is probably because it is a depiction of something hand-made by the man of the house. Not all of the trims were used for kitchen shelves: the deeper ones were used to decorate the chimneypiece over the cooking range and these often have stains from bearing witness to the odd splash of sauce from the kitchen pot.
Embroidered shelf trims can also create a charming effect in antique armoires where linen or china is stored. In a linen closet you could stitch the name of the items stored on that shelf—sheets, pillowcases, blankets, and so on.
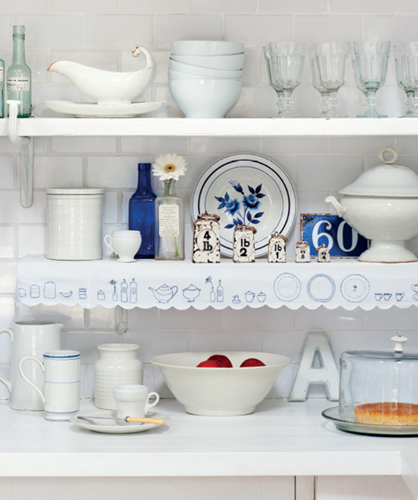
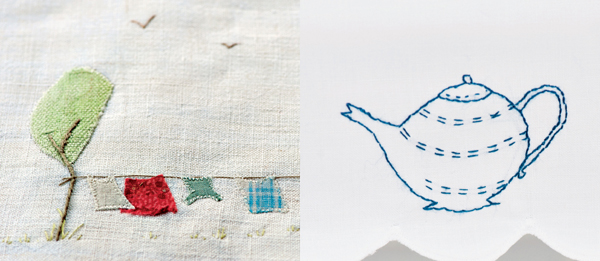
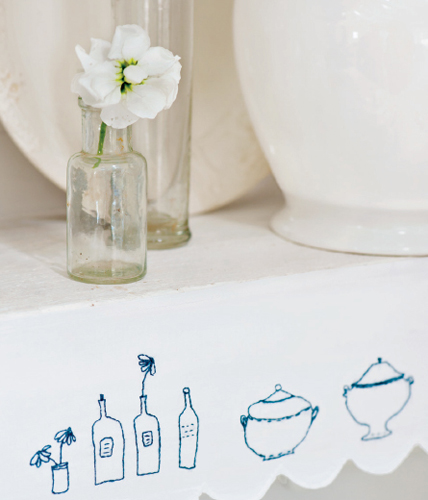
I felt inspired to create a length of shelf edging for this beach house kitchen with its collection of quirky ceramics and bottles. The cupboard in a family kitchen is full of memories, and so I followed the French tradition of embroidering a collection of favorite things: little bottles filled with flowers, tureens, chocolate pots, and old stone jars. If you don’t want to make a shelf trim, you may want to adopt this idea for the bottom of a kitchen shade. I happened to have a long piece of scalloped edging from the bottom of an old bedspread. I tried to give the piece a more contemporary feel by working it in a single mid-blue thread. You could personalize it by adding family members’ names on plates or jars.
Materials
A piece of fabric long enough for the shelf plus a 3/4 inch turn allowance. For this project you should use something that can be washed and ironed easily and not too thick, especially if you have to make the scallop. Some ribbon and trim shops now sell suitable scallop-edged trims.
Threads
For the templates for the scallop and embroidery
Stitches used:
Method
1 Using the scallop template cut the bottom edge. Hem the edges following the instructions for the chair cover. If you would like to embroider the scalloped edge use a fine blanket stitch worked in double thread (single is finer but will take a very long time).
2 For the embroidery, start in the center and work to the sides; you will achieve a better balance. If you trace the design from the template, then start the tracing in the center as well.
3 It is important to keep the back very tidy, and to sew in your ends neatly, as any kitchen textile has to withstand regular washing. If you decide to make this using red thread, remember that most modern red threads tend to bleed slightly, especially if you wet them when threading the needle. (Using a needle threader helps avoid this problem.) Fix the trim in place on the shelf with tiny tacks at each end and perhaps one in the center if it is very wide.
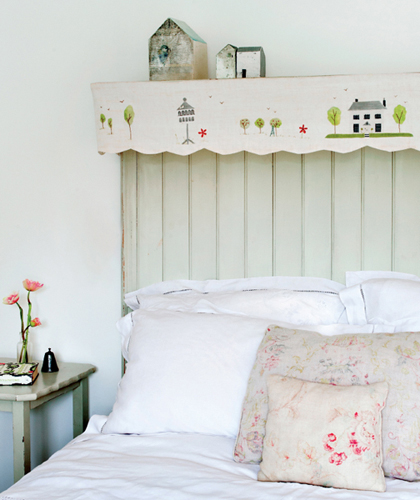
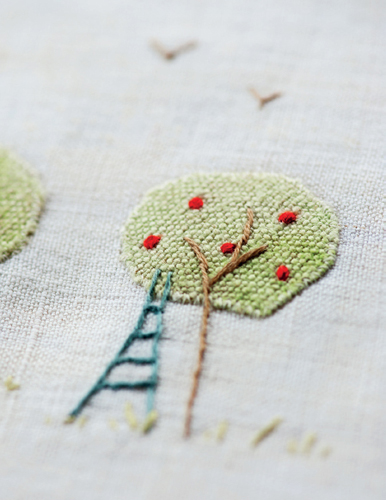
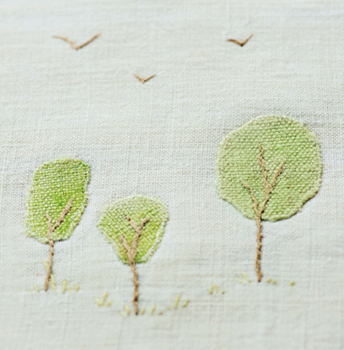
This headboard was made from an old tongue-and-grooved panel, some antique brackets, and a shelf, its edge now softened with a cover. If you don’t want to make a headboard cover, this design could just as easily be used to decorate the edge of a table cloth, or a window pelmet. I used appliqué to create the substance of the design. For the trees I used linen which I painted with very diluted watercolor paints, and I think this lends a painterly quality to the piece. I discovered that linen holds watercolor paint well when I had a mishap with a cup of coffee just as I finished stitching another embroidery. Nothing would get rid of the stain completely so I decided to have a go at camouflaging it with paint.
Materials
Linen for the base fabric
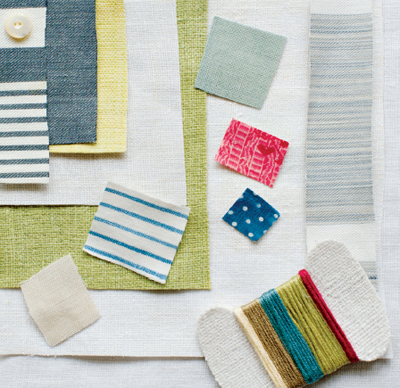
Assorted fabric scraps in different colors and patterns for the appliqué elements
Bonding web
Threads
For the templates for the scallop and embroidery
Stitches used:
Method
1 Measure the edge to which you plan to fix the finished piece. Allow about eight inches at either end to wrap around the sides. Cut out the scallops and then hem around all edges following the instructions for the chair cover.
2 Fuse your chosen fabrics for the appliqué with bonding web and trace the designs onto the paper side. Remember that when you want something to point left you must draw it pointing right on the paper.
3 Position the elements for the design on the base fabric. Peel off the bonding web and fuse the designs. Sew the designs to the cover using a fine machine appliqué stitch with the threads matching the colors of the fabrics as closely as possible. Some of the pieces are very small and a good trick is to machine stitch very slowly. On something like the tiny scalloped window awnings I sometimes turn the wheel of the machine by hand to have increased control.
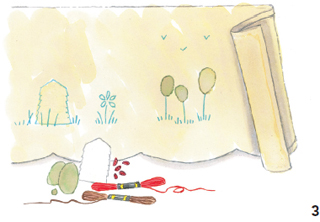
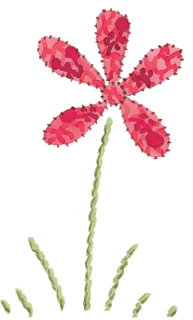
4 Some of the tinier pieces can be applied with short stab stitches. In this piece the red flower petals are made from a tiny piece of Victorian fabric that is too delicate to withstand machine appliqué.
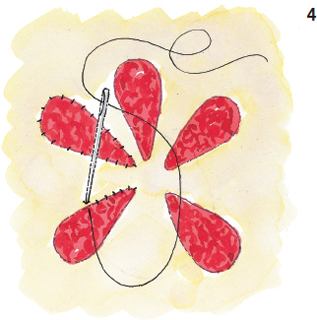
5 Now add the hand-embroidered details, all of which are worked in a combination of short and long straight stitches and knot stitch. The tree branches are worked in two strands, but everything else is single strand.
Remember that, as with all the projects in the book, this is just a starting point for your own creativity. So if you want to add more flowers, or work the trees in the same way as the tree in the bookend project then feel free to do so.
Painting linen with watercolor paint
Choose a fairly stiff but textured linen—anything too fine does not absorb color evenly. Place the linen on a piece of plastic or a flattened polyethylene bag. Dip your brush in the solid color and rinse the brush into a small jar of water. Keep adding solid color until you think you have the right shade. I use a china plate or bowl to mix the color so I can see what it will look like on the white fabric. Remember that natural greens have more yellow than blue. Test the color on a piece of card paper and when you think you have the color you want, apply the dilute color very slowly to the linen. Allow each droplet to be absorbed by the cloth and then quickly add the next brushful.
Hang the cloth to dry, then iron, and review it. You may have to add another layer of color. You can add a different color—for example a soft blue—when the first color is completely dry. Just remember to add the second color a fraction of an inch away from the first to avoid too much overlap.
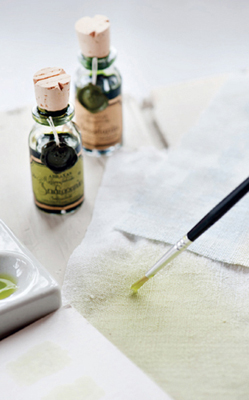
Watercolor inks are good for painting fabrics as long as you dilute them. There is no hard-and-fast recipe, but err on the side of extremely dilute and add color very gradually. There are many precedents for combining painted fabric with embroidery, notably in woolwork pictures worked on painted silk backgrounds. I have mostly used this technique for framed pictures, and the color does not fade. I do not suggest using it on projects that will get a lot of wear. For those, you could try hand-dyeing in the microwave. If something must be cleaned, I suggest dry-cleaning only.
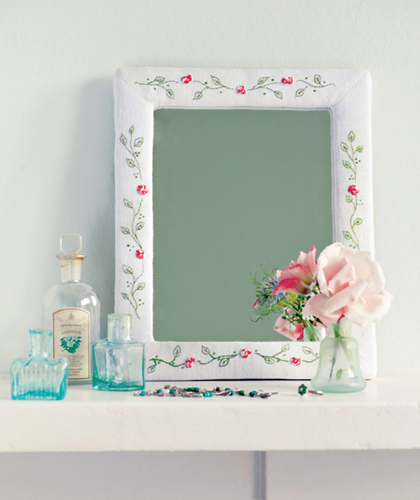
In the hallway of Monk’s House in Sussex, England, the former home of Virginia Woolf where we lived for just over a decade, there was a tapestry mirror frame which was one of the writer’s favorite possessions, and it gave me the idea to use embroidery for covering a small mirror frame. You could use any number of the ideas in this book to decorate a mirror frame, but this little frame suggested a trail of roses. If you want to make something more dramatic you can cover a larger and wider frame with the poppies from the director’s chair covers
Materials
A frame—for this project you want a small frame that is no more than 2 inches wide
Light wadding
A staple gun and staples
Base fabric—something with a reasonably strong weave
Printed lawn, silk, or other lightweight material for the roses
Threads
For the template for the embroidery
Stitches used:
Method
1 Cut two strips for the top and bottom and two for the sides in both the light wadding and the base fabric. Allow enough fabric on either side to fold around the frame and into the rabbet. You can always trim extra fabric off but it becomes a very fiddly job if you leave yourself short of fabric.
2 Make the mitered seams in the wadding, then trim and lay the wadding over the frame, folding it onto the back outside edge, and affixing it with staples. Pull the wadding around the frame and into the rabbet, again securing with staples. Trim off any excess.
3 Make a template for the long and short sides of the frame, ending where the corners join. Lay this on top of your base fabric and mark the corners lightly to demarcate the area which you are going to decorate. Make sure you keep the grain of the linen straight. Lightly trace your design onto the cloth. The design does not have to be exactly symmetrical but the top and bottom and two sides must balance each other. You can shorten or extend the repeat pattern to fit your chosen frame.
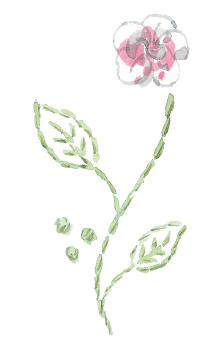
4 The leaves and stems are worked in single thread stem stich, the dots in double thread. Add the roses (see box following) and iron. Seam the four pieces together at the corners, iron, and trim the seams.
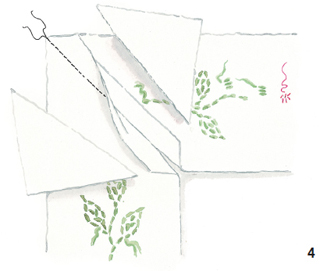
5 Fold the inner corners into the rabbet of the frame and, making sure it is all going to fit, staple each corner in place, this time working from the inside to the outside. Work around the frame, fixing the fabric in place over the wadding with a staple gun and taking care not to pull it so tight that the grain is not straight. Fix the mirror glass and backing in place and tape around the edges to finish.
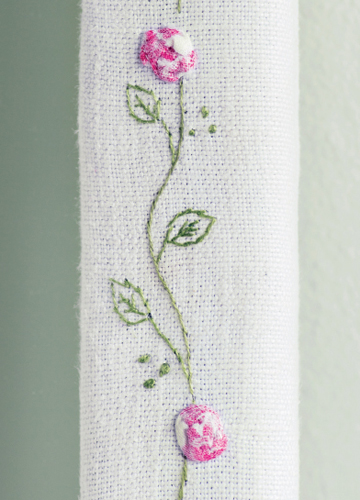
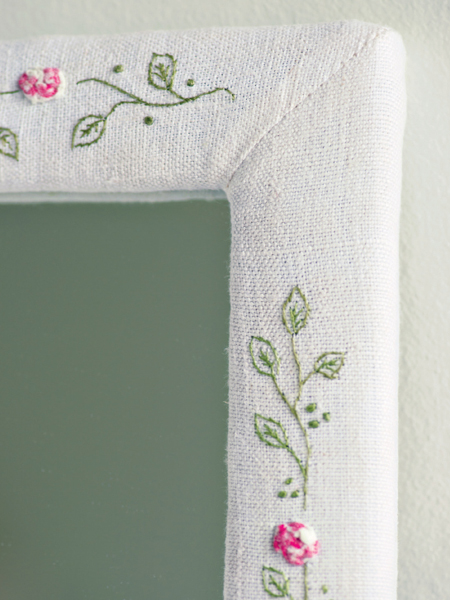
Fashioning fabric roses
For the roses you need very soft, lightweight material that folds easily and does not create too much bulk. For years I had some exquisite antique French silk from a damaged scarf, and now I am working my way through the skirt made from antique lawn printed with little roses. You might find that dress fabric is better for this. The finished roses are about 1/4 inch in diameter, for which you need to cut a piece about 3/4 x 1/2 inch.
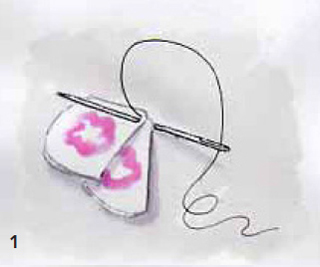
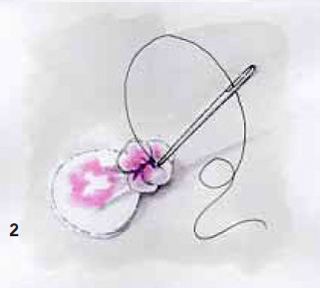
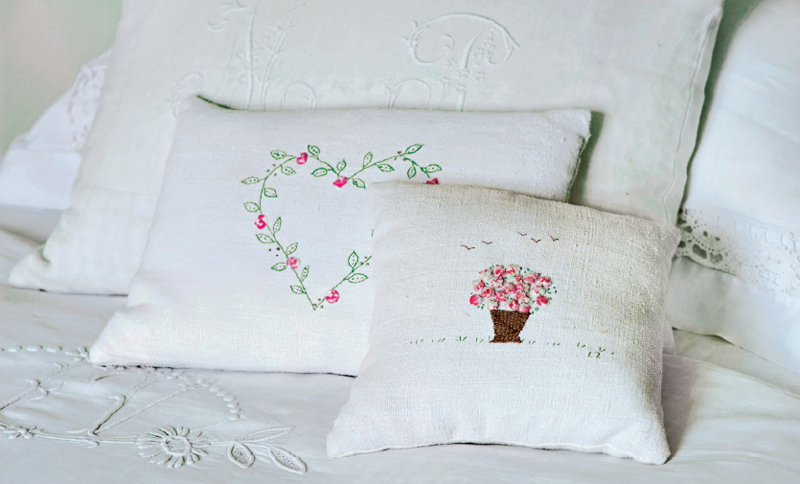
First fold the edge furthest away from you over and pleat the piece of fabric between the thumb and forefinger. Fix this pleat with a couple of stitches and then sew it to the cloth where you want the rose to be (1). Now you simply continue pleating and manipulating the fabric working in a counterclockwise spiral, stitching the pleats down with the tiniest stab stitches, tucking any stray ends under as you work (2). You can use this technique on pillows which are not going to get a lot of wear, or make a basket of roses instead of the daisy basket, like the one shown below.
