Chapter 2
Exploring the Types of 3D Printing
IN THIS CHAPTER
 Getting to know basic additive manufacturing
Understanding specialized additive manufacturing
Seeing what current technologies lack
Whenever you discuss additive manufacturing, direct digital fabrication, rapid prototyping, or 3D printing, you’re talking about the same process: translating a 3D design stored in a computer into a stack of thin layers and then manufacturing a real, physical object by creating those layers, one at a time, in a 3D printer. This chapter discusses current applications — and limitations — of this technology.
Exploring Basic Forms of Additive Manufacturing
To translate a 3D virtual model’s design into the stack of layers that make up an object, all 3D printers require the unique coordinates of every element of the object to be fabricated.
 Some 3D printers work across a level surface called the build plate, whereas others create objects atop successive layers of granulated material. Some of the RepRap printers discussed in this book are of two types: Cartesian, which uses motors to move in the X, Y, and Z directions (see Figure 2-1) and Delta, which relies on mechanical linkages to three motors to move an extruder within the entire build volume. (Even Delta-type 3D printers require X, Y, and Z coordinates into which they extrude the build material for the final object.)

FIGURE 2-1: Coordinates using X-, Y-, and Z-axis notation.
These printers are designed to accommodate the properties of the materials from which they create objects. The most common material types are
- Photopolymers
- Granular powders
- Laminates
- Composites and mixed materials
- Filament-based production (plastic wire for FDM-based 3D printers)
The next sections look at each material type in greater detail.
Photopolymers
Photopolymers are materials that can transform from a liquid to a solid almost instantaneously when the right kind of light shines on them. These materials are great for additive manufacturing.
The first type of additive manufacturing was termed stereolithography by its inventor, Charles W. Hull, who founded (and continues to lead) 3D Systems. From the word stereolithography comes the standard 3D-printed object file type, STL, invented by Hull in the late 1980s. Today’s 3D printers and software use the STL file type for most common printing operations; a few more modern file types are emerging as new variations of full-color and blended-material 3D printing become possible. Stereolithographic (SLA) fabrication is often used for high-resolution object manufacturing, providing highly detailed surfaces, as in the case of jewelry master designs for molding and casting.
Stereolithography uses focused ultraviolet light to transform liquid photopolymer plastic into solid form. (See Figure 2-2.) The process takes place on a movable platform above a reservoir of the photopolymer plastic. The platform submerges into the reservoir just enough to create a thin layer of liquid. A beam of ultraviolet laser light is drawn over the liquid to create the first hardened layer of the object. By lowering the platform to allow more liquid to cover the first layer, the machine operator can construct the second layer atop the first. Each layer must connect to the one below or to a support structure that can be removed later to keep the object from floating out of position as the new layers are added and more fluid polymer is poured atop them.
Stereolithographic formation of objects provides excellent detail (see Figure 2-3), but the materials are currently limited to UV or daylight-activated liquid polymers that can be cured to solid states under a focused beam of light or with a laser. Recent developments include Direct Light Processing (DLP) light projection of an entire layer at the same time across the bottom of the build volume, curing each layer as the object is raised out of the polymer liquid from atop a full-screen light source.
High-resolution variations of stereolithography use lasers focused so tightly that individual elements of the final object are microscopic. Such nano-scale lithographic designs have created entire buildings so small that they could be lost entirely in a single drop of water. The rendering of the Brandenburg Gate shown in Figure 2-4 is only a fraction of a millimeter in height.
Objet’s PolyJet system also uses photopolymerization but uses inkjet materials to build up the layers. This system doesn’t rely on a bath of liquid; instead, it keeps the materials in separate cartridges within the printer during operation (and can even mix materials as it sprays them), hardening the applied spray with ultraviolet light after each pass. (See Figure 2-5.) With this approach, you can create seemingly impossible printouts, such as a ship in a transparent bottle or a fetus gestating within a transparent belly.

FIGURE 2-2: How stereolithography works.

FIGURE 2-3: Object created via stereolithography on a FormOne printer.

Image courtesy of NanoScribe
FIGURE 2-4: Object created via multiphoton lithography on a NanoScribe 3D printer.

FIGURE 2-5: Objet’s photopolymer PolyJet printer can mix multiple types of materials.
The PolyJet’s capability to mix materials also allows for different functionalities within the same printed material. (Refer to Figure 2-5.) This means that complex objects, such as a prosthetic arm or foot — a flexible joint sandwiched between hard-plastic components — can be printed in a single process. Using this approach, you can create combinations of materials — part rubber and part solid plastic, for example — in a single printed item. Good examples of this type of prototyping include a cellphone with a hard plastic shell and rubber grip panels and a toy car with a rigid plastic wheel and rubber tires.
 You can see the detail and personalization that these multimaterial printers can produce in objects used in major movies. Objet’s printer, for example, was used to create the armor that fit Robert Downey, Jr., like a glove in the Iron Man movies. The printer also allowed the effects team for the blockbuster Prometheus to produce and custom-fit bubblelike space helmets for the actors.
Granular powders
Another technique, popular for plastics, metals, and even ceramics, relies on granular powders. This technology has been used to create large objects, such as James Bond’s car in Skyfall, as well as flexible artwork such as 3D-printed dresses. The granules can be solidified in a variety of ways:
- Binding the granules with bonding materials such as glues
- Sintering (combining powders by heating them below their melting point, as shown in Figure 2-6)
- Melting (combining powders by heating them above their melting point to create a full melt pool of material, using a laser or electron beam to provide the energy necessary to fuse the powder only where the final object needs to be)

FIGURE 2-6: Laser powder sintering.
Binding powder
Powder-binding printers use inkjet sprays to apply a rapidly solidified binder to the powder bed, creating the new solid object from this sprayed glue and the base powder material. When the entire model is complete, unused powder is removed and recovered for reuse, as shown in Figure 2-7.

Image courtesy of Francis Bitonti Studio
FIGURE 2-7: Extracting a piece of 3D-printed clothing from a granular binding powder bed.
Plastic-powder objects remain granular, so they can easily be crushed unless they’re dipped in a resin that fills the spaces between the granules. For metal and glass casting, the resulting “solid” shapes are stabilized by heating them to fuse the binder and powder. Simple metal powder can be infused with additional liquid metals (such as bronze) to create a stronger alloy or more pleasing appearance. This technique is popular in jewelry making, because precious metals such as gold and silver are too expensive to keep in granular form to fill the powder bed. Also, the use of powder granules from a more common source decreases the cost of materials.
Because the powder bed supports the solidified bound material, this type of production allows you to create large, complex designs without concern that thinner elements will break apart during fabrication. One vendor, VoxelJet, uses the powder bed’s support to allow continuous creation of objects. The system uses a binding jet that operates across a tilted granular bed and a conveyer belt that moves the entire volume of powder slowly through the printer. In this way, the printer builds models by adding powder along the incline layer by layer (see Figure 2-8) and selectively binding the powder according to the 3D design. You can even use this technique to fabricate solid objects that are longer than the entire printer’s depth by continually printing the front end of the model as the rear extends beyond the conveyer behind the printer.
Blown powder
Another technique used in metal fabrication involves blowing metal powder into a laser or electron beam; adding the blown powder to the melt pool formed by the heat source fuses the material together. This technique is particularly useful when the materials require exceptionally high levels of heat to melt; examples include tantalum and titanium used in aircraft manufacturing. As in the other forms of additive manufacturing, you can apply blown powder very exactly to create complex final parts with no more effort than creating a simple design that uses the same amount of material. (See Figure 2-9.)

Image courtesy of VoxelJet
FIGURE 2-8: A VoxelJet powder bed binding 3D printer prints along an inclined plane.
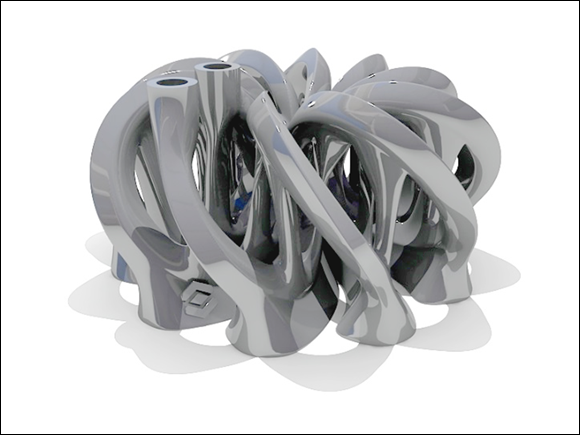
Image courtesy of WithinLab
FIGURE 2-9: A titanium cooler block created with EOS’s Direct Metal Laser-Sintering (DMLS) 3D printer.
Laminates
Another type of additive manufacturing, lamination, uses a rather different approach. Instead of laying down layers of powders or melting pools of material, lamination cuts individual layers of material and then stacks them, one atop another, with a form of glue. You can create laminated objects from metal foils, plastic sheets, and even common paper.
The final product, however, is only as strong as the material it’s made of: paper, foil, or plastic, together with the glue. Also, laminated object-manufacturing systems lack resolution on the Z axis (as the object gets taller) because each layer height is fixed at the thickness of the sheet of material plus the layer of glue. Still, these systems can be very attractive to people who need models for rapid prototyping of products and prefer inexpensive, rapid assembly to higher-resolution alternatives.
Filament-based production
Perhaps the best-known form of additive manufacturing is fused filament fabrication (FFF). Using STL files (refer to “Photopolymers” earlier in this chapter), an FFF 3D printer squeezes melted thermoplastics through a small nozzle to create an object. The process is much like squeezing toothpaste from a tube to cover a toothbrush. The printer builds layers of melted plastic to create an object that can cool to room temperature in a matter of minutes. (See Figure 2-10.)

FIGURE 2-10: Fused filament fabrication.
You may also hear FFF referred to as fused deposition modeling (FDM), a term that’s trademarked by Stratasys.
The thermoplastic used in this type of 3D printer is typically sold in spools of thin filament in two diameters: 1.75mm and the now much less common 2.85mm standard. This filament can be made of acrylonitrile butadiene styrene (ABS) polymer, polylactic acid (PLA) bioplastic, water-soluble polyvinyl alcohol (PVA), nylon, or composite materials. One experimental wood/plastic composite filament (see Figure 2-11) can be sanded and painted like wood; it can even be given a grainlike pattern by varying the temperature at which it’s squeezed out.

FIGURE 2-11: An example wood/plastic composite.
Understanding the Limitations of Current Technologies
The potential for additive manufacturing is little short of miraculous, but several factors will affect the speed of the transformation from traditional, subtractive manufacturing to additive manufacturing. I discuss those factors in the following sections.
Considering fabrication rates
Cultural expectations of instant fabrication were set by Hollywood: The simple statement “Tea, Earl Grey, hot” by an actor on Star Trek: The Next Generation was quickly rewarded by a cup of hot tea. These expectations are too high. Today’s technologies take minutes or even hours to create a plastic cup — never mind water and tea to fill it. The object may be hot, depending on the technique used to fabricate it, so perhaps it’s only a matter of time before you can order a cup of hot tea Enterprise-style.
Newcomers to 3D printing are often taken aback by how long it takes to print even small plastic items — several hours in most cases. Some of the items shown in magazines and on TV specials about 3D printing are amazing, but they may be composed of hundreds of pieces, each of which takes time to design and then print — assuming that everything works perfectly the first time. The benefit of additive manufacturing is that any complex features that would take a long time to produce through traditional means (holes through the object, stamped serial numbers, and so on) can be printed in the same time it takes to print the same model without those details.
Exploring size constraints
Most 3D printers have a specific volume within which they can create their output. For some printers, a Star Trek teacup might be too large; others can produce a full-scale chair in a single print. The concept of constrained build volume, however, may be eliminated when open-form systems such as a fully articulated 6D robot arm or gantry with multiple tool-changing extruders are perfected.
Identifying object design constraints
In addition to having to fit within the printer, an item has to be printable in the first place. Experience in design and materials science can help, but also an understanding of how the object is being built layer-by-layer can guide a designer on how to work with the 3D-printing process for greater success. (I go over designing specifically for 3D printing in Chapter 16.)
All forms of manufacturing have unique constraints. Anyone who’s familiar with injection molding, for example, knows that the process requires channels for air to escape the mold when filler material is forced in. Additive manufacturing is no different. Several considerations unique to 3D printing are already commonplace.
Some types of 3D printing require an effective support structure that can be removed later, as well as a specific amount of overhang so that each layer can be aligned atop the one prior to it without gaps or drooping edges.
Also, the software used to design printable objects takes some experience to master, although the software needn’t be expensive. Several alternatives for home use are free or much less expensive than the thousands of dollars per copy that many professional 3D modeling software packages command. You can expect that whole category of software to continue improving rapidly as more people are exposed to this technology in early education. New software is starting to handle full-color object designs, complex internal voids and structures, interlocking components in the same build volume, and qualities based on a unique mix of materials at each point in the build. I discuss software requirements and options unique to 3D printing in Chapter 11 and beyond.
Understanding material restrictions
The variety of new materials that can be used in 3D printers is expanding too quickly for me to enumerate here. The Objet PolyJet system alone uses more than 100 types of materials. Other manufacturers are offering ever-expanding suites of options for materials and fabrication techniques.
Whereas the bioprinters of 2015 were hard-pressed to produce anything approaching a functional artificial cartilage, today, 3D-printed organs based on a 3D-printed scaffold for lab grown cells are being tested. Someday, you may be able to print a steak for your home barbecue or a 3D replacement for your aging knee. One day, 3D-printed heart replacements or new muscular enhancements printed directly into our bodies may be as common as 3D-printed silverware. (See Figure 2-12.)

Image courtesy of Francis Bitonti Studio
FIGURE 2-12: 3D-printed silver forks.
 Fabrication techniques are being refined, but they aren’t perfect. Compared with injection-molded items, the fused thermoplastic objects created by today’s printers have minor weaknesses along each layer’s boundary. Both bonded and sintered granular materials have a more complex — and potentially fragile — inner structure than the solid forged or molded alternatives, but they also weigh far less and may prove to have surprising capabilities that their predecessors’ makers could never have dreamed of. The use of new sustainable materials such as PLA (a biodegradable plastic derived from plant starch) can be recycled and may aid in the adoption of 3D-printed products. All revolutionary change brings both new requirements and new capabilities.