About Kombucha
Kombucha is a naturally bubbly (or “effervescent”) probiotic drink. It originated in Northeast China then made its way to Russia. Kombucha was then brought to Germany, followed by the rest of Europe and the world. Kombucha is made from a living organism called a SCOBY, which stands for Symbiotic Culture of Bacteria and Yeast. A SCOBY is often referred to as a “mushroom” or “the mother.” It grows, multiplies, ferments, and feeds off tea and sugar. The probiotics and yeast eat the sugar, which ferments the beverage and results in a drink that is acidic, probiotic-rich, and mildly alcoholic. Just like all recipes in this book, it is important to take precautions when fermenting living organisms.
Kombucha contains acetic acid, which is a mild natural antibiotic. Because of the acidity of kombucha, bad strains of bacteria cannot grow in the culture, as the environment is not optimal for survival or reproduction. In this way, the good bacteria thrive while the bad bacteria have no fighting chance. Kombucha also contains lactic acid, and is rich in B vitamins, folate, and antioxidants.
It is stated that kombucha can aid in digestion, increase energy, manage hunger, and can create pH balance in the digestive tract. There is still a great deal of debate on whether there is scientific proof to support these health claims. It is important to keep in mind that this book makes no claim that kombucha will improve health nor will the alleged benefits apply to all individuals. Regardless, kombucha tastes great and most people report that it gives their digestive system regularity and makes them feel good.
If you have purchased kombucha or any other form of probiotic beverage from the grocery store, you have no doubt noticed how expensive it is. I began brewing kombucha because I was drinking store-bought kombucha every day and the cost was becoming unreasonable for my budget. With a few small start-up costs, I began brewing kombucha, which is an investment that has paid for itself hundreds of times over.
Brewing kombucha may seem very daunting and intimidating at first, but don’t let the long list of instructions fool you. It’s actually very easy to make homemade kombucha, but I want to emphasize the importance of brewing safely by providing detailed instructions.
How to Start
To brew kombucha, you need several kitchen tools plus a kombucha SCOBY in starter liquid. Starter liquid is simply unflavored homebrewed kombucha. There are many online sources from which you can purchase a SCOBY. I caution you to read reviews and talk to others who have purchased from the specific suppliers you are looking at because the quality of some SCOBY suppliers is more reliable than others. If you do choose to purchase your SCOBY online, make sure you begin brewing as soon as possible because the SCOBY will already be in slight shock from traveling and it is important to get it fed and in a healthy environment.
Keeping Your SCOBY and Kombucha Healthy
What does it mean to keep a SCOBY healthy? I will touch on this throughout the list of instructions, but essentially it means the following:
1. Feeding the SCOBY a mixture of tea and sugar; 100 percent black tea works best for brewing kombucha, but you may also use 100 percent green tea. Fancy teas typically contain peels and other ingredients that are not conducive to brewing kombucha. Plain black tea works great.
2. Keeping it out of the sunlight in a dark place: a closet shelf works as an excellent home for brewing kombucha or jun.
3. Keeping it covered while still allowing it to breathe: a kitchen towel or cheesecloth secured by a stretchy rubber band works perfectly to keep out the bugs.
4. Giving it an optimal temperature range (between 75° and 85° Fahrenheit).
5. Keeping the SCOBY moist with starter liquid. I recommend maintaining at least two inches of starter liquid for every one inch of SCOBY.
If you choose to purchase your SCOBY online, make sure you begin brewing a batch as soon as you receive it, as the SCOBY will be in shock.
Giving One of Your SCOBYs Away
With each new batch of kombucha you brew, a new SCOBY will form. While it is perfectly okay to allow the SCOBY to continue to grow, I find my SCOBY looks healthiest when it is three inches thick or less. You can peel off layers of your kombucha SCOBY and give them to your friends or family.
To do so, add starter liquid (which is simply kombucha) and a SCOBY to a plastic bag. Seal well and make sure the SCOBY lays flat and is out of direct sunlight while it is transported.
Because the SCOBY will be in shock from traveling, it is important to remove it from the bag as soon as possible so it can breathe. Inform the person you give the SCOBY to that they should brew a batch of kombucha as soon as they get the SCOBY home.
Fermenting Kombucha
Like any fermentation process, there needs to be food for the active probiotics and yeasts to feed off. For kombucha, food is tea and sugar. Each batch of kombucha you brew, a new SCOBY will form and the SCOBY will grow to the width of the container it is in. For instance, once you are on your fifth batch of kombucha, you will have five layers of SCOBY. As you brew, you can allow your SCOBY to grow, and you don’t need to discard it until it reaches more than three inches thick.
In addition to tea and sugar, kombucha requires an optimal temperature range to flourish. Between 75° and 85° Fahrenheit is the optimal temperature range for brewing kombucha. While it is generally okay for kombucha to experience temperatures outside that range, you will notice a difference in the strength of the kombucha if it is brewing below 70° or above 80°. A lower temperature may require a longer brewing time, whereas a higher temperature will make the fermentation process go faster. Too warm a temperature can kill the probiotics.
The fun part about brewing kombucha is flavoring it. It is perfectly fine to drink the kombucha you brew plain and not put it through a secondary fermentation; however, for the purpose of your kombucha enjoyment, I have included multiple recipes that you can use to make fizzy, sweet kombucha that can be enjoyed throughout the year. Note that kombucha should be flavored after it has gone through the first fermentation, as putting anything other than sweetened tea in a SCOBY’s environment can change the structure and health of the probiotics.
What is Secondary Fermentation and How Does it Work?
Secondary fermentation involves fermenting a beverage that has already been fermented for a second time. When you brew kombucha for the first fermentation, the bacteria and yeast feed off the sugar and tea that you give them. Once all of the “food” has been consumed by the probiotics, they are ready for more. This is where secondary fermentation comes in.
Immediately after the first fermentation (before you refrigerate the kombucha), you can add additional tea and water to begin a secondary fermentation. You can also add various fruits, herbs, and non-toxic flowers to flavor your kombucha to your liking. Once you have added additional ingredients, you can then bottle the kombucha and leave it in a dark place at room temperature for two to three days and the kombucha will continue fermenting.
Since the bottles are sealed, some pressure will build and the beverage will then become effervescent (or naturally carbonated). Similar to the first fermentation, the more sugar you add, the longer it will take the probiotics to process it. If you want your kombucha sweet, you can either add more sugar (cane sugar or fruit) than necessary or only allow the second fermentation to last one or two days versus two to three. Fermentation slows when you refrigerate the kombucha but does not stop completely.
Now here comes the really cool part! Depending on what you use for the secondary fermentation, you will end up with varying levels of effervescence. I found that more acidic fruit yields a more effervescent kombucha. I have also found that leaving fruit pulp inside the bottles during the secondary fermentation results in more effervescence. Additionally, allowing the sealed bottles to refrigerate for at least twenty-four hours before popping the bottle open will yield a more effervescent kombucha.
To summarize: to get the most effervescent kombucha (if that is what you’re going for), use an acidic fruit for the secondary fermentation process, leaving the pulp inside the bottles and allowing the bottles to sit for two to three days at room temperature. Then refrigerate the bottles for one to two days before drinking. Berries, apricots, and pineapple have resulted in the spunkiest kombucha in my experience. Remember to shorten the length of the secondary fermentation if you desire a sweeter (less dry) kombucha.
Because pressure and effervescence builds during the secondary fermentation, it is very important that you point the bottles away from your face when you open them. If you are using good quality flip-cap bottles, it is likely that you will have a batch or two of kombucha that will fizz out of the bottle when opened, similar to opening a can of soda after it’s been rolling around in the back of your car). Just be sure to open the bottles over the sink and never point them at your face or anything breakable. Do not ever give a small child a bottle of kombucha to open.
Kombucha and Allergies and/or Detox
A very small portion of the population is allergic to kombucha. The exact science behind the allergy is unknown. Similar to doing a juice cleanse, some people go through a detoxification after drinking kombucha. This may be perceived as an allergic reaction but it could be the body ridding itself of toxins. Symptoms of detox include headache, more frequent than usual bowel movements, runny nose, or even vomiting. Should you experience any of these symptoms, it is best to consult a doctor before attempting to consume any more kombucha.
It is not recommended to drink homemade kombucha on an empty stomach. If your stomach ever hurts after drinking kombucha, it could mean one of three things—your batch is bad (unlikely, unless you notice mold and/or the batch tastes abnormal), you drank too much, or your kombucha is too strong. Depending on the ingredients added for secondary fermentation, it is possible for people to have a negative reaction to one flavor and have no problem with other flavors.
Taking a Break Between Batches of Kombucha
By no means do you have to continue brewing kombucha forever and ever with no break between batches. Once your SCOBY is growing, you may consider peeling off one of the SCOBYs and using it in an additional jug to brew a higher volume of kombucha at one time. With that said, you may end up with more kombucha than you feel you need or you may simply get sick of brewing. Never fear, you don’t have to throw your kombucha SCOBY out! You can store your kombucha SCOBY in the same way you would store kombucha that is brewing: in a jar covered with cheesecloth bound with a rubber band.
Be sure there is plenty of starter fluid to keep the SCOBY moist. One inch of starter fluid for every one inch of SCOBY works well. You will need this starter fluid to keep your SCOBY alive and also to start your next batch when you are ready to brew again. If you go several weeks between batches, check on the SCOBY every once in a while to be sure it still has ample starter fluid.
Cleaning Your Tools
It is very important that everything you use that touches the SCOBY and/or kombucha be properly sanitized. You can sanitize your tools in the dishwasher, or with hot, soapy water, or by soaking them in distilled white vinegar for a couple minutes. If there is harmful bacteria on any of the tools you use, it can potentially contaminate your kombucha.
You do not need to clean the jug that you use to brew kombucha between batches. I do, however, recommend that you clean it periodically (I clean mine every three to five batches). To clean the jug, pour all of the kombucha liquid into bottles (if you haven’t already) except for a small amount of fluid to act as starter for your next batch. Place the SCOBY and starter fluid into a glass or stainless steel bowl and cover with a kitchen towel. Fill the jug with very hot, soapy water and use a sponge to get every last bit of kombucha culture out. I repeat this process multiple times to ensure my jug is sanitary.
Distilled white vinegar acts as a sanitizing agent, so you can use vinegar to clean the jug, as well. Pour about ½ cup of distilled white vinegar in the jug and slosh it around for a minute or two. Pour the vinegar out. You can either rinse the jug with clean spring/well water or simply leave it as is. A little bit of residual vinegar will not harm your SCOBY.
Now you can start another batch of kombucha by first adding your tea/sugar mixture to the jug and then carefully (and with clean hands) pouring the starter liquid and SCOBY back in the jug. Secure the opening with cheesecloth bound by a rubber band.
Flavoring Your Kombucha
While it is not necessary to add flavors to kombucha once it has finished its primary fermentation, experimenting with flavors is by far the most fun part of brewing kombucha! There are a myriad of options for giving your kombucha flavor, spunk, and fizz. Fresh fruit and herbs are my favorite ingredients to add before secondary fermentation to ensure the beverage will be bubbly, just the right amount of sweetness, and full of added health benefits.
One-hundred percent fruit juices are also effective for secondary fermentation, although not to the same extent as fresh fruit. Kombucha likes fruit pulp and tends to be much fizzier when fruit pulp is added for secondary fermentation. For every one gallon of kombucha, 1 cup of fruit juice can be added for secondary fermentation.
It is important to be mindful of the strength of your kombucha. If your kombucha is strong (meaning its pH is lower than 2.5), dilute it with additional sweetened tea along with fruit or other ingredients prior to the secondary fermentation. This ensures there will be enough sugar and tea for the probiotics to feed on for an effective secondary fermentation and will also ensure the kombucha is safe for consumption.
Typically for a gallon of strong kombucha, steeping 4 teabags in 4 cups of water and adding some sugar (¼ to ½ cup) is sufficient to dilute it, but depending on the strength, a higher amount of freshly brewed tea may be used. Always cool the tea (and any other hot ingredients) to room temperature before mixing it with kombucha because excessive heat will kill the probiotics.
Because you will need to save starter liquid (for every one inch of SCOBY, I typically save one to two inches of starter liquid) and also to leave some room at the top of the jar so that the liquid doesn’t spill over when the jar is moved, you will not get a true gallon when brewing 1 gallon of kombucha. The liquid yield is closer to ¾ gallon or less depending on how thick your SCOBY is. Similarly, when brewing kombucha in a 2-gallon jug, you will not get a full 2 gallons of kombucha. Most individuals brew either 1 gallon or 2 gallons of kombucha at a time, so I chose to focus my kombucha recipes on the 1-gallon batches. This means each recipe in this section calls for ¾ gallon of kombucha, but you can easily double the recipes if desired.
Don’t Be Surprised If . . .
Don’t be surprised when small SCOBYs form in the bottles during secondary fermentation. Because the probiotics and yeast continue to ferment, they form a colony during secondary fermentation, which is clear, gooey, and typically the size of a quarter. If you drink one by accident, nothing bad will happen, although the slimy texture going down your throat is not desirable for most people. Prior to drinking kombucha, use a fine strainer to catch whatever bacteria and yeast colonies (and/or fruit pulp that was added for flavor) have formed so that you can enjoy a SCOBY-free beverage.
Don’t be surprised when your SCOBY forms long brown strings underneath it. These are colonies of yeast and they look kind of like kelp. They are completely normal and do not need to be cleaned out or removed. Some people mistakenly think these furry-looking strings are evidence that the SCOBY has gone bad, when they’re actually evidence of a healthy SCOBY.
Making homemade kombucha can be risky if you are not careful. If you are new to making kombucha, please seek multiple sources to educate yourself about the process of brewing. It is very important to keep all instruments used in the process of making kombucha clean and to keep the SCOBY healthy. It is also important to avoid using ceramic or plastic for storing kombucha.
Use common sense and know that there is risk associated with fermentation. If you see a single spot of mold, abandon ship—throw out your whole SCOBY, discard all kombucha liquid, and completely sanitize the jar or jug you used to brew. Mold on kombucha looks similar to bread mold—it’s usually circular, white or green, and fuzzy. I have made countless batches of kombucha and allowed my SCOBYs to sit in their starter liquid for a month at a time and I’ve never encountered mold. Have faith that as long as you follow the instructions and keep your SCOBY in a healthy environment, it will be safe.
Women who are nursing or pregnant should consult with their doctors before drinking kombucha. Because of the acidic and slightly alcoholic nature of kombucha, children younger than the age of six should not drink it. Children older than the age of six may drink kombucha in small volumes.
Please read instructions very carefully before starting a batch of kombucha. If you purchased your SCOBY online, the supplier likely included a list of instructions in the package. Chances are you can trust those instructions, but to double-check, be sure to read my instructions, too.
Kombucha should never smell or taste foul. It should taste slightly sweet yet vinegary and should smell this way, too. Home-brewed kombucha tends to be much stronger than store-bought kombucha, so the scent and taste will be much more pungent than store-bought kombucha. This is normal. If there is ever a putrid smell or the flavor does not sit right in your mouth, throw out the whole batch and start fresh with a new SCOBY.
Homemade kombucha can get so strong that drinking it is very similar to drinking vinegar. The optimal pH of kombucha should be on the acidic end, between 2.5 and 4.5. An acidic pH prohibits kombucha from becoming contaminated with bad bacteria. A pH lower than 2.5 is too acidic for human consumption and will need to be diluted before drinking. If the pH of your kombucha is ever below 2.5, add more tea and sugar and check the PH again before bottling it. A pH higher than 4.5 will create an environment that is optimal for bad bacteria to grow.
While it is perfectly fine to drink kombucha every day, most people caution against drinking more than 6 to 8 ounces of home-brewed kombucha each day. Commercially made kombucha is subject to many controls and tests, which makes it safe for drinking a larger amount. Since most people who brew kombucha (including myself) do not own advanced pH- and bacteria-testing equipment, it is wise to drink a lesser amount rather than risk upsetting the balance in your digestive system.
If you are concerned about sustaining a certain pH level in your kombucha, you can buy pH test strips to get a general idea of the how strong the kombucha is. For a more exact pH reading, you would need to buy a pH tester, as the pH test strips can give ambiguous readings. It is not necessary to test the pH of every kombucha batch, but I do recommend testing it periodically, especially when you think your kombucha is becoming too strong.
Should you brew a batch of bad kombucha and experience negative side effects, consult a doctor immediately. When in doubt, always, ALWAYS throw it out and start over. Provided the SCOBY you use to start your first batch of kombucha is healthy and provided you follow the instructions, it is unlikely a bad batch will result. Still, bad kombucha can cause harmful side effects, so play it safe.
Have fun with your home-brewed kombucha!
The active probiotics and yeasts in kombucha feed off of tea and sugar.
Ingredients (yields just under 1 gallon of kombucha):
• 1 kombucha SCOBY
• 1 (scant) gallon spring water or well water. Don’t use water from your faucet because it probably has chlorine and/or fluoride in it.
• 10 black tea or green tea (no frills) tea bags*
• 1 cup cane sugar
*Be sure to use tea that is either 100 percent black or 100 percent green. Many companies add orange peel to black tea, which has essential oils in it that are not good for brewing. Stick to the 100 percent pure teas for the best results.
You Will Also Need:
• Large pot for boiling water
• Large (1 gallon or more) glass jug/container for fermenting the kombucha
• Long-handled spoon for stirring
• Stick-on or floating thermometer
• Cheesecloth or breathable dish towel
• Stretchy rubber band
• A glass pitcher or other efficient method of transferring the kombucha from the jug to bottles or the dispenser you will be using to drink the kombucha out of
• Small fine strainer (we use a metal coffee strainer)
• Glass bottles with sealable lids. Both screw-top and flip-cap bottles work, and dark glass works best because kombucha does not like sunlight.
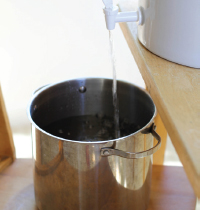
Add water to a sanitized pot before boiling
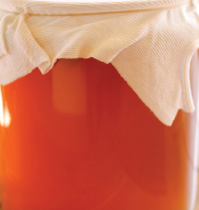
Covering your jug with cheesecloth allows the kombucha to breathe as it brews.
Optional Tools:
• Distilled white vinegar for cleaning your kombucha jug
• Heating device such as an electric heating pad. These work great for helping to maintain the temperature of your kombucha if your house is cold during the winter.
• Space blanket. May be used to trap in heat. During cold spells, wrapping the kombucha jug with a heating pad and securing it with a space blanket works wonders.
How to make homemade kombucha:
1. Sanitize everything you are using to make kombucha. You can do this by running it through the dishwasher, hand-washing in very hot water with soap, or by coating it in distilled white vinegar.
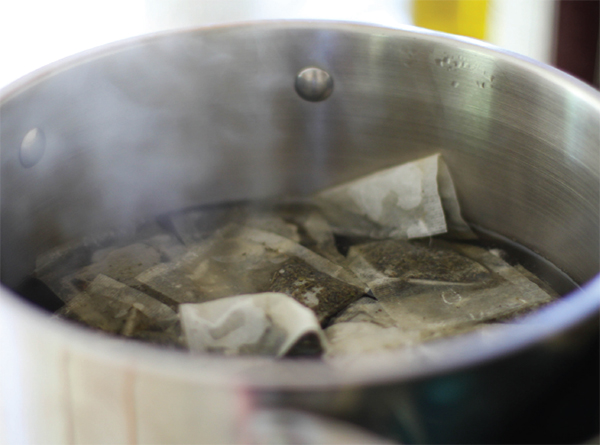
2. Boil water. If you are making 1 gallon of kombucha, you do not need to boil the entire 1 gallon—just enough (½ gallon or so) to brew the tea. This way you can add the remaining water to cool the tea once it’s brewed.
3. Once water has reached a boiling point, remove it from heat and add tea bags. Steep the tea for 8 to 10 minutes and then remove the bags.
4. Add the cane sugar and stir well to dissolve.
5. Allow the tea to cool to roughly 75° to 85° (or if you only boiled half a gallon of water, add the remaining half gallon of cool water so that the hot water cools faster).
6. Once the tea is in the optimal temperature range, add the SCOBY (if this is your first time making kombucha and you bought your SCOBY online, simply remove it from its package and slip it in).
7. If you have a sticky thermometer that can be stuck to a surface, stick it on the outside of the jug (optional).
8. Cover the jug with cheesecloth so that the kombucha can continually breathe.
9. Secure the cheesecloth with a stretchy rubber band.
10. Place jug in a dark place (closet) that stays relatively warm and is not disturbed by people and light.
11. Allow kombucha to brew for five to seven days (the longer it brews, the more sugar it eats and the stronger it is).
12. Continually check the temperature of the kombucha. For best results, it should stay in the 70° to 85° range. If it falls below 70°, it’s not a huge deal, it will just take longer for the kombucha to brew. If the kombucha gets above 85°, the probiotics may die. If you see any mold (it will look like bread mold . . . green/white and fuzzy circles), discard the SCOBY and the whole batch of kombucha.
13. When your kombucha is ready, remove the cheesecloth. NOTE: You will notice your SCOBY is bigger—it will grow to the width of the container it’s in and a second SCOBY will form. SCOBYs will always continue to grow. Once a SCOBY gets to be a couple of inches thick, I recommend peeling a layer or two off and either discard it or give it to a friend along with some starter liquid so that they can brew their own kombucha.
14. Now that your kombucha has completed the first fermentation, you can either bottle it and be finished or add ingredients by following the recipes in this book. I find it is easiest to pour the kombucha liquid out of the jug and into a smaller pitcher. Using the pitcher, it is easy to pour the kombucha into bottles.
15. Once you have bottled the kombucha, you can either take a break, leave your SCOBY and starter liquid in the jug covered with cheesecloth bound with a rubber band, or you can brew a new batch. As long as SCOBYs are in a healthy environment, they can sit for months at a time between batches. When taking a break, simply leave the jug in a warm, dark place that doesn’t get disturbed often (just as you would if you were brewing a batch) and be sure to inspect the SCOBY before brewing a new batch, especially if it has been sitting for more than a couple weeks. For every one inch of SCOBY, I typically save about two inches worth of starter liquid.
16. If you choose to add ingredients for a secondary fermentation, follow the recipe instructions and leave the bottles of flavored komucha at room temperature in a dark place for two to three days. During this process, the bacteria and yeast cultures eat the sugar you added (fructose from the juice or cane sugar) and continue to ferment. This makes the kombucha a little stronger and fizzy (“effervescent” is what the industry calls it). It is important to note that a small SCOBY will form in each bottle during the secondary fermentation, which can be strained out before drinking.
17. Place kombucha in the refrigerator for twenty-four hours before consuming for the best results. The cooler temperature will slow the fermentation (although the kombucha will continue to ferment), and refrigerating it seems to help in achieving a bubbly drink.
18. Get creative with your flavors, pat yourself on the back, and enjoy your homebrewed kombucha!
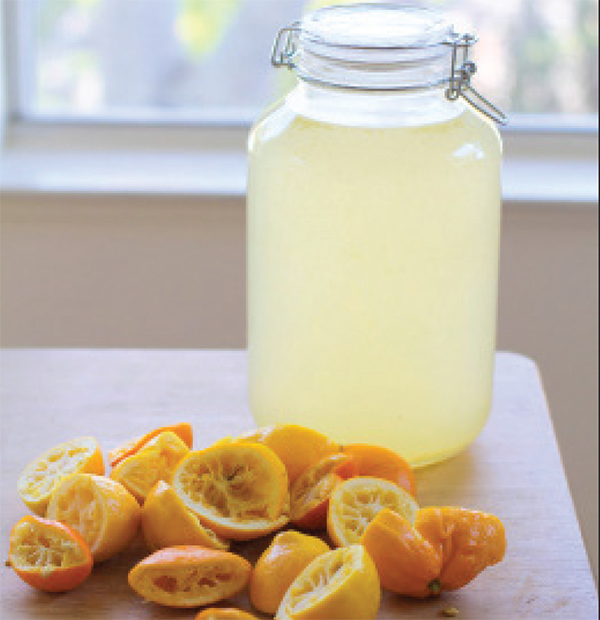
Pomegranate Kombucha (Kombucha and Juice)
I flavored the first few batches of kombucha I brewed using various 100 percent fruit juices, such as pomegranate, pear, blueberry, and cranberry. This is a very quick and easy way to add flavor as well as vitamins, minerals, and antioxidants to the kombucha.
Generally, 1 cup of juice per 1 gallon (or ¾ gallon) of kombucha is sufficient to put the kombucha through secondary fermentation. Pomegranate juice adds sweet, tart flavor as well as antioxidants.
Ingredients (yields just under 1 gallon of kombucha):
• 1 cup 100 percent pomegranate juice (or juice of choice)
• ¾ gallon kombucha (page 251)
Instructions
1. In a large pitcher or jug, combine the juice and the kombucha and stir well.
2. Pour the pomegranate kombucha into sealable bottles and leave them in a warm, dark place for two to three days for secondary fermentation.
3. Refrigerate the kombucha to slow the secondary fermentation.
Note:
When adding juice to kombucha for a secondary fermentation, the result does not come out as fizzy as if you added fresh fruit including the fruit pulp. Kombucha reacts more strongly during secondary fermentation when ingredients that have texture are added, resulting in a much fizzier beverage. Nevertheless, adding juice is tasty, healthful, and easy!
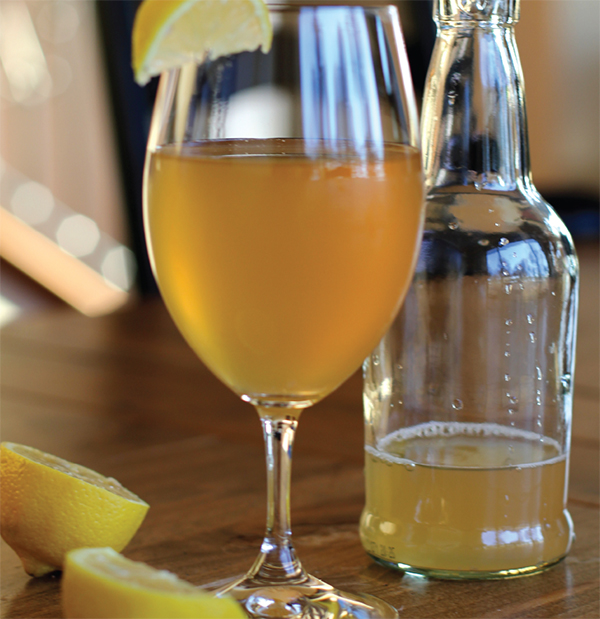
Lemon ginger kombucha is very handy to have on hand during cold and flu season! Not only does kombucha help boost the immune system, but both lemon and ginger are also great for fighting colds. Plus the beverage tastes great! When combined, lemon and ginger yields an almost creamy flavor, soothing the bite you’d expect from the ingredients on their own and leaving your palate happy!
Ingredients:
• 4 cups water
• 3 tbsps fresh ginger, grated
• 3 tbsps fresh lemon juice
• ½ cup cane sugar
• ¾ gallon kombucha (page 251)
Instructions:
1. Add the water and grated ginger to a pot and bring to a full boil. Reduce the temperature to medium and keep the water bubbling for about 5 minutes to infuse the water with ginger flavor.
2. Remove pot from heat and add the lemon juice and sugar, stirring to dissolve the sugar.
3. Allow the pot to sit until it cools to room temperature. This will allow the ginger to infuse the tea with flavor.
4. Once ginger tea is cool, add it to a pitcher or jug and combine it with the kombucha (depending on the size of your pitcher, you may need to do this in halves).
5. Stir kombucha and ginger tea together and then pour it into glass bottles. Try to get as much of the ginger in the bottles with the kombucha as possible. Secure with a tight cap.
6. Leave bottles in a warm, dark place for two to four days to allow it to undergo secondary fermentation. Refrigerate kombucha once the second ferment is complete to slow the fermentation.
7. When you’re ready to drink the kombucha, strain it into a glass using a fine strainer to get the ginger pulp and newly grown SCOBY out. Discard the pulp and enjoy your healthy beverage!
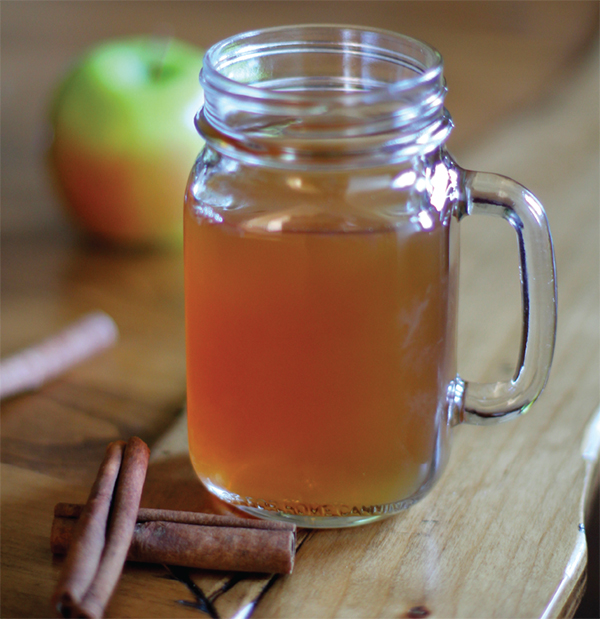
Apple cinnamon is my favorite kombucha flavor during the fall and winter months. The warm spices and sweet, tart apple make for a cozy beverage. Because the ingredients in this beverage are uncomplicated and easy to find any time of year at any grocery store, this is a great recipe to make in a large batch to store in bottles and enjoy for weeks.
Ingredients:
• 4 apple-flavored tea bags
• 4 cups water
• 1 tsp ground cinnamon
• ⅛ tsp ground nutmeg
• ½ cup sugar
• 3 ounces dried apple rings (no preservatives)*
• ¾ gallon kombucha (page 251)
*Purchase your dried apples from a natural food store to get them without preservatives. The ingredients list should be simple for any dried fruit you add to kombucha and it is worth paying a little extra to be sure the kombucha stays healthy and doesn’t have an adverse reaction with unnecessary chemicals or ingredients.
Instructions:
1. In a saucepan, add 4 cups of water and bring it to a boil.
2. Remove water from heat, add the apple-flavored tea bags, and steep tea for 5 to 8 minutes.
3. Add the sugar and stir to dissolve.
4. Set the sweetened apple tea aside and allow it to cool to room temperature. You can speed up this process by putting it in the refrigerator or an ice bath until it reaches a lukewarm temperature.
5. Slice apple rings in half and put two slices (one ring) in each bottle before filling it with kombucha. Seal the bottles.
6. Leave bottles in a warm, dark place for two to four days to allow kombucha to go through secondary fermentation.
7. Refrigerate the kombucha. When ready to drink, use a strainer to strain out the small SCOBY that formed in the bottle during secondary fermentation.
The tart and sweet blackberries give a great deal of life to the kombucha, as berries tend to make for a bubblier beverage and infuse very noticeable flavor. The sage gives the beverage a soft earthiness. Blackberries are rich in antioxidants and fiber. They aid in digestion, promote cardiovascular health, protect against cancer cells and neurological diseases, and more. Sage is an herb related to mint and is full of health benefits and medicinal uses. It is an anti-inflammatory, improves memory, can be used as an antiseptic, helps with allergic reactions and mosquito bites, and is packed with antioxidants!
Ingredients:
• 2 cups ripe blackberries
• .65 ounces sage leaves, chopped (about 15 to 20 large sage leaves)
• ⅓ cup cane sugar
• ¾ gallon kombucha (page 251)
Instructions:
1. Heat blackberries in a saucepan, covered, over medium heat. As the blackberries heat up and begin to bubble and soften, mash them with a fork.
2. Once a pulpy juice forms add the sugar and sage and bring to a gentle boil.
3. Reduce heat to medium-low, cover the saucepan, and allow the flavors to cook together, about 15 to 20 minutes. Do not allow mixture to boil or cook for too long, or else it will become very thick.
4. Leave bottles in a warm, dark place for two to four days to allow kombucha to go through secondary fermentation.
5. In a large pot or pitcher, combine the kombucha and blackberry sage mixture. Mix together well and then pour the blackberry sage kombucha into sealable bottles, including the sage leaves and blackberry pulp. Seal the bottles.
6. Allow the kombucha to go through its secondary fermentation by allowing it to sit in a warm, dark place for two to three days. Note that the longer the kombucha sits, the more sugar will be eaten by the probiotics, which will result in a less sweet and more fizzy beverage.
7. Refrigerate for twenty-four hours after the secondary fermentation is complete. This slows the secondary fermentation, but the kombucha will continue to ferment and get fizzier the longer it sits in the refrigerator.
8. When you’re ready to drink the kombucha, use a small fine strainer to strain out the sage leaves, blackberry pulp, and whatever small SCOBY has formed during the secondary fermentation. Discard all the pulp and enjoy the beverage!
Although kombucha prefers 100 percent black tea for brewing, you can add other flavored teas can be added for secondary fermentation. Consider using your favorite tea flavors and even use loose tea.
This relaxing beverage smells and tastes wonderful. Jasmine makes a naturally soothing tea that is known for calming the mood and lowering heart rate. Studies show jasmine can prevent stroke and esophageal cancer. Jasmine tea adds a soft, floral flavor and is an easy way of flavoring kombucha for secondary fermentation.
Ingredients:
• 3 cups water
• 3 jasmine tea bags
• ½ cup sugar
• ¾ gallon kombucha (page 251)
Instructions:
1. In a saucepan, bring the water to a boil.
2. Add the tea bags and steep for 5 to 8 minutes.
3. Add the sugar and stir to dissolve.
4. Allow jasmine tea to cool to room temperature. To speed up this process, you can put the pot of tea in an ice bath or pour the tea in a jug and put it in the refrigerator until it reaches a lukewarm temperature.
5. In a large pitcher or jug, combine the jasmine tea with the kombucha and stir.
6. Pour jasmine kombucha into sealable bottles and then seal them shut.
7. Leave them in a warm, dark place for two to four days to allow for secondary fermentation.
8. Refrigerate the bottles after secondary fermentation. When ready to drink, open bottles carefully in case pressure built during secondary fermentation.
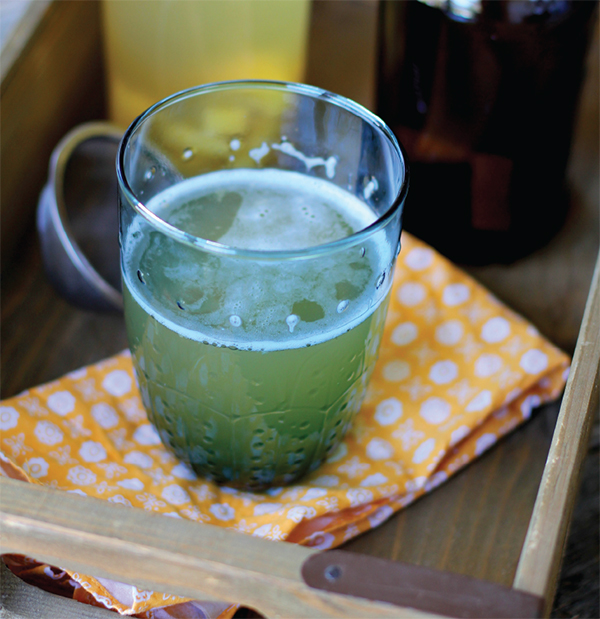
Are you looking for that kombucha that is ultra fizzy and sweet? Well here it is! When pineapple chunks are added to kombucha for secondary fermentation, a very fizzy beverage results. I have found that the more acidic fruits yield the more effervescent probiotic beverages. For this reason, acidic fruits are great for flavoring these beverages, but it is important to use non-breakable bottles and to be very careful when opening the bottles after secondary fermentation.
Screw-top bottles are recommended for bottling this particular recipe, as the pressure that builds during secondary fermentation from the pineapple becomes so great that the beverage overflows when it is opened out of a flip-cap bottle. With screw tops, a minimal amount of air is always allowed out and you are able to slowly twist the cap to relieve pressure before opening. For safety purposes, do not hand children bottles of pineapple kombucha, as they may explode all over and can be unsafe for them to open. It is best to always look away from the bottle while carefully opening it and never point it at anyone. The same is true for any fizzy probiotic beverage in this book.
While pineapple kombucha requires a little additional forethought and precaution, it has an incredible tropical flavor and is so refreshing in the spring and early summertime when pineapples are in season!
Ingredients:
• 2 cups fresh pineapple, chopped into ¼” to ½” pieces
• ¾ gallon of homemade kombucha (page 251)
Instructions:
1. Evenly distribute the chopped pineapple between the bottles you’re using for bottling.
2. Pour the kombucha into the bottles with the pineapple.
3. Seal the bottles and place them in a dark, warm spot, such as a cabinet or closet.
4. Allow bottles to sit for two to three days in a warm, dark place so that the kombucha goes through a secondary fermentation.
5. Refrigerate the kombucha for at least twenty-four hours before consuming. Allowing the kombucha to refrigerate for longer than a day will result in more effervescent kombucha.
The combination of raspberries and mint make a sweet, slightly tart, and refreshing beverage with an abundance of flavor. Fresh raspberries are heated with mint leaves to allow all the flavors to open up and infuse. Raspberry mint kombucha is a fun beverage any time of year, and is particularly great in the summer when raspberries are in season.
Ingredients:
• 6 ounces fresh raspberries
• .75 ounces fresh mint leaves, roughly chopped
• ½ cup sugar
• ¼ cup water
• ¾ gallon kombucha (page 251)
Instructions:
1. Remove mint leaves from the stems and using your fingers, rip them into smaller pieces (in half or thirds is fine).
2. Place raspberries, mint leaves, sugar, and water into a small saucepan and heat over medium. Bring mixture to a full boil.
3. Using a fork, smash the raspberries until they lose form.
4. Reduce heat to medium-low and allow the mixture to continue to boil gently for about 5 minutes to allow the mint to infuse.
5. Remove from heat and allow mixture to cool to room temperature. To speed up this process, pour it into a bowl or glass and place in the refrigerator.
6. In a large pitcher or jug, combine the kombucha and raspberry-mint mixture.
7. Stir to combine, then pour the kombucha into bottles.
8. Once you reach the bottom, spoon the raspberry and mint pulp into the bottles, trying to distribute the pulp evenly among the bottles.
9. Leave the bottles in a dark, warm place for two to four days to allow the kombucha to go through secondary fermentation.
10. Refrigerate at least twenty-four hours before drinking. The kombucha will get fizzier the longer you wait to drink it.
11. When you’re ready to drink the kombucha, use a fine strainer to strain out the newly formed SCOBY and the raspberry and mint pulp. Enjoy!
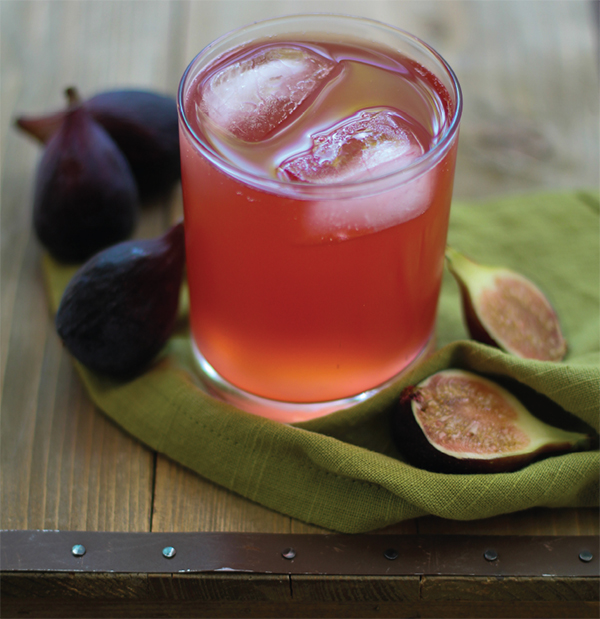
Incorporating figs into kombucha, smoothies, or even baked goods is an excellent way of achieving a naturally sweet treat. Figs are high in fructose and have a subtle flavor, making them a wonderful way to add sweetness without overpowering flavor. This is a fizzy and sweet kombucha with nothing but “original” flavor. Using 1 fig per 16-ounce bottle, you can scale this recipe to any size you would like. If you use the full ¾ gallon, you will end up with 6 bottles.
Ingredients (yields just under 1 gallon of kombucha):
• 6 ripe figs, chopped into small bits
• ¾ gallon kombucha (page 251)
Instructions:
1. Add 1 finely chopped fig to each 16-ounce bottle.
2. Seal bottles and leave them in a warm dark place for two days for secondary fermentation.
3. Refrigerate fig kombucha for a full twenty-four hours for best result before consuming.
4. When ready to consume, strain the fig pulp (and the newly-formed SCOBY) using a fine strainer and enjoy!